

We all strive for a clean, comfortable home, but sometimes the sheer thought of an ‘all-out cleaning session’ can feel overwhelming, especially with our busy lives. The good news? You don’t have to tackle everything at once! While deep cleans can certainly be saved for the weekends, there are specific tasks, surfaces, and areas in your home that truly thrive with a quick, daily sanitation session. Trust us, it’s far less daunting than it sounds, and the benefits are enormous.
Indeed, the idea of cleaning something every single day might initially feel pretty tedious, even to the most hygiene-minded among us. Yet, by dedicating roughly 30 to 60 minutes to these light cleaning tasks, you can knock them off your list and make a huge difference. These small, consistent efforts not only boost hygiene levels but also proactively prevent bigger, more challenging jobs from accumulating later on. Imagine wiping shower walls immediately after use – it saves you from stubborn soap scum and hard water spots down the line, and even keeps mildew at bay!
So, are you ready to embark on a journey towards a consistently cleaner, healthier, and more enjoyable living space? We’re here to guide you through 13 common household items that deserve a little daily TLC. Remember, you don’t have to cram them all into your routine in one go. Start small, integrate a few new habits at a time, and watch how these simple steps transform your home and lighten your cleaning load. Let’s dive in and discover which everyday essentials need your attention!

1. **Your Bathroom Countertop**Your bathroom countertop, often a hub for personal care products, offers incredible convenience, but it also silently collects a surprising amount of mess. From rogue toothpaste flecks and stray hair to soap scum, makeup residue, and water droplets, these seemingly minor nuisances quickly build up. Add in daily dust, and your bathroom vanity can rapidly look and feel untidy, making it a less-than-inviting space.
Beyond aesthetics, a neglected countertop becomes a prime breeding ground for bacteria, a thought that’s certainly not pleasant for a space meant for personal hygiene. Furthermore, if your vanity surface isn’t waterproof or can’t withstand prolonged exposure to water, this constant moisture and buildup could lead to permanent damage, such as warping or staining. It’s a silent threat to your bathroom’s longevity and cleanliness.
Making it a daily habit to wipe down your vanity counter is remarkably simple and effective. Begin by quickly swiping up any hair and dropping it into the trash. Then, dampen a clean microfiber cloth and run it over all the splatters and residue to leave your vanity top sparkling. To make this daily cleanup even easier, consider keeping a microfiber cloth readily accessible under your sink.
For those tougher spots on quartz or porcelain surfaces, a microfiber cloth dunked in warm water and a mild dish soap solution will work wonders. However, if you’re lucky enough to have luxurious marble, granite, or other natural stone countertops, you’ll need a pH-neutral cleaning solution, such as “Stone Care International’s Granite and Stone Daily Cleaner”. This is crucial because strong acids and alkalis can dull the surface and trigger “surface-level damage, a.k.a. etching.” A little daily care here goes a long way in protecting your beautiful investment.
Read more about: 15 Smart Home Upgrades That Significantly Boost Your Property’s Resale Value
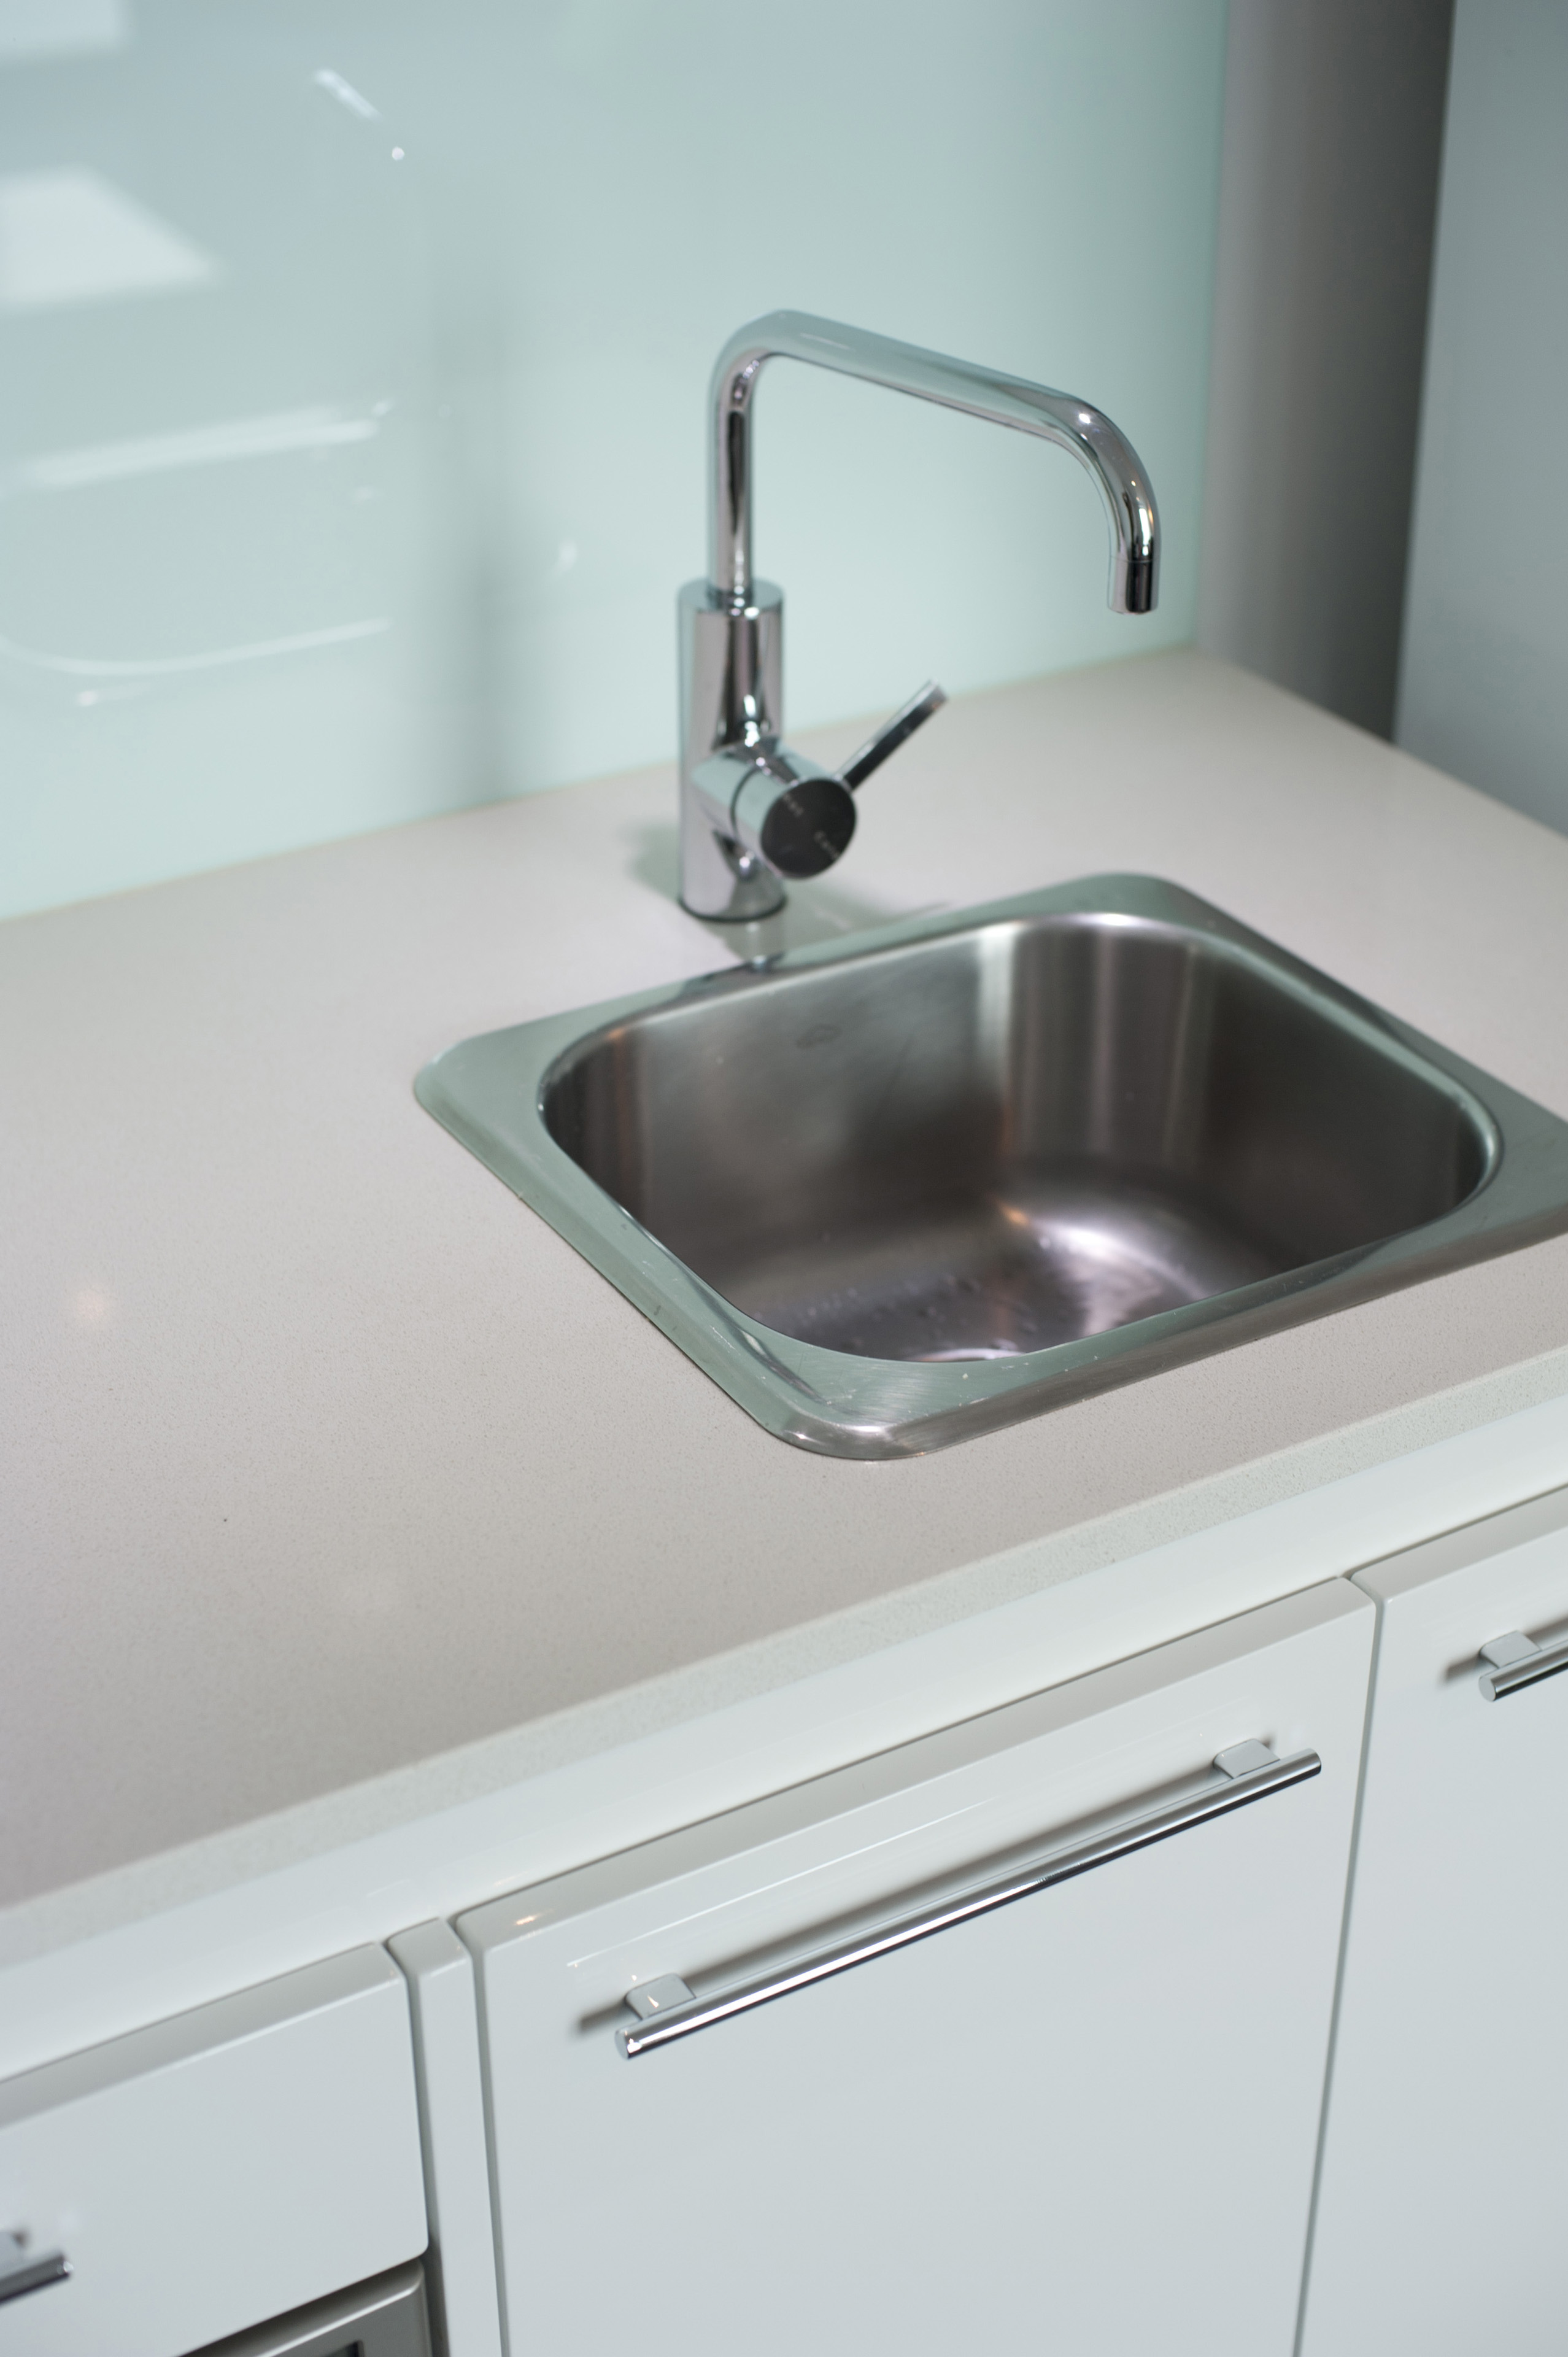
2. **The Kitchen Sink**Your kitchen sink is a true workhorse, witnessing everything from hand washing and rinsing vegetables to the more demanding tasks of washing raw meat, doing dishes, and even holding stale coffee or tea. While essential, this constant activity makes it incredibly susceptible to becoming a thriving breeding ground for bacteria. It’s a reality we often overlook, but its direct contact with food and hands demands our attention.
The findings from a USDA Food Safety Consumer Research Project in 2023 are quite eye-opening. Researchers tested kitchen surfaces for cross-contamination after participants prepared breakfast using raw sausage, shell eggs, and cantaloupe. Alarmingly, 37.5% of sinks tested positive for contamination, taking the top spot among kitchen surfaces. Even worse, bacteria lingering in the sink and on hands after handling raw meat transferred to the cantaloupe, contaminating over 25% of the fruit.
This crucial research underscores why cleaning your kitchen sink daily is so vital, ideally every night or immediately after you wash meat. This routine helps prevent unknowingly consuming harmful bacteria such as Salmonella and E. coli. Starting the process is straightforward: don your rubber gloves and fish out any leftover food residue; you certainly don’t want it rotting in your garbage disposal or clogging up the drain stopper. Rinse the sink with warm water.
Next, add a few drops of your favorite dish soap – if you’re still on the hunt for your holy grail option, there are many guides available to help you find the best dish detergents! Scrub the entire basin, making sure to include the sides and lip for a thorough clean, using disposable paper towels or a sponge. Don’t forget to go over your faucet and sprayer too. Once satisfied, rinse your sink and faucet with clean water. While this gets rid of greasy food residue, for thorough sanitization to truly minimize cross-contamination risks, you’ll need something stronger. You can wipe down your sink with a store-bought sanitizing solution, sanitizing wipes (like the Clorox Disinfecting Wipes), or easily make your own by mixing “1 tablespoon of liquid chlorine bleach in 1 gallon of water”. And remember, always wash your sponge and gloves afterward, and avoid leaving them in the sink to dry, as they can quickly become yet another moist breeding ground for bacteria.
Read more about: The Billionaire’s Box: Unpacking Why Elon Musk Calls a Tiny Prefab Home His Sanctuary

3. **Your Kitchen Floors**Unless your home experiences exceptionally high traffic, sweeping or vacuuming your entire floor a couple of times a week is usually sufficient. However, your kitchen floor stands as a notable exception to this rule. It’s the stage for dropped food, accidental spills, and those inevitable leftover crumbs that seem to materialize out of nowhere. If these are ignored, they quickly get trodden in, allowing greasy spots and debris to become stubbornly fused with the surface, making future cleaning a much harder task.
Leaving food residue and crumbs on your kitchen floor overnight is akin to setting out a welcome buffet for unwelcome guests like rodents and roaches. This is definitely not the kind of dinner party you want to host! Therefore, even if your daily kitchen use is limited to simple food prep tasks, a quick sweep after the last meal of the day ensures that crumbs, food bits, and other nasties don’t linger and attract pests overnight. It’s a simple preventative measure that pays off handsomely.
Fortunately, incorporating a daily clean for your kitchen floor can be a surprisingly quick operation. If you’re just dealing with a few scattered crumbs, simply grab your broom and run it over the floors. Gather all the debris in one spot and use a dustpan to easily dispose of it. If bending isn’t your favorite activity, give your back a break with a long-handle broom and dustpan set, or even better, fire up your vacuum cleaner instead.
For ultimate convenience, having a small, cordless vacuum stored in or near the kitchen makes after-dinner floor cleanup even quicker, allowing you to zip over the space in mere moments. Should the floor be sporting any spills, splatters, or stickiness, a quick mop or a once-over with a Swiffer can address these spots effectively. While this routine adds a small step to your nightly regime, this one daily task in your kitchen will significantly ease the burden of your weekly cleaning, freeing up precious weekend time for more enjoyable pursuits.
Read more about: Beyond the Lock: 14 Essential Home Safety Upgrades You’ll Be Grateful For

4. **The Toilet’s Exterior**It’s hardly a secret that toilets, by their very nature, harbor a significant number of germs. For many households, a weekly or bi-weekly deep clean is often enough to maintain a hygienic environment. However, the ideal frequency for cleaning your toilet is highly dependent on how many people use it and, perhaps more importantly, how they use it. This is where daily attention can become absolutely essential to protect everyone’s health.
If your toilet is shared by multiple people, particularly those who might occasionally “miss the mark,” such as children or individuals with an unpredictable aim, a quick daily cleaning becomes highly advisable. Furthermore, daily cleaning is paramount if you share your toilet with elderly people, anyone with a compromised immune system, or if a household member is sick. Instances of diarrhea or bouts of nausea significantly increase the presence of bacteria and the risk of exposure, making consistent daily sanitization a non-negotiable step.
Just like the other daily cleaning tasks on this list, sanitizing your toilet’s exterior doesn’t have to consume a lot of your time. The primary goal is to minimize exposure to lingering germs on frequently touched surfaces. All you need to do is wipe down the toilet’s exterior, focusing on the seat, the sides, and the tank. A simple spray of an antibacterial cleaning solution, such as “Lysol’s All Purpose Cleaner Spray”, applied to a microfiber cloth, followed by a thorough wipe, is all it takes.
Alternatively, for maximum convenience, grab a few bleach wipes or other antibacterial wipes that are proven to “kill most viruses and bacteria,” with “Lysol’s Disinfectant Wipes” being a good option. Whichever product you choose, never forget the flush handle, as it’s one of the most frequently touched spots and a prime area for germ transfer. While this basic daily sanitizing session handles the exterior, remember that you’ll still want to clean and disinfect the bowl a few times per week. For that deeper clean, there are specific steps to follow to ensure your entire toilet is impeccably hygienic.
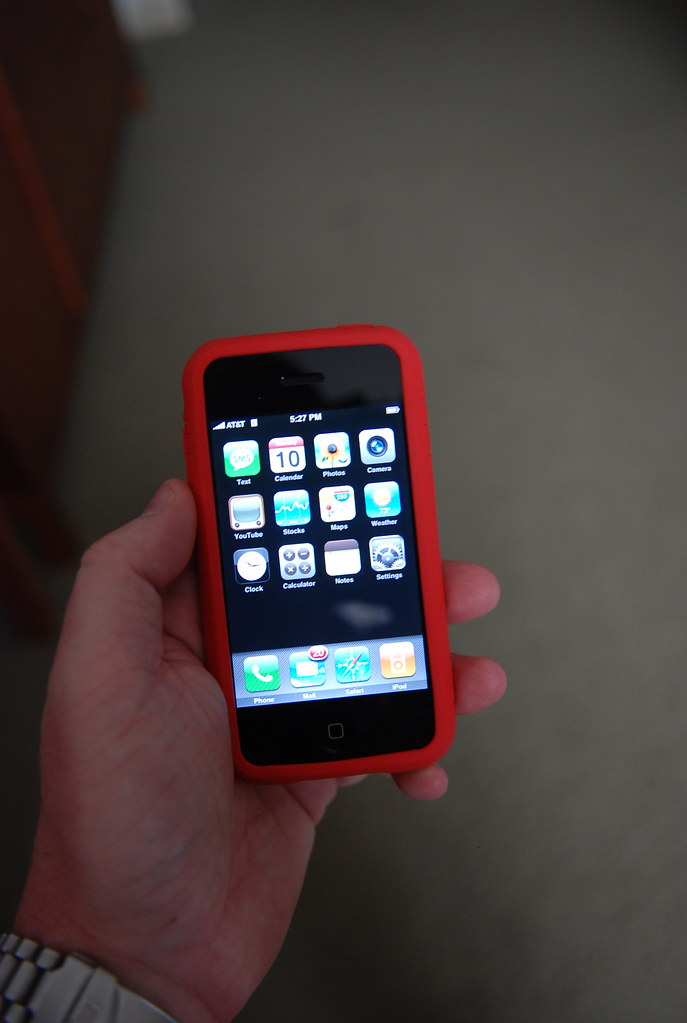
5. **Your Phones**In today’s digital age, our smartphones are practically extensions of ourselves. Research by Harmony Healthcare IT reveals that, on average, Americans spend over five hours a day glued to their phones. This translates to hundreds, if not thousands, of swipes, scrolls, and touches daily. Whether it’s using sweaty hands during a workout, frantic typing at work, doom scrolling in the bathroom, or handling them with sticky fingers while eating, all these interactions transform the glass surface into a veritable pool of germs. It’s a surprising reality that your phone could be harboring “10 times more bacteria than your toilet seat – yikes!”
The alarming truth is that viruses aren’t shy about making your phone their temporary home, potentially remaining on your screens for about “96 hours.” Face oils and grease only exacerbate the problem, providing a sticky haven for these microorganisms. So, moving beyond just sanitizing your electronics after you’ve recovered from the flu, it’s truly beneficial to clean your phone every single day if you can, making it a proactive measure for your health and hygiene.
Taking care of your device is a simple, multi-step process. Start by unplugging your mobile phone, turning it off, and carefully removing its case. Begin with a soft microfiber cloth to gently wipe away fingerprints and any hidden dust or debris. For lifting grime that has really settled in, you can spray a dedicated cleaner, such as “io CLEAN’s Screen Cleaner,” onto a fresh part of your cloth and then wipe your phone again to eliminate the lingering dirt. “EVEO’s Streak-Free Electronic Wipes” are also a fantastic and convenient alternative.
While a general surface clean is excellent, you’ll also want to disinfect your phone, and this is where a little caution is advised. While regular disinfection is vital for health purposes, overdoing it or using the wrong products can be detrimental, as harsh substances like bleach can damage electronic surfaces. Some advice even suggests avoiding disinfecting wipes because they might impair the fingerprint-resistant coating on your phone’s exterior. However, leading manufacturers offer guidance: “Apple states that its devices can be cleaned with alcohol-based or Chlorox disinfecting wipes, and Samsung states that you can use a cloth dipped in 70% isopropyl alcohol.” To be on the safest side, it’s always best to check the specific cleaning and disinfecting instructions provided by your device manufacturer. A quick, daily wipe with a microfiber cloth and an alcohol-based screen cleaner or 70% isopropyl alcohol will help keep both you and your device clean and healthy.
Read more about: How Well Do YOU Remember the ’70s? Answer These Real ‘Jeopardy’ Moments to Find Out!
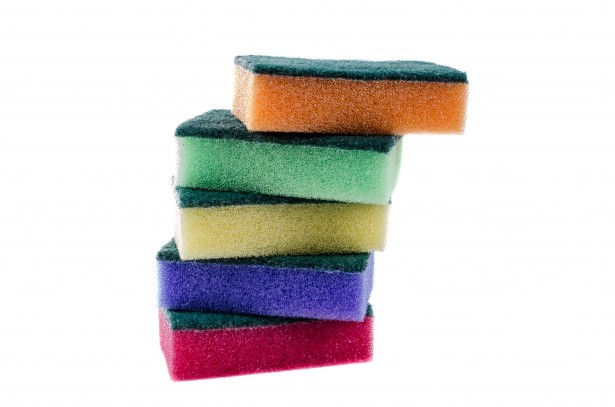
6. **Your Dishwashing Sponges**Dishwashing sponges are the unsung heroes responsible for scrubbing your crockery and cookware to gleaming perfection. However, these hardworking tools might be concealing more germs than you could ever imagine. The NSF’s “Germiest Places in the Home” study dropped a bombshell, revealing that these scrubbers are often “the filthiest object in a house,” with a staggering “75% of the ones tested hiding disease-causing bacteria like Salmonella and E. coli.” It’s a sobering thought that the very tool meant for cleaning could be a major source of contamination.
Consider the typical lifespan of a sponge: it remains damp for the better part of a day, a perfect environment when combined with food residue. This moist, nutrient-rich setting creates an ideal playground for bacteria to breed and thrive, multiplying exponentially. Mold and yeast also won’t be far behind, adding to the unsanitary conditions. Sanitizing your sponges every day isn’t just a good idea; it’s a crucial practice to ensure that you’re not inadvertently spreading potential pathogens while wiping surfaces and washing dishes, undermining all your efforts to keep your kitchen clean.
One of the simplest and most effective ways to disinfect a sponge is by leveraging the power of your microwave. Just soak it thoroughly until it’s wet – this is vital, as a dry sponge could dangerously go up in flames. Then, place the wet sponge in a microwave-safe container and select the high setting, microwaving it for 1 to 2 minutes daily. The intense steam produced during this process is incredibly effective, eliminating an astonishing “99.99999% of bacteria,” making your sponge safe for cleaning your dishes once more. Of course, always remember to let the sponge cool completely before handling it with your bare hands.
It’s important to note that this microwave method is not suitable for metallic sponges due to the risk of sparks and potential damage to your appliance. For metallic scrubbers, the dishwasher offers an excellent alternative: simply place them inside with your dirty dishes and choose the “heated dry” setting. This method is highly effective, killing “99.9998% of bacteria.” Alongside this vital daily practice, it’s also a good rule of thumb to replace your sponges every week or two – or even sooner if they start to smell bad, look worn, or immediately after they’ve come into contact with raw meat or blood.

7. **Your Bathroom Hand Towels**There are few things quite as unpleasant as reaching for a hand towel in the bathroom, only to encounter a limp, damp cloth that someone else has just used. And let’s be honest, drying your face with a stale-smelling one is arguably even worse! Beyond the unpleasant sensory experience, less-than-fresh hand towels pose a significant hygiene risk. Every time you use a bathroom hand towel, you’re likely transferring bacteria, including fecal strains, and other germs from your skin directly onto the absorbent fabric.
What makes this particularly concerning is the bathroom environment itself. It’s often humid, poorly ventilated, and dark – precisely the conditions where these microorganisms, including molds and yeasts, can breed and multiply rapidly. As a result, it’s not an exaggeration to say that your hand towels might harbor more bacteria than your toilet within just two days. This startling fact makes swapping in a clean hand towel every single day an absolutely brilliant and essential practice for maintaining a healthy home.
This daily switch becomes even more critical if your hand towels experience heavy usage. For instance, if all your family members and any guests are consistently using the same towel to dry their hands after going to the toilet, a daily change is non-negotiable. When it comes to laundering these dirty towels to get them sanitary, it’s best to run them separately in a dedicated towel load. This is because towels can easily cover your other garments in lint, and you certainly don’t want the towels to spread bacteria to your clothing items, or pick up strains from your dirty socks or underwear.
For the best results, opt for smaller loads, which allow for a more thorough clean, and choose the long wash cycle, pairing it with warm to hot water to effectively sanitize them. A common mistake is adding more detergent than necessary, which can cause towels to absorb the excess and feel rough. Similarly, it’s best to avoid fabric softeners, as they can actually interfere with your hand towels’ absorbency over time. Finally, ensure they are allowed to dry completely before storing them away, preventing any new bacterial growth and keeping them fresh and ready for use.
Read more about: 13 Simple, Proven Ways to Create a Greener Home: Practical Tips for a Sustainable and Healthier Family Life

8. **Your Shower Walls and Door**The thought of tackling a grimy shower might make you groan, but consistent daily maintenance can save you from back-breaking weekly cleans. Soap scum relentlessly builds up on your walls and door, and if you have hard water, those dreaded limescale deposits will further dull their appearance, especially on glass. Grout that remains perpetually wet can also invite mildew and mold, which are not only unsightly but can also pose health concerns for a healthier home environment.
To effortlessly keep your shower looking as pristine as the day it was installed, simply keep a squeegee within arm’s reach. After every single use, take a moment to run it over your shower walls and door. Many modern squeegee models, like “Hiware’s All-Purpose Shower Squeegee,” even come equipped with waterproof adhesive hooks or suction cups, making installation a breeze and ensuring it’s always right where you need it.
Start with your shower door, positioning the squeegee at the top and moving it in an ‘S’ shape to swiftly remove any leftover water. If an ‘S’ motion feels a bit tricky, straight lines from top to bottom work just as effectively. Then, apply the same strategy to your walls, ensuring you don’t miss built-in storage nooks or awkward corners where water can pool. If needed, a microfiber cloth can help with those tight spots.
For an added layer of prevention against deep cleaning, consider a spray bottle with a mix of distilled white vinegar and water. A quick spritz over your doors and walls, allowing them to air dry, helps combat buildup. Just remember to avoid acidic solutions on delicate surfaces like marble, granite, or slate, where a specialized product like “Granite Gold’s Shower Cleaner Spray” would be a safer choice. This minimal daily effort will keep your shower fresh and reduce future scrubbing.
Read more about: The Billionaire’s Box: Unpacking Why Elon Musk Calls a Tiny Prefab Home His Sanctuary

9. **Your Coffee Maker**For many of us, the day simply doesn’t begin until that first invigorating cup of coffee is in hand. However, if you’re brewing a fresh pot daily and then simply walking away without a quick rinse or clean, you’re setting the stage for more than just a less-than-perfect brew. Residual coffee grounds, milk, and oils from previous uses can quickly accumulate, subtly altering the taste of your morning cup and making the eventual deep cleaning a far more time-consuming and arduous task than it needs to be.
Beyond just taste, leftover water lingering in the coffee maker’s reservoir creates an ideal, stagnant environment where bacteria and mold can thrive undetected. Furthermore, if your home has hard water, mineral accumulation becomes an inevitable issue, meaning you’ll have to descale your appliance much more frequently to maintain its efficiency and longevity. These hidden issues are quietly compromising both your coffee experience and the hygiene of your kitchen.
To safeguard your health and ensure every cup of coffee tastes as delicious as it should, it’s a smart practice to lightly clean your coffee maker after every single use. This applies whether you’re using a Keurig, an espresso machine, or a classic French press. The initial step is always to safely remove and dispose of any spent grounds, preventing them from sitting and fermenting inside the machine.
Next, disassemble all the detachable components, which typically include the lid, the water reservoir, the coffee pot or carafe, and the filter basket. Wash each of these parts thoroughly with hot water and a mild dish soap. If you’re not a fan of manual cleaning, a quick check of your owner’s manual will reveal which components are conveniently dishwasher-safe, such as most glass carafes and brewing baskets. After washing, allow all the parts to air dry completely before carefully reassembling them and returning them to their designated spots. To complete your daily cleaning ritual, grab a damp microfiber cloth and give the appliance’s exterior and warming plate a quick wipe down. This simple, consistent routine ensures that your coffee maker remains free from residue, bacteria, and mold, promising you a fresh, delicious, and hygienic brew every single morning without the hassle of infrequent, intensive cleaning sessions.
Read more about: Unlocking Adventure: 14 Must-Try, Affordable Weekend Getaways Near New York City for Every Explorer
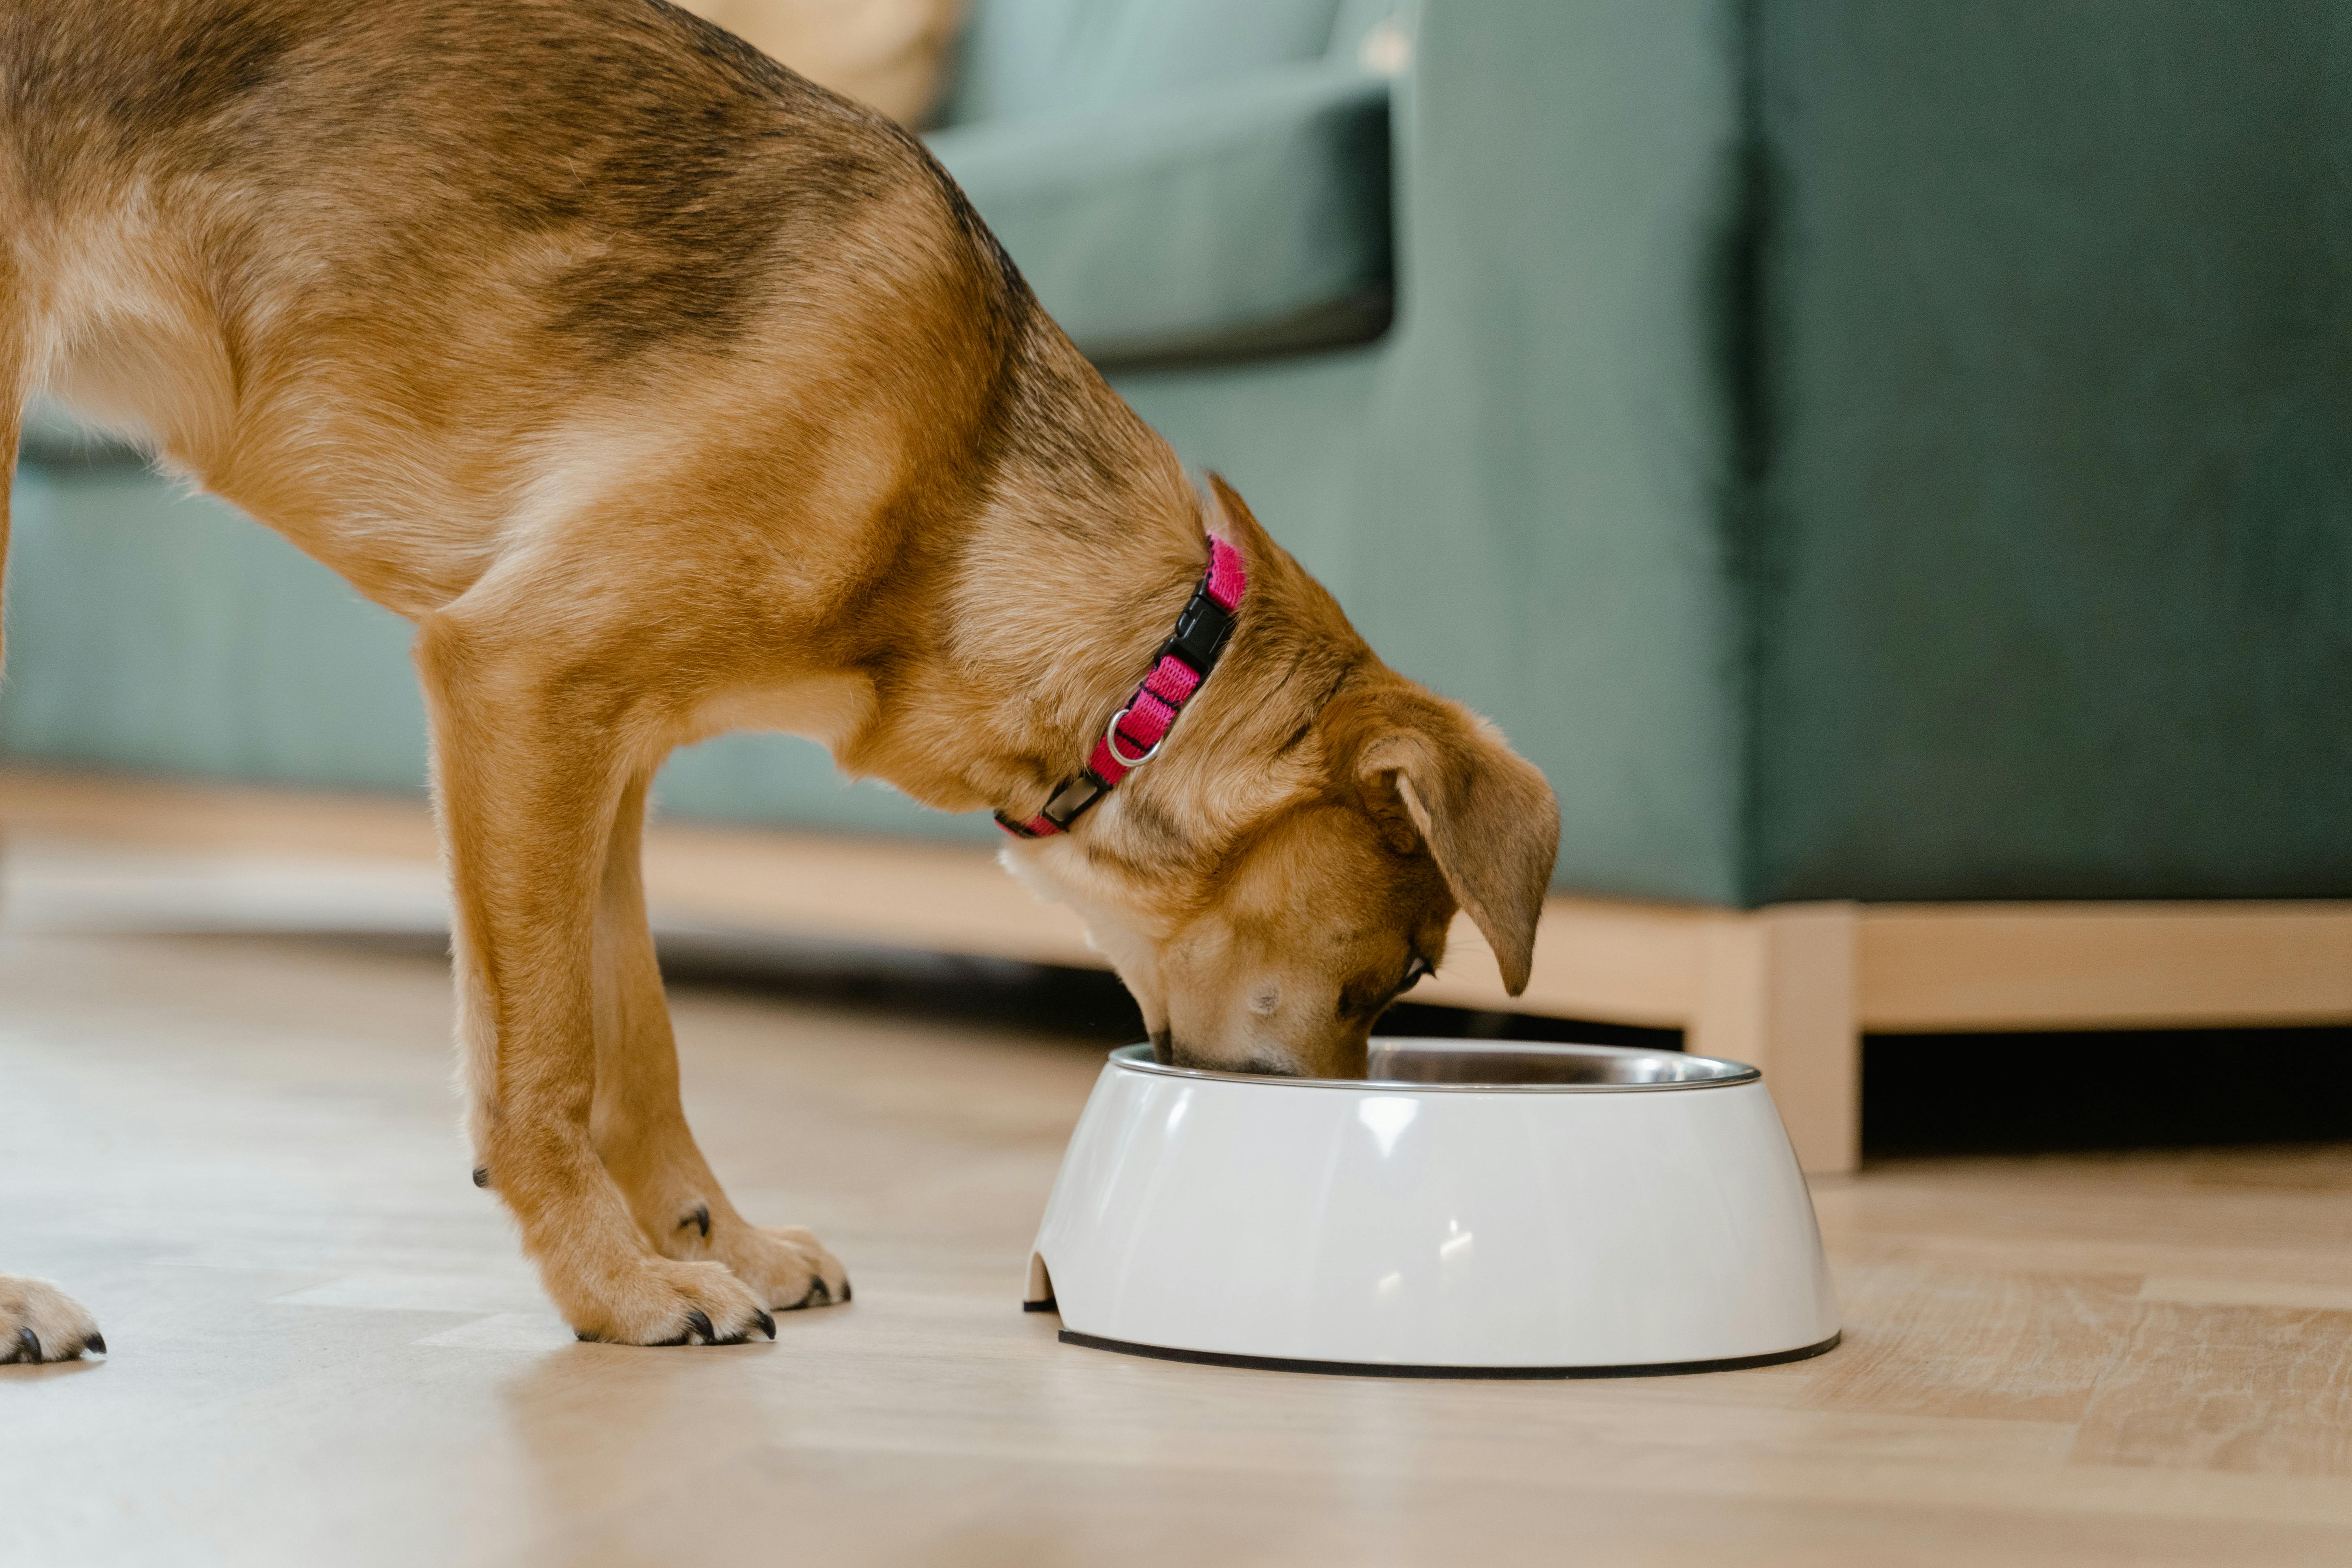
10. **Your Dog’s Food and Water Bowl**If you wouldn’t eat or drink from a dirty plate or glass yourself, why would you let your beloved furry friend? Neglecting to wash your dog’s water and food bowls daily is a common oversight, yet it’s crucial for their health. Your dog’s saliva naturally contains bacteria, which readily transfers to their dish every time they eat or drink. If these bowls are left unwashed, these microorganisms quickly find a haven in leftover food residue and moisture, creating a slimy, bacteria-filled layer known as biofilm.
In the worst-case scenarios, harmful bacteria like Salmonella and E. coli can flourish in these unsanitary conditions, potentially leading to serious digestive issues or even food poisoning for your pet. Beyond the immediate health risks, a dirty bowl also acts as an open invitation for other unwelcome pests, creating an unsanitary situation that can affect your entire household. It’s a silent threat to your pet’s well-being that can be easily avoided with a little daily attention.
To ensure your cherished companion remains healthy and free from illnesses caused by poor hygiene practices, it’s absolutely essential to wash their dry food and water bowls every single day. If you feed your dog wet food, the urgency increases; you’ll need to wash their used dish immediately after each meal, as wet food turns rancid very quickly, significantly speeding up bacterial growth. This proactive step is simple yet profoundly impactful for their health.
When it comes to cleaning, use hot water paired with a pet-friendly dishwashing liquid. It’s vital to choose a product that is free from harsh chemicals like alcohol, ammonia, and bleach, as these can be harmful to your pet. “Attitude’s EWG Verified Dish Soap” is a good example of a safe and effective option. For added convenience, if your dog’s bowls are made of durable ceramic or stainless steel, you can often wash them in your dishwasher on a high-heat setting, which provides excellent sanitization. Once washed, always allow the bowls to air dry completely before refilling them with water or food. This prevents moisture from lingering, which could again encourage bacterial growth. And don’t forget another often-missed item: the scooping tool. This too should be cleaned after each use, ensuring that every aspect of your pet’s mealtime hygiene is maintained. These small daily efforts make a huge difference in keeping your pet happy, healthy, and safe.
Read more about: The Beaver’s Boundless Reach: Buc-ee’s Roars Into Arkansas and Beyond, Redefining the Road Trip Experience!
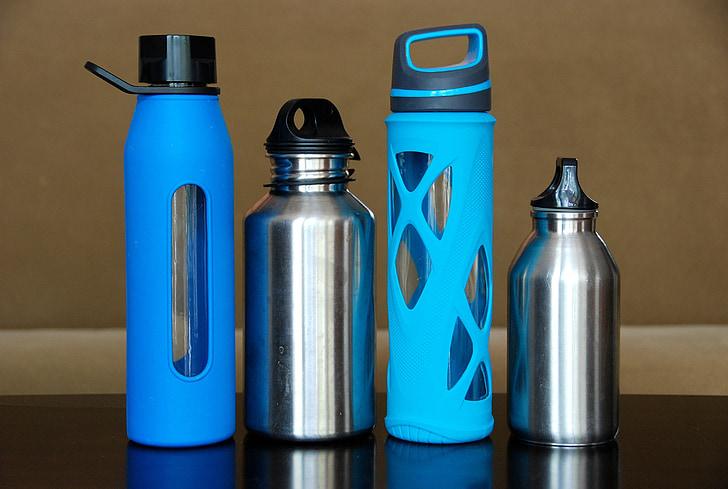
11. **Reusable Water Bottles**In our increasingly eco-conscious world, reusable water bottles have become an indispensable accessory, helping us stay hydrated while reducing plastic waste. However, the convenience and environmental benefits can sometimes mask a hidden hygiene challenge. While you might assume a quick rinse or a good soapy wash is sufficient, you could be wrong. The moist environment inside a water bottle, especially when coupled with regular use, creates a prime breeding ground for mold and bacteria.
What makes this particularly tricky are the harder-to-reach spots. The main container might appear sparkling clean, but the rims, lids, and intricate straw mechanisms are notorious for harboring germs. These often-overlooked areas can become veritable ecosystems for microorganisms, potentially affecting the taste of your water and, more importantly, your health. It’s a subtle but significant factor in maintaining proper personal hygiene.
To keep your reusable water bottle fresh, hygienic, and safe for daily use, a simple yet consistent cleaning routine is key. Make it a daily habit to wash your bottle with warm soapy water. This isn’t just a casual rinse; it requires a bit of attention to ensure all surfaces are thoroughly cleaned. For those trickier spots like straws and internal valves, using the right tools, such as specialized straw cleaners, is incredibly effective at dislodging hidden grime and residue. While daily washing takes care of surface cleanliness, for a deeper level of sanitization, consider disinfecting your water bottle weekly. A simple yet powerful solution involves using vinegar. Fill the bottle with a mix of water and vinegar, let it sit for a while, and then rinse thoroughly. This helps eliminate any stubborn bacteria or mold spores. By integrating both daily washing and weekly disinfection into your routine, you can ensure that your reusable water bottle remains a clean and healthy way to stay hydrated. These small, consistent steps not only extend the life of your bottle but, more importantly, protect you from unwanted germs, allowing you to enjoy your water worry-free.
Read more about: 13 Simple, Proven Ways to Create a Greener Home: Practical Tips for a Sustainable and Healthier Family Life

12. **Salt and Pepper Shakers and Other Spice Containers**Consider how often your hands make contact with your salt and pepper shakers, not to mention your colorful array of spice, herb, and seasoning containers, especially during cooking. These kitchen staples are handled regularly, picking up bacteria from unwashed hands as well as oils and food residue from all the other ingredients you touch while preparing meals. This constant interaction transforms them into stealthy carriers of germs, often without us even realizing it.
The problem is particularly pronounced during the chaotic flow of meal preparation, where you might be handling raw meats, fresh produce, and other ingredients, then instinctively reaching for a spice jar. Each touch contributes to the accumulation of invisible contaminants on the surface of these containers. Over time, this buildup can turn your spice rack into a less-than-hygienic zone, potentially compromising food safety. The insidious nature of this buildup means that what seems like a clean kitchen could harbor hidden risks, warranting regular attention to these frequently handled items.
Fortunately, the solution to this often-overlooked problem is remarkably easy and takes virtually no effort at all. To keep your salt and pepper shakers and other spice containers clean and germ-free, simply make it a habit to give them a quick wipe down after every single use. All you need is a disinfectant wipe or a cloth dampened with an appropriate cleaning solution. A swift pass over the jars and pots ensures that any surface contaminants picked up during cooking are immediately neutralized. This daily ritual, especially for items used regularly like salt and pepper, contributes significantly to maintaining a hygienic kitchen environment and peace of mind. By incorporating this quick wipe-down into your post-meal cleanup, you’re not just keeping your containers visibly clean, but also actively breaking the chain of potential cross-contamination in your kitchen. It’s a small step that yields substantial benefits, ensuring that your spices remain pure and your cooking space stays as sanitary as possible.

13. **Your Toothbrush**Your toothbrush, the very tool you rely on for oral hygiene, might seem innocuous, but it’s a surprising hotbed of bacteria. Studies have alarmingly found that some toothbrushes can carry over 100 million bacteria, thriving in those damp bristles. This includes a host of unpleasant nasties such as E. coli, staph, and even fecal particles. Yes, that last one is a particularly unsettling thought!
The primary culprit behind this unsavory truth is often the “toilet plume”—that invisible cloud of microscopic particles launched into the air every time you flush. This plume can send germs flying up to 1.8 meters (six feet), where they eventually settle on nearby surfaces, including your innocent-looking toothbrush. Coupled with the inherent moisture, this creates an ideal environment for bacteria to multiply. The inherent moisture in a bathroom further contributes to bacterial multiplication. Combined with airborne contaminants, this creates an ideal environment for microorganisms to thrive, turning your hygiene tool into a potential source of germs. Understanding this silent threat is the first step toward effective prevention and a truly clean mouth.
Prevention is absolutely key to keeping your toothbrush as clean as possible. Always make it a steadfast rule to close the toilet lid before flushing, effectively containing the toilet plume. Furthermore, position your toothbrush as far away from the toilet as possible, ideally in a cabinet or a holder that provides some cover, to minimize exposure to airborne contaminants. Beyond these preventative measures, a daily cleaning routine for your toothbrush is essential. After each use, thoroughly rinse the brush head under hot water to dislodge any lingering toothpaste residue and food particles. Don’t forget to give the handle a quick wipe as well, as your hands transfer germs to it every time you brush. For a deeper, weekly sanitization, soak the brush head in antibacterial mouthwash for about 15 minutes before rinsing it thoroughly.
It’s also a crucial best practice to replace your toothbrush or brush head every three to four months, or even sooner if you notice the bristles beginning to fray, as worn bristles are less effective and can harbor more bacteria. If you use an electric toothbrush, extend your cleaning to wiping the handle and charging base with a disinfectant wipe or isopropyl alcohol to prevent grime buildup. Always store your toothbrush upright in a well-ventilated area, allowing it to air dry completely, which is vital for preventing further bacterial growth and ensuring your daily oral hygiene routine is as clean and effective as possible.
Read more about: 12 Ingenious Home Hacks: Transform Everyday Items into Powerful Problem-Solvers for a Smarter, More Efficient Home
There you have it! A comprehensive guide to the 13 common household items that truly benefit from a little daily attention. While the thought of a daily cleaning regimen might initially seem like a monumental task, remember that these are small, manageable steps that collectively create a significant impact. By consistently addressing these high-touch and germ-prone areas, you’re not just maintaining a visibly tidier home; you’re actively cultivating a healthier, safer, and more pleasant living environment for yourself, your family, and even your beloved pets. Embrace these simple habits, and you’ll discover the joy of a home that consistently feels fresh, clean, and truly cared for, all without the overwhelming burden of endless deep-cleaning marathons. It’s about smart, sustainable hygiene that makes everyday life better.


