

There’s a unique satisfaction that comes with driving a car that feels as fresh and pristine as the day it rolled off the lot. Yet, despite our best efforts, time and daily use inevitably leave their mark, slowly eroding that showroom-new feeling. Dust settles in every crevice, fabrics show signs of wear, and the once-matte surfaces develop an unsightly sheen. The good news is, you don’t have to resign yourself to a tired-looking interior. The secret to recapturing that brand-new appeal lies in one comprehensive approach: meticulous interior detailing.
Interior detailing isn’t just about a quick wipe-down; it’s a precise, systematic process of deep cleaning and protecting every surface inside your vehicle. This holistic method addresses the root causes of wear and tear, from preventing UV damage on plastics and leather to extracting deeply embedded grime from carpets and upholstery. It’s the essential practice that transforms a neglected cabin into an inviting, immaculate space, restoring not just its appearance but also enhancing your overall driving experience.
If you want your car’s interior to genuinely look brand new again, and stay that way, you need to understand and apply these professional-grade techniques. In this guide, we’ll break down the complete interior detailing process, focusing on specific areas of your car’s interior and how they can be meticulously cleaned, restored, and protected to achieve an undeniable showroom finish. Prepare to rediscover the pride and comfort of an interior that looks like it’s never been driven.
1. Thorough Vacuuming
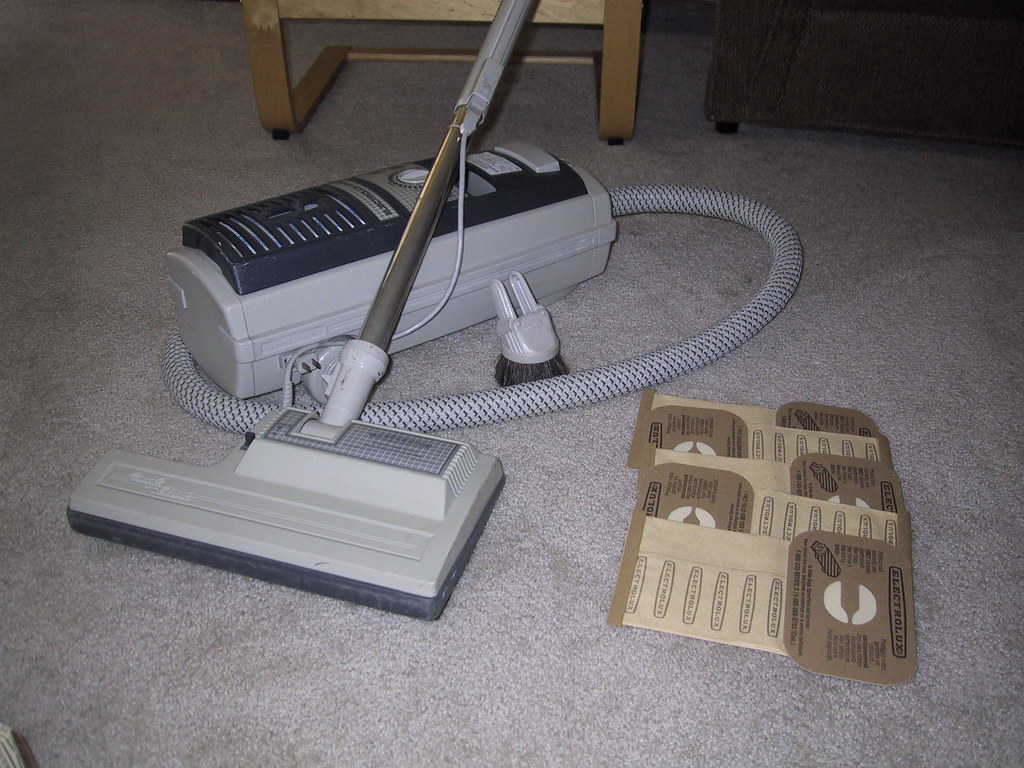
The very first port of call for any interior deep clean, and arguably one of the most crucial, is thorough vacuuming. It is absolutely essential not to neglect this initial step or to do a so-so job, because insufficient vacuuming will undoubtedly make the rest of the deep cleaning process far more difficult and less effective. Think of it as preparing a canvas before painting; you need a clean, clear base to build upon.
For this critical task, you’ll benefit greatly from having the right tools. While a cordless hoover can make the job significantly easier due to its maneuverability, a wired vacuum can still achieve excellent results; you’ll likely just need an extension cable to reach all areas comfortably. More importantly, you’ll need two specific types of attachments: a crevice tool and a brush attachment, each serving a distinct purpose in your detailing arsenal.
The crevice attachment proves invaluable for accessing those difficult-to-reach areas on and around the seats, as well as the tight corners of the dashboard and carpet where dust and debris love to hide. However, a word of caution is in order: exercise care when using a plastic crevice attachment on plastic trim, as it can inadvertently cause scratches. The brush attachment, on the other hand, is superb for agitating and lifting dirt from carpets, mats, and cloth seats. It’s also surprisingly effective and safer for tackling the dashboard, covering a larger area more efficiently than the crevice tool.
If you’re contending with a particularly dirty car, this vacuuming step may take up to half an hour to complete thoroughly. Resist the urge to rush or skip ahead. Investing the time now to remove as much loose dirt and debris as possible is paramount. It lays the groundwork for all subsequent cleaning efforts, making them easier, more efficient, and ultimately, far more successful in achieving that brand-new appearance.
Read more about: After Extensive Testing: The 15 Best Robot Vacuums That Actually Work for Your Home
2. Dashboard Deep Clean & Protection
With the initial vacuuming complete, the next logical step in your interior restoration journey is to tackle the dashboard. Typically, the main issue affecting this prominent area is the pervasive build-up of dust, often compounded by environmental exposure. To effectively address this, you’ll want to gather a few key tools: a lightly damp microfiber towel, a dry microfiber towel, a small soft brush (a clean paintbrush can work wonders here), and an all-purpose cleaner (APC).
To clean the dashboard, begin by spraying a small amount of all-purpose cleaner onto your lightly damp microfiber towel, then gently wipe down the dash. It’s crucial that the towel is only very lightly damp; you must avoid over-saturating the interior, as this risks water running into delicate electric components. For those difficult-to-reach crevices and intricate textures that even the vacuum couldn’t quite conquer, deploy your small soft brush. It will effectively dislodge and capture dust, ensuring no detail is overlooked.
This cleaning step is surprisingly quick and rewarding, typically taking only around 5-10 minutes to do a thorough job on a dirty car. If your vehicle has been regularly maintained, you’ll find it’s an even faster process. The immediate visual improvement after clearing away years of accumulated dust and grime is often quite dramatic, setting the stage for the next crucial phase: protection.
Protecting the dashboard is just as vital as cleaning it, particularly because this area is relentlessly subjected to UV rays throughout the day. Without adequate protection, this constant exposure inevitably leads to fading over time, making your interior look old and tired. To prevent this, apply a dedicated dashboard sealant or dressing. This is typically accomplished using either a microfiber cloth or an applicator pad; many find applicator pads provide a more even coverage and a smoother finish. Crucially, when your intention is to make the interior look brand new again, opt for matte-look dashboard dressings. Shiny interiors are not characteristic of new cars, so a matte finish delivers a more authentic, factory-fresh appearance.
Read more about: Don’t Waste Your Money: 14 Walmart Buys That Experts Say to Skip (and What to Choose Instead)
3. Upholstery & Carpet Deep Clean & Protection
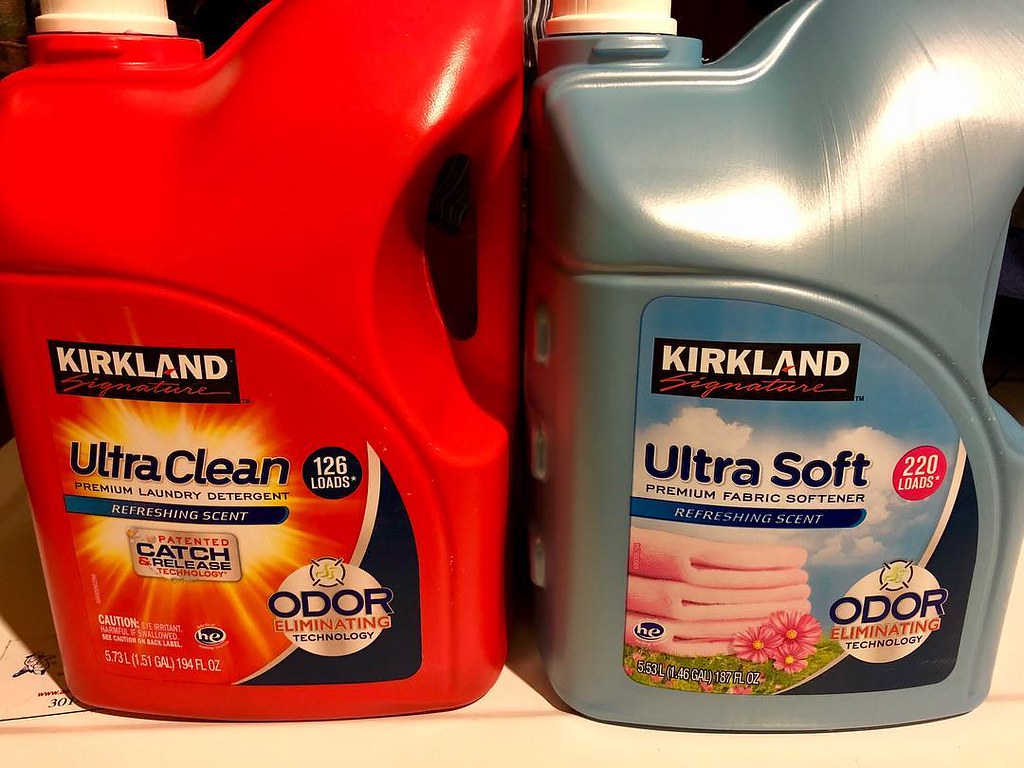
Moving beyond the dashboard, your attention should now turn to the fabric surfaces within your car’s interior: the carpets and any cloth seats. These areas are notoriously prone to staining, whether from tracked-in dirt, accidental spills, or the gradual accumulation of sweat over time. While regular vacuuming helps, periodic deep cleaning is absolutely essential to maintain their fresh, new appearance. For this intensive cleaning, you’ll need a small brush (soft leather brushes can be surprisingly effective here), a microfiber towel, an all-purpose cleaner (APC), and ideally, a wet-vac.
Begin the deep cleaning process by applying your all-purpose cleaner directly to the fabric. Once applied, use a microfiber cloth to spread the product evenly across the surface. This is where your small brush becomes indispensable; using it to work the product into the fabric in circular motions helps to agitate and loosen deeply embedded dirt and stains. Following this, utilize a wet-vac to thoroughly extract the dirt-laden cleaner from the material. If a wet-vac isn’t available, you can alternatively use a microfiber towel to soak up any excess cleaning product, though it won’t be as effective at extraction.
For stubborn stains, you may find it necessary to repeat this process a few times to achieve the best results. However, exercise caution: avoid over-soaking the fabric, as this can paradoxically leave behind unsightly water stains and potentially worsen the appearance of your seats. Instead, use the cleaning product sparingly, relying on the brush to genuinely work it into the fabric, and then efficiently soak it up with your microfiber towel. To ensure no excess APC remains, finish by wiping the treated area with a fresh, damp microfiber cloth.
Once your fabric surfaces are thoroughly clean, the next step is to protect them. The context highlights using a product like Gtechniq I1 Smart Fabric for this purpose. This advanced solution is specifically engineered to create an invisible, hydrophobic coating on the fabric. This protective layer effectively repels stains and dirt, making future spills easier to clean and significantly extending the clean appearance of your carpets and cloth seats. It’s a smart investment in maintaining that pristine, factory-fresh interior.
Read more about: You Won’t Believe How Gross These 14 Common Household Items Actually Are: Your Ultimate Germ Hotspot Guide!

4. Leather Care (Cleaning & Protection)
If your car is equipped with luxurious leather seats or features leather accents on the dashboard, these surfaces demand a distinct approach compared to the fabrics and plastics we’ve just discussed. Leather requires specific care and focused attention to ensure its color remains vibrant and its finish retains its supple, soft feel over time. A crucial first step in proper leather care is understanding the type of leather you’re dealing with. The three main categories are aniline (uncoated, not water-repellent), semi-aniline, and pigmented (both coated and more durable). It’s worth noting that nearly all modern cars feature coated leather, which influences the care products you should choose.
Cleaning the leather itself is a relatively straightforward process, but a key tip is to always use a dedicated leather cleaner rather than a general-purpose all-purpose cleaner (APC). This ensures that you’re not exposing the delicate leather to harsh chemicals that could compromise its integrity or finish. Furthermore, a specialized leather cleaner helps to maintain the protective coating present on most modern automotive leather, thereby preserving its new appearance. The context suggests a foam-format cleaner, applied and spread using a microfiber towel and a leather brush to meticulously clean corners and stitching, effectively removing stains, oils, and dirt.
When it comes to protecting and maintaining your leather, you typically have two main product choices: a conditioner and a sealant. While most car owners are primarily aware of conditioners, sealants are generally the more suitable option for modern automotive leather. This is because conditioners struggle to penetrate the coating on contemporary leather, meaning they simply sit on the surface and are often wiped away without providing significant benefit. Unless you’re working with uncoated aniline leather, or if the original coating has visibly worn away after many years of driving, a conditioner may not be necessary. A simple test involves placing a couple of water drops on the leather: if they soak in, the leather is uncoated and would benefit from a conditioner.
For most situations, especially with coated leather, a sealant is the superior choice. A quality sealant works effectively on coated leather and can even be applied over a conditioner if one was deemed necessary. Its primary function is to provide robust protection against damaging UV rays, everyday dirt, sweat, friction, and various stains, all of which contribute to leather looking tired and aged. By forming a protective barrier, a sealant ensures your leather remains looking newer for a significantly longer period. The Leather Repair Company LRC4 is cited as an example, offering 2-3 months of protection, ease of application, and a natural-looking finish.

5. Steering Wheel Restoration
One of the most overlooked areas, yet one that can dramatically age an otherwise clean interior, is a shiny steering wheel. It’s a personal pet-hate for many detailers, and for good reason. Walk into a showroom and examine a brand-new car’s interior, and you’ll immediately notice that the steering wheel has a distinct matte finish, not a glossy sheen. That undesirable shine on an older wheel isn’t a sign of cleanliness; it’s the tell-tale residue of accumulated oil, dirt, and sweat. Beyond being unhygienic, it visually detracts from the car’s overall appearance.
The good news is that restoring a shiny steering wheel to its original matte glory is surprisingly simple and quick. You’ll need just a few basic items to achieve this transformation: an all-purpose cleaner (APC) or, if your steering wheel is leather, a dedicated leather cleaner, two microfiber towels, and a small brush. These tools will enable you to effectively break down and remove the embedded grime that causes the undesirable shine.
The process is straightforward: begin by working your chosen cleaner—either the APC or leather cleaner—into the steering wheel using one of your microfiber towels and the small brush. The brush helps to agitate the cleaner into the texture and stitching, ensuring a thorough clean. Once the cleaner has had a moment to work, use your second, damp microfiber cloth to meticulously wipe away all the loosened dirt and cleaner residue. This simple yet effective treatment will reveal the original matte finish, instantly making the steering wheel look and feel brand new, greatly enhancing the overall perception of your car’s interior.
Read more about: 15 Classic Cars You Might Want To Skip: An Expert Guide for Discerning Collectors

6. Detailing Vents, Controls & Gear Stick
Having addressed the larger, more prominent areas of the car’s interior, it’s now time to pivot our focus to the often-neglected yet critical details: the vents, controls, and the gear stick. These intricate areas are where many people tend to overlook, but their cleanliness is absolutely paramount if your goal is for your car’s interior to truly look brand new. Ignoring these spots can leave an otherwise spotless interior looking incomplete and aged.
For this meticulous task, a soft detailing brush is your best friend. Many find that a super soft paintbrush can work just as effectively, providing the necessary gentle bristles to reach into tight spaces. Use this brush to meticulously work through all these areas, dislodging and removing any signs of dust that have settled within the slats of the vents, around the buttons of the controls, and at the base of the gear stick. This action alone can make a significant difference, bringing a renewed crispness to these components.
Should you encounter any stubborn stains, caked-on dirt, or particularly tough-to-remove dust, you can enhance the brush’s efficacy by wetting it very lightly – do not soak it. This slight dampness will help to more easily dislodge and lift away the ingrained grime. However, a crucial caution is needed here: refrain from using a brush on any shiny black trim. This type of plastic is exceptionally prone to scratching, and even a soft brush can inflict damage. For such surfaces, it is far safer and more effective to use a very soft microfiber towel. Similarly, when wiping down any controls with a damp microfiber towel, always be careful not to over-saturate the area, preventing any water from potentially running into sensitive electrics.
Read more about: Buckle Up! These 15 Car Trends Are Making Everyone Nuts – And Need to Stay in the Past!
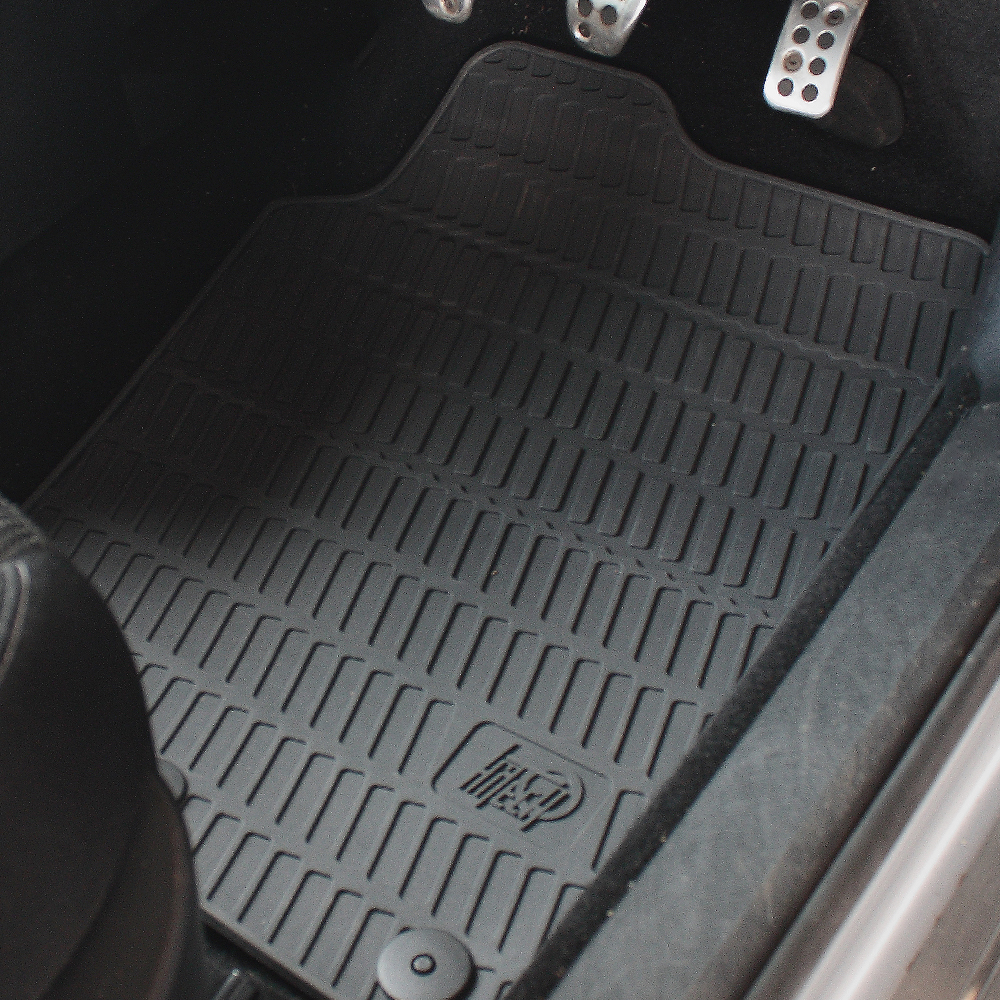
7. Mats Deep Clean & Protection
Deep cleaning and subsequently protecting the mats in your car is an utterly essential step in making your interior look brand new, playing a pivotal role in maintaining overall cleanliness. Cars typically feature two main types of mats: fabric and rubber, each requiring its own tailored approach to cleaning and protection for optimal results.
For fabric car mats, the cleaning process closely mirrors that of your car’s carpet. Begin with a thorough vacuuming, ideally utilizing a brush attachment to lift and loosen embedded dirt. Following this, you can spray an all-purpose cleaner or a dedicated foaming fabric cleaner onto the mat and work it in meticulously using a brush. The final, crucial step is to use a wet-vac or extractor to thoroughly remove the dirt and cleaning solution, leaving the fabric clean and refreshed. To ensure these mats stay looking new, they should then be protected with a sealant. A product such as Gtechniq I1 Smart Fabric, also suitable for cloth seats and carpets, creates a repellent barrier against dirt and water, helping them maintain their pristine appearance for longer.
Rubber car mats, by contrast, are generally a bit easier to keep clean due to their non-absorbent nature. The process starts by removing the mats from the car and giving them a good shake to dislodge any loose debris. Next, rinse the mats thoroughly with high-pressure water to remove surface grime. Apply an all-purpose cleaner (APC) and use a stiff brush to scrub it into the rubber, breaking down any caked-on dirt or stains. Rinse again with pressure water, repeating the scrubbing and rinsing if necessary for heavily soiled mats. Finally, dry them completely with a towel to prevent water spots.
Regardless of whether your car has fabric or rubber mats, their importance extends beyond mere aesthetics. If you currently don’t use mats in your vehicle, it’s highly recommended to invest in some. Not only do they significantly contribute to the overall clean look of your interior, but they also act as a crucial barrier, making the entire interior cleaning process considerably easier and more efficient in the long run. They are a frontline defense against dirt and wear, preserving the underlying carpet.
Read more about: The Unsung Hero in Your Trunk: Why a Crowbar is Your Car’s Most Essential Emergency Tool

8. Glass
Keeping the glass pristine is an absolutely essential step in making your car look truly new, but it’s not just about aesthetics—it significantly enhances driving safety. Many find cleaning car glass to be a particularly vexing task, often battling issues like difficult-to-access areas on the windscreen or the elusive quest for a streak-free finish. Fortunately, with the right approach, you can conquer these challenges and achieve crystal-clear results.
The key to avoiding frustrating streaks and annoying fiber residue lies in choosing the correct tools for the job. You’ll want to invest in high-quality waffle-weave microfiber towels or specialized fish-scale glass cloths, as these are engineered to provide superior cleaning performance without leaving behind lint. Crucially, steer clear of soft plush towels or standard terry cloths, which are more prone to shedding fibers and creating streaks, ultimately defeating your purpose.
For optimal access to your windscreen, a clever trick is to clean it from the passenger side, which conveniently keeps the steering wheel out of your way and provides a more comfortable angle for reaching tricky spots. Alternatively, for even greater maneuverability, consider standing outside the car and reaching in. When applying your chosen glass cleaner, employ a cross-hatch motion to guarantee even coverage across the surface, meticulously wiping until every trace of the product is removed. It’s imperative not to allow the glass cleaner to dry on its own, as this is a primary culprit for streaking. Finally, always opt for a glass cleaner that is ammonia-free, as ammonia can, over time, cause damage to window tints.
Read more about: Who’s Still Bringing the Sunshine? Catching Up with the Enduring Cast of ‘Eight Is Enough’!
9. Headliner
The headliner is an area of the car’s interior that is frequently overlooked, yet its condition can dramatically impact the overall impression of cleanliness, particularly in older vehicles. If your car hasn’t been treated with consistent care, the headliner can accumulate stains that starkly undermine the appearance of an otherwise spotless interior. Addressing this often-neglected surface is vital for achieving that coveted “brand new” look.
Typically, effectively cleaning the headliner can be accomplished with a simple yet powerful combination: a clean microfiber towel and an all-purpose cleaner (APC). The process involves gently applying the APC to the towel, then carefully wiping the stained or soiled areas of the headliner. The goal is to lift dirt without scrubbing aggressively, as the headliner material is often delicate.
However, a critical caution must be heeded during this process: under no circumstances should you over-saturate the headliner with cleaning product or water. Excessive moisture can have a detrimental effect, potentially causing the headliner fabric to sag or even detach from the roof. To actively prevent this from happening and ensure the material retains its integrity, it is absolutely essential to always thoroughly dry the cleaned area using a separate, dry microfiber towel immediately after cleaning.
Read more about: Sabrina Carpenter: How a Prophetic ‘Woman of My Word’ Moment Unlocked Her Coachella Headlining Destiny
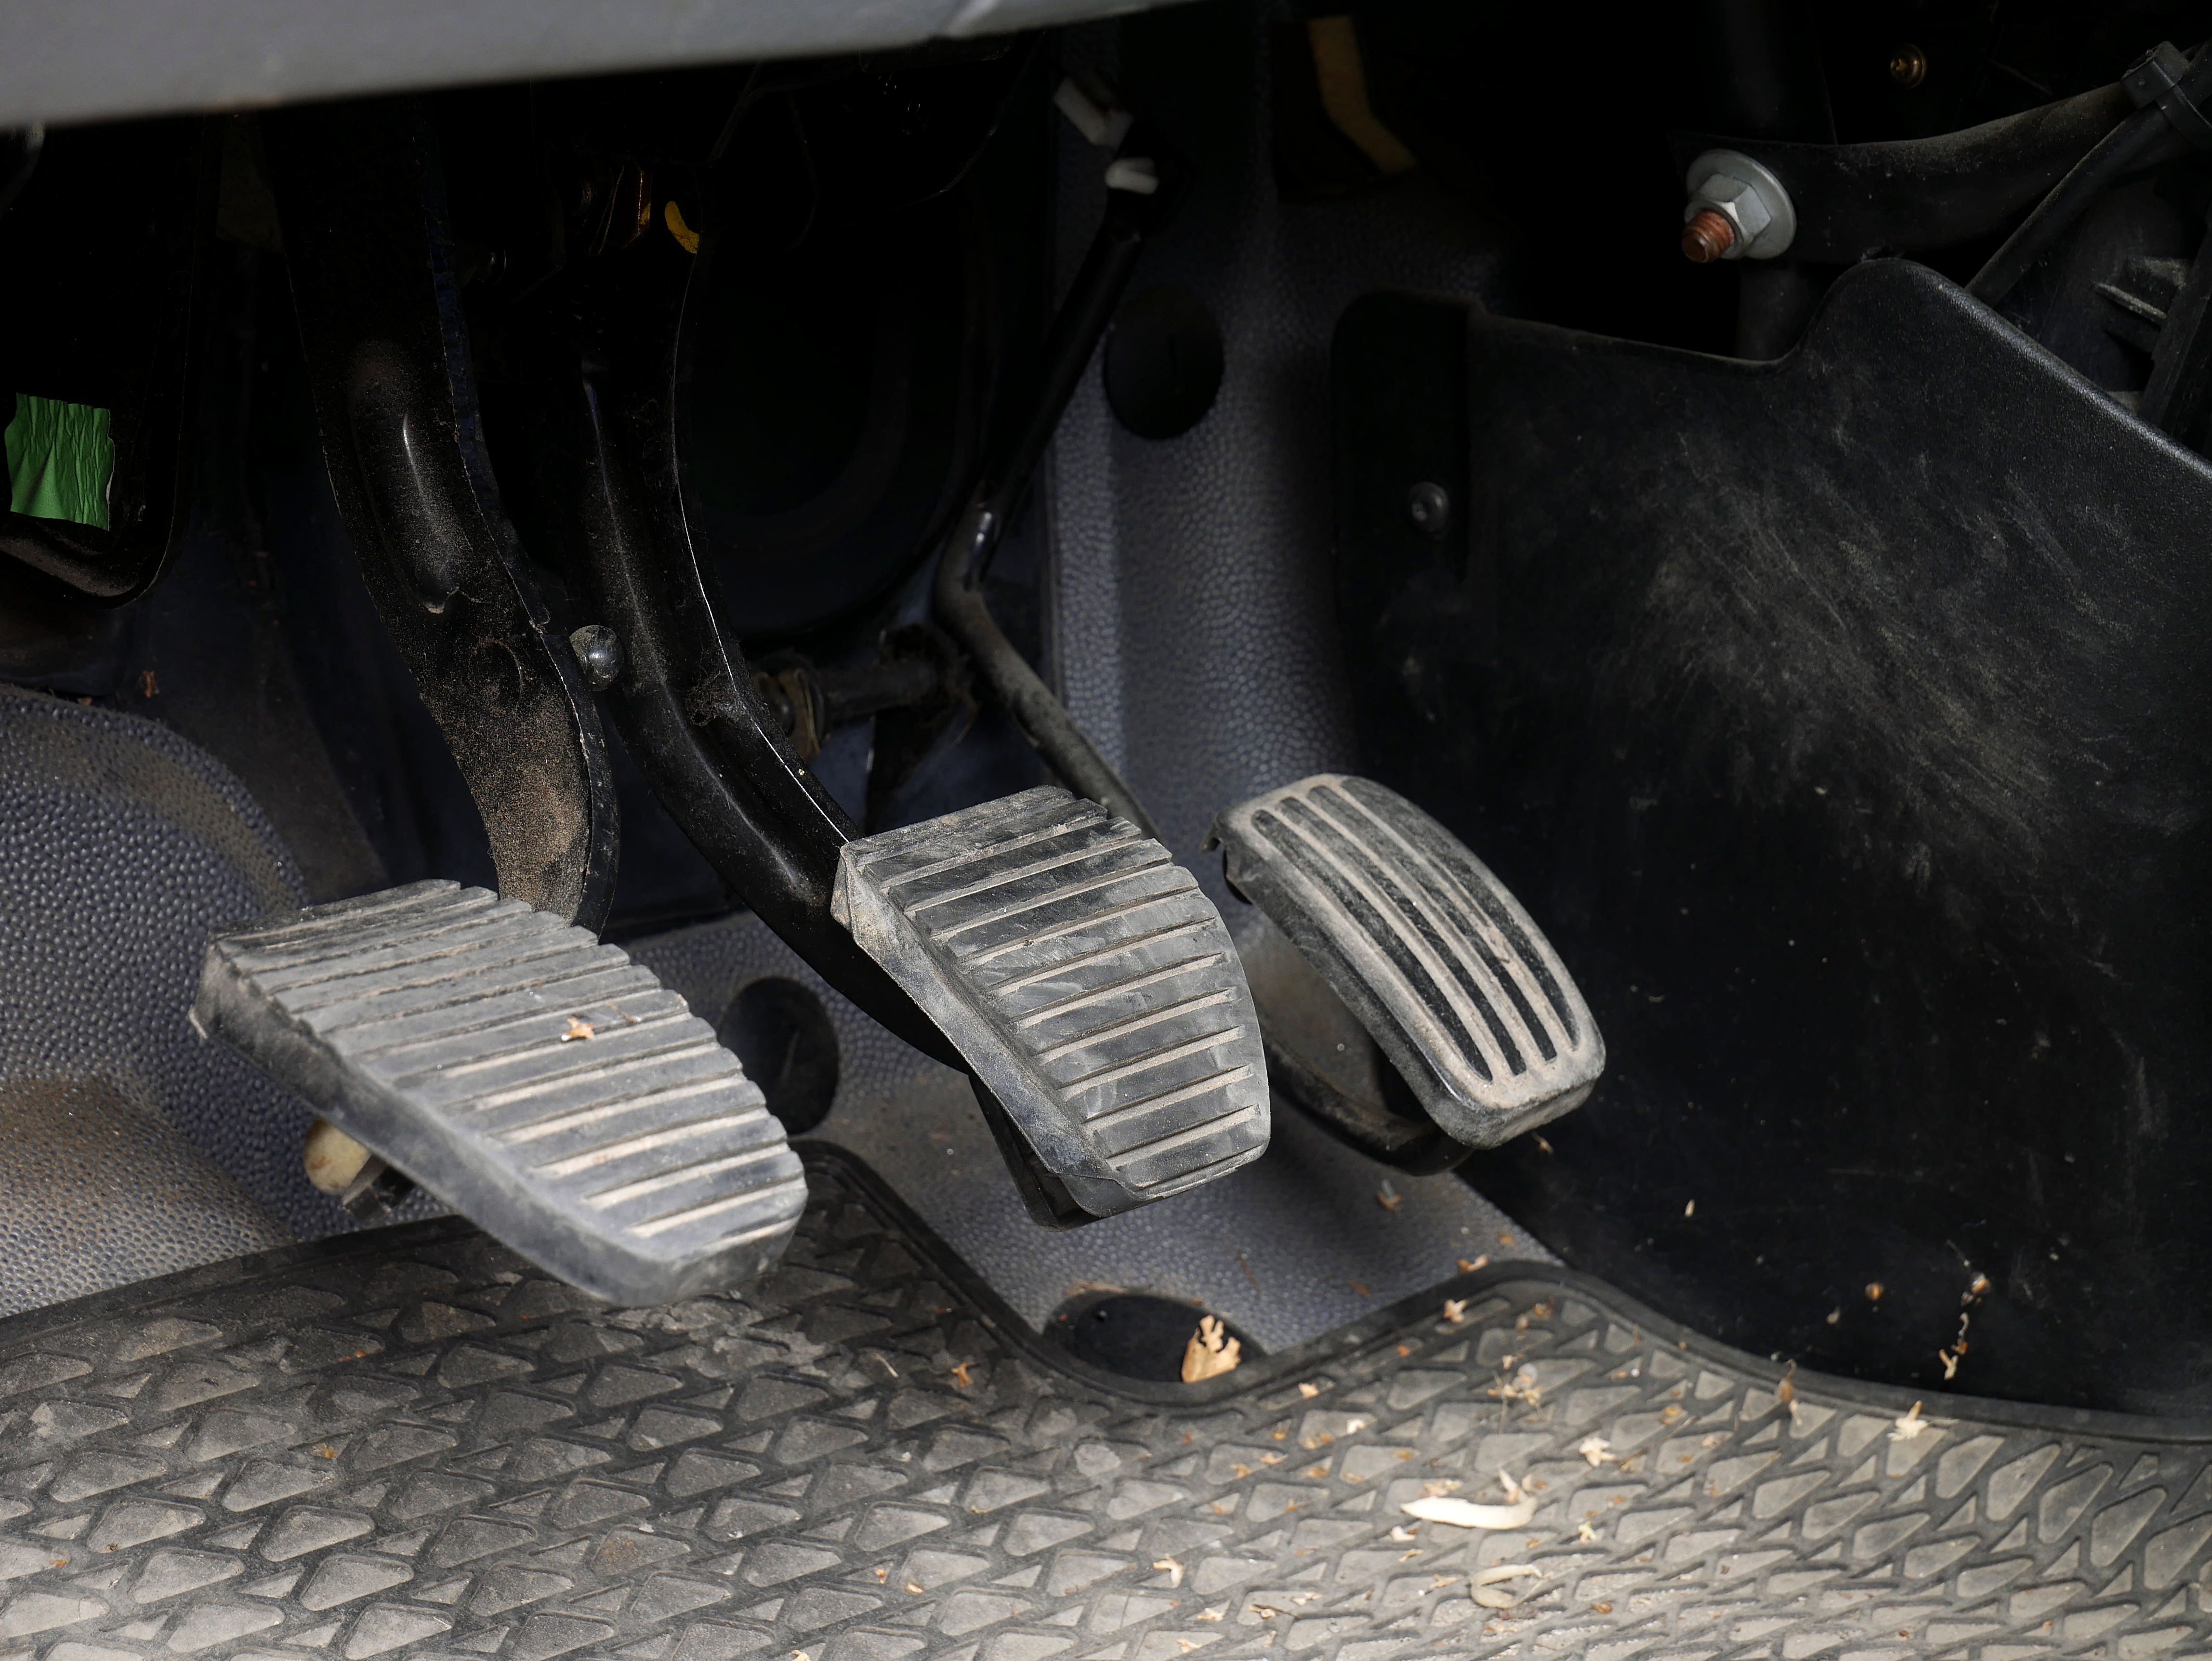
10. Pedals
While some might consider it an extreme measure, paying attention to your car’s pedals is an often-skipped detail that can significantly contribute to the “brand new” feel of your interior. Cleaning them isn’t just about cosmetic finishing; it also plays a practical role by helping to prevent dirt from being transferred back onto your freshly cleaned floor mats. It’s a quick and easy task that truly completes the transformation.
To prepare for cleaning, first cover the carpet and the area behind the pedals with a microfiber towel. This simple step acts as a crucial barrier, preventing these areas from getting soaked as you work. Once the surrounding areas are protected, you can then spray the pedals directly with an all-purpose cleaner (APC), ensuring a close-range application for targeted effectiveness.
With the APC applied, take a dedicated toothbrush and use it to meticulously scrub the pedals. The small bristles of a toothbrush are perfect for reaching into the grooves and textures of the pedal surfaces, effectively dislodging accumulated dirt, grime, and debris that regular cleaning might miss. This focused scrubbing action is key to restoring their original appearance.
After thoroughly scrubbing, spray the pedals with a small amount of clean water to rinse away the all-purpose cleaner and the loosened dirt. Finally, dry them completely with either a terry cloth or another clean microfiber towel. This final drying step ensures no water spots are left behind and brings out the restored, pristine finish, making your entire footwell look immaculate.
Read more about: Beyond the 911: 10 Thrilling Sports Cars That Deliver Porsche-Level Performance for Less
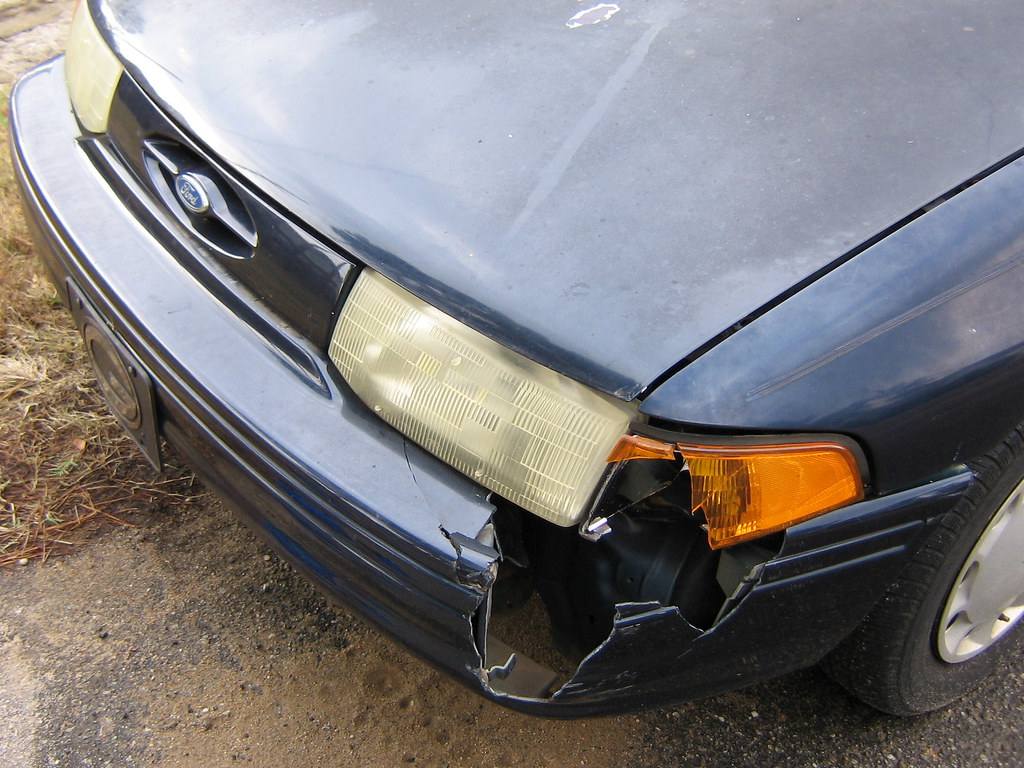
11. Addressing Wear and Damage
Even after a meticulous deep clean, certain signs of wear and damage can still detract from a car’s interior, making it look less than “brand new.” Fortunately, many common interior issues are not insurmountable and can be effectively resolved with targeted solutions, restoring both the appearance and tactile quality of your vehicle’s cabin. This crucial step in interior rejuvenation ensures all components reflect the care you’ve invested.
One frequent problem area is torn upholstery. For minor tears or small punctures, specialized repair kits are readily available and can provide surprisingly effective, discreet fixes that blend seamlessly with the existing fabric or leather. However, in cases of extensive damage or significant wear across large sections of seating, professional reupholstering services might be the most comprehensive solution to genuinely restore the factory-fresh look and feel.
The steering wheel, a constant point of contact, often shows signs of wear through a degraded surface or worn-off texture. While a deep clean can remove grime, actual material wear requires more. Leather or synthetic covers designed specifically for steering wheels offer an excellent way to rejuvenate these tactile surfaces, providing a fresh grip and aesthetic. Simultaneously, faded dashboards, a common consequence of prolonged UV exposure, can be significantly improved and protected from further deterioration through the consistent application of dedicated UV protectants, which help restore color and prevent cracking.
Another aspect often signaling an older interior is a sagging headliner. For minor instances where only small sections are beginning to detach, an adhesive spray formulated for automotive fabrics can be a practical DIY fix. However, if the sagging is widespread or severe, indicating a more significant failure of the adhesive beneath the fabric, a full replacement of the headliner might be necessary to achieve a truly ‘new’ and taut appearance. Each of these specific remedies contributes to an overall renewed interior environment.
Read more about: Beyond the Quarter-Million Mark: Our Shortlist of Cars Engineered for Extreme Longevity
12. Odor Elimination
No matter how immaculately cleaned and restored your car’s interior appears, persistent, lingering odors can instantly diminish the perception of cleanliness, creating a dated and uninviting atmosphere. True interior rejuvenation isn’t just about what you see; it’s also profoundly about what you smell. Therefore, tackling and eliminating embedded odors is a non-negotiable step for achieving that elusive “brand new” cabin experience.
The very first and most critical step in effective odor elimination is diligent source removal. This means identifying and thoroughly cleaning all surfaces and materials where odors might reside or originate. This could involve deep cleaning carpets, upholstery, and floor mats where spills or contaminants have settled, or even checking under seats for forgotten food items. Simply masking odors without removing their source is a temporary fix that will inevitably fail.
Once the source has been addressed, deploy dedicated odor neutralizers. Unlike air fresheners that merely mask unpleasant smells with stronger, often artificial fragrances, true odor neutralizers work on a chemical level to break down and eliminate the odor-causing molecules. Choose products specifically designed for automotive use to ensure they are safe for your car’s interior materials and effective against common automotive odors.
Beyond topical treatments, ensuring good air quality within the cabin is paramount. This involves a crucial, yet often overlooked, maintenance item: replacing your cabin air filter. A dirty or old cabin air filter can harbor mold, mildew, and other particulates that contribute to musty or stale smells circulating through your car’s ventilation system. A fresh filter can make a remarkable difference.
For the most severe and stubborn cases of embedded odors, such as those caused by smoke, pet accidents, or extensive mildew, professional ozone treatment can be a highly effective solution. Ozone generators create O3 molecules that penetrate deeply into materials, chemically reacting with and permanently eliminating odor-causing bacteria and compounds, leaving the interior genuinely fresh and revitalized.
Read more about: Beyond the Hue: Unpacking the Complex Layers of Donald Trump’s Public Persona and Enduring Impact

13. Maintenance Plan for Lasting Results
Bringing your car’s interior back to a like-new condition requires a significant investment of time and effort, but the work doesn’t stop there. Crucially, establishing a consistent maintenance plan is paramount for preserving your meticulous restoration work and ensuring those pristine results last for years to come. The good news is, while the initial deep clean may take a while, it never has to be that intensive again if you diligently keep on top of it.
A practical, regular maintenance schedule is the backbone of a perpetually clean interior. On a weekly basis, which should only take about 5-10 minutes, focus on quick upkeep: vacuuming mats, carpets, and seats to remove surface debris. Additionally, brush down and clean your mats using an all-purpose cleaner for a quick refresh, wipe all hard surfaces with a damp microfiber towel, and give your glass a quick clean to maintain clarity.
Building on this, a monthly routine adds an additional 10 minutes to your efforts. This expanded regimen should include brushing out all crevices and air vents to prevent dust buildup, giving your steering wheel a deep clean to maintain its matte finish, and using a dedicated leather cleaner on your seats if applicable, to keep them supple and fresh. These steps target areas prone to faster accumulation of grime.
Finally, every 3-4 months, dedicate an extra 15 minutes to more intensive protective measures. This involves deep cleaning your leather seats and reapplying a sealant to ensure long-term protection against wear and UV damage, and reapplying a dashboard sealant to prevent fading. As you can see, by breaking it down, maintaining a brand-new looking interior doesn’t actually take long at all and keeps your car in top condition consistently.
Beyond scheduled cleaning, adopting protective habits significantly extends your car’s refreshed appearance. Whenever possible, choose shaded parking areas to reduce the relentless UV exposure that fades and damages interior materials over time. Develop the discipline to address new damage, like spills or minor scuffs, quickly before they have a chance to worsen or set in. For long-term storage, using a car cover provides an essential barrier against dust and environmental contaminants, and always adhere to proper washing techniques and use the right tools and products to prevent new swirl marks on your interior plastics and screens.
Read more about: 12 New Cars Named ‘Best Buys’ for 2025: An Expert Guide for Savvy Shoppers
14. Worth-the-Investment Products
While the techniques and diligence you apply are paramount to restoring your car’s interior, the effectiveness of your efforts can be greatly amplified by investing in some truly worthwhile products. Certain premium items provide exceptional value, not just in their immediate performance but in their ability to maintain your car’s rejuvenated appearance and protect it for the long haul, making them smart expenditures for any car enthusiast.
High-quality microfiber towels are at the top of this list. Unlike lesser quality alternatives, premium versions are designed to be ultra-soft and highly absorbent, crucially preventing scratches during all stages of interior cleaning and drying, from delicate trim to glass surfaces. Paired with a pH-neutral car soap for exterior washing, these towels also help preserve the integrity of any wax or sealant protection you’ve applied, contributing to overall vehicle care.
For those inevitable minor messes or quick touch-ups between full cleaning sessions, quick detailers prove indispensable. These products allow for efficient spot cleaning without the need for a full wash, making it easier to maintain a pristine look on the fly. They can quickly wipe away dust, fingerprints, and light smudges, ensuring your interior always looks its best with minimal effort.
Finally, dedicated interior protectants are crucial for long-term preservation. Specifically, UV-blocking products are formulated to prevent the dashboard and other plastic or vinyl surfaces from cracking, fading, and degrading due to sun exposure. These protectants act as an invisible shield, extending the lifespan and aesthetic quality of your interior components and keeping them looking factory-fresh for years to come.
With these comprehensive strategies and a dedication to consistent care, you’re now fully equipped to transform your car’s interior from worn and tired to absolutely showroom-new. It’s a meticulous journey, certainly, but one that offers immense satisfaction and a vastly improved driving experience. By implementing these professional-grade techniques—from deep cleaning every surface to proactive protection and smart maintenance—you not only restore your vehicle’s aesthetic appeal but also its inherent value. Embrace the details, commit to the process, and rediscover the profound pride of an interior that genuinely looks like it’s never been driven, maintaining that pristine feeling for countless miles ahead.


