

When the summer sun beats down, a car with a weak or failing air conditioning system can turn even the shortest drive into an uncomfortable ordeal. We’ve all been there: cranking the AC knob only to be met with lukewarm air, strange noises, or simply no relief at all. It’s frustrating, certainly, but more importantly, it’s a clear signal that your car’s cooling system needs some attention.
Understanding the common culprits behind AC malfunctions is the first step toward reclaiming your comfortable ride. From refrigerant leaks to electrical glitches, the reasons can be varied, but many are surprisingly within reach for the average DIY enthusiast. This comprehensive guide will equip you with the knowledge to diagnose common problems and, where possible, tackle the repairs yourself, saving you time, money, and a lot of sweat.
So, if you’re ready to get your hands dirty and restore that ice-cold blast to your cabin, let’s dive into the most frequent issues plaguing car AC systems. We’ll explore the underlying causes, recognizable symptoms, and, most importantly, the practical, actionable solutions to get your system running efficiently again. Whether you’re an experienced mechanic or just looking to understand your vehicle better, this information is designed to empower you to keep your cool on the road.

1. **Low Refrigerant & Leaks**
The single most common cause of car AC problems is a low refrigerant level due to refrigerant leaks. Refrigerant is the lifeblood of your car’s air conditioning system; it’s a special chemical that absorbs heat from inside your car and releases it outside, leaving you with cool, refreshing air. Without enough refrigerant, your AC simply can’t cool properly, transforming your car into an oven, especially on a hot July afternoon. Your car’s AC system is designed as a sealed loop, meaning refrigerant shouldn’t just disappear under normal conditions. If levels are low, it almost certainly means there’s a leak somewhere.
When refrigerant leaks out of the system, cooling efficiency drops significantly. Over time, hoses and seals can deteriorate, leading to gradual refrigerant loss. A car’s AC system can leak refrigerant from rubber seals, hoses, joint connections, or even the condenser itself. Detecting and repairing these leaks promptly is crucial to maintaining a properly functioning air conditioning system. DIYers often refill their car’s AC without addressing the leak, but that can lead to even more costly failures down the road, as the refrigerant carries oil throughout the system to lubricate the compressor seals. When refrigerant leaks, so does some oil, leading to compressor wear.
Symptoms of a low refrigerant charge are quite noticeable. You might find the air never gets truly cold, being cooler than outside air but not properly chilled, or it takes a very long time for the air to cool down. Another sign is if the air is only cold when the car is moving, which can be due to lowered efficiency and compressor speed at idle with a low charge. Furthermore, a low refrigerant charge can cause evaporator icing, where ice blocks most or all of the airflow, leading to cold air that then completely stops. Hissing or bubble sounds can also indicate refrigerant escaping through a leak.
To fix low refrigerant, the first step is always to find and fix the leak. A UV leak detection kit, involving adding a small amount of UV dye and running the AC, can help pinpoint glowing spots around AC components like hose connections, the compressor, or the condenser. Once the leak is found, repair it by replacing an O-ring for small leaks or a damaged component like a leaky hose or condenser for bigger issues. After the leak is sealed, the system must be evacuated using a vacuum pump to remove any remaining refrigerant, air, and moisture, then refilled with the correct type and amount of new refrigerant, carefully measured with a refrigerant scale. Never add refrigerant without fixing the leak first; it’s a temporary fix that wastes money and can harm the environment.
Read more about: 13 Critical Car Maintenance Tasks Only Pros Should Handle
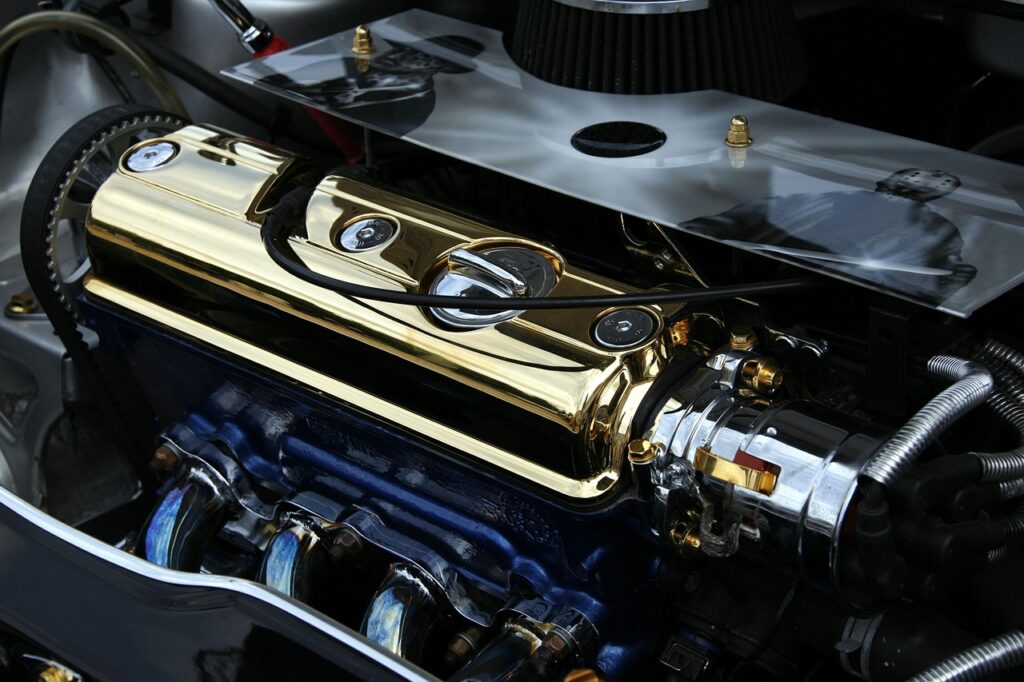
2. **Compressor Issues (General Failure)**
The compressor is often called the heart of the air conditioning system, as it pressurizes the refrigerant and circulates it through the entire system. Without a properly functioning compressor, your AC simply cannot perform its primary job of cooling. Compressor failure can stem from various issues, with a lack of lubrication due to a refrigerant leak being the most important and common underlying cause. When the refrigerant leaks out, the lubricating oil essential for the compressor’s health also escapes, leading to increased friction and wear.
Beyond lubrication issues, an AC compressor can fail for several other reasons. These include internal mechanical problems such as failing bearings within the compressor, which can cause significant resistance and noise. Seals inside the compressor can also go bad, leading to internal refrigerant loss or even external leaks. Additionally, a compressor might fail due to a bad flow valve, or simply from general wear and tear over years of operation, especially if the system has been under stress or poorly maintained.
As a compressor wears, particularly from a lack of lubrication, metallic wear particles can spread throughout the entire AC system. Any air or moisture introduced into the system causes these particles to oxidize and turn black, a severe condition commonly referred to as “black death.” This contamination can damage other vital components, like the expansion valve or orifice tube, leading to widespread system failure. Replacing the compressor without thoroughly flushing the entire system of these metallic particles and contaminants will likely result in the rapid failure of the new compressor, making this a critical consideration during repairs.
Symptoms of a failing compressor include no cold air at all, typically caused by a failed clutch or a faulty pressure regulator valve within the compressor. You might also experience cool but not truly cold air, indicating that a worn compressor isn’t compressing refrigerant efficiently enough. Perhaps the most alarming symptom is unusual noises, such as squealing or crunching/grinding sounds. These noises are a strong indicator of a mechanical failure within the compressor, often pointing to worn bearings or internal components struggling under friction. Ignoring these sounds can lead to complete compressor seizure and potentially more extensive damage to the AC system.
When faced with a faulty AC compressor, some units can be rebuilt by a qualified mechanic, but most should be replaced with a new one if the original goes bad. The repair process is involved, requiring the complete evacuation of old refrigerant from the system. After the compressor is replaced, the entire system must be thoroughly flushed to ensure any contaminants, especially metallic wear particles from a ‘black death’ scenario, are completely removed. Once clean, the system should be checked for leaks, evacuated again to remove air and moisture, and then refilled with new refrigerant. This meticulous approach ensures the longevity and proper functioning of the new compressor and the entire AC system.

3. **AC Compressor Clutch Malfunction**
The AC compressor doesn’t run continuously; instead, it engages only when cooling is needed. This engagement is controlled by the AC compressor clutch, which is a critical component for power transmission. The serpentine belts that loop around your engine’s pulleys also drive the AC compressor’s pulley. The clutch is attached to this pulley, and when you turn on your AC, the clutch engages, transmitting power from the spinning pulley to the compressor itself. This allows the compressor to pressurize the refrigerant and circulate it through the system. If this clutch wears out or malfunctions, it will no longer transmit the power required to turn the compressor and run the air conditioning system, leaving you without cold air.
One of the telltale signs of a clutch malfunction is when you turn on the AC and the compressor clutch doesn’t click. A healthy AC system will produce an audible click as the clutch engages, signifying that power is being transferred and the compressor is beginning its work. If you hear no click, or if the click is inconsistent, it could indicate that the clutch isn’t engaging properly. This could be due to electrical issues preventing the clutch from receiving the signal to engage, or simply mechanical wear preventing it from physically coupling with the compressor shaft. In some cases, a low refrigerant charge can prevent the clutch from engaging, as the system has built-in safeguards to protect the compressor when pressures are too low.
Another indicator of a failing clutch might be unusual noises when the AC is engaged. You might hear rattling, squealing, or grinding sounds coming from the compressor area, which can signify that the clutch mechanism is struggling. This often points to worn bearings or components within the clutch assembly that are no longer operating smoothly. Sometimes, these noises are intermittent, appearing only when the AC is first turned on or during certain engine RPMs. Ignoring these sounds can lead to complete clutch failure, leaving you without any AC function until the issue is addressed.
In terms of fixing an AC compressor clutch that won’t engage, it may be possible to replace just the clutch on some car models, rather than the entire compressor unit. This often involves removing the pulley and the large fastener holding the clutch onto the compressor shaft. For certain compressors, small shims are placed between the clutch and the compressor shaft; removing one of these shims can sometimes buy you a little more time by increasing contact between the components, offering a temporary reprieve. However, it’s important to note that many newer cars are now equipped with variable A/C compressors, which do not have a separate clutch. In these advanced systems, if there’s a clutch-related issue, the entire compressor unit must be replaced, making diagnosis and repair more complex and costly.
Read more about: Buyer Beware: 9 Luxury Sedans That Start Falling Apart After 70000 Miles

4. **Moisture in the System**
Moisture in a car’s AC system is a surprisingly common and detrimental issue, often overlooked but ranking as the third most frequent cause of AC problems. Any time air enters the sealed AC system, it inevitably carries moisture along with it. This moisture then reacts with the refrigerant and the lubricating oil within the system to form an acidic emulsion. This acidic sludge is highly corrosive and can cause significant damage to the delicate internal components of the AC system, slowly eating away at them and significantly reducing their lifespan. The presence of moisture fundamentally compromises the efficiency and health of the entire cooling mechanism.
The acidic emulsion created by moisture not only coats the inside of crucial components like the condenser and evaporator but also actively starves the compressor for proper lubrication. The compressor relies on the refrigerant-oil mixture to keep its internal moving parts well-oiled and operating smoothly. When moisture contaminates this mixture, the lubricating properties are diminished, leading to increased friction, wear, and eventually, premature compressor failure. This is a subtle yet insidious problem that can lead to costly repairs if not addressed promptly and thoroughly during any AC service.
One of the most immediate and noticeable effects of moisture in the system is its ability to cause the expansion valve to freeze shut. The expansion valve is responsible for regulating the flow of refrigerant into the evaporator. When moisture freezes at this critical juncture, it completely blocks the flow of refrigerant, thereby preventing any cooling from occurring. This can manifest as a sudden loss of cold air, even if other components seem to be functioning. Furthermore, the emulsion sludge created by moisture can clog the screen on orifice tube systems, another common refrigerant metering device, again impeding refrigerant flow and drastically reducing cooling performance.
Addressing moisture in the AC system requires a professional approach, as simply adding more refrigerant will not solve the underlying problem. The most effective method is a thorough evacuation of the system using a vacuum pump. This process, which should run for a sufficient duration (often 30 minutes or more), creates a deep vacuum that boils off and removes any moisture, air, and non-condensable gases from the system. After evacuation, the system must hold a vacuum, indicating it is free of leaks. Only then can new, dry refrigerant be added, ensuring the system operates efficiently and without the corrosive effects of moisture. Preventing future moisture ingress involves promptly repairing any leaks and always evacuating the system before recharging.
Read more about: Mechanics’ Top Frustrations: 14 Bad Car Habits You Need to Stop Now to Save Money and Your Vehicle’s Life

5. **Clogged or Damaged Condenser**
The AC condenser is a vital component of your car’s air conditioning system, responsible for removing heat from the refrigerant. It functions much like a mini-radiator, causing the hot, high-pressure gaseous refrigerant to cool and condense back into a liquid state. For maximum airflow and heat exchange, the condenser is typically located in a very exposed spot, usually in front of the radiator. While this placement is ideal for cooling efficiency, it also makes the condenser highly susceptible to external damage and obstruction from road debris.
Over time, the condenser’s fins can accumulate dirt, leaves, insects, and other contaminants, significantly hindering its heat exchange efficiency. This buildup creates a barrier, preventing air from flowing freely through the fins and reducing the condenser’s ability to dissipate heat effectively. A clogged or dirty condenser inevitably results in reduced cooling performance within the cabin, forcing the system to struggle to maintain the desired temperature. This means your AC has to work harder, consuming more fuel and potentially shortening the lifespan of other components like the compressor due to increased strain.
Beyond simple clogging, the exposed location of the condenser means it can be directly hit with stones and other debris while driving. Such impacts can bend the delicate fins, further reducing heat dissipation, or, more severely, cause direct physical damage to the condenser itself, leading to refrigerant leaks. A damaged condenser with a leak will result in a loss of refrigerant, which, as we’ve discussed, is the number one cause of AC problems. Any physical damage to the condenser necessitates immediate attention to prevent further system degradation and environmental harm from escaping refrigerant.
Fixing a clogged or damaged condenser typically involves a few steps. For simple obstructions, cleaning the condenser’s fins with compressed air or a soft brush can often restore airflow and improve efficiency. However, if the fins are significantly bent, they can be carefully straightened with a specialized fin comb, though this is a delicate process to avoid causing further damage. If the condenser is damaged to the point of leaking or severe structural compromise, it will most likely need to be replaced. In most modern cars, the condenser is designed to be replaceable in such cases. The AC system should be evacuated of old refrigerant before the condenser is replaced, and then checked for leaks, evacuated again, and refilled with new refrigerant once the work is complete to ensure proper operation.
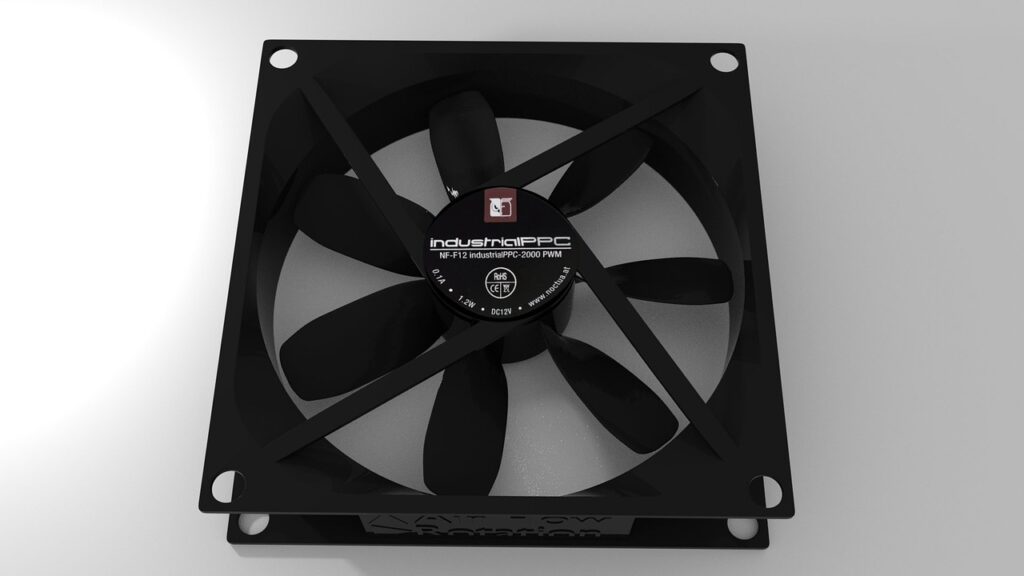
6. **Faulty Condenser/Radiator Fans**
While a moving car provides natural airflow to cool the AC condenser, this essential component still requires assistance when the vehicle is stationary or moving at low speeds. This is where the condenser fans come into play. Your car is equipped with fans – either a dedicated condenser fan or the primary radiator fans – that are designed to draw air through the condenser whenever the AC system is activated. These fans are crucial for maintaining proper heat exchange, especially when you’re stuck in traffic or idling on a hot day. If these fans aren’t operating properly, pressure in the condenser will rise to the point where the high-pressure switch shuts off the compressor as a protective measure, leading to a complete loss of cooling.
The most straightforward way to diagnose a problem with the condenser or radiator fans is to simply turn on your AC system while the car is running in your driveway and listen or watch for the fans to engage. If they don’t turn on, or if they operate intermittently, it’s a strong indication of a malfunction. The issue could be with the fans themselves, meaning the motors have failed, or it could be an electrical problem preventing them from being triggered. Faulty wiring, a blown fuse specific to the fan circuit, or a bad relay are common electrical culprits that can stop the fans from receiving the necessary power to operate.
Diagnosing the specific cause of non-functioning fans often involves using a multimeter. If the fans aren’t turning on, the next step is to check if voltage is being sent to them. By testing the electrical connections at the fan motor, you can determine if power is reaching the unit. If there’s no power, the problem likely lies upstream: either the fan relay is bad, or the AC control unit itself, which sends the signals, has gone faulty. Systematically checking each of these components will help pinpoint the exact point of failure, allowing for a targeted repair rather than guesswork.
Once the faulty component is identified, the fix is usually straightforward. If the fans themselves have gone bad or are physically damaged, they can be replaced. If the issue is electrical, replacing a blown fuse, a faulty relay, or repairing damaged wiring will restore power to the fans. In more complex scenarios where the AC control unit is determined to be the culprit, it would need to be repaired or replaced. Ensuring these fans are functioning correctly is paramount, as their failure can quickly lead to an overheated AC system, compressor shutdown, and a very uncomfortable cabin temperature.
7. **Faulty Pressure Switches**
Modern car AC systems are equipped with sophisticated safety and operational controls, including two critical pressure switches: a high-pressure switch and a low-pressure switch. The high-pressure switch is located after the compressor, monitoring the pressure of the highly compressed refrigerant. The low-pressure switch is positioned before the compressor, keeping tabs on the refrigerant returning to be re-pressurized. These switches continuously monitor the system to ensure the pressure remains within a safe and operational threshold, preventing components from being damaged by excessively high or dangerously low pressures.
If either of these pressure switches detects a problem – such as the pressure exceeding a safe limit, dropping too low due to a leak, or if the switch itself goes bad – it will prevent your air conditioning system from cooling. This is a protective mechanism designed to safeguard expensive components like the compressor. You might press the button to turn the AC system on, hear the blower fan, but notice that the compressor never engages to pressurize the system, resulting in no cold air whatsoever. The car’s computer interprets the pressure switch signal as a system fault and prevents AC operation to avoid damage.
Many newer cars are designed to illuminate the Check Engine Light (CEL) if a pressure switch malfunctions, providing an immediate alert to the driver. However, older cars may not offer such a direct warning, requiring more hands-on diagnosis. In these cases, you’ll typically need a multimeter to test the switches. By checking the voltage between the terminals on the switches, you can verify if they are operating correctly or if one has failed. A healthy switch will provide expected voltage readings when the system is operating or attempting to operate, while a faulty one will show an open circuit or incorrect readings.
Once you have determined which pressure switch is faulty, the repair involves evacuating the AC system of refrigerant before replacement. This is a crucial step to prevent refrigerant escape. After the old switch is removed and the new one installed, the system can then be checked for any new leaks that might have been introduced during the process, evacuated again to remove air and moisture, and then refilled with new refrigerant. Properly functioning pressure switches are essential not only for the AC system’s cooling capability but also for its longevity and safety, ensuring the compressor operates under optimal pressure conditions.
Navigating the complexities of your car’s air conditioning system might seem daunting, but armed with the right knowledge, many issues can be tackled right in your garage. We’ve explored the initial culprits, from refrigerant woes to compressor concerns, but the journey to a perfectly chilled cabin doesn’t end there. There are several other key components and systemic issues that can compromise your AC’s performance, and understanding them is crucial for a complete and lasting fix. Let’s dive into more common reasons your AC might be struggling and how you can get it blowing ice-cold once again.
Read more about: Beyond the Shiny Exteriors: Uncovering the Auto Industry’s Darkest Secrets and Corporate Scandals

8. **Your Belt Needs to be Replaced**
The AC compressor, the very heart of your cooling system, relies on another unsung hero under the hood: the engine belt. This belt, often part of the serpentine system that drives multiple accessories, or sometimes a dedicated belt for the AC compressor alone, is responsible for transmitting power from the engine’s crankshaft to the compressor. When you flip that AC switch, it’s the belt’s job to ensure the compressor spins into action, pressurizing the refrigerant and beginning the cooling cycle. Without a properly functioning belt, the compressor simply won’t get the rotational energy it needs to do its job, leaving you in a hot predicament.
Over time, like any rubber component constantly under tension and exposed to engine heat, these belts will inevitably wear down. You might notice subtle cracks forming along the ribbed surface, or the belt could become stretched and glazed, losing its grip. This deterioration means it can no longer efficiently turn the AC compressor pulley. A failing belt might slip, causing intermittent AC performance, or it could snap entirely, leading to a complete loss of AC function, often alongside other accessory failures if it’s a serpentine belt.
Diagnosing a worn belt is often as simple as a visual inspection. Pop your hood and carefully examine the serpentine or accessory belt(s) for any signs of cracking, fraying, or excessive wear. If the belt feels loose or appears shiny and glazed, it’s a strong indicator that its grip is compromised. You might also hear a squealing noise, especially when the AC first engages, which points to a slipping belt that isn’t able to transfer power effectively to the compressor.
Replacing the belt, while a fundamental maintenance task, can sometimes require a bit of effort depending on your vehicle’s layout. On some cars, it’s a straightforward job that involves releasing tension from a tensioner pulley and swapping the old belt for a new one. However, in other vehicles, the AC compressor belt might be nestled behind other components, necessitating the removal of other belts or accessories to gain access. Regardless, ensuring your belts are in prime condition is a foundational step in maintaining not just your AC, but your vehicle’s overall operational health.
Read more about: Beyond the Quarter-Million Mark: Our Shortlist of Cars Engineered for Extreme Longevity
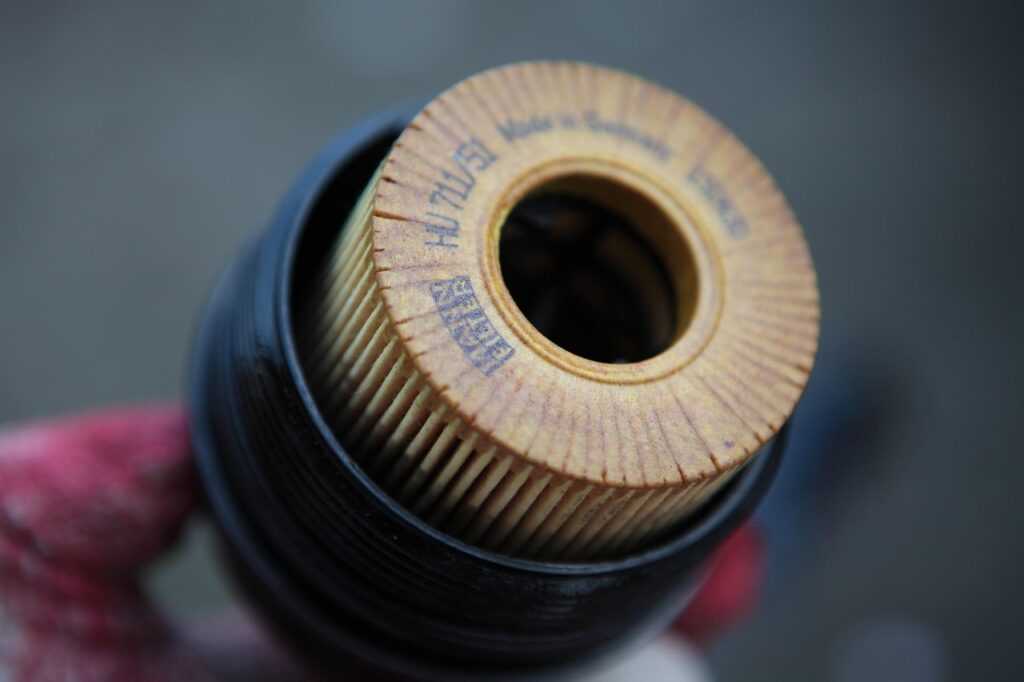
9. **You Have a Clogged Cabin Filter That Needs to be Replaced**
Often overlooked, yet crucial for both air quality and AC efficiency, the cabin filter acts as your car’s respiratory system, screening the air entering the passenger compartment. Typically tucked away behind the glovebox, this filter diligently catches dust, pollen, leaves, and other airborne debris before they can make their way into your vehicle’s interior. Its primary function is to ensure that the air you breathe inside your car is clean and fresh, free from external pollutants that can aggravate allergies or simply make the ride less enjoyable.
When this essential filter becomes clogged, it can significantly impede the airflow into your car’s cabin. This means that even if your AC system is generating perfectly cold air, that air struggles to reach you, leading to noticeably weak airflow from the vents. You might find your car’s air conditioning doesn’t cool as effectively, especially during the hot summer months, because the volume of cool air simply isn’t sufficient. Furthermore, a heavily contaminated filter can become a breeding ground for bacteria and mold, resulting in a musty or unpleasant odor emanating from your vents, transforming your fresh air into a foul one.
The symptoms of a clogged cabin air filter are quite distinct. Beyond the reduced cooling performance and weak airflow, you might notice an increase in airborne particles within the cabin, or a persistent, unwelcome smell whenever you turn on your AC. In some cases, the blower motor might also sound like it’s working harder than usual, a subtle hint that it’s struggling to push air through a blocked filter. Ignoring these signs not only diminishes your comfort but can also reduce the lifespan of your blower motor due to excessive strain.
The good news is that replacing a clogged cabin filter is one of the easiest and most affordable AC fixes you can undertake yourself. It’s considered a routine maintenance item, with most manufacturers recommending replacement annually or every 12,000 to 15,000 miles, though those in dusty environments might need more frequent changes. The filter is usually very accessible, often requiring no specialized tools beyond perhaps a screwdriver to remove a few fasteners. A quick replacement can dramatically improve your AC’s performance and the air quality inside your car, making it a simple yet highly effective DIY repair.
Read more about: 18 Simple Car Maintenance Secrets That Will Save You Serious Money
10. **You Have a Faulty Blend Door Actuator**
Imagine your car’s climate control system as a finely tuned orchestra, with various components playing their part to deliver the perfect temperature. Among these, the blend door actuator plays a critical role in directing airflow. Inside your car’s HVAC unit, there’s a ‘blend door’ that regulates the mix of hot and cold air, ensuring you get exactly the temperature you’ve set on your controls. This door’s movement, from allowing full hot air to full cold air, is precisely managed by the blend door actuator, an often small, motor-driven component.
When this actuator begins to fail, your ability to control the cabin temperature effectively disappears. You might find that no matter what temperature you select, the air coming from your vents remains stubbornly hot, or perhaps only cold, refusing to blend. One common symptom is an inconsistent temperature, where the air might start cold but suddenly turn warm, or vice versa, without any input from you. This can be incredibly frustrating, particularly when you’re trying to maintain a comfortable environment on a long drive.
Another tell-tale sign of a faulty blend door actuator is unusual noises coming from behind your dashboard, especially when you adjust the temperature settings. You might hear clicking, whirring, or grinding sounds as the actuator struggles to move the blend door, or perhaps no sound at all, indicating a complete failure. Before jumping to replace the actuator, however, it’s vital to rule out simpler electrical or vacuum issues. The actuator might be electrically or vacuum-driven, so checking for proper voltage or vacuum supply, as well as inspecting fuses and vacuum tubes for breaks or leaks, is a critical diagnostic step.
If preliminary checks confirm that power or vacuum supply is adequate, and the actuator itself is not responding or is making problematic noises, then replacement is the likely solution. While the component itself might not be overly expensive, its location deep within the dashboard can make the repair labor-intensive. Nevertheless, addressing a faulty blend door actuator is essential for regaining precise control over your vehicle’s cabin temperature, ensuring you can truly enjoy your AC system’s cooling capabilities.
Read more about: Mechanics Reveal 14 Used Cars That Will Drain Your Wallet: A Definitive Guide for Smart Buyers
11. **Your Heat Controller / Air Condition Control Unit is Faulty**
At the very heart of your vehicle’s climate control system is the central command center: the heat controller, or air conditioning control unit. This sophisticated electronic module is the brain that receives your input—whether you’re requesting colder air, hotter air, or directing airflow—and translates those commands into actions across the entire AC system. It sends vital signals to components like the blend door actuator to adjust temperatures, triggers the AC compressor to engage, and activates the condenser fans to cool the refrigerant. It’s an orchestrator, ensuring every part of the system works in harmony to achieve your desired climate.
Given its central role, a malfunction in the control unit can have widespread consequences for your AC system. If this unit goes bad, you might experience a partial failure, where some AC functions cease to work while others operate normally. For instance, the blower fan might turn on, but no cold air comes out because the unit isn’t signaling the compressor to engage. In more severe cases, the entire AC system might become unresponsive, leaving you with no cooling, no fan, and no temperature control whatsoever. Symptoms can be intermittent or constant, depending on the nature of the fault within the unit.
Diagnosing a faulty control unit can be challenging because its symptoms often mimic other, less expensive problems. This is why experts universally recommend systematically checking and eliminating all other potential causes of AC failure before pinpointing the control unit as the culprit. If you’ve methodically checked refrigerant levels, compressor function, fan operation, pressure switches, and even the blend door actuator, and still no resolution is found, then suspicion naturally turns to the control unit itself. Specialized diagnostic tools are often required to accurately test these complex electronic modules.
Replacing or rebuilding a faulty heat controller/AC control unit is typically one of the more expensive AC repairs. These units are intricately designed and, while generally robust, are not foolproof. Due to their cost and complexity, it is always prudent to perform thorough diagnostics to confirm the control unit is indeed the problem before committing to a replacement. This diligent approach helps ensure that you are not spending money on an unnecessary repair, making sure your investment restores your AC’s full functionality.

12. **Faulty Blower Motor**
The air conditioning system, even when producing perfectly cold air, relies heavily on one crucial component to deliver that chill to your face: the blower motor. This motor is responsible for pushing air through the evaporator coil and out through your car’s vents, essentially acting as the internal fan that circulates conditioned air throughout the cabin. Without a properly functioning blower motor, even the most efficient AC system won’t be able to provide the comfort you expect, as the cool air simply won’t reach you with enough force, or perhaps not at all.
The most common symptom of a failing blower motor is a noticeable reduction in airflow, or a complete absence of air coming from the vents, regardless of the fan speed setting. You might turn your fan to full blast and only feel a weak whisper of air, or perhaps hear the motor struggling, making unusual whirring or rattling noises before giving up entirely. Intermittent operation, where the fan works sometimes and not others, is also a classic sign of a blower motor on its way out. This can make driving uncomfortable and frustrating, especially on a hot day when you desperately need that blast of cool air.
Diagnosing a faulty blower motor typically involves checking for power and proper electrical connections. You can usually access the blower motor, often located under the passenger side of the dashboard, and test its wiring using a multimeter. If the motor is receiving power but still isn’t turning or is operating weakly, it confirms an internal fault within the motor itself. Conversely, if no power is reaching the motor, the problem likely lies upstream, possibly with a blown fuse, a faulty resistor, or a wiring issue that needs to be traced and repaired.
Replacing a faulty blower motor is a common repair and, for many vehicles, is a manageable DIY task. The motor is usually held in place by a few screws or clips and can be disconnected and swapped out. Once a new motor is installed and electrical connections are secured, you should immediately feel a strong, consistent airflow through your vents, restoring your AC’s ability to effectively cool your cabin. This repair not only brings back comfort but also ensures the longevity of your AC system by preventing other components from overworking due to lack of airflow.
Read more about: Buyer Beware: 15 Vintage Coupes That Rarely Make It Past 120,000 Miles Without Major Overhauls

13. **Blocked/Dirty Evaporator**
Deep within your car’s dashboard lies another unsung hero of the AC system: the evaporator coil. This component is where the magic of cooling truly happens, as the liquid refrigerant absorbs heat from the air passing over it, turning into a gas and leaving the air cool and dry before it’s blown into the cabin. For optimal performance, the evaporator needs unimpeded airflow and a clean surface to efficiently transfer heat. However, due to its damp environment and location, it’s particularly susceptible to blockages and accumulation of contaminants.
Over time, the evaporator can become a magnet for dirt, dust, and other airborne debris that bypass the cabin filter or accumulate during system operation. This buildup creates a layer of insulation on the coil’s fins, significantly limiting its ability to absorb heat from the air. The most immediate symptom of a blocked evaporator is weak or reduced airflow, as debris physically obstructs the path of air. Additionally, a dirty evaporator, especially when combined with moisture, creates an ideal breeding ground for mold, mildew, and bacteria. This leads to persistent, unpleasant, and often musty odors emanating from your vents, turning a cool breeze into a foul experience.
Furthermore, a severely blocked evaporator can also lead to reduced cooling efficiency, as the heat exchange process is compromised. The AC system will have to work harder and longer to achieve the desired temperature, consuming more fuel and putting additional strain on components like the compressor. In extreme cases, the combination of restricted airflow and poor heat exchange can even lead to the evaporator icing up, causing a complete blockage and temporary loss of all airflow, only to return once the ice melts.
Fixing a blocked or dirty evaporator requires a thorough cleaning. For minor accumulations, a specialized AC cleaner or disinfectant spray can be used to treat the coil, followed by running the AC to help flush out contaminants. For more significant blockages or persistent foul smells caused by mold and mildew, a professional service is often recommended. They have the tools and expertise to properly access and deep clean the evaporator coil, using compressed air and specialized cleaning agents to remove stubborn dirt and eliminate microbial growth. In some cases, accessing the evaporator can be a labor-intensive job, but it’s crucial for restoring airflow and eliminating odors.
To prevent future issues, it’s wise to run your AC on high periodically to help dry out the evaporator and inhibit moisture-related mold growth. Regularly changing your cabin air filter also plays a vital role in preventing dirt and debris from reaching the evaporator in the first place, ensuring your cooling system operates at peak efficiency and delivers fresh, clean air for every journey.
There you have it—a comprehensive tour of the most common reasons your car’s AC might be failing and, more importantly, how to tackle each one. From the tiny O-rings causing refrigerant leaks to the complex dance of pressure switches and control units, understanding these components empowers you to be a more knowledgeable car owner. Whether you’re rolling up your sleeves for a DIY fix or heading to a trusted mechanic, this guide provides the clarity you need to communicate issues confidently and ensure your ride stays comfortably cool. Don’t let a weak AC system dampen your drives; take control, diagnose the problem, and get back to enjoying that refreshing blast of cold air, no matter how hot it gets outside. Stay cool, and happy motoring!


