Unlock the secret to brilliantly clear headlights without spending a fortune on specialized kits or professional services. Many car owners face the frustrating problem of foggy, yellowed headlights, which not only detract from a vehicle’s appearance but also pose a significant safety risk. The good news is, you don’t need a trip to the auto shop or an expensive restoration kit to bring back that factory shine.
This comprehensive guide, rooted in practical, actionable advice, reveals a detailer’s ‘secret’ method using common household items you likely already have in your pantry or garage. We’re talking about simple ingredients and tools that, when applied correctly, can dramatically improve your visibility on the road and boost your car’s overall aesthetic. Prepare to transform your vehicle’s front end from dull and dangerous to bright and beautiful.
We’re here to walk you through each crucial step, from understanding the necessity of headlight restoration to gathering your supplies and executing a precise, effective cleaning and sealing process. Get ready to learn the insider tricks that will save you time, money, and potentially prevent accidents, ensuring your car not only looks its best but also keeps you safer on every journey.
1. **Why Restore Foggy Headlights?**The degradation of your vehicle’s headlights is more than just an aesthetic issue; it’s a critical safety concern. Yellowed, foggy headlights significantly diminish your night vision, reducing visibility by an alarming margin of up to 80%. This severe reduction means you have less time to react to hazards, pedestrians, or other vehicles, directly increasing your risk of accidents, especially during nighttime driving or in adverse weather conditions.
Beyond the immediate safety implications, neglected headlights often lead to failing mandatory vehicle inspections. Regulatory bodies require clear, functional headlights to ensure all vehicles on the road meet minimum safety standards. Avoiding restoration could result in fines or the inability to pass inspection, forcing you into costly last-minute repairs or replacements that could have been prevented with a simple DIY approach.
Opting for a do-it-yourself restoration using readily available items from your pantry offers substantial financial benefits. Instead of shelling out $50 to $200 for professional kits that accomplish the same task, or even more for full headlight replacements, you can achieve comparable results for a fraction of the cost. Imagine saving that money for other essential car maintenance or simply keeping it in your pocket.
Furthermore, this DIY method is incredibly time-efficient. Most of these home-based restoration techniques can be completed in under 30 minutes, allowing you to tackle the task quickly and get back on the road with improved visibility and confidence. Clear, bright headlights also make your car look significantly newer and better maintained, providing a noticeable boost to its resale value should you decide to upgrade in the future. It’s a small investment of time and minimal money for a substantial return, both in safety and curb appeal. The National Highway Traffic Safety Administration (NHTSA) states that “70% of UV damage-induced haze can be removed with abrasives and sealants,” confirming the effectiveness of the methods we’re about to explore.

2. **Tools & Supplies You’ll Need**Before you embark on your headlight restoration journey, gathering the correct tools and supplies is paramount. The beauty of this ‘detailer’s secret’ method lies in its reliance on everyday household items, making it incredibly accessible and budget-friendly. You won’t need specialized equipment or a trip to a niche automotive store; most of what you require is likely already within arm’s reach.
At the heart of our cleaning and polishing process are common kitchen and bathroom staples. You’ll need a tube of non-gel toothpaste, which acts as a mild abrasive polish to gently scrub away surface oxidation. Baking soda, a versatile cleaner, will be essential for deep cleaning and forming a sealing paste. White vinegar plays a crucial role in removing oxidation and serving as a rinse agent, ensuring your headlights are prepped for shine.
Beyond these pantry heroes, a few additional items are necessary for effective preparation and finishing. A set of varying grit sandpapers, specifically 800-grit, 2000-grit, and 3000-grit, is vital for systematically removing stubborn haze and smoothing the lens surface. Microfiber cloths are indispensable for wiping residue without scratching, ensuring a clear finish. Lastly, masking tape is crucial for protecting your vehicle’s paintwork from accidental contact with abrasives or chemicals during the process.
The total estimated cost for all these items is remarkably low, averaging around $10 if you need to purchase everything from scratch. This makes it an incredibly cost-effective solution compared to expensive professional kits. A crucial ‘Pro Tip’ to remember is to “Skip gel toothpaste—it lacks abrasiveness!” Gel formulas do not contain the necessary abrasive particles to effectively polish and remove the yellowed layer, so always opt for a traditional, paste-based variety.
Read more about: Reclaim Your Haven: 14 Surprising Yard Attractants That Invite Snakes and How to Send Them Packing

3. **Step 1: Clean and Tape**Every successful restoration project begins with a clean slate, and your headlights are no exception. The initial cleaning phase is more than just about aesthetics; it’s about preparing the surface for the subsequent treatments, ensuring maximum effectiveness of the abrasive and polishing agents. Removing loose dirt, grime, and road debris prevents these contaminants from scratching the lens during the sanding and buffing stages.
To begin, thoroughly wash your headlights with soapy water. You can use your regular car wash soap or even a mild dish soap solution. Focus on removing all visible dirt, dust, and any caked-on residue. After scrubbing, rinse the headlights completely to ensure no soap film remains, then dry them thoroughly with a clean towel or microfiber cloth. A completely dry surface is essential for the next steps to properly adhere and work efficiently.
Once your headlights are clean and dry, the next critical action is to protect the surrounding paintwork of your vehicle. This is where masking tape comes into play. Apply masking tape meticulously around the entire perimeter of each headlight assembly, creating a clear border between the lens and the car’s body. This barrier will shield your paint from any sanding mishaps, splashes of cleaning solutions, or toothpaste, preventing accidental damage and saving you potential touch-up work later on.
Taking the time to properly clean and tape might seem like a small detail, but it’s a foundational step that contributes significantly to the overall success and safety of your headlight restoration. It establishes a controlled working area, ensuring that your efforts are concentrated solely on the headlight lens without risking unintended consequences to your vehicle’s finish.
Read more about: Safety Risk Alert: 15 Popular SUVs That Failed the Toughest Crash Tests, According to Leading Safety Agencies

4. **Step 2: Sand Away Oxidation**With your headlights clean and the surrounding paintwork protected, you’re ready to tackle the primary culprit behind headlight dullness: oxidation. This crucial sanding step is designed to meticulously remove the yellowed, hazy layer that has accumulated over time due to UV exposure and environmental factors. It’s a systematic process that gradually refines the lens surface, preparing it for the polishing stages.
Begin by thoroughly wetting both the headlight surface and your 800-grit sandpaper. Wet sanding is paramount as it helps to lubricate the surface, preventing excessive heat build-up that could warp the plastic, and effectively carries away the removed oxidation particles, allowing the abrasive to work more efficiently. Start sanding in consistent, horizontal motions across the entire headlight lens. Apply firm, even pressure, ensuring you cover all areas where the yellowed layer is present. Continue this process until you visibly notice that the yellow, oxidized layer has been completely removed.
Once the initial heavy oxidation is gone, it’s time to refine the surface further. Switch to a finer grit sandpaper, specifically 2000-grit. Again, wet the headlight and the sandpaper, then sand the entire lens, continuing with consistent motions. This step works to remove the deeper scratches left by the 800-grit paper, creating a smoother, more uniform surface. The goal here is to reduce the abrasiveness and prepare for an even finer finish.
For the ultimate smoothness, progress to 3000-grit sandpaper. This final sanding stage is vital for achieving a nearly flawless, translucent finish. Repeat the wet sanding process, moving systematically over the entire lens until it feels incredibly smooth to the touch. Once you’ve completed the 3000-grit sanding, thoroughly rinse the headlight surface with clean water to wash away all sanding residue, then dry it completely. You should now have a uniformly hazy, but no longer yellow, headlight, perfectly prepped for polishing.

5. **Step 3: Polish with Toothpaste**After the rigorous sanding process, your headlights might still appear somewhat hazy, but fear not—this is exactly where the polishing power of toothpaste comes into play. This step is designed to refine the microscopic scratches left by the fine-grit sandpaper, bringing back the optical clarity and a noticeable shine to the lens. The mild abrasive properties of non-gel toothpaste make it an incredibly effective and accessible polishing agent.
To begin, apply a pea-sized dab of your non-gel toothpaste onto a clean microfiber cloth. It’s important to use a microfiber cloth to prevent any new scratches and ensure a gentle yet effective application. The goal is to work the toothpaste into the lens surface, allowing its mild abrasives to smooth and polish the plastic, filling in tiny imperfections and enhancing light transmission.
Using the cloth with the toothpaste, begin rubbing the entire headlight lens in circular motions. Apply moderate, consistent pressure as you work the paste across the surface. Dedicate a good 5 to 7 minutes of continuous circular rubbing for each headlight. This extended application time is crucial for the toothpaste to break down and buff away the residual haze, progressively restoring the lens’s transparency and luster. Ensure you cover every part of the lens evenly for a uniform finish.
Once you’ve completed the polishing, it’s time to reveal the results. Prepare a simple mix of white vinegar and water in a 1:1 ratio. Dip a clean section of your microfiber cloth into this solution and use it to thoroughly wipe off all toothpaste residue from the headlight surface. The vinegar-water mix helps to neutralize any lingering toothpaste and ensures the lens is sparkling clean, ready for the final sealing step that will lock in its newfound brilliance.
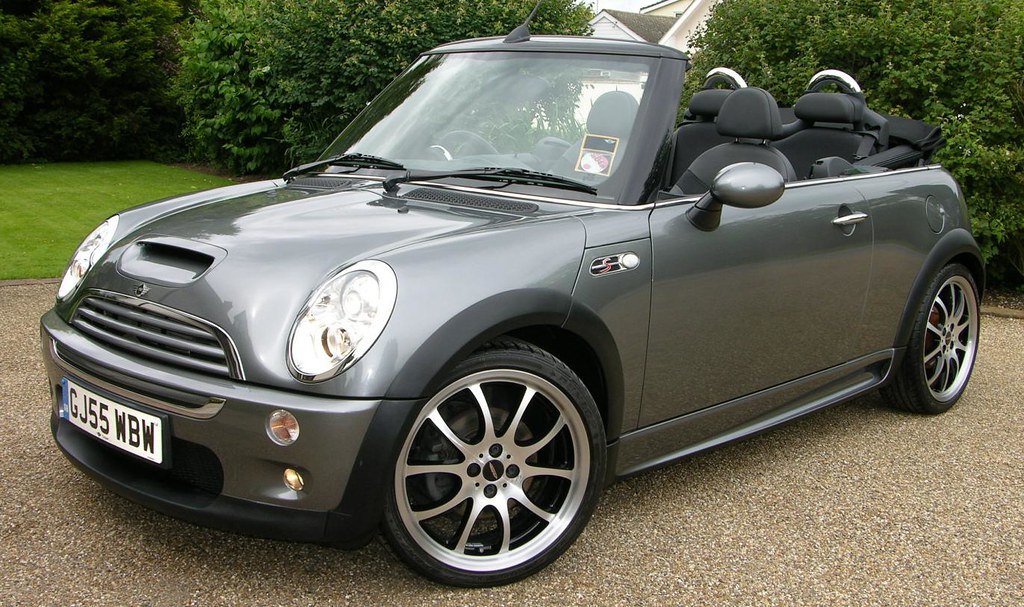
6. **Step 4: Seal with Baking Soda Paste**The final stage of this restoration method focuses on adding a protective layer and an extra boost of shine to your now-clear headlights. This sealing step is vital not only for enhancing the immediate aesthetic appeal but also for providing a temporary barrier against future oxidation and environmental damage. The baking soda paste, a surprisingly effective solution, is key to achieving this lasting brilliance.
To create your sealing paste, you’ll need to combine two common household items: baking soda and water. In a small container, mix two tablespoons of baking soda with one tablespoon of water. Stir the mixture thoroughly until it forms a smooth, consistent paste. The precise ratio ensures that the paste is neither too runny nor too thick, allowing for optimal application and buffing action on the headlight lens.
Once your paste is prepared, apply a small amount to a clean microfiber cloth. Then, begin buffing the headlight lens using circular motions. This process works to further refine the surface and introduce a protective layer. The mild abrasive nature of baking soda, combined with its cleaning properties, helps to deepen the shine and create a smoother finish, making the headlight even more transparent and brilliant.
Continue to buff the lights for approximately two to three minutes per headlight, ensuring an even application across the entire surface. This duration allows the baking soda paste to effectively work its magic, adding that coveted factory-fresh gleam. After buffing, thoroughly rinse the headlights with clean water to remove all traces of the paste, then dry them completely. You’ll be amazed at the crystal-clear, revitalized appearance of your headlights, ready to illuminate the road ahead with renewed power.

7. **Alternative Methods for Headlight Clarity**While our step-by-step method using toothpaste and baking soda offers stellar results, it’s worth exploring other techniques that detailers sometimes use or have been popularized for quick fixes. These alternative methods can be useful in specific situations, offering different levels of effectiveness and longevity. Understanding their applications can help you choose the right approach for your headlights, whether you need a deep restoration or just a temporary polish.
One interesting chemical reaction method involves a direct application of vinegar and baking soda. Instead of using them separately as in our primary guide, you can scrub the headlight surface with a paste made from baking soda, then immediately rinse it with white vinegar. This combination creates a powerful effervescent reaction that can help lift stubborn oxidation and grime, providing a thorough clean. It’s a slightly different mechanism than the gentle abrasive action discussed earlier, but equally rooted in common household chemistry.
Another method, often circulated as a ‘hack,’ involves using DEET-based bug spray. The idea is to spray the repellent onto the headlight, let it sit for a moment, and then wipe it clean. While this can offer a quick, temporary improvement in clarity by dissolving the outer layer of oxidation, it’s generally not recommended as a long-term solution. DEET is a strong solvent that can potentially damage the headlight plastic over time if used repeatedly, and its effects are often short-lived, meaning your headlights could haze up again rather quickly.
Finally, some enthusiasts have turned to WD-40 for a quick headlight refresh. The process involves spraying WD-40 onto the lens, allowing it to penetrate for about five minutes, and then buffing it off with a clean cloth. Similar to bug spray, WD-40 can provide a temporary cosmetic improvement, giving the headlights a clearer appearance. However, its effectiveness typically lasts only about two weeks, after which the fogginess tends to return. For a lasting factory shine, a more robust and abrasive approach like the one we’ve detailed is essential, followed by proper sealing.
Read more about: Unlock a Showroom Shine: Drivers’ Top Car Cleaning Hacks That Will Transform Your Ride and Save You Money

8. **Critical Mistakes to Avoid for Lasting Results**Achieving pristine headlights requires more than just following steps; it demands attention to detail and an awareness of common pitfalls. Even the most enthusiastic DIYer can accidentally undermine their efforts by making simple, yet impactful, mistakes. Understanding these missteps beforehand can save you time, frustration, and the need to redo your hard work, ensuring that your restoration is not just successful, but also durable.
One of the most significant errors is skipping the sanding process entirely, relying solely on toothpaste. While toothpaste is an excellent polishing agent, it lacks the abrasive power to remove deep oxidation and the thick, yellowed layer that accumulates on headlights. Without proper sanding with varying grits, you’ll only achieve a superficial clean, and the underlying haze will quickly reappear. Equally detrimental is dry sanding; this generates excessive heat, which can warp the plastic lens and leave irreversible damage. Always keep the headlight surface and sandpaper wet to lubricate and cool the area. Over-sanding is another pitfall, as it can thin the plastic lens, making it brittle and prone to cracking, so use firm, even pressure without dwelling too long in one spot.
Beyond the sanding technique, the choice of materials plays a crucial role. Using paper towels instead of microfiber cloths for wiping and buffing is a common mistake that can introduce new scratches to the newly polished surface. Paper towels are coarser and can be abrasive, negating your efforts to achieve a smooth finish. Similarly, not all toothpaste is created equal for this task; gel or whitening formulas typically lack the necessary abrasive particles to effectively remove oxidation. Always opt for a traditional, non-gel paste variety for optimal results.
Finally, neglecting the protective steps and thorough coverage can significantly reduce the lifespan of your restoration. Ignoring the application of a UV sealant or a protective car wax after polishing leaves your headlights vulnerable to immediate re-oxidation from the sun’s harsh rays. This protective layer is vital for maintaining clarity for months, or even over a year, with a proper UV-resistant clear coat spray. Also, don’t forget to clean and polish the edges of the headlight assembly, as haze often accumulates stubbornly near the hood and bumper where it’s easy to overlook.
Read more about: Beyond the Podium: Unpacking Why Hollywood’s Political Biopics So Often Miss the Mark
9. **Frequently Asked Questions: Your Headlight Restoration Queries Answered**As you embark on your headlight restoration journey, it’s natural to have questions. This DIY process, while straightforward, involves specific techniques and expectations. Addressing these common queries helps to demystify the process and provides you with the confidence to achieve and maintain brilliant headlights. We’ve compiled some of the most frequently asked questions to ensure you have all the information you need for a smooth and successful restoration.
A top concern for many is the longevity of the results. How long will the factory shine last after using this method? Typically, you can expect the results to hold for three to six months, maintaining impressive clarity. For those seeking a more enduring solution, applying a UV-resistant clear coat spray, which costs around $5, can extend the clarity for over a year. This clear coat acts as a durable shield against environmental elements and UV radiation, significantly delaying the return of fogginess. Another common question relates to versatility: “Can I use this method on taillights?” The answer is yes, you certainly can! However, exercise caution and avoid aggressive sanding on colored lenses to prevent any alteration to their tint.
Some car owners might wonder about the limitations of DIY restoration, especially if their headlights are already damaged. “What if my headlights are cracked?” Unfortunately, DIY fixes like those outlined won’t be able to repair cracks or significant physical damage to the lens. In such cases, the recommended course of action is to replace the lens or the entire headlight assembly to ensure both aesthetic appeal and optimal safety. Regarding the safety of our primary polishing agent, “Is toothpaste safe for all headlights?” Generally, yes, it is safe for most headlight plastics. However, as a precaution, especially with aftermarket lights, it’s always a good practice to test a small, inconspicuous area first to ensure there are no adverse reactions.
For those looking to speed up the process, a natural question arises: “Can I use a drill attachment?” While a drill attachment with a foam pad (available for around $10) can certainly accelerate the polishing stage, hand-polishing remains the safer option. Manual application allows for greater control over pressure and heat generation, reducing the risk of damaging the plastic. If you opt for a drill attachment, use it on a low speed setting and maintain constant movement to prevent concentrated heat build-up, ensuring a uniform and safe polish.
10. **Your Free Headlight Care Checklist for Ongoing Maintenance**Maintaining the crystal-clear brilliance of your headlights extends beyond a one-time restoration; it’s about establishing a routine of proactive care. To empower you with the tools for long-lasting clarity, we’ve created a comprehensive, free Headlight Care Checklist. This invaluable resource is designed to guide you through ongoing maintenance, ensuring your headlights remain in top condition and your visibility on the road is consistently optimized.
The checklist is packed with actionable insights and practical advice, serving as your personal guide to headlight longevity. It meticulously details monthly maintenance steps that are simple to integrate into your car care routine. These steps include quick cleaning tips, inspections for early signs of haze, and gentle polishing techniques to prevent oxidation from taking hold again. By following these routine checks, you can significantly extend the period between major restorations, keeping your headlights looking their best with minimal effort.
Furthermore, the checklist provides easy-to-follow DIY sealant recipes, allowing you to create your own protective coatings using common household ingredients. These recipes offer a cost-effective way to reinforce the UV protection on your headlight lenses, building on the initial sealing step from our restoration guide. You’ll also find a handy sandpaper grit guide, which is incredibly useful for future touch-ups or if you ever need to revisit the sanding process. This guide helps you select the correct grit for different levels of oxidation, ensuring you approach any future haze effectively and safely.
The Headlight Care Checklist offers a preview of its contents, promising a user-friendly and highly informative experience. It’s more than just a list; it’s a commitment to safer driving and a well-maintained vehicle, providing clear, concise instructions and expert tips at your fingertips. Download your free PDF today and take the guesswork out of headlight maintenance, ensuring that your vehicle’s most important safety feature remains impeccably clear.
Read more about: Red Flag Rides: 12 Critical Warning Signs Every Used Car Shopper Needs to Heed
11. **Final Pro Tips for Optimal Headlight Performance**Beyond the step-by-step process and maintenance, a few expert insights, or “Pro Tips,” can significantly enhance your headlight restoration results and prolong their clarity. These aren’t just minor adjustments; they are smart practices that maximize effectiveness and ensure your efforts lead to the best possible outcome. Incorporating these final pieces of advice will truly set your headlight care apart, yielding a finish that rivals professional detailing.
One of the simplest yet most effective tips is to always work in the shade. Attempting headlight restoration under direct sunlight can cause cleaning agents and polishes to dry too quickly. This rapid drying can lead to uneven application, streaking, and can make the buffing process far more challenging, potentially leaving behind residue that diminishes clarity. By working in a shaded area, you allow the products to work properly, giving you ample time to apply, rub, and remove them effectively for a superior, streak-free finish.
Another essential tip for personal safety and optimal handling of materials is to wear gloves throughout the entire process. While the ingredients we’ve discussed are household items, baking soda and white vinegar can still irritate sensitive skin, especially during prolonged contact. Gloves protect your hands from potential irritation and keep them clean, allowing you to focus on the intricate details of the restoration without discomfort. It’s a small step that makes a big difference in ensuring a comfortable and safe DIY experience.
Finally, consider upgrading your headlight bulbs once your lenses are sparkling clear. Pairing your newly restored, crystal-clear headlight lenses with modern LED bulbs can deliver maximum brightness and significantly improve your nighttime visibility. Traditional halogen bulbs, even through clear lenses, cannot match the intensity and broad illumination provided by quality LEDs, which can be purchased for around $20. This combination not only enhances safety but also gives your vehicle a contemporary, high-performance look, truly completing the transformation from dull to dazzling.
Read more about: Unlocking the ‘Magical’ Scratch Erasers: Top Car Finish Solutions That Deliver Instant Results, With or Without a Buffing Tool!

12. **Expand Your Automotive Knowledge with Expert-Curated Guides**Your journey to mastering headlight restoration is just one step in a much larger world of automotive expertise. Empowering yourself with practical knowledge about your vehicle can save you money, boost your confidence, and unlock new levels of DIY capability. We believe in providing accessible, high-quality information that enables every car owner to tackle maintenance and repairs with confidence.
To further expand your automotive prowess, we invite you to explore our extensive collection of over 500 free expert-curated guides. These resources cover a vast spectrum of topics, ranging from basic maintenance procedures like oil changes and tire rotations to more advanced repairs that might seem intimidating at first glance. Our clear, actionable tutorials are designed for every skill level, ensuring that whether you’re a complete novice or an experienced hobbyist, you’ll find valuable insights and step-by-step instructions to guide your way.
The beauty of these guides lies not only in their depth of information but also in their accessibility. You can access this wealth of knowledge anywhere, anytime, thanks to their mobile-friendly design. There’s no need for cumbersome downloads or subscriptions; all content is readily available, presented with high-definition visuals to make complex processes easy to understand. Imagine having a personal mechanic’s handbook constantly at your fingertips, ready to assist you with any automotive challenge that arises.
By delving into these expertly crafted resources, you’ll learn new skills and gain a deeper understanding of your vehicle’s mechanics. From troubleshooting engine issues to understanding electrical systems, our guides provide the clarity and confidence you need to take charge of your car’s well-being. This investment in knowledge pays dividends in cost savings, improved vehicle performance, and the sheer satisfaction of mastering new practical abilities. Drive smarter, maintain better, and truly own your automotive experience.
There you have it—the comprehensive guide to restoring your headlights to their factory shine, not just for aesthetics, but for paramount safety on the road. By leveraging common household items and embracing these simple, actionable steps, you’ve unlocked a detailer’s secret, saving both money and time. No longer will foggy, yellowed lights compromise your night vision or diminish your car’s curb appeal. Instead, you’re empowered with the knowledge and tools to maintain crystal-clear visibility, ensuring every journey is safer and your vehicle looks its absolute best. So go ahead, shine bright, and drive with confidence!

