

A slow tire leak can be one of the most insidious threats to your vehicle’s safety and your wallet. Unlike a sudden blowout, it often goes unnoticed, gradually diminishing your tire pressure and, with it, your peace of mind on the road. Many drivers assume that only complex tools or professional expertise can pinpoint these elusive issues, but we’re here to tell you that’s simply not the case.
Indeed, some drivers might think it’s perfectly fine to just keep topping off a tire with air every few days, but this approach is a risky gamble. A slow leak doesn’t merely consume your valuable time; it actively jeopardizes your vehicle’s performance and, more critically, your personal safety. Understanding how to identify these subtle problems early, and without relying on a tire gauge, empowers you to take control of your vehicle’s maintenance.
This in-depth guide is designed to equip you with the ‘easy tricks’ that seasoned tire professionals use to detect slow leaks accurately, all without needing a pressure gauge. We’ll walk you through a series of practical, hands-on methods that are not only effective but also accessible to every driver. Get ready to transform your approach to tire maintenance and ensure your wheels are always rolling safely and efficiently.

1. **Why Slow Leaks Demand Immediate Attention**
Ignoring a slow leak in your tire might seem like a minor inconvenience, but the repercussions extend far beyond just having to refill air frequently. This seemingly small issue can escalate into significant problems, impacting both your vehicle’s performance and your personal safety on every journey. It’s crucial to understand that a slow leak deserves your immediate and careful attention.
One of the most common consequences of underinflated tires is decreased gas mileage. When your tires lack the proper pressure, they increase rolling resistance, forcing your engine to work considerably harder to maintain speed. This extra effort translates directly into higher fuel consumption, effectively draining more money from your wallet with every trip you take.
Furthermore, consistently low tire pressure leads to uneven tire wear. The context states that “Constantly low pressure wears the tread unevenly, shortening the life of your tires.” This means that certain areas of your tire tread will wear down much faster than others, drastically reducing the overall lifespan of your tires. This premature wear often necessitates costly replacements long before they should be due.
Safety is perhaps the most critical concern linked to slow leaks. “Low air pressure affects how your car grips the road and responds in emergencies,” the context warns. This compromise in handling and braking capability means your vehicle might not respond as expected in critical situations, significantly increasing the risk of accidents. Such an impairment can be particularly dangerous on wet roads or during sudden maneuvers.
Perhaps the most alarming risk associated with a slow leak is the potential for a blowout. The context explicitly states, “A slow leak can turn into a sudden tire failure, especially on highways or during hot weather.” The longer you delay finding and fixing a leak, the higher the chances of needing a full tire replacement or, worse, experiencing a catastrophic tire failure at high speeds, which can lead to severe accidents. Addressing these issues promptly is not just about maintenance; it’s about securing your safety on the road.
Read more about: Beyond the Showroom Shine: Uncovering the Deep Discounts on Trucks (and More) Lingering on Dealer Lots
2. **Recognizing the Early Warning Signs of a Slow Leak**
Before you even get your hands dirty with inspection and testing, your vehicle often provides clues that a slow leak might be present. Learning to recognize these common signs is the first crucial step in diagnosing the problem early. These indicators empower you to act proactively, preventing the issue from worsening and potentially leading to more severe complications.
Modern vehicles are equipped with a Tire Pressure Monitoring System (TPMS) designed to alert you to pressure loss. If your “Tire Pressure Light Keeps Coming On” repeatedly after you’ve topped off a tire, it’s a strong indicator that you likely have a slow leak. This system is your vehicle’s primary digital guardian, offering a clear signal when something is amiss with your tire pressure.
Another telling sign is if “One Tire Is Always Low.” If you find yourself consistently refilling the same tire week after week, while the other three maintain their pressure steadily, then it’s highly probable that this particular tire is losing air somewhere. This consistent discrepancy points directly to a hidden issue that needs investigation, distinguishing a persistent problem from general air loss over time.
How your vehicle handles on the road can also be a significant indicator. If your “Vehicle Pulls to One Side,” especially when driving straight, it can be caused by low tire pressure in just one tire. The imbalance in pressure creates an uneven contact patch with the road, subtly veering your car off its intended path. This sensation often serves as an early, tangible warning that something is affecting your tire’s integrity.
Beyond driving dynamics, visible changes in your car’s stance can signal a slow leak. “Visible Sag or Flat Spot” can occur, even without the TPMS light illuminating. You might notice that one corner of your car appears to sit lower than the others, particularly after it has been parked for an extended period. This visual cue can be a clear indicator that a tire is slowly losing its essential air pressure.
Finally, keeping an eye on your tire’s surface can reveal problems. A slowly leaking tire will often exhibit “Unusual Tire Wear Patterns,” typically wearing down unevenly, especially along the edges. This uneven wear is a direct consequence of improper contact with the road due to underinflation. If you observe any of these signs, it’s definitely time to move on to a more thorough investigation.
Read more about: America’s Iconic Sports Car: Decoding the Most Problematic Corvette Models in History to Help You Buy Smart

3. **The Power of Visual Inspection: Your First Line of Defense**Before reaching for any tools or solutions, the simplest yet most effective initial step in detecting a slow tire leak is a thorough visual inspection. This method requires no special equipment, only your keen observation skills. A careful look can often reveal obvious culprits that might otherwise go unnoticed, making it an indispensable part of your diagnostic process.
Before reaching for any tools or solutions, the simplest yet most effective initial step in detecting a slow tire leak is a thorough visual inspection. This method requires no special equipment, only your keen observation skills. A careful look can often reveal obvious culprits that might otherwise go unnoticed, making it an indispensable part of your diagnostic process.
Start by meticulously checking the tire’s tread. As the context advises, “Look for sharp objects like nails, glass, or screws.” These foreign objects are common causes of punctures and can often be seen embedded in the rubber. Even if they haven’t created a wide hole, they can cause a slow, steady escape of air. A flashlight can be particularly helpful in low-light conditions to illuminate the tread and spot hidden debris.
Next, turn your attention to the sidewalls of the tire. The context suggests, “Inspect the sidewalls: Look for bubbles, cracks, or cuts.” Sidewall damage is often more serious than tread punctures and usually indicates that the tire is beyond repair. Even minor cracks or abrasions can compromise the tire’s structural integrity and lead to slow air loss, making a close examination of this area critical.
The valve stem, often overlooked, is another key area for visual inspection. The context recommends, “Examine the valve stem: Wiggle it gently if it’s loose or cracked, it may be the problem.” This small rubber piece where you add air can age, become damaged, or corrode over time, creating an avenue for air to escape. A loose or visibly cracked valve stem is a straightforward indicator of a potential leak source.
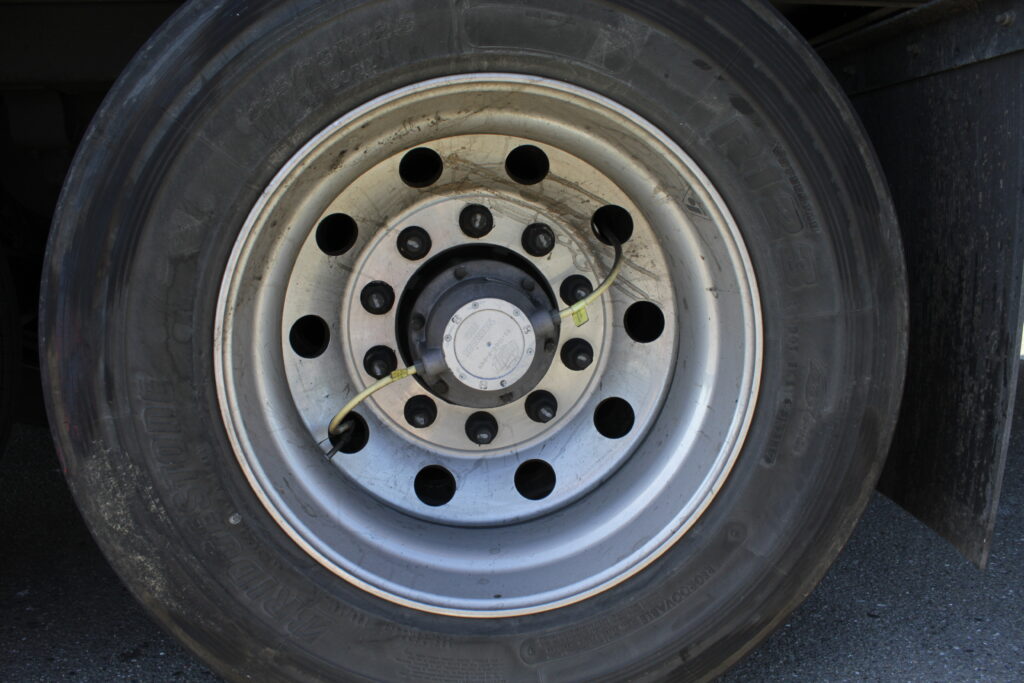
Lastly, extend your visual check to the wheel itself. “Look at the wheel itself: Check for bent or corroded rims, especially if you live in a snowy or coastal area.” Damage to the rim can prevent the tire from sealing properly against the wheel, leading to a ‘bead leak’ where air escapes from the edge. Mark anything suspicious you find during this visual sweep; these spots will be your primary targets for further, more definitive testing.
4. **The Simple Yet Effective Thumb Test**
When you’re without a tire gauge and need a quick, rough assessment of your tire pressure, the thumb test is a surprisingly useful method. This tactile approach relies on your sense of touch to gauge the firmness of your tire, providing a rapid, preliminary indication of its inflation status. It’s a fundamental skill for any driver looking to stay aware of their vehicle’s condition.
The core of this method is straightforward: “Give your tire a gentle thumb press.” As you press, pay close attention to the resistance you feel. “Does it feel firm and push back a bit? That’s a good sign of proper inflation.” A properly inflated tire, due to the physics of air pressure and material elasticity, will offer significant resistance against your thumb, indicating adequate internal pressure.
Conversely, if your tire is underinflated, the sensation will be markedly different. The context specifies, “If your thumb sinks in easily, it might be time for some air.” This lack of firm resistance means the tire’s internal pressure is insufficient to maintain its designed rigidity. The ease with which your thumb indents the tire serves as a direct, albeit qualitative, measure of its softness and potential underinflation.
This quick test provides a “rough gauge of your tire’s firmness,” as highlighted in the context. While it won’t give you a precise PSI reading, it’s excellent for identifying significant pressure discrepancies between tires or quickly confirming a suspicion raised by a visual inspection. It’s an immediate feedback mechanism that, when practiced regularly, can become a reliable part of your gauge-free maintenance routine.
Integrating the thumb test into your routine helps you establish a baseline for how your tires should feel when correctly inflated. This familiarity makes it easier to spot deviations quickly. Regularly performing this simple check ensures you’re always attuned to your tire’s condition, helping you catch potential slow leaks early and take necessary action.
Read more about: Beyond the Showroom Shine: Uncovering the Deep Discounts on Trucks (and More) Lingering on Dealer Lots
5. **Decoding Your Car’s Signals: Ride Comfort and Handling Cues**
Your vehicle is constantly communicating with you through how it feels on the road. Paying close attention to your car’s ride comfort and handling characteristics can provide crucial, gauge-free clues about potential tire pressure issues. These subtle cues, often perceived through the steering wheel and the seat of your pants, can be early indicators that one or more of your tires are slowly losing air.
“Pay attention to how your vehicle behaves on the road,” the context advises. If you start “Feeling a bit off in the steering or noticing sluggish performance,” your tires might be trying to tell you something important. A car with underinflated tires often feels less responsive, with steering that seems heavier or less precise than usual. This change in handling is a direct result of the tire’s altered contact patch with the road.
Uneven tire pressure, specifically if one tire is significantly lower than the others due to a slow leak, can manifest as your “Vehicle Pulls to One Side.” While other mechanical issues can cause a pull, a consistent drift or pull after parking and then driving again often points to a tire pressure imbalance. Your car’s tendency to veer subtly without your direct input is a strong signal that demands further investigation.
Beyond steering, the overall “Ride Comfort” can also change. An underinflated tire provides less cushioning and support, leading to a harsher, bumpier ride. You might feel more road imperfections, or the car might seem to ‘wallow’ or feel less stable, especially around corners. These changes are your vehicle’s way of indicating that its shock absorption system – the tires – isn’t functioning optimally.
These subtle cues, as the context notes, “can lead you to investigate further.” They serve as an invaluable feedback loop, confirming suspicions raised during visual checks or prompting an entirely new inspection. By tuning into your driving experience, you gain a dynamic, real-time assessment of your tire health, making you a more informed and proactive driver, even without a gauge.
6. **Listening for the Whisper: Detecting Leaks by Sound**
Sometimes, the simplest course of action is to stop, crouch down, and listen carefully. Your ears can be incredibly effective tools in detecting a slow tire leak, often picking up tell-tale sounds that signal escaping air long before a visible flat spot develops. This auditory method is entirely gauge-free and can be performed virtually anywhere, offering an immediate diagnostic advantage.
“Keep your ears open as you drive. Any strange thumping or flapping sounds could be a sign of low tire pressure,” the context instructs. These unusual noises occur because an underinflated tire flexes abnormally as it rolls, creating distinct sounds that are different from the usual road noise. Such auditory clues serve as an early heads-up, prompting a more thorough inspection and preventing the problem from escalating.
Once you’ve pulled over, or if you’re inspecting the tire in your driveway, the most direct auditory cue to listen for is a distinct hiss. The context advises, “Crouch down next to the tire you think may be slowly leaking and listen for any distinctive hissing sounds.” This sound is the audible evidence of air escaping under pressure, directly indicating a leak’s presence. If you hear a hiss, you’ve likely found your culprit.
The difficulty with this method, as the context points out, is that “you have to rotate the tires to ensure you don’t miss the leak.” A small puncture might be temporarily sealed by the ground if the leak is at the bottom of the tire. Therefore, “be prepared to roll your car forward or backward to ensure you aren’t inadvertently plugging the leak with the ground.” This allows you to expose the entire circumference of the tire to your listening ear.
Even if you can’t immediately see the source of the issue, listening intently can guide you. The context assures us, “It’s possible that you can hear the issue even if you can’t immediately see it.” Your tire is losing air, and you may find the leak by listening to a hissing sound, which is a sure sign. This keen attention to sound allows you to pinpoint the general area of the leak, directing your next steps towards a more focused inspection and repair.

7. **The Classic Soap and Water Solution: Unmasking Hidden Leaks**
When visual inspections, tactile tests, and auditory cues aren’t enough to pinpoint an elusive slow leak, the soap and water test stands out as the best DIY method for definitive detection. This technique is both simple and remarkably effective, leveraging basic science to reveal even the tiniest escape of air. It requires minimal tools and no mechanical expertise, making it a go-to trick for any driver.
The preparation is straightforward: “Mix dish soap with water in a spray bottle (about 1 part soap to 3 parts water).” If a spray bottle isn’t available, the context notes, “you can pour the substance over the tire instead of using it as a sprayer.” The key is to create a generously soapy solution that will react with escaping air. While the context mentions inflating the tire to the correct pressure as part of this step, the detection *itself* relies on the visual reaction, not a gauge reading.
Once your solution is ready, generously spray or pour the soapy water onto critical areas of the tire. The context recommends targeting the “Tread area, Sidewalls, Around the valve stem, The bead (where the tire meets the rim).” These are the most common locations for leaks. Thorough coverage is essential to ensure no potential leak source is missed, allowing the solution to interact with any escaping air.
Now comes the crucial part: “Watch closely for bubbles.” The scientific principle here is simple: “Soap bubbles will be created as the tire’s air leaks and come into contact with the soapy water mixture.” If a steady stream of small bubbles appears, you’ve unequivocally found your leak. The continuous formation of bubbles provides a clear, undeniable visual indicator of where the air is escaping, even from the smallest punctures or imperfections.
The effectiveness of this method is why it’s “one of the most searched DIY leak detection methods.” It’s “cheap, safe, and doesn’t require removing the tire” (though removing it for better access is an option). Once you’ve spotted the bubbles, “Mark the spot” with chalk or a marker. This precise identification allows you to proceed with either a DIY repair or to direct a professional exactly where the problem lies, making the repair process far more efficient.
Now that you’re well-versed in the primary gauge-free methods for spotting a slow leak, it’s time to deepen our understanding. Knowing the common culprits behind these elusive issues empowers you to narrow down your search and tackle the problem more effectively. Understanding what typically causes a leak can guide your inspection, making you a more efficient and informed vehicle owner.
Read more about: You Won’t Believe How Gross These 14 Common Household Items Actually Are: Your Ultimate Germ Hotspot Guide!

8. **What Causes a Slow Leak in a Tire?**
Before you even begin the hunt for a leak, it’s incredibly helpful to understand the usual suspects. Pinpointing the potential cause beforehand can significantly streamline your inspection process, guiding your eyes and hands to the most probable problem areas. Knowing the common origins of slow leaks transforms your diagnostic approach from a general search to a targeted investigation, saving you time and effort.
One of the most frequent causes is a simple puncture from road debris. As the context clearly states, “Puncture from a nail or screw: These can cause slow leaks if they only partially penetrate or don’t create a wide hole.” These insidious objects can embed themselves just enough to create a slow escape route for air without causing an immediate blowout, making them particularly difficult to detect without careful inspection.
Beyond simple punctures, issues with the wheel itself can be a significant factor. A “Damaged or corroded rim: If the seal between the tire and the wheel is weak, air can escape slowly.” This ‘bead leak’ occurs at the interface where the tire meets the rim, often due to physical damage or rust, especially in areas exposed to harsh weather conditions or road salt.
Another often-overlooked area is the valve stem. The context notes, “Cracked valve stem or valve core: The small rubber piece where you add air can age or become damaged.” Over time, this critical component can degrade or loosen, providing another pathway for air to slowly seep out. Even a tiny crack can compromise the seal, leading to persistent pressure loss.
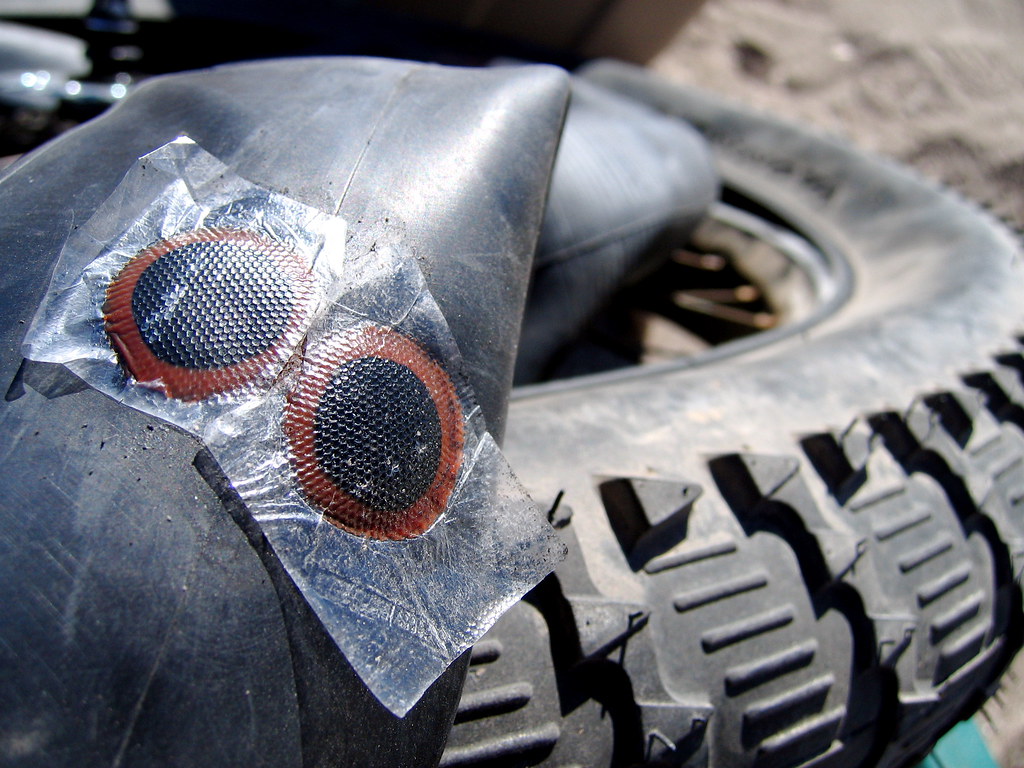
Lastly, prior repairs might not always stand the test of time. “Old patch or plug failure: Sometimes previous repairs wear out over time.” A patch or plug that once sealed a puncture effectively can eventually degrade or become dislodged, re-opening a slow leak. This reinforces the importance of knowing your tire’s history and conducting thorough checks even after a repair. Identifying these common causes upfront equips you with the knowledge to approach your tire inspection with a sharper focus and greater diagnostic precision.
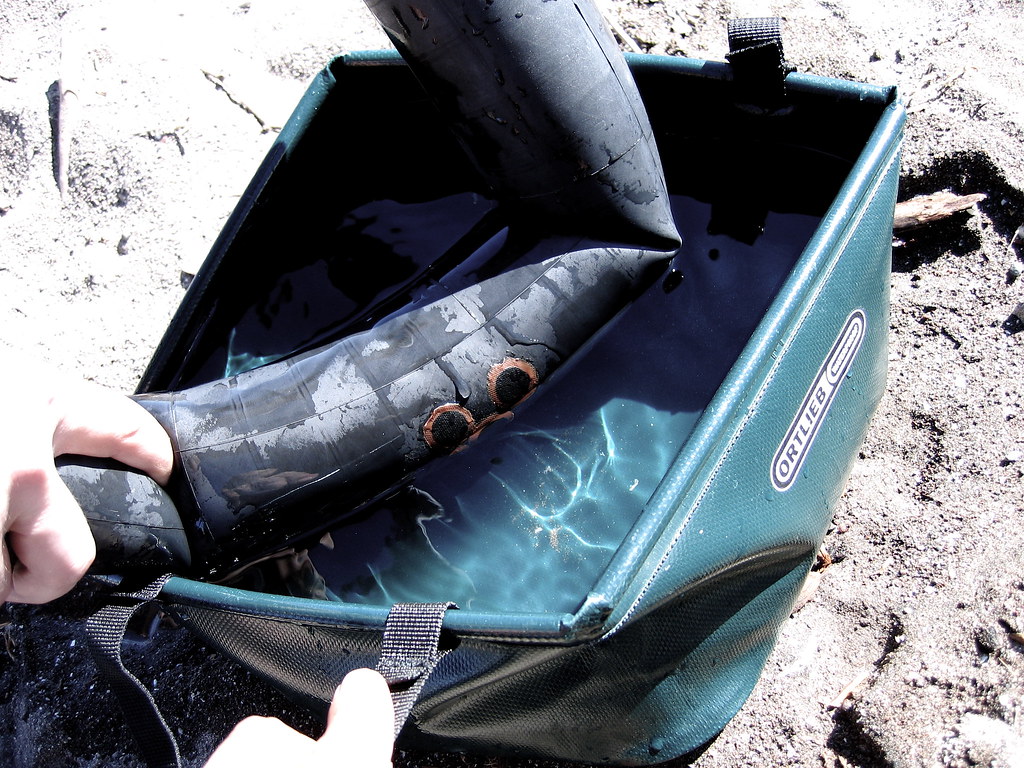
9. **Advanced Gauge-Free Diagnostic: Submerging the Tire**
When a slow leak remains stubbornly hidden despite visual checks and the soap and water test, it’s time to bring out the heavy artillery: the tire submersion method. This technique, though requiring a bit more effort, offers a nearly foolproof way to pinpoint even the most elusive leaks, leveraging the simple principle of buoyancy to reveal escaping air. It’s an advanced, yet entirely gauge-free, diagnostic approach.
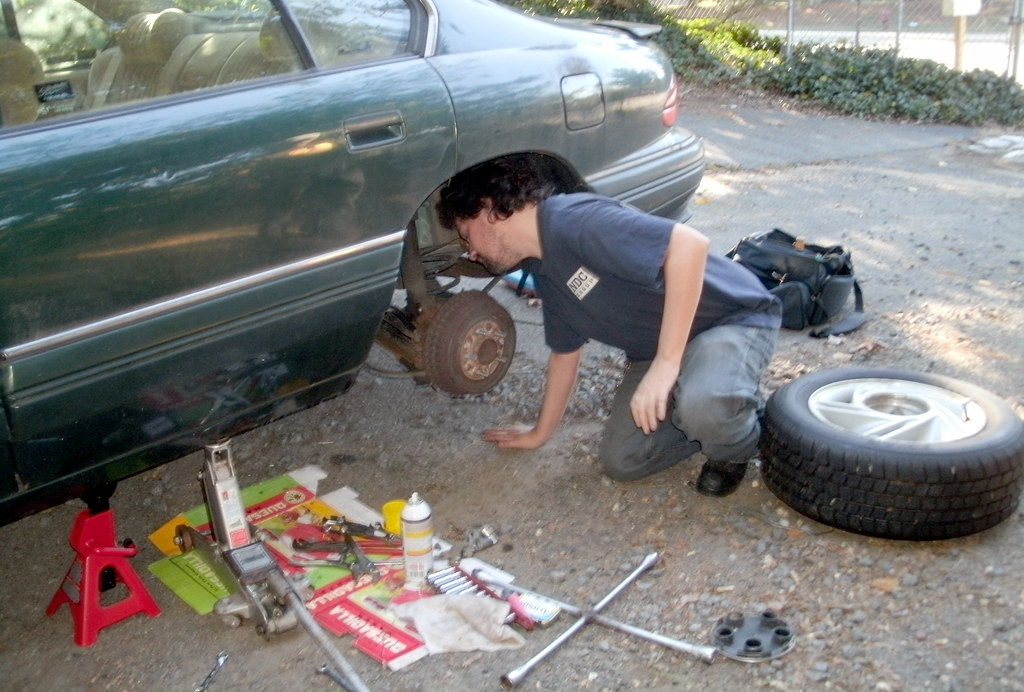
The first step in this highly effective method is to remove the tire from your vehicle. The context advises, “Remove the tire, though the lugs may now be accessible enough for manual removal. If not, use the lug wrench or impact wrench to complete the lug removal. Pull the wheel away from the wheelbase after the lugs have been taken off.” While this step adds a layer of work, it’s essential for ensuring complete access and maneuverability.
Once the tire and wheel are separated from the car, the next crucial step is to submerge them in water. “Take the tire and wheel off the car, then submerge it in a tub of water. At the location of the leak, bubbles will appear. If the tub isn’t big enough, submerge parts of the tire at a time.” This could be a large utility tub, a kids’ pool, or even a clean trash can, as long as it’s big enough to hold the tire.
The magic happens as you observe the submerged tire. “You might see air bubbles emerging from the tire once the water has settled. If so, you have discovered your leak.” The pressure inside the tire will force air out through any existing breach, creating a visible stream of bubbles in the water. Rotate the tire slowly, allowing every part of its surface, including the tread, sidewalls, and bead area, to be exposed underwater, ensuring no hidden leak goes undetected. This method is incredibly definitive because it offers a clear, visual confirmation of the leak’s exact location, making subsequent repairs much more straightforward.
10. **The Science Behind Gauge-Free Tire Pressure Techniques**
While many of these gauge-free detection methods might seem like common sense, there’s a fascinating scientific basis underpinning their effectiveness. Understanding these principles not only demystifies the ‘how’ but also enhances your ability to apply them accurately and confidently. It empowers you to interpret the subtle cues your tires are providing, making you a more knowledgeable and proactive driver.
At the core of tire pressure assessment is the “Physics of Air Pressure.” This involves the force exerted by the air contained within the tire. The context highlights, “Understanding that pressure is related to volume and temperature helps explain why tires can feel different under varying conditions.” This knowledge is key to interpreting the results of methods like the thumb test, where the resistance you feel is a direct consequence of the internal air pressure and how it interacts with the tire’s structure.
“Material Elasticity” is another crucial concept. Tires are engineered to be both flexible and robust, properties essential for maintaining proper air pressure and supporting vehicle weight. As the context explains, “The elasticity of tire material allows it to return to its original shape after being deformed.” This characteristic is precisely why the thumb test works; a properly inflated tire will resist deformation due to its inherent elasticity, providing a firm feel, while an underinflated one will yield more easily.
The science of “Sound Propagation” comes into play when you’re listening for unusual noises. Changes in tire pressure can significantly alter how sound waves travel through the tire and its interaction with the road. The context states, “Changes in tire pressure can alter how sound waves travel, making certain noises more pronounced.” This is why thumping or flapping sounds can indicate a problem, as they suggest changes in how the tire flexes and contacts the road. Similarly, “Visual Perception and Light” guide visual inspections; your eye can detect subtle differences in shape and light reflection on the tire surface, especially with the aid of a flashlight.
Finally, the widely used soap and water solution method is rooted in simple “Chemical Reactions.” This technique relies on the straightforward principle that “air escaping from a leak creates bubbles in the soapy mixture.” This reaction provides an undeniable visual indicator of leaks, making it a scientifically sound and practical method for identifying even minute punctures. By grasping these scientific foundations, you gain a deeper appreciation for why these everyday techniques are so effective.
11. **Overcoming Common Challenges in Gauge-Free Detection**
While gauge-free tire leak detection methods are incredibly practical, they aren’t without their unique challenges. It’s important to acknowledge these hurdles so you can approach the task with realistic expectations and develop strategies to overcome them. Being aware of these potential difficulties will help you become even more adept at diagnosing tire issues without relying on specialized equipment.
One significant challenge is “Inconsistent Visual Cues.” The context notes, “Tires can appear similar even when their pressure varies significantly.” This means that relying solely on how a tire looks can be misleading, particularly if you’re not intimately familiar with its appearance when perfectly inflated. To mitigate this, regularly observe your tires when they are known to be correctly inflated, establishing a personal visual baseline.
“Environmental Factors” also play a role. As the context mentions, “Weather and temperature can affect tire pressure, making it harder to judge accurately without a gauge.” Cold weather, for instance, naturally causes tire pressure to drop slightly. Understanding these external influences is crucial for making informed judgments rather than mistaking normal temperature-induced fluctuations for a leak.
Another hurdle is the “Lack of Immediate Feedback.” Unlike a precise gauge reading, alternative methods often provide qualitative rather than quantitative data. The context highlights that this “can lead to uncertainty about whether your tires are truly at the right pressure.” The best strategy here is to combine multiple methods—for instance, corroborating a thumb test with observations of ride comfort or a soap test.
“Difficulty in Detecting Slow Leaks” without a gauge is also a common complaint. “This is because small pressure losses over time might not be visually noticeable.” This is where the soap and water solution truly shines, as it can reveal leaks that are far too small to be seen or felt. Similarly, “Comparative Analysis Limitations” can arise if you’re comparing one tire to others, assuming the others are perfectly inflated. If multiple tires are underinflated, your comparison might be skewed. Regularly checking all tires and consulting an inflation reference chart can help ensure accurate comparisons. By understanding and proactively addressing these challenges, you can maximize the effectiveness of your gauge-free detection efforts.

12. **What to Do After You Find the Leak**
Successfully locating a slow leak without a gauge is a significant accomplishment, but the job isn’t done until the issue is addressed. Knowing your options for repair or replacement is crucial for restoring your tire’s integrity and ensuring your continued safety on the road. This next step is about moving from detection to decisive action, ensuring the problem doesn’t re-emerge.
Your course of action largely depends on the nature and location of the leak. For “Tread puncture: Plug it yourself with a tire plug kit or take it to a shop for a patch.” A small puncture in the main tread area is often the most repairable type of damage, offering a relatively straightforward fix that can be done at home with the right tools or professionally patched for a more robust solution.
However, not all damage is created equal. The context explicitly states, “Sidewall damage or bead leaks: These are usually not repairable replacement is safer.” The sidewall is under immense stress during driving, and a repair here compromises the tire’s structural integrity, making it a significant safety risk. Bead leaks, though sometimes repairable by cleaning and resealing the rim, often point to more serious issues requiring professional intervention or replacement.
If the problem originates from the valve stem, the solution can be simpler. For a “Valve core issue: You can tighten or replace the core with a valve tool.” This small, inexpensive component is a common source of slow leaks and is often an easy DIY fix. For a “Corroded rim: May need to be cleaned, sealed, or replaced.” Corrosion can prevent the tire from sealing properly against the wheel, causing slow air loss that requires mechanical attention.
Ultimately, safety should always be your top priority. The context advises, “If you’re unsure, have a tire professional inspect it.” Taking a detected leak to a reputable tire shop allows experts to assess the damage accurately and recommend the safest and most effective solution, whether it’s a repair or a full replacement. Timely action after detection is paramount to preventing minor issues from escalating into major safety hazards.
Read more about: Prepare for Tears: 13 Movie Endings So Raw and Emotional, Directors Dared Not Cut Away
13. **When You Should Replace the Tire Instead of Repairing It**
Knowing how to find a slow leak is invaluable, but equally important is understanding when a repair is simply not enough. There are critical circumstances where attempting to fix a tire is a compromise to safety, making replacement the only responsible choice. This knowledge is not just about maintenance; it’s about making informed decisions that protect you and your passengers on every journey.
Not all leaks can or should be fixed, and certain conditions automatically tip the scales towards replacement. The context clearly outlines these scenarios, starting with location: “Leak is on the sidewall.” As previously noted, sidewall damage cannot be safely repaired due to the structural stresses and flexing this part of the tire endures. Any puncture or damage here requires immediate replacement to ensure safety.
Beyond location, the overall condition of the tire is a major factor. If the “Tire is bald or tread is under 2/32 inch,” it’s time for a new tire, regardless of a leak. A bald tire lacks the necessary grip and stability for safe driving, especially in adverse conditions, and a leak simply compounds this existing safety risk. Similarly, “Multiple punctures or previous repairs” can compromise the tire’s structural integrity over time. A tire that has been patched multiple times might have inherent weaknesses that make further repairs unsafe.
The severity of the damage also dictates the decision. “Large gashes or deep cracks” are generally beyond the scope of safe repair. These types of extensive damage often mean the tire’s internal structure has been compromised, making it unsafe to continue using. The context provides a stark warning: “Driving on a weak tire is a safety risk, especially at highway speeds.” Ignoring these indicators can lead to catastrophic tire failure, emphasizing that knowing when to replace is a non-negotiable aspect of tire maintenance.
Read more about: Planning on Trouble? The 14 Engines and Models Most Likely to Leave You Stranded Before 100,000 Miles

14. **How to Prevent Future Tire Leaks: Proactive Measures**
Once you’ve successfully dealt with a slow leak, the best strategy is to take proactive steps to prevent future occurrences. Implementing a regimen of regular checks and mindful driving habits can significantly extend the lifespan of your tires and minimize the chances of facing another unexpected leak. Prevention is always better than cure, especially when it comes to tire health and road safety.
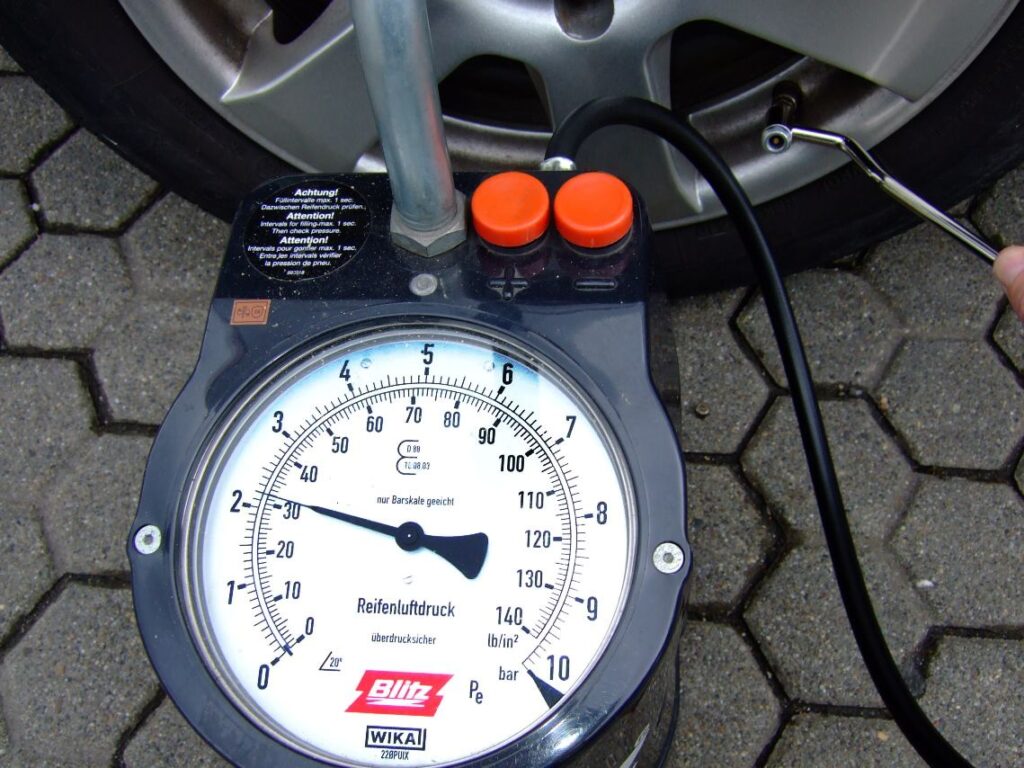
A fundamental preventative measure is consistent pressure monitoring. The context advises, “Check tire pressure monthly using a gauge not just the warning light.” While TPMS is helpful, a monthly manual check provides more accurate and proactive insight, ensuring your tires are always at their optimal inflation levels, which helps prevent uneven wear and bead leaks caused by underinflation.
Regular maintenance and mindful driving also play a crucial role. “Rotate your tires regularly to avoid uneven wear.” Proper tire rotation ensures that wear is distributed evenly across all four tires, prolonging their lifespan and maintaining balanced handling. Furthermore, “Avoid potholes and road debris as much as possible.” These common road hazards are frequent culprits for punctures and rim damage that lead to slow leaks.
Small details, like valve caps, can make a surprising difference. The context suggests, “Replace valve caps to keep dirt and moisture out.” These caps protect the valve core from environmental elements that can lead to corrosion and eventual leaks. Lastly, “Clean rims periodically, especially in winter climates.” Cleaning helps prevent corrosion and ensures a good seal between the tire and the rim, mitigating the risk of bead leaks. Being proactive with these simple measures can truly add thousands of miles to your tire’s lifespan, ensuring smoother and safer journeys ahead.
Catch It Early, Drive Safer
Navigating the world of tire maintenance doesn’t have to be a guessing game, even without a fancy gauge. By harnessing the ‘easy tricks’ and expert insights we’ve shared, you’re now equipped to detect, understand, and even prevent slow leaks with confidence. From the subtle signs your car provides to the definitive science of soap bubbles, each method offers a powerful tool in your vehicle care arsenal. Embracing these practical approaches transforms you from a reactive driver into a proactive guardian of your ride, ensuring that every mile you travel is safer, more efficient, and worry-free. So go ahead, give those tires a quick check – a small effort today can save you from a major headache tomorrow, keeping your wheels rolling smoothly on the open road. Keep driving smart, keep driving safe!


