

Our vehicles are marvels of engineering, intricate compositions of tens of thousands of interworking parts designed to move us effortlessly from point A to point B. Whether you’re behind the wheel of a traditional internal combustion engine or a cutting-edge electric vehicle, one constant remains: the reliance on a symphony of various fluids to keep everything operating in perfect harmony. These vital liquids aren’t just an afterthought; they are the very lifeblood of your automobile, performing crucial tasks from lubrication and cooling to enabling critical safety functions.
While modern cars are indeed the best they’ve ever been, they haven’t yet evolved into maintenance-free wonder machines. The truth is, even the most advanced vehicles still demand regular attention, and a significant part of that care revolves around its essential fluids. Neglecting these seemingly simple checks can lead to a cascade of problems, ranging from reduced performance and diminished fuel economy to severe, costly damage that could leave you stranded and facing exorbitant repair bills.
As seasoned gearheads and automotive professionals understand, staying on top of your car’s fluid health isn’t just a recommendation – it’s a fundamental pillar of responsible vehicle ownership. In this comprehensive guide, we’ll dive deep into six of the most vital fluids that nearly every car needs, demystifying their roles, outlining precise checking procedures, and detailing the crucial intervals for their maintenance. We’ll begin by focusing on three indispensable fluids that form the bedrock of your vehicle’s mechanical integrity and operational safety: engine oil, coolant, and brake fluid. Let’s uncover how simple, routine checks can significantly extend your car’s lifespan and ensure a safer, smoother journey for years to come.
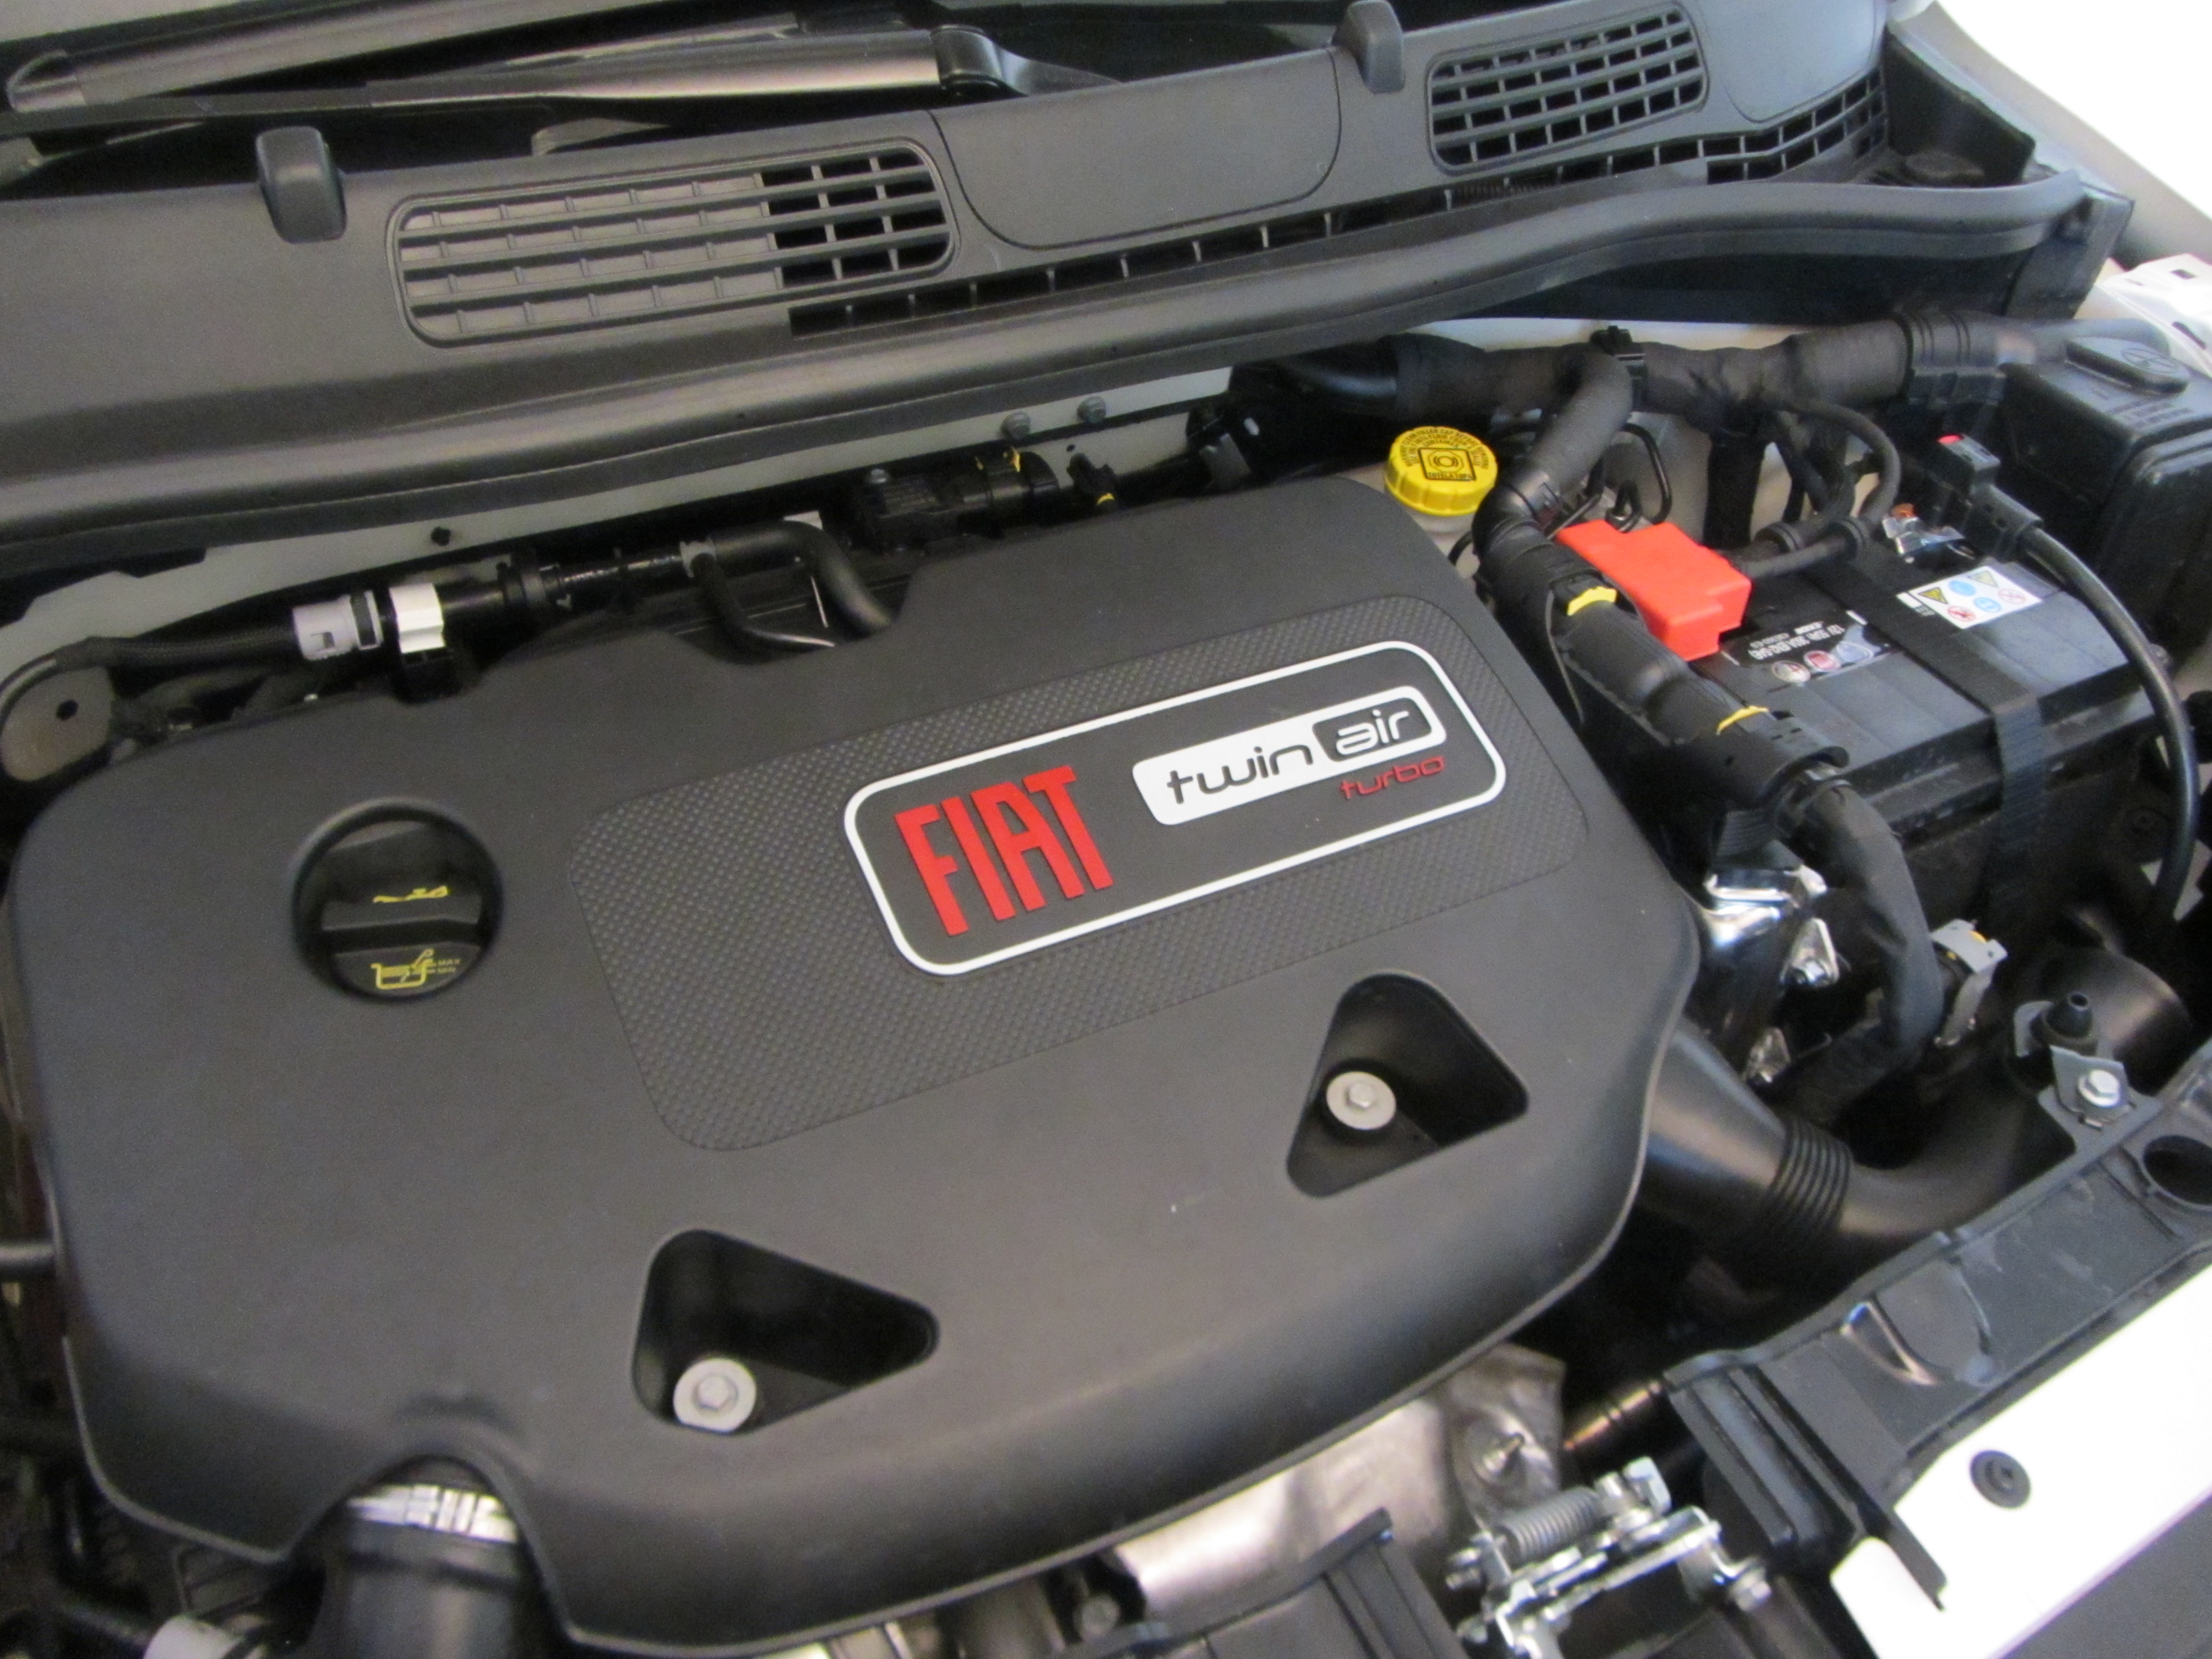
1. **Engine Oil: The Lifeblood of Your Engine**At the absolute top of your car’s fluid priority list is engine oil, often considered the lifeblood of any internal combustion engine. Its primary role is multifaceted and critical: lubricating the thousands of components that spin thousands of times a minute, reducing friction, carrying away heat, and preventing wear and tear. Without proper lubrication, the intricate metal parts inside your engine would grind against each other, quickly leading to catastrophic failure and an engine replacement that nobody wants to face.
Maintaining the correct engine oil level and condition is paramount for your engine’s longevity and efficient performance. A low oil level can indicate a leak or that your engine is burning oil, a serious issue that, if left unaddressed, can cause significant and irreparable damage. Similarly, contaminated or degraded oil loses its ability to lubricate effectively, allowing friction to build up and heat to soar, placing immense stress on vital engine components.
Fortunately, checking your engine oil is one of the simplest and most accessible DIY maintenance tasks. To get an accurate reading, park your vehicle on a level surface and ensure the engine has been turned off for at least 10 minutes, allowing the oil to drain back into the oil pan and cool. Locate your engine’s dipstick, typically marked with a brightly colored loop or handle, then pull it out and wipe it completely clean with a lint-free rag. Reinsert the dipstick fully into its tube, wait a moment, then pull it out again to check the oil level against the maximum and minimum indicators. If the oil is near the maximum mark, you’re usually good to go, but if it’s close to or below the minimum, it’s a clear signal that you need to add oil immediately.
Beyond just the level, the condition of your oil offers vital clues about your engine’s health. Smear a small amount of oil from the dipstick between your fingers; it should feel slick and smooth. If you detect any particles or grittiness, it’s a strong indicator that internal engine components are likely wearing down, signaling a potentially major issue that warrants professional inspection. Another crucial aspect to examine is the oil’s color. Fresh, healthy oil typically appears as a clear yellow or amber hue. If it’s a darker coffee color or completely black, it signifies that the oil has degraded and it’s time for an oil change. Alarmingly, if you observe a milky, opaque color, it’s a severe warning sign that coolant is leaking into the engine, demanding immediate professional attention to prevent catastrophic damage.
Oil changes are, fittingly, the most common fluid service your car will need. According to Kelley Blue Book, it’s generally best to change your oil every 5,000 to 7,500 miles, although your owner’s manual will provide the precise recommendations for your specific make and model, as well as the correct type of oil to use. Whether you choose to visit an oil change shop, a dealership, or tackle it yourself with the right products and tools, consistent checks and timely changes are non-negotiable for preserving your engine’s health, extending your vehicle’s lifespan, and ensuring reliable performance mile after mile.

2. **Coolant: Keeping Your Engine’s Temperature in Check**Beneath the hood of your car, where combustion creates immense heat, coolant – also widely known as antifreeze or radiator fluid – stands as a crucial guardian of your engine’s operational health. Its primary mission is to regulate the engine’s temperature, preventing it from both overheating during scorching summer days and freezing solid in harsh winter climates. This seemingly simple liquid works tirelessly, absorbing the substantial heat generated by the engine and then dissipating it efficiently through the radiator, thereby maintaining optimal operating temperatures for all vital components.
The continuous cycle of heating and cooling can, over time, cause coolant to break down and become contaminated, reducing its effectiveness and potentially leading to serious consequences. Neglecting coolant levels or failing to replace old fluid can result in your engine running too hot or too cold, both scenarios posing significant risks. Overheating, in particular, can warp engine components, blow head gaskets, and lead to incredibly expensive repairs, transforming a simple fluid check into a preventative measure against major mechanical failure.
Checking your coolant levels is a straightforward process, but it comes with a critical safety precaution: never open the radiator cap when the engine is hot. Pressurized hot coolant can spray out, causing severe burns. Always ensure your car is turned off and has had ample time to cool down completely, ideally sitting for a while or even overnight. Once safe, locate the translucent plastic coolant reservoir, which is usually situated near the radiator and clearly marked with “min” and “max” lines on its side.
Visually inspect the fluid level in the reservoir; it should consistently fall between these minimum and maximum indicators. If you find the level is low, it’s time to top it off. The standard recommendation is to use a 50/50 mix of coolant and distilled water, unless your specific coolant comes pre-mixed. Before adding any fluid, always confirm it’s the type approved for your vehicle, as specified in your owner’s manual. Slowly pour the mixture into the reservoir until it reaches the “full” line. After filling, run the vehicle for a little while, then recheck and top it off if the level has dropped slightly, as trapped air bubbles can “burp” out.
The condition of your coolant provides another layer of insight into your cooling system’s health. Healthy coolant should be bright and clear, typically green, yellow, or red, depending on the type specified for your car. If you notice the fluid appearing brown, murky, or with visible particles floating within it, these are strong indicators that your coolant has degraded or become contaminated and requires a full flush and replacement. A sudden drop in coolant level, accompanied by signs of overheating such as steam or smoke from the engine, or a high temperature gauge reading, demands immediate investigation and professional attention to prevent further damage. While some sources suggest checking less frequently, it’s generally recommended that you check your car’s coolant level every six months or every 10,000 miles, whichever comes first, and replace it entirely every two to three years, adhering closely to your car manufacturer’s specific guidelines.
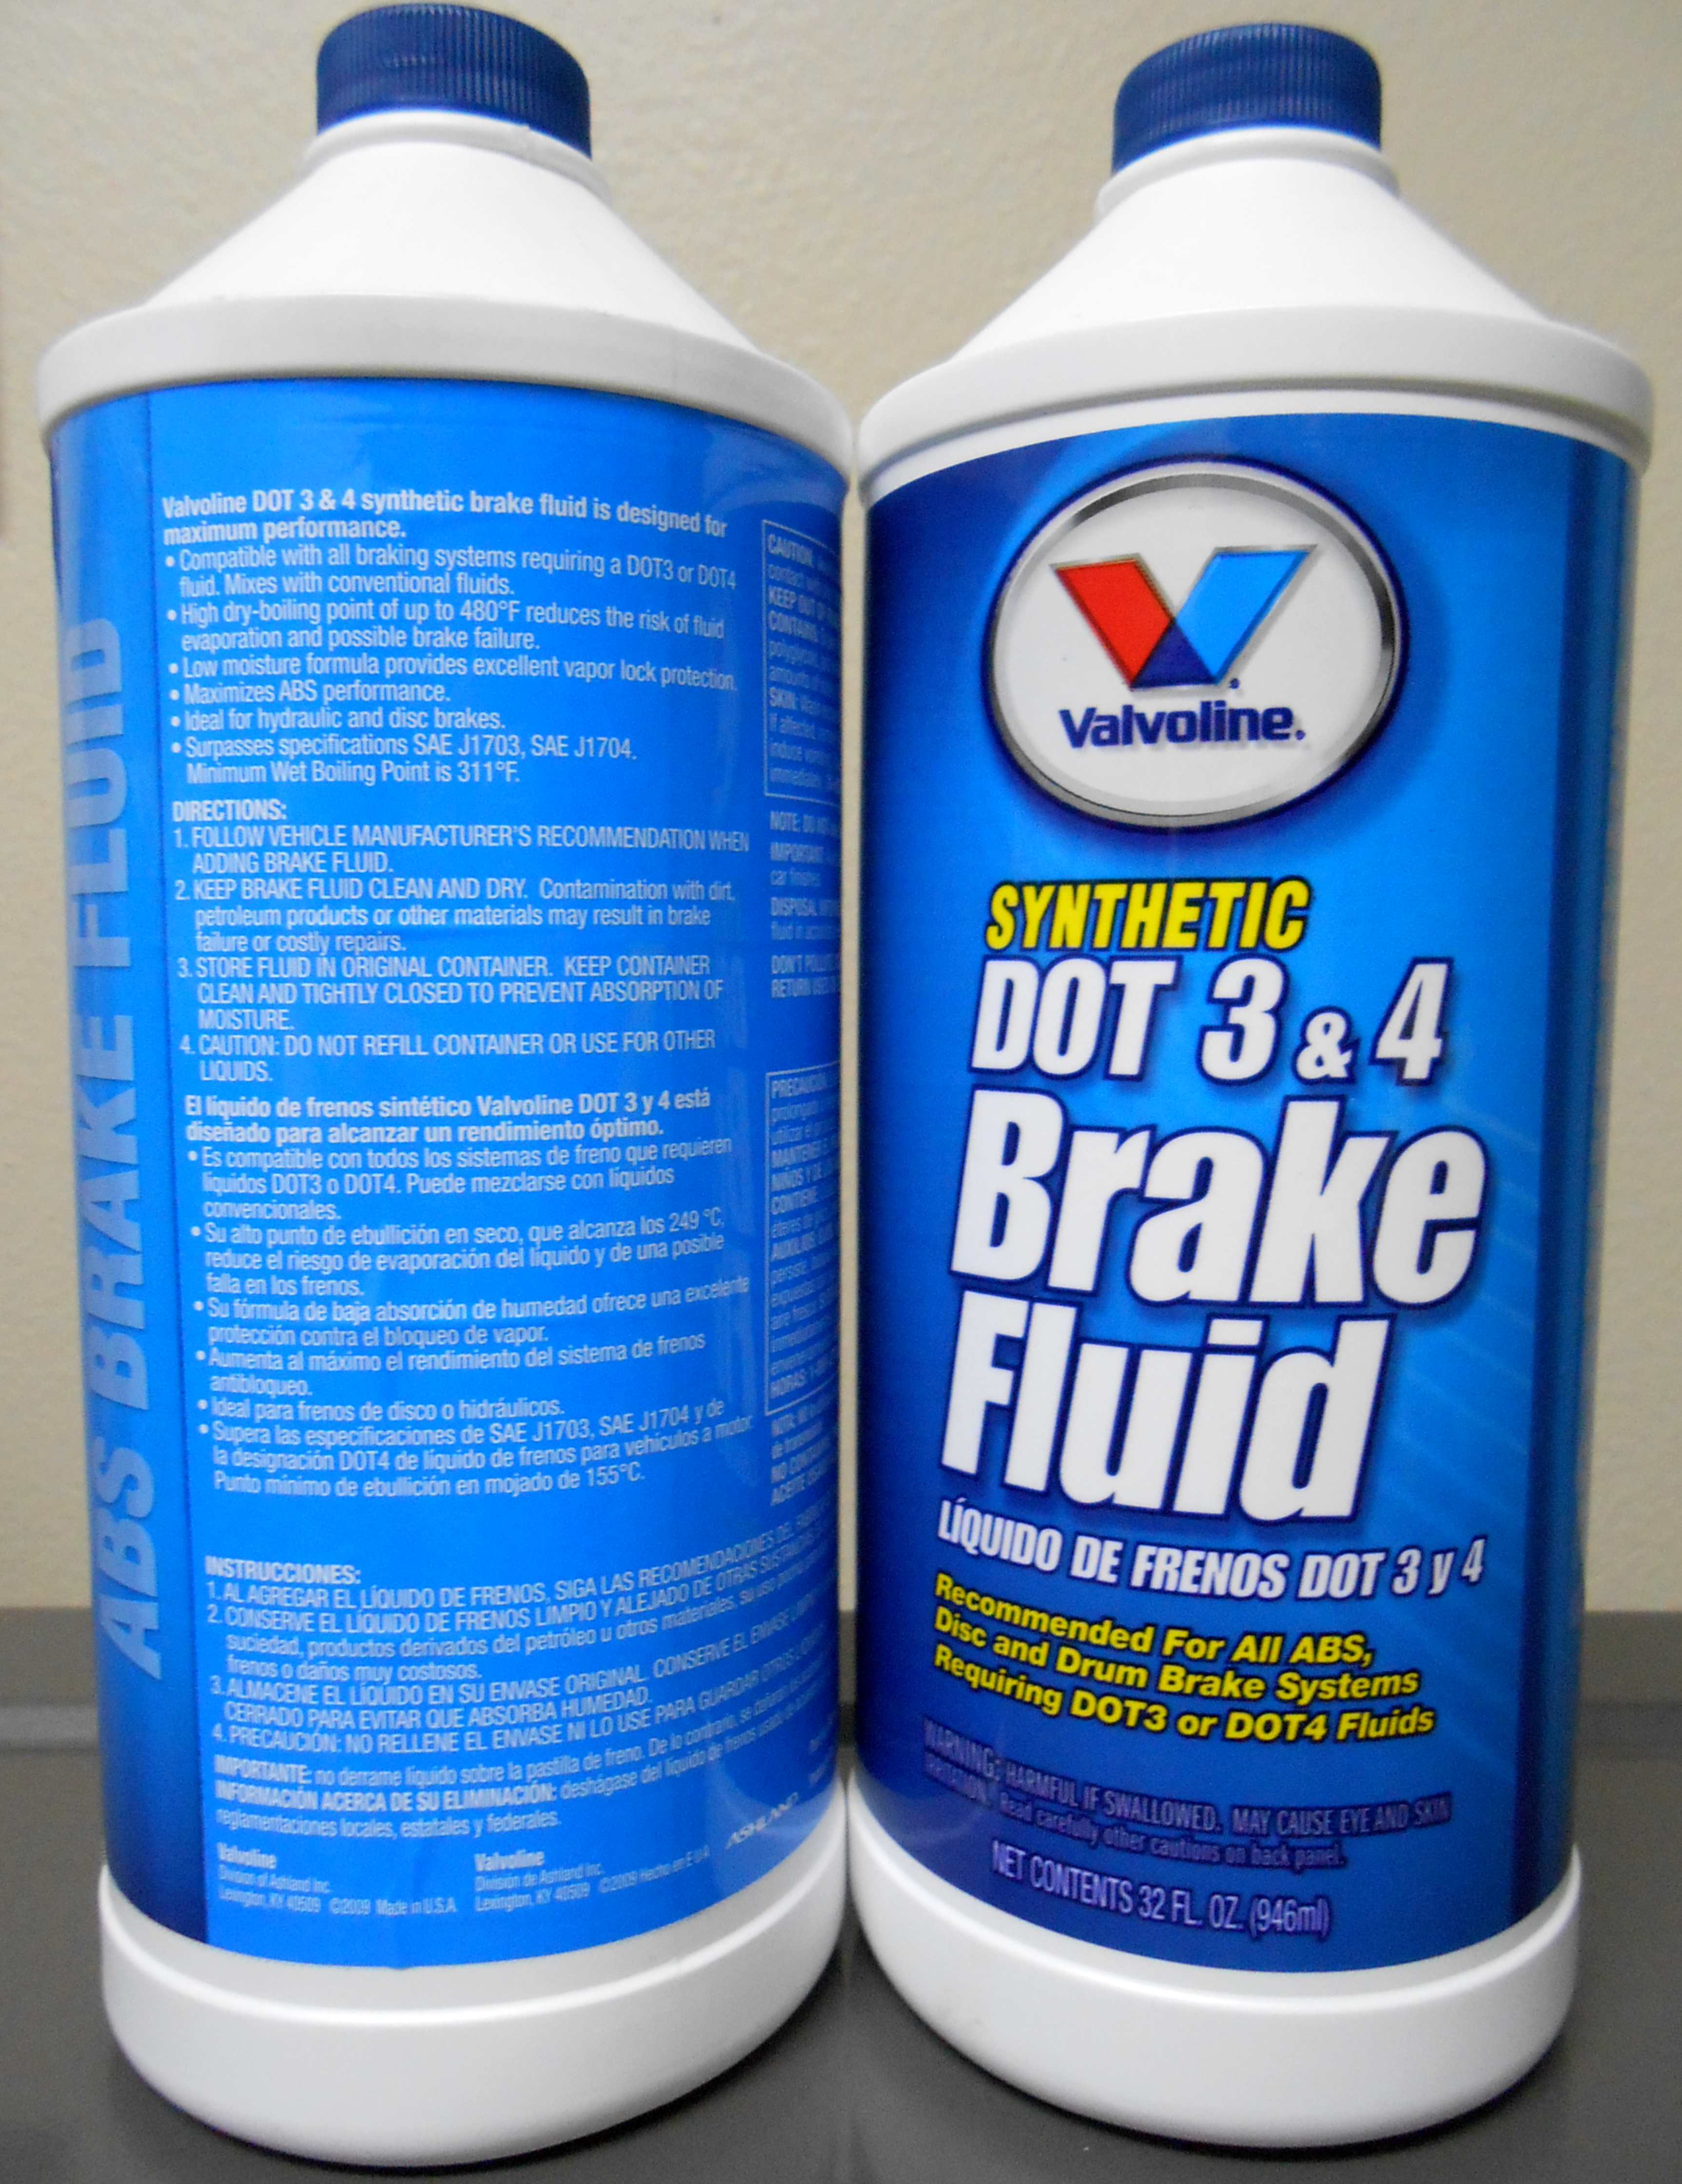
3. **Brake Fluid: The Unsung Hero of Vehicle Safety**Few components in your car are as critical to your safety as the braking system, and at the heart of its reliable operation is brake fluid. This hydraulic fluid plays an indispensable role by efficiently transferring the force from your foot on the brake pedal directly to the brake pads or shoes, which then clamp down on the rotors to slow or stop your vehicle. It’s a process that needs to happen instantaneously and with absolute precision every single time you apply the brakes, making the integrity of your brake fluid non-negotiable for safe driving.
Any compromise in your brake fluid can lead to alarming consequences, directly impacting your ability to stop your car effectively. A spongy or soft brake pedal, unusual noises when braking, or a noticeable reduction in stopping power are all tell-tale signs that your brake fluid system might be compromised. The fluid is hygroscopic, meaning it naturally absorbs moisture from the air over time. This water contamination can significantly lower the fluid’s boiling point, leading to vapor lock during heavy braking and drastically reducing braking efficiency, especially in demanding conditions. Furthermore, water in the system can cause internal corrosion of brake lines and components, leading to leaks and potential brake failure.
Checking your brake fluid is a simple yet crucial task you can perform at home. Start by locating the brake fluid reservoir in your vehicle’s engine bay; it’s typically a small, transparent plastic container situated towards the back, often near the driver’s side, and usually marked with a distinct brake fluid reservoir symbol. With the engine turned off, visually inspect the fluid level through the translucent walls of the reservoir. Most reservoirs clearly display “min” and “max” lines, and your fluid level should always reside safely between these markers.
If you observe the fluid level dipping below the “min” line, it’s imperative to add more fluid promptly. However, exercise extreme caution during this process: never overfill the reservoir, as brake fluid is highly corrosive and can inflict severe damage to your vehicle’s paintwork and other engine bay components. Additionally, it’s absolutely essential to use only the specific type of brake fluid (e.g., DOT 3, DOT 4) recommended in your car’s owner’s manual, as incompatible fluids can cause substantial damage to your braking system.
Beyond level, the color and clarity of your brake fluid offer critical insights into its condition. Healthy brake fluid should be clear or have a slightly yellow tint and be free of any particles or cloudiness. If the fluid appears dark, cloudy, or gritty, it’s a strong indication that it has absorbed too much moisture or become contaminated and needs to be replaced immediately. This is not a task to postpone. While you should check your brake fluid every six months or every 10,000 miles, whichever comes first, it’s also highly recommended that you replace your car’s brake fluid entirely every two years, regardless of mileage, due to its hygroscopic nature and the critical safety function it performs. Prioritizing brake fluid maintenance is a direct investment in your driving safety and the longevity of your entire braking system.
Now that we’ve covered the foundational fluids essential for your engine’s health and your vehicle’s stopping power, let’s continue our journey into the often-overlooked yet equally vital fluids that contribute to a smooth, comfortable, and safe driving experience. From ensuring seamless gear changes to effortless steering and clear visibility, these next three fluids are integral to your car’s overall operational excellence.

4. **Transmission Fluid: The Unsung Hero of Smooth Shifts**Just as engine oil is the lifeblood of your engine, transmission fluid plays a parallel, crucial role within your vehicle’s transmission system. Its primary purpose is multifaceted, working tirelessly to lubricate the countless internal components, including gears, clutches, and valves, which are constantly moving to facilitate seamless gear shifts. Beyond lubrication, transmission fluid is also responsible for cooling these components, preventing the immense heat generated during operation from causing premature wear and tear.
Neglecting your transmission fluid can lead to a cascade of performance issues, turning what should be a smooth driving experience into a frustrating ordeal. Old or low fluid can manifest as rough shifting, where your car jerks or hesitates between gears, or even cause gears to slip entirely. Left unaddressed, these symptoms can escalate to severe overheating within the transmission, leading to significant internal damage and potentially incredibly costly repairs or even a complete transmission replacement.
Checking your transmission fluid is a crucial maintenance step, though the procedure can vary depending on your vehicle. While some cars, particularly older models, are equipped with a separate dipstick for the transmission fluid (distinct from the engine oil dipstick), many newer vehicles feature sealed transmissions that require a professional mechanic for inspection. For those with a dipstick, the process is similar to checking engine oil, with one key difference: you’ll generally need to have the engine turned on and the transmission in Park or Neutral to get an accurate reading.
Once you’ve located the dipstick and ensured the engine is running and warmed up, pull it out, wipe it clean, reinsert it fully, and then pull it out again. Inspect the fluid level against the ‘full’ and ‘add’ marks, ensuring it falls within the recommended range. Equally important is assessing the fluid’s condition. Healthy transmission fluid should appear amber or bright red and feel smooth to the touch. If you notice it’s dark, cloudy, or gritty, these are strong indicators of degradation or contamination, signaling that it’s time for a change.
To add transmission fluid, if your vehicle has a fill tube, carefully pour the new fluid in, being sure to use the exact type specified in your owner’s manual. After verifying the fluid level on the dipstick, it’s a good practice to move the gear selector through all the gears with your foot firmly on the brake. This helps circulate the new fluid throughout the transmission system. While some sources might suggest less frequent checks, the general recommendation for changing transmission fluid is every 30,000 to 60,000 miles. However, some car manufacturers recommend checking it more frequently, perhaps every 15,000 miles, especially depending on the type of fluid and your driving conditions. If you continue to experience transmission problems after checking and topping off the fluid, it’s always best to consult a professional.
5. **Power Steering Fluid: Navigating with Ease**Picture trying to maneuver a vehicle without the assistance of power steering – it’s a workout! That’s where power steering fluid comes in, transforming what would be a heavy, arduous task into an effortless motion. This hydraulic fluid plays an indispensable role by lubricating the intricate internal components of your power steering system, allowing the steering wheel to turn with remarkable ease at any speed. Many modern cars rely on these hydraulic systems, where pressurized fluid makes navigating turns and parking a breeze.
Neglecting your power steering fluid can quickly degrade your driving experience, making your car feel like an old-fashioned, non-power steering vehicle. Common symptoms of low or contaminated fluid include difficulty turning the steering wheel, a noticeable increase in the effort required to maneuver, or even a distinct whining noise when you turn. If you find yourself frequently adding fluid, it’s a clear warning sign of a leak within the system, which, if left unaddressed, will make your car increasingly challenging and potentially unsafe to steer.
Checking your power steering fluid is a relatively straightforward task that can save you a lot of headache. The first step is to locate the power steering fluid reservoir in your engine bay, which is typically well-labeled and often situated towards the front. It’s important to perform this check with the engine turned off and preferably cool, to ensure safety and an accurate reading. Once you’ve located the reservoir, clean the area around the cap to prevent any dirt or debris from entering the system when you open it.
Many reservoirs feature clear ‘min’ and ‘max’ lines on their side, indicating the appropriate fluid level, or a dipstick attached to the cap. The fluid level should always fall between these two markers. If it’s below the minimum line, it’s time for a top-off. When adding fluid, always ensure you use the specific type recommended in your vehicle’s owner’s manual; using an incompatible fluid can cause severe damage to your power steering system. The fluid itself should be clear, not overly dark, and free of any visible particles. If it appears murky or contains debris, a fluid change is likely warranted.
While there isn’t always a strict, universally set timeframe for replacing power steering fluid, the consensus among experts suggests a check every six months or every 10,000 miles, whichever comes first. For a full replacement, some manufacturers recommend around every 50,000 miles. If you notice any signs of problems with your power steering system, such as persistent difficulty turning the steering wheel or unusual noises, checking the fluid level immediately is crucial. Addressing these issues promptly is an investment in your safety and the longevity of your steering system.

6. **Windshield Washer Fluid: Your Clear View Ahead**While it might not affect your engine’s performance or your braking ability, windshield washer fluid is undeniably vital for safe driving. Imagine navigating through a sudden downpour, a dusty construction zone, or a morning commute riddled with bug splatters without the ability to clear your windshield. A clear view of the road ahead is paramount, and this simple fluid is your first line of defense against obscured visibility.
Fortunately, windshield washer fluid is arguably the easiest fluid to maintain in your entire vehicle, offering straightforward and hassle-free management. Replenishing this fluid doesn’t require complex tools or extensive mechanical knowledge. You can readily purchase jugs of it at almost any gas station, auto supply store, or even many supermarkets, making it one of the most accessible maintenance items for any car owner.
To check and refill your windshield washer fluid, simply pop your car’s hood. The reservoir is typically a translucent container, often topped with a blue cap and clearly marked with a windshield and water spray symbol. You literally can’t miss it. Visually inspect the fluid level through the container’s side; if it’s below the fill line or you can’t see any fluid, it’s time to add more.
When refilling, simply open the cap and pour new washer fluid into the reservoir until the liquid reaches the fill line or is just below the top. Securely replace the cap to prevent any spillage. A crucial tip, especially if you live in colder climates, is to choose a windshield washer fluid specifically formulated with antifreeze properties. This prevents the fluid from freezing in harsh temperatures, which could damage your washer system and, more importantly, leave you with an obstructed view when you need it most.
How often you need to change this fluid largely depends on how frequently you use your windshield washer feature and your driving environment. As a general rule of thumb, it’s recommended to check your car’s windshield washer fluid level at least once a month, or even more frequently if you reside in an area prone to dust, dirt, or road debris. Regularly refilling the reservoir ensures you always have ample fluid for optimal visibility. Should you notice any problems, such as reduced spray or no spray at all, checking the fluid level promptly can prevent further issues with your car’s cleaning system.
**Staying Ahead: The Ultimate Maintenance Mindset**
As we’ve explored the six essential fluids that keep your vehicle running smoothly and safely, the message becomes crystal clear: consistent, routine checks are not merely suggestions, but fundamental pillars of responsible vehicle ownership. From the lifeblood of your engine oil and the temperature control of coolant, to the safety of brake fluid, the seamless operation of transmission fluid, the ease of power steering, and the clarity provided by windshield washer fluid—each plays an irreplaceable role. Neglecting these seemingly simple checks can lead to a cascade of problems, from diminished performance and reduced fuel economy to severe, costly damage that leaves you stranded. Empower yourself with this knowledge, make fluid checks a regular habit, and you’ll not only extend your car’s lifespan but also ensure every journey is safer, smoother, and more reliable. After all, a well-maintained vehicle is a dependable partner on the road, ready for whatever adventure lies ahead.


