
")
The feeling of unboxing a brand-new vacuum cleaner is truly unparalleled, isn’t it? That promise of pristine floors, effortlessly tackling dust bunnies, and reclaiming your home’s sparkle. For those initial uses, it’s a dream come true, a powerful ally in the never-ending quest for a clean living space. But then, something unsettling happens: after just seven uses, that mighty roar diminishes, and the once-unyielding suction starts to waver, leaving you with frustratingly half-cleaned floors and a growing sense of disappointment.
It’s disheartening to find your trusty cleaning companion suddenly struggling, especially when you’ve barely gotten acquainted with its amazing potential. You might wonder if you bought a lemon, or if there’s some secret maintenance ritual you missed. Before you resign yourself to sweeping or, even worse, contemplating an entirely new purchase, take a deep breath. The good news is that often, the reasons behind this premature dip in performance are incredibly common and, thankfully, quite simple to diagnose and fix.
As your friendly home and appliance experts, we understand this common household struggle all too well. We’ve rolled up our sleeves and delved into the heart of vacuum cleaner mechanics to bring you the inside scoop. In this comprehensive guide, we’re going to explore the most frequent culprits behind your vacuum’s sudden loss of suction, providing you with practical, actionable, and easy-to-follow steps to troubleshoot and restore its powerful performance. Let’s get that cleaning hero back to its prime!
1. **A Clogged Hose and/or Nozzle**
This is perhaps the most frequent culprit behind a vacuum’s diminished performance, and thankfully, it’s one of the easiest to spot and remedy. When debris builds up within the hose or at the nozzle, the free flow of air becomes restricted, and as the context mentions, this “lead[s] to diminished performance.” It’s like trying to drink through a straw that has a blockage—you just can’t get enough liquid through. Your vacuum operates on a similar principle, relying on unobstructed airflow to create that powerful suction.
So, how do you tackle this common issue? The first step is always to turn off and unplug your vacuum for safety. Then, give the hose and nozzle a thorough visual inspection. As Elizabeth Shields, Operations Manager for Super Cleaning Service Louisville, suggests, “If you see a blockage near the ends, just reach in and pull it out.” Often, stray socks, pieces of paper, or even clumps of pet hair are the culprits, and they’re usually easy to retrieve with your hands.
For more stubborn or deeper clogs that aren’t immediately visible or accessible, you might need a little extra help. Shields recommends, “If it seems like the gunk is stuck in there, grab something long and flexible like a broom handle and gently poke through to clear it out.” For the nozzle, a “thin tool or straightened coat hanger” can work wonders to dislodge compacted debris. Always be gentle to avoid damaging the internal components of your vacuum.
Prevention is always better than cure, right? The experts advise a quick pre-vacuuming check of your floors. “Before you start vacuuming, take a quick look around for any stray socks or coins that could clog up the machine.” This simple habit can save you a lot of troubleshooting time. Additionally, if you’re cleaning delicate areas or picking up tiny items, Shields shares a clever trick: “cover the nozzle with a piece of pantyhose and secure it with a rubber band.” This acts as a strainer, catching small items while still allowing air to flow.
2. **A Full Dust Container or Bag**
It might seem incredibly obvious, but a full dust container or bag is another primary reason your vacuum’s suction power takes a nosedive. The vacuum cleaner works by creating a pressure difference, pulling in air, dust, and debris. If the collection system is already overflowing, it simply cannot create the “necessary airflow to maintain strong suction.” Imagine trying to fill a bucket that’s already full; there’s just no room for anything else, and your vacuum feels the same strain.
For those with bagless vacuum cleaners, checking the dust canister is your first port of call. The context clearly states, “Empty the Dust Canister: A full canister decreases suction efficiency. Empty it regularly.” It’s a simple act, yet one that’s easy to overlook in the rush of daily chores. Beyond just emptying, an occasional thorough cleaning of washable canisters can make a difference. The instructions suggest to “Rinse under running water and let it dry completely before reassembling,” ensuring no mold or residual dirt impedes future performance.
If your vacuum uses bags, the principle is similar: “Check the Bag: If the bag is full, replace it with a new one.” Don’t try to squeeze a few more uses out of an overstuffed bag; it will only compromise your cleaning efforts. Moreover, the fit of the bag is equally important. “Ensure the Bag Fits Correctly: A poorly fitted bag may cause air leaks that hurt suction performance.” A bag that’s not properly seated can allow air to escape, negating the vacuum’s efforts to create strong suction.
Ultimately, regular emptying is key to maintaining peak performance. The experts wholeheartedly “recommend emptying the vacuum’s dustbin after every use.” This ensures optimal airflow and prevents the vacuum from having to work harder than necessary, which can also extend its lifespan. Making this a routine habit after each cleaning session can help keep your new vacuum feeling brand new and powerful for much longer.
Read more about: Art’s Provocative Edge: A Chronicle of the Exhibits That Ignited Uproar and Redefined Artistic Boundaries
3. **Clogged Filters**
Filters are the unsung heroes of your vacuum cleaner, diligently trapping dust particles and preventing them from escaping back into the air. However, their very effectiveness can lead to a common problem: “Clogged filters can severely restrict airflow.” When these vital components become choked with dirt and debris, the vacuum struggles to pull air through, leading to a noticeable drop in suction power. This restriction affects not only cleaning efficiency but also the motor’s health, as it works harder to compensate.
Most vacuums have at least two types of filters that require attention. The “Pre-Motor Filter: Prevents debris from entering the motor” and is crucial for protecting the vacuum’s core. Then there’s the “Exhaust Filter,” which “Cleans the air released back into your home” and ensures you’re breathing cleaner air. Both need regular inspection. The context emphasizes to “Clean or replace as recommended by the manufacturer” for the pre-motor filter and to “Make sure [the exhaust filter]’s not dirty or clogged. Clean or replace it if needed.”
When it comes to maintenance, the approach depends on your filter type. Elizabeth Shields advises, “If you’ve got washable filters, just rinse under cold water and dry completely before putting them back in. Try to check and clean them every month.” It’s absolutely critical that washable filters are completely dry before reinstallation, as a damp filter can lead to mildew and unpleasant odors. For “the disposable kind,” Shields recommends to “swap them out as recommended by the manufacturer,” often every 3-6 months, depending on usage.
Beyond visual inspection, your vacuum might actually tell you if its filters are clogged. Liam Cleverdon, Flooring Trends Expert at Flooring King, notes that “One massive indicator that the suction is being affected is the sound of the vacuum, normally it should maintain a steady loud tone, but a suction problem can lead to stuttering or whistling, indicating an issue.” Regularly cleaning or replacing filters every 1-3 months, or according to your manufacturer’s instructions, is a small effort that yields significant returns in maintaining robust suction and a healthier home environment.
Read more about: Unmasking the Silent Destroyers: 14 Everyday Driving Habits Secretly Wrecking Your Ride

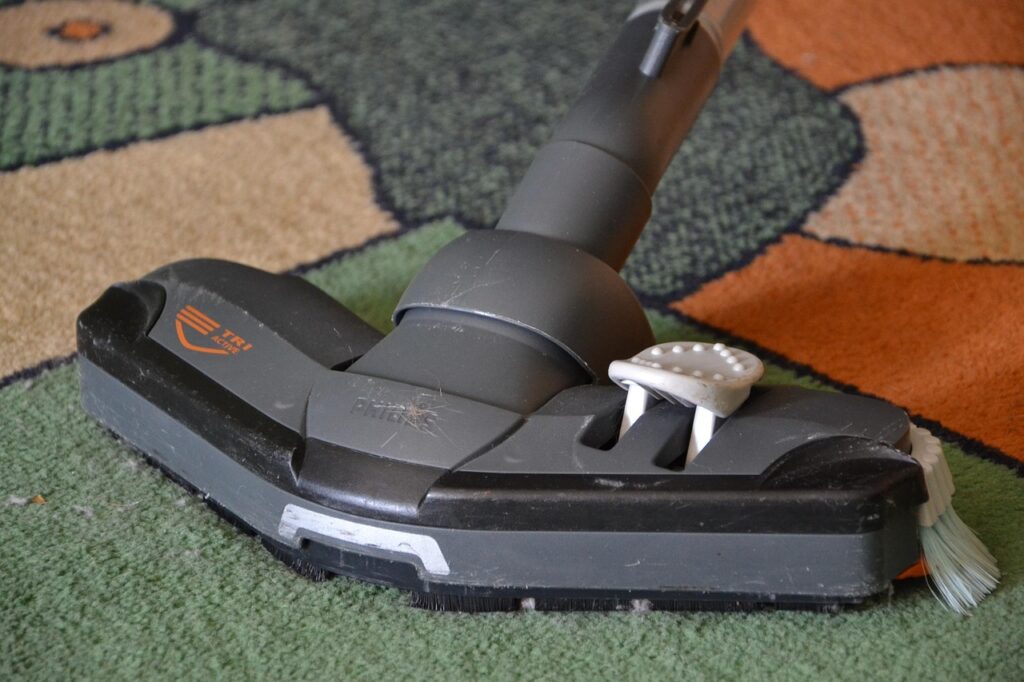
4. **A Worn or Clogged Brush Roll**
The brush roll, often located at the head of your vacuum, plays a critical role in agitating dirt and debris from carpets and hard floors, making it easier for the vacuum to pick them up. So, when this component isn’t functioning correctly, “A malfunctioning brush roll can prevent your vacuum from picking up debris effectively.” This often manifests as your vacuum pushing dirt around rather than sucking it in, making your cleaning efforts feel fruitless, especially on carpeted surfaces where agitation is key.
One of the most common issues is the accumulation of hair and fibers. As Elizabeth Shields explains, “If you’ve got pets or long hair, those can get all tangled up and clogged. That’s when you know it’s time to either clean or replace that brush roll to keep your vacuum working its best.” This tangled mess prevents the bristles from spinning freely and effectively. The solution is straightforward: “Cut and remove any debris” carefully. Shields specifically recommends, “grab a pair of scissors or a seam ripper, and carefully cut through any hair or threads wrapped around the brush roll.”
Beyond clogs, the brush roll itself can experience wear and tear over time. Shields points out, “Bristles on the brush can wear down after a while, especially if you’ve got a lot of carpet to clean.” If the bristles are visibly flattened, stiff, or missing, their ability to agitate dirt is severely reduced. She advises, “Take a good look at the bristles to see if they’re all worn out. If they’re looking pretty beat up, then it’s probably time to think about getting a new one.” A worn brush roll simply can’t do its job, no matter how strong the suction from the motor.
Regular inspection of the brush roll’s functionality is essential. After clearing any tangles, “Inspect Brush Roll Functioning: Ensure the brush roll spins freely.” If it’s still stiff or doesn’t rotate easily when manually spun (with the vacuum unplugged, of course!), there might be deeper mechanical failures at play. Keeping your brush roll in tip-top shape ensures that your vacuum not only sucks powerfully but also effectively dislodges and lifts debris, giving you that truly clean feeling you deserve.
Read more about: Why Your Car’s AC Is Struggling: A Comprehensive Guide to Diagnosis and DIY Fixes
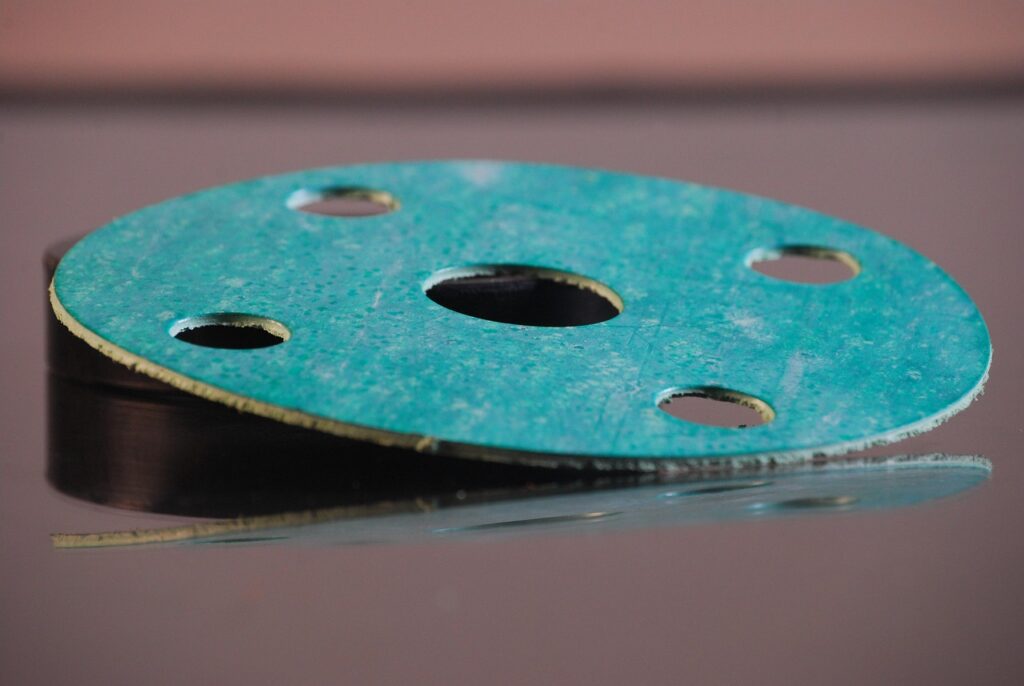
5. **Damaged or Loose Seals/Gaskets**
Think of your vacuum cleaner as a finely tuned, airtight system. Its ability to create powerful suction relies on maintaining a sealed environment, allowing it to generate the necessary pressure difference. This is where seals and gaskets come into play. They create tight connections between various components, preventing air from escaping. If these seals are “worn out, cracked, or even come loose,” as Elizabeth Shields describes, “This is super important as it stops air from leaking out and messing with the suction power.” Even a small leak can significantly compromise your vacuum’s performance.
Delah Gomasi, Managing Director & CEO of MaidForYou, highlights this issue as a common culprit, stating, “I’ve found the most common to be that either the canister or hose sealing has come loose.” These seemingly minor imperfections can allow air to bypass the intended collection path, leading to a noticeable drop in suction. It’s a bit like trying to inflate a balloon with a tiny hole—you’ll struggle to achieve full inflation, and your vacuum struggles to achieve full suction.
Identifying a damaged or loose seal requires a careful inspection of several key areas. Shields advises, “Check around the dustbin, hose connections, and motor housing.” These are the critical junctions where components meet and where seals are most often found. Look for visible cracks, tears, or areas where components don’t seem to fit snugly together. Sometimes, a seal might simply be dislodged rather than damaged, and repositioning it correctly can restore the airtight connection.
If you find seals that are a bit stiff but not completely broken, Shields suggests applying “a light coating of a silicone-based lubricant so they don’t get all stiff and crack.” However, if a seal or gasket is truly “worn out, or it might be broken,” the context clarifies, you should “Replace it with a new one.” Always ensure that “everything is properly aligned and sealed up before you start using the vacuum again” to guarantee maximum suction power. Paying attention to these often-overlooked components can make a huge difference in your vacuum’s overall efficiency.

6. **A Worn or Broken Vacuum Belt**
Beneath the surface of many upright and canister vacuums lies a crucial component that directly drives the brush roll: the vacuum belt. This often-elastic band connects the motor pulley to the brush roll, transferring power and enabling the brush to spin and agitate dirt from your carpets. The context explains that “The motor pulley turns the belt, which creates enough friction leading to a deep cleansing for your surface.” When this belt is compromised, the brush roll either spins weakly or not at all, severely impacting your vacuum’s ability to pick up debris effectively.
Over time, vacuum belts endure considerable stress. They naturally “stretch out with use causing wear and tear leading to loss of suction in a vacuum cleaner.” This stretching means the belt loses its tension and can no longer effectively turn the brush roll. Beyond simple wear, belts can also “become tangled and lead to the same problem,” often with hair or other debris getting caught. The troubleshooting guide advises to “Inspect Belts: Check for wear, tear, or breakage.” A broken belt will be immediately obvious, as the brush roll will remain stationary even when the vacuum is on.
Replacing a vacuum belt is a maintenance task that homeowners can often perform themselves, though it might require a bit of DIY confidence. The good news is that replacement belts are generally inexpensive and widely available. The general recommendation from users and makers alike is to “change your vacuum belt every three months.” This proactive approach ensures that the belt maintains optimal tension and prevents unexpected performance dips. However, if you notice issues sooner, don’t wait.
Regularly checking your belt ensures that your vacuum’s brush roll is always working at its peak, providing that deep clean you expect. If “the belt is damaged, it should be replaced as it may prevent the brush roll from spinning.” A functional belt is critical for the brush roll to effectively do its job, which in turn significantly contributes to your vacuum’s overall suction and cleaning power. Don’t underestimate the impact of this small but mighty component!
Read more about: Demystifying the Dreaded Engine Knock: Your Ultimate Guide to Diagnosis, Repair, and Prevention for a Quiet Ride

7. **Incorrect Height Settings**
Sometimes, the reason your vacuum seems to be losing suction isn’t a mechanical failure at all, but rather a simple adjustment that needs to be made. Many vacuum cleaners come with adjustable “height settings,” designed to optimize performance across different floor types. If these settings are incorrect, your vacuum might be “unable to suck up to various particles from the floor, carpet or upholstery because of the machine’s height settings.” It’s a common oversight that can dramatically affect cleaning efficiency.
The principle is quite straightforward: the vacuum’s nozzle needs to be at an appropriate distance from the surface to create the strongest possible suction. If “the height of the device may have been set at a higher level than what is suitable for the surface you are cleaning,” the suction isn’t concentrated, and air can escape around the nozzle, reducing its effectiveness. This is particularly noticeable on hard floors or low-pile carpets, where too high a setting means the brush roll might not even make contact, or the suction just isn’t focused enough to lift debris.
Fortunately, adjusting the height setting is typically a quick and easy fix. “Most vacuum cleaners have a knob or a dial that allows you to adjust the height.” Simply consult your vacuum’s user manual to locate this control, and then “Lower the height by turning the dial” for hard floors or low-pile carpets. For thicker carpets, you might need to raise the setting slightly to allow the brush roll to move freely and agitate the fibers without getting bogged down.
Optimizing your height settings ensures that your vacuum creates a more focused and powerful suction. The context emphasizes, “Adjust height settings to optimize suction for various surfaces; lower settings work better on hard floors.” This small adjustment can make a world of difference, preventing your vacuum from just pushing debris around and ensuring it efficiently picks up every bit of dust and dirt, transforming your cleaning experience from frustrating to incredibly effective. It’s often the simplest solutions that make the biggest impact!”
Now that we’ve tackled the immediate and most common culprits behind your vacuum’s waning power, it’s time to delve deeper into the mechanical and systemic issues that can affect its long-term performance. Sometimes, the problem lies beyond simple clogs or dirty filters, extending into the very heart of the machine. Understanding these more intricate reasons, from motor health to internal component wear, will empower you to keep your vacuum running like a dream for years to come. Let’s uncover these deeper issues and arm you with the knowledge to maintain lasting cleaning power.
Read more about: Global Ford Recall Alert: Essential Guide to Rearview Camera Failures Impacting Millions of Mustang, F-150, and Super Duty Models

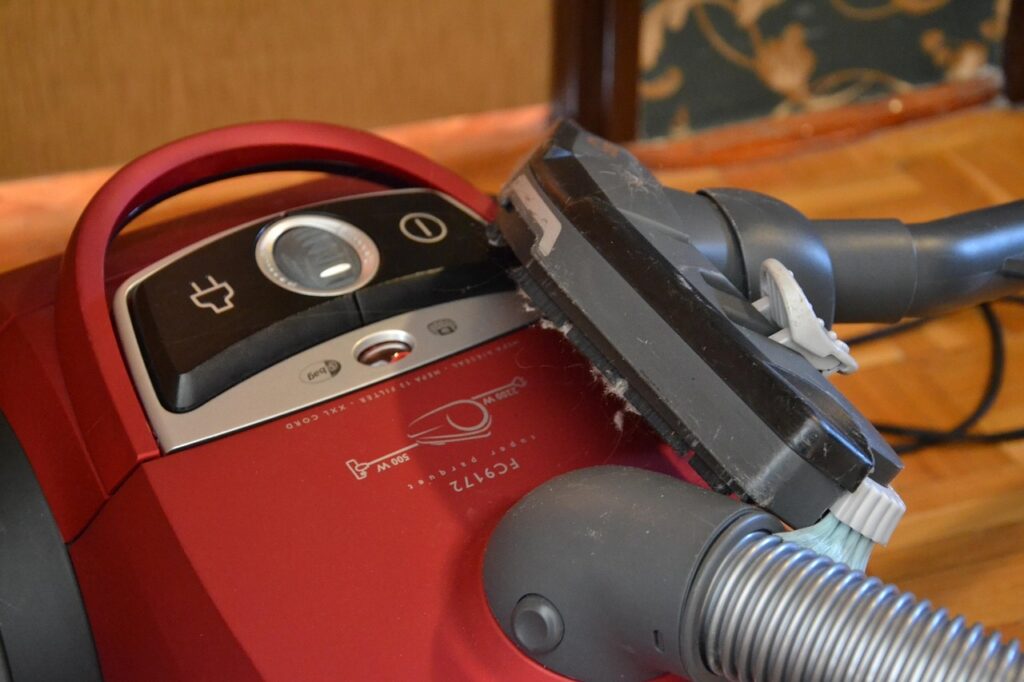
8. **Faulty Motor**
The motor is the absolute heart of your vacuum cleaner, the powerhouse that drives the entire suction mechanism. It’s responsible for creating that essential pressure difference that pulls in air, dust, and debris, allowing your vacuum to perform its fundamental job. As the context emphasizes, the motor “Powers the suction mechanism,” so when this core component begins to falter, a noticeable and frustrating loss of suction is an almost inevitable outcome, turning your once-powerful cleaner into a struggling machine.
Identifying a motor issue often comes down to listening to your vacuum. You might notice unusual sounds that weren’t there before, indicating that the motor is working harder than it should be, or failing to work efficiently. The troubleshooting guide advises, “Listen to Motor Sounds: Unusual sounds might indicate motor issues. If the motor seems to be struggling, it may need replacement.” These sounds can range from a high-pitched whine to grinding or roaring, distinct from the vacuum’s usual steady hum.
Experts like Elizabeth Shields note that if your vacuum is making “odd ‘clank- clank’ and isn’t functioning like it usually does,” it’s a clear sign of a potential motor fault. High-pitched sounds can often suggest air escaping or blockages causing strain, while grinding noises might indicate a deeper mechanical problem within the motor itself or related components like the brush roll. These auditory clues are your vacuum’s way of telling you it’s in distress and needs attention.
Unfortunately, motor problems are typically not DIY fixes for the average homeowner. If you’ve addressed all the simpler issues like clogs and filter maintenance, and the unusual sounds or lack of suction persist, it’s time to consider professional help. The context clarifies, “Issues such as motor failure or advanced electrical problems often require specialized knowledge and tools to fix.” Attempting to repair a motor without the right expertise could void your warranty or cause further damage, so don’t hesitate to reach out to a professional repair service.
Read more about: America’s Iconic Sports Car: Decoding the Most Problematic Corvette Models in History to Help You Buy Smart

9. **Damaged Hoses (Cracks or Tears)**
While we touched upon clogged hoses earlier, the structural integrity of the hose itself is another critical factor in maintaining powerful suction. The vacuum’s hose acts as the vital conduit, collecting “the dust and debris from the surface and deposits it into the collection bag.” If this pathway isn’t perfectly sealed, you’re going to experience a significant drop in performance. Even a small crack or tear can compromise the vacuum’s ability to create and sustain the necessary airflow for effective cleaning.
Imagine trying to drink through a straw with a hole in it—you’d mostly suck air, right? Your vacuum operates on the same principle. The context clearly states that “Cracks lead to the system becoming not airtight and thus resulting in loss of suction for your vacuum cleaner.” These leaks, no matter how tiny, allow air to escape before it reaches the collection system, making your vacuum work harder without delivering the desired cleaning power. It’s a frustrating scenario when you’re diligently vacuuming, but the dirt just isn’t disappearing.
Inspecting your hose for damage should be a regular part of your vacuum maintenance routine. Carefully detach the hose and flex it, looking and feeling for any visible cracks, tears, or perforations. Sometimes, these small imperfections are hard to spot but can be felt as weakened areas. If you discover a small crack, the context offers a quick, temporary fix: “use silicon putty to cover it up and make the hose airtight again.” This can buy you some time and restore some suction in the short term.
However, if the damage is extensive, or if the silicon putty doesn’t fully restore suction, it’s a sign that the hose needs to be replaced. Continuing to use a heavily damaged hose will only lead to continued frustration and inefficient cleaning. Proactive inspection, ideally monthly, helps catch these issues early, as the advice to “Regularly check hoses and attachments for clogs or tears to ensure maximum suction performance” is key to preventing major suction loss.

10. **Broken Fan Blades**
Beyond the motor and the hose, a less commonly considered but equally critical component for generating suction is the fan. Nestled within your vacuum, the fan blades work in conjunction with the motor to create the powerful airflow that literally lifts dirt and debris from your surfaces. As the context explains, “The electric motor causes the fan to rotate, which creates the suction that enables the vacuum to collect dust particles from different surfaces.” If these blades are compromised, the entire suction process is significantly hindered.
A direct hit from a hard object, accidental drops, or even just long-term wear and tear can lead to a fan blade breaking. When this happens, the fan can no longer efficiently displace air and create the crucial pressure difference needed for suction. The context is very direct about this: “The fan blades may break, which means that they will not be able to rotate and collect dust from the surface you are cleaning.” This means your vacuum will struggle to pull in any particles, no matter how powerful its motor might otherwise be.
If you suspect a broken fan blade, you’ll likely notice a dramatic and sudden drop in suction, possibly accompanied by unusual noises or vibrations, as the fan becomes unbalanced. While checking this component might involve a bit more disassembly than a simple filter swap, it’s an important step in comprehensive troubleshooting. The solution, fortunately, is straightforward if you’re comfortable with a little DIY: “If you find that a fan blade has broken replace the fan with a new one to get a fully functioning vacuum cleaner again.”
Ensuring your fan blades are intact and spinning freely is paramount to your vacuum’s overall performance. Without a properly functioning fan, the motor’s power is essentially wasted, and your vacuum cannot generate the consistent, strong airflow required for effective cleaning. This means that even if every other component is in perfect working order, a broken fan blade can single-handedly bring your cleaning efforts to a frustrating halt.
Read more about: Wait, What?! These 14 Celebrities Actually Dated Their Onscreen Family Members

11. **Overall Air Leaks in the System**
Your vacuum cleaner is designed to be a sealed, airtight system, and any breach in this seal, no matter how small, can lead to a significant drop in suction power. While we’ve discussed specific issues like damaged seals and cracked hoses, it’s important to consider the broader concept of overall air leaks throughout the entire system. “If there is any form of leakage that prevents the system from being airtight, then the vacuum will lose its suction,” the context clarifies, highlighting the fundamental importance of this sealed environment.
These air leaks can manifest in various ways and are sometimes more elusive than a single, obvious crack. They can arise from components not being properly seated after maintenance, such as a dust bag that doesn’t fit snugly or a canister that’s not quite clicked into place. Even a poorly fitted bag, as the context points out, “may cause air leaks that hurt suction performance.” This allows air to escape through unintended pathways, bypassing the nozzle and significantly reducing the vacuum’s ability to pull in dirt and debris effectively.
The challenge with overall air leaks is that they can be cumulative. A tiny gap here, a slightly warped plastic casing there, and a minor tear in an attachment can all add up, creating multiple points where suction is compromised. Each tiny escape route contributes to a less efficient machine, forcing the motor to work harder to achieve diminishing returns. It’s a bit like trying to fill a bucket that has several small holes – it’s a constant battle against escaping pressure.
To troubleshoot for these more general leaks, you need to be thorough. After checking specific seals and hoses, give your entire vacuum a meticulous inspection, paying attention to all connections, joints, and where different sections of the machine meet. Listen for any subtle whistling sounds while the vacuum is running (with attachments removed to isolate the main body) or feel for escaping air. Ensuring every component is correctly aligned and tightly sealed is a key step in reclaiming that lost suction and ensuring your vacuum operates at its peak efficiency.
Read more about: Is It True? The Wild Rumor About Beyoncé and a Stolen Master Recording: An Unpacking of the Atlanta Theft

12. **Neglecting Regular Preventive Maintenance**
It’s easy to think of vacuum cleaner maintenance as something you only do when a problem arises, but the truth is, a proactive approach can save you a world of trouble and expense down the line. One of the overarching reasons for a new vacuum losing suction, especially after a mere seven uses, can be a fundamental lack of consistent preventive maintenance from the start. The context provides clear guidance: “To keep your vacuum cleaner operating efficiently, consider implementing a regular maintenance schedule.” This isn’t just about fixing; it’s about preventing.
Neglecting simple, routine tasks, even if your vacuum is brand new, can quickly lead to a cascade of issues. For instance, consistently failing to empty the dust container means the vacuum is constantly fighting reduced airflow, even if it’s not completely full. Similarly, not cleaning filters frequently allows dust to build up, progressively choking the vacuum’s breath, long before they become visibly ‘clogged.’ These small oversights, compounded over a short period, can prematurely age your machine and diminish its efficiency.
The key to preventing this decline is to integrate specific actions into your cleaning routine. The preventive maintenance tips highlighted in the context are your roadmap: “Empty the Dust Container Regularly,” “Clean Filters Frequently,” “Inspect Hoses and Attachments Monthly,” and “Keep Brush Rolls Clean.” These aren’t just suggestions; they are the bedrock of maintaining optimal suction and preventing the accumulation of the very issues we’ve discussed, from clogs to strained motors.
Embracing these preventative habits is not just about avoiding immediate suction loss; it’s about enhancing the overall lifespan and performance of your appliance. “Regular maintenance not only helps avoid suction loss but enhances the longevity of your vacuum cleaner,” ensuring it remains a reliable partner in your quest for a clean home. By investing a small amount of time regularly, you protect your investment and ensure your vacuum continues to deliver that powerful, pristine clean you expect.
Read more about: Maximize Your Miles: The Definitive Guide to Electric Scooter Battery Lifespan and Care

13. **Aging and General Component Wear**
While a new vacuum losing suction after just seven uses is certainly a cause for concern, it’s also important to acknowledge that all mechanical devices, including your trusty vacuum cleaner, are subject to the effects of aging and general wear and tear over time. Even if individual parts like the belt or brush roll have been replaced, a general degradation of internal components can contribute to a systemic loss of efficiency. The context notes that “Over time, components such as the motor, belts, or brush rolls can wear down or become damaged, negatively affecting your vacuum’s suction capabilities.”
This kind of widespread wear goes beyond a single, fixable problem. It’s the cumulative effect of constant vibration, friction, and exposure to dust and debris on every part, from internal wiring to plastic casings and connecting joints. A vacuum that “can no longer pick up debris efficiently often indicates that substantial internal issues have developed, such as motor problems or extensive wear and tear on crucial components like the brush roll or hose,” as the context explains. It’s not just one thing, but a collection of small degradations that lead to a less powerful machine.
When you find yourself constantly troubleshooting, replacing parts, and still battling with diminished suction despite your best maintenance efforts, it might be a sign that your vacuum is simply reaching the end of its useful life. The context suggests that if your vacuum is “over 8 to 10 years old and you frequently face issues that affect its performance, it may be more cost-effective to invest in a new model.” At a certain point, the cost and effort of continuous repairs outweigh the benefits.
Considering a new model isn’t just about giving up on your old one; it’s also about leveraging advancements in technology. “Modern vacuums often come with advanced features and technology that can improve cleaning efficiency, dust filtration, and overall user convenience.” Sometimes, the most practical solution for persistent suction problems is to retire your aging appliance and embrace the enhanced power and features of a new, efficient model, ensuring your cleaning routine remains effortless and effective.
Read more about: America’s Iconic Sports Car: Decoding the Most Problematic Corvette Models in History to Help You Buy Smart
14. **Attachments and Their Impact**
Attachments are not just accessories; they are integral components designed to extend your vacuum’s versatility and cleaning reach into nooks, crannies, and specialized surfaces. Just like the main hose, these attachments are part of the vacuum’s crucial airflow system, helping to “conduct[] suction from the nozzle to the dirt container.” Therefore, their condition and correct usage have a direct and significant impact on your vacuum’s perceived and actual suction performance. A powerful vacuum with compromised attachments is like a superhero without their tools.
Similar to the main hose, attachments are susceptible to blockages and damage. Small pieces of debris, pet hair, or lint can easily accumulate within the narrow openings or internal channels of crevice tools, upholstery brushes, or extension wands, creating resistance to airflow. The context advises, “Regularly check hoses and attachments for clogs or tears to ensure maximum suction performance.” Ignoring these smaller, often-used components can lead to a gradual but frustrating decrease in your vacuum’s ability to clean specific areas effectively.
Furthermore, the context briefly mentions “Incorrect Settings or Attachment Use” as a common reason for suction loss. While we covered height settings, using the *wrong* attachment for a specific task, or not using an attachment at all when one is clearly needed, can make your vacuum seem underpowered. For example, trying to deep clean pet hair from upholstery without the appropriate brush attachment will yield poor results, not necessarily because the vacuum’s motor is weak, but because the wrong tool is being used for the job.
To ensure your attachments aren’t contributing to suction woes, make a habit of visually inspecting them before and after use. Clear any visible debris, ensuring all pathways are unobstructed. If an attachment is cracked or broken, replace it, as it will inevitably cause an air leak. And always select the right tool for the task at hand—your vacuum is only as effective as the attachment guiding its powerful suction, ensuring you get that truly spotless finish you’re aiming for.
Read more about: The Enduring Power of a Name: Unveiling the Lives and Latest Chapters of Notable Williams, from Royalty to Hollywood’s Beloved Icon
So, there you have it! From simple clogs to deeper mechanical issues, and the vital role of consistent maintenance, we’ve covered the most common reasons your new vacuum cleaner might be losing its powerful suction. It’s clear that a little proactive attention, regular inspections, and a willingness to troubleshoot can go a long way in bringing your cleaning hero back to its prime. Remember, your vacuum is an investment in a cleaner, healthier home, and with these tips, you’re now equipped to keep it performing at its best, ensuring pristine floors and a sparkling living space for countless cleaning sessions to come. Happy vacuuming!


")