If you’ve found yourself increasingly frustrated with your iPhone’s battery indicator plummeting before the day is out, you’re certainly not alone. Many users instinctively blame the age of their device, resigning themselves to a life tethered to a charger or perpetually stuck in Low Power Mode. While it’s true that all phone batteries experience natural degradation over time, the real culprit often lies not with the hardware itself, but with a collection of ‘hidden’ settings quietly siphoning power in the background.
Indeed, your iPhone is packed with features designed to enhance user experience, from fluid animations and immersive haptic feedback to always-on displays and dynamic widgets. However, the convenience and aesthetic appeal of these features come at a cost – a continuous draw on your precious battery. The good news is that you don’t need to sacrifice the core functionality of your expensive device or invest in a new phone to gain hours of extra life. With a few targeted adjustments, you can reclaim significant battery power and enjoy your iPhone for much longer.
Before you even consider buying a new device, it’s wise to check your Battery Health menu (Settings > Battery > Battery Health & Charging; anything above 80% capacity is generally considered decent). Once you’ve assessed your battery’s fundamental condition, you’re ready to make impactful changes. We’re not talking about extreme measures like dimming your screen to 1% or constantly using Low Power Mode, which can compromise the iPhone experience. Instead, we’ll guide you through actionable tweaks to power-hungry settings that make a genuine difference without turning your device into a joyless slab of metal. Let’s dive into the first six adjustments that can instantly start saving your battery.

1. Turn Off Lock Screen and Home Screen Widgets
Widgets, while incredibly convenient for quick glances at information like weather, sports scores, or calendar events, are notorious battery culprits. The issue stems from their fundamental design: to display up-to-date information, widgets on your lock screen and home screen force their associated apps to run automatically in the background. This constant activity involves continuously fetching data and updating information, which, in turn, continuously drains power.
Because these apps are perpetually running to refresh widget data, they are constantly consuming processing power and engaging your device’s network capabilities. This background operation, even if seemingly minor for each individual app, accumulates significantly across multiple widgets. If you want to help preserve battery on iOS, the best thing to do is simply avoid widgets on your lock screen and home screen altogether, especially resource-heavy ones like Smart Stacks.
The easiest way to address this is to switch to another lock screen profile that doesn’t have any widgets. You can do this by pressing your finger down on your existing lock screen and then swiping around to choose a widget-free option. If you prefer to keep your current wallpaper but remove the widgets, press down on your lock screen, hit ‘Customize,’ choose the ‘Lock Screen’ option, tap on the widget box, and then hit the ‘—’ button on each widget to remove them. Similarly, for home screen widgets, simply hold down on a widget or an empty screen area until everything starts ‘jiggling,’ and then tap the minus button to remove unneeded widgets.
Consider how often you genuinely use a particular widget. If you can’t recall the last time you interacted with it, it’s a strong indicator that you might as well remove it and simply open the app when needed. This approach not only conserves battery by preventing constant background updates but also helps declutter your often-crowded home screen, freeing up valuable visual space. Your apps will still update when you open them directly, but they won’t be working constantly in the background, which is a significant power-saving change.
Read more about: Navigating the Digital Road: Which Car Infotainment System Is Easiest to Use in 2025?
2.Reduce UI Motion and Visual Effects
Your iPhone’s user interface is celebrated for its sleek, fluid animations and visual tricks. From the smooth motion of opening and closing apps to the vibrant burst of color when you activate Siri with Apple Intelligence, these aesthetic flourishes bring the slab of metal and glass to life. They create an immersive and polished user experience, contributing to iOS’s renowned intuitiveness and appeal. However, these constant visual processes are not purely decorative; they require continuous GPU processing, which directly consumes battery power.
Features like the parallax wallpaper effect, which makes your background appear to shift slightly as you move your phone, and the various app opening transitions, while fun and engaging, are constantly demanding resources. Every subtle animation and transition, including Siri’s colorful activation, contributes to the processing overhead. This continuous processing, especially during periods of heavy usage, steadily drains your battery in the background. While the individual impact of one animation might seem small, their cumulative effect throughout the day can be substantial.
Fortunately, iOS provides a solution to minimize these battery-consuming visual flourishes without compromising core functionality. By enabling the ‘Reduce Motion’ setting, you can opt for subtler animations across iOS. To do this, navigate to ‘Settings’ > ‘Accessibility’ > ‘Motion’ and toggle on ‘Reduce Motion.’ This adjustment streamlines the visual experience, replacing complex animations with simpler crossfades or static movements.
Enabling ‘Reduce Motion’ means your iPhone will feel slightly less flashy, but significantly more efficient. It maintains the full functionality of iOS while drastically reducing the processing overhead associated with constant animations and visual effects. This setting becomes particularly valuable during heavy usage periods, where every bit of battery life matters, ensuring your device remains operational for longer without frequent recharges.
Read more about: Beyond the Buzz: Unpacking the Hidden Nausea of Next-Gen EVs and How Tech is Tackling Car Sickness
3. Disable Keyboard Haptic Feedback
Keyboard haptic feedback, a feature that provides a subtle vibration with each keystroke, was a welcome addition to iPhones with iOS 16. Prior to this update, iPhone keyboards only offered auditory click-clack sounds. The introduction of haptic feedback aimed to create a more immersive and tactile typing experience, adding a physical response to digital input, which many users found appealing and satisfying. This small vibration for every key you hit gives a sense of physical interaction that enhances the overall user experience.
However, this seemingly minor feature comes with a direct impact on battery life. According to Apple itself, on an official support page regarding the keyboard, haptic feedback “might affect the battery life of your iPhone.” While Apple does not provide specific details on the exact amount of battery life this feature drains, the implication is clear: enabling haptic feedback contributes to increased power consumption. The reason is simple: every single keystroke activates the iPhone’s vibration motor, and considering how much typing we do on our phones daily, these tiny, continuous vibrations add up quickly over time.
It’s important to note that keyboard haptic feedback is not enabled by default. If you’ve turned it on yourself, or if you’re unsure, you can easily disable it to conserve battery. To do so, go to ‘Settings’ > ‘Sounds & Haptics’ > ‘Keyboard Feedback’ and toggle off ‘Haptic.’ By doing this, you eliminate the constant activation of the vibration motor, which can lead to noticeable battery savings, especially for heavy texters or those who type frequently throughout the day across various apps.
Even without haptic feedback, you’ll still hear keyboard clicks if sound feedback is enabled, maintaining an auditory cue for your typing. The primary goal here is to remove the power-hungry vibration component, ensuring that your iPhone’s battery is reserved for more essential functions. This small tweak can have a surprisingly significant cumulative effect on your device’s daily endurance.
Read more about: Wirecutter’s In-Depth Review: Unpacking the Best Standing Desks After Real-World Testing

4. Manage Background App Refresh
One of the most persistent smartphone myths, which Apple has explicitly debunked, is the idea that closing out your apps in the App Switcher saves battery. In fact, Apple has stated that it actually consumes *more* battery to kill your apps than to simply swipe them away and let the system automatically freeze them in the background. This is because completely closing an app means it has to perform a full restart when you next open it, which is more resource-intensive than resuming a frozen background process. The true key to saving battery isn’t closing apps, but controlling their background activity.
Instead of compulsively swiping away apps, you should focus on managing which applications are allowed to update and run off-screen using the ‘Background App Refresh’ setting. This feature allows apps to fetch new content in the background, such as updating your social media feed, downloading new emails, or syncing cloud data, even when you’re not actively using them. While convenient, having too many apps constantly refreshing in the background is a significant drain on your battery, as it involves continuous network activity and processing power.
To take control of this, head to ‘Settings’ > ‘General’ > ‘Background App Refresh.’ Here, you’ll find a comprehensive list of all your installed apps, most of which are typically toggled ‘On’ by default. The recommendation is to toggle off as many as you reasonably can. It’s a personal choice, but generally, you should consider leaving this setting on for your most critical apps—those that rely on push notifications (like email clients and messengers) or apps that genuinely need to update quietly in the background (such as productivity tools or map applications to maintain location accuracy).
Disabling Background App Refresh for a significant portion of your apps can potentially save a substantial amount of battery life throughout the day. If you’re unsure which apps are the biggest offenders, your iPhone provides incredibly detailed metrics in ‘Settings’ > ‘Battery,’ showing how much power each app consumes, even when hidden off-screen. These statistics will make it glaringly obvious which apps need their background activity restricted, allowing you to make informed decisions for optimal battery conservation.
Read more about: Mitzi Gaynor, the Effervescent Song-and-Dance Queen, Dies at 93: A Legacy of Razzle-Dazzle and Hollywood Charm
5. Limit Unnecessary Location Services
Your iPhone, with its array of sophisticated sensors and connectivity options, has the capability to track your full location history in the background. While Apple has implemented strict limitations on how and when apps can access this information, the process of pinpointing your position is inherently power-intensive. It requires your iPhone to actively engage its Wi-Fi, cellular, and GPS radios to triangulate your exact position, a process that consumes battery with every request.
Even apps that you’ve already stopped from background-refreshing might still be requesting location data. This isn’t necessarily nefarious activity; it could be as benign as a weather app attempting to provide up-to-date forecasts for your current location, or a navigation app ensuring it’s ready for your next trip. However, each instance of an app firing up these radios for location services contributes to battery drain. Consequently, fewer apps with location permissions translates to less wasted battery, generally speaking, and greater privacy for you.
To manage this, navigate to ‘Settings’ > ‘Privacy & Security’ > ‘Location Services.’ Here, you can review each app’s location permissions. The critical setting to scrutinize is how many apps have their location access set to ‘Always.’ This allows an app to track your location even when it’s not actively in use. The ‘While Using’ option is preferable, as it means the app will only access your location when it’s active on screen. Even then, it still drains battery, so the most conservative approach for non-essential apps is to set location permissions to ‘Never.’
Furthermore, consider Apple’s own system services and other features that may be using your location. For example, if you’ve shared your location with another iPhone user, that automatic sharing can also take a toll on your battery. Every time that person requests your location or even opens ‘Find My,’ your device updates its position. This drain can be more significant than the average app, as your location may be updated more frequently. For one-time needs, alternatives like sharing your ETA via Maps or using the ‘Check In’ feature in Messages are far more battery-friendly solutions than 24/7 tracking.
Read more about: Beyond the Dashboard: Unmasking the Shocking Data Collection Habits of Your Connected Car
6. Enable Dark Mode
Modern iPhones, specifically those since the iPhone X released in 2017, come equipped with OLED screens. Beyond offering superior color contrast and truly deep blacks, OLED technology boasts a significant advantage in energy efficiency compared to traditional LCD displays. This efficiency is a direct result of how OLED screens render black colors. Unlike LCDs, which struggle to produce true black (often resulting in a murky backlight), individual OLED pixels can switch off entirely. When a pixel is off, it consumes no power, creating gorgeous, deep blacks that conveniently save energy.
This fundamental difference in display technology means that using dark mode-enabled apps can lead to remarkable energy savings. Some tests have concluded that adopting dark mode can reduce energy consumption by as much as two-thirds in certain scenarios, drastically extending your device’s operational time between charges. The less white or bright colors your screen displays, the more pixels are off or running at lower intensity, directly translating to less power drawn from your battery. It’s a simple, aesthetic change with a powerful impact on endurance.
Beyond the tangible battery benefits, dark mode offers additional advantages. Other research suggests that using dark mode may also ease eye strain, especially in low-light environments, and can even contribute to better sleep patterns by reducing exposure to bright blue light before bed. These are all significant ‘pluses’ with virtually no ‘minuses’ in terms of user experience, making it a highly recommended adjustment for almost any iPhone user looking to optimize their device.
To enable Dark Mode on your iPhone, simply go to ‘Settings’ > ‘Display & Brightness’ and select ‘Dark.’ Apple apps will automatically switch to the dark theme, and many third-party apps also support it. If you’re not a fan of constant dark mode, you can still leverage its battery-saving benefits by letting it enable automatically at night, when it makes the most sense. This allows you to save battery during late hours while still enjoying Apple’s default light mode during the day if you prefer. This ensures you get the best of both worlds: aesthetic preference and intelligent battery management.
Navigating beyond the foundational tweaks, we now delve into another set of advanced and often-overlooked iPhone settings that can dramatically extend your device’s longevity. These adjustments focus on how your iPhone interacts with cellular networks, manages notifications, processes AI suggestions, handles charging, and controls display features, offering smarter ways to conserve power without compromising your overall user experience. By making these thoughtful changes, you can unlock even more hours of precious battery life, freeing you from the constant search for a charger.
Read more about: Banned from the Big Screen: Iconic Moments That Sparked Outrage and Censor’s Fury
7. Optimize 5G Usage
While 5G promises lightning-fast speeds and enhanced connectivity, it often comes at a direct cost to your iPhone’s battery life. The advanced radio technology required for 5G connectivity consumes more power than its 4G LTE predecessor. If you find yourself in an area with inconsistent 5G coverage or simply don’t require the absolute fastest speeds for your daily tasks, actively managing your 5G settings can yield significant battery savings.
Apple attempts to mitigate this with a feature called Smart Data, which aims to automatically switch between 4G LTE and 5G based on your needs, theoretically saving battery. However, even with Smart Data, consistent 5G usage can still be a drain. Manually setting your iPhone to prioritize LTE can provide a more consistent battery experience, especially when streaming video or downloading large files on the go isn’t your primary concern.
To take control of your 5G settings, head to ‘Settings’ > ‘Cellular’ > ‘Primary’ > ‘Voice & Data.’ Here, you’ll find options to choose between ‘5G On,’ ‘5G Auto’ (which is Smart Data), and ‘LTE.’ Selecting ‘LTE’ will ensure your iPhone uses the more power-efficient 4G network for all data activities. If you prefer to stick with 5G but want to manage data consumption, you can also explore ‘Data Mode’ settings.
Within ‘Settings’ > ‘Cellular’ > ‘Primary’ > ‘Data Mode,’ you’ll find three choices: ‘Allow More Data on 5G,’ ‘Standard,’ and ‘Low Data Mode.’ The ‘Allow More Data on 5G’ option prioritizes high-quality video, FaceTime, faster updates, and HD streaming, which, while offering a premium experience, will consume significantly more battery. Opting for ‘Standard’ or ‘Low Data Mode’ can help curb excessive data usage and, by extension, reduce the constant power draw from your cellular modem.
Read more about: Beyond the Buzz: Unpacking Why Car Subscription Services are Driving the Future of Automotive Mobility
8. Disable Always-On Display
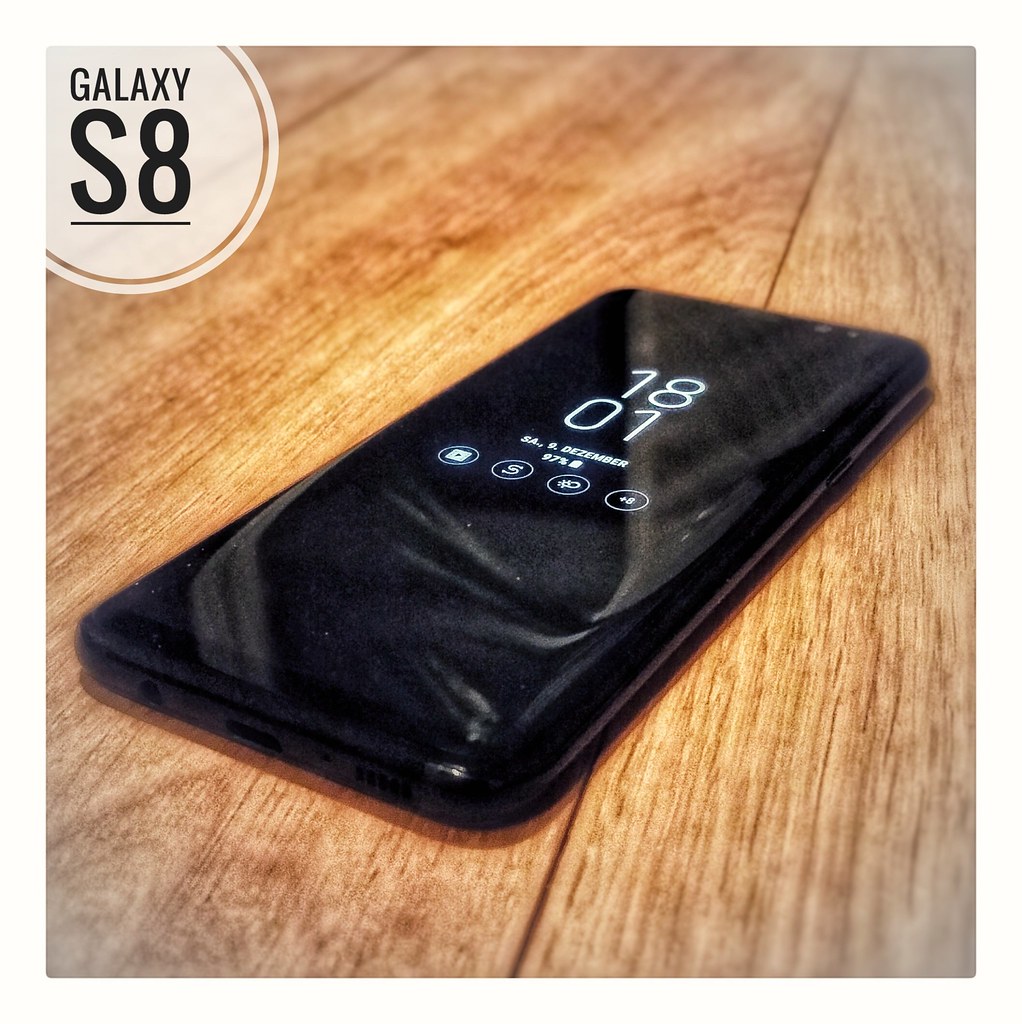
Introduced with newer iPhone models, the Always-On Display is a convenient feature that keeps a dimmed version of your lock screen visible, showing time, widgets, and notifications without requiring a tap. It provides an immediate glance at essential information, keeping you connected at a glance. However, this convenience comes at a significant power cost, as the screen, even when dimmed, is still technically active and consuming energy.
Some testing in real-world scenarios has suggested that the Always-On Display feature can “gobble up a whopping 20% of battery in 24 hours.” This is a substantial drain for a feature that many users might find adds little to their essential daily workflow, especially when compared to simply tapping the screen to wake it. For those truly focused on maximizing battery life, parting ways with this specialized display feature can make a noticeable difference.
Fortunately, disabling it is straightforward. To turn off the Always-On Display entirely, navigate to ‘Settings’ > ‘Display & Brightness’ > ‘Always-On Display’ and simply toggle the feature off. If you appreciate the concept but want to reduce its impact, you can also keep the Always-On Display enabled but “turn off the Show Wallpaper setting” within the same menu. This ensures only essential information like the time is displayed, rather than the more power-intensive wallpaper.
Beyond just battery savings, disabling the Always-On Display can also inadvertently boost your productivity. With your screen no longer constantly showing notifications or your wallpaper, you’re less likely to be distracted by the device’s always-visible elements in the corner of your eye. This small change can encourage a more mindful approach to phone usage, helping you focus on the task at hand rather than being pulled into your digital world every few minutes.
Read more about: The 14 Car Features Drivers Are Paying For But Rarely Use: An Expert Dive Into Unutilized Tech
9. Leverage Scheduled Summary for Notifications
In our always-on world, notifications constantly buzz, ding, and illuminate our screens, each demanding a piece of our attention and, crucially, a slice of our battery life. While urgent messages and calls warrant immediate alerts, many notifications — from app updates to social media likes — don’t require instant action. Every time your screen flashes on to display a new alert, however brief, it consumes energy, and these small, frequent activations accumulate into a significant drain over the course of a day.
This continuous barrage of alerts can not only be distracting but also contribute to your iPhone’s battery woes. The feature of your phone’s screen “flashing on and off all day like Christmas lights uses energy, however little.” To combat this, Apple introduced ‘Scheduled Summary,’ an intelligent feature designed to bundle non-urgent notifications and deliver them in a neat package at specific, predetermined times throughout your day.
To implement this clever battery-saving and focus-enhancing feature, go to ‘Settings’ > ‘Notifications’ > ‘Scheduled Summary.’ Here, you can toggle it on and then choose the exact times you’d like your bulk deliveries of notifications to show up. You can set multiple summary times to fit your schedule, ensuring you receive updates without constant interruptions.
Crucially, implementing Scheduled Summary does not mean you’ll miss critical alerts. Urgent notifications, such as calls, direct messages, or ride-share updates, will still break through immediately, ensuring you’re never out of the loop for truly important communications. The primary benefit is preventing your screen from repeatedly activating for less critical information, thereby conserving battery and helping you maintain focus without the constant temptation to check your phone.
Read more about: Ford’s Hybrid Fire Risk: An In-Depth Consumer Report on Escape, Corsair, and Maverick Recalls
10. Turn Off Siri Suggestions and ‘Learn from This App’
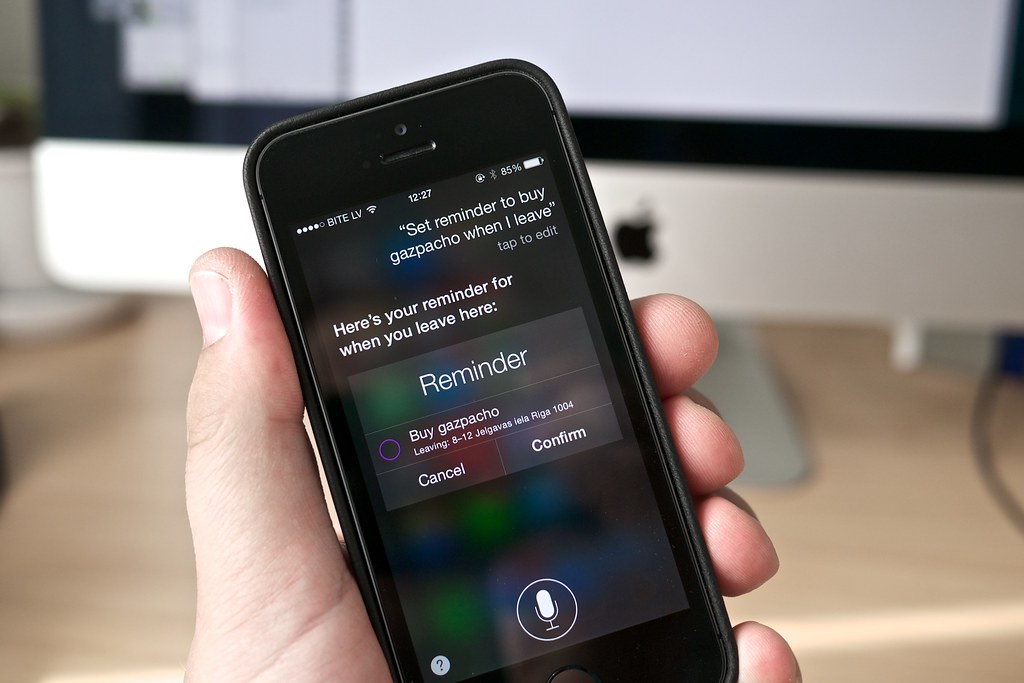
Your iPhone is constantly working to be smarter, more proactive, and more helpful through features like Siri Suggestions. This includes Siri learning your usage patterns within apps, suggesting apps you might want to open, or even providing “suggestion notifications.” While this personalized experience might seem convenient, the underlying processes require continuous background activity, observation, and data analysis, which are all significant consumers of battery power.
As one tech expert, Joe George, explained, these particular settings “do nothing but spy on your habits and eat up your battery life at lightening speed.” The constant data collection and processing for these suggestions mean that your iPhone’s processor is frequently engaged, even when you’re not actively using Siri. This silent background work contributes to unnecessary battery drain, compounding over time depending on the number of apps you have installed.
Disabling these features is a smart move for anyone prioritizing battery life and even a bit of privacy. To manage these settings, navigate to ‘Settings’ and then tap on ‘Siri & Search’ (or ‘Apple Intelligence and Siri,’ depending on your iOS version). Scroll down to the ‘Apps’ section, where you’ll find a list of all your third-party applications.
You’ll need to go into each app individually. For each app, it is “highly recommended you turn off ‘learn from this app’, ‘suggest app’ and ‘suggestion notifications’.” As Joe George further elaborated, “There is absolutely no reason why Siri should be learning from this app, let alone allowing suggestions to appear in search and in widgets.” By toggling these off, you instantly boost battery performance and ensure your iPhone is only expending power on tasks you explicitly control.
Read more about: AI Chatbot Showdown: We Tested 9 Popular Tools – Here’s Our Unbiased Winner
11. Set an Optimal Battery Charge Limit
While modern iPhone batteries are designed for thousands of charge cycles, their overall lifespan can be significantly impacted by how they are charged. Lithium-ion batteries, which power your iPhone, generally last longer if they don’t consistently stay fully charged to 100% for extended periods. This is why many experts recommend keeping your battery between 20% and 80% charge for optimal long-term health, but Apple has also introduced a more direct solution.
For users with an iPhone 15 or newer, Apple has provided a built-in feature to manage this: the ‘Charge Limit.’ This setting allows you to prevent your iPhone from charging past a certain threshold, providing a convenient way to optimize battery health without requiring constant manual monitoring. It’s a proactive measure that can contribute to extending the overall chemical age and efficiency of your battery over the years.
To utilize this battery-preserving feature, go to ‘Settings’ > ‘Battery’ > ‘Charging.’ Within this menu, you will find the ‘Charge Limit’ slider. You can use this to set your charging threshold anywhere between 80% and 100%. Once you’ve chosen your desired limit, your iPhone will intelligently stop charging when it reaches that specific percentage, preventing it from topping off unnecessarily.
The recommendation is to “Try setting it at 95% first and see if the battery lasts your day.” This provides a good balance between daily usability and battery health. If you find that 95% is more than sufficient for your daily needs, you can progressively lower the limit further to extend the battery’s lifespan even more. This simple adjustment ensures you get the most out of your iPhone’s battery, both in the short term and for its overall longevity.
Read more about: The Hidden Costs: Unmasking the Real Reasons Your Electric Bill Exploded After Bringing Home an EV
12. Manually Control Auto-Brightness
The iPhone’s auto-brightness feature is designed to automatically adjust your screen’s luminosity based on ambient light conditions, aiming for optimal viewing and power efficiency. However, this continuous adjustment, while seemingly intelligent, can often work against your battery’s best interests. The sensors required to constantly measure ambient light and the subsequent adjustments to the display brightness consume power throughout the day.
Brightness is one of the single biggest drains on your iPhone’s battery. While auto-brightness attempts to find a balance, it might frequently overcompensate, making your screen brighter than necessary in certain situations, or constantly making micro-adjustments that add up. By taking manual control, you can ensure your screen is only as bright as it absolutely needs to be, directly reducing one of the most significant power consumers on your device.
To disable the automatic brightness adjustment, navigate through your iPhone’s settings. Go to ‘Settings’ > ‘Accessibility’ > ‘Display & Text Size,’ and then scroll down to find the ‘Auto-Brightness’ toggle. Switch this setting off. Once disabled, your iPhone will no longer automatically change its screen brightness based on its surroundings.
With auto-brightness off, you’ll gain full control over your screen’s illumination. You can then manually adjust the brightness to your preference using the slider in the Control Center (accessed by swiping down from the top-right corner on Face ID iPhones, or up from the bottom on older models). This allows you to set a lower, battery-friendly brightness level in environments where you don’t need maximum illumination, ensuring that precious power is conserved for when it truly matters.
Ultimately, reclaiming control over your iPhone’s battery life isn’t about sacrificing its best features or living in a state of constant compromise. It’s about smart, informed management. By understanding these often-hidden settings and making these practical adjustments, you’re not just extending your daily usage; you’re optimizing your device for peak performance and longevity. Say goodbye to the red battery indicator anxiety and hello to a more enduring, efficient iPhone experience. Enjoy the freedom of a phone that truly keeps up with your day.”
Read more about: Beyond the Hype: The Real Reasons Your New iPhone Isn’t Perfect (and How to Master the Fixes)


