

Are you ready to gaze at the stars and not just wish upon them, but actually *capture* their breathtaking beauty with your very own camera? Astrophotography, the art of photographing celestial objects and the night sky, might sound like something reserved for seasoned astronomers with high-tech observatories. But guess what? It’s totally within your reach, and your trusty DSLR camera is about to become your new best friend on this incredible cosmic journey!
Forget those blurry phone snaps where stars look like faint smudges. We’re here to show you how to transform your night sky experiences into stunning, frame-worthy images. Whether you’re a complete beginner who’s never even thought about pointing your camera upwards after dark, or someone who’s tried and failed (we’ve all been there!), this in-depth guide is packed with all the tips and tricks you need to get started and achieve incredible results. No more throwing your camera into the bushes in frustration, as one expert playfully suggests might happen when you first try focusing on the night sky!
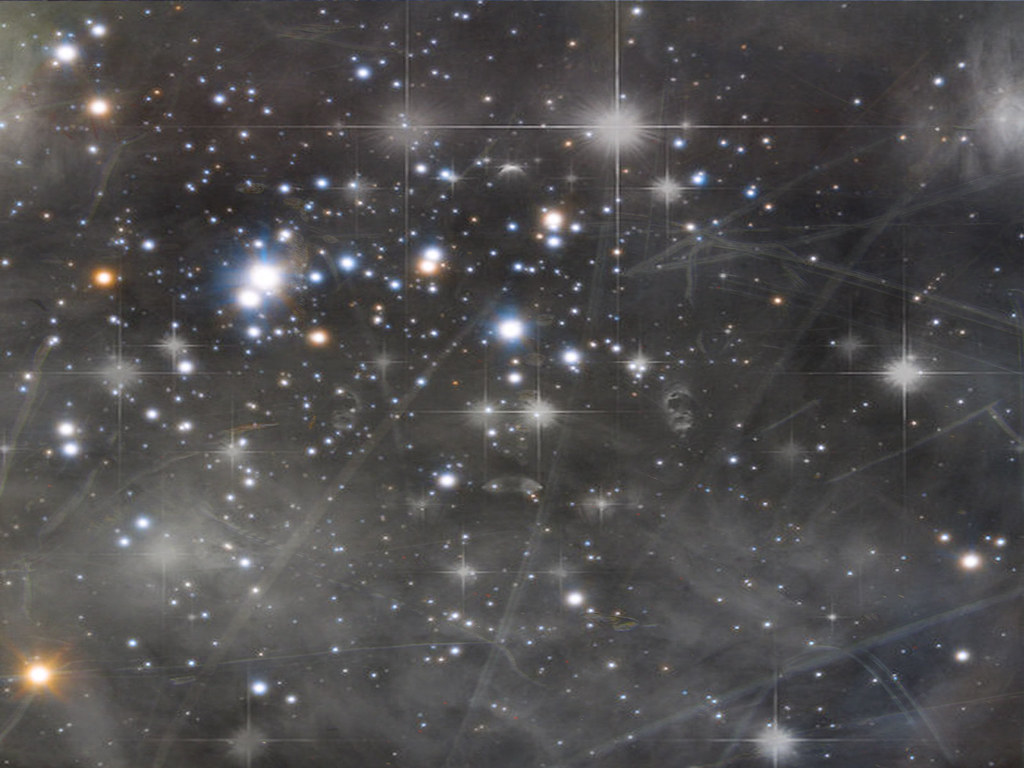
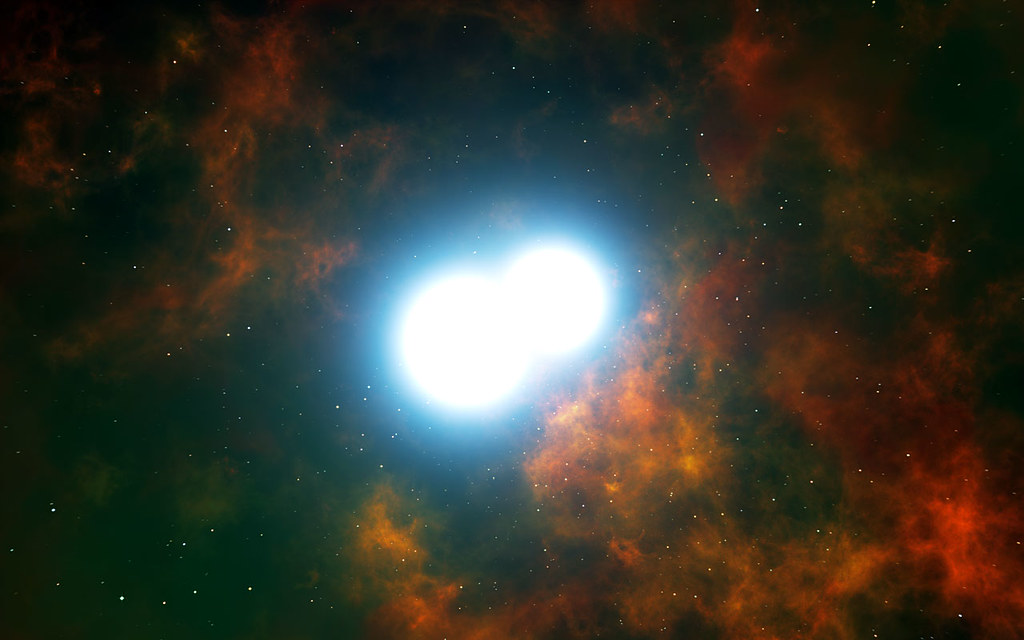
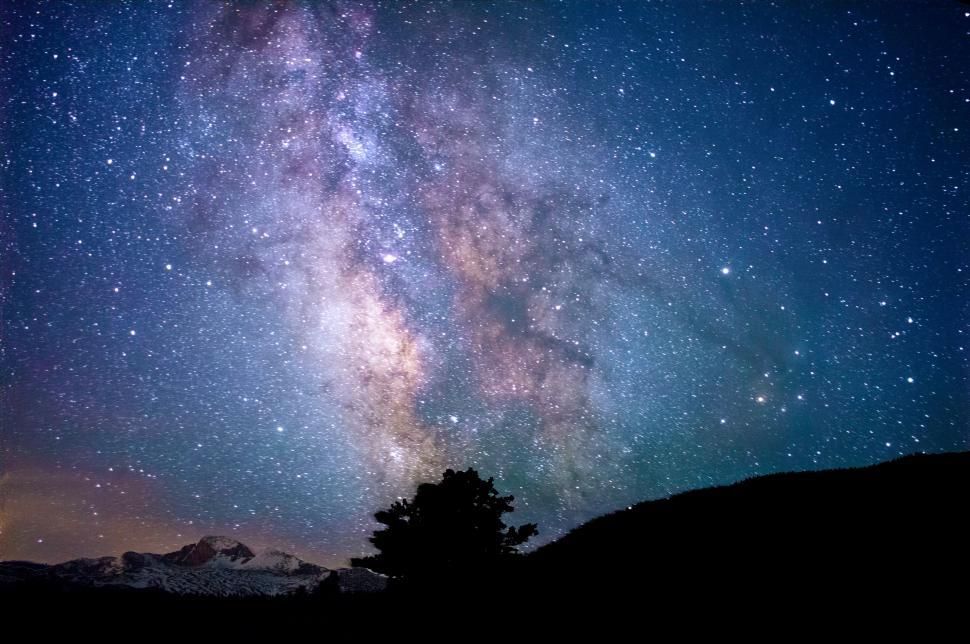
So, if you’ve been dreaming of capturing the Milky Way, the Orion Nebula, or even just a field full of sparkling stars, you’ve come to the right place. We’re going to break down everything from the must-have equipment to the crucial planning and initial shooting techniques. Get ready to embark on a visual adventure that will make you see the night sky in a whole new light (pun absolutely intended!). Let’s dive in and turn those starry aspirations into stunning photographic realities.
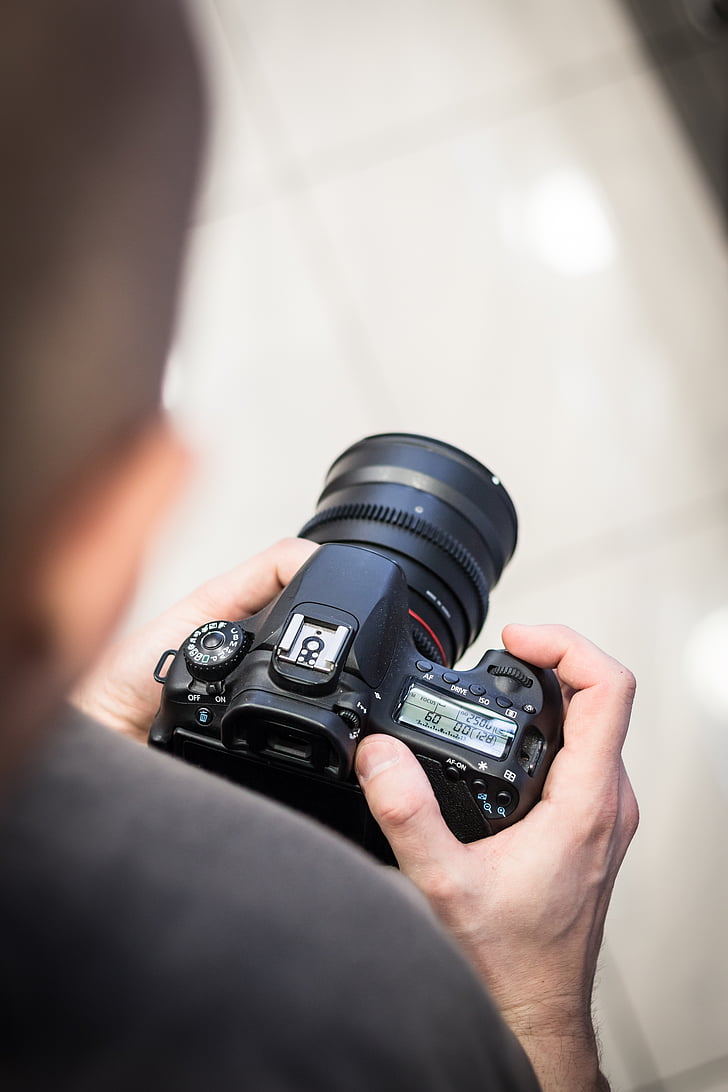
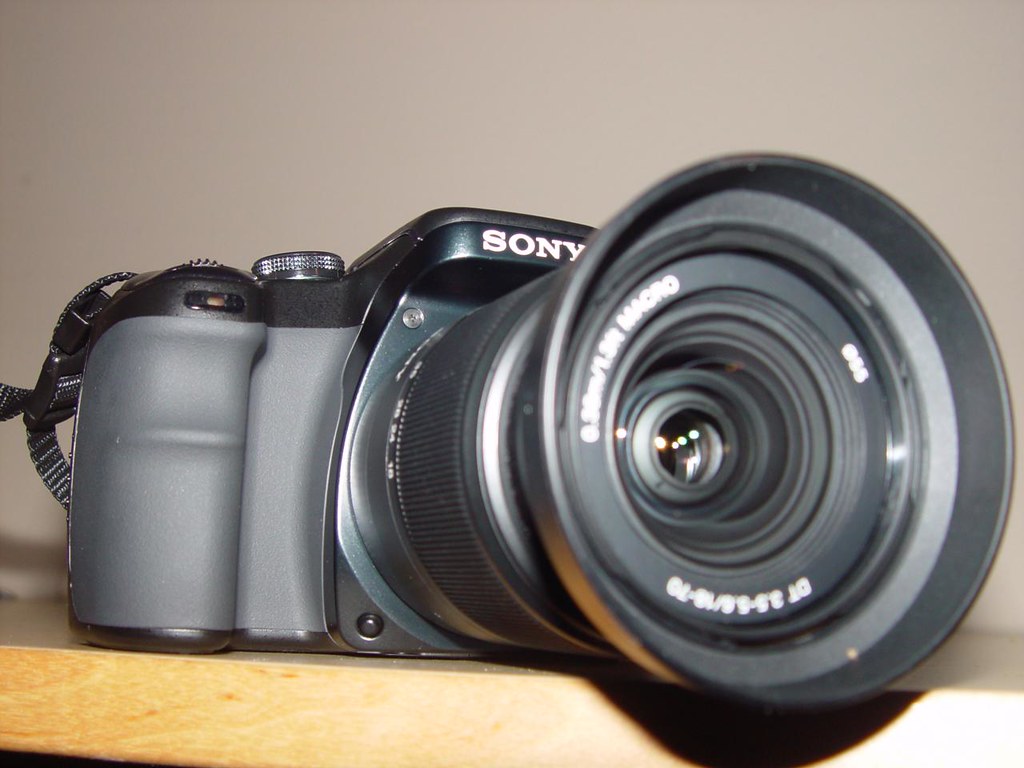
1. **Your Essential DSLR Camera**First things first: the heart of your astrophotography setup is, predictably, a DSLR camera. And here’s the cool part: you probably already own the most essential piece of gear! As our guide points out, “the most essential thing is a DSLR, and we’re going to assume you already have one of those!” This means you don’t need to break the bank on brand-new, specialized equipment right off the bat. Your existing camera is ready for action.
What kind of DSLR works best? “The make of your DSLR is irrelevant. They all do the same job, which is to collect light on a sensor chip that is turned into an image.” This is fantastic news because it means you don’t need to get hung up on brands or models. Any DSLR or similar mirrorless camera that allows you to change the lens and operate in manual mode will serve you well, giving you the control you need over settings like shutter speed, f-stop, and ISO.
Now, for those looking to upgrade or just understand the nuances, there’s a bit more to consider. For best results, a full-frame sensor camera is often recommended over an APS-C (crop sensor) model. Why? Because “full-frame sensor cameras are better in low-light conditions and capture a wider expanse of the sky when you are shooting.” A larger sensor provides a larger surface area to “capture” the light, which can also help “reduce the amount of noise in high ISO images, in turn providing higher-quality images.”
However, don’t let that deter you if you only have an entry-level DSLR with a crop sensor. The experts assure us, “if you already own a DSLR – even an entry-level model with a crop sensor – there is nothing to stop you from using that. You can definitely take great photos of stars with these cameras – it’ll just be a little harder.” The key takeaway is that having the right gear makes it easier, but it doesn’t make the impossible possible; you can still capture amazing star photos with what you have!
Read more about: Emma Watson’s Unflinching Account: How an Illustrious Acting Career Led to Personal ‘Rock Bottom’ and Her Journey to Reclaim a Grounded Life
2. **Choosing the Right Lens**Once you’ve got your camera sorted, the next crucial piece of the puzzle is your lens. If you’re like most DSLR owners, you’ve probably accumulated a few lenses for various daytime photography adventures. But for astrophotography, the rules change a little. You might be wondering, “which one should you use for astrophotography?” The good news is that you likely already have a suitable option in your kit.
For beginners, the standard “18-55mm ‘kit lens’ or standard 50mm lens that came with your camera will be fine. Don’t use anything ‘bigger’ than 50mm yet.” This is a great starting point, proving that you don’t need highly specialized optics to begin. However, as you delve deeper, you’ll discover that specific lens attributes can significantly enhance your night sky images.
The ideal lens for star photography will have two main characteristics: a wide-angle focal length and a fast aperture. “A wide angle is indicated by a low focal length in millimeters, for example, 14mm. Anything from 8mm to 35mm could be considered ‘wide’ and work for star photography.” You might even get “great results with 50mm lenses.” This might seem a bit counterintuitive when you’re photographing incredibly distant objects, but a “short focal length allows you to capture a wider expanse of the night sky whereas a long focal length results in a narrow field of view.” This is essential for capturing sprawling constellations or vast swathes of the Milky Way.
The second critical characteristic is a fast aperture, indicated by a low f-number (e.g., f/2.8, f/1.8). “The ‘faster’ the lens, the better it will be at capturing light from dark skies.” This wide opening allows your camera’s sensor to gather as much light as possible in the shortest amount of time, which is paramount in low-light astrophotography. While your 18-55mm kit lens is “plenty wide enough and can be used for night sky photography,” it “will not usually have a fast enough aperture and might hold you back.” But again, remember, “it’s not impossible, just harder” – so use what you have and learn its limits!
Read more about: The Enduring Legacy of Low: A Deep Dive into Their Pioneering Sound and Unforgettable Journey
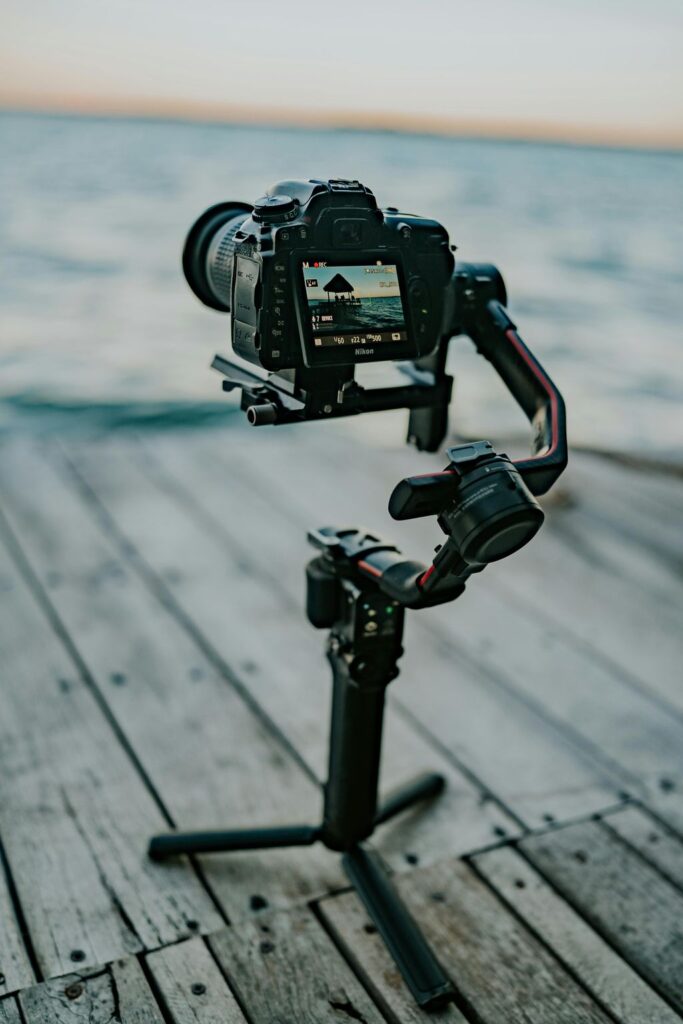
3. **The Unsung Hero: A Sturdy Tripod**Alright, you’ve got your camera, you’ve selected your lens, but before you head out, there’s one more non-negotiable piece of equipment: a rock-solid tripod. Seriously, this isn’t an optional extra; it’s absolutely essential. As the experts vividly put it, “you just won’t get the same results from pushing your camera down into a bean bag or rolled-up jumper plonked on the top of your car!” A stable base is key to sharp astrophotography.
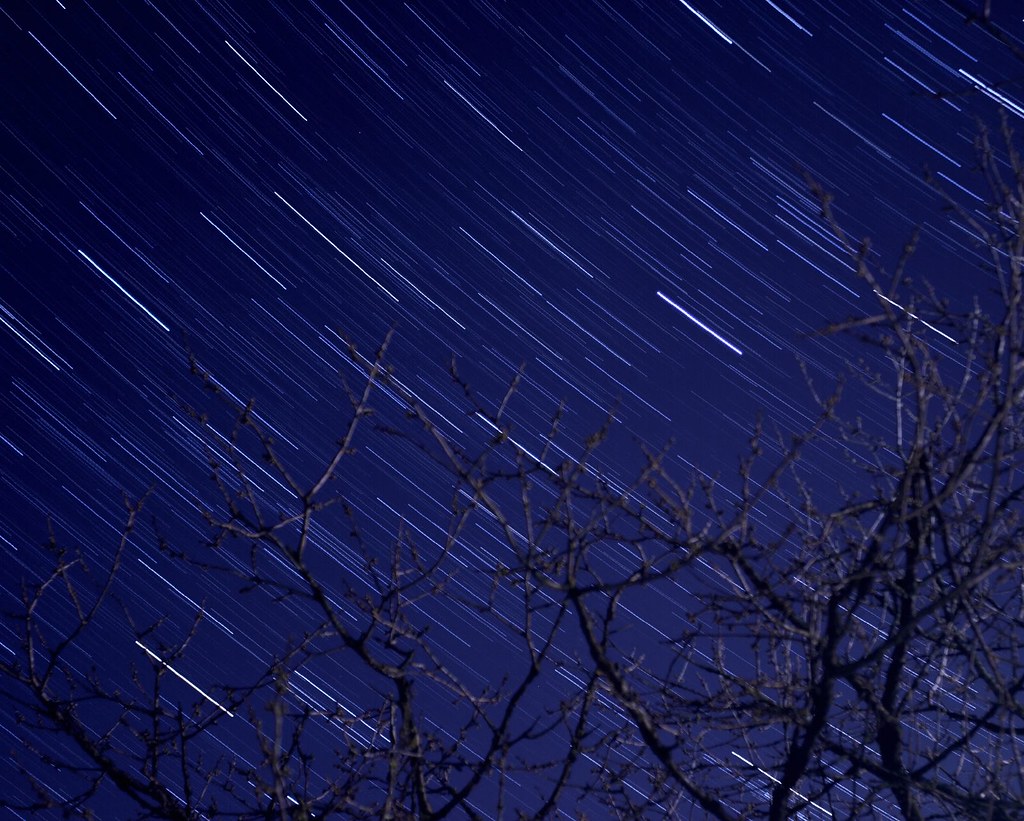
The reason a sturdy tripod is so critical boils down to exposure time. You’re going to be taking long exposures, sometimes for many seconds, to gather enough light from the faint stars. During this time, your camera must remain perfectly still. If your tripod shakes even a tiny bit from “the wind or from the vibrations of footsteps,” your “images will be ruined.” Instead of pinpoint stars, you’ll end up with blurry streaks or “squiggles,” which, while interesting in some contexts (like star trails), isn’t what we’re aiming for with a first astrophoto.
While high-end carbon fiber tripods are lauded for “reduc[ing] vibration providing sharper images,” you don’t necessarily need the best of the best to get started. The key is to avoid the flimsy, budget options that will inevitably cause camera shake. You can find perfectly adequate models without spending a fortune, as it’s noted, “you can easily pick up models that are good enough for $50-60.” The most important aspect is that “the tripod head is well built and does not move during the long exposures required for star photography.”
So, before you venture out under the night sky, make sure your camera is securely mounted on a dependable tripod. It’s the silent, steady partner that will ensure all your other efforts in camera settings and planning don’t go to waste. A good tripod isn’t just a piece of gear; it’s the foundation for your stellar images, literally keeping everything in place as your camera drinks in the distant starlight.
4. **Handy Extras for Cosmic Capture**Beyond the big three (camera, lens, tripod), there are a few other bits and bobs that will make your astrophotography adventures much smoother and more successful. Think of these as your trusty sidekicks for battling the darkness and capturing those elusive photons. You definitely don’t want to be caught unprepared!
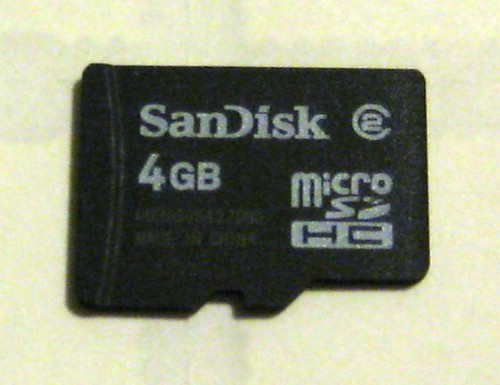
First up, and this one is a classic oversight: a memory card. You might laugh, but an expert humorously recalls, “You don’t want to be standing in the middle of a field in the dark and see the words ‘No Memory Card In Camera’ appear on your screen because you left it at home – not that I’ve ever done that, of course!” So, double-check that memory card is firmly in your camera before you leave, and perhaps even pack a spare just in case. They also mention bringing a “spare battery for your camera – You don’t want to run out of juice when you’ve got up in the middle of the night to shoot the stars.” Nothing halts a productive shoot faster than a dead battery.
Next, consider a remote shutter release or using your camera’s time delay function. “A remote shutter release is highly recommended, but not essential.” Its main job is to help “reduce vibrations after clicking the camera’s shutter, keeping your stars as points of light instead of squiggles.” If you don’t have one, setting a “Time Delay – around 3 seconds or 10 seconds” on your camera does a similar job, giving the camera a few moments to settle after you press the button. This small step makes a huge difference in image sharpness.
And for navigating in the dark without ruining your night vision, a red light is a game-changer. “Take along the red torch or red head torch you use when you’re out stargazing.” Why red? Because “regular white or yellow light from torches ruins your night vision so you are best with red light, which does not.” If you don’t have one, a “Red Light’ app onto your phone” can be a clever workaround. Another advanced, but useful, accessory is a light pollution filter. These “can be used to improve images taken from light-polluted locations” but are “not essential” for starting out, something you can add later.
Finally, for those looking to expand their horizons later, there are tools like Star Trackers and Intervalometers. “Star Tracker – These are small mounts that sit between your tripod and camera and move your camera at the speed and direction of the rotation of the Earth so it stays focused on the stars.” While an amazing addition for progression, it “is not essential” for beginners. An Intervalometer acts as a “remote controls for your camera that allow you to program it to shoot a certain number of times with your chosen settings.” It’s “not required for star photography but it is required for star trails photography.” For now, focus on the essentials, but keep these cool gadgets in mind as you get more serious!

5. **Mastering Moon Phases**Now that you’ve got your gear lined up, it’s time to talk planning. And when it comes to night sky photography, planning is almost as important as the equipment itself. “The most important element of being able to successfully take photos of stars is planning.” One of the biggest factors that can make or break your stellar shots is the moon. It’s beautiful, yes, but it can be an astrophotographer’s biggest challenge!
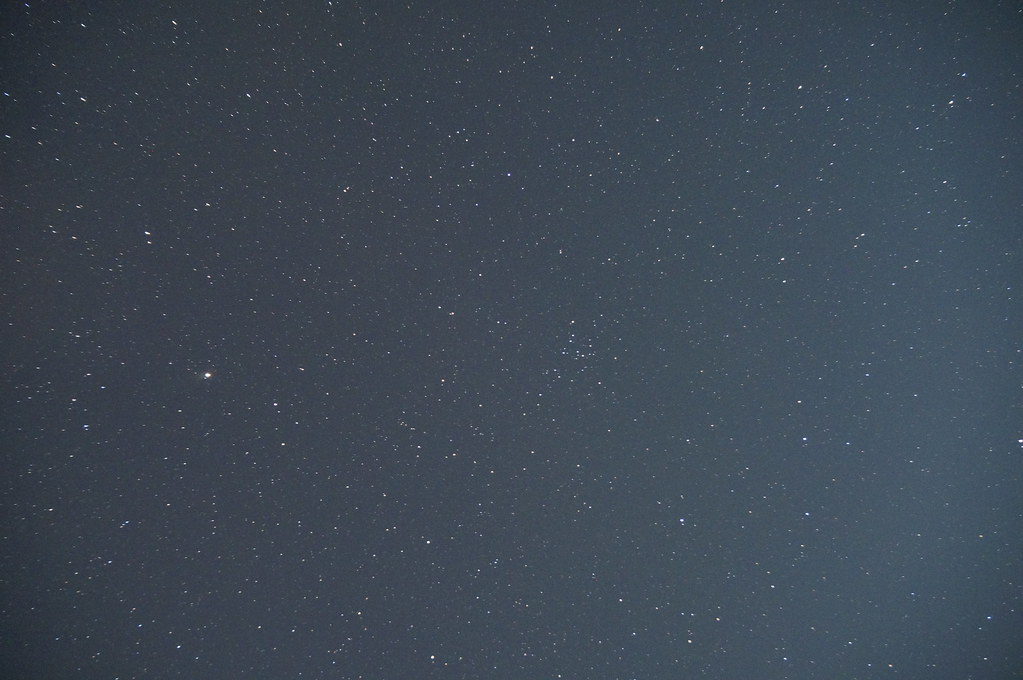
Here’s the golden rule: “You want the moon to be as small as possible, ideally a New Moon, when it is completely invisible in the sky.” Why is this so crucial? Because “the moon is a source of light and to get the best shots of stars you want the sky to be as dark as possible.” Even a small crescent moon can introduce enough light to significantly reduce the brightness and visibility of the fainter stars and deep-sky objects you’re trying to capture.
So, when should you plan your celestial shoots? The ideal window is “5 days before and after the New Moon.” During the New Moon phase, the moon cannot be seen in the sky, offering the darkest possible conditions. This will give you the deepest, richest star fields and allow nebulosity and galaxies to truly pop in your images. You can use various websites or apps like Clear Outside to track moon phases accurately, ensuring you pick the perfect nights.
By strategically timing your shoots around the New Moon, you’ll dramatically increase your chances of capturing stunning astrophotos with minimal light interference. This simple planning step can make a world of difference, allowing your camera to truly drink in all that magnificent starlight without being overwhelmed by our closest celestial neighbor. Remember, dark skies are essential for star photography, and minimizing moonlight is a huge part of achieving that darkness.
Read more about: Archaeology’s Enduring Mysteries: A Deep Dive into Humanity’s Past Through the Lens of Material Culture

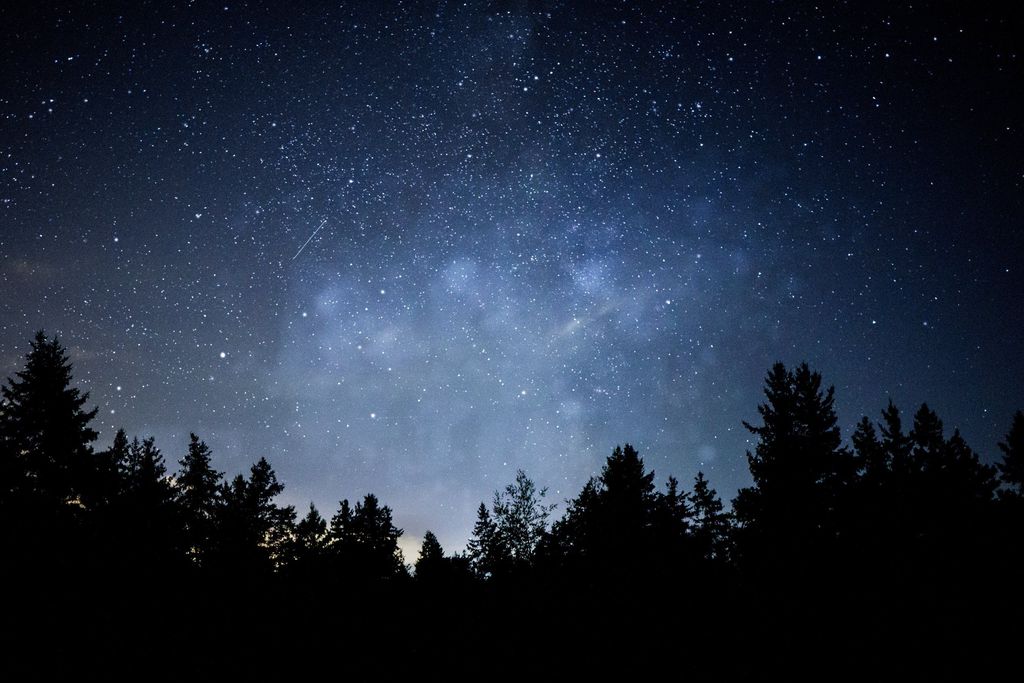
6. **Escaping Light Pollution**Just as the moon can be a source of light pollution, so too can our earthly dwellings. “You are much more likely to get great pictures of stars if you are shooting from a location with low light pollution.” This is a fundamental truth in astrophotography, as artificial lights from cities and towns can severely diminish the visibility of the night sky and wash out the faint light from stars and nebulae.
Think about it: streetlights, security lights, illuminated shop signs – they all contribute to a glow that scatters light upwards, creating a veil over the stars. “We need dark skies to allow the stars to shine through more easily.” This means, ideally, you want to get “away from all the streetlights, security lights and illuminated shop signs to a dark-sky site.” The darker the sky, the more stars your camera sensor can pick up, leading to far superior results.
But what if you’re restricted to your backyard? Don’t despair! “If you’re restricted to your back garden that’s fine, you can still take pictures.” You can still capture some amazing shots, especially if you apply techniques like using light pollution filters (as mentioned earlier) or careful post-processing. However, if you have the opportunity to travel to a designated dark-sky site, those pictures “will be much better” because the natural darkness enhances everything.
To find these celestial havens, you don’t need to wander aimlessly. “You can check a light pollution map to check how it looks where you are or to scope out other possible sites.” These maps visually display areas of varying light pollution, helping you pinpoint the darkest spots within driving distance. Prioritizing a dark location is a critical step in your planning process, ensuring your camera has the best possible canvas to paint its starry masterpieces.
Read more about: High-Mileage Havoc: The Crippling Electrical & Mechanical Nightmares Haunting Your Sports Car – A Deep Dive into the Ford S197 Mustang
7. **Weather Wisdom for Stellar Shoots**So, you’ve got your gear, you’ve picked a moonless night, and you’ve found a deliciously dark location. But there’s one more crucial element to successful astrophotography planning: the weather! Imagine getting all set up, only for a thick blanket of clouds to roll in and obscure your starry canvas. That’s a real bummer, right? “To take photos of stars you want clear skies free from clouds.”
Luckily, modern technology makes predicting sky conditions a breeze. “There are some great apps to help you plan this.” One highly recommended free app is Clear Outside, which provides a wealth of information beyond just cloud cover. It gives you details on the “phase of the moon, the time of sunrise and sundown, the temperature, and the chance of rain,” making it an invaluable tool for your planning arsenal.
While perfectly clear, cloudless nights are often the goal, some photographers actually appreciate a little atmospheric flair. One expert notes, “I actually prefer to have some clouds in the sky because they add to the composition and “interestingness” of the scene.” The sweet spot? “Aiming for nights with 0-50% cloud cover will yield the best results.” A few scattered clouds can add depth and drama to your foregrounds without completely hiding the stars.
Ultimately, thorough planning is the unsung hero of astrophotography. “The most important element of being able to successfully take photos of stars is planning.” By checking the weather, consulting moon phase calendars, and scouting for dark-sky locations, you’re not just taking pictures; you’re setting yourself up for an epic cosmic adventure. These initial steps are the foundation upon which your amazing starry images will be built, ensuring that when you finally press that shutter, you’re doing so under the most optimal conditions possible. Now, let’s get ready for some serious shooting!
Alright, stargazers and aspiring cosmic capturers! We’ve armed you with the essential gear and prepped you on the absolute must-knows for planning your starry escapades. But hold onto your telescopes, because we’re about to blast off into the really exciting stuff: mastering your camera settings, nailing that elusive focus, and transforming your raw images into jaw-dropping celestial masterpieces. Get ready to go from ‘I took a picture of the sky’ to ‘I captured the universe’!
8. **Advanced Composition and Location Planning**You’ve found your dark sky, dodged the moon, and checked the weather – great! But now, let’s talk about making your images truly unforgettable. It’s not just about getting stars; it’s about making a *scene*. As the experts tell us, you want somewhere where you can take a great shot that incorporates some of the features of the landscape. This is where composition really shines, adding depth and narrative to your cosmic photos.
Gone are the days of just pointing and shooting into the black abyss. Modern tools make planning your composition a breeze, even before you step out the door! The PhotoPills app, for instance, is a game-changer, allowing you to scout locations during the day and use augmented reality (AR) to visualize how they’ll look at night. Imagine seeing where the Milky Way will perfectly frame that gnarly old tree – all from the comfort of your couch!
Beyond PhotoPills, there’s Stellarium, another incredible tool that helps you easily find the location of the Milky Way in the sky. It provides a realistic 3D sky, just like what you’d see with your eye, making it perfect for visualizing and planning precise and effective night sky photoshoots. You can figure out if that stunning rock formation will be perfectly silhouetted against our galaxy’s core!
And don’t forget the power of Google Earth/Maps. This is where many pros spend the most time because it’s fantastic for visualizing the topographical layout of a location. By using it, you can figure out if your shooting spot enables you to face south to capture the Milky Way, and even identify other celestial objects like Saturn and Jupiter that might be visible in your shot, making your image not just pretty, but truly informative and awe-inspiring.
Read more about: Mariah Carey’s Unprecedented Vegas Takeover: The ‘Demand’ That Commands Sin City’s Stage for the Holiday Season
9. **Mastering Manual Camera Modes and Focus**Okay, you’ve planned your shot like a pro, now let’s make sure your camera is ready to execute! Forget about ‘auto’ mode when it comes to astrophotography – it’s just not going to cut it. As we learned, “none of the preset modes like automatic are going to work for us.” You need to take full control, and that means diving headfirst into Manual (or Bulb) mode on your DSLR. This gives you the power to independently tweak every critical setting.
Once you’re in Manual mode, the next crucial step is wrestling with focus. This is often the trickiest part for newcomers, with some experts even jokingly suggesting you might want to throw your camera into the bushes! But fear not, once you know how, it’s actually quite easy. You absolutely cannot fix unfocused night sky images in post-processing, so getting it right in-camera is paramount.
The best way to achieve pinpoint sharp stars is by using your camera’s live view screen. First, set your lens to infinity (that little ‘∞’ symbol). Then, zoom into a bright star on your live screen and meticulously tweak the focusing until that star appears as small and sharp as possible. This should lock in your perfect focus. Once it’s set, whatever you do, “don’t move the focus on the lens even a tiny bit now, some lock it in with tape” to avoid accidental shifts.
If your camera doesn’t have a live view screen, don’t despair! There are other clever workarounds, like focusing on a distant streetlight or a light on a building during twilight, and then locking that focus in for the night. The key takeaway is precision here. Your stars need to be sharp points of light, not blurry smudges, and mastering manual focus is your ticket to achieving that celestial crispness.
Read more about: Maximizing Your Value: A Consumer Reports Guide to Buying a Used Car at the Best Age and Mileage
10. **Dialing in ISO for Stellar Quality**Now that your focus is locked, let’s talk ISO – your camera’s sensitivity to light. This setting is a delicate dance between capturing enough starlight and keeping your images free from dreaded ‘noise’ or graininess. Generally, “we use low ISO in the daytime and with good light sources, and high ISO in low light.” For astrophotography, you’ll definitely be leaning towards higher ISOs.
However, crank it up too high, and “higher ISO settings degrade the quality of the image and lead to what is known as ‘noise’ in the picture.” Every camera behaves differently, so finding that sweet spot requires a bit of experimentation with your own setup. You need to balance having an ISO high enough to capture the stars, but low enough to retain image quality.
A great strategy is to take a series of test shots at different ISOs – try low (around 200), mid (800), and high (1600+). You might notice that a low ISO image doesn’t look as impressive on your tiny camera screen, but don’t be fooled! It often looks much better when you get it onto your computer for editing, especially if you plan on ‘stacking’ multiple images later.
Another pro tip: take an initial shot at a super high ISO just to check your composition quickly. Once you’re happy with how the scene is framed, you can then dial down the ISO to a more quality-friendly setting for your actual capture. This little trick saves you time and ensures you get both the composition you want and the image quality you deserve.
11. **Unlocking Shutter Speed Secrets: The 500 and NPF Rules**Next up in our camera settings deep dive is shutter speed, or ‘exposure time’. This is where things get really fun because you’re essentially telling your camera how long to drink in that precious starlight. The goal is simple: “keep the shutter open for as long as possible to capture as much light and give you the best chance of photographing the stars.” But there’s a cosmic catch!
The Earth is constantly rotating, and while we don’t feel it, the stars appear to move across the sky. If your shutter stays open for too long, those beautiful pinpoint stars will turn into blurry streaks or ‘squiggles’ because of this apparent motion. That’s why we rely on some clever mathematical rules to figure out the maximum exposure time before star trails become noticeable.
Enter the venerable ‘500 Rule’: simply divide 500 by the focal length of your lens in millimeters, and that’s your maximum exposure time in seconds. So, a 14mm lens gives you roughly 36 seconds (500/14 = 35.7). It’s a fantastic starting point and easy to remember, especially when you’re just getting into the swing of things.
However, for those craving even greater precision, there’s the ‘NPF Rule’. This more advanced equation takes into account your camera’s megapixels for an even more accurate exposure time. For example, a Nikon D750 with a 14mm lens might suggest 18 seconds via the NPF rule, compared to the 36 seconds from the 500 rule. While the 500 rule is a great guide, the NPF rule often gives you a tighter window for truly pinpoint stars. Don’t worry, there are free online calculators and apps like PhotoPills that can do the math for you!
12. **Aperture: Your Gateway to Light Capture**We’ve talked ISO and shutter speed, and now it’s time for the third leg of the exposure triangle: aperture, often referred to as f-stop. For astrophotography, the rule is pretty straightforward and goes back to capturing as much light as possible: “You want your aperture to be as wide (fast) as possible.”
A wide aperture means a low f-number (like f/2.8 or f/1.8). This wide opening allows your camera’s sensor to literally ‘drink’ in more light from the dark skies, and it does so quickly. This is crucial because you’re dealing with incredibly faint light sources from distant stars and nebulae. The ‘faster’ the lens, the better it is at this light-gathering magic.
So, if you have an f/2.8 lens, set it to f/2.8. If you have an f/1.8 lens, even better – set it there! Getting the widest aperture available from your lens is key to ensuring you gather enough light during your calculated shutter speed. This is especially important for bringing out the fainter details of the Milky Way or distant constellations.
There’s a tiny caveat, though, for those looking to fine-tune. Some lenses, particularly at their absolute widest, can introduce a bit of softness at the edges of the frame. In these cases, you *might* find slightly better results by stopping down just one step (e.g., from f/2.8 to f/3.2 or f/3.5). But to start, keep it simple: go as wide as your lens allows, and let that light pour in!
13. **Image Format & White Balance: Your Digital Darkroom Foundation**Before you click that shutter, let’s quickly talk about how your camera saves those precious photons! You’ll find options for ‘JPEG’ and ‘RAW’ format in your camera’s menu, and understanding the difference is key to unlocking your images’ full potential. Think of it as choosing between a pre-made cake and all the raw ingredients for a baking masterpiece!
JPEG images are like that pre-made cake: your camera has already done some internal processing, applying sharpening, contrast, and color adjustments. They might look pretty good right off the bat, especially on your camera screen, and they’re great for quick sharing. However, the camera discards a lot of data during this process, limiting your ability to make significant edits later without introducing artifacts.
RAW files, on the other hand, are the raw ingredients. They contain all the unprocessed data captured by your camera’s sensor. They might look a little flat or dull on your camera screen initially, but “they retain the potential for you to edit it and make it look better.” This is super important for night sky photography, where post-processing can dramatically improve your images. So, shooting with RAW is highly recommended!
A cool trick is to set your camera to save both JPEG and RAW. That way, you get the instant gratification of a decent JPEG for quick shares (like Instagram) and the flexibility of RAW for serious editing. Just remember, RAW files are much larger, so they’ll fill up your memory card faster – keep a spare handy! As for White Balance, stick with ‘Daylight’ or ‘Auto’ for your initial shots; you can always fine-tune this in post-processing if you’re shooting in RAW.
14. **The Art of Post-Processing: Bringing Your Stars to Life**Congratulations! You’ve captured your very first raw astrophotos. Now comes the magical part: turning those initial captures into breathtaking works of art! This is where ‘processing’ comes in, and while it might seem daunting at first, it’s incredibly rewarding. You’re about to reveal the true beauty hidden within your images!
To get started, you’ll need a way to transfer those images to your computer – a USB card reader or your computer’s built-in slot works perfectly. Then, you’ll need some image processing software. While professional tools like Adobe Lightroom or Affinity Photo are fantastic, you can even begin with free online options like Pixlr. Don’t panic if your image looks less bright on your computer screen than on your camera; it’s just a different viewing environment!
The absolute basics of processing involve a few key adjustments. First, play with the ‘Curves’ function to adjust brightness and contrast. Remember, less is often more here – you’re enhancing, not reinventing. Next, use ‘Saturation’ to boost or reduce the colors of the stars. If they’re too garish, dial it back; if they’re bland, give them a gentle kick!
Finally, for that extra pop, use the ‘Sharpen’ function. This is especially helpful if your focus wasn’t quite as pinpoint as you hoped. If you shot in RAW, your images will generally look cleaner and respond better to these adjustments. Once you’re happy, create a new folder (maybe titled with the date you shot!) and export your amazing, newly processed image. Don’t forget to ‘Save As’ to create a new file, leaving your original RAW untouched on your memory card for future experimentation!
And there you have it, future cosmic photographers! You’ve journeyed from selecting your gear and planning your shoot to mastering camera settings and bringing your starry visions to life in post-processing. It’s a learning curve, absolutely, but every click of the shutter and every slider adjustment in your editing software gets you closer to those awe-inspiring shots you dream of. The night sky is waiting, full of wonder and endless photographic possibilities. So, grab your camera, look up, and start capturing the universe – one stunning image at a time!


