


Visibility truly matters, especially when we talk about uality in the vibrant world of entertainment. For a long time, Black bisexual individuals in Hollywood have navigated incredibly demanding careers, all while deciding how, when, or even *if* they would speak openly about their identities. It’s a journey filled with intense public scrutiny, profound personal reflection, and often immense courage. Today, thankfully, more of these profound stories are coming to light, making it easier for us to see the beautiful and complex ways that personal truth and professional work bravely intertwine. This growing transparency isn’t just about individual liberation; it’s about shaping a more representative and understanding cultural landscape for everyone.
It’s 2023, and yet, biuals still face the disheartening reality of erasure in society. As GLAAD aptly points out, bi-erasure is “a pervasive problem in which the existence or legitimacy of bisexuality (either in general or in regard to an individual) is questioned or denied outright.” There’s a common misconception that bisexuality strictly means attraction to both men and women. But, as we know, sexuality is a rich and diverse spectrum, meaning things aren’t always so clear-cut. Bisexuality, in its broader sense, can also simply mean you’re attracted to more than one gender, period. This inclusive understanding is vital as we celebrate those who bravely choose to live authentically and challenge outdated binaries.
Despite biual people making up a significant portion of the LGBTQ+ community, they often don’t receive the media visibility they truly deserve. We’re here to shine a much-needed spotlight on some truly remarkable Black actors who have not only graced our screens with their undeniable talent but have also openly embraced their bisexual or pansexual identities, enriching the fabric of Hollywood. Their courage to share their authentic selves has undoubtedly inspired countless others to come to terms with their own identities, fostering a more inclusive and understanding world. Let’s dive into the powerful narratives of these trailblazers who are changing the game, challenging perceptions, and making history with every honest step.
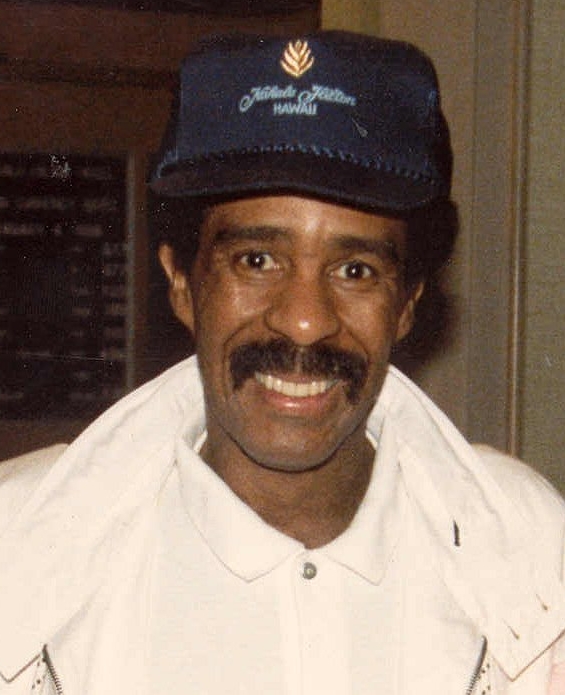
1. **Richard Pryor: The Unforgettable Legend Who Lived His Truth**When we talk about groundbreaking figures in comedy and film, Richard Pryor’s name immediately springs to mind as an undisputed legend. He stands as one of the most influential comedians to ever transition into film, leaving an indelible mark on how comedic actors approach candid, boundary-pushing material. Pryor’s humor was often raw, deeply personal, and unflinchingly honest, allowing him to tackle complex social issues with both sharp wit and profound vulnerability. This unique blend of comedic genius and authentic storytelling meant that his work not only entertained but also provoked thought, challenging societal norms and shining a light on uncomfortable truths. His artistic courage was truly unparalleled.
Beyond his legendary status as an entertainer, Richard Pryor’s personal life harbored a complexity that continued to unfold even after his passing. Accounts from those closest to him have described him as biual, adding another fascinating dimension to his already multifaceted public persona. In 2018, his widow, Jennifer Lee Pryor, openly discussed his relationships with men, referencing intimate diaries she noted as documenting these very personal experiences. While some relatives publicly disputed certain aspects of these claims, Jennifer Lee Pryor’s confirmation remains a significant and acknowledged part of the public record, fundamentally shaping how biographers and fans alike discuss the intricate tapestry of his life. This posthumous revelation not only deepens our understanding of the man but also underscores the crucial importance of acknowledging the full spectrum of an individual’s identity, even when it challenges established narratives.
On screen, Pryor achieved mainstream stardom through a spectacular run of hits that perfectly showcased his unique, combustible energy and razor-sharp timing. Audiences recognize his unparalleled genius from iconic films such as ‘Silver Streak’, where his dynamic chemistry with Gene Wilder created a legendary comedic duo that transcended the screen. He also lit up the screen in beloved comedies like ‘Stir Crazy’ and ‘See No Evil, Hear No Evil’, further cementing his status as a box-office draw. These roles allowed him to translate his electrifying stage presence into cinematic gold, making him a truly unforgettable figure in popular culture and a constant source of joy for millions.
His deep artistic commitment extended to more personal projects, including his semi-autobiographical film, ‘Jo Jo Dancer, Your Life Is Calling’, which he not only starred in but also directed. This film offered a raw, deeply introspective, and profoundly personal look into his own challenging experiences, further cementing his legacy as an artist unafraid to explore the depths of the human condition with unflinching honesty. Such projects were rare for comedians of his era and demonstrated his unique vision.
Richard Pryor’s journey to film stardom was meticulously paved by his earlier stand-up breakthroughs and captivating television appearances, which allowed him to hone his craft and connect with a rapidly growing audience. These early successes provided the essential launchpad for a film career that saw him frequently collaborate with the incomparable Gene Wilder, creating a comedic partnership that remains iconic to this day. His enduring legacy continues to profoundly shape and inspire generations of comedic actors, consistently encouraging them to embrace candid storytelling and to bravely push the boundaries of what is considered acceptable, much like he did throughout his own remarkable life and trailblazing career. He wasn’t just a performer; he was a cultural force who redefined comedy and courage.
2. **Keiynan Lonsdale: A Vibrant Voice for Queer and Biual Representation**Keiynan Lonsdale is a name that resonates deeply within the realms of fan-favorite television and blockbuster franchise films, celebrated not just for his captivating performances but equally for his powerful authenticity and unwavering commitment to representation. As an Australian-Nigerian actor, Lonsdale has carved out a significant and impactful space for himself in Hollywood, bringing his unique talent, vibrant energy, and genuine spirit to every role he undertakes. More than just an actor, he has become a highly visible and vocal advocate for LGBTQ representation, both on and off the screen, demonstrating the profound and liberating impact that living openly can have on personal growth, creative expression, and inspiring change within the industry.
Lonsdale bravely made headlines when he publicly came out as biual in 2017, choosing to share this deeply personal news across his social media platforms and through various interviews. His public announcement was met with widespread support and admiration, marking a pivotal and transformative moment in his life and burgeoning career. Following this courageous declaration, he has also openly embraced “queer” as a broader, more inclusive descriptor for his identity, reflecting the fluid and expansive nature of modern sexuality and providing a powerful example for others navigating similar journeys. He has eloquently spoken about the truly transformative effect this openness has had on his daily life and creative choices, describing the announcement as a crucial and necessary step toward living a more honest and integrated life after what he described as years of self-suppression and inner struggle. His candor has undeniably made a significant difference.
His acting résumé is truly impressive and wide-ranging, spanning highly popular franchise films and beloved television series that have garnered massive fan bases around the globe. Many will instantly recognize him for his dynamic and memorable role as Kid Flash, or Wally West, on the hit CW series ‘The Flash’, where he brought a youthful exuberance and compelling depth to the fast-paced superhero world. This role solidified his place in the hearts of millions of viewers, showcasing his ability to embody complex characters within a popular genre.
Furthermore, Lonsdale played a significant and heartfelt part in ‘Love, Simon’, a groundbreaking studio teen romance that reached a wide audience and was universally celebrated for its pioneering portrayal of a gay teenager’s coming-out journey. His involvement in such a culturally important film further amplified his unwavering commitment to diverse storytelling and authentic representation, showcasing his dedication to projects that truly matter and resonate with a broader audience. He effortlessly demonstrates that diverse stories are not only necessary but also incredibly successful and impactful, shaping public perception.
Beyond these prominent roles, Lonsdale also made his mark in the action-packed ‘Divergent’ series, showcasing his versatility and ability to inhabit diverse characters across different genres. His creative pursuits aren’t limited solely to acting; he has actively continued to work across both music and acting, often deliberately engaging with projects and communities that prioritize and uplift LGBTQ representation. His dedication ensures that stories from these often-marginalized communities are told with unparalleled authenticity and respect, contributing significantly to a more inclusive and understanding entertainment landscape. Keiynan Lonsdale is a true artist who uses his platform not just for entertainment, but for meaningful advocacy and cultural impact, inspiring others to live their truths.
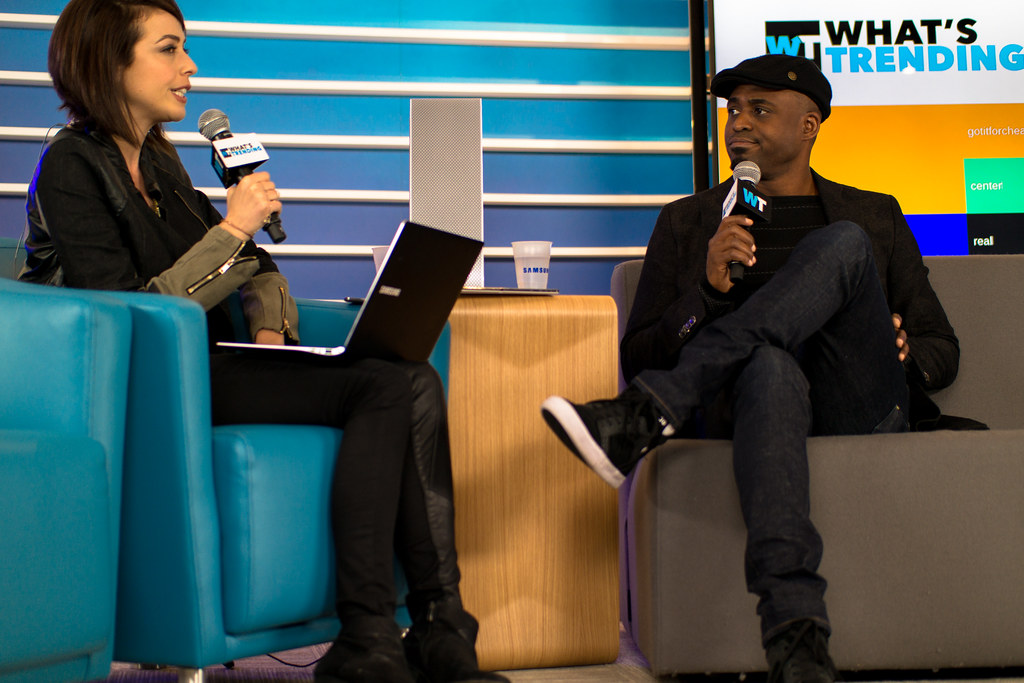
3. **Wayne Brady: An Icon of Versatility Embracing His Panual Truth**Wayne Brady is a name synonymous with unparalleled versatility and an enduring, beloved presence in the entertainment world, known for his incredible range as an actor, comedian, and host. From his lightning-fast wit on improv stages to his commanding and engaging presence in long-running television shows, Brady has charmed and captivated audiences for decades. His illustrious career has been a remarkable testament to his adaptability and profound talent, allowing him to effortlessly shift between highly demanding comedic roles, poignant dramatic performances, and engaging hosting duties with a natural ease that few can match. Beyond the bright glare of the spotlight, Brady has also embarked on a deeply personal and profoundly public journey, bravely sharing a vital part of his identity with the world and inspiring countless others in the process.
In a deeply moving and widely reported moment in 2023, Wayne Brady bravely shared with the public that he identifies as panual, a significant announcement that resonated deeply with many fans and members of the LGBTQ+ community. He thoughtfully and eloquently explained that he is attracted to people regardless of their gender, clarifying that this specific label best captures his unique and expansive experience of attraction. This open and honest announcement was not merely about affixing a label to his sexuality; Brady described it as an integral and empowering part of a broader, ongoing mental-health journey. He emphasized how speaking openly about his identity helped him to profoundly align his personal life with the unwavering authenticity he consistently strives for in his public work, creating a powerful example of self-acceptance and integrity for all to witness.
Brady’s extensive career as an actor and entertainer boasts an impressive and varied screen résumé, skillfully built alongside his formidable stage and improv career. He first captured widespread public attention and earned immense adoration as a beloved regular on the iconic sketch-and-music showcase ‘Whose Line Is It Anyway?’, where his improvisational brilliance and spontaneous comedic genius shone brightly, making him a household name. This dynamic platform allowed him to demonstrate his quick thinking, musical talent, and unparalleled comedic timing, paving the way for further widespread success across numerous diverse mediums in Hollywood and beyond. His ability to create compelling humor and engaging content on the spot is truly unparalleled and has endeared him to generations of viewers.
His presence on television has remained remarkably steady and incredibly diverse, with audiences recognizing him from memorable recurring roles and captivating guest arcs in popular series like the long-running sitcom ‘How I Met Your Mother’ and the DC Comics-inspired superhero drama ‘Black Lightning’. These roles showcased his dramatic capabilities and allowed him to expand his acting repertoire beyond pure comedy, proving his depth as a performer. His ability to move seamlessly between genres demonstrates a rare talent and dedication to his craft, ensuring his longevity in a competitive industry.
Additionally, his long-running and highly successful hosting stint on ‘Let’s Make a Deal’ further showcases his incredible charisma, infectious energy, and natural ability to connect genuinely with people from all walks of life, making every episode a joy to watch. All these diverse roles collectively underscore his vast range as a performer and solidify his status as a steady, cherished, and incredibly versatile presence in the entertainment industry. His decision to live authentically, embracing his panual identity so publicly, makes his already impactful career even more meaningful, contributing significantly to positive representation and visibility for the bisexual and pansexual community on a global scale.
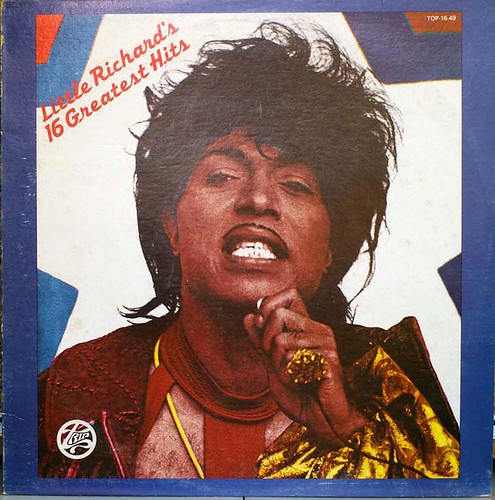
4. **Little Richard: The Rock-and-Roll Pioneer Who Explored His Identity**When you think of the foundations of rock-and-roll, Little Richard’s electrifying presence immediately comes to mind. He wasn’t just a musician; he was a phenomenon, an undeniable force whose charisma and revolutionary sound reshaped popular culture forever. As a rock-and-roll pioneer, his impact was monumental, creating a blueprint for generations of performers to come. Beyond the music, he also graced our screens, adding another layer to his already unforgettable legacy.
Throughout his vibrant life, Little Richard openly discussed his attractions to more than one gender, navigating a complex path that often shifted over time. Biographical reporting and insightful documentaries have meticulously chronicled how he oscillated between embracing and, at times, renouncing same- desire. These accounts note his relationships with men alongside his relationships with women, revealing a deeply personal journey where faith, fame, and sexuality intertwined in ways that were uniquely his own. This intricate dance with his identity made him a truly multifaceted figure, adding profound depth to his public persona.
His dynamic personality extended beyond the stage, making a notable mark as an actor and on-screen presence. Little Richard appeared in various projects that brilliantly showcased his inherent charisma and immense cultural impact. Audiences had the pleasure of seeing him in memorable films such as ‘Down and Out in Beverly Hills’, ‘Mystery Train’, and ‘The Naked Truth’. These roles allowed him to translate his boundless energy and captivating spirit from the concert hall to the silver screen, proving his versatility as a performer.
Beyond feature films, his unique star power also lit up numerous music-driven specials and guest spots on television. Each of these appearances wasn’t just a performance; it was a living history lesson, brilliantly linking the groundbreaking innovations of early rock-and-roll to new, eager generations. He effortlessly demonstrated how an unmistakable showman, with his larger-than-life personality and magnetic appeal, could illuminate any medium he chose to inhabit, leaving an indelible impression on everyone who watched him.
Little Richard’s journey stands as a powerful testament to the complex realities faced by many artists who navigate their identities under intense public scrutiny. His willingness to discuss his attractions, even with shifting perspectives, solidifies his place not just as a music legend but as a significant, albeit complex, figure in the history of Black biual representation. His story underscores the ongoing conversation about how personal truths shape artistic legacies and inspire an evolving understanding of identity in entertainment.
Read more about: Flashback to the Fifties: 12 Icons Who Ruled the Charts and Revolutionized Music Forever
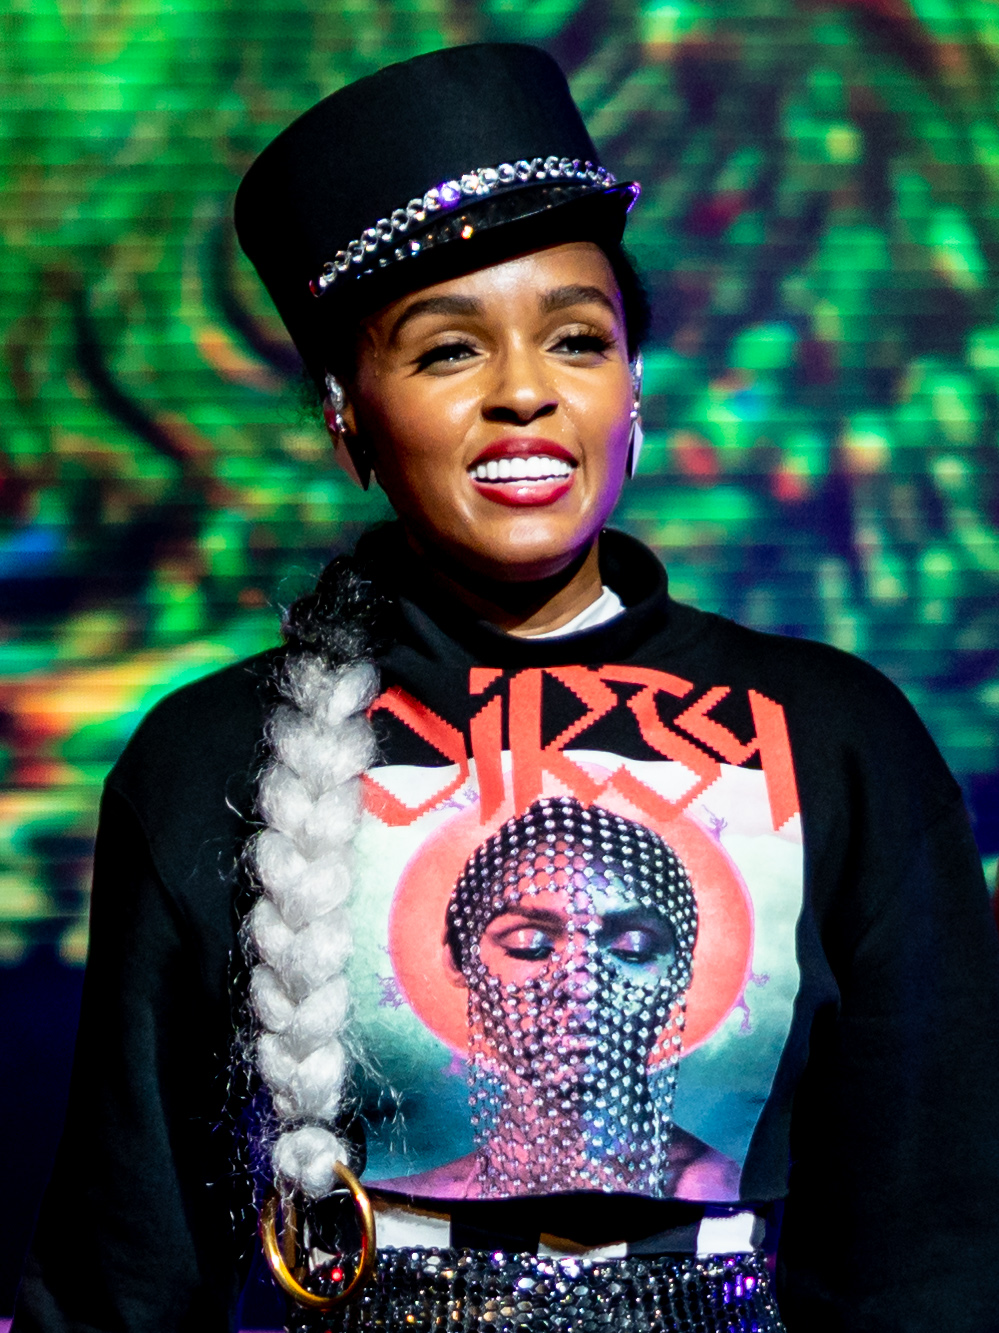
5. **Janelle Monáe: A Visionary Artist Embracing Panual Visibility**Janelle Monáe is a true visionary, an artist who effortlessly transcends categories as a singer-songwriter, actress, model, and record producer. Her career is a dazzling tapestry woven with innovation, style, and a profound commitment to pushing boundaries across every creative endeavor she undertakes. As an actress, she has brought a unique perspective and powerful presence to her work, complementing her trailblazing musical journey and solidifying her status as a cultural icon in a league of her own.
In a moment that resonated deeply across the LGBTQ+ community and beyond, Janelle Monáe bravely shared her identity as panual, a significant declaration that brought much-needed visibility to this often-misunderstood sexual orientation. As eloquently stated in the context, “Pansexual is not the same as bisexual. Janelle Monáe is bringing visibility to us all.” This statement underscores the critical distinction and importance of her openness. For Monáe, identifying as pansexual means she is attracted to people regardless of their gender, embracing an expansive understanding of attraction that challenges rigid, “outdated binaries” and celebrates the rich diversity of human connection.
Her courage to live openly and authentically has a ripple effect that extends far beyond her personal life, profoundly influencing her artistry and inspiring countless individuals. By embracing her truth, Monáe actively champions the idea that this “growing transparency isn’t just about individual liberation; it’s about shaping a more representative and understanding cultural landscape for everyone.” Her presence as a Black, panual actress means that her voice and experiences are amplified, demonstrating how personal truth can empower creative expression and foster profound societal change.
In a world where “biuals still face the disheartening reality of erasure in society,” Janelle Monáe’s powerful visibility serves as a crucial counter-narrative. The context points out that “while bisexual people might take up a big part of the LGBTQ+ community, they still do not get seen as often as they should in media and entertainment.” As an influential Black actress who identifies as pansexual, Monáe directly addresses this disparity, proving that authentic representation is not only vital but also incredibly impactful. Her platform allows her to combat misconceptions and bring inclusive understandings of sexuality to wider audiences.
Ultimately, Janelle Monáe embodies the very essence of a trailblazer. Her unwavering commitment to showcasing her authentic self, coupled with her immense artistic talent, makes her a beacon of hope and inspiration. She consistently challenges perceptions, enriches the fabric of Hollywood, and contributes significantly to a more inclusive and understanding world. Her journey demonstrates how “personal truth and professional work bravely intertwine,” marking her as a groundbreaking figure who continues to redefine what it means to be a celebrated artist in the modern era.

6. **Tessa Thompson: A Powerful Voice for Biual Representation**Tessa Thompson stands as one of Hollywood’s most compelling and dynamic actresses, renowned for her powerful performances and captivating screen presence. Her career is marked by a diverse array of roles that showcase her remarkable talent and versatility, making her a celebrated figure in contemporary entertainment. Beyond her undeniable acting prowess, Thompson has also made a significant impact through her brave decision to publicly embrace her biual identity, adding another layer of depth and influence to her public persona.
In a moment that garnered widespread attention and appreciation, Tessa Thompson openly identified as biual, bravely sharing a deeply personal aspect of her identity with the world. As the context notes, “Tessa Thompson Comes Out as Bisexual and Says She and Janelle Monáe ‘Love Each Other Deeply’.” This candid declaration was a powerful act of self-acceptance and a significant contribution to LGBTQ+ visibility. Her openness resonated with many, underscoring the importance of seeing authentic identities reflected in public life, especially from beloved figures in entertainment.
Her decision to live authentically contributes immensely to the vital “visibility” that truly matters, particularly within the entertainment industry. As an actress, Thompson’s platform provides an invaluable opportunity to challenge outdated narratives and inspire countless individuals who may be navigating similar journeys of self-discovery. Her presence as a prominent Black biual woman in Hollywood helps to broaden perceptions and foster a more inclusive understanding of diverse sexualities, demonstrating that personal truth can indeed reshape public discourse and inspire positive change.
Thompson’s courageous honesty directly addresses the persistent issue of bi-erasure in society. The article highlights that “biuals still face the disheartening reality of erasure,” despite making up “a big part of the LGBTQ+ community.” By openly embracing her identity, Tessa Thompson serves as a crucial counterpoint to this invisibility, showing that “bisexuality can also mean you’re attracted to more than one gender, period.” Her unapologetic self-acceptance validates the experiences of many and reinforces the necessity of diverse representation across all media.
Through her talent and her truth, Tessa Thompson embodies the courage to share an authentic self that undoubtedly inspires others to come to terms with their own identities. She is a vital force in fostering a more inclusive and understanding world, making history with every honest step she takes. Her journey highlights how influential Black actors, through their authenticity, are shaping artistry and inspiring diverse audiences, leaving an enduring mark on Hollywood and beyond. Thompson’s voice is a powerful reminder that our authentic selves are our greatest strength.
As we’ve explored the profound narratives of these groundbreaking Black biual and pansexual actors, their stories illuminate the incredible power of authenticity and the vital importance of visibility in shaping our world. From trailblazing legends who paved the way to contemporary icons actively redefining representation, each individual has courageously shared their truth, inspiring countless others and enriching the tapestry of Hollywood. Their journeys remind us that embracing one’s true self is not just a personal act, but a revolutionary statement that resonates deeply, challenging perceptions and fostering a more inclusive, understanding landscape for everyone. Which of these incredible talents first captivated you with their work, and whose story has resonated most deeply on your own journey?”


