

Nothing kills the vibe in a good game faster than a broken gaming headset. One minute you’re mid-battle or deep in a squad chat, and the next, you’re dealing with silence, static, or a mic that’s mysteriously gone mute. This sudden disruption can turn an immersive experience into a frustrating struggle, often leading gamers to immediately consider an expensive replacement. But what if many of these common audio issues, microphone failures, or connectivity glitches are not death sentences for your gear, but rather solvable puzzles?
At Wirecutter, our philosophy centers on providing practical, user-centric advice that emphasizes functionality, durability, and true value. In the realm of gaming headsets, this means empowering you to diagnose and often repair problems at home, saving you time, money, and the hassle of a premature purchase. Our in-depth approach focuses on helping you get the most out of your current setup, guiding you through a systematic troubleshooting process before you even think about tossing your headset in the bin or rushing out to buy a new one. This guide is your essential tool to navigate the common pitfalls that can plague gaming headsets, offering clear, authoritative steps to restore optimal performance.
We believe that a well-informed buyer is a smart buyer, and understanding how to maintain and troubleshoot your gaming headset is paramount to ensuring its longevity and preventing unexpected audio woes. From baffling silence to frustrating static and communication breakdowns, we’ll walk you through the most common issues and their reliable fixes. This first section will tackle the immediate, observable problems and the foundational checks you should perform, setting the stage for a resilient gaming experience.
1. **No Sound or Unbalanced Audio**Experiencing no sound or audio distortion with your gaming headset can be profoundly frustrating, effectively halting your immersive gaming experience. Whether you’re unable to hear any audio at all or encountering distorted and unpleasant sounds, this is one of the most common yet surprisingly fixable issues. Before panic sets in and you consider a replacement, a methodical approach to troubleshooting can often reveal a simple, overlooked cause.
The absence of sound or uneven audio output frequently stems from basic connection problems or misconfigured settings. A loose or improper connection, for instance, can prevent your device from recognizing the headset entirely, leading to baffling silence. Similarly, if your headset isn’t selected as the default playback device or if volume levels are inadvertently muted, you won’t hear a thing. These initial checks are critical and surprisingly often resolve the issue without needing deeper investigation.
Start by inspecting your physical connections meticulously. Ensure the 3.5mm jack, USB plug, or wireless dongle is fully inserted into the correct port. “Make sure the plug goes all the way into the proper port.” A slight wiggle of the connector can be diagnostic; if sound cuts in and out, you likely have a loose or damaged connection. If your headset uses a USB connection, trying a different USB port can sometimes resolve issues, especially since some ports on your laptop or computer can become faulty over time.
Furthermore, inspect your headset cable thoroughly, as cables are a common failure point. Look for “frayed or exposed wires,” kinks, bends, or any signs of stress, particularly near the connector. If your cable is detachable, the simplest test is to “try swapping it with a known working one.” If this resolves the issue, a replacement cable is a far more cost-effective solution than an entirely new headset. Remember, even minor visible damage can significantly impact audio integrity, leading to intermittent sound or complete failure.
A crucial diagnostic step is to “Test it on another device.” Plug your headset into another phone, console, or PC. If it works perfectly there, then the issue isn’t with your headset but rather with your original device’s settings or ports. This quickly helps you isolate the problem, directing your troubleshooting efforts more effectively. Always confirm volume controls and mute toggles on both the headset (earcup wheel, inline control box) and the audio source, ensuring nothing has been accidentally muted or turned down.
Read more about: The 11 Critical Mistakes Even Expert Gamers Make When Building a High-End PC

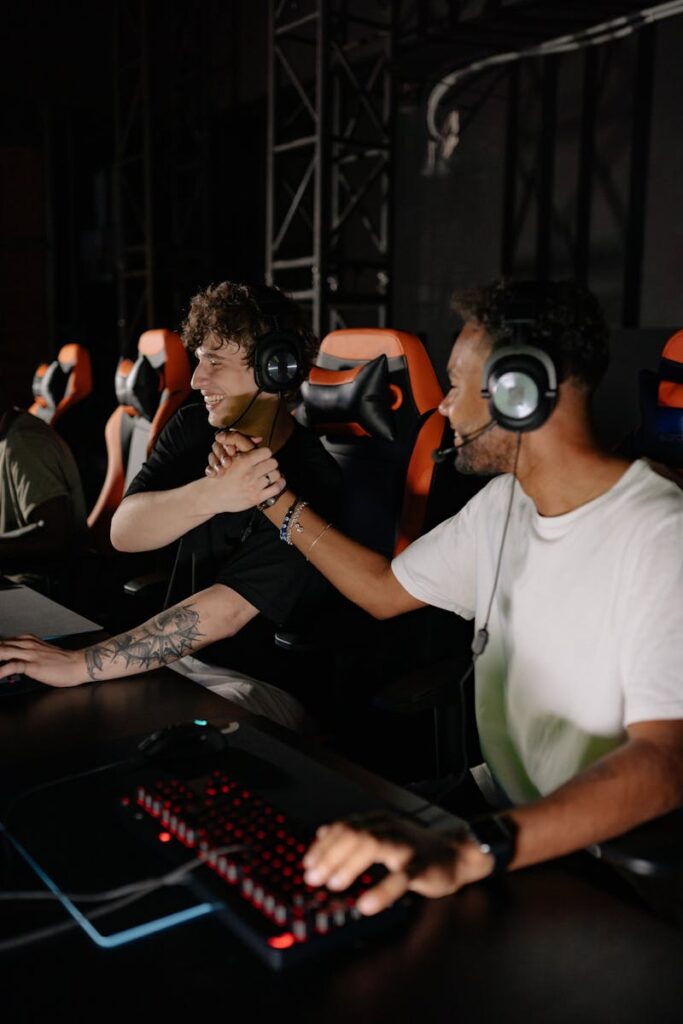
2. **Microphone Malfunctions**Clear and effective communication is absolutely crucial in gaming, especially in team-based scenarios where coordination is key. When your gaming headset’s microphone stops working, it can transform a cooperative session into a frustrating solo endeavor, hindering your ability to strategize and engage with teammates. Often, a “gaming headset mic not working” issue isn’t a complex hardware failure but a simple oversight, like an activated mute switch or an incorrect software setting.
The first and most surprisingly common culprit for a silent microphone is a physical mute switch or a flip-to-mute boom mic. Many users report “gaming headset mic not working” only to realize there’s a toggle or switch they forgot about on the mic arm or inline control. Always check these physical controls first, ensuring they are in the ‘unmuted’ position. It’s a simple check that can save a lot of head-scratching and deeper troubleshooting.
Next, delve into your device’s microphone input settings. On Windows, right-click the sound icon in the taskbar, go to Sound settings, and under Input, “make sure your headset mic is selected.” For consoles, navigate to audio or chat settings and confirm your headset mic is the active input device. Sometimes, gaming headsets use a single jack for both output and input, and a bad connection of the mic could lead to the entire headset being misrecognized, affecting both sound and mic functionality.
Software permissions are another vital area to check. On Windows, go to Settings > Privacy & security > Microphone, and “make sure microphone access is enabled for your device and apps.” Without these permissions, even a perfectly functional microphone will remain silent. This is particularly important after system updates, which can sometimes reset or alter privacy settings.
Similar to audio issues, “Test the mic on another device” to determine if the problem lies with the headset itself or your device settings. Plugging the headset into your phone or a different PC to test the microphone can quickly confirm its basic functionality. If it works elsewhere, you can then narrow your focus to the settings and drivers on your primary gaming device. Additionally, “dust and lint can clog up connectors,” so a gentle cleaning of the mic port with a soft brush or compressed air, though a long shot, is a worthwhile step.
Finally, if your headset features a detachable boom mic, consider a replacement. Manufacturers’ sites or third-party sellers often offer these specific components, providing a cost-effective solution compared to buying a whole new headset. “Just make sure it’s the correct model” for compatibility. This approach ensures that a single faulty part doesn’t render your entire setup obsolete, aligning with a practical, value-driven repair strategy.
Read more about: Unlock Your Drive: 10 Essential Reasons Why a Modern Car Tablet is Your Ultimate Automotive Upgrade
3. **Static, Crackling, or Distorted Audio**Hearing crackles, popping sounds, or robotic voices during gameplay is a distinctly unwelcome experience, fundamentally disrupting immersion and making crucial in-game audio difficult to decipher. These auditory anomalies are usually a clear sign of interference or a poor connection, indicating that the audio signal is not traveling cleanly from source to ear. Diagnosing the specific cause requires a systematic approach, often starting with environmental factors.
Wireless headsets are particularly susceptible to interference. “Move the wireless dongle” away from common sources of electromagnetic interference such as routers, cellphones, or large metal objects. These devices can operate on similar frequencies, leading to signal degradation. If you’re on a desktop PC, consider if the USB port choice could be an issue. “Switch USB ports;” rear USB ports typically offer “better power and signal integrity” compared to front panel ports, which can sometimes be less stable.
Sometimes, the issue isn’t wireless interference but rather the connection method itself. If your headset “supports both USB and 3.5mm,” try switching to the analog 3.5mm connection. If the issue improves or disappears, it strongly suggests a problem with the digital USB connection or wireless signal, guiding your further troubleshooting. This simple test can quickly rule out a broad category of potential causes.
Beyond physical connections and interference, outdated software or firmware can also contribute to static or distorted audio. Many modern gaming headsets come with companion software suites like SteelSeries GG, Logitech G Hub, or Razer Synapse. It’s crucial to “Update firmware/software” using the appropriate software suite, as manufacturers frequently release updates to improve stability, performance, and address known audio issues.
Persistent static or crackling can unfortunately also be a more serious indicator of “a damaged cable or a failing speaker driver.” While external cables are often replaceable, internal damage is more complex. “Try testing with another headset to confirm, if possible.” This comparative test can definitively tell you if the problem is inherent to your problematic headset or if it’s an environmental or source-related issue affecting all audio devices. Such a test is invaluable in deciding whether to pursue repair or consider replacement.

4. **Wireless Connectivity Failures**Wireless headsets offer unparalleled freedom and convenience, liberating gamers from tangled cables and restrictive movement. However, this convenience quickly turns to frustration when they refuse to connect, leaving you tethered to silence. Whether your headset relies on Bluetooth or a dedicated USB dongle, connectivity issues are a common headache that, fortunately, often have straightforward solutions.
The most obvious, yet frequently overlooked, cause for a wireless headset failing to connect is a depleted battery. It “Seems obvious, but low or dead batteries are often overlooked.” Ensure your headset is fully charged before attempting any further troubleshooting steps. A full charge ensures that the headset has enough power to establish and maintain a stable connection, preventing intermittent dropouts or complete refusal to pair.
If the battery isn’t the culprit, the next step is often to “Re-pair the headset.” For USB dongles, this typically involves pressing a pairing button on both the dongle and the headset itself; always refer to your user manual for the exact procedure. For Bluetooth headsets, you’ll need to go into your device’s Bluetooth settings, remove the headset from the list of paired devices, and then “re-add the headset” as if it were a new device. This process clears any corrupted pairing data that might be preventing a connection.
Wireless drivers and firmware can also become buggy, particularly “after an operating system update.” Manufacturers often release updates specifically to address compatibility issues or improve wireless stability. Therefore, “Check your manufacturer’s software for the latest updates.” Keeping these drivers and firmware current is a critical preventative and reactive measure for maintaining reliable wireless performance, ensuring your headset’s software is optimized for your system.
A less intuitive but significant source of wireless interference comes from certain USB ports. “USB 3.0 ports can emit noise in the 2.4GHz range,” which is the same frequency band many wireless dongles operate on. This interference can severely disrupt connectivity. To mitigate this, “Try plugging into a USB 2.0 port or use a USB extender to create distance” between the dongle and the potentially noisy USB 3.0 port. This simple adjustment can often resolve persistent wireless dropouts and connectivity woes, restoring your wireless freedom.
Read more about: Beyond the Showroom Shine: Uncovering the Deep Discounts on Trucks (and More) Lingering on Dealer Lots

5. **Addressing Physical Damage**While internal electronic failures can be perplexing, physical wear and tear are an inevitable reality for any frequently used piece of equipment, and gaming headsets are no exception. “No headset lasts forever,” and components like earcups, headbands, and mic arms are constantly subjected to stress, friction, and accidental impacts. Addressing physical damage often prolongs the life of your headset, allowing you to avoid a complete replacement for what might be a localized issue.
One of the most common comfort and aesthetic issues arises from “worn earcups.” If your cushions are flaking, flattened, or simply disintegrating, they not only become uncomfortable but can also degrade sound isolation. The good news is that “replacements from the brand’s site” are often available, and “you can often find compatible third-party pads on Amazon, eBay, or audio accessory shops.” However, if replacements are unavailable, you might be out of luck unless you’re under warranty. “Note that if your headset is still under warranty, you may be eligible for a replacement because of this.”
A “loose or broken headband” can compromise both comfort and structural integrity. If the headband is cracked or stretched, “a zip tie or two can hold things together as a short-term fix,” providing temporary relief. For a more “permanent fix,” epoxy or plastic glue can be used, though it “may not look pretty.” The goal here is functionality over aesthetics, ensuring the headset remains usable and comfortable enough for continued gaming sessions without constant slippage or discomfort.
“Broken mic arm or cable” damage is particularly frustrating, as a snapped boom mic or a cable split at the base can render the communication aspect of your headset useless. In many cases, these issues “usually need replacement parts.” While the idea of soldering might come to mind, it’s generally advised, “Don’t attempt soldering unless you’re confident in your skills (and you’re outside warranty),” to avoid further damage or voiding any remaining coverage. Thankfully, “You can often find replacement booms online, including for older models,” making this a viable repair option.
For headsets that are “Out of warranty,” you may find success in replacing individual components rather than the entire headset. Enthusiastic communities on platforms like Reddit often share “DIY part swaps or headset mods,” and searching “your exact model number on eBay or Amazon” can yield specialized replacement parts. This approach allows for targeted repairs, extending the life of an otherwise functional headset and embodying a practical, cost-effective consumer mindset championed by Wirecutter.
Read more about: The Futile Fight: Why Studios and Brands Can’t Erase Online Failures in the Social Media Age
6. **Verifying Physical Connections**In the world of troubleshooting, starting with the basics is not just good practice; it’s often the quickest path to a solution. When a gaming headset goes silent or experiences intermittent issues, the very first line of defense is meticulously “checking your physical connections.” This fundamental step, though seemingly simple, addresses a surprising number of problems that arise from loose plugs, damaged cables, or obstructed ports.
Begin by ensuring that any plugs – whether a 3.5mm jack, a USB plug, or a wireless dongle – are “fully inserted into the correct port.” A common oversight is a plug that’s only partially seated, which can lead to no sound, sound from only one side, or a non-functional microphone. For wired headsets, this means checking both ends of the cable – where it connects to the headset and where it connects to your device. Sometimes, a seemingly firm connection might still be slightly off, so a gentle push can make all the difference.
Once inserted, try “wiggling the connector gently.” If, as you do this, sound cuts in and out, or if static appears and disappears, you’ve likely pinpointed the problem: a loose or damaged internal connection within the plug or port itself. This diagnostic wiggle test is invaluable for identifying subtle connection failures that aren’t immediately apparent. Such a finding often points towards needing a replacement cable or, in rarer cases, a port repair on your device.
“Inspect the cable” itself with careful attention. Cables are high-stress components, especially near connectors where they are frequently bent and pulled. Look specifically for “frayed or exposed wires,” as well as “kinks, bends, or signs of stress.” Even if the cable appears outwardly intact, internal damage can still occur. If your headset features a detachable cable, “try swapping it with a known working one” to quickly rule out the cable as the source of the problem. This is often the most straightforward and effective test for cable integrity.
Beyond the cables, the ports themselves can be a source of trouble. A “dusty port is like a sock in a washing machine—nothing will work right!” Dust, lint, or other debris can accumulate in headphone jacks or USB ports, preventing a full and proper connection. Using a soft, dry brush or compressed air to “gently clean the mic port” and other audio ports can dislodge obstructions and restore connectivity. For USB connections, particularly for wireless dongles, remember that “USB 3.0 ports can emit noise in the 2.4GHz range, interfering with wireless dongles. Try plugging into a USB 2.0 port or use a USB extender to create distance.” These small details in physical setup can profoundly impact performance.
The journey into ensuring your gaming headset stands the test of time often requires moving beyond the initial checks. While foundational troubleshooting can resolve many immediate concerns, some issues demand a deeper dive into software intricacies, advanced hardware diagnostics, and a clear understanding of when to seek external expertise. This second part of our comprehensive guide delves into these more advanced troubleshooting steps and crucial preventative measures, empowering you to tackle complex problems and maintain your headset’s long-term reliability.
Read more about: Conquering Connectivity: The 15 Most Common Wi-Fi Problems Plaguing Modern Homes, and How to Fix Them
7. **Updating and Managing Sound Drivers**Outdated or corrupted sound drivers are insidious culprits behind many perplexing audio problems, often leading to no sound, muffled output, or even distorted audio. These essential software components act as the bridge between your operating system and your headset’s hardware, and when that bridge is faulty, communication breaks down. A common trigger for driver issues can be recent system updates, which sometimes introduce incompatibilities with existing audio drivers, leading to unexpected silence or performance degradation.
The context emphasizes that “Outdated or corrupted sound drivers can prevent your headset from working correctly.” It specifically notes that “Sometimes, a recent system update can interfere with audio drivers, making them incompatible.” This highlights why regular driver maintenance is not just good practice but a critical proactive measure. Conflicting drivers from previously installed audio devices can also contribute to these woes, making driver management a multi-faceted task.
To address this, Windows users should open Device Manager by right-clicking Start, then navigating to Sound, video and game controllers to find their headset. From there, “right-click, and choose Update driver” to allow Windows to search for the latest version. If problems persist even after updating, a more aggressive approach involves uninstalling the device and restarting your PC, which will force Windows to reinstall it with a fresh, hopefully uncorrupted, driver.
Beyond Windows’ built-in tools, “It’s important to regularly update your drivers to maintain smooth functionality.” Many gaming headsets come with companion software suites like SteelSeries GG, Logitech G Hub, or Razer Synapse. These platforms often provide crucial firmware updates alongside driver updates, which can significantly improve stability and performance. “If you think there is some sort of conflict by a driver, roll it back to where it previously operated correctly” as an alternative, allowing you to revert to a stable, working state.
Read more about: Unlock Longer Life: 12 Hidden iPhone Settings to Boost Your Battery by 40%
8. **Navigating Software Conflicts and Permissions**Even when physical connections are solid and drivers are up-to-date, invisible software conflicts can silently sabotage your gaming headset’s performance. These issues often stem from third-party applications or system settings inadvertently interfering with audio pathways, transforming crystal-clear sound into frustrating silence or garbled communication. Identifying these conflicts requires a methodical approach, checking various layers of your system’s software environment.
A significant source of interference can be “You may have software that has voice changers, equalizers, or virtual audio drivers.” These applications, while offering customization, can “interfere with your headset.” The recommended action is to “disable or uninstall them temporarily and verify if the problem has been resolved.” This simple test can quickly isolate whether a specific third-party program is the root cause, allowing you to make an informed decision about its necessity.
Another often overlooked area is security software. “Check Settings of Antivirus and Firewall” because “some security programs block the audio drivers or communication apps mistakenly.” To rule this out, you can “temporarily disable the antivirus and test the headset to rule out conflicts.” While not a long-term solution, this diagnostic step is invaluable for pinpointing security software as the culprit, after which you can adjust its settings to allow your headset to function correctly.
Furthermore, gaming platforms themselves can override system audio settings. “Verify Audio Settings in Gaming Platforms,” such as “Discord, Steam, or Xbox Game Bar.” It’s crucial to “Access their settings to make sure the headset is the selected input and output device as well as the volume levels.” Alongside this, “Disable Virtual Audio Drivers” that some applications install. Heading to your sound settings and unchecking any “unused devices from under both playback and recording” can prevent these phantom drivers from causing interference.
9. **Diagnosing Deeper Hardware Malfunctions**While many gaming headset issues can be resolved with software tweaks or simple physical adjustments, there are unfortunate instances where the problem lies deep within the hardware itself. These are the moments when a headset genuinely approaches the end of its lifespan, manifesting in symptoms that are often beyond the scope of a home repair. Recognizing these critical hardware malfunctions is key to deciding whether to attempt a complex fix, seek professional help, or consider a replacement.
The context provides clear indicators for when to step back: “Internal speaker or mic driver failure,” “Non-detachable cable damage,” “Severe distortion or blown speakers,” and “Battery won’t hold a charge (wireless models).” These are typically issues that require specialized tools, intricate knowledge, or proprietary parts that aren’t readily available to the average user. Attempting to fix these without proper expertise can often lead to further damage or voiding any remaining warranty.
For wireless models, a “Battery won’t hold a charge” is a definitive sign of internal hardware degradation. Unlike external cables or earcups, an internal battery that has lost its capacity is usually not an easily replaceable component for most users, pushing the headset towards obsolescence. This particular issue underscores the importance of considering the overall longevity of wireless devices and the cost-effectiveness of their repair.
A crucial diagnostic step before concluding hardware failure is to “Test whether the headset has a hardware failure by checking it on another device.” The logic is simple and powerful: “If there are no problems with it in another device, it means that your original gadget is the issue.” Conversely, “If the device has been dropped or exposed to moisture, internal components may be damaged,” further solidifying the likelihood of a hardware fault that may be beyond a simple fix.
Read more about: Tech Trouble in Every Drive: 12 Vehicle Infotainment Glitches Drivers Report as Most Frustrating
10. **Utilizing Reset and System Restore Options**Sometimes, despite all the targeted troubleshooting, software settings can become so tangled or corrupted that a fresh start is the most effective solution. This is where reset options and system restore points become invaluable tools in your troubleshooting arsenal, capable of resolving deep-seated software conflicts or issues introduced by system changes. They offer a way to revert your system’s audio environment to a known working state without necessarily needing to reinstall everything from scratch.
“Resetting audio settings can often fix persistent sound issues.” On Windows, this involves navigating to the Sound settings, scrolling down to “Advanced sound options,” and clicking reset. This action typically restores all audio-related configurations to their default values, clearing any misconfigurations that might have accumulated over time. Similarly, for console users, the process involves restoring audio settings to their default state within the system’s menu.
If third-party audio software is suspected to be the problem, a temporary disable or uninstall can serve as a diagnostic step. “If third-party audio software is installed, disable or uninstall it temporarily to see if it resolves the issue.” This helps to determine if the software itself is causing conflicts. In more severe cases of persistent software conflicts, “A factory reset of your device may also help if software conflicts are suspected,” though this is a more drastic measure to be considered after other options.
For problems that appear directly “after updating its system,” the context suggests “try rolling back the update or performing a system restore.” Windows users can access “Recovery” options under “Update & Security” in Settings to “Go back to the previous version” if available. Alternatively, “use System Restore to revert to a restore point when your headset is working well.” This allows you to undo recent system changes that might have introduced the problem, restoring functionality while still allowing you to eventually update once compatibility issues are resolved.
Read more about: The True Cost of ‘Peace of Mind’: 13 Critical Reasons Why Extended Warranties for Your Appliances Are Rarely Worth It
11. **When to Seek Professional Help and Warranty Support**There comes a point in troubleshooting when DIY efforts reach their limit, and it’s time to consider external assistance. While we champion the ability to fix problems at home, knowing when to “step back and consider alternatives” is a crucial aspect of responsible product ownership. This involves understanding your warranty, exploring professional repair services, and making an informed decision about repair versus replacement.
Before attempting any complex repairs that might void coverage, “Check your warranty.” Most headsets come with a “1–2 year manufacturer warranty.” It is paramount to “Visit the brand’s website and look for warranty options,” carefully noting “what the warranty actually covers, as damage caused by different factors can affect coverage.” Always “Keep your receipt or Best Buy Canada proof of purchase handy” as it is essential for any warranty claim. The golden rule here is, “Don’t void it by cracking the thing open.”
For issues beyond simple fixes or within warranty, professional services can be a lifeline. “Best Buy Canada’s Geek Squad may offer in-store diagnostic or repair support.” They provide “In-store diagnostics and troubleshooting,” along with assisting with “Repairs, replacements, or warranty claims.” Importantly, they offer “Expert advice on whether to fix or upgrade,” which can be invaluable when you’re on the fence about the financial viability of a repair.
The ultimate decision often boils down to cost-effectiveness. The context provides a practical benchmark: “If repairs cost more than 50–60% of the original price, you’re likely better off buying a new headset.” This objective advice helps consumers avoid throwing good money after bad, reinforcing the Wirecutter philosophy of long-term value. It’s a pragmatic approach to ensure you’re making the smartest decision for your gaming setup.
Read more about: Unlock Your Power: 11 Essential Legal Rights Every American Tenant Must Master for a Stress-Free Rental Life
12. **Implementing Preventative Measures for Longevity**The best fix, of course, is preventing the problem from occurring in the first place. Once you’ve navigated the complexities of troubleshooting, adopting a proactive approach to headset care can significantly extend its lifespan and maintain optimal performance. “Preventing Future Audio Issues” is about smart habits and regular maintenance that safeguard your investment and ensure uninterrupted gaming sessions.
A primary preventative measure involves software hygiene. “Maintain compatibility with system updates by keeping your sound drivers and firmware up to date.” Regular updates from the manufacturer often include critical bug fixes, performance improvements, and compatibility enhancements that can prevent future audio woes. This consistent attention to software ensures your headset operates with the latest optimizations, minimizing the risk of software-induced problems.
Physical care is equally vital. “Properly store your headset in order not to cause cable damage and issues while connecting it.” This simple habit, such as hanging your headset on a stand or placing it in a designated spot, prevents accidental tugs, bends, and knots that are notorious for damaging cables and connectors. Avoid leaving cables tangled or under heavy objects, as continuous stress can quickly lead to internal wire breakage.
For wireless headsets, specific preventative steps enhance reliability. “In the case of a wireless headset, maintain a good charge and also follow the firmware update procedure by the manufacturer.” Consistent charging prevents battery degradation, and firmware updates often improve wireless stability and connection quality. Additionally, “Avoid turning in-game or system audio on mute unintentionally” and “do not install unnecessary third-party audio software which may interfere with your headset.” These practices minimize user error and software conflicts, ensuring a smooth, long-lasting gaming experience.
Navigating the complexities of gaming headset issues can sometimes feel like a mini-boss battle in itself. From mysterious silence to frustrating mic failures, the journey to a flawless audio experience is often paved with systematic troubleshooting. As we’ve explored, many common problems, from connection glitches to physical wear, can be confidently addressed at home with a bit of patience and the right knowledge.
We’ve delved into everything from verifying physical connections and managing drivers to diagnosing deeper hardware faults and understanding crucial software conflicts. Ultimately, the goal is to empower you, the gamer, to maximize the life and performance of your gear. By understanding when to apply a simple DIY fix, when to lean on advanced troubleshooting like driver management or system resets, and crucially, when to consult warranty support or professional services, you’re better equipped to make informed decisions.
Read more about: Beyond the Showroom Shine: Why Some Vans Rust Fast and 10 Expert Strategies to Conquer Corrosion Before Winter
Remember, prevention is your best ally. Regular updates, proper storage, and mindful use will go a long way in ensuring your headset delivers crisp sound and clear communication for countless gaming adventures to come. Don’t let a minor glitch derail your quest; with this guide, you’re ready to conquer any audio challenge.


