


Car ownership is a gateway to freedom and convenience, but let’s be honest, it often comes with a hefty price tag when it comes to maintenance and repairs. Those trips to the mechanic can drain your wallet faster than a gas guzzler on a cross-country journey! But what if we told you that many common car woes don’t require professional intervention? Imagine saving hundreds, even thousands, of dollars each year just by dedicating a little time to learning some basic DIY car care. It’s truly a game-changer.
This isn’t about becoming a certified auto technician overnight. Instead, it’s about empowering yourself with practical knowledge and actionable advice that turns complex-sounding tasks into simple, manageable projects. From ensuring your engine runs smoothly to keeping your car looking sharp, there are a surprising number of maintenance jobs you can easily handle right in your driveway or garage. Not only will you keep more money in your pocket, but you’ll also gain a deeper understanding of your vehicle, allowing you to spot potential issues early and plan for those bigger fixes with confidence.
So, get ready to roll up your sleeves and dive into the world of DIY car maintenance! We’ve rounded up a fantastic collection of tasks that are well within your reach. With a few basic tools and a can-do attitude, you’ll discover the immense satisfaction of taking charge of your vehicle’s health and boosting its longevity. Let’s transform your garage into an amateur mechanic’s paradise and embark on a journey that will save you money and make you a savvier car owner.

1. **Change Engine Oil and Filter**
Changing your oil regularly is, without a doubt, one of the most effective ways to prolong the life of your engine. Fresh oil lubricates engine components, cleans away dirt and debris, and helps to prevent overheating, all critical functions for your vehicle’s long-term health. This is a common maintenance task, and you should always change the oil and filter as often as your vehicle manufacturer specifies, ensuring your engine receives the precise care it needs.
While you might not save a massive fortune on each individual oil change compared to a service center, there are compelling reasons why doing this work yourself is a smart move. For one, it’s the only way you can be absolutely sure of the quality of oil that actually goes into your engine, giving you complete control over this vital component. Furthermore, it provides a fantastic opportunity to get underneath the vehicle and visually inspect other areas, allowing you to proactively spot any potential issues while you’re already there.
The process itself is quite straightforward, though it can get a little messy, so be prepared! To start, ensure your engine is cool and gather your essential tools: an oil filter wrench, a drain pan, a socket set, and, of course, the appropriate type of new oil. After safely draining the old oil into the pan, proceed to replace the oil filter to guarantee no contaminants remain in the system. Finally, pour in the new oil and check the level with the dipstick. Remember to properly dispose of your old oil at a recycling center; it’s a small but important step for environmental responsibility. Many online tutorials specific to your vehicle model can provide intricate guidance, especially as oil types and capacities can vary significantly.
Read more about: Electricity Unveiled: A Consumer Guide to Its Fundamental Concepts, History, and Modern Applications
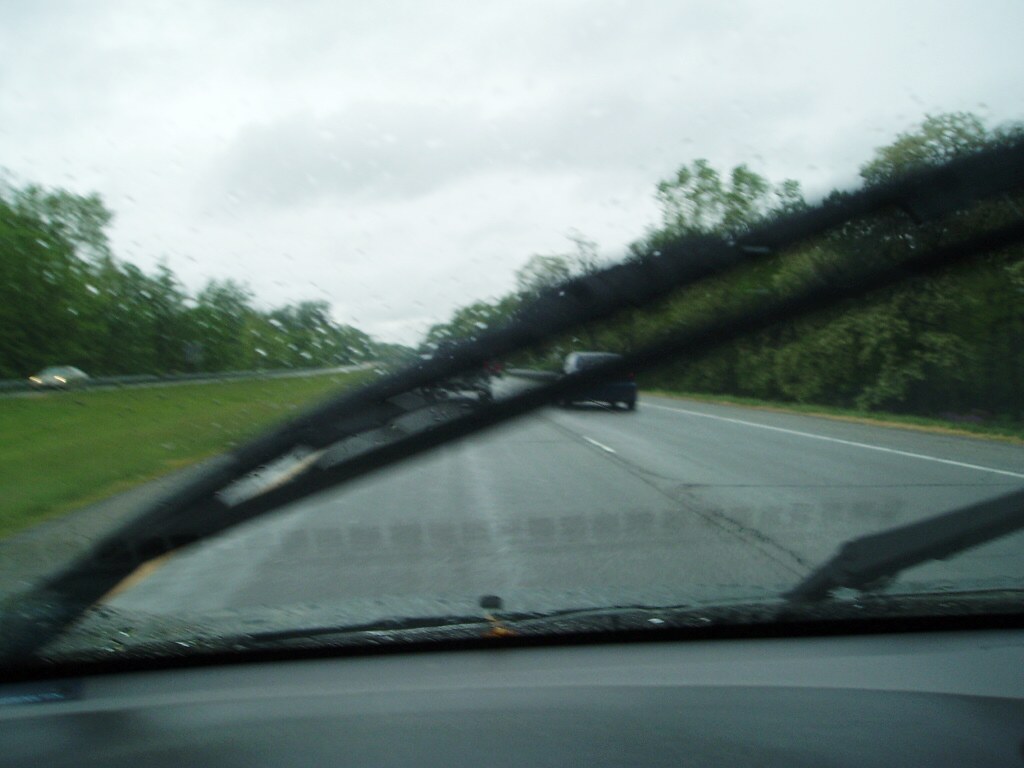
2. **Replace Windshield Wipers**
Windshield wipers are truly unsung heroes for driving safety, yet they often become one of the most neglected car parts. Old or damaged blades dramatically reduce visibility during rain, sleet, or snow, creating unnecessary hazards that no driver wants to face. Fortunately, figuring out when your blades need replacing is incredibly easy: just press the washer button and see if your blades wipe clean. If they leave streaks or chatter across the glass, they’re definitely “toast.”
Replacing your wipers is a breeze, usually requiring no special tools, and it’s a task that almost every driver can handle without professional help. A new pair of wipers typically costs a modest $20–$40, and the entire installation can be done in under 10 minutes, making it one of the quickest and most impactful DIY fixes. Many auto parts stores have convenient fit guides or knowledgeable clerks who can assist you in finding the perfect size and type for your specific vehicle.
Most wiper arms are ingeniously designed for quick release, and you’ll find clear, step-by-step instructions included right in the packaging of your new blades. The installation typically involves lifting the wiper arm away from the windshield, pressing a small tab on the old wiper, and sliding it off. Then, simply slide the new wiper onto the arm until you hear a satisfying snap, and carefully lower the arm back onto the windshield. A crucial safety tip: always maintain a firm grip on the wiper arm once you remove the old blade; if it gets away from you, it can spring back with enough force to potentially crack your windshield. As a bonus, consider upgrading to silicone wiper blades for even longer life and superior visibility.
Read more about: Are You Driving a ‘Jerk’ Car? 14 Vehicles With Bad Driver Reputations
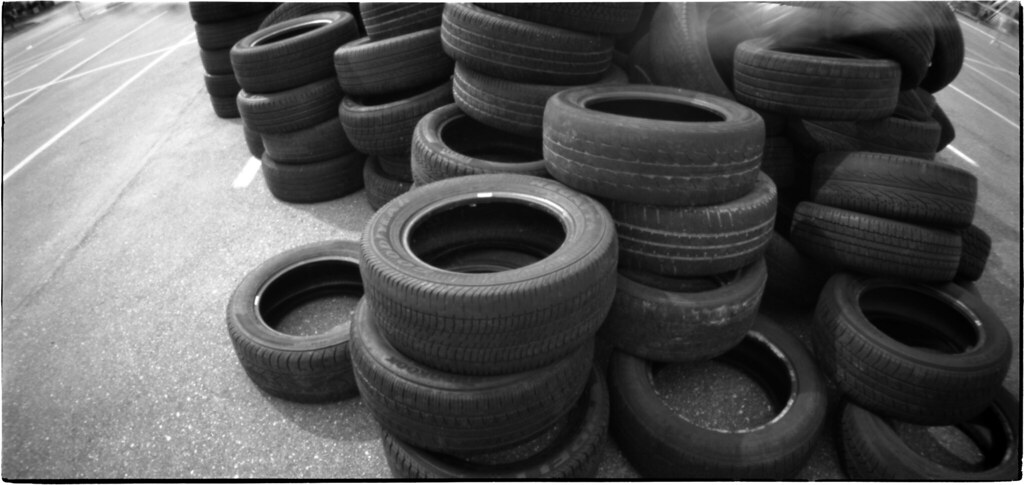
3. **Check and Maintain Tire Pressure**
Maintaining proper tire pressure is absolutely essential for safe driving and achieving optimal fuel efficiency. It’s a simple check that yields huge benefits, impacting everything from your car’s handling to the longevity of your tires. Under-inflated tires can lead to sluggish handling, decreased fuel economy, and accelerated tire wear, costing you money and compromising safety. On the flip side, over-inflated tires can reduce traction and even lead to dangerous blowouts, so finding that sweet spot is key.
Making tire pressure checks a regular part of your routine is a smart habit to cultivate. Aim to check your tire pressure at least once a month, or definitely before embarking on any long trips. For the most accurate reading, the morning is usually the best time to check your tires since they haven’t been heated by driving, which can temporarily increase internal pressure. This simple, proactive step can prevent a myriad of problems down the road.
The process couldn’t be simpler: use a reliable tire gauge to measure the pressure in each tire. Crucially, compare this reading to the recommended levels found in your owner’s manual or, more commonly, on the driver’s door sticker (not the maximum pressure listed on the tire sidewall). If adjustments are needed, you can use a pump to inflate or release air as necessary to achieve the right pressure. Most gas stations offer free air, making this a cost-free way to save money long-term and ensure your vehicle is always rolling efficiently and safely.
Read more about: The S.M.A.R.T. Goal Revolution: Ditching the Vague and Embracing Clarity for Unstoppable Success – What You’re Missing
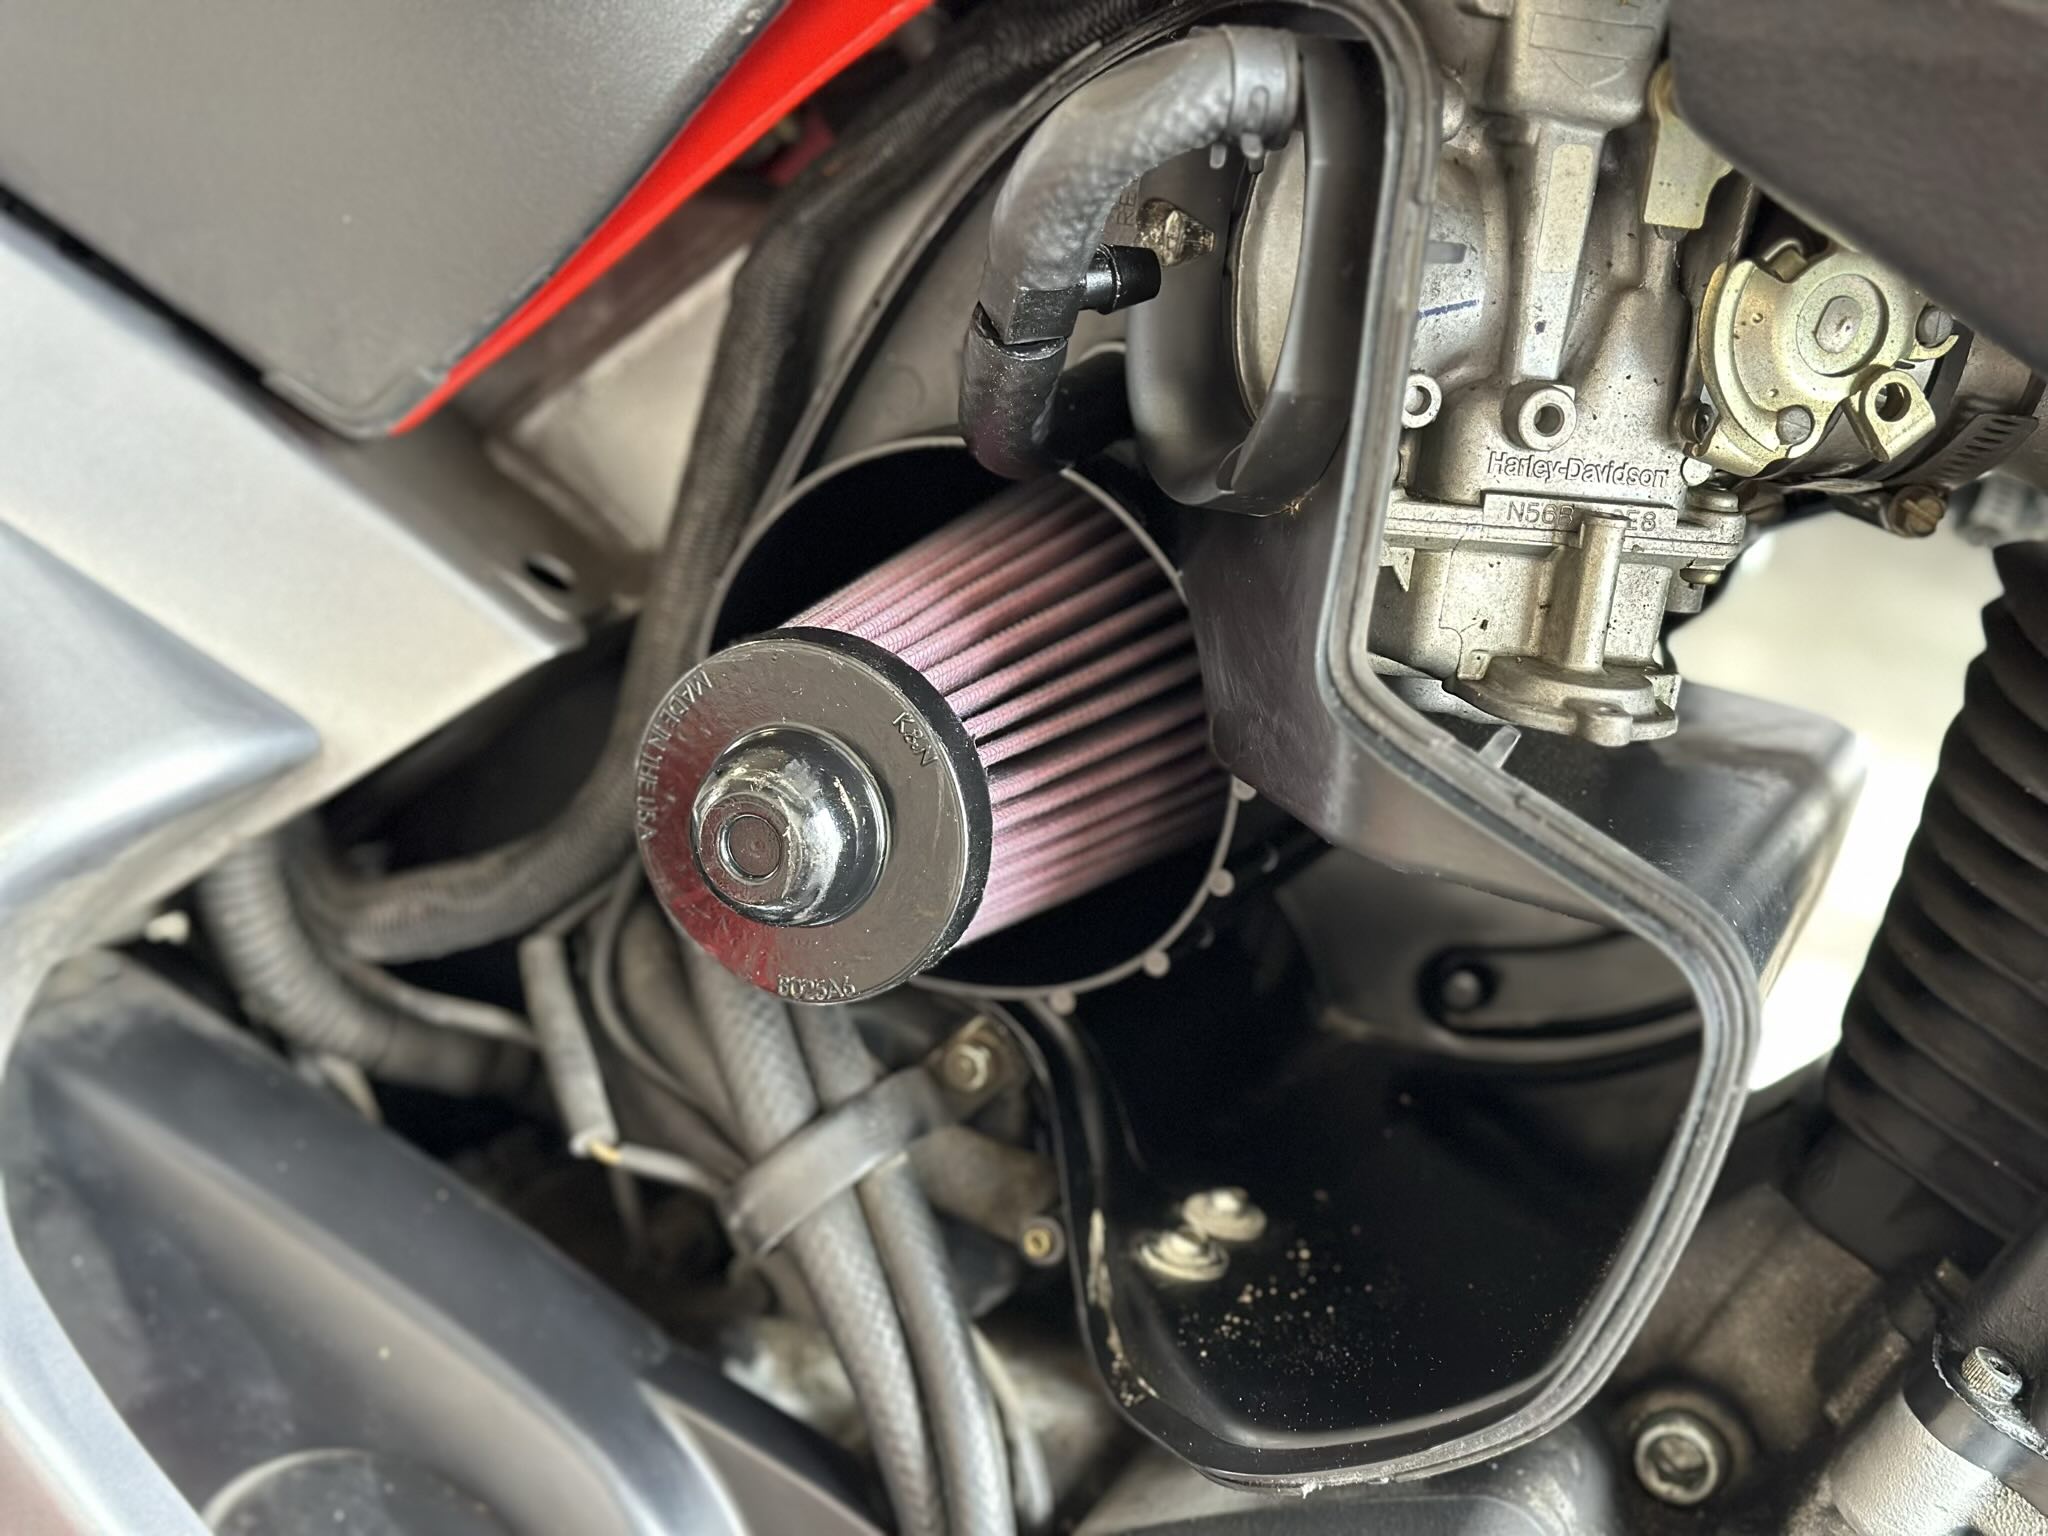
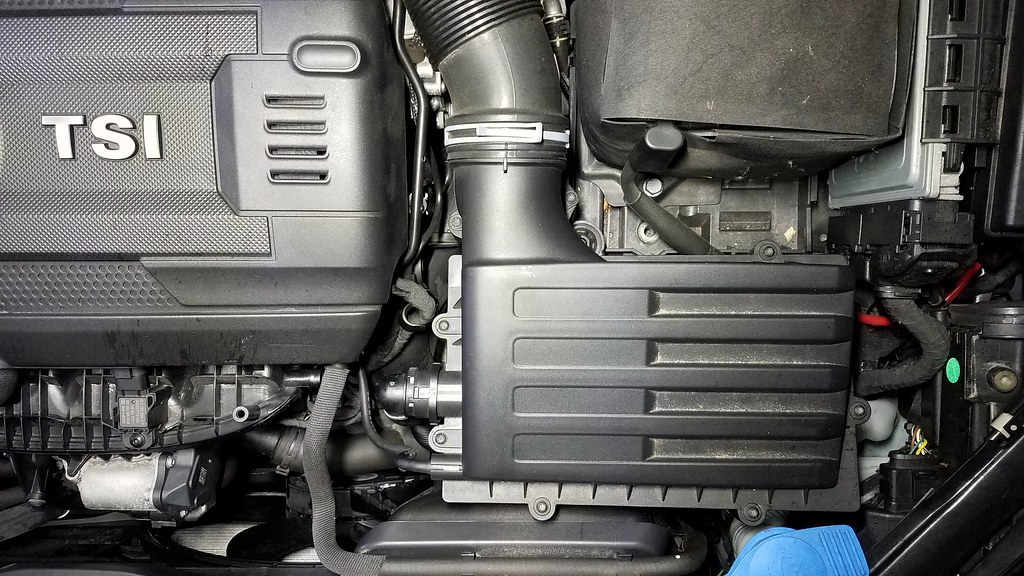
4. **Replace Engine Air Filter**
The engine air filter is a vital, yet often overlooked, component that plays a critical role in your car’s performance and longevity. It acts as your engine’s lungs, ensuring it receives clean air for proper combustion. A clogged air filter restricts this crucial airflow, leading to reduced engine performance, decreased fuel efficiency, and, if left unchecked, potentially costly repairs. Keeping this filter clean is a small investment that pays big dividends in engine health.
The good news is that swapping out a dirty engine air filter is genuinely one of the quickest and easiest DIY tasks you can tackle. You won’t need any special tools, and there’s absolutely no need to pay a mechanic for something so simple. Replacing your engine air filter every 15,000–30,000 miles, or as recommended by your manufacturer, is a fantastic habit for maintaining your vehicle’s vitality and is certainly one of the easier things you can do to fix up cars.
The replacement process is incredibly straightforward. First, locate your car’s airbox, which is typically found in the engine bay. Most airboxes are secured by simple clips or a few screws; just pop it open and carefully remove the old filter. A great way to check its condition is to hold a shop light behind it. If the filter blocks 50 percent or more of the light, it’s definitely time for a replacement. If not, simply put it back in, securely close the air filter box cover, and you’re good to go. This small investment can significantly enhance your driving experience and the longevity of your vehicle.
Read more about: Consumer Alert: Unpacking 14 SUVs That Master Transmission Reliability, Defying Post-Warranty Failure
5. **Replace Your Cabin Air Filter**
Beyond the engine’s needs, your car also has a filter dedicated to your comfort: the cabin air filter. These unsung heroes work tirelessly to keep the air inside your car fresh and clean by trapping dust, pollen, and various pollutants before they enter the passenger compartment. However, like any filter, they clog over time, leading to reduced airflow from your vents and potentially even musty odors. A severely clogged cabin air filter can even damage your car’s blower motor and cause your AC to run longer and harder in the summer, impacting both comfort and system wear.
Fortunately, replacing your cabin air filter is another fantastically easy and budget-friendly DIY task. It’s typically a five-minute job that usually involves nothing more complicated than opening the glove compartment, sliding out the old filter, and inserting a fresh one. Cabin air filters usually cost a modest $15–$25, but mechanics often charge $75 or more for the service. Doing it yourself is easily one of the most straightforward and satisfying money-saving fixes you can perform on your vehicle.
To get started, simply purchase a replacement cabin air filter from any auto parts store. Don’t hesitate to ask the clerk to print out the installation instructions, as locations can vary slightly. While many are conveniently located in the air ducts behind the glove box in late model vehicles, some carmakers might place them in the cowling or console area. Just remove the access covers and carefully slide out the old filter. Pay close attention to the direction of the airflow arrows on the old filter and the new one so you can install it in the proper orientation. Then, simply reinstall the covers, and you’re done! You’ll be breathing easier in no time.
Read more about: New Tesla Recall: Model 3 and Y Rollaway Risk Due to Software Glitch – An In-Depth Look at Tesla’s Evolving Vehicle Landscape
6. **Replace a Car Battery**
A dead battery is one of those annoying inconveniences that can leave you stranded and frustrated, but here’s the good news: you can absolutely handle it yourself! Your car battery is the crucial component responsible for starting your vehicle and powering all its electrical systems. If you’ve started noticing signs of a failing battery, such as dim headlights, sluggish accessories, or a slow engine cranking when you turn the key, it’s a clear signal that it might be time for a replacement. While most car batteries typically last about three to five years with proper care, extreme temperatures can significantly affect their lifespan.
Taking a proactive approach to battery maintenance can save you a lot of hassle and expense. Make testing your car battery a priority on your regular maintenance checklist so that you have ample warning and can start setting aside money for a new one. Battery testers, which are not expensive, measure the capacity of the battery compared to what it was designed to deliver, along with critical details like voltage during start-up. These gauges provide invaluable insights that will help you keep your vehicle working reliably and prevent you from being caught off guard.
Replacing a car battery is much easier than you might think, and it’s a job you can usually complete in 10–15 minutes. Always ensure the engine is off and the keys are out of the ignition before you begin. The cardinal rule for safety is to always disconnect the negative terminal first, then the positive, using a wrench or socket set. When installing the new battery, simply reverse the order, connecting the positive terminal first, followed by the negative. Don’t be alarmed if you see a few small sparks – that’s perfectly normal. This simple task can save you from costly markups at the service center and gives you the confidence of knowing you can handle this common roadside scenario.
Read more about: Buyer Beware! Is Your Fitness Tracker Refusing to Charge? 15 Fixes Before You Toss It!

7. **Fix Minor Paint Scratches**
It’s a fact of life that nicks, scratches, dents, and dings can make your beloved car look older than it actually is, diminishing its aesthetic appeal and potentially its resale value. While truly serious body damage definitely requires professional help, the exciting news is that you can confidently repair many minor marks yourself. Tackling these cosmetic imperfections at home is a fantastic way to restore your car’s appearance and protect your investment without shelling out big bucks at a body shop.
When it comes to paint scratches that haven’t penetrated through the paint layer, you might just think you’ve done magic once you’re finished. For these surface blemishes, some very fine abrasion can make them disappear like they were never there. You can even employ a 6-inch random orbit woodworking sander for this task, but with a buffing pad installed instead of an abrasive disc, of course. Apply a mild auto body buffing compound with the moistened buffing pad, work your magic, and then simply rinse it off when you’re done to reveal a smoother, cleaner finish.
For slightly deeper, yet still minor, scratches that buffing alone might not fully resolve, various scratch-removal products and touch-up paints are widely available at auto parts stores. While the results of DIY cosmetic fixes may not always match the flawless finish of professional work, they often improve the appearance significantly enough to avoid depreciation when you decide to sell or trade in your car. This empowers you to maintain your vehicle’s curb appeal and protect its value with practical, accessible solutions.
Now that you’re well-versed in the foundational DIY tasks for your vehicle, let’s dive into some more specific fixes and detailing secrets that continue to bolster your car’s health and aesthetic appeal. These next steps demonstrate just how much control you can gain over your car’s upkeep, all while keeping those costly mechanic bills at bay. Get ready to expand your amateur mechanic’s paradise even further, transforming minor annoyances into satisfying accomplishments.
Read more about: Beyond the Bumper: How Minor Collisions Can Stealthily Turn Your Hatchback Into a Money Pit

8. **Replace That Broken Antenna**
A broken or damaged antenna can be quite an eyesore, not to mention a nuisance if you rely on your car’s radio. The good news is that replacing an antenna, whether it’s a fender mount or a pillar mount, is a very achievable DIY task that can save you the cost of a trip to the repair shop. You don’t need to be an electrical engineer to get your tunes back!
For those with a fender mount antenna mast, the fix is particularly simple. Often, all that’s required is to unscrew the broken portion of the mast directly from its base. Once you have the old piece removed, you can easily purchase a replacement mast from any auto parts store. Make sure you get the correct model for your vehicle, and then simply screw the new one into place. It’s a quick, satisfying repair that takes minutes.
Pillar mount antennas, while slightly more involved, are still well within the capabilities of a savvy DIYer. Your first step will be to disconnect the antenna cable from your radio – this usually involves carefully pulling the radio out of the dash. Next, connect a heavy string to the end of the old antenna cable. Unscrew the antenna mount from the pillar itself and then gently pull the old antenna and the attached string straight out from the vehicle.
With the string now threaded through the car’s interior, attach the new antenna cable to the string. Carefully pull the cable back into the vehicle using the string as a guide, connecting it to your radio. Finally, secure the new antenna to the pillar using the screws provided, ensuring a snug fit. This might sound like a lot, but taking it step-by-step makes it a breeze, restoring both your car’s appearance and your radio reception.
Read more about: The Essential DIY Car Maintenance Tasks That Can Save You $3,000 (Or More!) In Repairs

9. **Fix That Leaky Sunroof**
There’s nothing quite as disheartening as finding raindrops falling inside your car, especially when you thought you were safely tucked away beneath a closed sunroof. A common culprit for this unwelcome interior downpour isn’t necessarily a cracked sunroof, but rather clogged drain holes. Over time, debris like leaves, dirt, and pollen can accumulate in these small channels, preventing water from draining properly and causing it to back up and spill into your car’s cabin.
Fortunately, this is a very manageable DIY fix that can save you from costly interior water damage and professional repair bills. To begin, open your sunroof fully and carefully inspect the front and rear corners of the sunroof assembly for small drain holes. Once located, your first line of attack is often a shop vacuum. Duct tape a small rubber or plastic tube to the end of your shop vacuum hose – this allows you to create a focused suction that can effectively draw out any loose debris or blockages stuck within the drains.
After vacuuming, it’s a good idea to test the drains. Slowly dribble a small amount of water into each drain hole and then check under the car to see if the water is freely draining onto your driveway or garage floor. If the water still seems to be backing up or isn’t draining freely, you might be dealing with a more stubborn clog. This is where a speedometer cable, available at auto parts stores, comes in handy for a deeper clean.
Gently insert the speedometer cable into the drain and carefully push it down the tube, spinning the cable with your fingers as you go. The flexible nature of the cable allows it to navigate the drain’s curves and dislodge deeper blockages. A crucial word of caution here: avoid pushing too hard, as you could accidentally puncture the drain tubes, which would only exacerbate the problem by dumping water into your dash area. Once you feel the clog release, flush the drain with water again to ensure it runs free. With this simple procedure, you’ll be enjoying a watertight ride once more!
Read more about: The Essential DIY Car Maintenance Tasks That Can Save You $3,000 (Or More!) In Repairs

10. **Keep Your Seats Looking Nice**
Your car’s interior, particularly the seats, endures a lot of wear and tear, and it can significantly impact the overall look and even the resale value of your vehicle. While significant reupholstering is a job for the pros, many minor imperfections like tears in leather or vinyl, and general grime, are things you can absolutely tackle yourself. Keeping your seats in top condition is not just about aesthetics; it’s about preserving your investment and enjoying a more pleasant driving environment.
When it comes to fixing tears in leather and vinyl upholstery, those professional shops can charge a fortune for what is often a few hours of work. You can achieve impressive results at home with an affordable vinyl and leather repair kit, readily available at any auto parts store. The process involves first gluing a reinforcing fabric onto the underside of the torn material. This provides a stable base for the repair.
Next, you’ll mix the heat-set filler included in the kit to match your seat’s fabric color as closely as possible. This step might require a bit of practice to get the perfect hue, but even if it’s not an exact match, it will be a vast improvement over an open tear. Apply the filler to the torn area, then place a textured mat (also usually in the kit) that mimics your seat’s texture over the liquid filler. Heat the patching tool with a clothes iron and press it onto the textured mat. After removing the patching tool, leave the mat in place until the patch cools, then peel it off to reveal a mended, smoother surface. It’s truly satisfying to see how much better your seats will look!
Beyond repairs, regular cleaning and conditioning are paramount for maintaining the beauty and longevity of your seats. Over time, dirt and body oils can cause the color of your leather or vinyl to fade or change, losing its original luster. It’s not enough to just condition; a thorough cleaning must come first to remove accumulated grime. This is where you can truly make a difference in preserving the supple feel and vibrant color of your interior.
Start by generously spraying a dedicated leather cleaner onto the seats and vigorously rubbing it with a clean terry cloth towel. As you work, keep flipping the cloth to expose a fresh surface, ensuring you’re lifting the grime away rather than just rubbing it back into the material. Allow the seats to dry completely for about an hour. Once dry, rub in a high-quality leather conditioner, which helps to keep the leather soft, prevents cracking, and restores its natural sheen. These products are easily found at discount stores and auto parts stores, making this an accessible and impactful DIY project.
Read more about: Your Ultimate Single Car Solution: The Best Picks for Every Driver in 2025

11. **Clean the Carpet**
The carpeting in your car can take a real beating, collecting everything from spilled coffee to tracked-in mud and dust that settles deep within its fibers. Vacuuming is a good start, but for that truly deep clean that restores your carpet’s original look and smell, a carpet cleaning machine is your best friend. These powerful devices are designed to extract embedded dirt and grime, making your car’s interior feel fresh and new.
A carpet cleaning machine works by spraying a solution of water and cleaner deep into the carpet fibers, loosening stubborn dirt. Then, it uses strong suction to pull the dirty solution back into a separate reservoir, effectively removing the grime from your car. Investing in one of these machines can be incredibly cost-effective, as it often pays for itself after just a few uses compared to professional detailing services.
If purchasing a machine isn’t feasible, don’t worry – you still have excellent DIY options. Many rental centers offer carpet cleaning machines for a reasonable daily rate, allowing you to achieve professional-grade results without the upfront cost of ownership. Alternatively, for lighter cleaning or spot treatments, a high-quality spray-on carpet cleaner combined with a sturdy scrub brush can work wonders. Just apply, agitate, and then blot clean with a microfleece towel. Whichever method you choose, you’ll be amazed at the difference a truly clean carpet makes to your car’s interior ambiance and hygiene.
Read more about: No More Panic Buttons: 11 Genius Phone Features That Seriously Soothe Your Soul (And Stop Those Mini Heart Attacks)

12. **Remember the Recesses**
When it comes to cleaning your car’s interior, it’s easy to focus on the broad surfaces, but true detailing means paying attention to the intricate trim lines and recesses. These often-overlooked nooks and crannies are notorious for accumulating dust, dirt, and spills, which can detract from the overall cleanliness and polished look of your vehicle’s cabin. A thorough cleaning of these areas can dramatically elevate your car’s interior aesthetic.
The secret to tackling these tight spots is a simple, yet effective, tool: a worn screwdriver wrapped in a clean cloth. By wrapping the cloth around the screwdriver, you ensure there are no sharp edges that could scratch or damage your interior surfaces. Spray your chosen all-purpose cleaner directly onto the cloth-wrapped screwdriver, making it slightly damp, and then gently move it along the trim lines, crevices, and seams.
As you clean, make sure to frequently flip the cloth to expose a fresh, clean section. This prevents you from simply redistributing dirt back into the recesses. Extend this meticulous cleaning to areas around buttons, switches, and controls, where grime often collects. Once these areas are sparkling, consider following up with an interior rejuvenator or protectant, which will not only add a finishing touch but also help to repel future dust and maintain that “just detailed” look. This small effort provides a surprising boost to your car’s overall interior appeal.
Read more about: Unlock Your Car’s Full Potential: 14 Simple DIY Maintenance Tasks Every Driver Must Master for a Longer, Safer Ride

13. **Wash the Windows**
You might think washing your car windows is a straightforward task, but there’s a sneaky detail that many drivers overlook: the very top edges of the windows. Have you ever noticed that faint line of grime that appears when your windows are partially rolled down? That persistent strip of dirt and film is often missed during a quick wash, diminishing the clarity and overall cleanliness of your glass, and it’s something that instantly makes a car look less pristine.
This overlooked detail is not just about aesthetics; it also means that when your windows are fully rolled up, that grime is still there, ever so slightly obscuring your view and potentially getting transferred to the interior window seal. The good news is that tackling this particular bit of dirt is incredibly simple and requires virtually no extra effort or special products. It’s one of those quick wins that yields surprisingly satisfying results.
All it takes is a few minutes with a reliable glass cleaner, like Windex, and a clean rag or microfiber towel. After washing the main surfaces of your windows, simply roll each window down about halfway. Spray the top edge of the glass and the exposed portion of the window seal with your glass cleaner, then wipe it thoroughly with your rag. Roll the window up and down a few times, wiping the edge again to ensure all the built-up residue is gone. This small, forgotten step ensures streak-free visibility and a truly polished finish for all your car’s glass.
Read more about: Don’t Get Muted: A Wirecutter Guide to Fixing Common Gaming Headset Problems Before You Buy Again
14. **Keep Locks and Latches Functioning Smoothly**
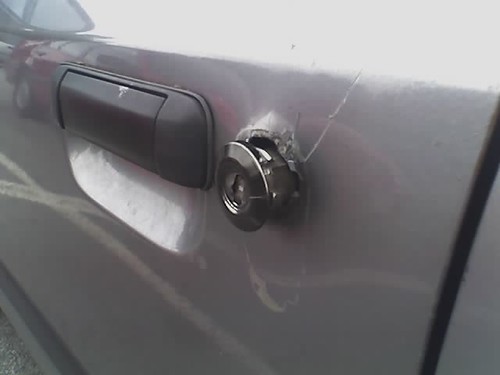
Nothing is more frustrating than a car door that won’t unlock smoothly, or a hood that sticks stubbornly when you try to open it for routine checks. These minor annoyances often signal that your locks and latches are starting to show their age, usually due to a lack of proper lubrication or the buildup of rust and grime. The great news is that keeping these critical components functioning flawlessly is an incredibly fast and straightforward DIY maintenance task that can save you significant hassle and potential repair costs down the line.
Let’s start with your door locks. These delicate mechanisms are rarely thought about until a key breaks off inside the cylinder, or the lock simply refuses to turn. To keep them moving freely and prevent such calamities, a blast of dry graphite powder is your best friend. You might need to gently push back the small dust protector flap with a tiny metal nail file to gain access to the lock mechanism. A quick pump of the tube will dispense enough graphite. Afterward, insert your key and move the lock cylinder several times to work the graphite thoroughly into the mechanism. Don’t forget to apply this same treatment to your trunk lock as well; it’s a small preventative step that ensures long-term reliability.
If your hood doesn’t latch and unlatch with ease, it’s highly probable that rust and dryness are the culprits. This problem can be resolved in about 10 minutes, making it one of the quickest fixes on our list. Begin by popping the hood and thoroughly saturating the entire latch mechanism with a spray rust penetrant. This product is designed to break down rust and free up seized parts. Latch and unlatch the hood several times, allowing the penetrant to work its magic until the mechanism moves smoothly.
While rust penetrant is excellent for breaking down existing rust, it doesn’t offer long-lasting lubrication. For a more durable solution, open the hood again and spray all the moving parts of the latch mechanism with white lithium grease. This thick, protective lubricant will provide enduring smooth operation. Latch and unlatch the hood a few more times to ensure the grease is evenly distributed, and you’re good to go. These simple applications will keep your locks and latches operating like new, providing convenience and peace of mind.
There you have it – a comprehensive guide to tackling common car maintenance tasks yourself, transforming intimidating repairs into empowering DIY projects. From ensuring your engine breathes clean air to keeping your seats pristine and your locks moving freely, each of these actions contributes significantly to your vehicle’s longevity and your wallet’s health. By embracing these practical tips, you’re not just saving money; you’re becoming a more knowledgeable and confident car owner, ready to keep your ride running smoothly for years to come. So grab your tools, roll up your sleeves, and take pride in the savings and satisfaction that come with maintaining your own vehicle!


