

Owning a car comes with a promise of freedom, but it also brings the responsibility of upkeep. For many, the thought of car maintenance conjures images of hefty mechanic bills and complex repairs that feel beyond reach. Yet, a proactive approach to vehicle care isn’t just about preventing breakdowns; it’s about empowering yourself, saving significant money, and fostering a deeper connection with your machine. Far too often, crucial maintenance tasks are overlooked or dismissed as too difficult for the average car owner, leading to more severe and costly issues down the road.
The truth is, while some repairs absolutely require professional expertise, a surprisingly large number of vital maintenance checks and replacements can be handled right in your own garage, often with just a few basic tools and a bit of guidance. These aren’t just minor adjustments; they’re fundamental aspects of your car’s health that, when regularly attended to, ensure better performance, enhanced safety, and even lower insurance premiums. Neglecting these seemingly small tasks can quickly escalate into major problems, diminishing your car’s lifespan and emptying your wallet.
This in-depth guide is designed to transform your perspective on car maintenance. We’ll demystify 12 essential tasks that are often overlooked but are perfectly within the capabilities of an engaged car owner. By embracing these actionable steps, you’ll not only gain confidence in your DIY skills but also unlock substantial savings, prolong your vehicle’s life, and maintain its peak performance. Get ready to roll up your sleeves and take control of your car’s destiny.
1. **Checking Tire Pressure**Maintaining correct tire pressure is far more critical than many drivers realize, standing as a cornerstone of both vehicle safety and fuel efficiency. It’s a simple check that yields profound benefits, directly impacting how your car handles on the road and how much fuel it consumes. Underinflated tires are a silent culprit behind numerous problems, including increased rolling resistance, which forces your engine to work harder and thus consumes more gasoline. This translates directly into more frequent trips to the fuel pump and higher operating costs over time.
Beyond the economic impact, improperly inflated tires pose significant safety risks. The National Highway Traffic Safety Administration (NHTSA) vividly highlights this, reporting that underinflated tires contribute to an astonishing 11,000 accidents annually. This statistic alone underscores the importance of this seemingly minor task. Under-inflation can lead to uneven tire wear, weakening the tire structure and making it more susceptible to dangerous blowouts, especially at highway speeds. Proper inflation, on the other hand, ensures even contact with the road, distributing the vehicle’s weight correctly across the tire’s tread.
The good news is that checking and adjusting tire pressure is a quick and straightforward task that requires minimal equipment—just a reliable tire pressure gauge. Your vehicle’s owner’s manual or a sticker on the driver’s side door jamb will provide the recommended pressure (often specified in PSI) for your tires. It’s important to check the pressure when the tires are cold, meaning the vehicle hasn’t been driven for at least three hours or more than a mile. Driving heats the tires and increases the internal pressure, which would give you an inaccurate reading.
Experts consistently advise checking your tire pressure at least once a month. Furthermore, it’s a critical pre-trip inspection to perform before embarking on any long journeys. Weather fluctuations also play a significant role, as tire pressure tends to drop in colder temperatures and increase in warmer ones, necessitating more frequent checks during seasonal changes. By making this simple routine a habit, you not only extend the life of your tires by promoting even wear but also enhance your car’s handling and overall safety. This vigilance potentially saves you from costly repairs and dangerous situations on the road.
Read more about: Wild-Caught vs. Farm-Raised Fish: A Comprehensive Guide to Omega-3s, Nutrients, and Sustainable Choices for Your Health
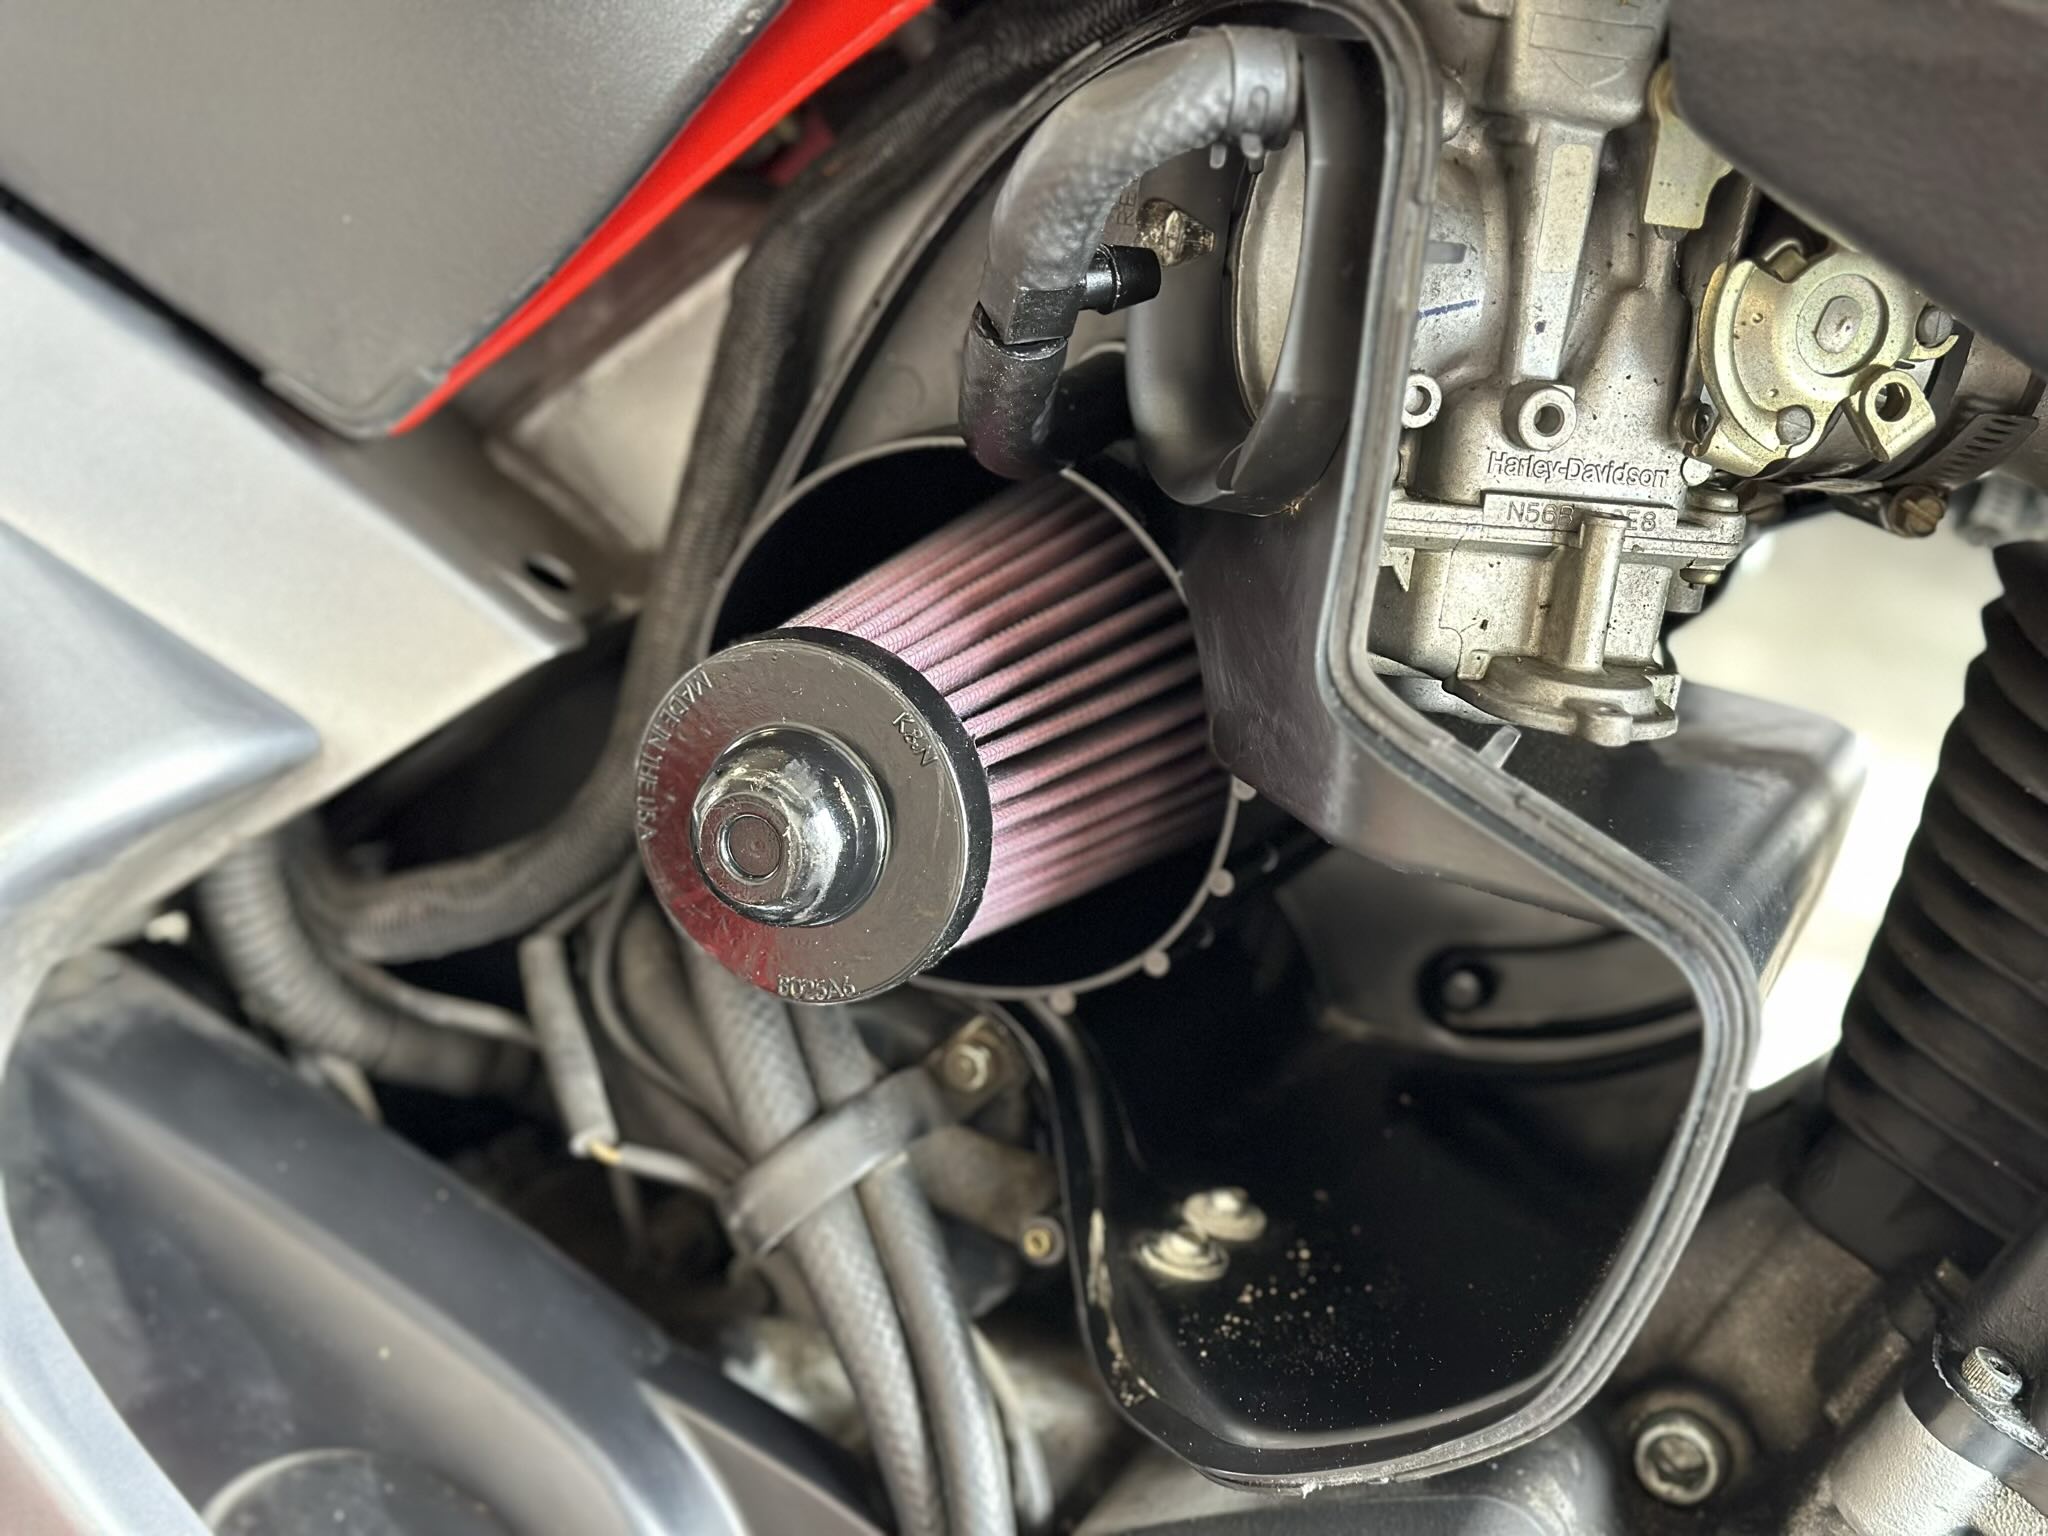
2. **Changing the Engine Air Filter**The engine air filter, often out of sight and out of mind, is a crucial component that plays a direct role in your car’s performance, fuel efficiency, and long-term engine health. Its primary job is to prevent dust, dirt, insects, and other airborne contaminants from entering the engine’s combustion chambers. A clean air filter ensures a steady supply of clean, unrestricted air, which is essential for proper fuel combustion and optimal power output. When this filter becomes clogged, the engine effectively suffocates, leading to a cascade of negative effects.
A dirty or clogged air filter directly impacts your vehicle’s ability to perform. It restricts airflow, which can result in reduced horsepower and diminished acceleration, making your car feel sluggish. More critically, this airflow restriction also compromises fuel efficiency. When the engine struggles to pull in enough air, it may compensate by burning more fuel to achieve the desired power output, directly increasing your gasoline expenses. The Car Care Council, a respected authority on vehicle maintenance, emphasizes the importance of this task, recommending that the engine air filter be checked and replaced every 12,000 to 15,000 miles.
Ignoring this seemingly minor replacement can have severe implications beyond just reduced performance and increased fuel consumption. Over time, a heavily clogged filter can cause microscopic particles to bypass the filter medium and enter the engine. These contaminants act as abrasives, causing premature wear on internal engine components. In extreme cases, this can lead to significant engine damage that requires expensive, professional repairs. Moreover, a dirty air filter can also contribute to increased emissions, impacting the environment and potentially causing issues during vehicle inspections.
Replacing an engine air filter is generally considered one of the easiest DIY car maintenance tasks you can undertake, requiring no specialized tools. Most modern vehicles feature an easily accessible air filter box, often located under the hood and typically secured with clips or a few screws. The process involves simply unscrewing or unclipping the retainers, removing the old filter, and inserting the new one, paying attention to the correct orientation. A useful tip from the context: you can hold a shop light behind the old filter; if it blocks 50 percent or more of the light, it’s time for a replacement. This proactive step helps maintain horsepower, ensures better fuel economy, and protects your engine from unnecessary wear.
Read more about: Cruise Nights to Forgotten Rides: Boomer Classics Millennials *Need* to Experience

3. **Flushing the Coolant**Coolant, also known as antifreeze, is an indispensable fluid that safeguards your engine from the twin threats of extreme temperatures: overheating in summer and freezing in winter. Beyond temperature regulation, it contains crucial additives that protect the engine’s internal components from corrosion and rust, which can silently degrade performance and longevity. Over time, these protective additives break down, and the coolant itself can become contaminated with rust particles and sediment. When this occurs, its ability to efficiently dissipate heat and protect against corrosion is severely compromised.
Neglecting to flush and replace your engine’s coolant can lead to a host of serious and costly problems. An engine operating without effective cooling is highly susceptible to overheating, which can cause significant damage such as warped cylinder heads, cracked engine blocks, and blown head gaskets. These are not minor repairs; they often entail thousands of dollars in labor and parts. Furthermore, as the coolant’s anti-corrosive properties diminish, rust and scale can build up within the cooling system, clogging passages and reducing the efficiency of the radiator, water pump, and heater core.
The American Automobile Association (AAA) provides clear guidance on this vital maintenance task, advising that coolant should be flushed every 30,000 miles. This recommendation serves as a critical benchmark, helping car owners ensure their engine remains properly cooled and protected. While a complete flush might be more involved than a simple fluid top-off, understanding its importance can prompt you to prioritize it, either as a DIY project if you’re comfortable or as a scheduled service with a trusted mechanic.
Regular coolant flushes are a preventative measure that offers peace of mind and substantial savings in the long run. By circulating fresh coolant, you restore the system’s optimal heat transfer capabilities and replenish the necessary corrosion inhibitors, effectively extending the life of your engine and preventing premature component failure. This proactive approach ensures your vehicle continues to run reliably and efficiently, protecting one of its most expensive components from preventable damage.
Read more about: The Cooling Crisis: 12 Sports Bikes Rated on Heat Management – From Rider-Friendly to Scorching Hot

4. **Replacing the Timing Belt**Few components in your car are as critical to the very operation of the engine as the timing belt. This often-hidden rubber belt synchronizes the rotation of the crankshaft and camshafts, ensuring that the engine’s valves open and close at precisely the right time in conjunction with the movement of the pistons. This intricate dance is fundamental to the engine’s internal combustion process. Consequently, a failure in the timing belt can lead to catastrophic damage, making its replacement a non-negotiable part of your vehicle’s maintenance schedule.
The dangers of a neglected timing belt are severe and far-reaching. When a timing belt breaks, especially in an interference engine (which most modern engines are), the camshafts stop rotating while the crankshaft continues to move. This can cause pistons to collide with open valves, resulting in bent or broken valves, damaged cylinder heads, and potentially cracked pistons or engine block. Such internal engine damage is typically so extensive that it often necessitates a complete engine overhaul or even replacement, repairs that easily run into thousands of dollars and can sometimes exceed the value of the car itself.
Despite its critical role and the dire consequences of its failure, the timing belt is one of the most frequently overlooked maintenance tasks by many drivers. Perhaps because it’s not visible like an oil filter or tire, it easily slips from mind until it’s too late. The Car Care Council, therefore, strongly advises a specific replacement interval: timing belts should be replaced every 60,000 to 100,000 miles. This range isn’t arbitrary; it’s based on extensive research and engineering to predict the lifespan of the material under normal operating conditions.
Adhering strictly to these manufacturer-recommended intervals is paramount. While replacing a timing belt can be a more complex DIY task than, say, changing an air filter, and often requires specialized tools and a good understanding of engine mechanics, knowing its importance empowers you to budget for it and ensure it’s addressed by a qualified professional if you’re not comfortable tackling it yourself. Neglecting this crucial component is a gamble with incredibly high stakes, ultimately leading to engine failure and significant financial heartache that could have been entirely avoided with timely preventative action.
Read more about: The Ghosts of the Grid: Unearthing 15 Vanished Truck Engines That Left Their Mark on Automotive History
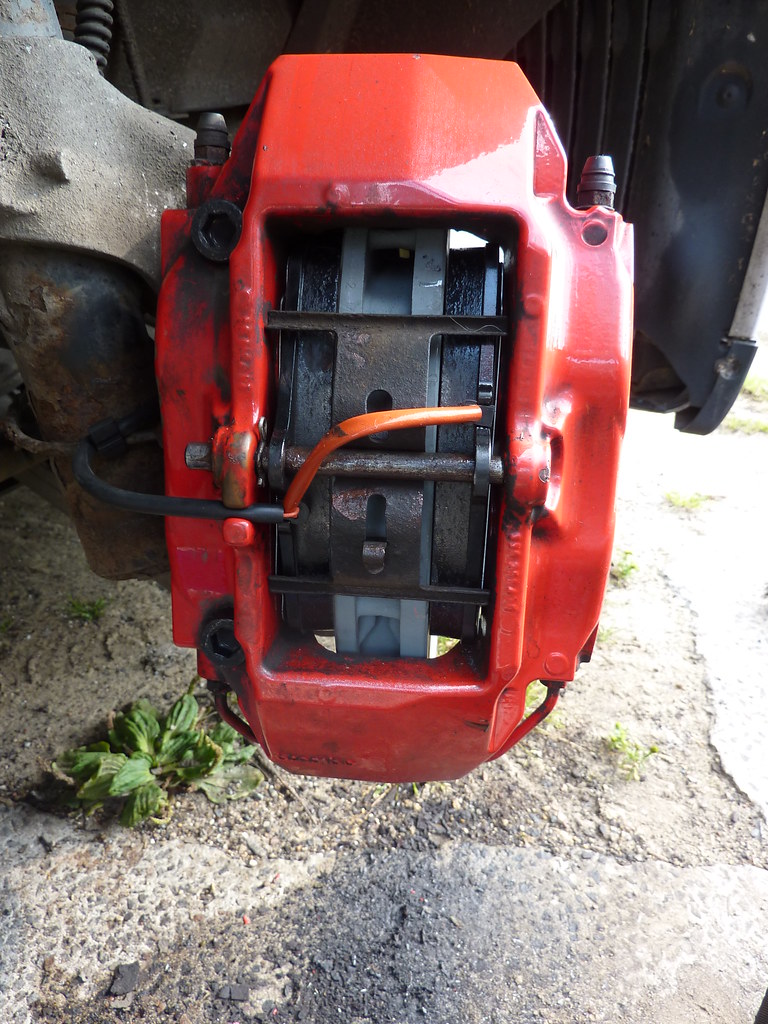
5. **Checking Brake Pads and Rotors**When it comes to vehicle safety, few systems are as vital as your brakes. They are your primary defense against collisions, providing the crucial ability to slow down or stop your car quickly and effectively. The brake pads and rotors are at the heart of this system, working in tandem to generate the friction needed to halt your vehicle. As such, their condition directly dictates your braking efficiency and, by extension, your stopping distances. Any compromise in their integrity immediately translates into dangerous driving conditions, potentially putting you and others at risk.
Worn brake pads and rotors are not merely an inconvenience; they are a serious safety hazard. As pads wear down, their ability to create friction diminishes, requiring more force on the pedal and longer distances to bring the car to a stop. Rotors, the metal discs that the pads clamp onto, can also wear thin, warp, or develop grooves, further reducing braking effectiveness and causing vibrations or pulsation during braking. The grim statistics from the NHTSA underscore this danger, reporting that faulty brakes contribute to a staggering 22% of all car accidents, a figure that should compel every driver to prioritize regular brake inspections.
The good news is that with a bit of attentiveness, you can stay ahead of brake problems. Regular inspection is key, and the recommended frequency is to check brake pads every 10,000 to 20,000 miles. Rotors, being more robust, typically require inspection every 50,000 to 70,000 miles. However, it’s crucial to understand that these are general guidelines. Any immediate signs of reduced braking performance, such as a spongy pedal, unusual noises (like grinding or squealing), or vibrations when you apply the brakes, demand immediate professional attention from an auto mechanic.
While actual brake replacement might be a more advanced DIY task for some, visually inspecting your pads for wear and checking rotors for signs of damage or excessive thinning can be done by a careful owner. This vigilance allows for timely replacements, keeping your brakes sharp and reliable. Proactive maintenance of your braking system isn’t just about avoiding costly repairs; it’s about safeguarding lives, maintaining peak performance, and ensuring your vehicle can stop reliably when it matters most, reducing the risk of accidents and the associated insurance claims.
Read more about: Your Comprehensive Guide to Smartly Inspecting a Used Subaru: What Every Buyer Needs to Know
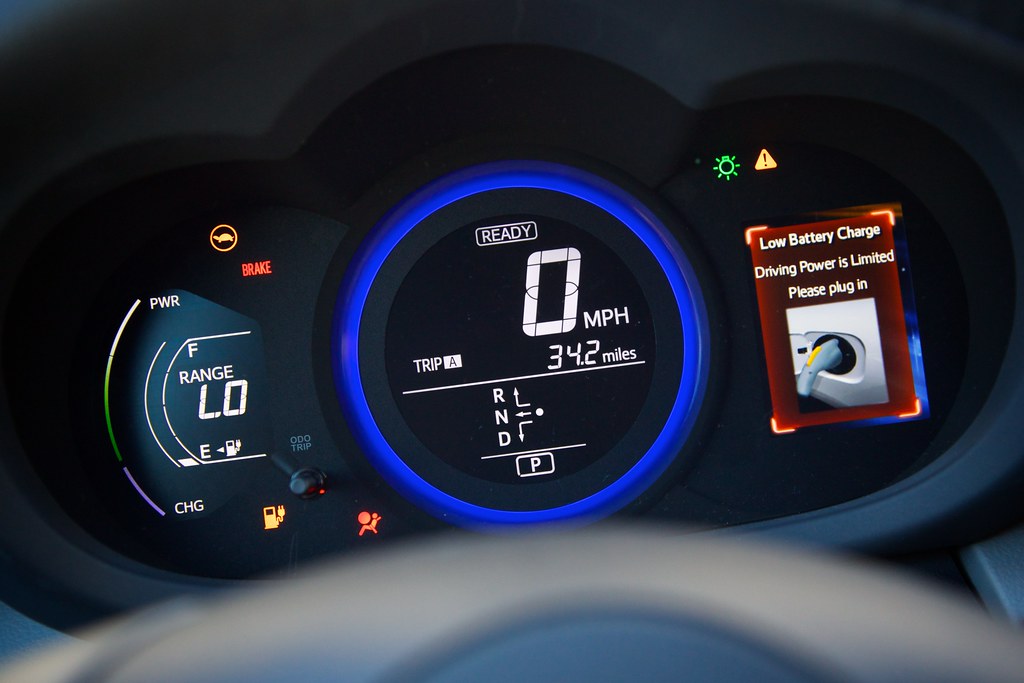
6. **Inspecting the Battery**Your car’s battery is the silent workhorse that powers nearly every electrical component in your vehicle, from the moment you turn the key to activate the ignition, to running the GPS, infotainment system, power windows, headlights, and even your horn. It’s an indispensable source of power, but like all vital components, it has a finite lifespan. Car batteries typically last between three to five years, though this can be significantly shortened by extreme temperatures—both scorching summers and freezing winters—as well as by driving habits that involve frequent short trips that don’t allow the battery to fully recharge.
The consequences of a weak or dead battery extend far beyond a mere inconvenience; they can leave you stranded at the most inopportune moments, leading to unexpected towing costs and potential safety hazards. Moreover, a struggling battery can put undue strain on other components of your car’s electrical system, potentially causing further damage down the line. To maximize its lifespan and ensure reliable starts, several simple maintenance practices are recommended. Keeping the battery terminals free of dirt and debris is crucial, as buildup can cause parasitic drains that discharge the battery. Ensuring it’s securely mounted prevents damage from vibrations, which can loosen internal components.
The American Automobile Association (AAA) provides sound advice for battery maintenance, recommending that you test your battery annually and consider replacing it if it’s weak or more than three years old. This annual check helps you gauge its remaining capacity and anticipate a replacement before it fails unexpectedly. For those interested in a more hands-on approach, battery testers are readily available and not expensive. These gauges measure the battery’s capacity against its design specifications and provide critical voltage details during startup, offering insights that are invaluable for proactive maintenance.
Replacing a car battery is also a relatively straightforward DIY task that many car owners can easily handle. If your battery tests poorly or has simply reached the end of its typical lifespan, swapping it out yourself can save you on labor costs. Most auto parts stores that sell new batteries will also happily recycle your old one free of charge, making the process environmentally responsible. By making regular battery inspection and timely replacement a priority on your maintenance checklist, you ensure reliable starting power, protect your electrical system, and avoid the hassle and expense of roadside assistance.
Building on the foundation of automotive self-sufficiency, we now explore six more vital maintenance tasks. Mastering these steps will deepen your understanding of your vehicle, significantly reduce reliance on mechanics, and enhance your car’s longevity, performance, and safety. Get ready to take even more control over your car’s destiny.
Read more about: 15 Van Problems That Make Owners Say ‘Delete From History’ — And How To Fix Them!

7. **Changing Transmission Fluid**Transmission fluid is crucial for your car’s smooth operation, lubricating components for seamless gear shifts and cooling the system to prevent overheating. Manual transmissions typically need fluid changes every 30,000 to 60,000 miles, while automatics can often wait 60,000 to 100,000 miles, as manufacturer recommendations guide.
Neglecting regular checks and replacements is perilous. It can lead to transmission overheating, causing severe damage like worn-out gears, a compromised torque converter, or even complete transmission failure. These are not minor issues; they often result in incredibly expensive repairs that timely fluid care could easily prevent. Proactive maintenance truly saves a fortune.
While some transmission oil pans have a convenient drain plug, others require removing the pan to access the fluid. If you face the latter, consider installing a retrofit drain plug after the first removal to simplify future changes. This proactive step transforms a complex task into a routine one. The Automatic Transmission Rebuilders Association (ATRA) suggests changing differential fluid every 30,000 to 60,000 miles, highlighting the critical nature of regular fluid changes to avoid costly repairs and maintain smooth operation.
Read more about: Mastering the Manual: Your Ultimate Guide to 14 Golden Rules for Smooth Clutch Engagement Every Time
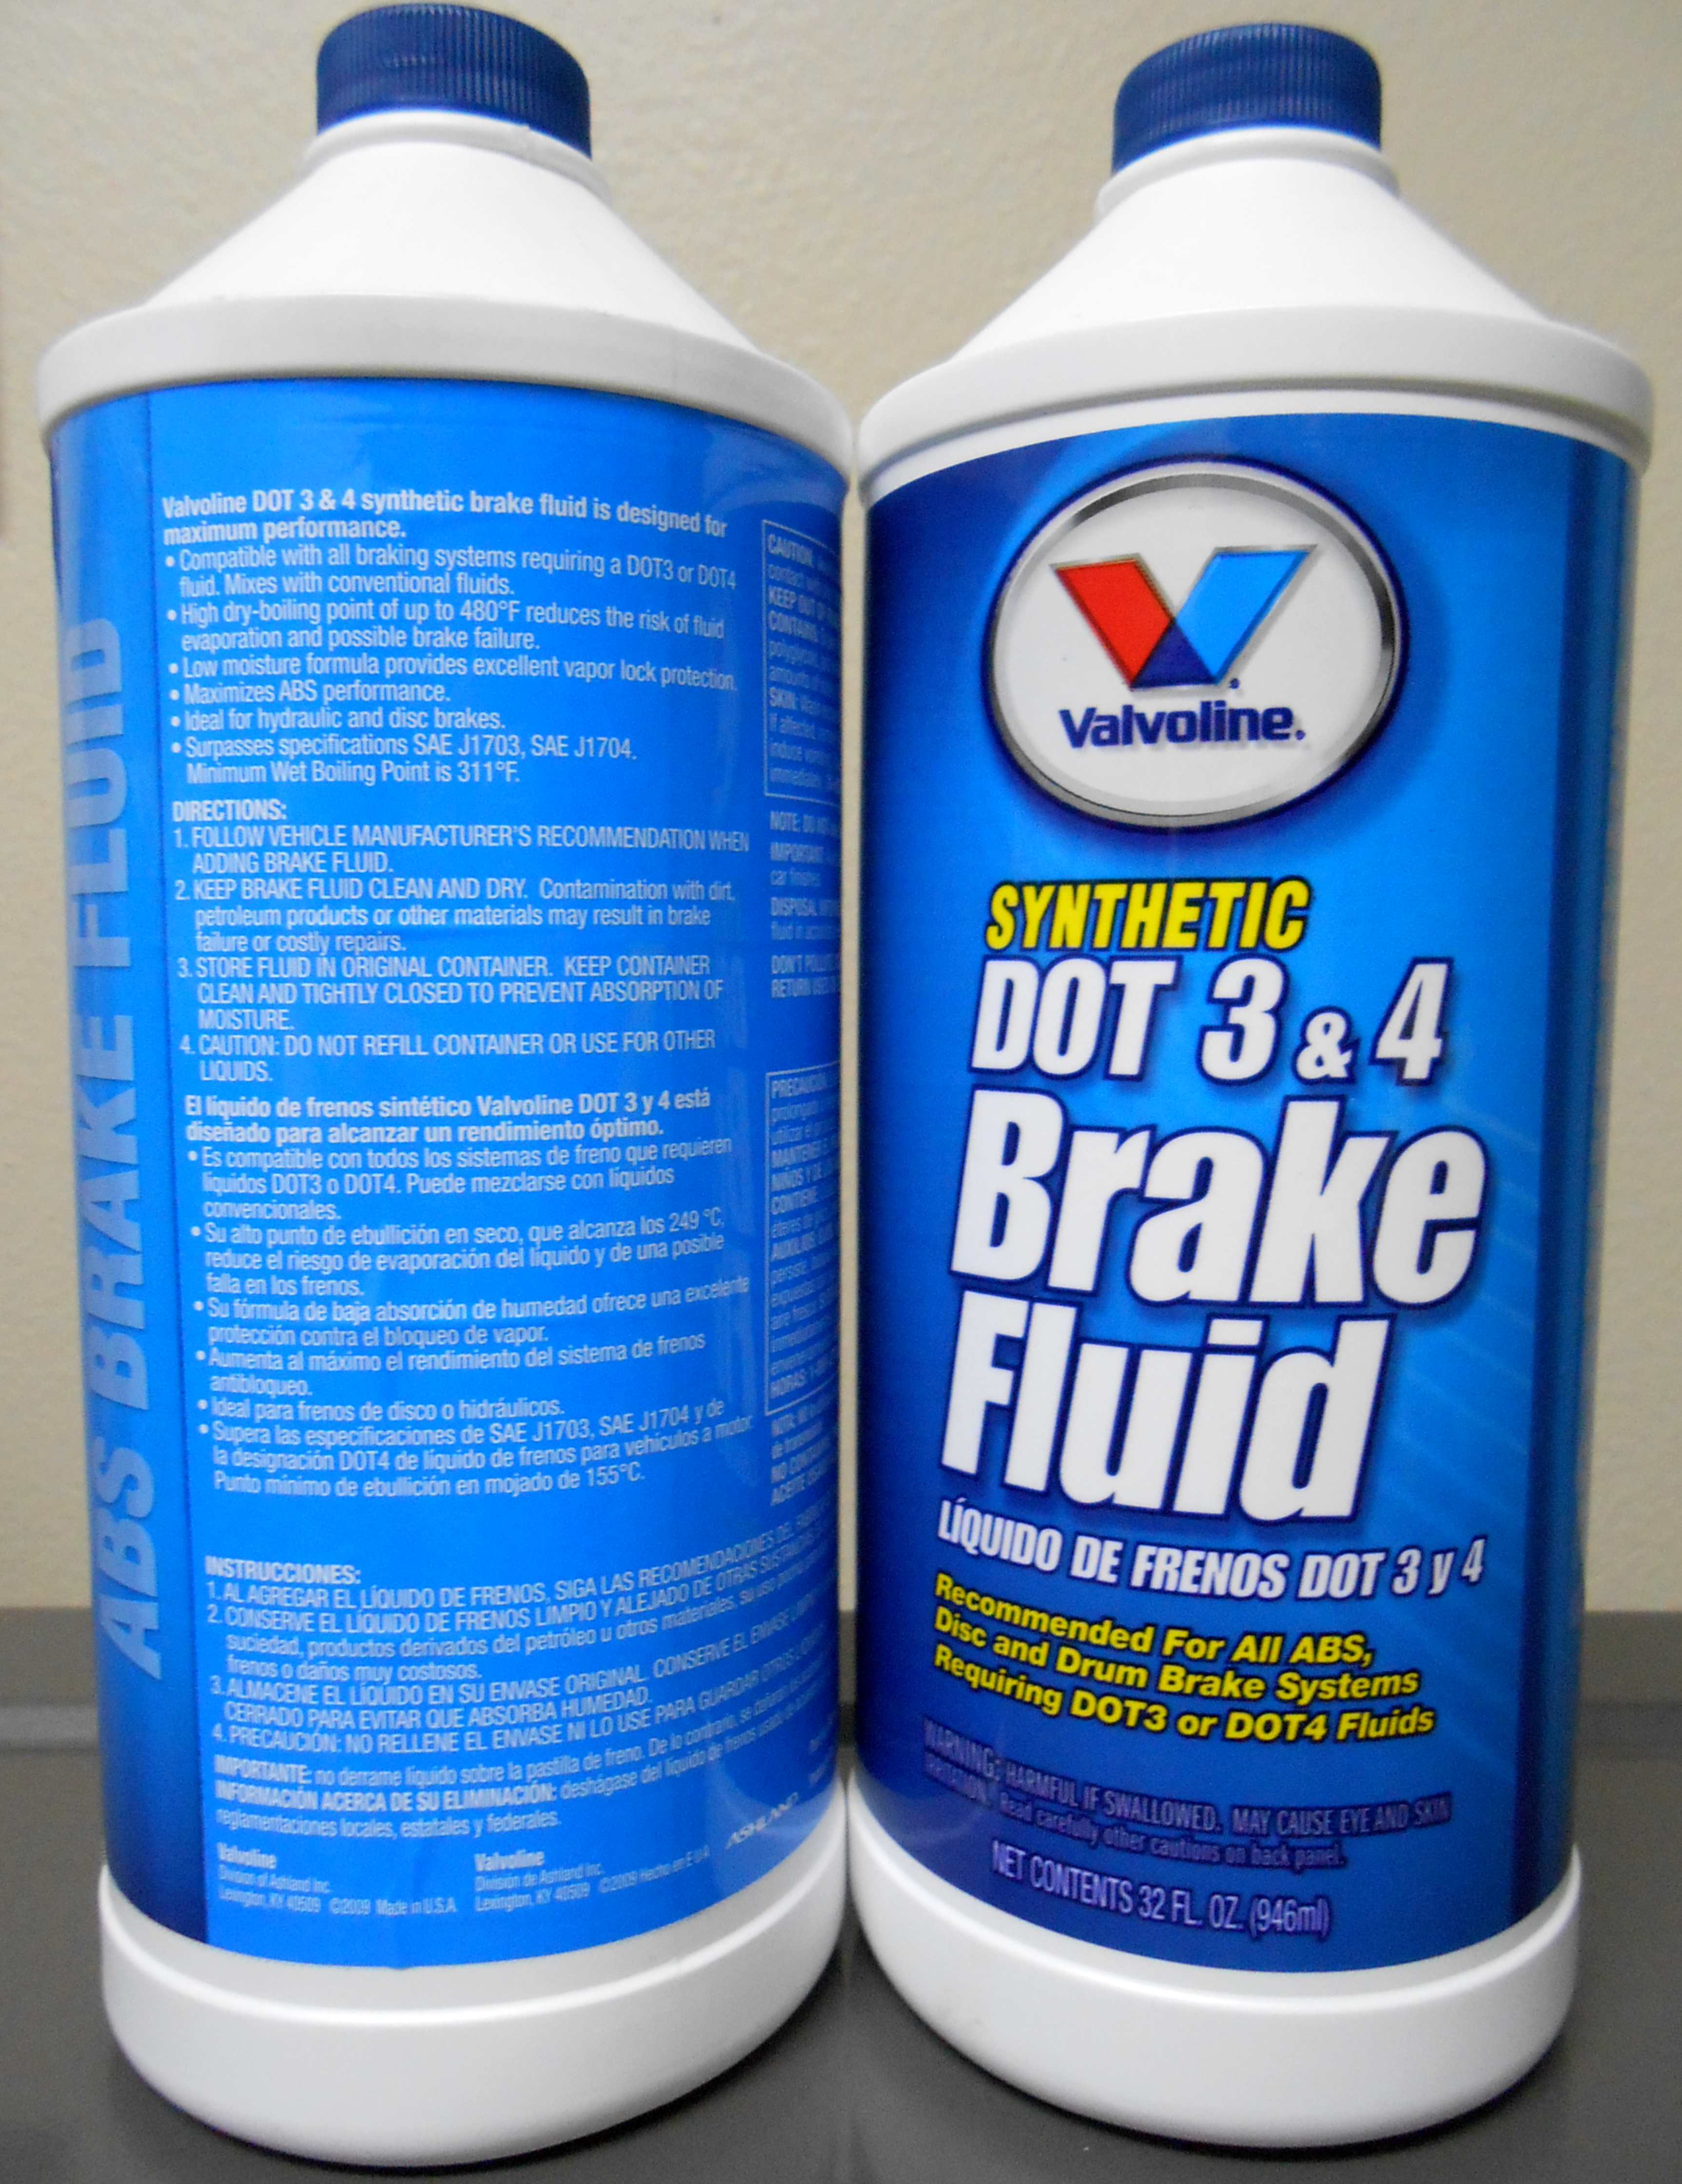
8. **Flushing Brake Fluid**Your vehicle’s brake fluid is vital for safety, directly affecting braking power. Over time, it absorbs moisture, weakening its effectiveness and lowering its boiling point. This contamination can lead to a spongy brake pedal and reduced stopping power, especially under heavy use, compromising your ability to stop safely.
Failing to flush and replace old brake fluid can lead to more than just diminished braking performance; it can result in outright brake failure, creating extremely dangerous driving conditions. Flushing and replacing the fluid is a straightforward process that helps ensure your brakes remain in peak condition, performing optimally when you need them most. Keeping your brake system meticulously maintained significantly lowers the risk of accidents, which in turn helps you avoid costly repairs and keeps your insurance rates stable.
While a complete professional flush is ideal, you can perform a beneficial fluid swap at home. This involves using a baster (distinct from the one for power steering fluid) to remove old brake fluid from the reservoir. Refill with fresh fluid, drive for a week, then repeat this several times until the fluid retains its light honey color. To gauge its condition, use a test strip; dip it into the fluid and compare the color to the packaging chart. It’s suggested to flush your brakes every 30,000 miles or every two years, whichever comes first, ensuring your system remains responsive and safe.
Read more about: Beyond the Dream: Unpacking the Eye-Watering Hidden Costs of Porsche 911 Ownership That Most Enthusiasts Overlook
9. **Inspecting Shocks and Struts**Shocks and struts are the unsung heroes of your car’s suspension system, working tirelessly to provide you with a smooth, controlled, and comfortable ride. They absorb the countless bumps and imperfections of the road, preventing jarring impacts from reaching the cabin and, crucially, helping to keep your car or truck stable and predictable as you drive. These components are essential for maintaining proper tire contact with the road, which is fundamental for effective steering and braking.
When shocks and struts wear out, their ability to perform these critical functions diminishes significantly. You might start to notice a rougher ride, excessive bouncing after hitting bumps, or even difficulty steering, as the vehicle struggles to maintain stability. This wear can also contribute to uneven tire wear, as the tires are no longer consistently pressed against the road surface. More seriously, worn shocks and struts compromise your car’s handling and braking performance, increasing the risk of accidents and potentially leading to higher insurance claims down the line due to reduced control and increased stopping distances.
Regular inspections and timely maintenance of these components are paramount. It’s recommended to inspect your shocks and struts every 12,500 miles. Typically, they should be replaced every 50,000 miles, or immediately if you experience signs of wear like a rough ride, excessive bouncing, or difficulty steering. The American Automobile Association (AAA) echoes this, recommending inspection every 50,000 miles and replacement if they are leaking or providing poor ride quality. Prioritizing this maintenance ensures your ride remains comfortable, your handling stays sharp, and your vehicle’s safety integrity is maintained.
Read more about: Warning: 11 Collector Cars and Common Restoration Pitfalls That Demand $50K in Immediate Repairs

10. **Replacing Windshield Wiper Blades**Safe driving relies heavily on clear visibility, a truth that becomes acutely apparent during inclement weather. Your windshield wiper blades, often taken for granted, are your primary tool for maintaining that essential view through rain, snow, and road spray. These seemingly simple components are crucial for ensuring you can react promptly and safely to anything the road throws your way, making their condition directly proportional to your driving safety.
Neglecting worn or damaged wiper blades can have significant consequences. When blades are past their prime, they no longer effectively clear your windshield, leading to streaks, smears, and an impaired view that drastically increases the risk of accidents. The National Highway Traffic Safety Administration (NHTSA) highlights the seriousness of this issue, reporting that poor visibility is a contributing factor in a staggering 17% of all car accidents. Beyond safety, degraded blades can even scratch your windshield, potentially leading to costly replacements of the glass itself.
Fortunately, replacing wiper blades is a straightforward DIY task. Simply press your washer button; if the blades streak or leave unwiped areas, it’s time for new ones. New sets come with easy-to-follow installation instructions. Just be cautious: firmly grip the wiper arm after removing the old blade to prevent it from snapping back and potentially cracking your windshield. Replace your wiper blades about once a year, or more often if you live in areas with harsh winters, to ensure consistent visibility.
Read more about: The 7 Most Catastrophic Component Failures in Modern Cars: Brake Blunders and Transmission Troubles That Tanked Reliability
11. **Replacing Your Cabin Air Filter**While your engine air filter protects your car’s internal combustion system, your cabin air filter plays an equally important role in safeguarding your health and comfort. Its job is to filter the air that enters your vehicle’s interior through the heating, ventilation, and air conditioning (HVAC) system, trapping dust, pollen, pollutants, and other airborne particles. This ensures that you and your passengers breathe cleaner, fresher air during your journeys.
Over time, just like any filter, the cabin air filter becomes clogged with accumulated debris. A dirty filter significantly reduces airflow into the cabin, making your HVAC system work harder to push air through. This increased strain on the blower motor can shorten its lifespan and cause your AC to run longer and less efficiently in the summer months. More immediately, a clogged filter can lead to unpleasant odors inside the vehicle and a noticeable reduction in overall air quality, diminishing the comfort of your driving environment.
Replacing a cabin air filter is one of the more accessible DIY car maintenance tasks and generally requires no special tools. Most late-model vehicles locate these filters behind the glove box, though some manufacturers place them in the cowling or console area. The process typically involves removing access covers, sliding out the old filter, and inserting the new one. Always note the direction of the airflow arrows on the old filter for proper installation. The American Automobile Association (AAA) recommends replacement every 15,000 to 30,000 miles, making this a simple yet impactful routine to improve your in-car experience.
Read more about: The Enduring Roar: Celebrating 6 Naturally Aspirated V8 Engines That Defined Performance Sedans
12. **Maintaining Proper Wheel Alignment**Proper wheel alignment is a fundamental aspect of your vehicle’s health that directly influences both safety and performance. When your wheels are correctly aligned, they point straight ahead, ensuring even tire wear, optimal handling characteristics, and efficient fuel consumption. This meticulous calibration is what allows your car to track true and respond precisely to your steering inputs, making every drive predictable and secure.
Misaligned wheels, on the other hand, can create a host of problems that range from inconvenient to dangerous. A common symptom is your car pulling noticeably to one side, forcing you to constantly correct the steering. This not only makes driving tiresome but also leads to uneven tire wear, where one side of your tire wears down faster than the other, significantly shortening its lifespan. If left unchecked, misalignment can escalate into more serious issues, including unsafe handling, premature suspension damage, and a heightened risk of accidents. The National Highway Traffic Safety Administration (NHTSA) reports that misalignment contributes to a significant number of tire-related accidents, underscoring the severity of this often-overlooked issue.
Fortunately, addressing alignment issues quickly can save you considerable money on premature tire replacements and prevent more severe damage down the road. Regular checks are key to catching problems early. You have several options for frequency: get your car’s wheels checked for alignment every 6,000 miles, once a year, or every other oil change, whichever comes first. However, if you notice distinct signs like your car pulling to one side, the steering wheel being off-center when driving straight, or visible uneven tire wear, don’t hesitate—head to your mechanic immediately. By staying proactive with your wheel alignment, you ensure better handling, maximize tire life, and maintain critical vehicle safety.
Read more about: Drive Far, Spend Less: 15 Highly Reliable Used Cars That Won’t Break Your Budget
Embracing these maintenance tasks transforms you into an empowered automotive enthusiast. This journey of discovery, encompassing every fluid change and alignment check, not only extends your vehicle’s life but also deepens your connection to the machine. By adopting this proactive approach, you invest in a safer, more efficient, and more enjoyable driving experience, preventing costly repairs along the way. Gather your tools, consult your manual, and savor the satisfaction of being truly in the driver’s seat of your car’s well-being. Your vehicle and your wallet will certainly thank you.


