

The worst time to face a flat tire is undoubtedly when you’re traveling on a busy road, with high-speed traffic whizzing by. That sudden ‘thump, rumble, rumble’ can instantly turn a pleasant drive into a stressful emergency. Many drivers understandably feel a surge of fear or panic in such a vulnerable situation, but understanding the right steps can transform anxiety into confidence, getting you safely back on your way.
While the convenience of roadside assistance is a comforting thought, life isn’t always neat and tidy. What happens if your phone battery is dead, or you’re in an area with little to no reception? What if you simply forgot your phone at home? In these moments, your own tire-changing skills become invaluable, saving you time, money, and potentially a long walk for help. Learning this crucial skill is not just about mechanics; it’s about empowerment and preparedness.
This in-depth guide is designed to equip you with the knowledge and actionable steps needed to handle a flat tire on the side of a busy highway with authority and precision. We’ll break down each critical phase, focusing on safety, practical execution, and problem-solving, so you’re never left stranded or helpless. Mastering these techniques ensures that when the unexpected happens, you’re ready to tackle the challenge head-on.
1. **Prepare Ahead: Gather Your Essential Tools**The very first step towards successfully changing a flat tire is proactive preparation. Do you have every item that you need to change a flat tire? This foresight is crucial because the contents of your trunk can make all the difference between a quick resolution and a prolonged ordeal. It involves more than just having a spare tire; that spare should be in good shape and, critically, with sufficient air pressure.
Beyond the spare, your essential toolkit should include your vehicle’s owner’s manual, which is an indispensable resource for specific instructions pertaining to your car model. You’ll also need a reliable car jack, a lug wrench for removing and tightening nuts, and blocks or wedges for wheels to prevent unintended movement. Don’t forget warning flares or reflective triangles to alert other drivers of your presence.
For added convenience and safety, consider packing a flashlight, especially if you anticipate working in dim light or at night, a towel and hand cleaner for the inevitable mess, and a pair of gloves to protect your hands from grime and injury. Furthermore, a reflective vest, a tire pressure gauge, and a headlamp can significantly enhance your safety and efficiency. Bad weather might also come into play, so keeping a poncho, umbrella, and a heavy coat in your car is a smart move for any road trip.
It’s highly recommended to learn how to use your jack and lug wrench in advance. You don’t want to be under pouring rain at 2 a.m., frantically trying to figure out which way a handle should be turned. Your owner’s manual will also guide you on where your spare tire is located, as this varies—some are in the trunk, others tucked inside a rear panel, and in larger vehicles, it might even be under the vehicle itself.
Read more about: The Ultimate Guide to 15 Affordable Sedans of 2024 Guaranteed to Conquer 250,000 Miles
2. **Find a Safe Place to Stop and Get Out of the Way**When you feel that unmistakable thump and rumble of a flat tire, your immediate priority is to find a safe, secure location to pull off the busy road. This is one of the most vital safety tips when changing a tire, as your proximity to high-speed traffic poses a significant risk. Turn on your hazard lights or flashers as soon as you detect a problem, signaling to other drivers that you’re traveling at a reduced speed and require caution.
As you slow down, actively scout for a stable surface that is not on an uphill or downhill grade. You absolutely do not want your vehicle to roll away while you’re working on it. Try to avoid parking on dirt or grass, as these unstable areas could allow your car jack to sink into the ground, compromising the stability of your vehicle during the lift.
If the pull-off space is relatively small, you may want to travel a short distance to find a larger area that offers more space, away from the immediate flow of traffic. However, exercise caution; avoid traveling for miles at a time or at higher speeds, as this can lead to severe rim damage. Travel just enough to find the right location that provides ample room to work safely and keeps you clear of traffic, where a distracted driver might not notice your car along the side of the road.
If you’re on the freeway and the ground next to the shoulder is even, consider getting all the way onto the grass to protect yourself, especially if the flat tire is on the driver’s side. However, always be aware that muddy conditions or uneven terrain might leave you stuck. Once you’ve pulled over, park your vehicle as far away from traffic as possible, ideally on a flat, level surface, and give yourself a moment to gather your thoughts before tackling the flat tire.
Read more about: 14 Unlikely Automotive Heroes: The Cars That Shocked Everyone and Redefined Success

3. **Make Yourself and Your Vehicle Visible**Once you’ve secured a safe location, the next crucial step is to make yourself and your vehicle as visible as possible to other drivers. Turning on your hazard lights is just the beginning; it serves as an initial signal to oncoming traffic that you are experiencing car trouble and requires increased caution. The sooner you can flip your hazards on, the better for everyone around you, especially since it might take a few minutes to adjust your speed, find a secure location, and begin the tire change.
To significantly enhance visibility, especially during low light conditions or at night, ensure you use your triangle reflectors or road flares. These devices are designed to trigger a warning to oncoming traffic from a distance. If you have multiple flares in your roadside safety kit, stagger them behind your car to extend the warning period for other drivers, creating a protective buffer zone around your vehicle.
For your personal safety, wearing an electric vest is highly recommended. Coupled with placing warning triangles 50 feet apart behind your vehicle, this step becomes paramount. Never assume that drivers can see you, especially given that in 2022 alone, 562 people lost their lives from tire mishaps, many of which could have been prevented by following proper safety rules and maximizing visibility. A headlamp, in particular, rules supreme over a flashlight, as it keeps both hands free for repairs while simultaneously increasing your visibility to oncoming traffic.
If you have them, you can also use flares, placing the first one approximately 15 feet behind your vehicle and the second 30 feet behind. These visual cues are essential in creating a little breathing room around your car, giving you space and allowing you to perform the tire change with reduced risk. Remember, the goal is to give approaching drivers ample warning, compelling them to move into the lane away from your car.
Read more about: Master Your Commute: 12 Life-Changing Strategies to Slash Stress and Boost Your Well-being Every Day
4. **Immobilize the Car for Maximum Stability**Before you attempt to lift your vehicle, it is absolutely vital to ensure it is completely immobilized. This step prevents any possibility of the car shifting, rolling, or slipping off the jack while you are working, a scenario that could lead to serious injury or further damage. Begin by turning off your vehicle completely and applying the emergency brake. This enhances the stabilization of your vehicle and provides an optimal position for lifting.
To further secure your car, make sure it won’t roll away by placing a rock, brick, or purpose-built wheel chock against the wheels on the opposite side of your car from the flat tire. For instance, if your front left tire is flat, place chocks behind the rear right wheel. Even the slightest incline can subtly shift a vehicle’s weight, and the parking brake alone may not always be sufficient to hold it perfectly steady.
This immobilization is particularly critical if you had to pull over near a road construction zone or on any busy roadway. Statistics show that forward-moving pedestrian vehicles are responsible for a significant percentage of work zone fatalities, and a portion of these result from a vehicle propelling another vehicle into a victim. By diligently immobilizing your car as soon as you pull over, you effectively eliminate these dangerous possibilities.
As you place the wedges or chocks, always walk around the vehicle’s far side, facing away from oncoming traffic. Avoid walking between your car and the flow of traffic at all costs, as getting pinned between vehicles is one of the most common and preventable roadside injuries. This mindful approach to securing your vehicle is a cornerstone of safe tire changing on a busy highway.
Read more about: For Snow Belt Residents: A Deep Dive into the 10 Worst Winter-Ready Vehicles on the Market Today
5. **Remove the Hubcap and Gather Work Items**With your vehicle safely stopped and immobilized, it’s time to assemble your work items. Begin by fetching your spare tire from the trunk, along with the jack, lug wrench, screwdriver, and any other essential tools you might need. Consolidating these items near the flat tire minimizes the number of trips you have to make to and from the back of your car, thereby reducing your exposure to potential hazards from passing vehicles or road debris.
Before you can access the lug nuts, you may need to remove a wheel cover or hubcap. Take a good look at your tire: if it has a wheel cover or hubcap, you’ll need to pry it off. Most lug wrenches are designed with a flat, ‘screwdriver’ side that can be inserted into the jack, and this can be used for prying. Alternatively, a smaller screwdriver from your toolkit can also do the trick.
It’s important to note that removing a hubcap isn’t always easy, as their fit can vary significantly between different car models. You may need to gently pry around it in several locations before it comes loose. Patience is key here; if something feels like it’s going to snap or break, stop and try prying from another spot. While a bent hubcap isn’t the end of the world—affordable replacements are usually available after-market or at scrap yards—exercising care will prevent unnecessary damage.
Once the hubcap is off, set it aside in a clean, safe place where it won’t roll away or get stepped on. You’ve now gained access to the lug nuts, bringing you one step closer to getting that flat tire off and your spare in place. This methodical approach ensures you’re working efficiently and safely, without added distractions or complications.
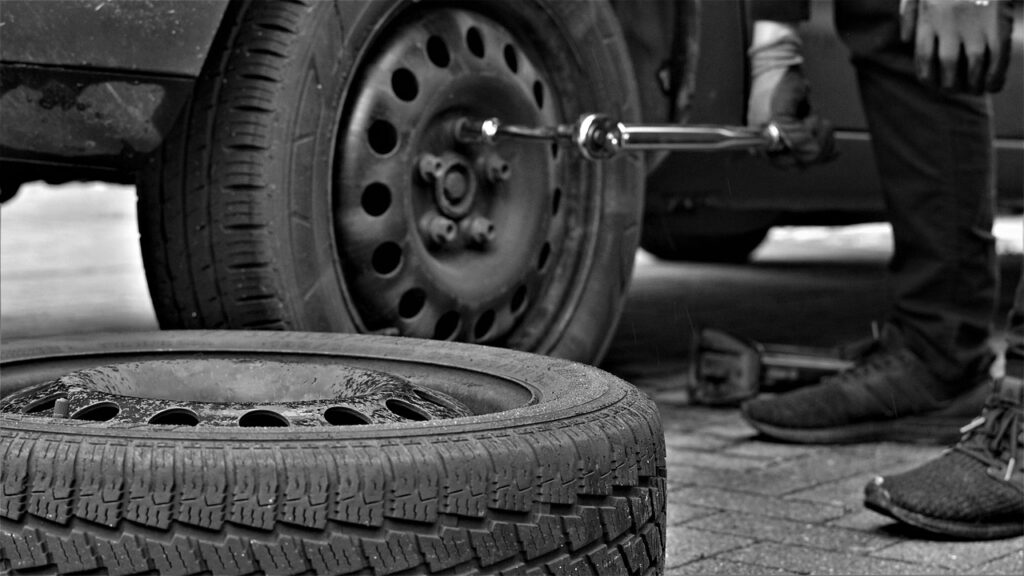
6. **Loosen the Lug Nuts (But Don’t Remove Them Yet!)**Now that you have access to the lug nuts, the next critical action is to loosen them. This step requires a specific approach: you want to loosen them, but not remove them entirely just yet. They need to remain attached to keep the wheel securely in place while the vehicle is still on the ground, providing essential stability before you lift it.
Using your lug wrench, position it firmly over each lug nut. To loosen them, you will turn each one counterclockwise. You’ll want to apply significant force, and some lug nuts will undoubtedly be more stubborn than others, especially if they haven’t been touched in a while or were tightened with excessive torque. Don’t be afraid to use your body weight for extra leverage; you may have to use your foot, leg, or even your whole body weight to get the lug wrench to move, and that’s perfectly fine.
Give each lug nut just under one full turn, enough so they are clearly loose but still threaded onto the wheel studs. The goal is to break their initial resistance, making them easier to unscrew completely once the car is safely lifted. This initial loosening while the tire is still firmly on the ground is much safer and provides better leverage than trying to do so when the vehicle is suspended in the air.
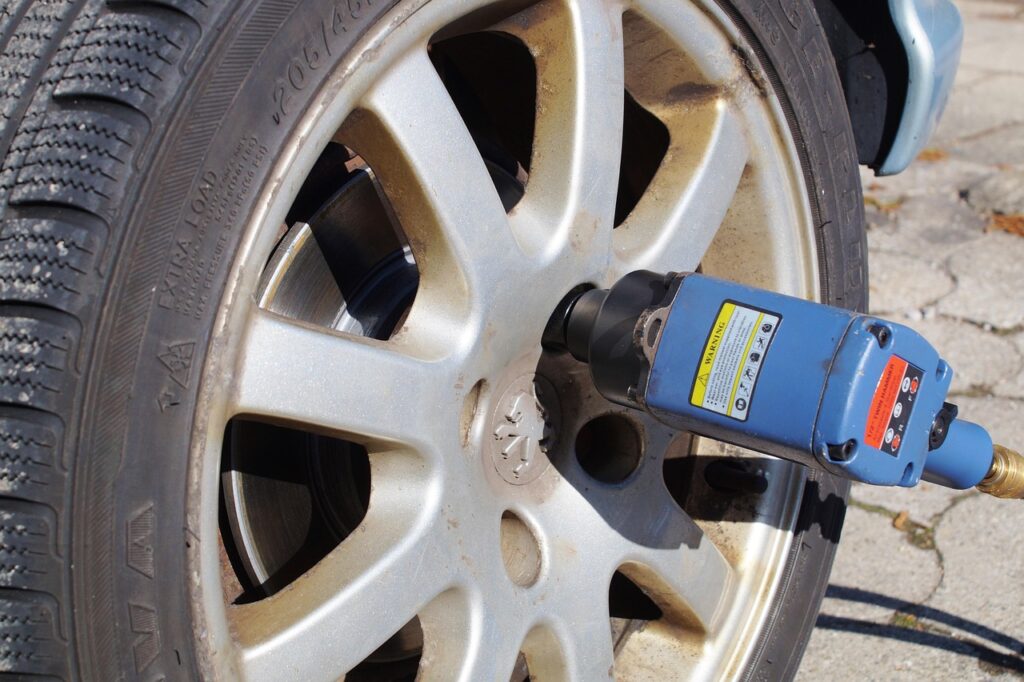
Real talk time: If you’re struggling despite your best efforts, especially if a professional or someone with considerable strength was the last person to tighten your tires, you might need more force than your arms can generate. In such cases, an impact wrench or a cordless torque wrench can be a literal lifesaver, sparing you much roadside frustration and potential injury. Having one in your vehicle’s emergency kit can make a world of difference when lug nuts prove exceptionally stubborn.
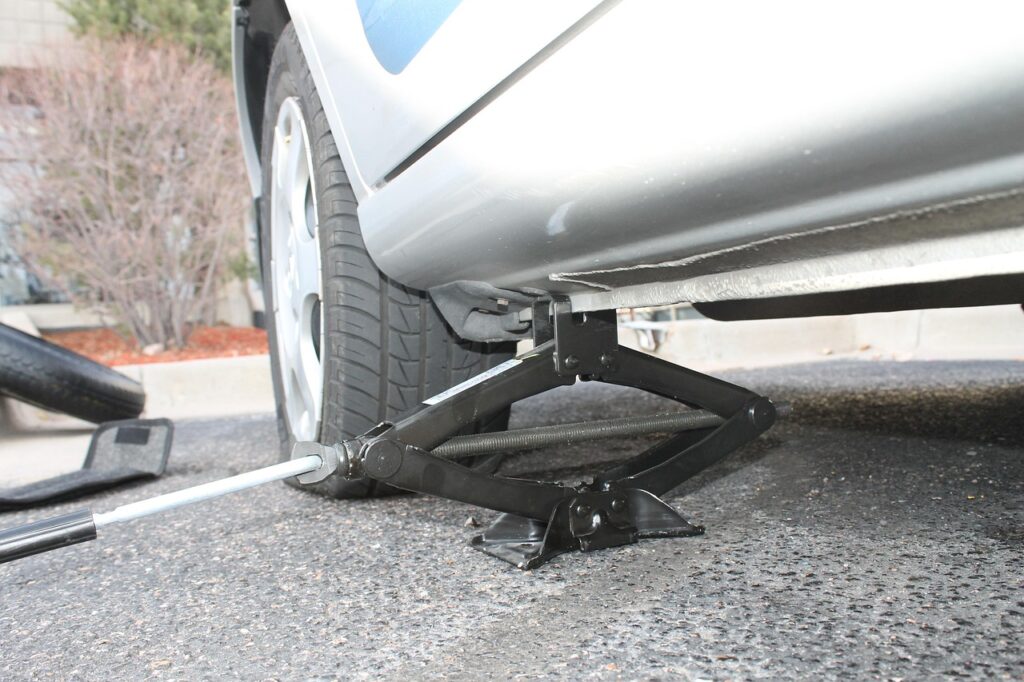
7. **Lift Your Vehicle Safely and Precisely**With your lug nuts pre-loosened, the next critical phase involves carefully elevating your vehicle. The foundational step here is accurately locating your vehicle’s designated jack point. This specific spot is unique to each car model, making your vehicle’s owner’s manual an indispensable resource for pinpointing this “sweet spot” with certainty. An incorrect jack placement can lead to significant damage to your car, so paying close attention to this detail is paramount. Often, the most secure location is directly underneath the frame, situated near the flat tire.
Once the jack is correctly positioned, you can begin the process of raising your car. Turn the jack handle clockwise, ensuring a slow and controlled ascent. Your goal is to lift the vehicle at least six inches off the ground, or sufficiently high enough to not only easily remove the damaged tire but also to comfortably slip on the fully inflated spare. This deliberate, unhurried approach is vital. It’s worth noting that the standard jacks provided with many vehicles can sometimes appear complex; consequently, practicing with your jack at home on a flat surface before you face a roadside emergency can significantly boost your confidence and proficiency.
Throughout the entire lifting procedure, a non-negotiable safety rule is to keep all parts of your body, especially your feet, completely clear of the area beneath the vehicle. Jacks, by design, do not offer sufficient stability for extended undercarriage work, and getting trapped beneath a lifted car can result in severe injury. Always maintain a safe distance, remaining on the side of the car as you observe the lift. Prioritizing your personal safety at every turn is not merely a recommendation but a critical directive.
For those who may struggle with a standard jack or are considering alternatives, it’s imperative to resist the dangerous temptation of using improvised supports like blocks or stones to elevate your car. While these might seem like quick fixes, they pose a severe risk of instability and collapse. If you foresee frequent roadside repairs or find your vehicle’s factory jack challenging to operate, a worthwhile investment might be an aftermarket floor jack, which typically offers greater leverage and stability. In scenarios involving a slow tire leak, a can of tire repair gel can often provide a temporary fix, allowing you to reinflate your tire after sealing it without the immediate need for a jack.
Read more about: Rediscovering the Essentials: 13 Indispensable Workshop Tools You Might Be Forgetting
8. **Expertly Remove the Flat Tire**With your vehicle now safely elevated and stable, it’s time to finalize the removal of the lug nuts you previously loosened. Carefully unscrew each lug nut completely, turning them counter-clockwise until they are entirely free from the wheel studs. As you remove them, immediately place them into a secure, clean container, such as a small bag or even the wheel cover if it’s clean and stable. This crucial step prevents them from getting lost, rolling into traffic, or accumulating dirt in their threads, which could lead to complications during reinstallation.
Once all the lug nuts are off and safely stored, proceed to remove the flat tire itself. Grip the tire firmly with both hands, ideally by the treads, and pull it straight towards you with a steady motion. Be prepared for its substantial weight; most car tires range from 20 to 25 pounds, with larger SUV or truck tires potentially weighing considerably more. A firm, deliberate pull should dislodge it from the wheel hub without excessive struggle.
After successfully detaching the flat tire, carefully roll it over to the rear of your vehicle. Lay it down flat on its side in a secure spot, ensuring it’s well away from the flow of traffic and positioned so it cannot roll away unexpectedly. This action clears your immediate workspace, minimizing further hazards, and ensures the damaged tire is safely contained until you can properly stow it in your trunk for transport to a repair facility.
Read more about: 13 Action Films That Crumbled at the Finish Line: When Great Stories Get Betrayed by Their Endings
9. **Seamlessly Install the Spare Tire**Now, with the flat tire removed and your workspace clear, take your spare tire and carefully lift it into position against the exposed wheel hub. This stage demands precision: align the bolt holes on the spare tire with the wheel studs protruding from your vehicle’s hub. Gently push the spare tire onto the studs until it sits flush and snugly against the wheel hub, ensuring a proper and even seating.
Once the spare tire is correctly seated on the studs, begin threading the lug nuts back onto them by hand. Turn each lug nut clockwise, tightening them as firmly as you possibly can using only your bare hands. It is absolutely critical that you only hand-tighten the lug nuts at this point; under no circumstances should you attempt to use the lug wrench while the car is still suspended in the air.
Attempting to fully tighten the lug nuts with a wrench while your vehicle is jacked up is exceptionally dangerous. The rotational force and potential for movement could cause your car to slip off the jack, risking severe injury to yourself and further damage to the vehicle. Hand-tightening provides sufficient security to hold the tire in place, allowing for a safe and controlled lowering of the vehicle before the final, critical tightening with the lug wrench. Adhering to this sequential method is a fundamental principle of safe roadside tire replacement.
Read more about: Unlock the Illusion: 13 Simple DIY Hacks to Make Your Small Bathroom Feel Twice as Spacious and Stylish
10. **Lowering the Vehicle and Securing the Nuts**With the spare tire firmly in place and the lug nuts hand-tightened, it’s time to gently bring your vehicle back down to solid ground. Begin to slowly and carefully lower your car by turning the jack handle counterclockwise. Allow the new tire to gently make contact with the road surface, but do not fully remove the jack from beneath the vehicle just yet. This controlled, gradual descent is crucial for maintaining stability and ensuring the tire settles properly.
Once the car’s weight is partially resting on the ground, you can proceed with the initial stage of final lug nut tightening. Use your lug wrench to firmly tighten each lug nut, making sure to work in a star or crisscross pattern. This specific tightening sequence is not arbitrary; it is essential for ensuring even pressure distribution across the wheel, which prevents warping of the brake rotor or wheel itself and guarantees a secure fit that will remain stable under driving conditions.
Continue lowering the car completely until its full weight is entirely back on the ground and the jack is no longer supporting it. Once the vehicle is fully lowered and stable on its own wheels, give the lug nuts one or two more good, firm twists with the lug wrench, reiterating the star or crisscross pattern. This final action ensures they are maximally snug and secure. After this, you can safely remove the jack from under the car and carefully stow it away with your other tools.
Read more about: Beyond the Buzz: Inside the Energy Drink Industry’s Transformative Leap Towards Sustainable Packaging and a Greener Future
11. **The Critical Final Tightness Check and Stowage**After the spare tire is installed and your vehicle is fully back on the ground, it is absolutely imperative to double- and triple-check the tightness of the lug nuts. This is not merely a suggestion; it is a critical safety measure that cannot be overstated. You must apply as much force as possible to ensure that the tires are securely fastened to your car and will not come loose while in motion. Your diligence in this step directly impacts your safety and the stability of your vehicle on the road.
To achieve maximum torque, feel free to use your full body weight for increased leverage. In some stubborn cases, you may even need to carefully step on the wrench, ensuring you maintain good balance to avoid any personal injury. Tighten the lug nuts firmly, consistently employing the essential star or crisscross pattern to guarantee even force distribution across the wheel. This meticulous step confirms the wheel is properly seated and completely safe for travel, giving you confidence in your repair.
With the lug nuts thoroughly secured, it’s time to gather all your tools and stow them safely back in your vehicle. If your spare tire can accommodate it, replace the hubcap, though many temporary spares may not fit the original. Place the flat tire into your trunk or another secure location for transport to a repair facility or for proper disposal. Finally, remember to clear your immediate workspace on the side of the road, collecting any reflective triangles, flares, or other safety devices. A quick wipe down of your hands and tools with a towel, hand cleaner, or even hand sanitizer can manage the inevitable grime from the job.
12. **Spare Tire Awareness and Post-Change Protocols**Before you set off, it is a crucial step to check the air pressure of your newly installed spare tire using a reliable tire pressure gauge. If you’ve installed a “donut” or compact temporary spare, its pressure should typically register at least 60 PSI; manufacturers design these with higher pressure to account for gradual air loss over time and to adequately support the vehicle’s weight. Conversely, if your spare tire is a full-size match to your other tires, its PSI should fall within the standard range, usually between 28-32 PSI for most passenger vehicles.
It is vital to understand that most spare “donut” tires are not engineered for high speeds or extended journeys; they are strictly a temporary solution. When operating your vehicle on a donut tire, you must never exceed 50 mph, and anticipate that your braking performance, cornering ability, and overall vehicle handling will be noticeably affected. Always consult your vehicle’s owner’s manual for specific mileage limitations for your particular donut, but as a general guideline, aim to travel no more than 50 miles before seeking a proper replacement for your damaged tire.
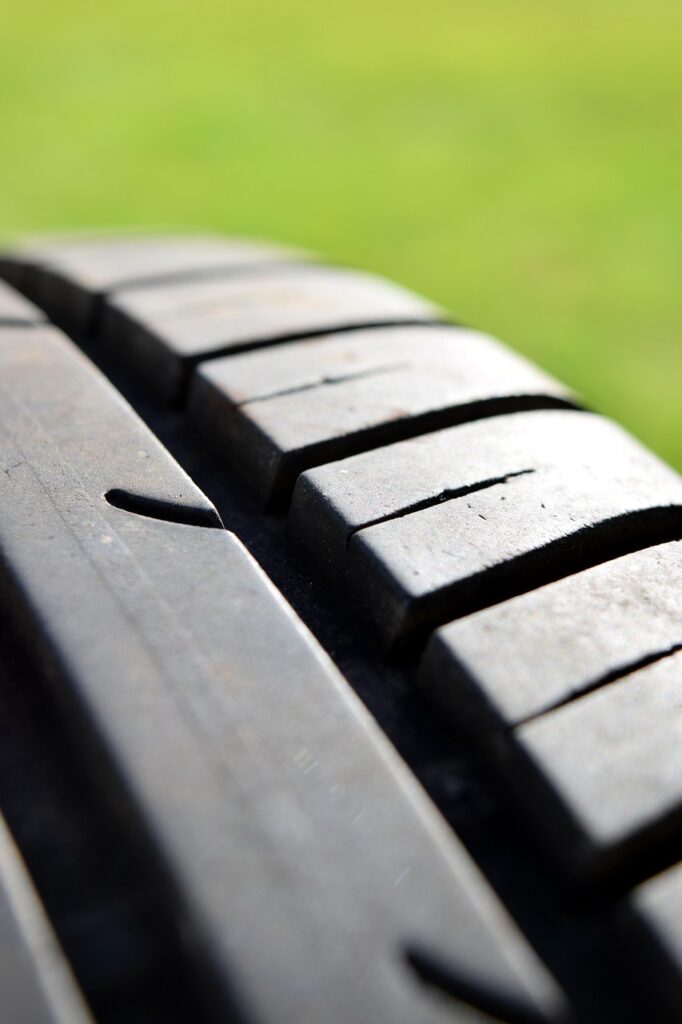
With the temporary spare safely installed, your immediate next step is to drive cautiously to the nearest service station to have your flat tire repaired or completely replaced as quickly as possible. To significantly minimize the chances of facing future emergency roadside tire changes, cultivate the habit of regularly monitoring your tires. Maintain proper inflation levels, rotate them routinely (experts often recommend every 6,000 to 7,500 miles), and diligently inspect them for signs of tread wear, sidewall cracks, or bubbles. Proactive tire maintenance is your most effective defense against unexpected flats and ensures safer travels.
Changing a tire on the side of a busy highway is never a desirable situation, but with the practical, step-by-step knowledge and confidence you’ve gained, you are now equipped to handle it safely and efficiently. This essential skill not only empowers you but can save you valuable time and money, transforming a daunting emergency into a manageable task. By following these clear instructions and always prioritizing safety, you can conquer the unexpected and get back on the road with peace of mind.


