

Let’s be honest, we’ve all been there. You’re scrolling through classifieds or wandering through a dusty barn, and *BAM!* A classic calls out to you. That rust bucket isn’t just a car; it’s a dream on four flat tires, a glorious vision of chrome, horsepower, and open road adventures just waiting to be unleashed. The allure of transforming a forgotten relic into a show-stopping masterpiece is powerful, almost intoxicating.
But hold your horses, gearhead. While TV shows and glitzy auction coverage might make restoration look like a quick, easy, and financially risk-free Sunday afternoon project, the brutal reality is often a stark contrast. Most restorations are a monumental undertaking, demanding hundreds, often thousands, of hours of grueling work, an “upside-down amount of money,” and a timeframe that can stretch longer than a cross-country road trip – sometimes years. The highs are glorious, sure, but the lows? Oh, those budget overruns and unexpected damage revelations can hit harder than a seized engine.
Buckminster Fuller famously said, “If you can learn from mistakes, you’ll be smarter.” And while your own screw-ups definitely offer the most visceral lessons, learning from other people’s usually costs a whole lot less – both in cash and sanity. So, pull up a crate, grab a cold one, and let’s dive into some of the most common, soul-crushing restoration mistakes that seasoned drivers and wrench-benders universally agree they’d “avoid” if they could. Hopefully, by studying these pitfalls, your own garage adventures will see more triumphs and fewer headaches.

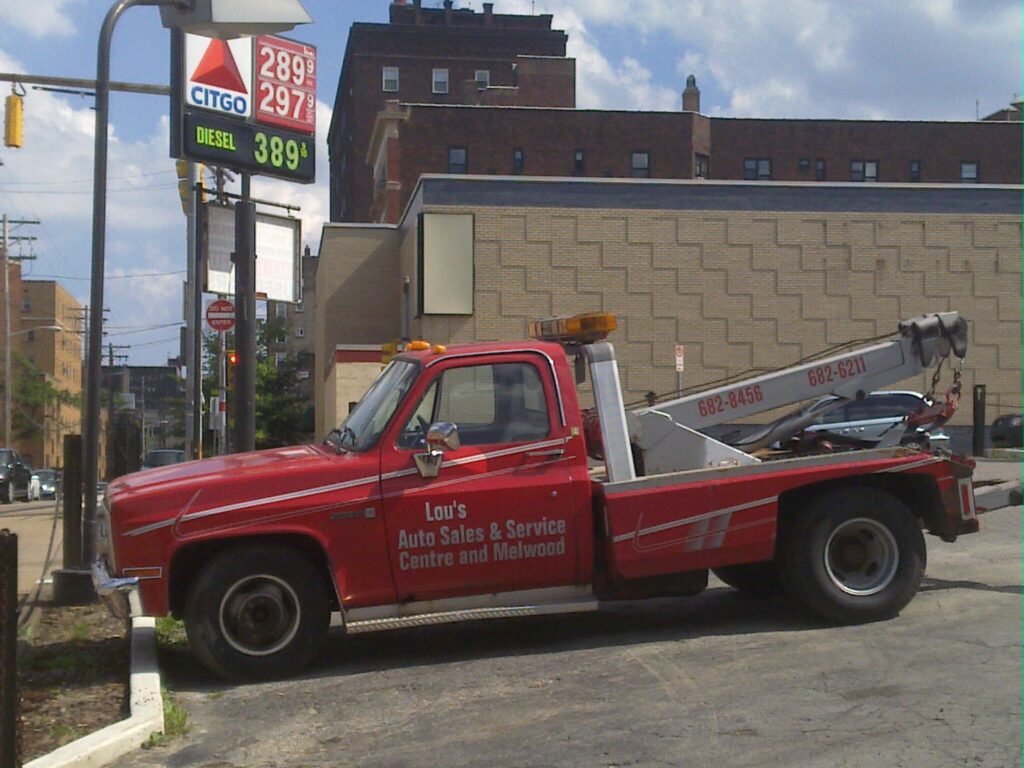
1. **Starting With the Wrong Car / Project**You know the feeling. You fall head over heels for a car, often sight unseen, envisioning its triumphant return to glory. But the harsh truth is, unless you’re sentimentally attached to a specific chassis or genuinely “up for a big, expensive challenge,” choosing the right starting point is probably the single most critical decision you’ll make. Getting this wrong can doom your project before the first wrench even turns.
What defines the “wrong car”? Think rust—lots of it. Missing crucial parts that are unobtanium. Collision damage that looks like it was hit by a freight train. Extreme wear and tear that screams “money pit.” Sure, these examples are cheaper to buy, but as the old adage goes, you pay for it on the back end. They invariably become “much more expensive to restore” in terms of both time and money.
The real pros will tell you: “The right car is almost always the nicest example you can find.” This means spending time searching carefully for a solid foundation, a car known for good “parts availability and community support.” Models like early Mustangs, Camaros, or Chevelles are popular for a reason. Avoid vehicles with severe rust, poor titles, or those missing major components like the engine or key trim pieces, unless you’re a masochist with deep pockets. And for the love of all that is holy in the automotive world, “Know what you are buying.” Do your homework and verify the car’s authenticity. “The advertised Z/28 that isn’t,” or “the Hemi ‘Cuda that was a Slant Six car” are horror stories for a reason. Once you buy a bogus ride, you’re stuck with it.
Read more about: Unpacking the ‘Why’: Decoding Your Skyrocketing Homeowner’s Insurance Bill and Strategies to Bring it Back to Earth
2. **Lack of Comprehensive Planning & Organization**Hands up if you’ve ever grabbed a bunch of tools and WD-40, then jumped headfirst into thrashing apart a rusty old muscle car “just to get it apart.” Yeah, you’re not alone. It’s a classic rookie move, and it’s precisely “how most projects immediately go off the rails.” You end up with a shell on four jackstands, surrounded by a bewildering pile of parts, wondering what on earth to do next.
The seasoned veterans will tell you that “every project, no matter how small, should begin with a written plan.” This isn’t just about dreaming; it’s about practical execution. Your plan needs to be detailed, encompassing a clear budget, a realistic timeline, and a comprehensive list of tasks for every phase: disassembly, bodywork, mechanical rebuilds, paint, interior, and reassembly. Being prepared for detours is smart, but having that basic plan is your compass.
And then there’s the chaos of disorganization. “We can tell you from miserable experience that you must have an organized environment in which to build a car.” Clutter breeds madness. Parts aren’t just “thrown on the shelf in piles” – that’s a direct highway to “you’re in trouble from the get-go.” The simple fix? Grab a “bunch of disposable food containers in various sizes,” arm yourself with felt tip markers, and meticulously “load and mark each container with what’s inside.” This ensures “reassembly is smooth and that no parts are misplaced or forgotten.” And a pro tip from Jerry From LA: “Don’t disassemble the car until it’s time to disassemble the car.” Doing one section at a time is far better than a forlorn-looking body on jacks amidst a sea of uncatalogued parts.
Read more about: Your Definitive Guide to the Safest Family Vehicles of 2025: Top Models Earning Highest Safety Ratings

3. **Underestimating Costs and Skimping on Quality**Let’s face it, the dream of a classic car restoration often collides violently with the reality of your bank account. “Restoration has never been cheap if you want exceptional results.” Yet, so many enthusiasts “underestimate the total cost of the restoration,” believing they can “do it on the cheap.” This is a fast track to shattered dreams and stalled projects, as many learned the hard way after the economic crash of 2008.
To avoid this financial heartbreak, “conduct thorough research to estimate the costs of parts, labor, and unexpected expenses.” More importantly, “It’s often wise to budget for a contingency fund”—at least 20-30% for those inevitable surprises like hidden rust, missing parts, or unexpected shop labor. Remember, there are *always* surprises that “involve even more cash flow.” It always costs more than you budgeted. Always.
This mistake is often exacerbated by “skimping on metalwork and paint.” Bodywork is usually “the most expensive part of the restoration,” and cutting corners here is a “false economy.” While you can “redo just about any mechanical job with a little time and a little cash, redoing substandard bodywork is pretty much like starting over.” The only real way to save on bodywork and paint is to “start with a solid car and make sure the work is done properly.” Don’t compromise; inconsistent quality standards across the restoration will show, and they will haunt you every time you look at your “finished” car.
Read more about: Tattoo Trouble? 10 Big Ink Blunders You Absolutely Need to Avoid!
4. **Neglecting Thorough Inspection & Research**Many restorations begin with a romanticized, “idealized view of what the final product will be.” This is where the rubber meets the road, or more accurately, where your fantasy meets the cold, hard facts of an old car. “Most restorations, no matter how well executed, are still just old cars when they’re done.” They won’t “run as well, stop as well, handle as well, or have the amenities we’ve grown to love” compared to modern vehicles.
This is why “not driving it first” is such a colossal blunder. “Try to drive your car, or at least a similar example, before diving into the restoration.” Find out if you even “fit,” if it’s “too hot,” “too slow,” or if “the smells get to you.” Waiting until the final glorious reveal to discover you actually hate driving your restored dream machine is a mistake you absolutely do not want to make. Factor these quirks into your plan and budget, or consider a different car altogether.
Beyond the test drive, “Skipping a thorough inspection before starting the restoration” and “Neglecting Research About the Project” are equally grievous sins. “Assess the car’s condition thoroughly. Identify rust, structural damage, and other issues that may not be immediately apparent.” This deep dive guides the entire restoration process. Research is “the backbone of a successful classic car restoration,” helping you “understand the history, specifications, and unique quirks of your vintage vehicle.” Utilize “automotive literature, online forums, and expert advice to gather information.” Remember, “you don’t know what you don’t know,” and a lack of research can easily lead to “inaccurate restoration decisions” and buying something like an “unknown engine” that turns out to be junk.
Read more about: Behind the Velvet Curtain: How Secretive Crisis PR Firms Navigate Hollywood’s Most Explosive Scandals and Shape Celebrity Destiny
5. **Ignoring Professional Advice & Not Checking References**Let’s be clear: unless you’re a seasoned master of all automotive trades, attempting every complex task yourself is a recipe for disaster. The allure of DIY is strong, but “trying to tackle specialized tasks—like bodywork, wiring, or engine tuning—with no experience” is a common trap. “There’s no shame in outsourcing key parts of the build.” In fact, “seeking advice can prevent costly mistakes.”
The real trick is knowing *who* to trust. Enthusiasts are constantly “stung by less than reputable shops, engine builders, body shops, upholstery facilities, plating shops, and more.” This is why “it’s essential that you check references.” And we’re talking plural, folks – “one reference is not enough.” You need to ask past customers three critical questions: “Did the shop perform quality work? Was it on budget? Was it on time?” Quality is non-negotiable; if it’s not there, “walk away.” Delays and budget creep can be planned for, but shoddy work is a terminal illness for your project.
But here’s the kicker, the one that bites so many: “Not Getting a Written Estimate.” You “would be amazed how many of us contract work with a shop without a written estimate or signed agreement.” The “gentleman’s agreement is extinct. The humble handshake is meaningless. Trust no one.” Shops have selective memories, and once they have your money, “you’re at their mercy.” We heard about a guy who handed over a “$40,000 deposit” with a verbal agreement, only to get his car back “largely unfinished” five years later. “Always get a written estimate and be stingy with your deposit. Pay a modest deposit and spot the shop cash as the work is complete and inspected.” Your wallet, and your sanity, will thank you.
Read more about: Unlock Your Retirement Potential: Avoiding the Social Security Mistakes That Can Cost You 30% For Life

6. **Improper Timing of Engine & Parts Acquisition**Picture this: You’re ecstatic, you’ve just scored a smoking deal on a fully rebuilt engine! You proudly wheel it into the corner of your garage, ready for when the time comes. Flash forward a year or two, and that pristine powerplant is now “sitting and degrading in a dusty corner of the shop.” Or worse, you’ve blown a huge chunk of your budget on an engine that you don’t even need yet.
This is precisely why our “rule is simple: Don’t rebuild the engine until it’s time to put it back in.” An “engine rebuild sucks a lot of money out of the budget” upfront. If “that money gets spent early, it sometimes means cost-cutting in important areas, like paint and body.” Think about it: you can always paint a used engine and drop it back in, saving the rebuild for later. But try redoing substandard bodywork because you exhausted your funds on an engine too soon. It’s a false economy that can cripple your entire project.
The same logic applies to “Buying Parts Too Early.” We all love a good sale, but “too many people stock up on thousands of dollars’ worth of parts well before they need them.” These eagerly acquired treasures then “get damaged in storage, go missing, turn out to be the wrong ones, or once again suck important funds from the budget at the wrong time.” Here’s a secret that could save you a fortune: “Yes, there may be a sale, but there will probably be a sale next year, too.” The smart play? “Buy your parts just in time and in appropriate bundles to save on shipping and keep the project moving. But don’t buy parts you aren’t ready to use.” Your wallet and your organized workspace will be much happier.

7. **Forgetting the “Why” and Losing Momentum**Every classic car restoration starts with a spark, a dream, a clear goal. “Hopefully, your first goal is to have fun.” Beyond that, you might aim for “awards, great drives, the satisfaction of doing it yourself, or meeting like-minded people.” These goals are your North Star, guiding you through the inevitable frustrations and setbacks. But tragically, it’s all too easy to lose sight of them.
When you “forget your goals and get too hung up on schedules, budgets, problems or other distractions, your restoration will risk major failure.” Restorations are marathons, not sprints. They can stretch for “years,” and the “time required” is almost always “underestimated.” “Losing momentum” is a silent killer of projects, leaving countless cars “setting on a rotisserie waiting to be completed…someday,” as one commenter TexSquirrel lamented. Tim Suddard, the publisher, freaks out “how many stalled restorations I see in my travels.” Most blame money, but the “hard work cost very little on a restoration, if you are doing it yourself.”
The key is focus and flexibility. “Keep those goals at the forefront of your mind, and adjust things quickly when you stray.” And trust us, “you will stray!” It’s easy to “start looking for the next project when I’m about 80% done with the original one,” as one reader admitted, making it “really hard to stay focused.” Donatello also offers a gem: “decide beforehand how deep you want the restoration to go.” You can “save heaps of time and money if you decide intentionally to not be a perfectionist and ignore some of the flaws that you (and probably only you) notice.” This helps manage expectations, prevents burnout, and ensures that the fun—the whole reason you started—doesn’t get lost in the endless pursuit of unattainable perfection.
Alright, gearheads, we’ve navigated the early pitfalls of classic car restoration, from picking the right project to meticulously planning your assault on rust and neglect. But the journey isn’t over yet! As the wrenches keep turning and the paint starts flying, a whole new set of challenges emerge. This is where the rubber truly meets the road, where the difference between a ‘decent’ restoration and a ‘great’ one is forged. So, grab another cold one, because we’re diving deep into the remaining six common mistakes that drivers – and their wallets – universally agree they’d absolutely sidestep for a successful finish. These are the mid-to-late stage booby traps that can derail your dream, so pay close attention!
Read more about: 15 Critical Mistakes to Avoid in a Job Interview: Expert Insights for Professional Success

8. **Safety First: Unsafe Support Systems**Let’s talk about something absolutely non-negotiable: your safety. We’ve all seen the horror stories, the precarious setups that make you cringe just looking at them. It is frightening what some people use to support muscle car bodies and chassis during restorations. Seriously, your life is worth more than a stack of old tires or questionable cinder blocks.
We’ve indeed “seen it all: milk crates, blocks of wood, and worse.” These aren’t just bad ideas; they’re outright invitations to disaster. There’s but one important truth in muscle car restoration—safety. When you’re underneath a multi-thousand-pound hunk of metal, what is your life worth? Don’t even think about cutting corners here; it’s a gamble you will always lose.
The good news is, avoiding this particular graveyard-bound mistake is incredibly straightforward. While a full rotisserie might be out of reach for some budgets, a “heavy-duty quartet of jackstands should be within reach.” Carefully place one at each corner, get that body or chassis “as high as possible,” and for the love of all that is holy, check it for stability before getting underneath. “Never leave anything to chance.” And absolutely, under no circumstances, “never support your project with hydraulic jacks or those flimsy sheetmetal jackstands. Those cheap stamped steel jackstands are dangerous and can maim or kill you.” Harbor Freight (or your preferred tool store) has the right stuff to keep you safe and your project secure. Don’t be that guy.

9. **Electrical Nightmares: Circuit Protection & Grounding**Picture this: you’ve sunk countless hours and dollars into your pride and joy, the engine purrs, the paint gleams, and then… *poof*. Smoke, sparks, and the acrid smell of burning wires. “We’re convinced electrical fires probably do in more muscle cars than accidents or natural disasters.” It’s a silent, insidious killer, and one that’s entirely avoidable with a little foresight.
If you’re bravely going back with the original half-century-old wiring harness, know this: it “mandates methodical installation and security.” That old insulation is brittle, and chafing is its natural enemy. It needs a “fresh wrap of electrical tape” in critical areas and “should be secured properly.” Watch out for any spots where wiring may “ground against a hot exhaust manifold, header, or sharp sheetmetal edges.” These are prime locations for catastrophe.
And don’t forget the circuit protection. “Not all classic muscle cars have circuit protection,” which is a terrifying thought. This means adding a “master fuse or fusible link between the battery and main feed.” Or, at the very least, getting into the habit of “disconnecting the battery whenever the car is parked in your garage.” If you’re building a driver, one of the “better aftermarket electrical systems from Painless Performance or American Autowire” can give you peace of mind and more options.
But here’s a kicker many miss: “Most electrical system woes are caused by improper grounding.” It’s an easy thing to overlook. Enthusiasts often “forget to ground the engine to the chassis,” or leave those smaller, seemingly insignificant (most are black) grounds disconnected. The result? Accessories fail, headlights are dim, and the engine struggles to start. If you’re chasing electrical ghosts, start with those grounds. A good ground is like a strong foundation for your house—invisible but absolutely critical.
10. **Braking Bad: Old Plumbing & Wrong Pads**Okay, so you’ve poured your heart and soul into making your classic look amazing and run like a dream. But what’s the point if it can’t, you know, *stop*? “We’re astonished at the restorations we’ve seen through the years where restorers cleaned up and reused 50-year-old brake lines and hoses.” Let’s be unequivocally clear: this is a recipe for disaster. Safety should never, ever, be compromised for authenticity, no matter how much you love originality.
Those “50-year-old brake lines and hoses” are a ticking time bomb. Think about it: repeated heat cycles, constant pressure, and decades of environmental exposure. Even “new old stock” isn’t a guaranteed safe bet, because “the elements are hard on reinforced rubber hoses even when they’ve been sitting on the shelf for 50 years.” Always, always “opt for new lines and hoses.” Your life, and the lives of those around you, depend on it. Companies like Classic Tube offer modern, reliable solutions like StopFlex braided stainless hoses and new tubing, so there’s simply no excuse.
And while we’re on the subject of stopping, let’s talk pads. It’s an easy mistake to make, but “street cars should get organic or semi-metallic brake pads,” which are genuinely “very effective” for daily driving and spirited cruising. But if you’re thinking of slapping on “metal and ceramic pads” because they sound cool or race-ready, think again. Those are “for the racetrack not street use.”
Using high-heat racing pads on the street will be an exercise in frustration. Not only will “they’re noisy” – which quickly gets annoying – but they’ll also “eat up your rotors and drums” like nobody’s business. You’ll spend more time and money replacing worn components than enjoying your ride. Match the pad to the purpose, and for street driving, that means skipping the race compounds.

11. **Cosmetic Catastrophes: Paint Protection & Mock-Ups**After all that painstaking bodywork and the seemingly endless sanding, there’s nothing quite as soul-crushing as that first scratch on your fresh, glorious paint. “It seems there’s always a certain amount of combat damage when you’re assembling a painted body,” but it doesn’t have to be a certainty. Protecting that pristine finish is paramount during the final stages of assembly.
Your painted body returning from the shop should be treated like a newborn baby – with extreme care. “Keep it covered when you’re not working on it, and keep a heavy layer of padding beneath the cover.” Think beyond just a blanket; consider moving blankets or purpose-made car covers. Critically, “Keep anything and everything away from the body that could fall and do damage.” That means stowing away bicycles, lawn equipment, trash cans, and anything else that could tip, swing, or scratch.
When you are working in a specific area, keep adjacent painted surfaces covered. And for the love of all that is shiny, “Resist the urge to get in a hurry or get frustrated to where you slip with a wrench or screwdriver and do the unthinkable.” Approach your build “with the mind-set of a neurosurgeon.” Every move is calculated, every tool placed with care. Invest in fender covers from National Parts Depot or Classic Industries; they’re cheap insurance against a very expensive mistake.
Now, let’s talk about something many enthusiasts skip at their peril: the “humble, time-consuming mock-up.” Street rodders have understood this sacred process for generations. A mock-up “consists of pre-fitting and gapping all body panels when they’re in raw steel or primer prior to finish work and paint to ascertain fit.” This step, often ignored in the rush to get to paint, is your absolute best friend.
“Few things are more emotionally taxing than trying to fit doors, fenders, hoods, and other sheetmetal in fresh paint while trying to prevent damage.” Imagine the agony of trying to hammer on a panel or adjust a hinge when every slip could mean a re-spray. If it doesn’t fit right in primer, it certainly won’t fit perfectly once painted. Doing the mock-up means you can make those critical adjustments without the constant fear of damaging your immaculate, fresh finish. It’s a tedious step, sure, but it saves immeasurable heartache and potential costly rework down the line.

12. **Power Play Pitfalls: Overcarburetion, Exhaust Sizing & Excessive HP**Ah, the pursuit of power. It’s a siren song for every car enthusiast, and for generations, the mantra has been “bigger is better.” More cubes, more carburetor, bigger pipes, more horsepower! But as any seasoned wrench-bender will tell you, this isn’t always true, and blindly following this logic can lead to a seriously compromised street machine.
Take carburetors, for instance. If 600 cfm gives your backside a thrilling shove at wide-open throttle, surely 650 or 700 cfm must be even better, right? Nope. “Carburetor size should be proportional to displacement, cylinder head type, compression, and cam profile.” Slap on too much carburetor, and you can actually “lose both horsepower and torque” in the usable rev range. It’s a balancing act, and finding that optimum size is key to a responsive, powerful engine, not just a big one.
The same fallacy plagues exhaust pipe sizing. “When exhaust pipe sizing becomes too large, low to mid-range torque suffers.” Even if you’re running a monster big-block, “pipe sizing doesn’t need to be any larger than 2-1/2 inches.” Start “courting the 3-inch mark,” and you’ll start sacrificing that precious torque that gives you the traffic-light-to-traffic-light advantage. Plus, you’ll likely wind up with “pipe clearance headaches.” Remember, “Sewer pipes are for public utilities, not muscle cars.” A slightly smaller, properly sized exhaust system will give you better street manners and a more enjoyable drive.
And then there’s the 1,000-horsepower obsession. “We’re always asked how to build insane levels of power into classic muscle cars.” But seriously, how much do you truly need for the street? “All 700 to 1,000 hp nets you is bragging rights at the local cruising spots.” It makes “little sense for street power” beyond that. Power is intoxicating, yes, but “power in the hands of the inexperienced can get you (and others) killed.” If you’re chasing those four-digit numbers, you’d “better have a chassis, brake system, and tires that are up to the task.” A truly powerful street car is a well-balanced machine, not just an engine dyno queen.

13. **The Final Stretch: Skipping the Sorting Stage**You’ve done it. The car is assembled, the engine fires, the paint glows. You’re ready to hit the road! But hold on just a minute. “We believe that most cars billed as ‘restored’ are really about 50 to 100 hours from finished.” Sure, “they look nice and drive pretty well,” but here’s the million-dollar question: “are they sorted?”
The sorting stage is that often-skipped, crucial final phase that separates a merely decent restoration from a truly great one. A “good restoration ends with a lot of test-driving and list making.” This isn’t just a joyride; it’s a meticulous shakedown. “The lists will note rattles, things that don’t feel right, parts that don’t fit correctly, and cosmetics that need attention.” Sometimes, it might even mean tackling a “big job, like removing the drivetrain to fix something” that reared its head only after some serious road time.
It’s easy to be “out of money or sick of working on your car” by this point, but trust us, “sorting makes a decent restoration into a great restoration–and can save you from a bad restoration.” It’s the period at the end of the sentence, the final polish that ensures your hard work pays off with a genuinely reliable and enjoyable classic. Donatello, a wise commenter, even suggested, “Get a few other people to drive your car too. A mechanic specializing in the car you are restoring can fast-track diagnosing some issues.” Fresh eyes and experienced hands can spot things you’ve become blind to.
And speaking from personal experience, you might even get some invaluable, unsolicited feedback. My wife, who is no mechanic at all, does a very good job at pointing out why my car still drives like an ‘old car’. Thanks, honey, I didn’t even have to ask you to do that for me, lol. But honestly, once those squeaks, clunks, bad smells, and other quirks that you’ve been willing to put up with are gone, you truly do “enjoy driving it more.” The sorting stage isn’t a burden; it’s the final, satisfying step to realizing the full potential of your classic dream machine.
So there you have it, folks! Thirteen common mistakes that can turn your classic car restoration dream into a full-blown nightmare. From the initial thrill of the find to that glorious, sorted first drive, the path is fraught with peril. But armed with a little forethought, a lot of patience, and the wisdom of those who’ve been there (and probably messed up big time), your journey can be one of triumph. Learn from these pitfalls, stay focused on the fun, and you’ll be cruising in your perfectly restored masterpiece sooner than you think. Keep those wrenches spinning, and may your projects be filled with more highs and fewer headaches!


