


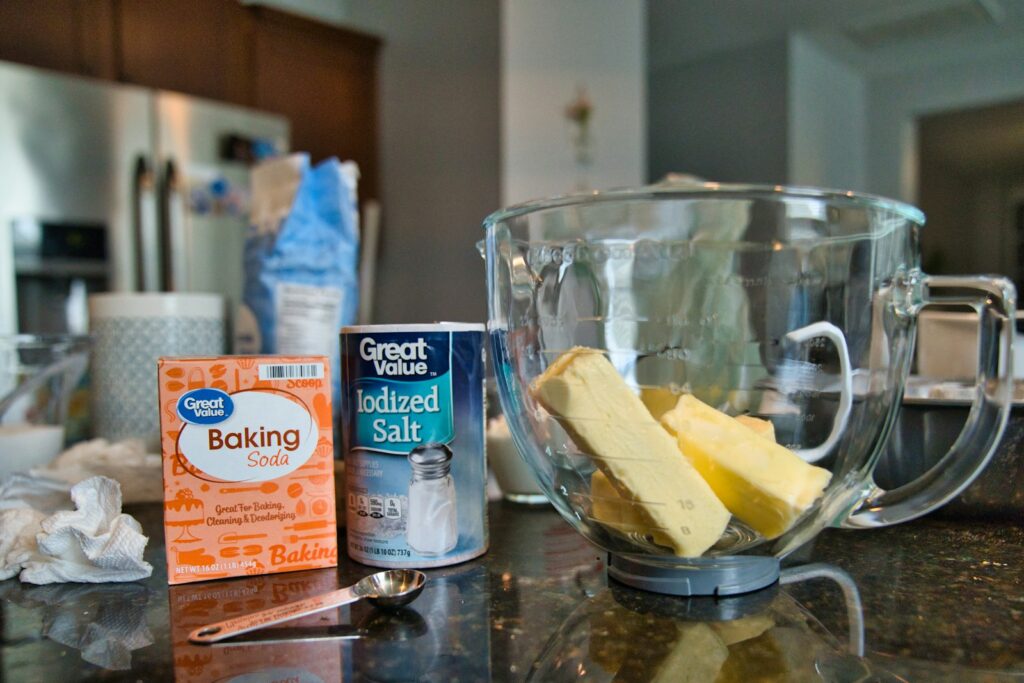
Are you tired of shelling out good money for specialized cleaning products that only work on one tiny corner of your car? Imagine tackling almost every car cleaning challenge with a single, humble, and incredibly cost-effective ingredient, probably already in your pantry. Well, that world is here! We’re talking about baking soda – the unsung hero of home and auto detailing.
Baking soda is nothing short of a miracle worker for keeping your vehicle spick-and-span, inside and out. It’s a versatile, powerful, and gentle cleaning agent, making it an exceptional choice for maintaining your car’s freshness and shine. With its mild abrasive nature, it effectively cuts through dirt, grime, and stubborn stains without risking damage to your paint, upholstery, or other delicate surfaces. Plus, it’s an eco-friendly champion, offering a safe and natural alternative to harsh chemicals.
In this in-depth guide, we’ll dive deep into nine ingenious ways to leverage baking soda for car cleaning. From refreshing your interior to sprucing up the exterior, you’ll discover practical, actionable tips and step-by-step instructions. Get ready to transform your ride with the simple, yet mighty, power of baking soda, saving you significant time and money!
1. **Reclaiming Spotless Car Seats with Baking Soda**Car seats endure a lot, accumulating dirt, grime, and unpleasant odors from daily use and spills. Baking soda offers a powerful, gentle, and cost-effective solution to restore their pristine condition, without resorting to expensive, chemical-laden cleaners. Its unique properties allow it to penetrate fabric and upholstery, lifting away embedded dirt and neutralizing smells, making it ideal for both routine maintenance and tougher challenges.
Before cleaning, proper preparation is key. Start by thoroughly removing any loose debris like crumbs, dirt, or pet hair from your car seats. Use a handheld vacuum or a soft brush to get into all crevices and dislodge surface-level grime. This crucial initial step ensures your cleaning solution can deeply penetrate the fabric, leading to a more effective clean and preventing dirt buildup.
Next, craft your powerful cleaning solution. In a bowl, combine equal parts baking soda and vinegar, stirring until it forms a consistent, paste-like texture. Add a few drops of water if the paste is too thick. While a simple baking soda and water paste works, vinegar significantly boosts cleaning power, offering an extra punch against stubborn stains and enhancing odor elimination. This dynamic duo creates a fizzing action that helps lift and break down grime effectively.
With your paste ready, apply it using a clean cloth or sponge. Gently rub a small amount onto stained areas, ensuring even coverage. For resilient stains or strong odors, let the paste sit for 15 to 20 minutes to penetrate and loosen dirt and odor particles. After dwelling, grab a soft-bristled brush or clean toothbrush and gently scrub the treated areas in circular motions, focusing on stubborn spots. Finally, use a damp cloth to thoroughly wipe away all residue. If cleaning leather seats, condition them after drying to maintain suppleness and prevent cracking.

2. **Banishing Persistent Car Odors Naturally**Unwanted odors can quickly make your car an unpleasant place, stemming from spills, pets, or everyday use. Baking soda is a renowned natural deodorizer, capable of absorbing and neutralizing smells without merely masking them. This makes it an ideal, safe, eco-friendly, and cost-effective solution for restoring a fresh scent to your vehicle’s interior. Its fine particles have a vast surface area, perfect for trapping odor molecules effectively.
As with any cleaning, starting with a clean slate is crucial. Before applying baking soda, prepare your car’s interior by removing all loose debris such as crumbs or dirt from seats and floors. A handheld vacuum or soft brush ensures the baking soda directly contacts odorous surfaces without obstruction. This initial sweep maximizes contact and absorption, laying the groundwork for truly effective odor elimination.
Now, create your baking soda solution or paste. For general odor absorption, sprinkle dry baking soda directly onto carpets and fabric seats. For targeted application on specific odorous spots, mix baking soda with water to create a paste. You can adjust water for desired consistency. For an extra boost, combine baking soda with vinegar for wiping down hard surfaces, offering a comprehensive attack on odors.
Apply the paste using a clean cloth or sponge, rubbing it gently onto affected interior surfaces. For stubborn odors, allow the paste to sit for 15 to 20 minutes, giving the baking soda time to absorb smells and loosen stains. After waiting, use a soft-bristled brush to gently scrub the treated areas. Finish by using a damp cloth to wipe away residue, then vacuum any remaining baking soda from the interior. This ensures your car is left immaculately clean and completely odor-free.
3. **Illuminating Your Drive: Headlight Restoration with Baking Soda**Clear, bright headlights are a critical safety feature, ensuring proper visibility for all drivers. Over time, headlights can become foggy, yellowed, or grimy, significantly reducing their effectiveness. Cleaning your car headlights with baking soda offers a brilliantly simple, eco-friendly, and cost-effective method to restore their sparkling clarity. This DIY approach avoids expensive kits, providing a gentle yet powerful way to enhance nighttime driving safety.
Preparation is essential before applying any cleaning solutions. Begin by carefully removing any dust, grime, or loose debris from the headlight surface using a clean microfiber cloth or soft-bristled toothbrush. This step maximizes solution effectiveness and prevents accidental scratches from embedded grit. Taking these moments ensures a clean canvas for optimal results. Remember to wear gloves and use masking tape to protect surrounding paint from the cleaning solution.
To create your magic solution, you’ll need baking soda, a fresh lemon, and a mixing bowl. Squeeze lemon juice into the bowl, removing any seeds. Gradually add baking soda, stirring continuously until you achieve a thick, paste-like consistency. Adjust baking soda as needed for the right texture, thoroughly combining ingredients until smooth. The citric acid in lemon juice, combined with baking soda’s mild abrasive properties, creates a potent and natural cleaning concoction.
With your paste ready, apply it to the headlights using a clean cloth or sponge, spreading evenly over the entire lens. Gently scrub in circular motions, focusing on stubborn dirt, grime, or yellowed areas. Apply moderate pressure but avoid excessive force to prevent damage. After scrubbing, thoroughly rinse the headlights with clean water to remove all traces of the solution. Ensure no residue remains, then gently dry with a clean microfiber cloth. If headlights are very dirty, repeat these steps several times for desired results, as baking soda is a gentle abrasive.
4. **Maintaining Car Battery Health with Baking Soda**A clean car battery is fundamental to your vehicle’s smooth and reliable operation. Corroded battery cables can significantly impede electrical flow, causing starting problems and reducing battery lifespan. Baking soda provides an excellent, safe, and effective solution for cleaning these crucial components, helping maintain optimal car performance. Regular cleaning ensures consistent power, preventing frustrating breakdowns and extending service life.
Safety is paramount when working with car batteries. Park your vehicle in a well-ventilated, brightly lit area, turn off the engine, and engage the parking brake. Don personal safety gear: essential rubber gloves and safety goggles. It’s also wise to wear a long-sleeved shirt and old clothes, as battery acid can ruin fabric. These non-negotiable precautions ensure a safe cleaning experience.
Open the hood and locate the battery, identifying positive (+) and negative (-) terminals (usually color-coded). Disconnect the battery cables, always starting with the negative cable first, then the positive. This specific order minimizes the risk of accidental short circuits, preventing sparks or damage to your car’s electrical system and ensuring your safety throughout the process.
Prepare your specialized cleaning solution by mixing baking soda with water in a bowl. You can use lukewarm distilled water and add about a teaspoon of baking soda for a solution, or mix equal parts baking soda and water to form a thicker paste. While some sources suggest vinegar, sticking with plain baking soda and water is generally recommended for battery cleaning to avoid potential adverse reactions, ensuring safety. Dip an old toothbrush into this mixture.
Begin scrubbing the battery terminals and cable clamps, applying effort as corrosion can be stubborn. Clean the toothbrush frequently. Continue scrubbing until all white, green, or blue buildup, corrosion, and dirt are removed. The baking soda will react with any remaining battery acid, neutralizing it and lifting deposits. Rinse the terminals thoroughly with remaining solution or distilled water, then dry completely with a clean, lint-free cloth. Finally, apply a small amount of petroleum jelly or Vaseline to protect from future corrosion. Reconnect cables: positive first, then negative, tightening securely for good electrical connection.
Read more about: Beyond the Manual: 14 Genius Car Hacks Every Driver Will Wish They Knew Sooner to Master the Road
5. **Sparkling Wheels and Tires: The Baking Soda Method**Your car’s wheels and tires bear the brunt of road grime, brake dust, and various environmental pollutants, often looking dull and dirty even after a general wash. Thankfully, baking soda offers an incredibly effective, yet gentle solution to restore their shine without harsh chemicals. This approach leverages its mild abrasive qualities to tackle tough grease and dirt, making your wheels sparkle as if they were brand new, enhancing your car’s overall aesthetic appeal and reflecting meticulous care.
Crafting the right baking soda paste is the first step to dazzling wheels. In a small mixing bowl, combine three parts baking soda with one part water, stirring until it forms a consistent, wet paste. For an enhanced cleaning power, especially if your wheels are heavily soiled, consider replacing half of the water with white vinegar. This combination will create a slight bubbling reaction, signaling its active grime-fighting properties, which helps to further break down stubborn residues.
Once your paste is prepared, it’s time for application. Using a sponge, a dedicated detailing brush, or a clean cloth, generously apply the baking soda paste directly onto your car wheels. Ensure you spread the paste evenly, thoroughly covering all areas that need attention. For added convenience, you can also sprinkle dry baking soda onto a damp brush or cloth and then gently rub it against the wheels, allowing the natural abrasiveness to work its magic.
Allow the paste to sit on the wheels for a few minutes. This crucial dwell time gives the baking soda ample opportunity to penetrate and effectively break down the embedded dirt, grease, and grime that have accumulated over time. For those particularly stubborn, heavily soiled areas, extending this sitting time up to five minutes can significantly improve the cleaning outcome, ensuring a more thorough and impressive result.
After the paste has had sufficient time to work, gently scrub the wheels using your chosen sponge, brush, or cloth. It’s important to use moderate pressure and avoid any harsh brushes or excessive force, as this could potentially damage the wheel finish. Once you’ve thoroughly scrubbed away the grime, rinse the wheels completely with clean water. Repeat this rinsing step multiple times if necessary, ensuring all baking soda residue is entirely removed, and then dry the wheels with a clean cloth. For a final flourish, you might choose to apply a shine product to truly enhance the appearance of your now immaculately cleaned wheels, making them look professionally detailed.
6. **Eradicating Exterior Salt and Grime**Winter weather, with its pervasive salt treatments and muddy roads, can leave your car’s exterior looking dull and caked with corrosive grime. Regular car washes might struggle with these stubborn deposits, but baking soda provides a powerful, yet gentle solution for effective exterior cleaning, protecting your paint job while restoring its luster. This method is particularly invaluable after the colder months, helping to safeguard your vehicle’s finish from long-term salt damage.
Before diving into the deep clean, it’s always best to prepare your car by rinsing off any excess dirt and loose debris with a hose or a bucket of water. This initial rinse is crucial, as it makes your overall cleaning job significantly easier by preventing you from scraping any loose dirt or small pebbles across your car’s surface with your sponge or rag, which could otherwise lead to unsightly scratches and damage to your paint job. This foundational step ensures a smoother, safer cleaning process.
To create an exceptionally powerful cutting agent for your exterior wash, add one cup (240 mL) of baking soda to one gallon (3.8 L) of soapy hot water. This unique combination transforms ordinary car wash water into a formidable solution, highly effective at breaking down and lifting away layers of road salt, mud, and other accumulated grime. The baking soda works synergistically with the soap, enhancing its cleaning capabilities and making it particularly adept at tackling the challenges posed by post-winter conditions.
Once your baking soda and soapy water solution is ready, dip a soft microfiber cloth or sponge into the mixture and begin washing your car’s exterior. Work in sections, gently scrubbing to lift away dirt and salt. The mild abrasive quality of the baking soda assists in dislodging grime without scratching the paint. After thoroughly washing each section, rinse it immediately with clean water to prevent any soap or baking soda residue from drying on the surface. Continue this process around the entire car, ensuring all salt and grime are meticulously removed, leaving your vehicle’s exterior refreshingly clean.
7. **Tackling Rust on Hubcaps with Baking Soda Paste**Rust can be a frustrating sight on your car’s hubcaps, detracting from its overall appearance and hinting at underlying wear. While seemingly stubborn, rust spots don’t always require aggressive chemicals or extensive effort to remove. Baking soda offers a surprisingly simple and effective solution, harnessing its gentle abrasive power to lift away minor rust, restoring the clean, polished look of your hubcaps without damaging the surrounding material.
To effectively combat rust, begin by creating a targeted baking soda paste designed for precision cleaning. In a small bowl, combine three parts baking soda with one part warm water. Stir these ingredients thoroughly until they form a thick, consistent paste. The specific ratio ensures a potent mixture that adheres well to the rusty areas, allowing the baking soda to concentrate its cleaning action where it’s most needed, without being overly runny or difficult to apply.
With your rust-fighting paste ready, apply a generous amount directly to the rusty areas on your hubcaps. Ensure the paste completely covers the visible rust spots. Once applied, allow the mixture to sit on the hubcaps for a few minutes. This crucial dwell time gives the baking soda the opportunity to begin its work, gently breaking down the rust particles and loosening their grip on the metal surface, preparing them for easy removal.
After the paste has sat for its recommended duration, take a clean rag and firmly wipe away the baking soda mixture. You’ll observe the rust coming off with the paste, revealing the cleaner surface beneath. For any lingering or particularly stubborn rust spots, you can repeat the application and wiping process. This targeted approach ensures that your hubcaps are effectively cleaned, helping to restore their original sheen and keep your vehicle looking its best, all with a common household ingredient.
Read more about: 13 Ingenious Household Hacks to Make Your Car’s Interior Look Brand New
8. **Naturally Freshening Car Air Quality**Even the cleanest cars can sometimes fall prey to lingering odors from food, spills, or everyday use, making the interior feel less inviting. Instead of masking these smells with artificial fragrances, baking soda provides an outstanding natural solution to purify your car’s air quality by truly absorbing and neutralizing offensive odors. It’s an inexpensive and highly effective way to ensure a continuously fresh and pleasant environment inside your vehicle.
One of the simplest ways to harness baking soda’s deodorizing power is by sprinkling a small amount directly into your car’s cup holders or even your ashtray, if you have one. Approximately two teaspoons (9.9 mL) of baking soda can work wonders, quietly absorbing ambient smells and purifying the air around it. It may take a few days to fully notice the significant improvement in air quality, but once your car’s interior begins to smell noticeably fresher, simply wipe away the baking soda with a damp cloth to remove any residue.
If you prefer a more discreet or decorative approach, or if you simply don’t want to fill your car’s existing compartments with loose powder, consider an alternative method. Fill a mug or a small cup with baking soda and place it inconspicuously in a cup holder or another out-of-sight pocket within your car. This arrangement works just as effectively in absorbing odors while maintaining a tidy appearance. For an extra touch of sensory delight, you can infuse this natural air freshener with a few drops of your favorite essential oil. Popular fresh scents like lavender, eucalyptus, or lemon are excellent choices, adding a pleasant fragrance that complements the refreshing effects of the baking soda without overwhelming the senses.
Another clever method to create a potent, long-lasting air freshener involves a small jar. Add approximately one-quarter cup (59.1 mL) of baking soda to the jar, then punch a few holes into the lid to allow for optimal air circulation. You can then place this customized air freshener in a cup holder or tuck it away in a car pocket. Similar to the cup method, adding a few drops of essential oils will enhance the experience, creating a pleasant and natural fragrance. Alternatively, for a more rustic DIY feel, fill a cup with baking soda and stretch some cheesecloth across the top, poking a few holes into the cheesecloth to achieve the same odor-absorbing and air-freshening effect. These simple, resourceful tricks ensure your car remains an oasis of freshness.
**Conclusion**
And there you have it! We’ve journeyed through nine incredibly simple, yet profoundly effective ways to wield the humble power of baking soda, transforming your car from drab to fab, inside and out. From restoring weary car seats to a like-new state, banishing persistent odors, and making your headlights sparkle for safer night drives, to ensuring your battery cables are pristine, your wheels gleam, and even tackling stubborn rust and pervasive exterior grime, baking soda truly proves its mettle as the ultimate multi-purpose cleaning hero. It’s a testament to how often the most unassuming items in our pantry hold the key to complex problems.
Embracing these baking soda ‘hacks’ isn’t just about achieving a cleaner car; it’s about adopting a smarter, more sustainable, and undeniably more budget-friendly approach to vehicle maintenance. You’re not only saving a significant amount of money that would otherwise be spent on specialized, often chemical-laden products, but you’re also making an eco-conscious choice by opting for a natural, safe alternative. Imagine the satisfaction of knowing your ride looks fantastic, smells fresh, and performs optimally, all thanks to a few clever tricks and one powerhouse ingredient.
Read more about: Unlock a Showroom Shine: Drivers’ Top Car Cleaning Hacks That Will Transform Your Ride and Save You Money
So, go ahead and empower yourself with these actionable tips. Grab that box of baking soda, put on your gloves, and rediscover the joy of a truly clean car, achieved with minimal fuss and maximum impact. Your vehicle will thank you, your wallet will thank you, and you’ll undoubtedly feel a sense of accomplishment by mastering these ingenious DIY cleaning solutions. It’s time to stop shelling out cash on pricy products and start making use of the everyday household ingredients you’ve already got on hand to make your car look brand new again!


