

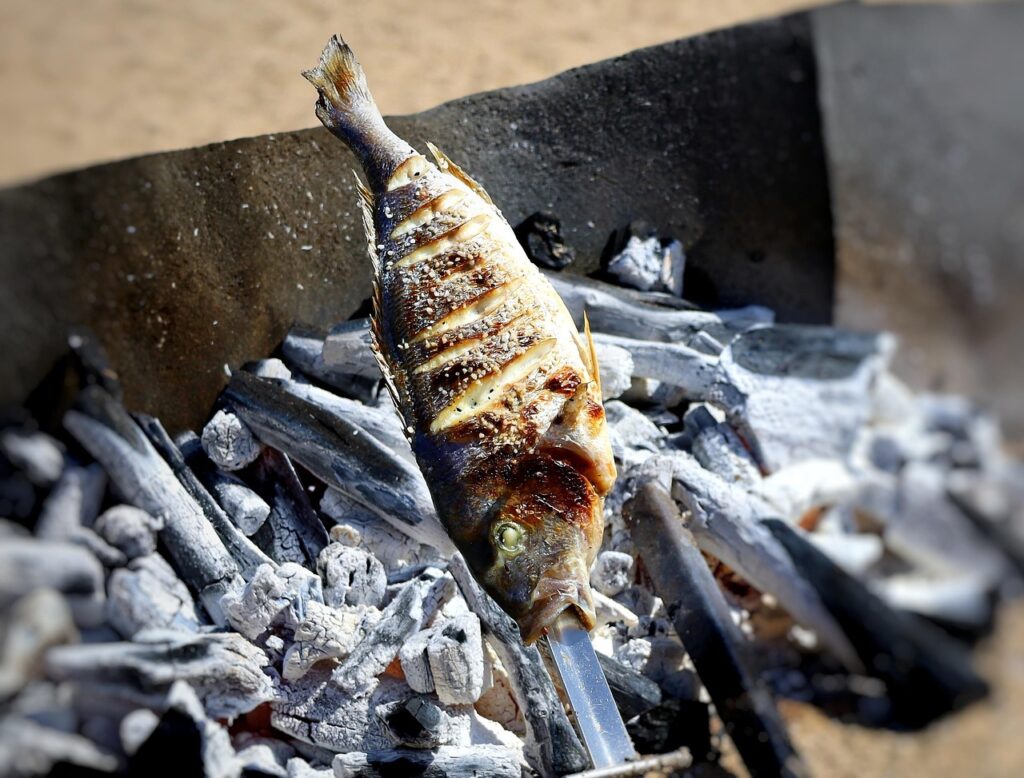
The tantalizing aroma of sizzling meat, the crackle of charcoal, the anticipation of a perfectly grilled meal—these are the hallmarks of a great barbecue experience. Yet, for many home cooks, that perfect vision can quickly turn into a frustrating reality of charred exteriors, raw interiors, or food stubbornly glued to the grates. It’s a journey every pitmaster, from backyard beginner to seasoned champion, has navigated, stumbling upon common errors that derail delicious outcomes.
But here’s the secret: BBQ mastery isn’t some innate talent reserved for a select few. It’s built not just on your greatest successes, but, perhaps more importantly, on the lessons learned from those inevitable missteps. That dry brisket, that charred burger, that bitter pork shoulder—they are not failures if you learn from them. They are data points on your journey, invaluable insights that, when understood and corrected, pave the way for consistent grilling glory.
This guide isn’t here to scold or discourage; it’s your early warning system, turning potential disasters into mere footnotes in your barbecue education. We’ve analyzed the universal mistakes that stand between you and BBQ perfection, offering the exact knowledge and battle-tested techniques to ensure your grilling attempts don’t just become edible, but truly extraordinary, every single time. Let’s dive in and transform those common blunders into barbecue brilliance.

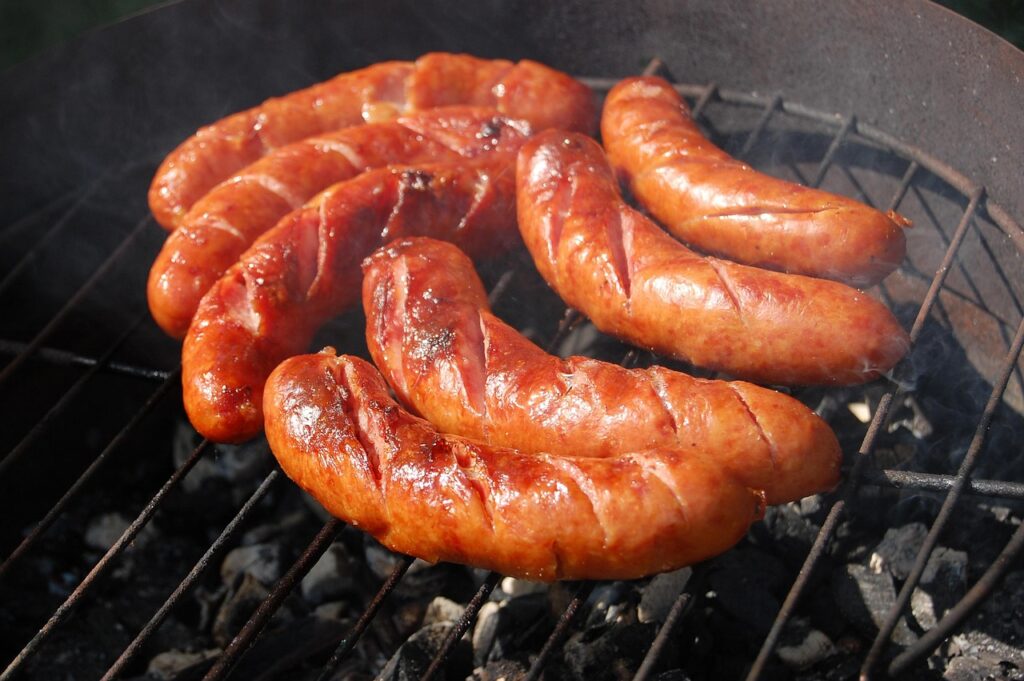
1. **Oiling the Grates (Instead of the Food)**This is perhaps one of the most widespread and easily avoidable errors in backyard grilling, a habit many have adopted without realizing the detrimental effects it has on their food and their grill. The idea seems logical on the surface: oil the grates to prevent sticking. However, in practice, it’s a big blunder that can lead to frustration and ruined meals, directly contradicting one of the most fundamental principles of successful outdoor cooking.
When you brush oil directly onto hot cooking grates, especially over a lit grill, you run a significant risk of causing a big flare-up. The high heat of the grill instantly burns the oil, not only creating potentially dangerous flames but also leaving behind a sticky residue. This residue acts like a powerful adhesive, effectively “gluing” your food to the grates. Instead of preventing sticking, this method actively promotes it, leading to food tearing apart when you try to flip it and drying out in the process, much like dehydrating food.
The expert mantra for this situation is clear and concise: “Oil the food, not the grates!” This simple shift in technique makes all the difference. When you brush oil directly onto the food itself, it stays juicy and promotes a beautiful caramelization, giving you those coveted, impressive grill marks that are a hallmark of well-cooked barbecue. More importantly, oiling the food provides a barrier that helps to prevent “stickage” without the risks of flare-ups or sticky residue on the grates.
So, before your next grilling session, remember this crucial distinction. Prepare your proteins and vegetables by lightly coating them with a high-smoke-point oil. This ensures that when they hit the hot grates, they release cleanly, develop that fantastic crust, and retain their internal moisture, leading to a much more satisfying and delicious result. It’s a small change with a massive impact on the quality of your grilled dishes.
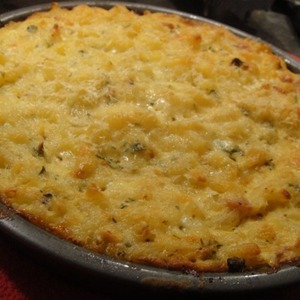
Cook the Book: Macaroni and Cheese Carbonara
Ingredients
Equipment
Method
- Preheat your oven to 375°F (190°C). Butter a 9×13-inch baking dish.
- Bring a large pot of salted water to a boil. Add the elbow macaroni and cook just under al dente according to package directions. Drain and set aside.
- In a large Dutch oven or heavy-bottomed pot, heat the olive oil over medium-high heat. Add the diced pancetta and cook until crispy and golden. Remove the pancetta with a slotted spoon, leaving the rendered fat in the pot.
- Reduce heat to medium. Add the finely chopped garlic to the pot and sauté for 30 seconds until fragrant. Whisk in the flour and cook, stirring constantly, for 1-2 minutes to create a roux.
- Gradually whisk in the hot whole milk until the sauce is smooth and thickened. Bring to a gentle simmer.
- Remove the pot from the heat. Stir in the finely chopped fresh thyme leaves, cayenne pepper, and most of the grated Asiago, Irish white cheddar, American cheddar, and aged Fontina cheeses until melted and smooth.
- In a separate bowl, lightly whisk the egg yolks. Gradually whisk a ladleful of the hot cheese sauce into the egg yolks to temper them. Slowly pour the tempered egg mixture back into the pot with the remaining cheese sauce, whisking constantly until fully incorporated. Season with kosher salt and freshly ground black pepper to taste.
- Add the cooked macaroni to the cheese sauce, tossing gently to coat all the pasta evenly.
- Pour the macaroni and cheese mixture into the prepared baking dish. Sprinkle the remaining grated cheeses, along with the Parmesan, over the top.
- Bake for 25-30 minutes, or until the top is golden brown and the sauce is bubbly. Let stand for a few minutes before serving, garnished with fresh flat-leaf parsley.
Notes

2. **Putting Food on a Cold Grill (The Impatient Fire)**One of the most common mistakes that separates a truly great griller from an average one is impatience—specifically, the failure to allow the grill to reach its optimal temperature before any food touches the grates. The lure of the flickering flames or the immediate heat from a newly lit gas grill can be strong, but succumbing to this urge almost always leads to disappointing results: food that sticks stubbornly, cooks unevenly, and fails to develop that beautiful, flavorful sear we all crave.
Understanding the science behind why a properly preheated grill is essential is key. For charcoal, simply seeing flames isn’t enough; the charcoal isn’t truly ready until the briquettes are covered in a uniform white-gray ash. This ash indicates that the charcoal has fully ignited and is radiating intense, consistent heat, which is vital for even cooking and creating the Maillard reaction – that desirable brown crust that adds so much depth of flavor. Similarly, gas grills aren’t ready the moment you turn them on; they require 10-15 minutes of preheating with the lid closed. This not only allows them to reach the proper cooking temperature but also serves to sterilize the grates, burning off any leftover residue from previous cooks.
The problem with cooking on a grill that hasn’t reached its target temperature, or paradoxically, one that’s *too* hot from fresh charcoal or gas on maximum, is multifold. A cold grill will cause food to stick immediately, preventing that clean release and crispy exterior. Conversely, cooking on a grill hotter than 550°F is usually counterproductive. While high heat is good for searing, excessive heat means you’ll often burn the outside of your food before the inside has a chance to cook through, resulting in a charred exterior and a raw or undercooked interior. This is a common occurrence with thinner cuts or delicate items.
The fix for this widespread blunder is simple: patience and proper temperature testing. For charcoal, adhere to the “20-Minute Rule” – wait until the briquettes are at least 80% covered in white-gray ash, which typically takes about 20 minutes in a chimney starter. For gas grills, preheat with the lid closed for a minimum of 15 minutes on high. A practical way to test the readiness is to hold your hand 5 inches above the grate; if you can’t hold it there for more than 2-3 seconds, your grill is ready for action. By respecting these preheating guidelines, you set the stage for perfectly cooked, non-stick, and beautifully seared dishes every time.
3. **Neglecting Grill Cleaning**Many aspiring grill masters approach their outdoor cooking equipment with a level of reverence, yet often overlook a crucial aspect of its care: consistent cleaning. An outdoor grill, in many ways, behaves much like a well-seasoned cast-iron skillet – it improves with repeated use, building up a protective patina that enhances cooking. However, this analogy breaks down if you neglect the basic maintenance, leading to a grill that performs poorly and can even transfer unwanted flavors to your food.
Failing to clean your grill after each use creates a build-up of old food particles, grease, and charred remnants. This residue not only makes subsequent cooking sessions more difficult, causing fresh food to stick and cook unevenly, but it can also impart off-flavors to your carefully prepared dishes. Imagine cooking a delicate piece of fish over the burnt remains of last week’s steak; the flavors simply won’t be as pure or enjoyable. Furthermore, neglecting cleaning means that the next time you fire up the grill, you’re starting with a less-than-ideal cooking surface, impacting everything from sear quality to heat distribution.
The solution is refreshingly simple and, when made a habit, requires minimal effort. The key is to clean your grill grates twice during every cookout: once before you begin cooking and again immediately after you’ve finished. Before you place any food on the grates, give them a thorough brush to remove any lingering debris from the previous session. After you’ve removed your cooked food, while the grates are still warm, clean them again. This proactive approach ensures that the grill is always ready for its next use, preventing large, stubborn build-ups that make cleaning a daunting chore.
To accomplish this, a stiff, metal-bristle grill cleaning brush is your best friend. Its robust bristles are designed to scrape away tough residue effectively. If, however, you find yourself without a specialized brush, don’t despair! A clever and equally effective workaround is to crumple a ball of heavy-duty aluminum foil and hold it securely in a pair of 12-inch locking chef tongs. This makeshift scrubber provides the abrasive surface needed to clean the grates just as effectively. By incorporating this simple twice-per-cookout cleaning routine, your grill will remain in prime condition, always ready to deliver consistently excellent results without the hassle of a massive cleaning job.
Read more about: 15 Car Wash Practices and Pitfalls That Secretly Damage Your Vehicle’s Paint Finish

4. **Misunderstanding Direct vs. Indirect Heat**One of the most fundamental yet frequently misunderstood aspects of grilling is the application of heat. Many aspiring grillers make the mistake of using a single, uniform heat setting for everything they cook, regardless of the food type or desired outcome. This leads to common culinary calamities: chicken that’s raw in the center but burnt on the outside, or thick cuts of meat that are either undercooked or completely dried out. To truly excel at grilling, you must grasp the nuanced differences between direct, indirect, and combination grilling methods and, crucially, understand when to employ each.
Direct grilling is the most intuitive method for many, where food is placed directly over the heat source, much like broiling in your oven. This technique is ideal for items that cook quickly—typically in 20 minutes or less. Think of beloved barbecue staples such as hamburgers, hot dogs, boneless chicken breasts, smaller steaks, and most vegetables. The intense, immediate heat creates a beautiful sear and cooks these thinner items through without drying them out. The goal here is swift cooking and maximum contact with the heat source for charring and flavor development.
Indirect grilling, on the other hand, is akin to roasting or baking in your oven. With this method, the heat source is located on either side of the food, with the burners turned off directly underneath it. This creates a more controlled, oven-like environment within your grill, allowing food to cook slowly and evenly without direct exposure to flames. It’s the go-to method for larger cuts of meat, whole chickens, briskets, ribs, or any food that requires more than 20 minutes to cook thoroughly. This gentle, radiant heat ensures that the interior cooks to perfection without burning the exterior, resulting in tender, juicy results.
Then there’s the versatile combination grilling method, which expertly marries the best of both worlds. This technique is perfect for foods that benefit from an initial high-heat sear to lock in juices and develop a crust, followed by a period of slower, indirect cooking to finish without overcooking. A prime example is searing a tenderloin or a large, thick steak over direct heat to achieve a magnificent crust, before moving it to the indirect zone to cook through to your desired doneness. Mastering these three heat zones provides you with an expansive toolkit, allowing you to tackle virtually any ingredient with confidence and precision. By applying the general rule of thumb—under 20 minutes for direct, over 20 minutes for indirect, and combo for larger, seared items—you unlock a world of grilling possibilities, ensuring every meal is cooked to perfection.
Read more about: The Unholy Seven: Crushing the Costly Transmission Fluid Myths Mechanics Wish You’d Ditch Already
5. **Panicking During Flare-Ups (Flare-Up Panic)**Flare-ups are an almost inevitable part of grilling, particularly when cooking fattier meats. For many, the sudden burst of flames can trigger panic, leading to instinctive reactions that often do more harm than good. Sprays of water, frantic lid lifting, or even pressing down on food to “hear the sizzle” are common missteps that can quickly turn a minor inconvenience into a major barbecue disaster, resulting in ruined food and potentially damaged equipment.
One of the most critical errors is attempting to extinguish flare-ups with a water bottle. While it might seem like a quick fix, spraying water onto a hot fire can produce intense steam vapors, which pose a severe burn risk. Moreover, the sudden temperature change from water hitting hot grates can cause the porcelain-enamel finish of your grill to crack, leading to irreversible damage. Another counterproductive habit is pressing burgers or other meats down on the grates. While it might create an appealing sizzle, this action actually squeezes out precious juices and fats, which then drip onto the heat source, creating *more* flare-ups. The result of these panicked reactions and ill-advised techniques is often food that is sooty, bitter-tasting, with an unpleasant burnt exterior and a raw interior, a truly disheartening outcome.
The master move for dealing with flare-ups is rooted in understanding and preparation. Firstly, proactively minimize drippings by trimming excess fat from your meats before they hit the grill. Secondly, and perhaps most importantly, master the art of two-zone grilling. This means creating both a hot zone (direct heat) and a cool zone (indirect heat) on your grill. When a flare-up occurs, simply move the offending food from the hot zone to the cool zone. Then, close the lid. This action starves the flames of oxygen, quickly suffocating them without the need for water or frantic intervention. Cooking with the lid down whenever possible also helps to manage oxygen flow and prevents flare-ups from getting out of control.
For *prevention*, keeping a spray bottle filled with water nearby is acceptable, but it should be used strategically: a quick mist directed *at the base of the flames before they grow* can sometimes prevent a full-blown flare-up without causing harm. In a worst-case scenario, if you have a full-on, uncontrollable fire, immediately turn off all burners (for gas grills) or remove the food (for charcoal) and extinguish the flames with kosher salt or baking soda, which are effective fire suppressants for grease fires. A fire extinguisher is always a last resort, as its chemicals will almost certainly ruin your grill. By understanding these principles, you can confidently manage flare-ups, ensuring beautiful, even caramelization and clean, pure flavor without the bitter taste of soot.
6. **Avoid Frequent Flipping (The Restless Cook)**There’s a natural tendency, especially among newer grillers, to constantly prod, poke, and flip food while it’s cooking. This incessant handling, often driven by anxiety about burning or sticking, is a surprisingly common mistake that can significantly undermine the quality of your grilled dishes. The “restless cook” mentality often prevents food from developing a proper sear, disrupts the cooking process, and can even dry out your carefully prepared ingredients.
Understanding the physics of grilling is crucial here. When protein—whether it’s a burger, a chicken breast, or a steak—first makes contact with hot grill grates, it will naturally stick. This initial adhesion is a normal part of the cooking process as the proteins begin to denature and form a crust. The mistake lies in trying to force a flip too soon. If you attempt to turn the food before it’s ready, you’ll find it tearing, leaving a significant portion stuck to the grates, which leads to an unevenly cooked and less appealing final product.
The beauty of grilling is that, as the food cooks and that desirable crust forms, it will naturally release itself from the grates. This is your cue—the moment when the food is truly ready to be turned over. For items cooked by the direct method (think hamburgers, hot dogs, boneless chicken breasts, small steaks, and vegetables), the rule is wonderfully simple: flip only once, halfway through the cooking time. This allows sufficient time for one side to develop a deep, flavorful sear and crust, while the other side begins to cook gently from the radiant heat.
Using a good pair of 12-inch locking chef tongs for flipping is also essential; they provide the control and reach needed without piercing the food and losing valuable juices. And, as a consistent reminder of the first mistake we discussed, always remember to oil the food, not the grates! This ensures the best chance for a clean release when the time is right. By resisting the urge to frequently flip and trusting the natural release process, you’ll achieve a superior sear, more even cooking, and ultimately, a more succulent and delicious result from your grill. Patience truly is a virtue in the world of barbecue.

7. **Dodge Cross-Contamination**One of the most common mistakes backyard cooks make is using the same tongs for raw and cooked foods. This seemingly minor oversight is a major hazard, creating what’s known as cross-contamination and potentially leading to serious food-borne illness. It’s a simple error with significant health implications, turning a joyful barbecue into a risky culinary roulette.
The solution to this widespread problem is refreshingly straightforward and easy to implement. As seasoned grill masters often advise, color-coding your grilling tools is a foolproof method. Consider using 12-inch locking chef tongs, and mark them distinctly—perhaps with red duct tape for raw foods like chicken and green for cooked foods. This visual cue helps immensely in preventing accidental mix-ups during the heat of a grilling session.
Beyond just the tongs, extending this practice to other equipment is equally crucial. Always remember to use a separate, clean platter for your cooked food. Never place beautifully grilled meats back onto the plate that previously held their raw counterparts. By adopting these simple yet vital habits, you ensure every delicious bite is not only perfectly cooked but also perfectly safe, elevating your barbecue from good to truly worry-free.
Read more about: Engine Enemies: The 13 Worst Fluids You Should Never Mix in Your Car’s Vital Systems
8. **Don’t Sauce Too Soon**If I had a dime for every time I saw someone pour thick sweet barbecue sauce on bone-in chicken pieces or a whole rack of ribs while they were raw, I would be a very wealthy griller! This is a classic rookie mistake, driven by the desire for maximum flavor penetration, but it often leads to disappointing and even inedible results on the grill.
The science behind this pitfall is simple: all barbecue sauces have a lot of sugar in them. Sugar, by its very nature, burns quickly when exposed to the high, direct heat of a grill. This means that if you apply sauce too early in the cooking process, you’ll almost always end up with a charred, blackened, and bitter exterior long before the inside of your chicken or ribs has a chance to cook through to a safe and tender doneness.
The expert recommendation is to introduce your barbecue sauce at the right moment. Generally, it’s best to brush food with sauce during only the final 10-15 minutes of cooking time. This allows the sauce to caramelize and adhere, creating that desirable sticky-sweet glaze without succumbing to the fiery embrace of the grates.
For longer-cooking items like ribs, a slightly modified approach is sometimes employed. For ribs that cook for 2-3 hours, a diluted sauce—often a 1/2 beer and 1/2 sauce mixture—can be brushed on during the final 30 minutes of cooking time. This gentler application helps to build flavor without the risk of burning, ensuring your ribs are perfectly glazed and tender.

Lentils Curry
Ingredients
Equipment
Method
- Rinse red lentils thoroughly under cold running water until the water runs clear; set aside.
- Chop the brown onion or thinly slice shallots; crush ginger and garlic together to form a paste; thinly slice the green chili.
- Heat a tablespoon of oil (or ghee for richer flavor) in a heavy-bottomed pot over medium heat.
- Add cumin seeds and mustard seeds to the hot oil and let them sizzle until aromatic, about 30 seconds.
- Add chopped onion/shallots and cook until softened and translucent, about 3-5 minutes.
- Stir in the crushed ginger-garlic paste, sliced green chili, turmeric powder, cumin powder, coriander powder, and curry leaves; cook for 1-2 minutes until fragrant, adding a splash of water if spices stick.
- Add the rinsed lentils and 4-5 cups of water to the pot; bring to a boil, then reduce heat to low and simmer, covered, for 15-20 minutes, or until lentils are tender.
- Stir in the tomato sauce and continue to simmer for another 5 minutes to allow flavors to meld.
- Taste and adjust seasoning if necessary (salt is often added at the end to prevent toughening lentils).
- Garnish generously with chopped fresh coriander before serving.
Notes
Read more about: Beyond the Hashtag: 12 Crucial Things Psychologists Say You Should Always Keep Private for Your Well-being
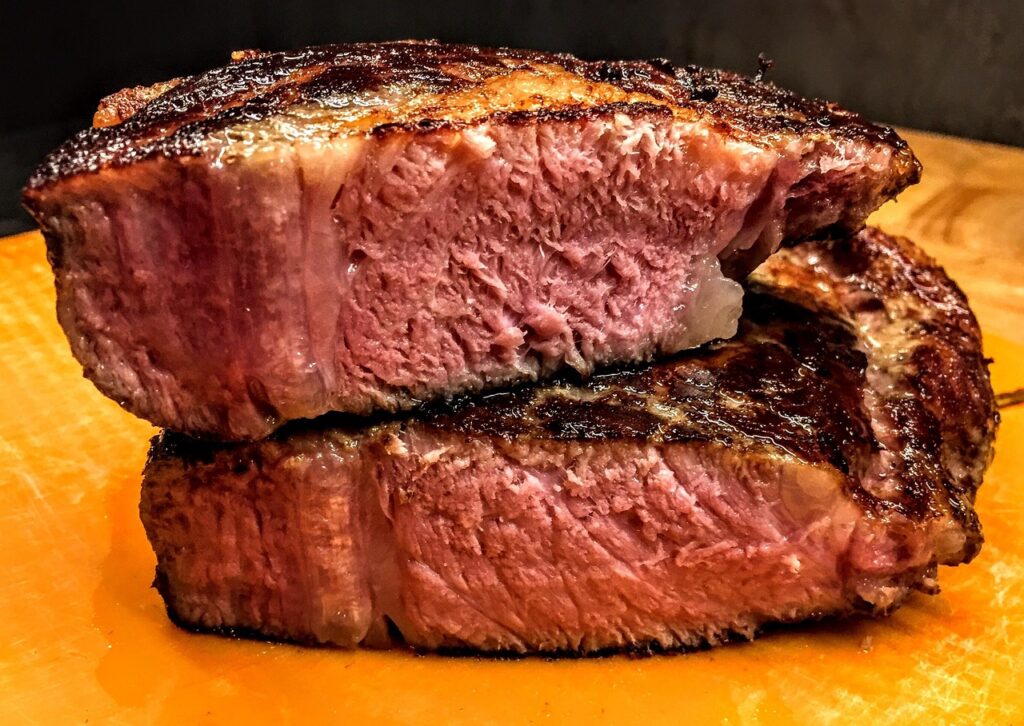
9. **Resist Testing for Doneness by Cutting**Another common way people bungle their food on the grill is by impulsively cutting into it to test for doneness. This reflex, often stemming from uncertainty about internal temperatures, is a detrimental practice that sacrifices both flavor and texture in the pursuit of reassurance. It’s a quick shortcut that often leads to culinary regret.
When you cut any protein, you are immediately letting precious internal juices escape. These juices are what keep your meat succulent and flavorful. If the food happens to be undercooked, and you return it to the grill after cutting, the now-exposed area will invariably overcook, resulting in a dry and unevenly textured piece of meat that misses the mark entirely. This is why ‘guessing doneness’ is such a pervasive problem.
The reliable and precise fix for this mistake is to embrace the instant-read meat thermometer. This indispensable tool allows you to accurately check the internal temperature of your food without piercing it excessively or causing any loss of moisture. It’s the simplest way to ensure your meats are cooked to perfect doneness, every single time, from rare steak to fully cooked chicken, without resorting to damaging cuts.
Furthermore, once your food has reached its target internal temperature and is removed from the grill, resisting the urge to cut into it immediately is crucial. Always let your food rest for at least 5 minutes before cutting into it. This resting period allows the juices to redistribute throughout the meat, resulting in a far more tender, juicy, and flavorful final product. Patience, once again, proves to be a virtue in the art of grilling.

Roasted Red Pepper Soup with Corn and Cilantro
Ingredients
Equipment
Method
- Preheat oven to 400°F (200°C). Arrange red peppers, heirloom tomatoes, garlic cloves (in skin), and halved shallots on baking sheets. Drizzle generously with EVOO, season with kosher salt and black pepper.
- Roast for 30-40 minutes, or until vegetables are tender and slightly charred. Flip halfway through for even cooking. Remove from oven and let cool slightly.
- Once cool enough to handle, peel the skins from the roasted red peppers and garlic. Discard pepper seeds and garlic skins. Coarsely chop the roasted vegetables.
- Combine roasted vegetables with 2 1/2 cups chicken stock, pimenton, and a portion of fresh cilantro in a high-speed blender. Blend until very smooth.
- For an exceptionally smooth texture, pass the blended soup through a fine-mesh sieve into a large pot, pressing solids firmly to extract all liquid. Discard any remaining solids.
- Heat the soup gently over medium-low heat. Stir in a splash of sherry vinegar and adjust seasoning with salt and pepper to taste. Add more stock if a thinner consistency is desired.
- For the corn relish: In a small skillet, melt butter over medium heat. Add finely minced shallot and sauté until translucent, about 2-3 minutes.
- Add fresh corn kernels and finely minced thyme leaves to the skillet. Sauté for 3-5 minutes, until corn is tender-crisp.
- Ladle the hot soup into bowls. Top each serving with a spoonful of the warm corn and thyme relish.
- Garnish generously with crumbled feta cheese and the remaining fresh cilantro before serving.
Notes
Read more about: Say Goodbye to Tough Steaks! 14 Genius Hacks to Make Any Cut Melt-in-Your-Mouth Tender (You Won’t Believe #7!)
10. **Fighting the Grain**While not strictly a cooking error on the grill, the way you slice your cooked meat after it comes off the heat can drastically affect its tenderness and overall eating experience. Many backyard chefs, eager to serve their masterpiece, overlook the critical step of carving against the grain. This seemingly small oversight can transform a perfectly cooked piece of meat into a chewy, difficult-to-eat disappointment.
The ‘grain’ refers to the direction in which the muscle fibers run. When you cut with the grain, you’re creating long, tough strands of muscle that are hard to chew, even in the most tender cuts. It’s like trying to eat a bundle of tightly packed wires. This mistake, often committed in haste, undermines all the effort put into achieving optimal doneness and flavor during the grilling process.
The actionable solution is to identify the direction of the muscle fibers before you make your first cut. For most cuts of meat, you can easily see these lines. Once identified, simply slice perpendicular to them. This technique shortens the muscle fibers, making each bite significantly more tender and easier to chew, allowing the meat’s flavor and juiciness to truly shine.
This is especially crucial for tougher cuts or those with a prominent grain, such as flank steak, skirt steak, or brisket. Taking the extra moment to properly orient your knife ensures that every slice is a testament to your grilling prowess, not just your cooking skill but also your carving artistry. It’s a fundamental technique that separates truly exceptional barbecue from merely edible attempts.
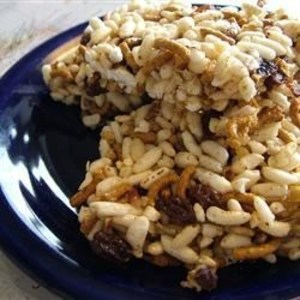
No-Bake Raisin Bars Cookie
Ingredients
Equipment
Method
- Line a 9×13 inch baking dish with parchment paper, leaving an overhang on the sides for easy removal.
- In a large saucepan, melt the miniature marshmallows and butter over low heat, stirring constantly until smooth and fully combined.
- Remove the saucepan from the heat and immediately stir in the multi-grain puffed rice cereal, raisins, chopped walnuts, and ground cinnamon.
- Mix thoroughly until all ingredients are evenly coated with the marshmallow mixture.
- Transfer the mixture to the prepared baking dish.
- Using the back of a spoon or a piece of parchment paper, press the mixture down firmly and evenly into the dish.
- Allow the bars to cool completely at room temperature, or chill in the refrigerator for about 30 minutes to set faster.
- Once set, use the parchment paper overhang to lift the entire slab of bars out of the dish.
- Place on a cutting board and cut into 12 even bars using a sharp knife.
- Serve immediately or store in an airtight container at room temperature.
Notes
Read more about: Travel changed everything: A mother’s unwavering fight for her daughter sparked a national conversation about student welfare

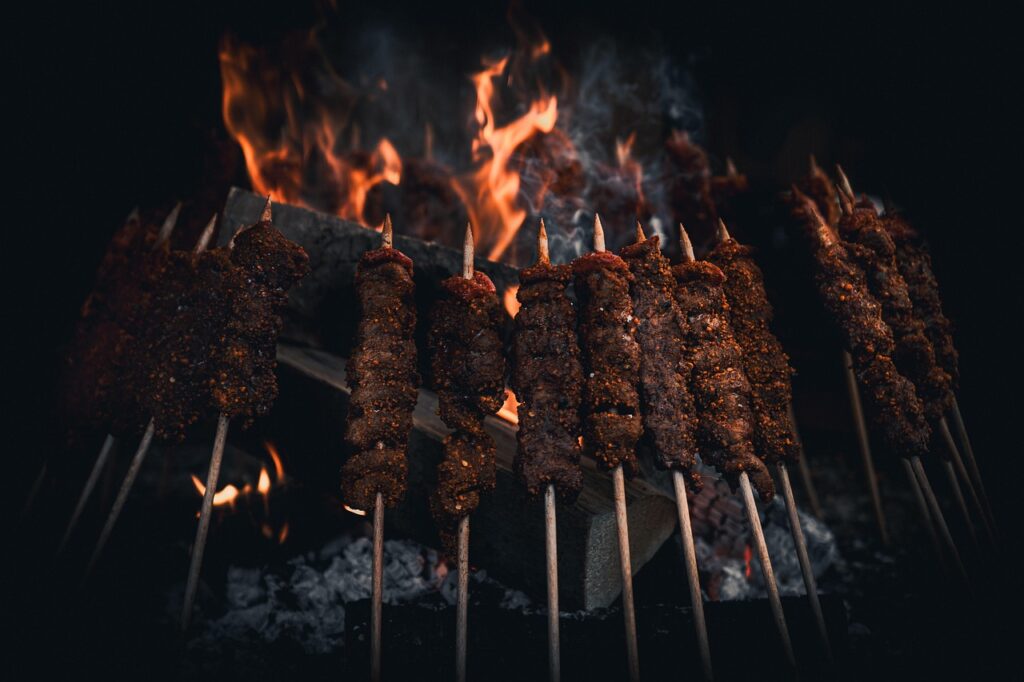
11. **Dirty Smoke Syndrome**For many grillers, the allure of adding smoky flavor leads to another common pitfall: generating ‘dirty smoke.’ The goal of smoking on a grill is to impart a clean, delicate aroma, but often, beginners produce thick, acrid white smoke that delivers a bitter, unpleasant taste to their food, effectively ruining the subtle nuances of wood-fired cooking.
Dirty smoke, characterized by its dense white or grey appearance, is a sign of incomplete combustion. This usually occurs when wood chips or chunks are applied improperly, either too many at once, or on a grill that isn’t hot enough, causing them to smolder rather than burn cleanly. This dense, heavy smoke contains compounds that will coat your food with an undesirable, sooty flavor, far from the coveted barbecue profile.
The secret to clean smoke, often called ‘blue smoke’ or ‘thin blue smoke,’ is proper wood application and temperature management. Only add a small handful of wood chips or a few chunks at a time, ensuring they are placed on or near the hot coals (for charcoal) or in a designated smoker box (for gas grills) where they can ignite quickly and produce a consistent, light wispy smoke.
For charcoal grills, ensure your coals are fully lit and covered in white ash before adding wood. For gas grills, preheat thoroughly. The aim is to have the wood combust efficiently, creating that almost invisible, sweet-smelling smoke that infuses your food with true barbecue magic. By understanding and controlling your smoke, you move from mere grilling to true pitmastery, ensuring your food tastes smoky, not simply burnt.
12. **Seasoning Timing Errors**Seasoning is paramount to delicious barbecue, but even here, common mistakes can derail the outcome. One frequent error is incorrect seasoning timing – either applying rubs too close to cooking time or not allowing enough time for salt and spices to properly interact with the meat. This oversight leads to flavor that merely sits on the surface, rather than penetrating deeply and enhancing the entire cut.
Many home cooks will sprinkle on a rub just minutes before the food hits the grates. While this provides some surface flavor, it doesn’t allow the salt to draw out moisture and then reabsorb with the spices, a process essential for developing a deep, integrated flavor profile. The result is often an underwhelming taste that lacks the complexity and richness characteristic of well-prepared barbecue.
For optimal flavor, especially with larger cuts like roasts, briskets, or whole chickens, a ‘dry brining’ technique is highly recommended. This involves seasoning the meat with salt (or a salt-heavy rub) anywhere from 6 to 24 hours before cooking. The salt works to tenderize and season the meat from within, ensuring every bite is bursting with flavor.
For thinner cuts like steaks or burgers, a shorter seasoning window can still be effective. Applying salt and pepper at least 40 minutes before grilling, or immediately before it hits the heat, are both valid approaches, avoiding the ‘sweating’ phase in between. However, for rubs, especially those with sugar, applying them too early can also be an issue if the meat will be left uncovered, as sugars can draw moisture out.
Understanding the interplay between salt, spices, and time is crucial. Adjust your seasoning schedule based on the type and thickness of your meat, aiming for that perfect balance where flavors are not just present, but deeply integrated, making your barbecue truly unforgettable.
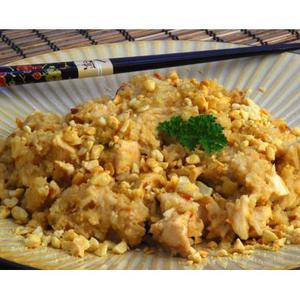
Thai Peanut Chicken
Ingredients
Equipment
Method
- Cook the jasmine rice according to package instructions, typically 1.5 cups of rice with the appropriate amount of water, and set aside.
- Cut the boneless, skinless chicken breasts into uniform, bite-sized cubes for even cooking.
- In a large pot or Dutch oven, heat a small amount of oil over medium-high heat, then brown the chicken cubes in batches until lightly golden on all sides; remove and set aside.
- Deglaze the pot if necessary, then add the chicken broth, coconut milk, and Thai seasonings; bring the mixture to a gentle simmer.
- Return the seared chicken to the pot. Stir in the Jiffy Honey Roasted Extra Crunchy Peanut Butter until it is fully incorporated and the sauce is smooth.
- Reduce the heat to low, cover, and simmer for 10-15 minutes, allowing the chicken to cook through and the flavors to meld.
- Stir in the lime juice, taste the sauce, and adjust seasonings (more lime, Thai seasoning, or a pinch of sugar if needed) to achieve desired balance.
- While the chicken simmers, slice the scallions thinly and chop any whole dry roasted peanuts if not already prepared for garnish.
- Serve the Thai Peanut Chicken generously over the prepared jasmine rice.
- Garnish each serving with fresh sliced scallions and a sprinkle of dry roasted peanuts before serving hot.
Notes
Read more about: Spill the Beans! Subway Workers Reveal the 14 Sandwich Builds and Customer Habits They Secretly Dread (and What You Should Order Instead)
The journey to barbecue brilliance is less about innate talent and more about informed practice. By recognizing and rectifying these common missteps – from prepping your grill to perfecting your carve, and managing smoke to mastering seasoning – you transform potential disappointments into consistent triumphs. Embrace these insights, turn lessons learned into unforgettable flavors, and elevate every cookout into a testament to your newfound grilling mastery. Your next perfect plate is not just possible; it’s practically guaranteed when you cook smart.


