

The culinary landscape is in a constant state of flux, ever-evolving with new techniques, exotic ingredients, and fleeting trends. Yet, amidst this relentless forward march, a fascinating phenomenon has taken root: the widespread resurgence of retro recipes in home cooking. For years, food culture seemed to exclusively champion innovation, often sidelining the classics our grandparents cherished. But as seasoned editors in the food world, we’ve keenly observed a pronounced shift, an undeniable embrace of vintage meals that begs for a deeper, more analytical exploration. This isn’t just a fleeting fad; it’s a profound re-evaluation of our culinary past, driven by a confluence of practical needs and emotional desires.
This renewed affection for old-school dishes isn’t merely about sentimentality; it’s underpinned by very tangible benefits that resonate deeply with today’s home cooks. The meals that graced our grandparents’ tables were, by and large, affordable, relying on easy-to-obtain ingredients. This inherent thriftiness, combined with a universal yearning for dishes that evoke a sense of coziness and calm in an increasingly unpredictable world, has catapulted these forgotten gems back into relevance. Moreover, the inherent kitschy visual appeal of many retro dishes offers a distinct advantage in our hyper-visual social media age, turning a simple meal into a potential viral post. Whatever the precise alchemy of reasons, these dishes are unequivocally back in vogue, challenging the notion that culinary progress only moves in one direction.
As we delve into the heart of this retro revolution, we’ll peel back the layers of popular resurgence, examining not just the “what” but the “why” behind the comeback of these beloved culinary artifacts. Our journey will highlight the intrinsic qualities that made these dishes popular in the first place, their eventual decline, and the specific catalysts that have sparked their triumphant return to the modern kitchen. We’ll explore the science of comfort food, the psychology of nostalgia, and the practical genius embedded in recipes that have stood the test of time, even if they occasionally took a detour from the mainstream. Prepare to rediscover the joy, the ingenuity, and the sheer deliciousness of dishes that prove, definitively, that everything old can indeed be new again.
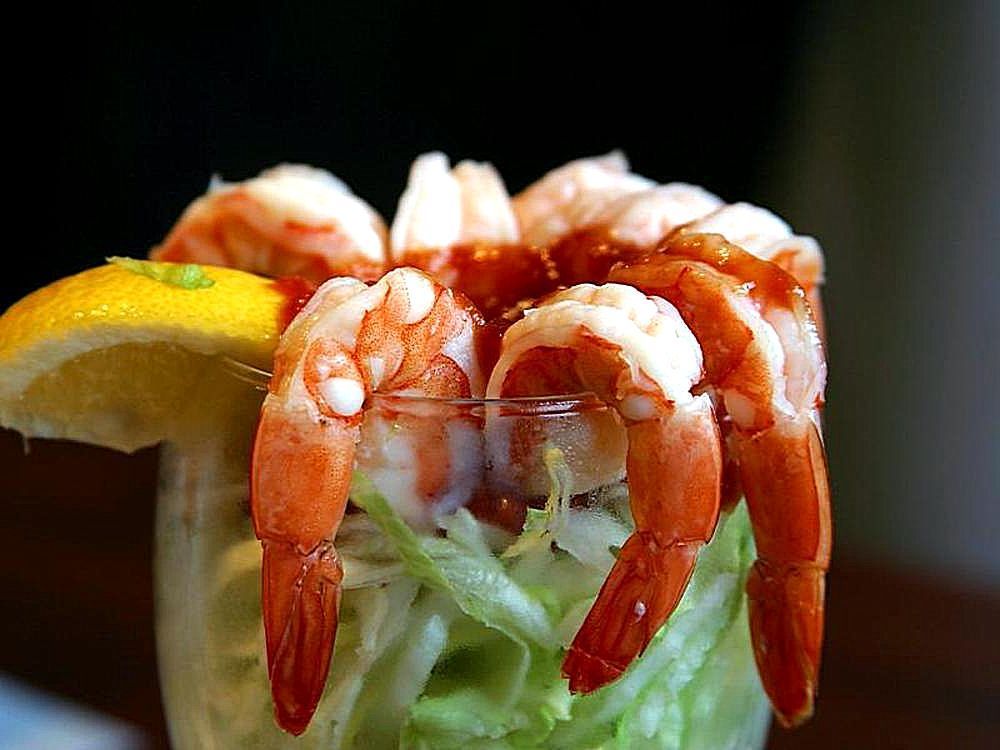
1. **Shrimp Cocktail**: There was a period, surprisingly recent, when ordering a shrimp cocktail would elicit a chuckle rather than anticipation. This quintessential old-school seafood appetizer first gained significant traction in the 1960s, particularly after its high-profile introduction on Las Vegas menus, quickly becoming a standard starter across the nation. Its initial popularity stemmed from its perceived elegance and relative novelty, offering a sophisticated opening to a meal that felt both indulgent and accessible. The simplicity of perfectly poached shrimp paired with a tangy cocktail sauce proved to be an irresistible combination for diners looking for something special.
However, as culinary tastes evolved and innovation became the dominant narrative in dining, the shrimp cocktail began to suffer. By the 1990s and 2000s, it had largely been relegated to the realm of the “insufferably old-fashioned” or, perhaps more charitably, a “gaudy starter you’d only order in a casino.” Its widespread presence seemed to breed contempt, and people, always seeking the next culinary thrill, moved on to more avant-garde appetizers. The perception shifted from elegant to passé, and while it was never entirely forgotten, its once-lustrous appeal faded considerably, much like an outdated fashion trend.
Yet, like all true classics, the shrimp cocktail refused to be permanently confined to the archives of culinary history. Its return is a compelling illustration of the broader embrace of retro cuisine, sparked in no small part by prominent chefs who have rediscovered its inherent virtues. None other than Alison Roman, a chef celebrated for her cool and approachable style, prominently features a recipe for it on her website, underscoring its versatility and its potential as a sociable dish. This renewed professional endorsement, coupled with a general yearning for comforting, uncomplicated flavors, has effectively “catapulted it back into the mainstream,” reminding us that sometimes, the simplest pleasures are the most profound. The science of a good shrimp cocktail is in the quality of the shrimp and the zing of the horseradish-laden sauce; no need for complex molecular gastronomy here.

Shrimp Cocktail with Three Sauces
Ingredients
Equipment
Method
- Fill a large bowl with ice and water; set aside to create an ice bath.
- In a large stockpot, bring ample water to a rolling boil, seasoning generously with coarse salt (and optional aromatics like lemon or bay leaf).
- Carefully add the shrimp to the boiling water. Do not overcrowd; cook in batches if necessary.
- Cook for 1-3 minutes, or until the shrimp turn opaque pink and just begin to curl.
- Immediately remove the cooked shrimp with a slotted spoon or spider and plunge them into the prepared ice bath to stop the cooking process.
- Allow the shrimp to cool completely in the ice bath for several minutes.
- Drain the cooled shrimp thoroughly in a colander.
- Peel and devein the shrimp, leaving the tails on for presentation and ease of handling.
- Chill the prepared shrimp in the refrigerator for at least 30 minutes, or until thoroughly cold.
- Arrange the chilled shrimp on a serving platter and serve immediately with your selection of cocktail sauces.
Notes
Read more about: Your Ultimate NYC Foodie Bucket List: 14 Must-Visit Restaurants That Are Absolutely Slaying the Culinary Scene!

2. **Pimento Cheese Spread**: For those who haven’t revisited pimento cheese recently, now is undeniably the time. This “serious throwback” found its initial stride in the 1920s, rapidly evolving from a Southern staple into a nationwide culinary phenomenon. Cookbooks of the era were replete with recipes featuring this versatile spread, celebrating its dual utility: it could stand proudly on its own, served alongside crackers or crudités, or be seamlessly integrated as a core ingredient in a myriad of other dishes. Its appeal lay in its creamy texture, its tangy-savory profile, and its ability to elevate simple ingredients into something truly satisfying, offering a comforting richness that transcended regional boundaries.
Despite its early ubiquity, pimento cheese eventually succumbed to the changing tides of culinary fashion. It began to be “associated with those old-timey cookbooks a little too much,” its charm slowly eroding as a wider array of ingredients, especially specialty cheeses, became more readily available to the average home cook. The once-novel combination started to feel a bit too familiar, too unadventurous, in an era increasingly enchanted by exotic flavors and sophisticated techniques. Consequently, its popularity waned, and pimento cheese, for a time, became more of a nostalgic whisper than a culinary shout.
But, as the narrative of retro food consistently demonstrates, true comfort never truly disappears. Pimento cheese has staged a formidable comeback, fueled by a renewed appreciation from chefs who recognize the contemporary craving for “spins on comfort food that bring them up to date while honoring their cozy, old-fashioned nature.” Social media has also played a pivotal role in this renaissance, with countless individuals sharing their own creative takes and recipes, further stoking the flames of its resurgence. This collective digital enthusiasm has highlighted its adaptability, proving that a classic can be both timeless and refreshingly modern with just a few thoughtful tweaks, offering a rich, savory experience that satisfies both the palate and the soul. The emulsification of cheese and mayonnaise, enhanced by the distinct piquancy of pimentos, is a simple, yet masterful, culinary achievement.

Pimento Cheese Spread
Ingredients
Equipment
Method
- Using a box grater or food processor, grate both the mild yellow cheddar and the aged white sharp cheddar cheeses into a large mixing bowl.
- Finely chop the scallions and mince the garlic.
- Open the can of pimentos; do not drain, as the recipe calls for using them with their juice.
- Add the chopped scallions, minced garlic, and the undrained pimentos to the bowl with the grated cheese.
- Add the mayonnaise, fresh lemon juice, Worcestershire sauce, and Tabasco sauce to the bowl.
- Season with freshly ground black pepper.
- Using a sturdy spatula or spoon, thoroughly mix all ingredients until well combined and the cheese is evenly coated.
- Taste the spread and adjust seasonings (Worcestershire, Tabasco, lemon juice, black pepper) as desired to achieve your preferred flavor balance.
- Cover the bowl and refrigerate the pimento cheese for at least 1 hour to allow the flavors to meld and the spread to firm slightly.
- Serve chilled with crackers, raw vegetables, or as a delicious sandwich spread.
Notes
Read more about: Avoid These 12 Barbecue Blunders: Your Ultimate Guide to Mastering the Grill for Edible Success
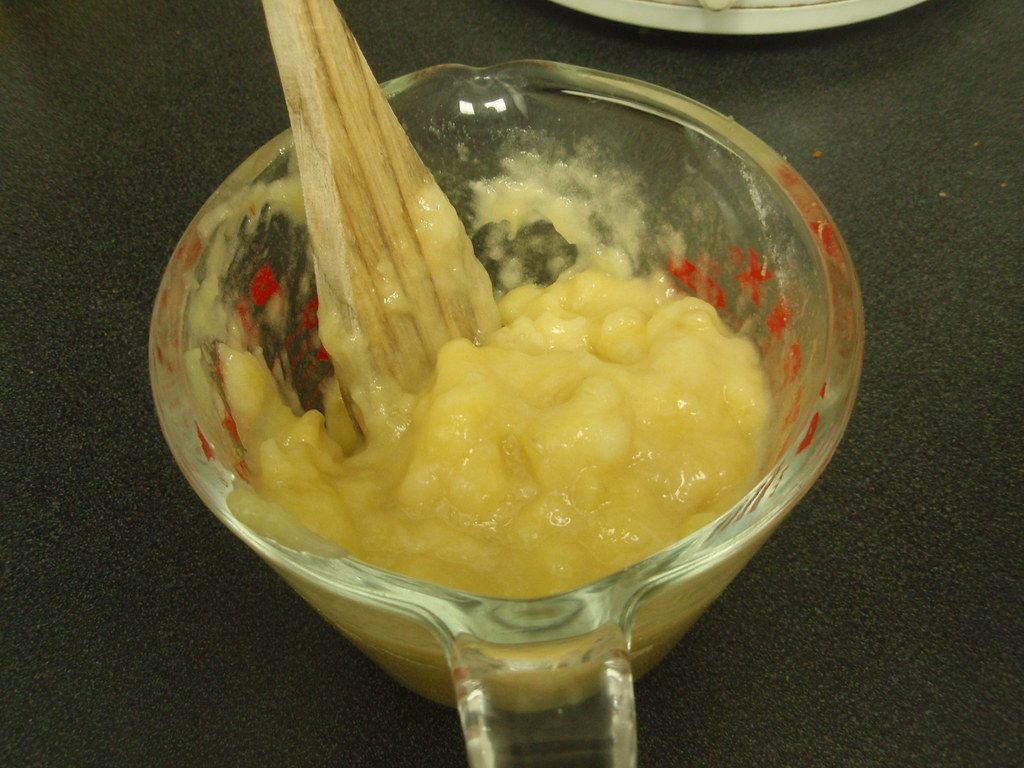
3. **Banana Pudding**: While banana pudding never entirely vanished from the culinary consciousness, it certainly experienced a significant dip in its mainstream appeal. This dessert, widely considered the “most quintessential of Southern desserts,” despite its actual origins tracing back to Massachusetts and Illinois, is almost unparalleled in its capacity for nostalgia. A harmonious blend of ripe bananas, creamy pudding, vanilla wafers, and a generous topping of whipped cream, it found its “big time” moment in the 1940s. This was largely thanks to the National Biscuit Company, which wisely began printing recipes for it on its Nilla wafer boxes, cementing its status as a must-make for potlucks, picnics, and barbecues across the country.
However, the very qualities that initially propelled banana pudding to fame—its humble ingredients and straightforward preparation—eventually contributed to its decline in perceived desirability. Over time, its inherent “beigeness” and uncomplicated flavor profile started to feel “just a little bit too retro.” As diners sought out more dynamic and exciting ways to conclude a meal, banana pudding, with its comforting but unassuming nature, receded into the background. It became a dish associated more with traditional family gatherings than with cutting-edge culinary experiences, and its lack of overt glamour made it seem less appealing to an evolving palate.
The tide, however, has turned. The broader embrace of retro foods has brought banana pudding back into the spotlight, reminding a new generation of cooks and eaters of its enduring appeal. Its ease of preparation and the profound sense of comfort it delivers are now celebrated virtues. Furthermore, its profile has been significantly “boosted by folks bringing it up to date with their own takes,” such as substituting Nutter Butters for the traditional Nilla wafers. These subtle innovations breathe “new life into it,” demonstrating that even the most classic recipes can benefit from a contemporary twist. This dessert, a masterclass in layered textures and mellow sweetness, is poised to grace many more tables in the years to come, confirming its place as a truly timeless comfort food. The interplay of starches from the wafers, the enzymatic browning of bananas, and the creamy pudding is a simple yet effective formula for deliciousness.
Read more about: The 14 Best Foods for Muscle Recovery That 15 Sports Nutritionists Recommend for Optimal Performance
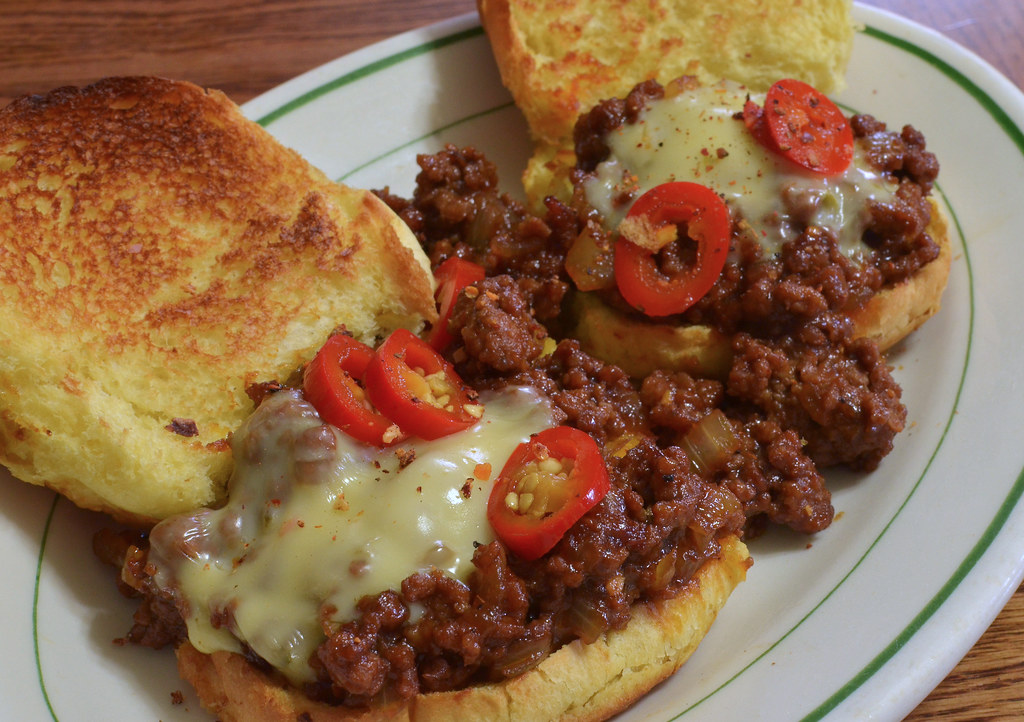
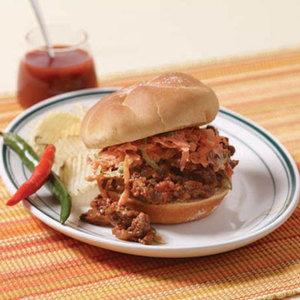
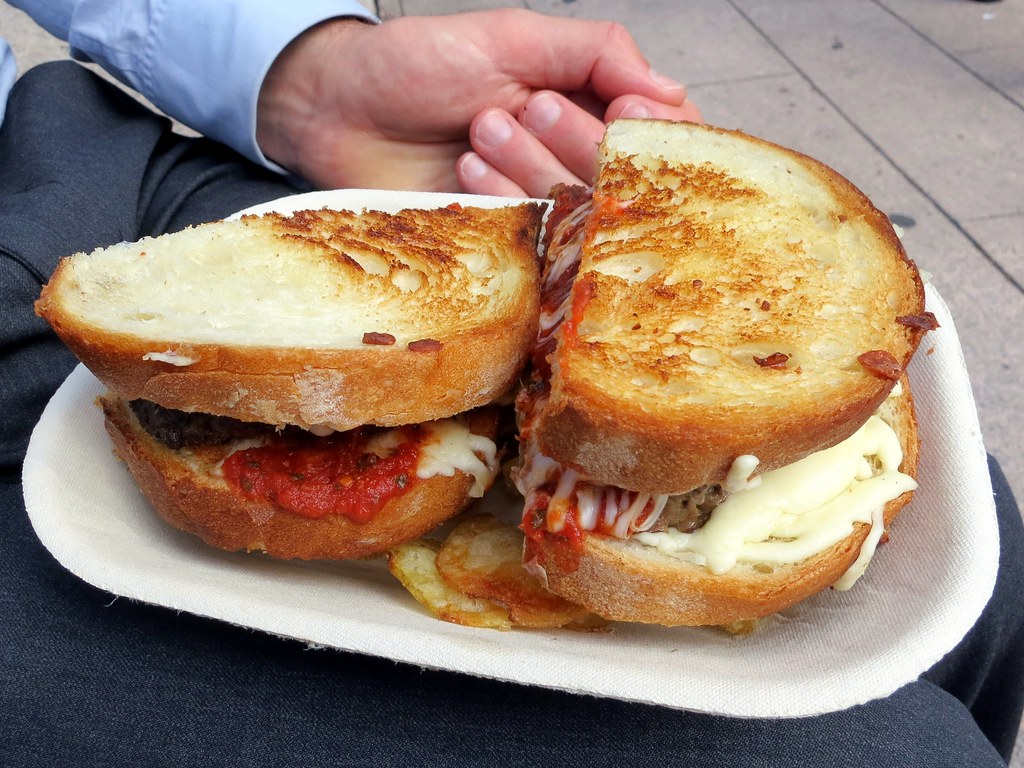
4. **Sloppy Joes**: It’s almost bewildering to consider that sloppy Joes, given their undeniable deliciousness, ever fell out of culinary favor. While their precise origins remain somewhat shrouded in mystery, this “90s lunchroom classic” actually began to hit its stride much earlier, notably in the 1940s and 1950s. The latter decade, marked by the post-war era’s newfound economic excess and a departure from wartime austerity, provided the perfect environment for sloppy Joes to thrive. Piled high with savory ground meat and rich barbecue sauce, these sandwiches were perceived as “big, bold, and exciting,” actively marketed to a burgeoning teenage demographic eager for the “next cool thing to eat.” Their deeply comforting nature further solidified their place in American diets for decades.
Yet, the very characteristic that gave them their name—the “sloppy” part—eventually contributed to their waning popularity. As culinary preferences shifted towards more refined and “elegant sandwich[es],” the practical inconvenience of having “to wipe sauce off their fingers with every bite” began to diminish their appeal. The bold, unpretentious nature of the sloppy Joe started to feel less sophisticated, and it gradually lost its prominent spot on menus and in home kitchens, becoming associated more with casual, less formal dining occasions.
Despite this period of decline, the inherent “sense of sloppy Joes being cozy and calming never quite left.” More recently, there’s been a significant resurgence of interest, largely driven by a collective yearning for meals that evoke childhood nostalgia, particularly pertinent in “a chaotic time.” The year 2025 has already seen a “boom in sloppy Joe recipes across the internet,” a trend undoubtedly amplified by fast food giants like White Castle reintroducing them as “limited-time offers,” thus “further boosting their profile.” The beauty of a sloppy Joe lies in its perfect balance of sweet, savory, and tangy notes, providing a satisfying and hearty meal that speaks directly to our primal comfort food desires, proving that sometimes, messy is exactly what we need. The combination of ground meat, aromatics, and a balanced tomato-based sauce, often with a hint of sweetness and tang, creates a synergistic flavor profile that is both hearty and approachable.
Sloppy Joes with Carrot-Jalapeño Slaw Recipe
Ingredients
Equipment
Method
- Prepare the slaw vegetables: Using a box grater, finely shred the carrots. Finely chop the jalapeños (adjusting for heat by removing seeds/membranes as desired) and the red onion. Combine in a bowl, season with salt, and let sit while preparing the sloppy joes.
- Heat canola oil in a large skillet or Dutch oven over medium heat. Add the finely chopped onion and sauté until softened, about 5-7 minutes.
- Add the minced garlic and chopped green chiles to the skillet, cooking for another 1-2 minutes until fragrant.
- Increase heat to medium-high. Add the ground beef, breaking it up with a spoon. Season with salt and pepper. Cook until thoroughly browned, then drain any excess fat.
- Stir in the puréed tomatoes, barbecue sauce, ketchup, mustard, brown sugar (1-2 tablespoons, to taste), and cayenne powder. Bring to a simmer.
- Reduce heat to low, cover, and simmer for at least 20-30 minutes, stirring occasionally, to allow flavors to meld. For a thicker consistency, simmer uncovered for the last 10 minutes.
- While the sloppy joe mixture simmers, finish the slaw: Stir in 1/4 to 1/2 cup sour cream into the shredded carrot mixture, mixing until evenly coated. Taste and adjust seasoning if needed.
- Toast the hamburger buns until golden brown and lightly crispy.
- Spoon a generous amount of the hot sloppy joe mixture onto the bottom half of each toasted bun.
- Top with a spoonful of the carrot-jalapeño slaw and cover with the top bun. Serve immediately.
Notes
Read more about: Seriously, Where Did They Go? 12 Iconic American Foods That Vanished From Our Tables

5. **Pineapple Upside-Down Cake**: For many, pineapple upside-down cake holds a special place in the pantheon of beloved desserts, often recollected with fondness yet, paradoxically, not frequently consumed. This dessert stood as the “epitome of ’50s and ’60s cooking”: a confection celebrated for its ease of preparation, its reliance on readily available boxed and canned ingredients, and its “unbelievably gaudy” yet charming visual appeal. While it became a defining symbol of mid-century food culture, its rise to prominence actually occurred earlier. The Hawaiian Pineapple Company (later Dole) inadvertently launched its stardom through a recipe competition, which was “flooded with takes on pineapple upside-down cake,” instantly thrusting the dish into the national spotlight.
As the decades advanced, the very attributes that once made pineapple upside-down cake so fashionable began to work against it. The widespread desire to use “fresh ingredients instead of canned ones in their desserts” became a prevailing culinary ethos, making the cake’s reliance on convenience products seem dated. Furthermore, the “glitter of the maraschino cherries on top began to feel a bit gauche,” out of step with an emerging preference for more understated and natural aesthetics in food presentation. Consequently, this once-celebrated cake slowly drifted out of mainstream popularity, confined largely to nostalgic reminiscence.
Yet, the cyclical nature of food trends has once again shone favorably upon the pineapple upside-down cake. In recent years, it has “started to creep back into people’s lives,” finding renewed appreciation for its inherent ease and thriftiness. Home cooks have rediscovered how effortlessly it can be assembled with “just a few canned and dried staples,” making it an appealing option in an era that values both convenience and budget-friendliness. Its adaptability, allowing for subtle variations, has further fueled its resurgence. This revival has undoubtedly been bolstered by public endorsements from “celebrities like Reba McEntire,” which have helped it “feel trendy again,” proving that sometimes, a classic just needs a celebrity spokesperson to remind everyone of its timeless charm and practical genius. The caramelization of sugar and pineapple at the bottom of the pan, which then becomes the top, is a simple chemical reaction that yields complex flavors and an appealing visual texture.

Pineapple Upside-Down Cakes
Ingredients
Equipment
Method
- Melt the unsalted butter in a medium, heavy-bottomed skillet over medium heat.
- Sprinkle the light brown sugar evenly over the melted butter. Cook, stirring occasionally, until the sugar melts and forms a bubbly caramel sauce, about 2-3 minutes.
- Carefully arrange the pineapple slices in a single layer over the caramel in the skillet.
- Place the split hamburger bun halves, cut-side down, directly on top of the pineapple slices. Press gently to ensure good contact.
- Reduce the heat to medium-low and continue to cook for 5-7 minutes, or until the buns are warm and lightly toasted, absorbing the caramel flavors.
- Using a spatula, gently check if the pineapple and caramel have set slightly and the buns are warmed through.
- Carefully remove the skillet from the heat.
- Place individual serving plates directly over each bun half in the skillet.
- Working quickly and carefully, invert each bun-pineapple assembly onto the serving plates.
- Serve immediately, optionally topped with a scoop of vanilla ice cream.
Notes
Read more about: Seriously, What Happened? 12 Once-Beloved Foods Americans Just Don’t Eat Anymore (And Why We Kinda Miss ‘Em)
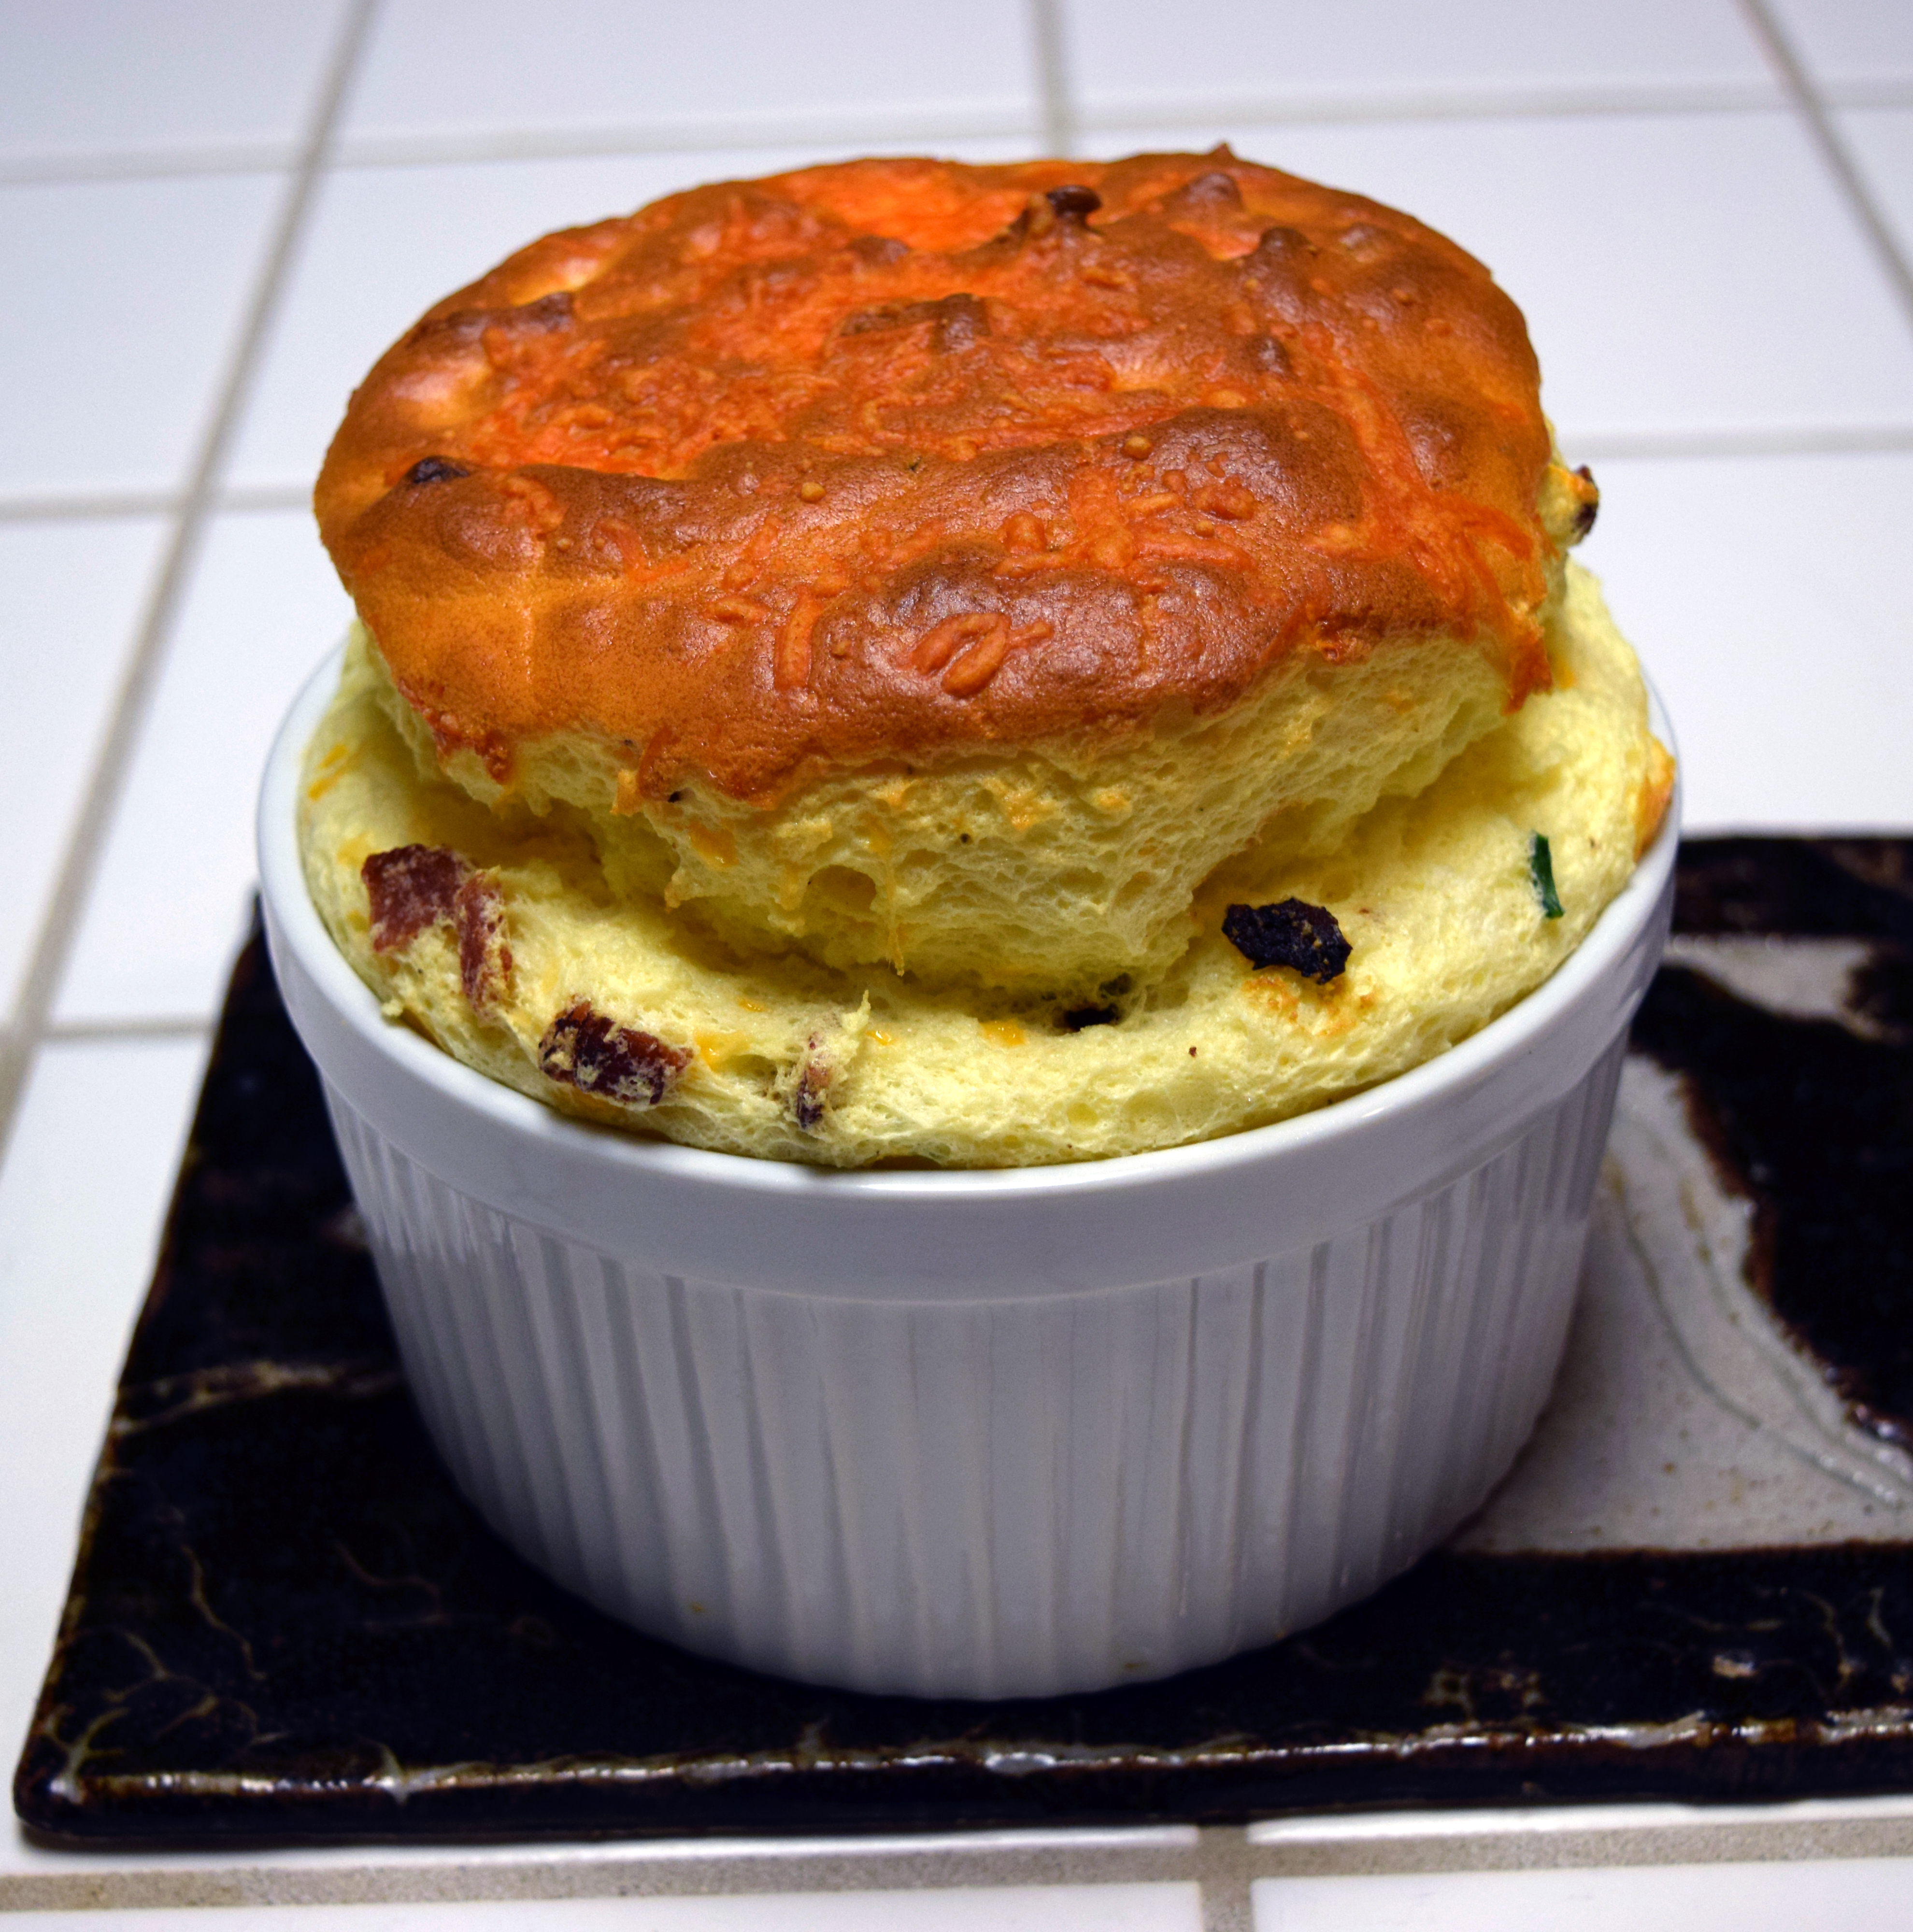
6. **Cheese Soufflé**: Is there any dish that evokes vintage elegance quite like a cheese soufflé? This culinary marvel undeniably “screams the ’70s,” despite its origins stretching back to the mid-1800s in France. It took considerable time for the soufflé to find a mainstream audience in the United States, but once it did, it swiftly ascended to become “the pinnacle of fine dining.” It was often intimately associated with luxurious settings: “white linen, bowtied waiters, and impeccable table service,” symbolizing sophistication and refined taste, a true test of a chef’s skill and a diner’s appreciation for culinary artistry.
However, the very perception of the soufflé as a demanding, delicate dish eventually contributed to its decline. Over time, it “lost its appeal,” no longer seen as stylish but rather, in some circles, “lacking in substance.” As culinary tastes broadened and shifted towards more robust and perhaps less intimidating dishes, the cheese soufflé became somewhat of a “running joke,” removed from numerous menus across the country. Its technical difficulty and the precision required for its perfect execution made it seem inaccessible, both to home cooks and to restaurateurs seeking more straightforward offerings.
Fortunately, the recent “love of retro dining that has brought back so many other dishes has swept cheese soufflé back into the spotlight.” Restaurants bold enough to reintroduce it to their menus have witnessed a “skyrocket” in sales, a testament to a renewed appreciation for classic techniques and the inherent drama of a perfectly risen soufflé. Contemporary twists on the dish have been instrumental in making it “feel up-to-date instead of boring,” proving that innovation can coexist beautifully with tradition. The soufflé’s magic lies in the scientific mastery of incorporating air into egg whites, creating a light, airy structure that delivers concentrated flavor. Its comeback suggests that diners are once again willing to embrace culinary challenges and appreciate the artistry involved in such a magnificent, albeit delicate, creation. This time, it feels like soufflé is back for good, a testament to the enduring allure of classic French cookery.
Five-Cheese Souffle
Ingredients
Equipment
Method
- Preheat your oven to the specified temperature (not provided, typically 375-400°F or 190-200°C) and generously butter and flour the inside of your soufflé dish(es).
- In a heavy-bottomed saucepan, melt 4 tablespoons of butter. Whisk in 1 cup plus 1 tablespoon of all-purpose flour and 1 tablespoon of coarse salt, cooking for 2-3 minutes to form a smooth roux.
- Gradually whisk in 3 ⅓ cups of half-and-half until the mixture thickens into a smooth béchamel sauce. Remove from heat.
- In a separate bowl, whisk the 6 large egg yolks until light. Slowly temper the egg yolks into the warm béchamel sauce, whisking constantly to prevent scrambling.
- Stir in the Emmental, Comte, Scharfe Maxx, Appenzeller, and Pleasant Ridge cheeses into the béchamel mixture until they are completely melted and well combined.
- In a clean stand mixer bowl, whisk the 11 large egg whites with the ¼ cup egg white powder on medium-high speed until they form stiff, glossy peaks.
- Gently fold about one-third of the whipped egg whites into the warm cheese mixture to lighten it, then carefully fold in the remaining egg whites in two additions, taking care not to deflate the mixture.
- Pour the soufflé mixture into the prepared soufflé dish(es), filling about three-quarters full. Smooth the top if desired.
- Carefully place the soufflé dish(es) into the preheated oven and bake until golden brown and puffed (typical baking time 30-45 minutes depending on size); avoid opening the oven door during baking.
- Remove the soufflé from the oven and serve immediately to enjoy its full volume and delicate, airy texture before it deflates.
Notes
Read more about: Separating the Savory from the Sorry: 12 Viral TikTok Recipes That Actually Deliver Flavor (Because Not All Trends Do!)

7. **Baked Alaska**: Can you name a better comeback story than the baked Alaska? It’s cool, we’ll wait. Few dishes have seen such a turnaround in their stock as this one, which has a longer history than you probably think. This dessert, which turns heads by utterly defying physics and logic, was first pioneered in the mid-1860s at Delmonico’s, New York. Its combination of a meringue casing and a frosty ice cream interior turned heads, and soon restaurants were serving it nationwide, before it achieved its “coolest” status in the mid-20th century.
However, like many once-glamorous dishes, baked Alaska largely became a bit of a punchline for a period. It was inextricably associated with cruise ship dining, a place where culinary innovation often takes a back seat to mass appeal. Its perceived complexity and the theatricality that once made it appealing also perhaps contributed to its decline, as diners sought less ostentatious and more “serious” dessert options. For decades, it seemed destined for the culinary archives.
In the 2020s, though, things are changing for good. The baked Alaska is seriously back in fashion, as more and more people have come to appreciate how truly mind-boggling the dessert is. An ice-cold inside baked in an oven, without any melting? How is it possible? This show-stopping nature, combined with modern chefs looking for new spins on the classic flavors of a baked Alaska and an understanding of people’s need for comfort and nostalgia, have led to it being placed on menus everywhere.
The magic behind the baked Alaska is a testament to clever thermal insulation. Meringue, made primarily of whipped egg whites and sugar, is an excellent insulator due to the air pockets trapped within its structure. When briefly exposed to high heat in an oven, the meringue’s exterior browns and caramelizes rapidly, forming a protective barrier that shields the frozen interior from melting. This culinary sleight of hand demonstrates a perfect balance of scientific understanding and theatrical presentation, making it a masterclass in controlled temperature manipulation. While it may be slightly complicated to make, the craft is truly part of the fun, offering a rewarding challenge for the adventurous home cook.

Baked Alaska
Ingredients
Equipment
Method
- Cut the pound cake into desired serving-sized pieces, typically squares or rounds.
- Place each piece of pound cake onto a baking sheet lined with parchment paper.
- Scoop approximately 2 ounces of firm chocolate ice cream onto the center of each pound cake piece, shaping it neatly.
- Immediately transfer the baking sheet to the freezer and freeze for at least 2 hours, or until the ice cream is rock solid.
- In a very clean mixing bowl, combine egg whites and cream of tartar.
- Using an electric mixer, whip the egg whites on medium-high speed until soft peaks form.
- Gradually add the sugar, one tablespoon at a time, continuing to whip until stiff, glossy peaks form. Beat in the vanilla extract.
- Remove the frozen cake and ice cream from the freezer. Working quickly, cover each with a generous layer of meringue, ensuring the cake and ice cream are completely sealed to prevent melting.
- If desired, return the meringue-covered desserts to the freezer for a few minutes to firm up the meringue slightly.
- Using a kitchen blowtorch, carefully brown the meringue until golden all over, or place under a preheated broiler (highest setting) for 1-2 minutes, watching constantly. Serve immediately.
Notes
Read more about: Unleashing Your Inner Foodie: Yelp’s Top 14 All-You-Can-Eat Restaurants, State by State
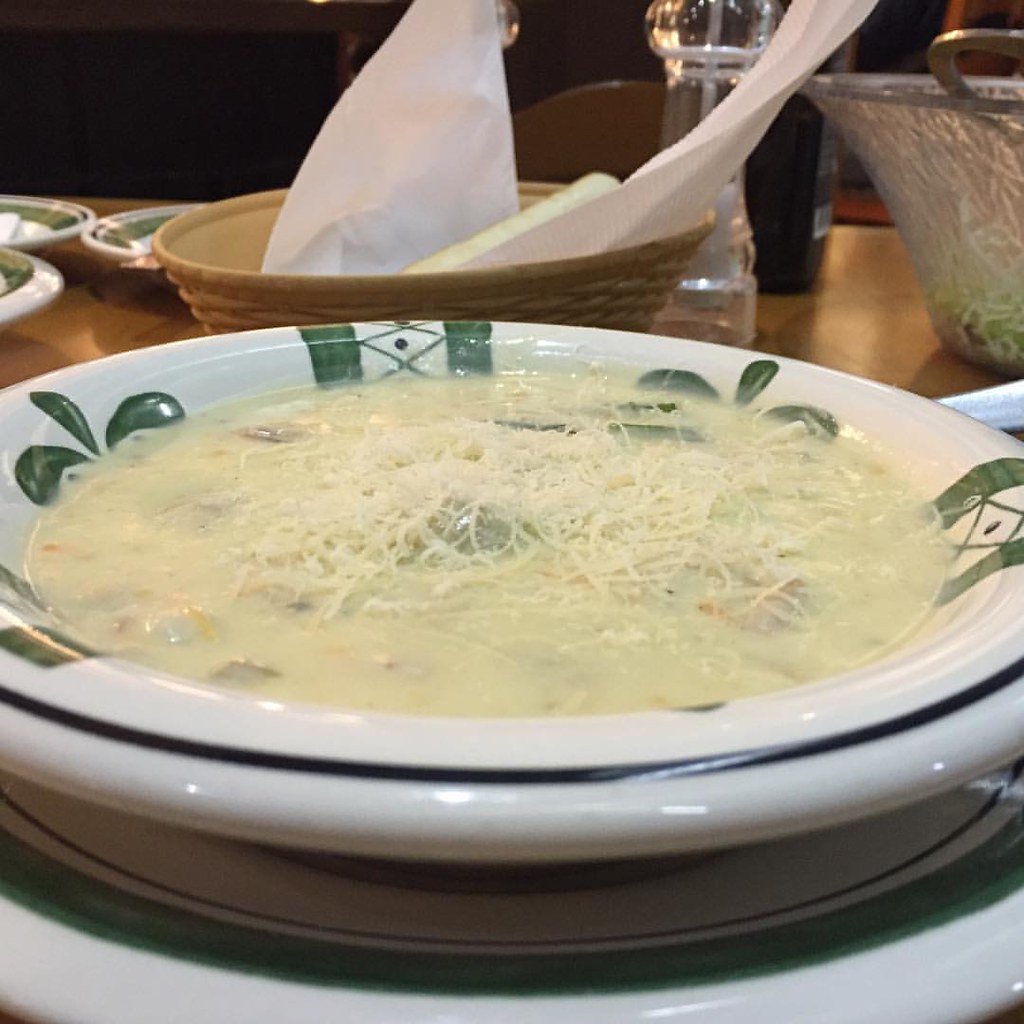
8. **Chicken à la King**: Food culture these days feels like it’s all about evoking the simple pleasures. People don’t want fussy stuff — they want dishes they can sink into, that make them feel all warm and fuzzy. Well, folks who want that should look no further than chicken à la King, which is having a real comeback. This chicken dish used to be one of the fanciest things you could order in a restaurant, but that was back in the 1950s and ’60s when it was at its peak popularity. It offered a perceived elegance that delighted diners of the era.
Its downfall came as people realized that it’s a fairly straightforward combo of chicken, mushrooms, sherry, and cream. As food trends changed, embracing more exotic ingredients and sophisticated techniques, chicken à la King started to feel a little uncool. Its very simplicity, which once made it accessible and comforting, now seemed to render it mundane in the eyes of an evolving culinary landscape. The dish, once a symbol of dining out, receded into the background.
Nonetheless, the 21st century has brought renewed energy to the dish, proving that some classics are too good to stay hidden. Over the last few years, chicken à la King has been featured prominently on food websites, with food professionals celebrating its comforting aspects and instructing folks how to make the perfect version of the bygone dish. There’s also no denying that chicken à la King has a thriftiness to it that appeals to diners today, who want something that feels special without spending money on expensive ingredients.
The technique behind a truly exceptional Chicken à la King revolves around building layers of flavor and achieving the perfect consistency. A well-executed roux is essential for a smooth, velvety sauce that envelops the tender chicken and earthy mushrooms without being cloyingly thick. Sautéing the mushrooms properly to develop their umami, and judiciously adding sherry at the right moment, creates a depth that elevates the dish beyond its humble components. For the modern home cook, this dish offers a practical and actionable lesson in creating rich, satisfying meals from simple, affordable staples, demonstrating how classic techniques can transform everyday ingredients into something truly special.

California Pizza Kitchen’s Thai Chicken Pizza recipes
Ingredients
Equipment
Method
- In a large bowl, dissolve 1 tablespoon honey in warm water, then stir in yeast and let bloom for 5-10 minutes. Add flour and salt, mix until a dough forms, then knead on a floured surface for 5-7 minutes until smooth. Let rise in a greased bowl for 45-60 minutes, or until doubled.
- In a separate bowl, whisk together peanut butter, brewed tea, rice vinegar, soy sauce, chili oil, minced ginger, 2 teaspoons honey, and sesame oil until smooth.
- Cut chicken breast into 1/4-inch strips. Cook in a lightly oiled skillet over medium-high heat until cooked through, about 3-5 minutes. Set aside.
- Preheat your oven to 450°F (232°C) with a pizza stone or baking sheet inside, if possible.
- Shred carrot and chop cilantro and green onions. Toast sesame seeds in a dry pan until fragrant.
- On a lightly floured surface, roll out the pizza dough to your desired thickness. Transfer to a pizza peel or parchment-lined baking sheet.
- Spread the prepared Thai peanut sauce evenly over the dough, leaving a small border for the crust.
- Sprinkle shredded Mozzarella cheese over the sauce, then evenly distribute the cooked chicken strips and shredded carrot.
- Carefully slide the pizza onto the preheated stone or baking sheet. Bake for 10-15 minutes, or until the crust is golden brown and the cheese is melted and bubbly.
- Remove from oven. Immediately sprinkle with toasted sesame seeds, chopped green onions, and fresh cilantro. Slice and serve warm.
Notes
Read more about: Your Ultimate Guide: 14 Unforgettable Ontario Weekend Getaways That Are Totally Worth the Drive!
9. **Meatloaf**: Ah, meatloaf. You’ve never left our hearts, even though people really hated you there for a minute. There’s no denying that meatloaf is an American classic, but there’s also no getting around the fact that in the last few decades it’s been seen as a dish that’s stuck firmly in the 20th century. For too long, we’ve associated it with weeknight meals, Betty Crocker cookbooks, and a certain stodginess that feels just a little depressing.
The reasons for its fall from grace are varied, often stemming from poorly executed versions—dry, dense, or bland. Many cooks, perhaps fearing fat, opted for overly lean ground beef, leading to a sawdust-like texture, or simply lacked the understanding of proper seasoning and binding. This led to a widespread perception of meatloaf as an uninspired, utilitarian dish rather than a hearty, flavorful centerpiece, relegating it to the realm of culinary obligation rather than desire.
Well, until recently, that is. In the last couple of years, people have begun to remember how truly heartening meatloaf is. It’s been heralded as the ultimate comfort food, one that remains constant and unchanging in the winds of culinary trends. It’s always there for you, and it can be made with affordable ingredients, using plenty of stuff you likely have in your cupboards already, making it incredibly appealing in a world seeking both economy and solace.
Mastering meatloaf involves a few key best practices that elevate it from mundane to magnificent. The choice of ground meat is crucial; a blend of beef, pork, and even veal can add moisture and flavor, preventing dryness. Incorporating a binder like breadcrumbs or crackers, moistened with milk or broth, helps create a tender, cohesive texture. Aromatics such as onions, garlic, and herbs, along with a flavorful glaze (think ketchup, Worcestershire, or barbecue sauce), are essential for depth of taste. The practical application here is simple: don’t be afraid to add moisture and flavor, and avoid overmixing, which can lead to a tough loaf. This dish is an expert lesson in maximizing flavor from accessible ingredients through thoughtful preparation.
I Made Chrissy Teigen’s Spicy Meatloaf & Here’s What I Thought
Ingredients
Equipment
Method
- Tear bread into small pieces, place in a large bowl, and pour milk over it; let soak for 5 minutes.
- Add mushrooms, hot Italian sausage (casings removed), ground beef, finely chopped onions, grated carrots, large egg, Worcestershire sauce, kosher salt, red pepper flakes, and black pepper to the bowl with the soaked bread.
- Gently mix all ingredients with your hands until just combined, being careful not to overmix, which can lead to a tough texture.
- Transfer the mixture to a loaf pan or form it into a compact loaf shape on a parchment-lined baking sheet.
- In a small bowl, whisk together the ketchup and brown sugar to create the sweet and tangy glaze.
- Evenly spread the prepared glaze over the top and sides of the meatloaf.
- Bake the meatloaf in a preheated oven (typically 375°F/190°C) until the internal temperature reaches 160°F (71°C).
- Remove the meatloaf from the oven and let it rest for 10-15 minutes before slicing.
- Slice the rested meatloaf into portions.
- Serve hot.
Notes
Read more about: Unleashing Your Inner Foodie: Yelp’s Top 14 All-You-Can-Eat Restaurants, State by State

10. **Tuna Noodle Casserole**: Dishes don’t get more retro than tuna noodle casserole. Arguably the most famous casserole dish out there, the meal was invented by the Campbell’s Soup Company way back in the 1940s, no doubt to plug the use of its Cream of Mushroom soup. It very quickly took off, and the ’50s saw an unstoppable march of tuna noodle casseroles out of people’s kitchens. Home cooks loved that you could make this meal in mere minutes, using just a few things, and have it come out of the oven perfect every time.
Its eventual decline was perhaps inevitable as culinary tastes shifted away from reliance on highly processed, canned ingredients. The “Cream of Mushroom soup” base, once a convenience marvel, began to symbolize a lack of culinary ambition for a generation increasingly interested in fresh, from-scratch cooking. As food became more gourmet and health-conscious, the simplicity of tuna noodle casserole was seen as “uncool,” and it gradually declined in popularity, becoming a culinary relic.
So, why have people started to get excited by tuna noodle casserole again? For exactly the same reason as they did in the ’50s: because it’s easy. Making a tuna noodle casserole requires little more than throwing a few ingredients together and putting your dish in the oven, and those ingredients don’t cost much, either, aligning perfectly with today’s budget-conscious home cooks. This practical application of simplicity is undeniably powerful.
Cooks have also embraced the versatility of this dish, and how you can combine it with other classics to boost its flavor. Instead of using mushroom soup, some folks opt for boxed mac and cheese, creating an even more comforting hybrid. While it may not sound much like sophisticated cooking, think about it: You get your carbs, protein, and fats in one go, it’s filling, and it only takes a few minutes to prepare. This focus on efficiency, adaptability, and complete nutritional satisfaction makes it a brilliant example of practical home cooking. We’re not gonna argue with that kind of culinary genius in a chaotic world.
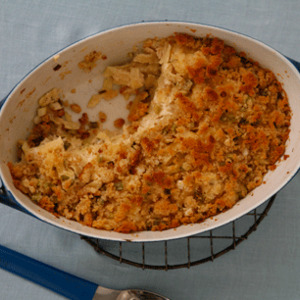
Tuna–Noodle Casserole
Ingredients
Equipment
Method
- Preheat your oven to 375°F (190°C). Grease a 9×13-inch baking dish.
- Bring a large pot of salted water to a boil. Add the flat egg noodles and cook according to package directions until al dente; drain well.
- While noodles cook, melt 4 tbsp. of butter in a large skillet or saucepan over medium heat. Add the chopped scallions and cook until softened, about 3-5 minutes.
- Stir in the flour and dry mustard into the scallions, cooking for 2 minutes to create a roux.
- Gradually whisk in the milk until the sauce is smooth and thickened. Season generously with salt and freshly ground black pepper.
- Remove the sauce from heat and gently fold in the drained tuna chunks and cooked noodles.
- Transfer the noodle mixture into the prepared baking dish, spreading evenly.
- In a small skillet, melt the remaining 6 tbsp. of butter. Add the fresh bread crumbs and cook over medium heat, stirring frequently, until golden brown and crispy.
- Sprinkle the toasted bread crumbs evenly over the casserole.
- Bake for 20-25 minutes, or until the casserole is bubbly and the topping is golden brown. Let rest for a few minutes before serving.
Notes
Read more about: Seriously, What Happened? 12 Once-Beloved Foods Americans Just Don’t Eat Anymore (And Why We Kinda Miss ‘Em)

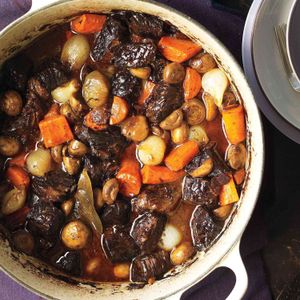
11. **Beef Bourguignon**: For a classic dish that’s rich in history and taste, Beef Bourguignon is a solid choice. Originally from France, this dish brings a touch of European finesse to your table without needing a passport. Its roots trace back to humble Burgundy kitchens, where tough cuts of beef were tenderized and flavored with the region’s famous red wine. It’s perfect for those nights when you want a meal that fills the room with its enticing aroma, a testament to its deeply savory and comforting nature.
The enduring appeal of Beef Bourguignon lies not only in its robust flavor but also in its ability to improve with time; it “always seems to taste even better the next day.” This culinary heritage piece, popularized globally by Julia Child, exemplifies the slow food movement before it was even a concept. It’s a dish that respects its ingredients and demands patience, transforming simple components into a symphony of rich, complex flavors that speak to generations of culinary wisdom.
The practical application and technique of Beef Bourguignon are what truly set it apart. Browning the beef thoroughly to achieve a deep, caramelized crust is the crucial first step, initiating the Maillard reaction that builds foundational flavors. Deglazing the pan, slowly simmering with a full-bodied red Burgundy wine, beef broth, and aromatics like carrots, onions, and garlic, allows the flavors to meld and deepen over hours. The addition of mushrooms and pearl onions towards the end ensures they maintain their texture and freshness. This isn’t just a recipe; it’s a masterclass in braising and flavor development.
For the modern home cook, Beef Bourguignon is a testament to the power of deliberate cooking. It’s a dish that can be prepared in stages, making it manageable even for busy schedules, and it yields a generous quantity perfect for meal prepping or entertaining. Its comforting, hearty nature makes it an ideal choice for cooler months, embodying culinary heritage while providing practical solutions for contemporary life. It’s a dish that reminds us of the profound satisfaction that comes from truly investing in our food.
Beef Bourguignon
Ingredients
Equipment
Method
- Preheat oven to 325°F (160°C). Cut bacon into ½-inch pieces, sear in a large Dutch oven until crisp; remove bacon, reserving the rendered fat.
- In batches, brown the 1-inch beef pieces in the rendered bacon fat and 3 tablespoons olive oil; season with coarse salt and ground pepper. Remove browned beef.
- Add quartered mushrooms to the pot, sauté until browned; remove and set aside.
- Stir 1 tablespoon tomato paste into the pot, cook for 1 minute, then sprinkle in 2 tablespoons all-purpose flour and cook for another minute, stirring constantly.
- Gradually whisk in 3 cups dry red wine, scraping up any browned bits from the bottom of the pot. Add 2 cups low-sodium chicken broth, 1 bay leaf, and 1 smashed garlic clove.
- Return browned beef and crisp bacon to the pot. Bring the liquid to a simmer on the stovetop.
- Cover the Dutch oven and braise in the preheated oven for 2 hours.
- Stir in 4 peeled and 1-inch cut carrots and 10 ounces peeled pearl onions. Continue to braise, covered, for another 1 to 1.5 hours, or until the beef and vegetables are very tender.
- Remove the bay leaf and garlic clove from the pot. Stir in 1 tablespoon butter until melted. Taste and adjust seasoning with salt and ground pepper as needed.
- Garnish with 2 tablespoons fresh chopped parsley (if using) before serving hot.
Notes
Read more about: Honestly, What Happened? 15 Once-Beloved American Foods That Vanished from Our Tables
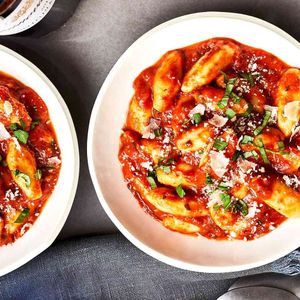
12. **Gnocchi**: Create your own satisfying Gnocchi and taste the difference homemade makes. These little dough pillows are a statement in a home-cooked meal, marrying Italian tradition with present-day delight. They hail from Italy, with variations found across regions, often serving as a clever way to utilize leftover potatoes or other starches, evolving from simple, rustic fare into a cherished culinary art form. Dish it up with your sauce of choice, or simply a dash of olive oil and herbs, to truly appreciate their delicate texture.
The culinary heritage of gnocchi is rich and diverse, spanning centuries. While potato gnocchi are most common today, historical versions have included semolina, breadcrumbs, flour, and even squash, reflecting regional agricultural diversity. This adaptability underscores their enduring appeal as a staple, offering a satisfying and versatile alternative to pasta. The sheer act of making them by hand connects the cook directly to generations of Italian home cooks, preserving a tangible piece of culinary history.
From a technical perspective, mastering gnocchi is about finesse. The secret to light, pillowy gnocchi lies in the type of potato used (floury varieties like Russets are best), cooking them thoroughly, and handling the dough as little as possible. Overworking the dough develops gluten, leading to dense, chewy gnocchi rather than the delicate morsels we crave. A light hand when mashing the potatoes and gently incorporating just enough flour and egg creates the perfect texture, ensuring they cook quickly and float to the surface when done, signaling their readiness.
The practical application of gnocchi in the modern kitchen is immense. They offer a quick-cooking, comforting base for an endless array of sauces, from a vibrant pesto to a robust bolognese or a simple brown butter and sage. For home cooks, learning to make gnocchi from scratch provides a deeply rewarding culinary skill, demystifying a seemingly complex dish and opening doors to creative improvisation. It’s an age-old classic that’s simply rewarding, allowing for personal expression while honoring timeless Italian culinary wisdom.
Gnocchi with Pomodoro Sauce
Ingredients
Equipment
Method
- Scrub potatoes and boil them whole in salted water until very tender, about 45-60 minutes, then peel while still warm.
- Pass the warm, peeled potatoes through a potato ricer or mash thoroughly into a fine, uniform consistency.
- In a large bowl, combine the riced potatoes with 1 cup grated Parmigiano-Reggiano, egg yolks, 2 teaspoons kosher salt, and pepper; gradually mix in the flour until just combined to form a soft dough.
- On a lightly floured surface, roll small portions of dough into long ropes, about 3/4-inch thick, then cut into 3/4-inch pieces. Optionally, roll each piece over the tines of a fork or a gnocchi board to create ridges.
- For the sauce, heat canola oil in a large skillet over medium heat. Add garlic and cook until fragrant, about 1 minute.
- Stir in the crushed San Marzano tomatoes, 2 tablespoons chopped basil, 1/4 cup plus 2 teaspoons kosher salt, and sugar. Bring to a simmer, then reduce heat and cook, stirring occasionally, for at least 30 minutes, or up to 1 hour, until thickened.
- Just before serving, stir in the 6 tablespoons of butter into the pomodoro sauce until melted and emulsified, then keep warm.
- Bring 16 cups of water and the remaining 1/4 cup kosher salt to a rolling boil in a large pot.
- Carefully drop the gnocchi into the boiling water in batches. Cook until they float to the surface, about 2-3 minutes.
- Using a slotted spoon, transfer the cooked gnocchi directly into the warm pomodoro sauce, tossing gently to coat. Garnish with additional fresh basil and grated Parmigiano-Reggiano before serving.
Notes
Read more about: The Definitive Wirecutter Guide: Comparing Top Meal Kit Delivery Services for Busy Professionals
Our journey through the evolving world of retro recipes demonstrates a powerful truth: true culinary excellence, whether humble or haute, never truly fades. These dishes, from the theatrical flair of Baked Alaska to the rustic elegance of Gnocchi, represent more than just meals; they are touchstones of our collective past, reinterpreted for our present. As we continue to navigate a rapidly changing world, the comfort, practicality, and sheer deliciousness embedded in these vintage recipes offer a reassuring anchor, reminding us that the best innovations often involve a respectful nod to tradition. So, roll up your sleeves, embrace the culinary heritage, and let these revived classics inspire your next delicious adventure in the kitchen.


