

Owning a vehicle doesn’t mean a lifetime of high maintenance expenses. If you’re someone who genuinely wants to keep more money in your wallet, you’ll discover that learning to tackle routine car maintenance yourself is an incredibly empowering and financially savvy move. Forget the fear of the unknown; many of these tasks are far simpler than you might imagine, often requiring just a few basic tools and a willingness to get your hands a little dirty. These aren’t just minor fixes; they’re the kind of preventive care that can prevent major breakdowns and significantly reduce your annual car care costs.
Indeed, tackling your own car maintenance, as long as it’s done well, will for sure save you quite a bit of money. You’ll not only avoid costly markups on parts and labor but also gain a deeper understanding of your vehicle’s systems, allowing you to proactively address potential issues before they escalate. With a socket wrench set, a drain pan, and a few other simple items, your garage can quickly become an amateur mechanic’s paradise, turning daunting tasks into manageable and rewarding projects.
Ready to learn some great practical pointers? As someone who’s spent a career tinkering with automobiles, I’ve seen countless examples of big breakdowns that started with tiny, ignored problems. We’re about to dive into some of the most vital—and cost-effective—tasks you can easily master, ensuring your ride stays in top shape without forcing anyone to empty their wallet. Let’s get started on keeping your car running smoothly and efficiently, all while padding your wallet.
1. **Changing Your Engine Oil & Filter**
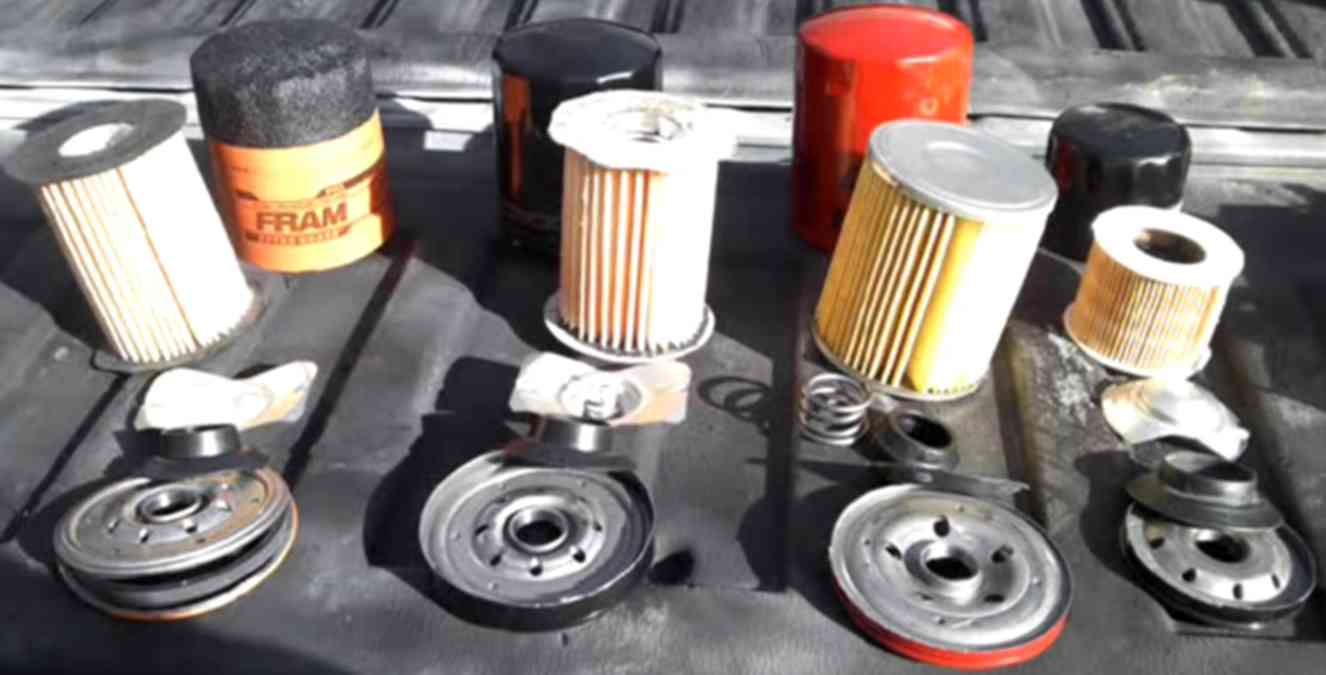
Changing your oil is genuinely one of the most vital — and cost-effective — tasks for keeping your engine in top shape. Fresh oil works tirelessly, reducing friction between countless moving parts and effectively carrying away heat and debris that can otherwise cause severe engine damage. Neglected oil levels can indeed lead to costly engine damage, so a few moments with a dipstick save a lot of grief.
To begin, you’ll need a few essentials: fresh oil that meets your manufacturer’s recommendation, a new oil filter, a drain pan, and a wrench. Locate the dipstick, pull it out, and wipe it clean with a rag. Reinsert it fully, remove it again, and carefully read the level. If it’s low, add the appropriate oil. When it’s time for a full change, you’ll drain the old oil into your pan, swap out the filter, and then refill with fresh oil, being mindful of the correct amount.
Doing this job yourself offers unique advantages beyond just saving money. Firstly, it’s the only way you can be absolutely sure of the quality of oil that actually goes into your engine, ensuring you’re using the best product for your vehicle. Secondly, it lets you get underneath the vehicle to look at other things while you’re loosening and tightening the drain plug, providing an invaluable opportunity for routine inspection.
The savings are substantial. While the DIY cost typically ranges from $25 to $50 for materials, a service center might charge anywhere from $35 to $75 (with conventional oil). That’s a minimum saving of $10 per change, quickly adding up over the life of your car. Remember to properly dispose of your used oil at a recycling center; many auto parts stores will take it for free, making this a fully self-sufficient and eco-friendly endeavor.
Read more about: Jamie Oliver: A Culinary Odyssey – The Enduring Influence of a Global Food Visionary, From Humble Pub Kitchens to International Acclaim

2. **Replacing Spark Plugs**
Spark plugs are small but mighty components, essential for igniting the air-fuel mixture in your engine’s combustion chambers. Over time, these crucial parts wear out, leading to reduced fuel efficiency, rough idling, and a noticeable drop in your car’s overall performance. Ignoring worn-out spark plugs can strain your engine and lead to more expensive repairs down the line, making their timely replacement a true money-saving move.
Replacing them yourself requires some attention to detail, but it’s a perfectly doable job for most drivers. A key piece of advice: never disconnect more than one spark plug wire at a time. This prevents confusion regarding which wire goes to which cylinder, ensuring your engine fires correctly after the replacement. You’ll need a spark plug socket and a gap tool to ensure the new plugs are set to the correct specification before installation.
The process involves carefully removing the old plugs, checking the gap on the new ones according to your vehicle’s specifications, and then securely installing them. While it might seem a bit technical, taking your time and following the specific instructions for your car’s make and model will make the task straightforward. The empowerment of doing it yourself and the immediate improvement in engine smoothness and efficiency are incredibly rewarding.
The financial incentive here is clear and compelling. The DIY cost for each spark plug typically ranges from $2 to $10. Compare this to a service center, where the same job could set you back anywhere from $100 to $250 in total. This significant difference makes spark plug replacement a standout example of how a bit of effort on your part can translate into hundreds of dollars saved, ensuring your engine runs optimally without breaking the bank.
Read more about: Your Definitive 2025 Guide: What to Check When Buying a Used Electric Vehicle

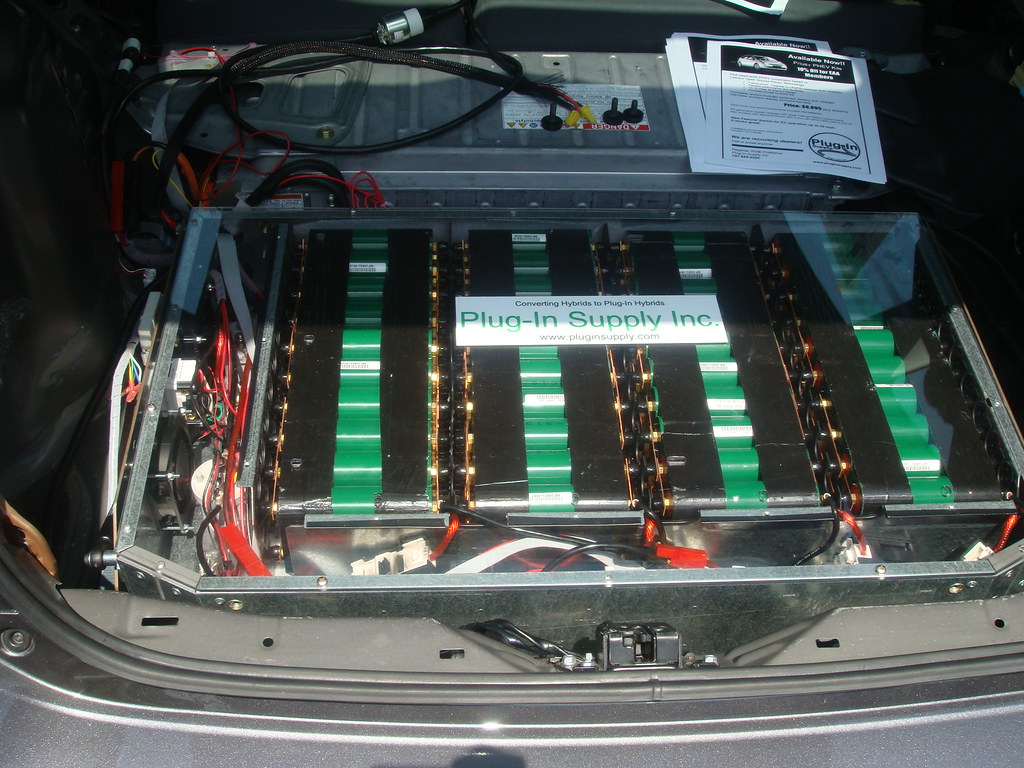
3. **Replacing a Car Battery**
A dead battery is more than just an annoyance; it’s a sudden halt to your plans and a source of unexpected stress. All automotive batteries eventually die, usually lasting about five years if they’re taken care of. Knowing when your battery is nearing the end of its life, and being prepared to replace it, is a proactive step that every car owner should prioritize on their repair and maintenance checklist.
Replacing a car battery is far easier than you might think, and it doesn’t require a trip to the mechanic. The fundamental rule for safety is to always disconnect the negative terminal first, then the positive. This minimizes the risk of accidental short circuits. When installing the new battery, reverse the order: connect the positive terminal first, then the negative. Don’t be alarmed if you see a few small sparks; they’re normal during this process.
Before you even need a replacement, consider testing your battery regularly with an inexpensive battery tester. These gauges measure the battery’s capacity and voltage during start-up, providing insights that will help you keep your vehicle working reliably and know when to start setting aside money for a new one. This foresight can prevent the inconvenient scenario of being stranded with a dead battery.
The good news is that replacing your battery is an easy fix, and most stores where you can buy a new battery will recycle your old one free of charge. While the DIY cost depends on the battery you choose, ranging from $80 to $400, doing this swap yourself helps you avoid costly markups on labor fees that service centers often apply. It’s a straightforward task that offers significant savings and gives you valuable peace of mind.
Read more about: Amazon’s Secret Stash Revealed: Unbelievable Deals on Home Essentials You Need Right Now!
4. **Checking & Managing All Fluid Levels**
Many drivers only crack the hood after a glaring warning light appears, but that’s like waiting to get parched before sipping water. Monitoring your car’s various fluid levels—engine oil (as discussed), transmission, power steering, brake, coolant, and wiper fluid—is a fundamental yet often overlooked aspect of keeping your car running well. Periodic checks of these fluids safeguard performance and prevent a cascade of potential issues that can quickly become expensive headaches.
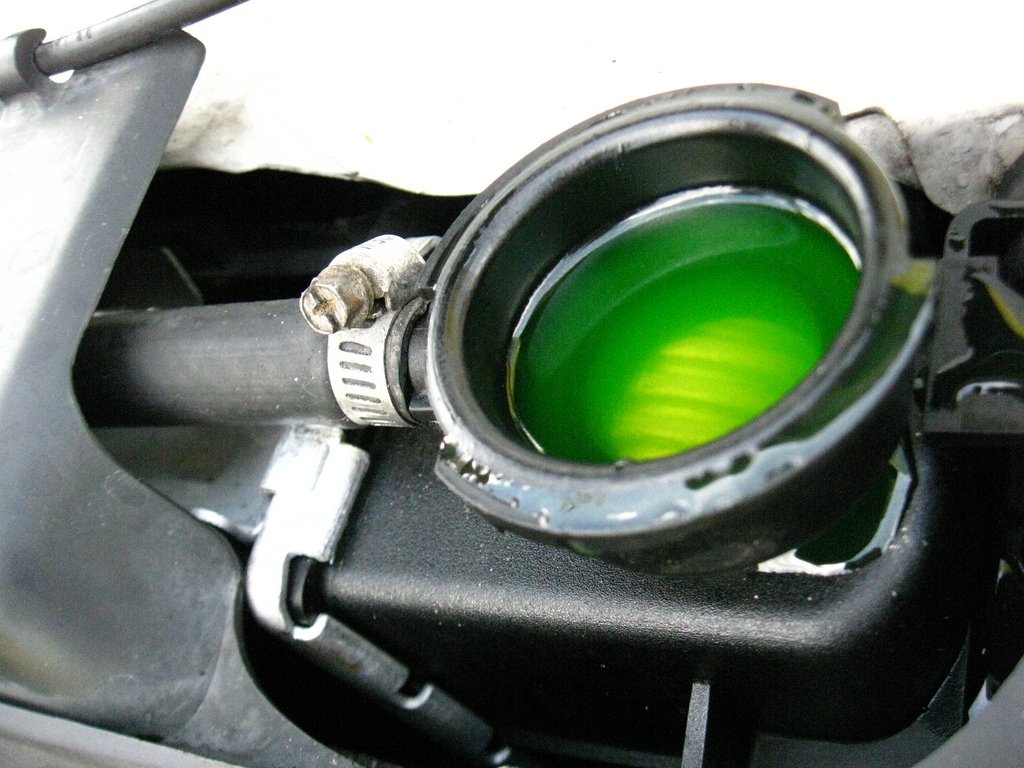
Let’s start with coolant, which protects your engine from overheating and corrosion. Always check the reservoir when the engine is cold, ensuring the fluid sits between the minimum and maximum marks. If necessary, add a 50/50 coolant-distilled water mix, as an overheated engine can ruin a perfectly good day and your bank account. For brake fluid, locate the reservoir near the firewall and ensure the fluid rests within the suggested range. Low fluid might hint at worn brake pads or hidden leaks, so swift action keeps the braking system healthy, which is far better than losing stopping power on a busy road. You can even use a test strip to check its condition.
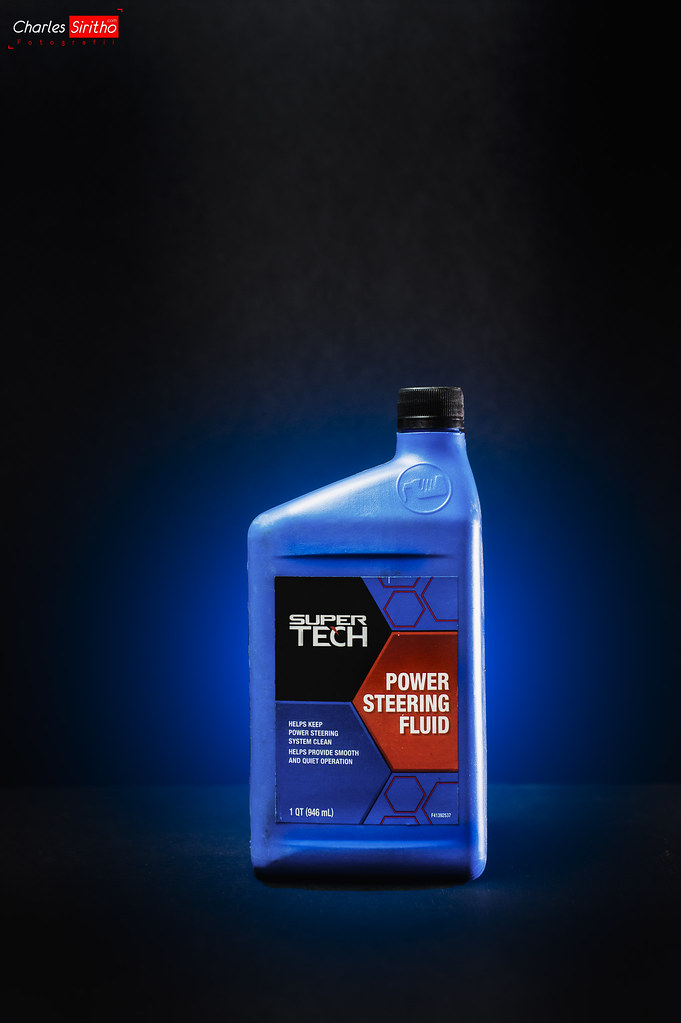
Power steering fluid also demands attention. Since there aren’t any test strips for power steering fluid, you’ll have to rely on the manufacturer’s service recommendations or a general rule-of-thumb: two years or 24,000 miles. A simple DIY method, often called the “turkey baster method,” allows you to suck out old fluid from the reservoir and refill with fresh. Crucially, never substitute a “universal” power steering fluid for the recommended type, and never add “miracle” additives or stop-leak products, as they can clog fine mesh filter screens and cause expensive failures.
Transmission fluid is another vital component often missed. While many understand the importance of engine oil changes, transmission fluid is equally critical. Some transmission oil pans have a drain plug, while others require pan removal. Installing a retrofit drain plug during the first pan removal can make future fluid changes much easier. Remember, automatic transmission fluid needs to be checked with the engine running, ideally after at least 10 or 15 minutes of driving, for the most accurate reading.
Ultimately, consistently monitoring these fluids is as simple as using a dipstick or checking marked reservoirs, and topping off as needed. Just don’t remove the radiator cap while it’s hot, as pressurized hot fluid can cause serious burns. The cost savings here are significant, as you avoid paying for shop fees on top of the cost of the fluids themselves. A routine glance at fluid levels can truly go a long way in preventing chaos and surprise repairs.
Read more about: Your Ultimate Guide to Navigating the Used Car Market: Avoid Rip-Offs and Drive Away with Confidence
5. **Flushing the Radiator**
An often-underestimated task, flushing your radiator is crucial for the long-term health of your vehicle’s engine. This procedure protects your engine from the twin threats of overheating and corrosion, ensuring that the cooling system operates at peak efficiency. Over time, coolant can break down and accumulate contaminants, diminishing its ability to regulate engine temperature, which can lead to costly damages if left unaddressed.
The process, while seemingly intricate, is quite manageable for the diligent DIYer. First and foremost, always wait for the car to cool completely before attempting to open the radiator cap, as the system is under pressure and filled with hot fluid. Once it’s safe, you’ll drain the old fluid into a suitable container for disposal. Following this, you add a flush solution mixed with distilled water, run the engine for a short period to circulate it, and then drain it again.
The final step involves refilling your radiator with fresh coolant, making sure to use the type recommended for your climate and vehicle. This ensures your engine has the necessary protection against freezing in winter and overheating in summer. It’s a proactive measure that drastically extends the life of your cooling system and, by extension, your entire engine.
When it comes to the bottom line, the financial benefits of performing a radiator flush yourself are quite substantial. The DIY cost for the necessary materials, including flush solution and new coolant, is typically about $50. Contrast this with service center costs, which can easily hover around $200 for the same job. This $150 saving for a relatively straightforward task makes radiator flushing an excellent example of how hands-on maintenance truly pays off.
Read more about: Mastering Classic Car Longevity: An Expert Guide to Keeping Your Vintage Beauty Running for Decades
6. **Replacing Air Filters (Engine & Cabin)**
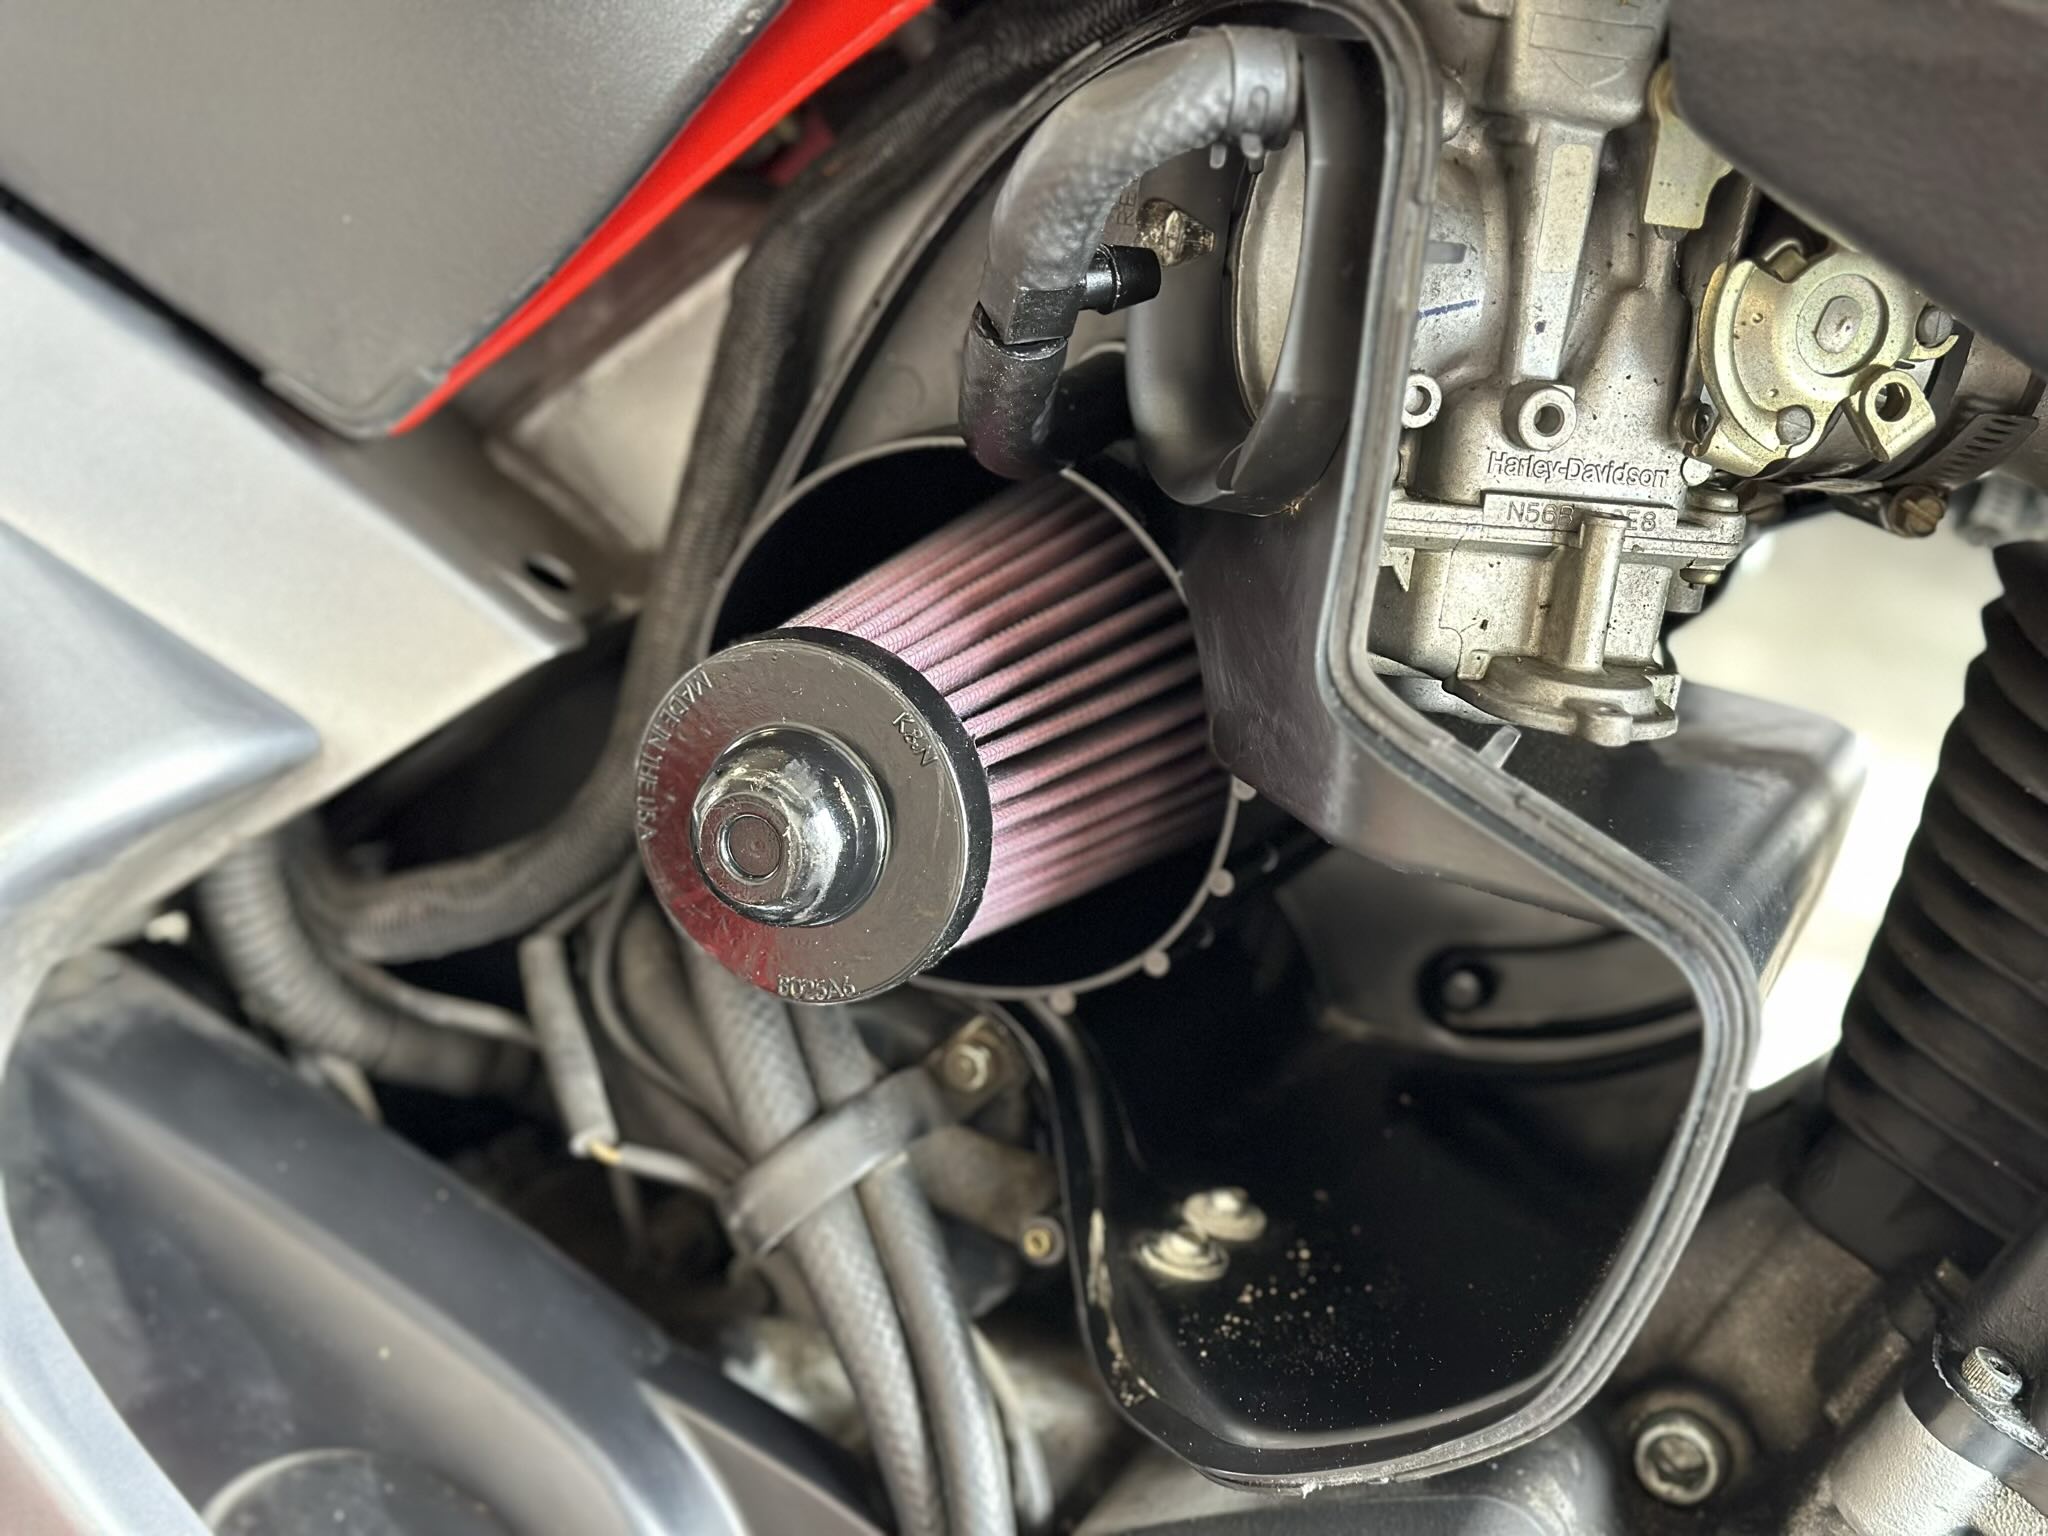
Your car breathes too, and like any living thing, it performs best with clean air. This is where your engine and cabin air filters come in, playing distinct but equally vital roles. A filthy engine air filter starves the engine of oxygen and hampers efficient combustion. This grime forces the vehicle to burn more fuel, straining the wallet in the long run and leading to sluggish performance. Similarly, a clogged cabin air filter can damage your car’s blower motor and cause your AC to run longer and harder in the summer, impacting both comfort and efficiency.
Swapping out a dirty engine air filter is one of the quickest and most straightforward DIY tasks imaginable. You simply locate the airbox, usually a plastic container with clips or screws, pop it open, and slide in a fresh filter. There are no special tools required, making it incredibly accessible for beginners. A quick check involves holding your old filter up to a shop light; if it blocks 50 percent or more of the light, it’s definitely time for a replacement. Proper air intake promotes smoother acceleration and reduces frequent fill-ups, benefiting performance more than most people expect.
The cabin air filter, while often overlooked, is just as easy to replace and crucial for interior air quality and HVAC system longevity. These filters are usually located in the air ducts behind the glove box in late-model vehicles, though some carmakers place them in the cowling or console area. After purchasing a replacement from any auto parts store, simply remove the access covers and slide out the old filter. Crucially, note the direction of the airflow arrows on the old filter so you can install the new filter in the proper orientation, then reinstall the covers, and you’re done.
There’s no need to pay a mechanic for something so simple, as the DIY cost varies only by the price of the filter itself, saving you a labor charge that can be disproportionately high for such a quick job. Keeping both your engine and cabin air filters clean is a fantastic example of preventative maintenance that directly impacts your car’s performance, your comfort, and your budget, proving that a little effort yields big returns.
Read more about: The Essential DIY Car Maintenance Tasks That Can Save You $3,000 (Or More!) In Repairs

7. **Maintaining & Rotating Tire Pressure**
Few aspects of car maintenance are as critical for safety, fuel economy, and tire longevity as proper tire pressure and regular rotation. Under-inflated tires increase friction, prompt rapid tread wear, and force the engine to work harder, leading to reduced fuel efficiency and compromised handling. Conversely, over-inflation can lead to a bumpy ride and uneven wear patterns, making your tires wear out prematurely and potentially reducing grip. Balanced tire pressure ensures stability on the road and is a surefire route to better fuel mileage.
Checking your tire pressure is a task that takes mere minutes and requires only a simple pressure gauge, which can be digital or analog. Always check your tires when they are cold, meaning they haven’t been driven recently, as driving heats them up and increases pressure readings. Compare the reading with the recommended PSI (pounds per square inch) listed on a sticker inside your driver’s door jamb. Then, inflate or deflate until the pressure matches that figure. Most gas stations offer free air, making this a truly cost-free way to save money long-term by extending tire life and improving fuel efficiency.
Beyond just pressure, regular tire rotation is another pillar of tire maintenance. Your wheels don’t wear out at the same rate; front tires, for example, often face more stress due to steering and braking. Rotation spreads that wear evenly across all four tires, which is essential for maximizing their lifespan and maintaining balanced handling. Nobody wants to replace an entire set prematurely, and tire rotation is key to avoiding that expense.
To perform a tire rotation, consult your owner’s manual for the correct pattern, as it can vary by vehicle type (e.g., front-to-back, back-to-front, or a crisscross pattern). You will need a jack and jack stands to safely raise the vehicle. Once lifted, you move each tire to its designated position according to the pattern. This simple procedure, ideally done every 5,000 to 7,000 miles (or as your manual suggests), stretches tire life, saving you a tidy sum by delaying the need for costly new tires.
Consistent monitoring of tire pressure and regular rotations prevent sudden blowouts, help tires last longer, and contribute significantly to better fuel mileage and overall vehicle safety. It’s a fundamental set of tasks that underscore how small, consistent efforts in DIY car care lead to substantial financial savings and a more reliable driving experience, keeping your valuable tires on the road for as long as possible.
Read more about: Shattering the Fictions: 14 Car Maintenance Myths That Are Quietly Draining Your Wallet and Damaging Your Ride
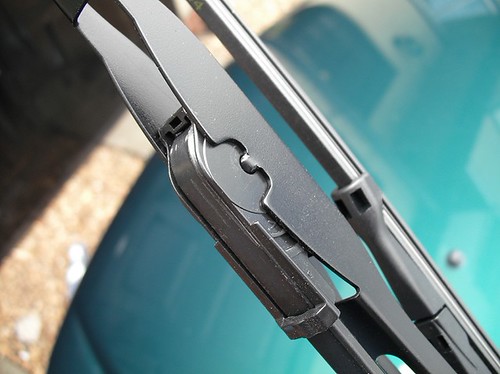
8. **Replacing Wiper Blades**
Visibility is non-negotiable when you’re behind the wheel, and worn-out wiper blades are a genuine hazard. They do an excellent job of smearing raindrops in irritating arcs, drastically reducing your ability to see the road clearly, especially when the weather takes a turn for the worse. Fortunately, swapping out these crucial components is one of the most straightforward tasks you can undertake, requiring minimal effort for maximum safety. Seriously, don’t compromise on clear vision.
Assessing if your blades need replacing is simple: just activate your washer fluid and observe their performance. If they leave streaks or miss sections of your windshield, they’re past their prime and need to go. Once you’ve purchased a new set that matches your vehicle, the replacement process is often as simple as lifting the wiper arm away from the windshield, pressing a small tab or release mechanism, and sliding off the old blade. A fresh blade will snap securely into place, instantly upgrading your driving experience.
One vital safety tip to remember during this task is to maintain a firm grip on the wiper arm once the old blade is removed. If it slips from your grasp and springs back, it can hit the windshield with enough force to cause a crack, turning a simple five-minute job into a costly repair. This quick fix demands no special tools and saves you the labor charge a shop would apply, proving once again that a little attention to detail can keep you safer and save you money.
Read more about: Mastering Winter Roads: Your Essential Guide to Car Winterization and Preventing Costly Breakdowns
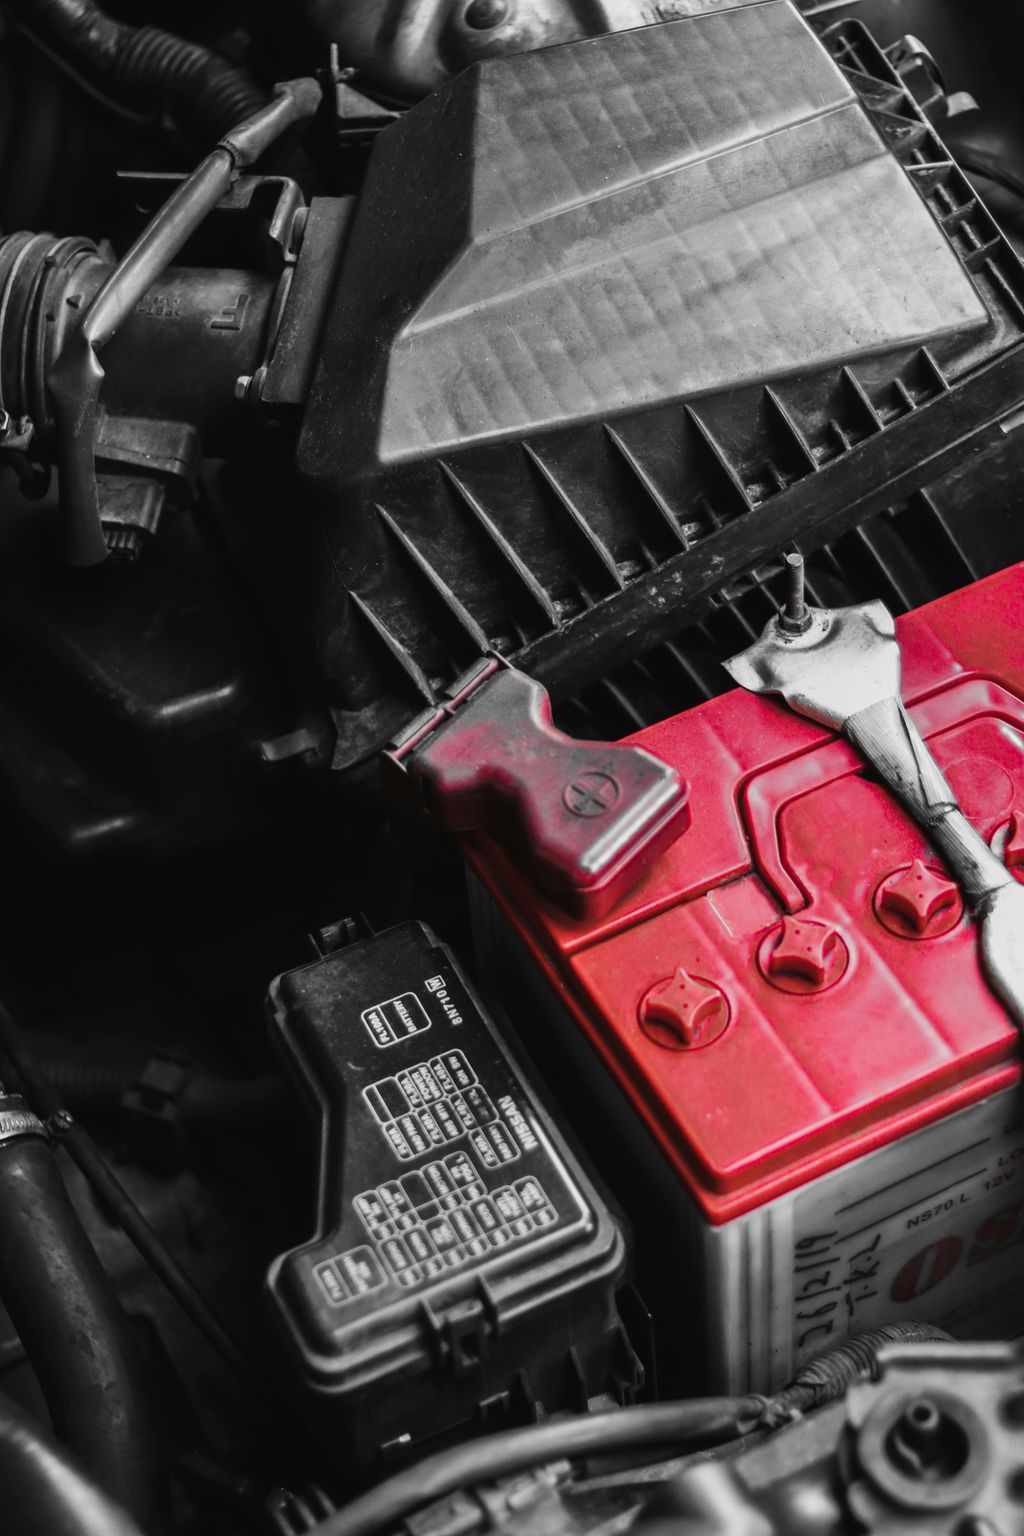
9. **Cleaning Battery Terminals**
There’s nothing quite like the dread of a slow engine crank on a frigid morning, or worse, a completely dead battery when you’re in a hurry. Often, the culprit isn’t a faulty battery but corrosion on the terminals, which can disrupt the flow of electricity and lead to unreliable starts and unpredictable electrical glitches. A few minutes dedicated to cleaning these connections can spare you considerable headaches and keep your electrical system running smoothly.
The method for tackling this is straightforward. Begin by disconnecting the negative cable first, then the positive, to minimize the risk of accidental short circuits. Prepare a simple paste using baking soda and water, which acts as a mild abrasive and neutralizes the corrosive acid. Scrub the terminals vigorously with a wire brush, rinse them thoroughly with clean water, and then dry them completely to prevent immediate re-corrosion. Once clean, reconnect the cables, positive first and negative last.
This simple procedure ensures a steady, uninterrupted flow of electricity from your battery to the rest of your vehicle’s systems. Imagine never having to hunt for jumper cables on a freezing morning or awkwardly waiting for a random passerby to help jump-start your vehicle again. It’s a small, proactive measure that yields huge peace of mind and prevents those inconvenient, unplanned interruptions to your day.
Read more about: Demystifying Engine Bay Cleanliness: An In-Depth Look at the Core Principles of a ‘Clean’ Engine
10. **Repairing Minor Cosmetic Marks**
Small imperfections like nicks, scratches, dents, and dings can make your car look older than it actually is, and they also open the door to more serious issues like rust. While major body damage undoubtedly calls for professional help, many minor marks can be repaired with a bit of DIY ingenuity, saving you substantial body shop fees and restoring your car’s aesthetic appeal and value.
For tiny paint chips that expose bare metal, a clear nail polish provides a surprisingly effective temporary seal against moisture. Simply clean and dry the chipped spot thoroughly with mild soap and water, then carefully dab the polish over the blemish. This isn’t a permanent fix, but it’s a brilliant trick to buy some time before a proper touch-up, as rust repair is far more expensive than a bottle of polish from the drugstore.
Minor dents from shopping carts or other random mishaps can sometimes be popped out using a household plunger. Wet both the dent and the plunger rim, then press the plunger firmly over the area and pull gently. Repeat this action until the dent is less visible or disappears entirely. While not foolproof for serious damage, it’s remarkably effective for smaller dings, demonstrating how a bit of elbow grease can spare a hefty repair bill.
Even paint scratches that don’t go all the way through the clear coat can be made to disappear with very fine abrasion and a bit of buffing. You can use a mild auto body buffing compound with a moistened buffing pad, perhaps even installed on a 6-inch random orbit woodworking sander, to carefully work away the blemish. For slightly larger dents, you can tackle them with autobody filler, sanding down to bare metal, applying thin layers of filler, and then feathering the final coat smooth before applying touch-up paint.
Mastering these minor cosmetic repairs doesn’t just improve your car’s appearance; it actively preserves its resale value and prevents small issues from escalating into expensive corrosion. It’s incredibly rewarding to restore your car’s finish with your own hands, maintaining that fresh-off-the-lot look without emptying your wallet at a costly body shop.
Read more about: Decoding the Dangers: The 13 Most Common Reasons Why Classic Car Tires Fail and How to Prevent Them
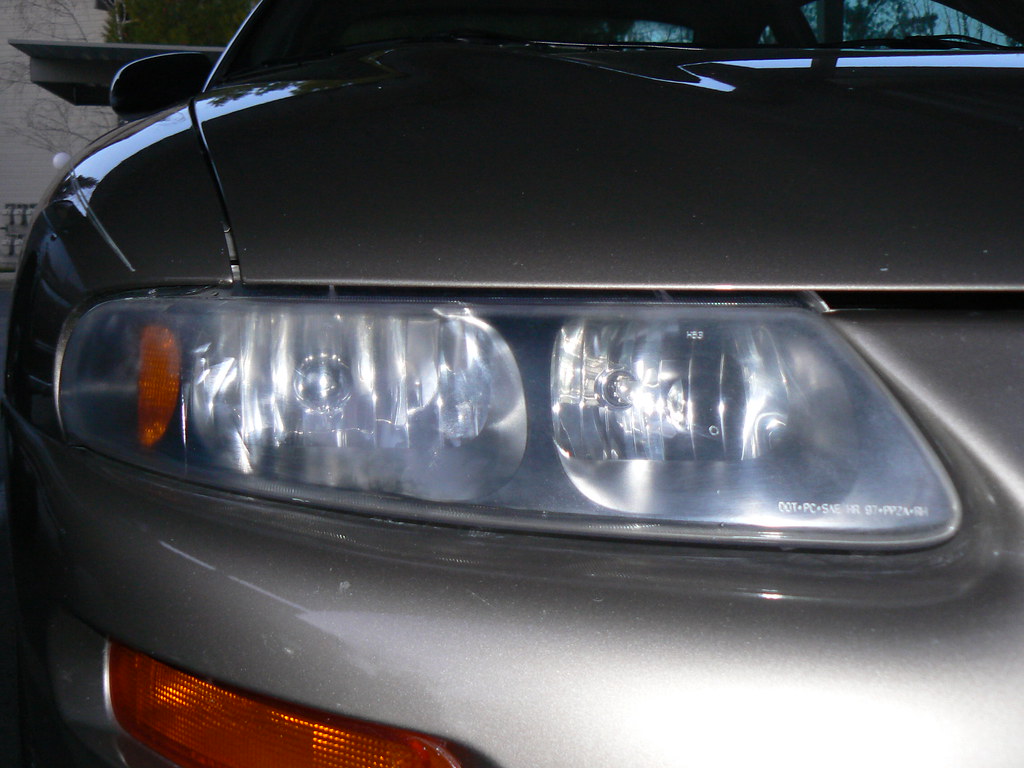
11. **Restoring Foggy Headlights**
Over time, years of oxidation and accumulated grime can cloud headlight lenses, diminishing their clarity and significantly reducing your nighttime visibility. This isn’t just an aesthetic problem; it’s a safety concern that can make driving after dark much more perilous. Fortunately, you don’t need expensive kits or professional service to tackle this issue; ordinary toothpaste often contains mild abrasives that can effectively polish away the haze.
The application process is incredibly simple. Squeeze a dollop of regular toothpaste onto the headlight lens. Using a soft cloth, rub the toothpaste in circular motions for a couple of minutes, ensuring you cover the entire foggy surface. You’ll be surprised at how the mild abrasive action begins to lift away the yellowed, oxidized layer. For best results, it’s worth spending a bit of time on this step, putting some real elbow grease into the circular motion.
Once you’ve thoroughly scrubbed the lens, rinse it completely with water, ensuring all toothpaste residue is removed, and then dry it with a clean microfiber towel. While the results can vary depending on the severity of the clouding, an improvement is often quite noticeable, making your headlights appear clearer and brighter. To further slow future oxidation and maintain that refreshed look, consider applying a protective wax or sealant afterward.
This simple, low-cost solution directly enhances both the safety and appearance of your vehicle. Improved headlight clarity means better illumination of the road ahead, making nighttime driving safer for you and others. Plus, clear headlights significantly boost your car’s curb appeal, making it look much newer and better maintained, all without any specialized tools or a trip to the repair shop.
Read more about: Unlock Your Car’s Hidden Shine: 8 Simple Baking Soda Hacks to Clean Every Inch, Inside and Out!
12. **Lubricating Door and Window Seals**
Rubber seals around doors and windows are essential for keeping out wind, noise, and moisture, but they degrade over time due to exposure to the elements. This degradation can lead to annoying squeaks, reduced cabin comfort, and even water leaks. Taking a proactive approach to lubricating these seals is a smart, simple DIY task that maintains their flexibility and extends their lifespan, making your driving experience more pleasant and protecting your car’s interior.
One particularly irksome problem, especially in colder climates, is frozen doors. Wrestling with a door that’s stubbornly iced shut at 7 a.m. is nobody’s idea of fun. A clever trick to ward off this moisture-induced ice buildup is to apply cooking oil spray to the rubber seals. Simply spray some cooking oil onto a paper towel and gently wipe along the rubber seal on each door. Reapplying after washing your car or during periods of frequent snowfall can prevent your daily routine from turning into an icy fiasco.
For general maintenance and to prevent squeaks and leaks year-round, a silicone or rubber lubricant is your best friend. Spray the lubricant onto a clean cloth, then carefully wipe along the perimeter of each door and window seal. This keeps the rubber supple and prevents it from drying out, cracking, or sticking. Be sure to remove any excess residue to avoid attracting dust and grime.
By keeping your seals in top condition, you’re not just ensuring quiet doors and properly sealing windows that block out wind noise and moisture. You’re also preserving your cabin’s comfort level, which is particularly noticeable in older models, and protecting your interior from water damage. This small effort contributes significantly to the longevity and enjoyment of your vehicle, making it feel more solid and secure on the road.
Read more about: The Silent Toll: What Happens to Your Car When It Sits Idle and How to Prevent It
13. **Thorough Cleaning and Detailing**
While some might view cleaning a vehicle as a purely cosmetic chore, consistent and thorough cleaning accomplishes far more than just improving its looks. Built-up grime, salt, mud, and road debris can corrode metal faster than you’d imagine, affecting critical components and significantly reducing your car’s lifespan and resale value. Regular washing and interior tidying are fundamental preventive maintenance steps that protect your investment.
When it comes to the exterior, don’t just focus on the shiny paint. Wash thoroughly, paying special attention to often-neglected areas like wheel wells and the undercarriage. These hidden spots are prime breeding grounds for rust, especially after winter driving or muddy outings. Using a hose attachment or a pressure washer designed for undercarriages can help blast away corrosive elements, maintaining structural integrity and preventing hefty repair bills for a corroded frame or exhaust system.
The interior also demands attention. Vacuuming floors and seats regularly removes dirt and grit that can grind into fabrics or leather, causing premature wear and tear. Wiping down dashboards and center consoles clears dust from vents and seams, preventing build-up that can affect air quality and component function. Remember the recesses and trim lines; wrapping a cloth around a worn screwdriver sprayed with an all-purpose cleaner can pick up hidden dirt.
By keeping your car spotless, both inside and out, you’re extending the lifespan of upholstery, preventing rust, and maintaining resale value. Furthermore, a clean and tidy interior significantly enhances the daily commute, making it a more pleasant experience for both drivers and passengers alike. This holistic approach to cleanliness is a simple yet powerful way to safeguard your vehicle’s health and your wallet, proving that a little elbow grease truly pays off.
Read more about: Unlock Your Car’s True Value: 10 Essential Trade-In Tactics to Outsmart Dealerships and Maximize Profit

14. **Fixing a Flat Tire**
A flat tire is a common and inconvenient setback, but thanks to advancements in automotive technology, fixing minor punctures in tubeless tires has become a manageable DIY task. This means you don’t always need to call for roadside assistance or visit a tire shop for every small leak. Knowing how to quickly address a flat can get you back on the road sooner and save you unexpected expenses.
Your first step is to locate the source of the leak. Pump up your flat tire and then spray its tread and sidewalls with a mixture of 80 percent water and 20 percent dishwashing liquid. Air escaping from a puncture will create visible bubbles, clearly indicating the problem area. Once you’ve found the spot, mark it with a piece of chalk or a white paint marker, making sure you don’t lose sight of the tiny culprit.
If you find a screw, nail, staple, or an empty hole in the tread of the tire – and crucially, not in the sidewall – that’s a DIY car maintenance job you can tackle. Jack up the vehicle safely and secure it with a safety block under the frame. Carefully pull out the offending object, then use a plug kit along with a tube of tire repair cement to seal the leak. These kits typically come with tools to ream the hole and insert the rubber plug securely.
It’s important to note the limitations of DIY tire repair. If air is leaking where the rubber meets the metal rim, or if the puncture is in the sidewall of the tire, that’s a job for a professional mechanic. These types of damage require specialized equipment to dismount the tire from the rim and remount it with sealing compound or to assess if the tire is simply too damaged to be safely repaired. For simple tread punctures, however, a DIY plug can be a lifesaver, offering immediate savings and convenience.
Read more about: Unlock Your Car’s True Value: 10 Essential Trade-In Tactics to Outsmart Dealerships and Maximize Profit
15. **Maintaining Locks and Latches**
It’s easy to overlook the small mechanisms that facilitate daily vehicle use until they start to fail. Sticking locks, a stubborn hood latch, or squeaky hinges can quickly turn simple interactions with your car into frustrating wrestling matches. Keeping your locks and latches functioning smoothly is crucial for convenience, security, and preventing bigger, more costly problems down the line.
For door locks, especially in older vehicles, the key mechanism can start to get stiff. Don’t wait until your key breaks off in the cylinder! A simple solution is a blast of dry graphite powder. You might need to gently push back the small dust protector flap with a tiny metal nail file to access the lock. A quick pump of the tube will dispense enough graphite. Then, work the lock cylinder with your key several times to distribute the graphite throughout the mechanism. Remember to do this for your trunk lock as well.
The hood latch is another common point of frustration. If your hood doesn’t latch and unlatch easily, it’s highly probable that it’s simply rusty and dry. This issue can be resolved in about ten minutes with two key products: spray rust penetrant and spray lithium grease. Pop the hood and liberally saturate the entire latch mechanism with the rust penetrant. Latch and unlatch the hood several times to allow the penetrant to work its way in and free up any seized components until the mechanism works smoothly.
Since rust penetrant isn’t designed for long-term lubrication, you’ll need to follow up with a more durable lubricant. Open the hood again and spray all the moving parts of the latch with white lithium grease. This provides lasting lubrication, ensuring the mechanism remains supple and responsive. Latch and unlatch the hood a few more times to work the grease in, and you’re good to go. These small, targeted maintenance tasks eliminate daily annoyances and contribute significantly to your vehicle’s overall reliability and usability.
Read more about: Your Definitive Guide to Long-Term Car Storage: Protecting Your Vehicle Through Travel and Winter
There you have it—a comprehensive guide to tackling an array of car maintenance tasks without needing to consult a professional or invest in specialized tools. From the initial lifeblood of your engine to the smallest details that impact your daily convenience, empowering yourself with these DIY skills means more money in your pocket and a deeper understanding of your vehicle. Remember, big breakdowns often start with tiny, ignored problems. A routine glance at fluid levels, tire pressure, brake pads, or a quick fix for a sticky latch can truly go a long way in preventing chaos and the surprise repairs that drain budgets. So roll up your sleeves, embrace the satisfaction of a job well done, and keep your ride running smoothly and efficiently for years to come.


