

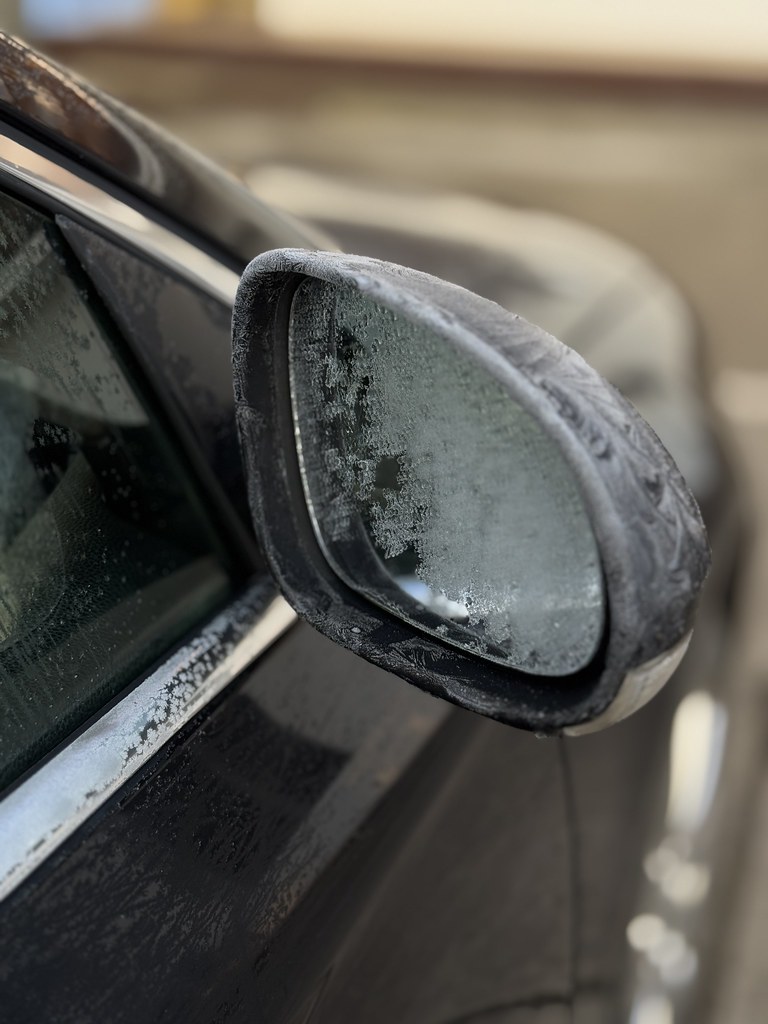
Have you ever found yourself staring at a broken or cracked car side mirror, wondering how it got there and what on earth to do next? Whether it was a minor parking mishap or a mysterious act of vandalism, a damaged side mirror can be both frustrating and dangerous. Luckily, replacing your car’s side mirror doesn’t have to be a complex task. Imagine the satisfaction of fixing it yourself and saving money on repair costs.
Driving with a broken car mirror is unsafe, as it limits your peripheral vision, which can put you, your passengers, and other road users at risk. It is actually hard to drive without a mirror even if you do not use them often. When it is gone, it makes changing lanes and merging unsafe and difficult, as automotive expert Chris “Moose” Pyle notes. This comprehensive guide will walk you through 13 simple, actionable steps to replace your car’s side mirror efficiently, empowering you with the confidence to tackle this task head-on and get back on the road safely.
From determining the right repair method to performing the final adjustments, we’ll break down each stage into manageable, sequential steps. Our aim is to equip you with the knowledge and confidence to restore your car’s functionality, ensuring a clear view and peace of mind on the road. Ready to dive into the process and enhance your DIY skills? Let’s get started.

1. **Understand Your Repair Needs: Glass-Only vs. Entire Assembly**The first crucial step in addressing a broken side view mirror is to determine the extent of the damage and, consequently, the method of repair you’ll need. This initial assessment will guide your entire project, ensuring you purchase the correct parts and avoid unnecessary work. There are essentially two ways to deal with a broken side view mirror: you can replace just the glass, or you can replace the entire mirror assembly. Making the right choice upfront will save you time, money, and frustration down the line.
To determine if your vehicle mirror is a candidate for glass only, a thorough examination of the existing mirror is essential. Carefully look for damage not just to the glass itself, but also to the motor or any cracked retainers that hold the glass in place. The mirror glass is typically attached to a plastic backing plate, and you can replace just the glass if this backing plate or the motor mechanism remains undamaged. If only the glass is cracked, this simpler and often less expensive repair is usually your best bet.
However, there are exceptions and nuances to consider. Some companies simplify the process by selling the replacement side mirror glass already attached to the backing plate. In these applications, the repair becomes much more straightforward: you simply unsnap the broken glass and backing plate from the mirror assembly and then snap on the replacement unit. Therefore, if your existing backing plate *is* damaged, or if you prefer a simpler installation, checking with suppliers for a glass-and-backing-plate product is a wise move. This ensures that you’re well-prepared for whatever scenario your mirror presents.

2. **Gather Your Tools and Materials: The Essential Toolkit**Before embarking on any DIY automotive repair, proper preparation is paramount. Having all the necessary tools and materials at hand not only makes the job smoother but also prevents frustrating interruptions midway through the process. A well-stocked toolkit is your best friend when tackling a side mirror replacement, ensuring you can confidently address each step without scrambling for forgotten items. This proactive approach significantly enhances efficiency and reduces the overall complexity of the task.
Start by acquiring the replacement side view mirror or replacement glass itself, making absolutely certain it matches your car’s specific make and model. Beyond the mirror, you’ll need a selection of basic hand tools: flathead and Phillips screwdrivers are almost always required, and a socket set will likely come in handy for various bolts. Depending on your vehicle’s design, you might also need Torx bits, so it’s good to have a set available just in case.
For accessing hidden fasteners and delicate trim pieces, a trim removal tool is invaluable; it helps prevent damage to your vehicle’s interior. Masking tape will protect surrounding paintwork, and electrical tape is crucial if your mirror is powered or heated, allowing for secure re-connections. Finally, prioritize your personal safety by having safety gloves and protective eyewear readily available. These items are not optional, especially when dealing with potentially sharp broken glass.
Read more about: The DIY Do-Nots: 14 Home Repair Shortcuts That Drive Pros Crazy (And Cost You Later!)
3. **Source the Right Replacement Part: Glass or Full Assembly**Once you’ve determined whether you need to replace just the mirror glass or the entire assembly, the next critical step is sourcing the correct replacement part. Driving with a broken side-view mirror is not only unsafe, limiting your peripheral vision and putting yourself and others at risk, but it also warrants prompt attention. Whether you choose to replace it yourself or have an auto shop do it, finding the right component is non-negotiable for a successful repair.
If your side-view mirror is cracked, chipped, or broken, and you’ve decided a glass-only replacement is appropriate, many companies sell replacement glass. It’s imperative to know exactly what you’re looking for. Begin by examining the mirror to determine whether the glass is glued to the power motor plate or if it is mounted in its own frame. If you’re unsure, online sources or a shop manual can clarify if the replacement glass is sold standalone or already glued into a frame with a backing plate.
For those requiring a full mirror assembly, you have options beyond the dealership. While OEM mirror assemblies from a dealer can be quite expensive, aftermarket replacements from online sellers offer a far less expensive alternative. Regardless of your choice, be aware that you will likely have to paint the mirror yourself or pay a body shop to paint it, as “NOBODY sells new prepainted mirrors.” Make sure the replacement assembly has the same features as your broken mirror, such as auto-dimming, heating, turn signals, or blind spot detection lights, to maintain your vehicle’s full functionality.
4. **Prepare for Glass-Only Replacement: Removing Old Glass, Adhesive**If your assessment indicates that only the mirror glass needs replacing, this process can be surprisingly straightforward, provided you approach it with caution and the right technique. The challenge often lies in safely removing the broken pieces and preparing the surface for the new glass. This step is critical for ensuring a clean, secure bond for your replacement mirror and preventing any lingering hazards from sharp fragments.
When your side view mirror glass is glued directly to the power window plate, you’ll face the task of removing the broken pieces and thoroughly scraping off the old adhesive. This is often described as the hardest part of the job due to the precision and safety required. Begin by prioritizing safety: wear eye protection and robust leather gloves to shield yourself from sharp shards. To contain the debris, cover the floor with a tarp or drop cloth, as pieces of glass can break off and scatter during removal.
Use a small pry bar to carefully dislodge the larger broken pieces. Once the bulk of the glass is removed, employ a putty knife to meticulously scrape off the old adhesive. A clean, smooth surface is essential for the new glass to adhere properly, so take your time with this scraping process. For mirrors where the glass is glued into a frame, the process differs; you shouldn’t bother removing the broken pieces individually. Instead, the frame itself will unsnap from the power mirror motor assembly, often making this a less labor-intensive removal. If you’re uncertain about how the frame unsnaps, consulting a shop manual is highly recommended to avoid accidental damage.
5. **Install New Mirror Glass: Adhesion Methods, Framed Glass**Once the old, damaged mirror glass has been safely removed and the surface properly prepared, the exciting part begins: installing your new, pristine mirror glass. The method of installation will largely depend on whether you’re working with plain replacement glass that needs adhesive, or a framed glass unit designed to snap into place. Ensuring a secure and lasting attachment is key to restoring full functionality and safety to your vehicle.
For installing plain glass, it’s important to understand the best adhesion practices. Some replacement glass might come with double-sided tape, but the expert advice is clear: “Do NOT rely on double-sticky backed tape. It will fail after a few years and the glass will fall off.” Instead, invest in a high-quality glass adhesive or rubber adhesive from any reputable auto parts store. These specialized adhesives are formulated to withstand the elements and vibrations of driving, providing a much more durable bond. Crucially, “Do NOT use household silicone adhesive; it won’t stand up to the elements.”
If your replacement is a framed glass unit, the installation becomes considerably simpler. In this scenario, the new glass comes pre-attached to its own backing plate or frame, designed for a direct fit. You can simply snap the new glass into the power mirror head or motor assembly. This design eliminates the need for messy adhesives and scraping, making it a quicker and cleaner installation. Always ensure you hear a definitive “snap” or “click” to confirm that the new unit is securely seated within the mirror housing, ready to provide a clear view of the road behind you.

6. **Prepare a Replacement Assembly for Installation: Painting and Pre-checks**If your repair involves replacing the entire side view mirror assembly, there’s a crucial step that often gets overlooked: preparing the new unit for installation, particularly regarding its finish. Unlike many other auto parts, “NOBODY sells new prepainted mirrors.” This means you’ll typically receive a plain plastic mirror assembly, requiring you to either paint it yourself or have a body shop match it to your vehicle’s color. This preparation is vital for aesthetics and long-term durability.
Painting a replacement side view mirror yourself can be a straightforward process with the right steps. Begin by masking off the mirror glass with painter’s tape to protect it from paint. Next, thoroughly wipe the plastic surface with alcohol to remove any fingerprints, grease, or contaminants that could interfere with paint adhesion. Hang the mirror in a dust-free location to prevent imperfections. The critical first coat is a plastic-compatible primer; apply this evenly and allow it to dry completely according to the manufacturer’s instructions before proceeding.
Once the primer is dry, apply a small can of spray touch-up paint, using your vehicle’s color code for an exact match. Apply this in thin, even coats, waiting the recommended “flash time” between each application. Finish with a clear coat layer to protect the paint and provide a factory-like gloss. Allow the paint to dry completely – and we mean *completely* – before you even think about installing the new mirror. If you’re not comfortable with painting, consider leaving it plain plastic or searching online junkyards for a used mirror in the right color to avoid this step entirely.
7. **Consult Your Vehicle’s Shop Manual: The Ultimate DIY Guide**While this guide provides comprehensive steps for replacing your side mirror, there’s one resource that stands above all others for vehicle-specific details: your car’s shop manual. These manuals are the authoritative, expert-backed guides to your vehicle’s construction and repair processes, offering invaluable insights that general instructions cannot. They are designed to empower you with precise, model-specific information, making complex tasks significantly easier and more accurate.
Consulting a shop manual is particularly important when you’re unsure how to remove specific components, such as the old mirror or interior trim panels. Different vehicles have varying designs for fasteners, wiring harnesses, and attachment points. A shop manual will show you exactly “where the hidden fasteners are and the order of removal,” preventing accidental damage and streamlining the process. This specific knowledge is critical, especially since “not all door panels come off in the same way.”
The good news is that accessing a professional shop manual is easier than you might think. Websites like Alldatadiy.com and eautorepair.net are excellent online sources for these manuals. You might even find that your local public library offers access to online shop manuals, making this vital resource readily available. Investing in or accessing a shop manual will still allow you to “save a lot of money on this repair, even after paying for a shop manual,” by avoiding costly mistakes and confidently performing the repair yourself. It truly is the difference between guessing and knowing.
Read more about: Decoding the Decay: How Rust Destroys Classic Car Value and What Every Enthusiast Must Know

8. **Access the Mirror’s Mounting Hardware**Having armed yourself with the right parts and invaluable shop manual insights, the next step is gaining access to the mirror’s mounting hardware. The approach here largely depends on your vehicle’s mirror type. For cars equipped with manual mirrors, the process is generally simpler, often bypassing the need to remove the entire door panel.
If your car has a manual mirror, you can probably skip that extensive step and simply pop off the mirror trim panel. This smaller interior cover typically conceals the three retaining screws that hold the mirror in place. Use a trim removal tool for this task, as it’s designed to gently dislodge plastic trim without causing unsightly scratches or damage to your vehicle’s interior. Once this trim piece is off, the mounting bolts become visible and accessible.
However, if your vehicle features a power mirror, accessing the electrical connector and retaining fasteners will likely require the removal of the interior door trim panel. This is because, on some vehicles, these crucial components are situated behind the panel itself. While this might seem like a more involved step, it’s a common procedure for automotive repairs and entirely manageable with the right guidance.
Read more about: Unveiling the Past: Simple Secrets to Authenticating Original Paint on Your Vintage Vehicle
9. **Carefully Remove the Interior Door Trim Panel (if required)**For those with power mirrors, removing the interior door trim panel is often an essential part of the process. While it might appear daunting at first, this step is designed to be performed for various servicing needs, from window mechanisms to door handle repairs. The key to a successful, damage-free removal lies in understanding where the hidden fasteners are located.
Start your search for screws within the armrest area, looking closely in the finger pull or under the armrest itself. Don’t overlook behind speaker grilles, as screws can often be concealed there. If you spot a round cover that doesn’t seem to serve any obvious purpose, there’s a strong chance it’s a decorative vanity cap (DVC) hiding a screw beneath. Using a “hooked pick,” gently pry off these DVCs to reveal the hidden fasteners.
After removing all visible and hidden screws, it’s time to tackle the Christmas tree–shaped fasteners that secure the trim panel to the door. There’s no universal pattern for these, so you’ll need to carefully feel around the edge of the trim panel, slowly prying as you go. As you locate each fastener, insert your trim panel removal tool behind it and pop it out of its hole. This methodical approach minimizes the risk of breaking clips or damaging the door panel, which is often made of fragile plastic.
Once all fasteners are dislodged, lower the window and carefully lift the entire trim panel up and out. Make sure to check both the trim panel and the door to confirm all fasteners came out correctly. If any fasteners were damaged during removal, it’s wise to get proper replacements from an auto parts store before reassembly, ensuring a secure fit later on.
10. **Disconnect Electrical Connections and Remove Old Assembly**With the mirror’s mounting hardware and electrical connections now exposed, the next critical phase is to disconnect the wiring and remove the damaged mirror assembly itself. Prioritizing safety, especially when working with electrical components, is paramount. Always ensure your car’s ignition is off to prevent any electrical mishaps before you begin, and while disconnecting the battery is generally not required for just the mirror, it’s a good practice to turn the ignition off when working with any electrical connectors, as noted by experts.
Locate the electrical cable running from the mirror assembly. Depending on your vehicle’s design, this connector may be accessible without removing the full door panel, but often it requires the panel to be off to reach it. Carefully disassemble the mirror’s electrical connector, typically by pressing release tabs or gently pulling the components apart. A steady hand is crucial here, as yanking can damage the wires or the connector itself, potentially leading to further electrical issues down the line. If your mirror is heated via electrical components, you will need to use pliers to disconnect the wiring safely.
Once the electrical connection is safely undone, turn your attention to the mirror mounting screws. These are usually two or three bolts holding the mirror firmly to the inside of the door. Use the appropriate screwdriver or socket wrench to remove these fasteners. Keep a firm grip on the mirror assembly as you remove the last screw, preventing it from dropping and causing further damage. With the bolts removed, the broken mirror will be free, allowing you to carefully pull it away from the car and set it aside, ready for its replacement.
Read more about: Expensive Headaches: 11 Critical Engine Problems That Demand Immediate Attention to Avoid Major Repairs

11. **Secure the New Mirror Assembly to the Vehicle**Now comes the satisfying part: installing your freshly prepared replacement mirror assembly. Ensuring a precise fit and secure attachment is key to restoring your vehicle’s appearance and, more importantly, its safe functionality. Before beginning, make sure you have the correct replacement mirror, verified to match your car’s make and model and equipped with all the same features as your old one, such as heating, turn signals, or blind spot detection. Remember, replacing the entire assembly yourself can save you significantly compared to dealership prices, making this DIY effort truly worthwhile.
Carefully align the new mirror assembly with the mounting holes on the inside of the door. Take your time to ensure all the holes line up perfectly before inserting the screws or bolts. Once aligned, insert the mirror mounting screws and tighten them with your screwdriver or socket wrench. It’s important to tighten them securely but avoid over-tightening, as this can crack the mirror housing or the mounting points, undermining the integrity of your new installation.
With the mirror physically secured, it’s time to reconnect its electrical lifeblood. Align the electrical connector from the new mirror with its counterpart in the car’s door harness. Gently push them together until you hear a definitive “click” or “snap,” indicating a secure and proper connection. This crucial step ensures that all your mirror’s power functions, such as remote adjustment, heating, or integrated turn signals, will operate correctly once power is restored, giving you complete control.
Read more about: Beyond the Hype: Unpacking 15 Infamous Rides That Earned a ‘Jerk Car’ Reputation Among Enthusiasts

12. **Reassemble Door Panels and Trim**Having successfully installed and connected your new mirror, the next logical step is to reverse the disassembly process and reassemble the door panels and trim. This not only restores your car’s interior aesthetics but also secures any underlying wiring and components. Remember to work methodically, just as you did during removal, to ensure everything fits snugly back into place, preventing future rattles or loose components.
If you removed the entire door trim panel, carefully lift it back into position. Align the panel’s clips and fasteners with their corresponding holes in the door. Use your fist or, as recommended by experts, a small rubber mallet to gently reinsert the Christmas tree–shaped fasteners, ensuring they are firmly seated without damage. Next, replace any screws that were hidden behind decorative vanity caps or in obscure recesses, starting with the armrest and any speaker grilles.
Reinstall the door handle bezel, checking for any retaining screws. If there weren’t any, it likely snaps into place; use a small flat-blade screwdriver to carefully engage the snaps. Finally, if your mirror assembly only required removing a small interior trim piece covering the mirror bolts, snap this back into place, ensuring it sits flush with the rest of the door panel and completing the interior restoration. A well-reassembled door panel will look and feel just like new.
Read more about: From Concept Car Catastrophe to Production Car Panic: 14 Vehicles That Redefined ‘Awful’ on the Asphalt
13. **Test Functionality and Perform Final Adjustments**You’re almost there! Before you declare the job complete, it’s absolutely crucial to perform a thorough functionality test and make any necessary final adjustments. This ensures your new side mirror is not only securely installed but also provides optimal visibility and safety for your driving. Skipping this step could lead to significant inconvenience or even hazards on the road, compromising your peace of mind.
Turn your vehicle’s ignition on, but you don’t necessarily need to start the engine. Begin by testing all the power functions of your new mirror. Use the car’s control panel to adjust the mirror’s position (horizontally and vertically), checking if it moves smoothly and responds accurately to your inputs. If your mirror has heating elements, turn them on and feel for warmth. Similarly, test any integrated turn signals or blind spot detection lights to confirm they are operational and properly integrated.
Once you’ve confirmed all electrical functions, it’s time for the all-important manual adjustment. Sit comfortably in the driver’s seat and adjust the mirror to provide the clearest possible view of the road behind you. The goal is to maximize visibility, ensuring you can effectively see beyond the sides of your vehicle and cover those critical blind spots, as automotive expert Chris “Moose” Pyle emphasizes the danger of driving without proper peripheral vision. Tilt the mirror until you achieve a wide, unobstructed perspective.
Finally, give the mirror a gentle wiggle to test its stability. It should feel firm and securely attached, without any noticeable wobbling or excessive movement. If you detect any looseness, re-check the mounting screws and tighten them gently. A stable mirror provides a steady, reliable view while driving, contributing significantly to your safety and peace of mind on every journey. With these final checks complete, you’ve successfully replaced your car’s side mirror!
Read more about: The Designer’s ‘Shame’ or Strategic Brilliance? Unpacking 9 Aesthetic Choices That Masterfully Slash Production Costs
Replacing a broken side-view mirror might have seemed like a daunting task when you first started, but by breaking it down into these manageable, practical steps, you’ve demonstrated that a confident DIY approach can yield impressive results. Not only have you saved yourself the cost and inconvenience of a professional repair, but you’ve also gained valuable experience and empowered yourself with new automotive skills. Getting back on the road with a fully functional, properly adjusted mirror means restored peripheral vision, enhanced safety, and the satisfaction of a job well done. Drive safely, and enjoy your clear view!


