


Got a dent in your car door and feeling annoyed every time you see it? You’re not stuck with it forever. Have you ever looked at your car and felt a pang of frustration upon spotting a dent in the door? You know how it feels to see a blemish on your beloved vehicle, ruining its sleek appearance, whether it’s a small ding from a parking lot mishap or a deeper dent.
But here’s the good news: you can fix it yourself. Yes, with just a few simple tools and techniques, you can restore your car door to its former glory. Imagine the satisfaction of smoothing out that dent without having to visit a costly repair shop. These DIY approaches work without special skills and can restore your car’s look while saving money on expensive body shop repairs.
You’ll discover easy-to-follow steps that will guide you through the process. Whether you’re dealing with a minor ding or a more noticeable dent, you’ll learn how to tackle it with confidence. This guide will walk through proven DIY techniques, explain when each method works best, and show you how to finish the repair so your car looks as good as possible. Keep reading to find out how you can turn that frustrating imperfection into a quick DIY project; your car deserves to look its best, and you’re just a few steps away from making that happen!
1. **Understanding Car Door Dents: Types and Causes**Before you jump into fixing anything, it’s absolutely crucial to understand the type of dent you’re up against. Not all dents are the same, and knowing the specific type will help you decide if a DIY fix is possible or if professional repair is smarter. This initial assessment ensures you pick the most effective method, saving you time and preventing potential mishaps down the line.
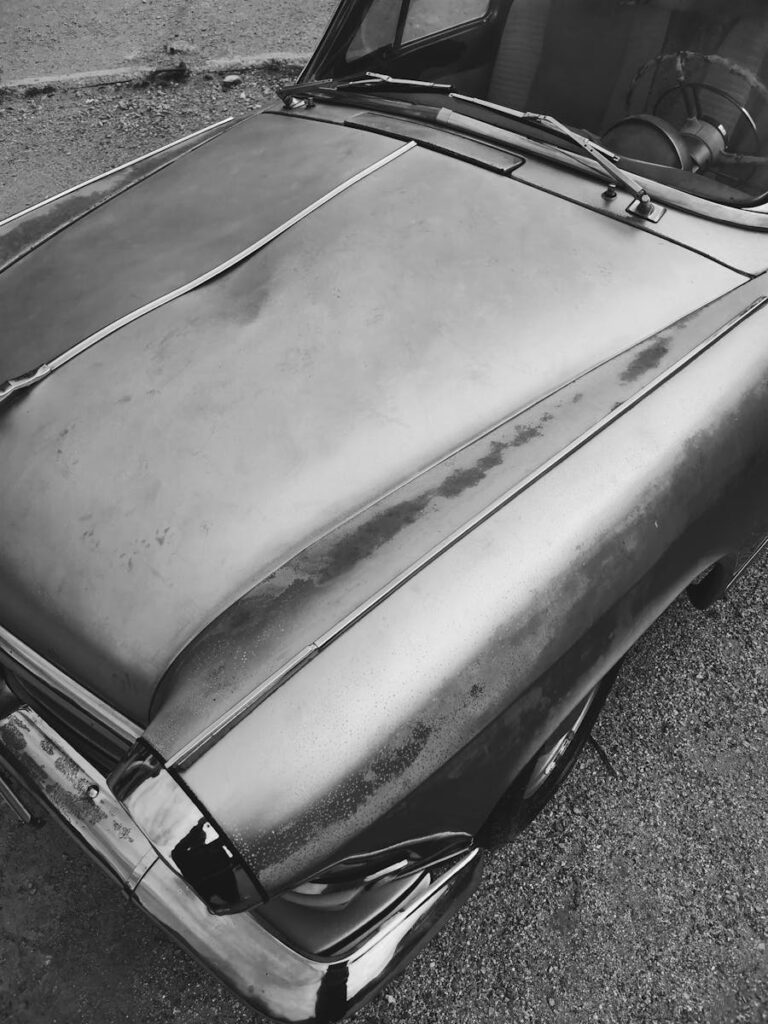
The world of car dents can be broken down into a few common categories. Small dings, often caused by shopping carts or other car doors in tight parking spaces, are known as “shallow surface dents.” These are the most prevalent, result from light bumps, and typically don’t break the paint, making them the easiest targets for a home repair project.
You might also encounter “Round or dimple dents,” which frequently appear after incidents involving hail, balls, or stones. While they may appear minor, their depth can sometimes make them surprisingly stubborn to remove without the right approach. Then there are “Crease dents,” which occur when something long scrapes across your car’s surface, bending the metal sharply. These are generally harder to fix at home, but with the right tools and patience, even these can be tackled.
Understanding what caused the dent in the first place offers valuable insight into how tricky it might be to fix and whether the paint or underlying panels are also affected. Car doors take hits in everyday life from parking lot bumps, hailstorms, or even careless door swings. Knowing these common culprits helps you not only identify the dent type but also consider future prevention strategies, which will be covered later in this comprehensive guide.
Read more about: The Untapped Car Insurance Loophole That Could Slash Your Premiums by Up to 45 Percent This Year

2. **Assessing the Damage Before Repair**Once you have a general understanding of dent types, your next critical step is to carefully assess the specific damage on your car door. This isn’t just about a quick glance; it’s about meticulously checking how big and deep the dent is, which will directly impact the feasibility of a home repair. Small, shallow dents are significantly easier to fix at home, whereas larger or sharp creases usually scream for professional attention.
A key detail to scrutinize is the paint around the dent. This is a crucial indicator. If the paint isn’t cracked or chipped, many DIY methods can work wonders, often leaving a flawless finish. However, if the paint is damaged, attempting DIY repairs could expose bare metal, which quickly leads to rust or peeling, creating a much bigger and costlier problem. Damaged paint often necessitates expert repair to prevent these issues and ensure a clean, lasting result.
The dent’s location on the door also plays a significant role in your repair strategy. Is it near the edge? Dents in these areas are often harder to fix because the metal is typically stronger and more reinforced, making it challenging to reposition. Conversely, dents in the middle of the door are generally easier to reach and work on. Pay attention to any curves or body lines near the dent; these features can complicate the repair, with flat areas being simpler and curved areas demanding more care.
This thorough assessment helps you choose the right approach, empowering you to make an informed decision. Always assess the dent size, depth, and paint condition before committing to a method. If the damage is deep, the metal is stretched, or sharp creases are present, DIY tricks often won’t cut it. In such cases, forcing it could actually make things worse, so knowing when to stop and call a professional is as vital as knowing how to start your DIY journey.
Read more about: Beyond the Road: Unpacking the Complex Journey of EV Battery Recycling and Its Future

3. **Gathering Your Tools and Materials**Before you dive headfirst into the satisfying process of dent removal, ensuring you have the right arsenal of tools and materials at hand will make your DIY project much smoother, more effective, and ultimately, more successful. Many common dent repairs require only basic supplies, and the good news is you might already have many of these items conveniently at home, making this an incredibly cost-effective endeavor.
For methods that rely on manipulating metal through temperature changes, you’ll definitely need a hair dryer or a heat gun to gently warm the metal, making it flexible. Complementing this, a compressed air can is essential for rapidly cooling the heated area, which often coaxes the dent to pop right back out. These two items form a dynamic duo for many shallow dents.
When it comes to suction-based remedies, a simple plunger can work wonders. Opt for a clean, small cup-type plunger, as it often creates a better seal and is more effective for car dents than a large toilet plunger. Should you decide to explore more advanced DIY options for stubborn imperfections, a dedicated suction cup dent puller kit or a glue puller kit can provide greater control and pulling power, specifically designed for various dent profiles.
Don’t overlook other useful items that ensure a clean and safe repair. A rubber mallet or a soft hammer can be invaluable for gently tapping dents out from the inside. Sandpaper will smooth any rough surfaces after the dent is gone, while body filler can conceal minor imperfections. Matching spray paint or touch-up paint is crucial for a clean, blended finish. Always remember to have clean rags for wiping away dirt, safety goggles to protect your eyes, and gloves to keep your hands safe, especially when handling hot tools or extremely cold materials like dry ice. Preparedness is indeed the key to a stress-free and successful DIY car repair.
Read more about: Redefining Defense: The 500 kW Laser and the Global Surge in High-Energy Weaponry Development
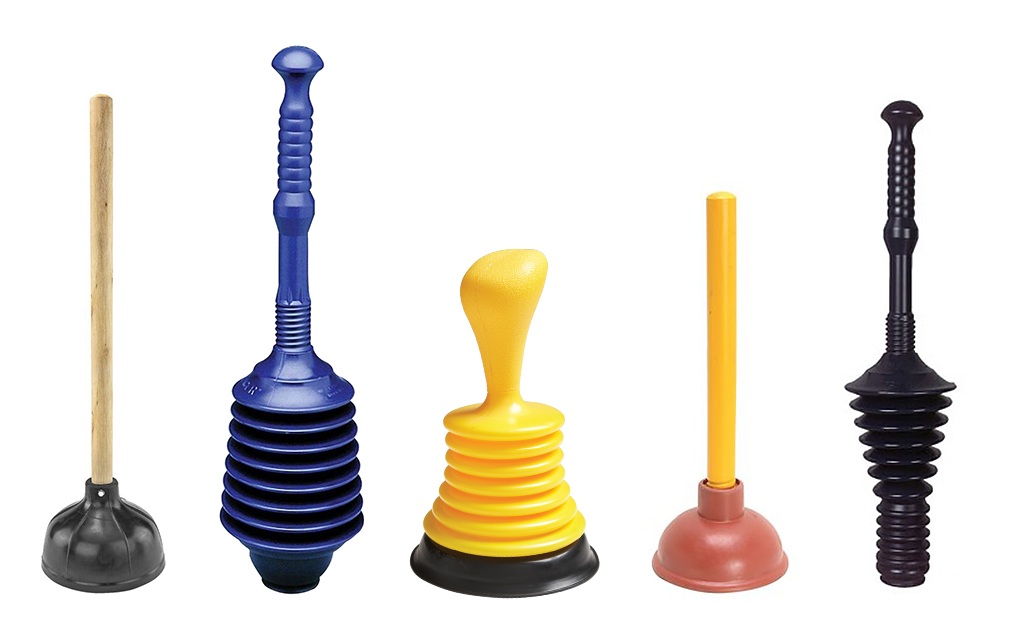
4. **The Plunger Method**Believe it or not, one of the simplest and most accessible tools for fixing a small dent in your car is a regular household plunger. This method is often the first and easiest technique to try at home because it doesn’t require any special equipment, making it an essentially free solution if you already own one. It proves surprisingly effective for shallow dents located on wide, flat panels like car doors, hoods, or fenders.
The underlying principle of the plunger method is straightforward: it creates suction. When applied correctly, that powerful suction can gently pull the dented metal outward, encouraging the surface to restore itself closer to its original shape. For this suction to work optimally, the plunger needs to form a tight, airtight seal with the car’s surface. To enhance this seal, splash a little water or soapy solution on both the rubber cup of the plunger and the dented panel; this simple trick reduces air gaps and helps generate stronger, more effective suction.
To begin, ensure your car is parked in a safe spot with ample light, allowing you a clear view of the dent. Thoroughly clean the door with a cloth to remove any dirt or debris, as grit can potentially scratch the paint during the process. Next, carefully position the plunger so it completely covers the dent. For larger dents, a standard toilet plunger might suffice, but for smaller, more defined dents, a sink plunger with a narrow cup can be more effective as it often creates a superior seal.
With the plunger firmly in place, push it in firmly to expel air and create that vital vacuum, then pull back quickly and steadily on the handle. It’s important to avoid jerky, sudden motions. Instead, gentle, consistent pulls give the metal the best chance to move back into place without stressing the paint. It’s rare for the dent to pop out on the very first attempt, so be prepared to repeat the process several times, slightly repositioning the plunger as needed, until you observe a noticeable improvement. Afterwards, inspect your results from various angles and clean the area thoroughly.
Read more about: Unleash Your Inner Mechanic: 15 Essential DIY Car Hacks to Save a Fortune on Maintenance

5. **Hot Water & Hair Dryer Method**The fascinating property of metal – its expansion when heated and contraction when cooled – is ingeniously harnessed in the hot water and hair dryer method. This technique stands as a popular and highly accessible DIY solution for small to medium dents, especially those where the paint remains intact without any cracks or chips. It’s an effective approach that leverages common household items you likely already own.
To kick off this repair, a clean surface is paramount. Thoroughly clean the dented area and its surroundings using a damp cloth or a mild car cleaner, then ensure it’s completely dry with a microfiber towel. This meticulous preparation guarantees even heating and prevents any dirt from hindering the repair process or causing further blemishes.
Next, bring a pot of water to a boil until it’s piping hot. Exercise extreme caution to avoid spills, as boiling water can cause burns. Carefully pour the hot water directly over the dented area. The immediate application of heat will begin to soften the metal, making it more pliable. Allow the hot water to sit on the surface for a few seconds, giving the heat sufficient time to penetrate the metal.
Immediately following the hot water application, plug in your hair dryer and switch it to its highest heat setting. Hold the dryer approximately six inches away from the dent and continuously move it around the heated area for about one minute. The objective here is to further warm the metal, increasing its flexibility. Crucially, do not touch the metal directly to gauge its temperature, as it will be very hot. Keep the dryer in constant motion to distribute the heat evenly and prevent any potential damage to your car’s paintwork.
Once the panel is thoroughly heated, you have a few options to encourage the dent’s reversal. If you can access the back of the dented area from inside the door panel, you can try pushing gently outward. Alternatively, you might use a soft tool or even your gloved hand to gently pull the metal outward, coaxing it back to its original shape. For optimal results, combining this heating step with a sudden cool, often from compressed air (a technique we’ll explore further), can work wonders by causing rapid contraction and making the dent pop out. You might need to repeat the entire heating process a couple of times for the best outcome, especially on small to medium dents located on flat metal surfaces like doors or hoods.
Read more about: Unveiling the Vortex: A Deep Dive into Dyson’s Journey of Ingenuity and Global Impact

6. **Dry Ice Application for Dent Removal**While heat brilliantly makes metal expand and become flexible, the opposite extreme – intense cold – can work equally astonishing wonders by causing metal to contract rapidly. This fascinating principle is the core of the dry ice application trick, a highly effective and visually dramatic method for popping out certain types of dents. It’s particularly adept at resolving shallow, rounded, or dimple dents, often causing the metal to snap back into its original form with an audible “pop.”
Before you even think about handling dry ice, prioritizing safety is non-negotiable. Dry ice is essentially frozen carbon dioxide and is extremely cold, boasting a temperature of -109.3°F (-78.5°C). Direct contact with your skin can cause severe frostbite. Therefore, it is absolutely essential to always wear thick, insulated gloves, such as work gloves or oven mitts, and a mask to prevent inhaling any sublimating fumes, especially in enclosed spaces. Furthermore, always keep dry ice well out of reach of children and pets, and ensure you’re working in a well-ventilated area. If storing it, choose a cool, safe place that is not airtight, as the gas needs to escape.
Once you’ve meticulously taken all necessary safety precautions, your first practical step is to thoroughly clean the car door. Use a suitable cleaner to make it completely free of dirt, grease, or wax. A clean surface is vital as it allows for uniform cooling and ensures the dry ice can effectively interact with the metal without interference.
Next, carefully take a piece of dry ice, holding it firmly with your gloved hands. Gently rub it directly and deliberately on the dented area. Move the dry ice in small, continuous circles over the dent for approximately 30 to 60 seconds. The rapid and intense cooling from the dry ice will cause the metal to contract almost instantly and with considerable force. You might hear a distinct popping sound, which is a satisfying indicator that the dent is successfully moving back into place. If the dent doesn’t fully pop out on the first try, allow the metal to return to ambient temperature for a few minutes before repeating the application. This method truly leverages the natural properties of metal to your advantage, offering a powerful, yet surprisingly simple, DIY solution.
Read more about: Unleash Your Inner Mechanic: 15 Essential DIY Car Hacks to Save a Fortune on Maintenance
7. **DIY Dent Repair Kits: Stepping Up Your Game**When basic household items aren’t quite cutting it, or you’re ready for a more targeted approach, DIY dent repair kits become your new best friend. These kits are specifically designed for car dents, offering specialized tools that provide greater control and pulling power than improvised solutions. They represent a significant step up from simple methods, equipping you to tackle more stubborn or complex imperfections. Think of them as your secret weapon for those dents that need a little extra coaxing.
These kits typically come in a few main types, each with its own mechanism. Puller kits often use strong suction cups, similar in principle to a plunger but with enhanced grip and leverage. Glue puller kits, on the other hand, utilize a special hot glue to attach small tabs directly to the dented surface. Tapping kits sometimes accompany these, providing tiny hammers or knock-down tools to meticulously refine the metal back into place from the outside.
Applying these kits effectively begins with a spotless surface. Thoroughly clean the dented area to ensure the best possible adhesion for glue tabs or suction cups. Once clean, carefully attach the chosen tool to the dent, whether it’s pressing a suction cup firmly or bonding a glue tab with precision. Many kits provide step-by-step instructions, which you should always follow diligently to achieve optimal results and avoid any mishaps.
With glue pullers, you’ll apply the specialized hot glue to the pulling tab, press it onto the dent, and allow it a minute to set securely. Then, using the kit’s leverage tool, you’ll gently and steadily pull the dent outward. This methodical approach is key; avoid sudden, forceful tugs, as patience is truly a virtue here. For tapping kits, use soft, controlled taps to gradually work the metal back into its original contour, constantly checking your progress.
These versatile kits are especially effective on shallow to medium dents that haven’t responded to simpler methods. They shine on flat metal surfaces like doors, hoods, and trunks, helping to restore the sleek lines of your vehicle. Remember, safety is paramount: always wear gloves and eye protection, particularly when dealing with hot glue or using any tapping tools, ensuring a safe and successful repair every time.

8. **The Hair Dryer and Compressed Air Method: A Thermic Transformation**Beyond the hot water technique, another powerful thermal trick you can employ for dent removal involves the direct application of a hair dryer followed by an immediate blast of compressed air. This method masterfully exploits the metal’s inherent properties of expansion and contraction, creating a rapid, almost instantaneous shift that often coaxes dents to pop right back into place. It’s a clean and efficient DIY solution that harnesses readily available household items.
To begin, ensure the dented area is thoroughly clean and dry. Then, grab your hair dryer and set it to its highest heat setting. Hold the dryer approximately six inches away from the dent and move it continuously around the affected area for about one minute. The objective here is to make the metal warm and flexible, preparing it for the next critical step. Crucially, avoid direct contact with the metal to prevent any potential damage to your car’s paintwork.
Once the metal is sufficiently heated, it’s time for the magic of rapid cooling. Immediately grab a can of compressed air – the kind used for cleaning electronics – and turn it upside down. Spray the dented area directly with the inverted can. This action releases liquid carbon dioxide, creating an intense, localized cold that causes the heated metal to contract almost instantly.
As the metal contracts with such speed and force, you might hear a satisfying popping sound, indicating the dent is moving back into its original position. The quick transition from expansion to contraction is what makes this technique so effective. If the dent doesn’t fully disappear after the first attempt, allow the metal to return to ambient temperature for a few minutes before repeating the heating and cooling cycle.
It’s important to remember safety when handling compressed air; direct skin contact with the extremely cold spray can cause frostbite. Always wear gloves, and ensure you’re working in a well-ventilated area. This method proves most effective on shallow, rounded, or dimple dents located on relatively flat metal surfaces, offering a high success rate for those annoying imperfections that frustrate car owners daily.

9. **Tapping Dents from the Inside: A Gentle Push**Sometimes, the most direct path to fixing a dent is to gently push it out from the inside. This “inside-out” approach is incredibly effective for dents where you can gain access to the back of the car door panel. It allows for more controlled and precise manipulation of the metal, gradually restoring its original shape without stressing the exterior paint. This method often works best when combined with careful observation and a light touch.
The primary tools for this technique are simple yet effective: a rubber mallet or a soft-faced hammer, often used in conjunction with a wooden block or a specialized plastic knocking tool. The soft nature of these implements prevents further damage to the metal, ensuring you’re reshaping rather than creating new imperfections. The key is to have a clear line of sight and comfortable access to the dent’s underside.
Before you start, you’ll need to remove any interior trim panels or components that obstruct access to the back of the dent. This might involve carefully unfastening screws or clips, so proceed with caution to avoid breaking any delicate parts. Once you have a clear opening, you can position yourself to accurately target the dent from the inside.
With your rubber mallet or soft hammer, begin tapping the dented area from the center outwards. Use light, controlled taps, rather than heavy blows, to gently push the metal back into place. Constantly check the exterior of the door panel to monitor your progress, ensuring you don’t overcorrect and create a new outward bulge. The goal is a smooth, gradual restoration of the surface.
This method is particularly suitable for larger, shallower dents that are easily accessible from behind. It’s a technique that demands patience and a delicate touch, but the payoff is a clean, often seamless repair without the need for external pulling or harsh chemicals. It empowers you to physically manipulate the metal, offering a satisfying and effective solution for specific dent types.
10. **Knowing When to Seek Professional Help: The Smart Decision**While the satisfaction of a successful DIY repair is undeniable, it’s equally important to recognize the limitations of home remedies. Not all dents are created equal, and attempting to fix complex damage yourself can often lead to greater problems, turning a minor issue into a costly nightmare. Knowing when to put down your tools and call in the experts is a sign of a truly savvy car owner.
Several clear indicators suggest it’s time to seek professional intervention. If the dent is particularly large, deep, or features sharp creases where the metal has been significantly stretched or folded, DIY methods likely won’t suffice. These types of complex dents require specialized tools, techniques, and expertise that a typical home garage simply cannot provide. Professionals possess the precise equipment to accurately restore the panel without causing additional damage.
The condition of the paint surrounding the dent is another critical factor. If the paint is cracked, chipped, or peeling, any attempt at a DIY fix can expose the bare metal beneath. This exposure immediately invites rust, which can spread rapidly and lead to extensive, expensive corrosion issues down the line. A professional body shop has the ability to not only repair the dent but also expertly match and reapply the paint, sealing and protecting your car’s surface.
Entrusting your vehicle to professionals for complex dents offers numerous benefits. They have a deep understanding of metalwork, body lines, and paint finishing. Their specialized skills ensure a flawless repair that seamlessly blends with the rest of your car’s body, restoring its aesthetic appeal and structural integrity. This level of precision is difficult to replicate at home, especially for critical areas or intricate bodywork.
Ultimately, making the smart decision to consult a professional for challenging dents saves you time, frustration, and potentially more money in the long run. They prevent further damage, ensure a lasting repair, and protect your vehicle’s overall value. While DIY empowers, knowing when to leverage expert craftsmanship is the hallmark of responsible car maintenance.

11. **Preventing Future Dents: Smart Parking and Protective Accessories**The old adage holds true: prevention is often better, and certainly easier, than a cure. When it comes to car door dents, proactive strategies can significantly reduce your risk of unwelcome dings and scrapes. By adopting mindful parking habits and utilizing smart protective accessories, you can keep your vehicle’s pristine appearance intact and minimize the need for future repairs.
One of the simplest yet most effective prevention methods involves where and how you park. Aim to park away from crowded areas in parking lots, selecting spots that offer more space between vehicles. Avoiding tight spaces reduces the chance of another car’s door swinging into yours. Opting for end spots, when available, limits the number of cars parked directly adjacent to your door, further mitigating risk. Even being cautious with curbside parking helps, as passing traffic can sometimes cause unexpected bumps.
Beyond smart parking, a range of protective accessories can act as a crucial line of defense for your car doors. Door edge guards, for instance, are designed to absorb impacts, shielding the vulnerable edges of your doors from chips and dents. Car covers offer comprehensive protection against minor bumps and scratches, especially when your vehicle is parked outdoors for extended periods. Even parking sensors can help you avoid hitting objects, preventing dents from your own driving.
Consider adding door protectors, particularly in garages or tight parking spaces where you frequently open your car door close to a wall or another obstacle. These simple additions can save you from frustrating and unsightly damage. Consistency in using these preventative measures is key; a moment of care today can prevent hours of repair work tomorrow.
Implementing these easy yet effective strategies will not only safeguard your car doors but also contribute to the overall longevity and appearance of your vehicle. It’s about being vigilant and making small, conscious choices that collectively yield big results in dent prevention.
Read more about: Your Ultimate Guide to Budget Infotainment Upgrades: 7 Smart Ways to Modernize Your Car Tech for Under $2000

12. **Maintaining Your Car’s Overall Appearance and Value: Beyond the Dent**Fixing a dent isn’t just about making an immediate imperfection disappear; it’s an integral part of maintaining your car’s long-term appearance and preserving its resale value. Every blemish, no matter how small, detracts from your vehicle’s aesthetic appeal and can reduce its worth over time. By taking a holistic approach to car care, you ensure that your efforts in dent repair are part of a broader strategy for vehicle longevity.
Regular check-ups of your car’s exterior are vital. Make it a habit to visually inspect your car often, as dust and dirt can easily hide small dents or scratches that, if left unattended, can escalate into bigger problems. Early detection allows for prompt action, preventing minor issues from becoming major, more costly repairs. A visit to a mechanic every few months isn’t just for mechanical issues; they can often spot hidden exterior problems too.
Beyond active dent repair, keeping your car clean and shiny is fundamental. Regular washing and waxing not only make your car look great but also protect its paintwork from environmental damage, which can make it more susceptible to dents and scratches. A well-maintained finish means small dents are more likely to be shallow surface dents, which are easier to fix at home.
Your efforts in proactively preventing dents and diligently repairing them contribute significantly to your car’s overall health and market appeal. A vehicle that looks well-cared for sends a clear message to potential buyers, signaling responsible ownership and meticulous maintenance. This often translates directly into a higher resale value when the time comes to upgrade.
Ultimately, the satisfaction derived from a smooth, dent-free ride isn’t just about saving money on body shop visits. It’s about the pride of ownership, the confidence that comes with a well-maintained vehicle, and the appreciation for your hard work. Keep it looking great with easy fixes and consistent care; your car deserves your attention, and you’ll appreciate the results of your dedication every single day.
Read more about: Unleash Your Inner Mechanic: 15 Essential DIY Car Hacks to Save a Fortune on Maintenance
Safe travels, and enjoy your beautifully maintained vehicle!


