A sagging car headliner is more than just a minor aesthetic inconvenience; it’s a persistent annoyance that can drastically diminish your vehicle’s interior appeal and even hint at deeper issues. That unsightly droop, the fabric detaching from the roof, can make even the most pristine car feel neglected and worn. But before you resign yourself to an expensive professional overhaul or simply live with the visual blight, know this: there are remarkably simple, budget-friendly hacks to tackle this common problem yourself.
Often, the thought of automotive repairs conjures images of complex tools, specialized knowledge, and hefty mechanic bills. However, when it comes to a sagging headliner, the reality is often far more empowering for the average car owner. This guide is crafted to equip you with practical, step-by-step methods to restore your car’s headliner, or even explore smart alternatives, all while keeping your expenses well under the $100 mark. We’re here to turn a frustrating car woe into a satisfying DIY triumph.
From understanding the core function of your headliner and why it sags in the first place, to implementing clever no-removal fixes, we’ll walk you through a series of actionable strategies. Our focus is on efficiency, problem-solving, and providing you with the clear, concise information you need to take control. Get ready to reclaim your car’s interior, save a significant amount of money, and enjoy the satisfaction of a job well done. Let’s dive into the world of headliner rejuvenation!
1. **Unveiling the Enigma: What is a Car Headliner?**At first glance, your car’s headliner might seem like a mere decorative covering, an afterthought in the grand scheme of automotive design. However, this fabric secured to the roof framing, or “headlining,” plays a surprisingly pivotal role in your vehicle’s overall comfort and aesthetics. It’s far more than just a pretty face; it’s a multi-functional component working tirelessly to enhance your driving experience.
A standard car headliner is a sophisticated sandwich of materials, most notably featuring a layer of foam—often polyurethane—bonded to a rigid headliner board. This board, in turn, is meticulously attached to the inside of your car’s roof. This layered construction is precisely what gives the roof a smooth, uniform texture, while also providing critical insulation against outside elements.
The benefits extend well beyond visual appeal. Without this thin but effective layer, your car would be a different environment altogether. Imagine a vehicle parked under a blazing sun; the interior would become significantly hotter without the headliner buffering the heat. Similarly, at highway speeds, wind noise would become far more noticeable, detracting from the peaceful cabin experience you’ve come to expect.
Furthermore, this often- overlooked insulation contributes significantly to the acoustic quality within your vehicle. It helps to absorb noises and improves the sound system’s performance, especially those audio systems customized to particular automobiles’ interiors. So, understanding its function underscores why maintaining your headliner is not just about looks, but about preserving comfort, quiet, and even your in-car entertainment.

2. **The Perplexing Puzzle: Why Car Headliners Start Sagging**Despite its robust construction and crucial role, the car headliner is not immune to wear and tear. One of the most common and frustrating issues car owners face is a sagging headliner, where the fabric becomes loose and separates from its backing board. This condition isn’t just unsightly; it can sometimes become an unavoidable repair because it gets in the way, impacting visibility or just constantly bothering you.
Several factors contribute to this unwelcome phenomenon, often acting in concert over time. A primary culprit is the relentless exposure to heat and sunlight. “Any extreme heat that the car roof is contacted with will result in a sagged and broken headliner. The heat will melt the headliner glue, causing this covered fabric to loosen.” This explains why vehicles in warmer climates or those frequently parked outdoors often experience headliner issues sooner.
Moisture is another formidable foe. “Humidity and leaks can seep into the headliner, causing the foam backing to absorb moisture and lose its shape. This can lead to warping and sagging.” This is particularly true if your car has a sunroof, where seals can degrade over time, allowing water to wick into the headliner material. Regular checks of your rubber seals are a simple preventive measure against this.
Sometimes, the problem can be traced back to the very beginning: “Poor installation. If the headliner wasn’t installed properly in the first place, using insufficient glue or improper techniques, it’s more likely to sag prematurely.” Additionally, “some vehicles may have inadequate waterproofing, allowing water to enter the roof liner foam and deteriorate the adhesive,” highlighting a design flaw that can hasten headliner failure.
Finally, everyday interactions can also play a part. “Drivers with children or pets are also prone to drooping headliners. Since both can play, scratch, or pull the headlining, putting physical strain on it and therefore, speeding up the failing process.” These seemingly minor disturbances, over months and years, can add up to significant strain on the adhesive and fabric, leading to premature sagging.
3. **The Tried-and-True Approach: Old-Fashioned Gluing**When confronted with a sagging headliner, one of the most straightforward and cost-effective methods for restoration is a simple gluing technique. This “old-fashioned gluing” approach is particularly effective if “the fabric is sagged partially, like in a corner or around the edges,” rather than the entire headliner coming loose. It’s a targeted fix that can save you a significant amount of money and effort.
The key to success with this method lies in using the correct adhesive. It’s imperative that “you have to apply a special headlining adhesive because ordinary glue will be of no use.” Standard glues found around the house often lack the heat resistance, flexibility, and bonding power required for automotive interiors, where temperature fluctuations are extreme and materials need to adhere securely to foam and fabric.
For optimal application and even distribution, “A spray can adhesive is likely to be the best solution to apply and distribute the glue evenly.” Spray adhesives designed for headliners offer a fine, consistent mist that helps bond the fabric without oversaturation or creating unsightly hard spots. This even coating is crucial for a smooth finish and prevents the glue from soaking through the fabric, which could lead to discoloration.
Before you begin, ensure the area is clean and free of dust or debris. Carefully pull back the loosened fabric just enough to access both the headliner board and the back of the fabric. Apply the spray adhesive according to the product’s instructions, usually a light, even coat on both surfaces. Allow it to become tacky for a moment, then gently press the fabric back into place, smoothing it out from the center outwards to avoid air bubbles and creases.
4. **Quick-Fix Cavalry: Pinning It Down with Flair**If you’re seeking an immediate, no-fuss remedy for a sagging headliner that requires minimal time and money, the “pin it down” method is a fantastic option. This approach can be surprisingly effective, even “if half of it is coming off,” offering a quick visual improvement and preventing further detachment while you consider more permanent solutions or just live with this stylish fix.
The beauty of this hack lies in its simplicity: “Use sequin pins or anything that serves your purpose.” These small, decorative pins, often used in sewing or crafts, come in various colors and designs, allowing you to choose ones that either blend seamlessly with your interior or add a contrasting, intentional aesthetic touch. The goal is to push the pins through the fabric and into the foam backing board, securing the loose material firmly.
What truly elevates this quick fix beyond a mere repair is the opportunity for personalization. “You can arrange the pins in a pattern to make the headliner look visually pleasing.” Imagine creating geometric shapes, straight lines that complement the car’s existing contours, or even a subtle starburst effect. This transforms an otherwise bothersome sag into a unique interior feature, making your repair a creative statement.
When selecting your pins, opt for ones with relatively flat heads to minimize any protrusion that could catch on hair or clothing. Space them evenly to distribute the tension and ensure a uniform appearance. While this method creates small holes in the fabric, they are typically discreet and do not compromise the structural integrity. It’s an excellent way to quickly restore order to your car’s ceiling without the commitment of adhesive or extensive disassembly.
5. **The Ingenious Solution: Clear-Headed Twist Pins (Saggy Stoppers)**For those looking for a more refined and specialized pinning solution, “clear-headed twist pins,” often marketed as “saggy stoppers,” are an ingenious alternative to traditional straight pins or even some gluing methods. These clever little fasteners are rightly named because they offer a “no-fuss and inexpensive means of putting the headliner in its place,” proving effective even “if the entire headlining is sagging and about to fall on your head.”
A significant advantage of these twist pins over standard tacks or pins is their design, which is specifically engineered to be less damaging. “These clear-headed pins won’t damage the thin headlining board with any holes.” Instead of piercing straight through, they feature a corkscrew-like design that allows them to twist into the fabric and foam backing, creating a secure grip without leaving permanent, noticeable punctures or tears.
This makes them a superior choice, especially for more delicate headliner fabrics. The context highlights this benefit, stating, “It’s a better option than glue or tacks because the latter things may leave you with more costly and complicated problems. As they can damage the fragile fabric if you are not careful with the car headliner repair.” This emphasis on preservation makes twist pins an appealing option for DIYers who want a clean, reversible fix.
Installation couldn’t be simpler: gather the sagging fabric and gently twist the pin into the material until it feels secure against the headliner board. The clear head of the pin makes it blend in discreetly, ensuring the repair is effective without drawing undue attention. For widespread sagging, you’ll want to space them out evenly, typically every few inches, to provide consistent support and achieve a smooth, taut finish.
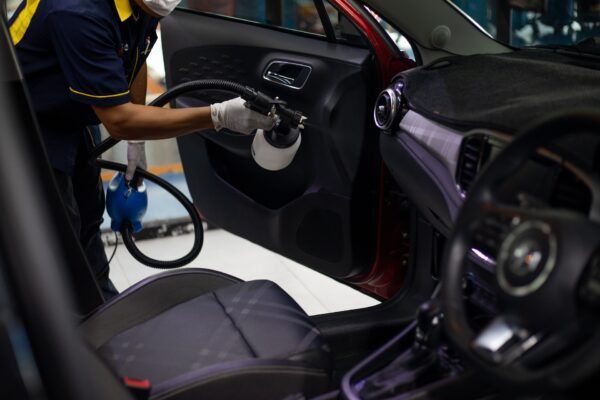
6. **The Power Duo: Steam Cleaner and Paint Roller Combo**Among the arsenal of DIY headliner fixes, the “steam cleaner and paint roller combo” stands out as a unique and surprisingly effective method, particularly suited for specific types of sagging. This ingenious hack focuses on reactivating the existing adhesive, making it pliable enough to re-bond the fabric smoothly to its backing board. It’s a testament to resourceful problem-solving, utilizing common household tools for an uncommon car repair.
The first component of this dynamic duo, the steam cleaner, plays a crucial role in preparing the headliner for reattachment. “The steam cleaner will melt the headliner glue and help it to reattach to its frame.” The gentle heat and moisture from the steam work to soften the old, hardened adhesive, allowing it to regain some of its sticky properties. This reactivation is key to achieving a lasting re-bond without adding new glues.
Once the adhesive has been sufficiently softened by the steam, the paint roller steps in to finalize the process. “After that, the paint roller will assist the fabric to set up evenly without any creases or wrinkles.” The consistent, gentle pressure applied by the roller helps to press the fabric firmly back onto the adhesive, expelling any trapped air and ensuring a smooth, uniform surface. This prevents the lumpy or uneven appearance that can sometimes result from hand-pressing.
It’s important to set realistic expectations for this particular hack; “This trick works best when the fabric sags around the edges.” For areas where the foam backing has completely disintegrated or the original adhesive is entirely gone, this method may not be sufficient. However, for minor to moderate edge sagging, it can deliver impressive results, making your headliner look dramatically better for minimal cost.
To maximize your success, the quality of your tools matters. “Make sure you’ve got the best car steam cleaner so you can free your mind of this stubborn task while enhancing your car’s comfort.” A good steam cleaner provides controlled output, preventing excessive moisture that could damage the headliner further. Always work in small sections, applying steam briefly and then immediately following with the paint roller, and allow the area to fully dry and re-bond.
Moving beyond immediate fixes, the savvy car owner knows that prevention is often the best cure, and sometimes, a complete overhaul with smart alternatives is the wisest path. This section dives into proactive strategies to keep your headliner pristine, explores cost-effective materials if you’re looking for a fresh start, and breaks down what you can expect when budgeting for headliner projects. It’s about empowering you with comprehensive knowledge, ensuring your car’s interior remains a sanctuary of comfort and style without breaking the bank. From simple preventative hacks to exploring full replacement options, we’ve got you covered.
7. **Proactive Measures: What You Can Do To Prevent Sagging**After mastering the art of fixing a drooping headliner, the next logical step is to understand how to prevent this pesky issue from recurring. As we’ve learned, sagging often stems from poor maintenance and sometimes, unavoidable environmental factors. However, being proactive and implementing a few simple habits can significantly extend the life of your car’s headliner, saving you future headaches and expenses.
One of the most effective strategies against headliner deterioration is to shield your vehicle from the sun’s harsh rays and extreme heat. “Always try to park your vehicle in the shade, and avoid direct sunlight,” as prolonged exposure can melt the adhesive that bonds the fabric to the headliner board. This simple action protects not only your headliner but also your entire car’s interior and exterior from premature aging.
Another common culprit is physical strain. If you frequently transport children or pets, take extra care to ensure they are properly secured in their seats. “Ensure that children and pets are kept close in their seats to prevent them from constantly contacting the car ceiling.” This prevents scratching, pulling, or general wear and tear on the headlining fabric, which can accelerate the failing process of the adhesive bond.
Moisture is a relentless foe for headliners. To combat this, make a habit of regularly inspecting your car’s rubber seals, especially around windows and sunroofs. “Check your rubber seals regularly to guarantee that no water enters the vehicle.” Addressing potential leaks promptly can prevent humidity and water from seeping into the foam backing, which can cause it to absorb moisture, lose shape, and ultimately lead to warping and sagging.
Lastly, if you utilize a steam cleaner for interior detailing, particularly on the headliner, exercise caution. While steam can be beneficial for cleaning, “if you use a steam cleaner to clean the headliners, avoid using too much pressure or steam.” Excessive moisture or force can damage the delicate fabric and foam, ironically contributing to the very problem you’re trying to prevent. Gentle, controlled application is key to maintaining its integrity.

8. **A Touch of Luxury on a Budget: Foam-Backed Alcantara as an Alternative**When your original headliner is beyond a simple fix, or you’re simply craving an interior upgrade, exploring alternative materials can open up a world of possibilities, even on a budget. One standout option that combines luxury with practicality is foam-backed Alcantara. This material offers a premium feel and appearance, making your car’s interior feel significantly more upscale without the exorbitant cost of factory-installed luxury fabrics.
Foam-backed Alcantara is a dream for DIY enthusiasts because it’s remarkably easy to install. Available on popular e-commerce platforms, it comes in a wide range of colors, allowing you to perfectly match or creatively contrast with your car’s existing interior. The key to a successful installation is selecting a quality glue specifically designed to work with Alcantara, ensuring a durable and long-lasting bond that won’t succumb to future sagging.
The installation process primarily involves careful measurement and precise cutting to fit your car’s roof contours. Once the material is prepared, you apply the recommended adhesive and meticulously press the Alcantara into place, smoothing out any air bubbles or wrinkles. This material is not only aesthetically pleasing but also boasts impressive durability, resisting sagging, pilling, stiffening, and shrinking over time, ensuring your investment stands the test of thousands of miles.
Beyond its resilience, Alcantara provides that coveted ‘luxury look and feel’ with a velvety smooth texture and refined appearance. It’s an ideal choice for elevating various automotive or home upholstery projects, from headliners to door panels and seats. This versatile fabric, often shipped folded, can be easily flattened or steamed to remove creases, making it highly adaptable for your DIY project and delivering a professional-grade finish.
9. **Robust and Practical: Considering Carpet as a Headliner Alternative**If durability, practicality, and a rugged aesthetic are higher on your list than a plush, luxurious feel, then a carpet-like material could be an excellent alternative for your car’s headliner. While it might not offer the sleekness of Alcantara, a well-chosen automotive carpet can provide exceptional insulation and sound dampening, getting the job done effectively and economically.
The crucial distinction here is to source carpet specifically built for automotive or marine applications, rather than household carpet. These specialized materials are engineered to be lighter, stronger, and significantly more resistant to mold and mildew, which are critical factors in a car’s interior environment. They are designed to withstand the unique conditions found within a vehicle, ensuring longevity and performance.
One of the major benefits of using automotive carpet is its flexibility, which translates into easier installation. You won’t struggle as much with rigid materials; carpet conforms well to the curves of your car’s roof. When purchasing, it’s always wise to buy a bit in excess. This ensures you have enough material to cover all parts, allowing for mistakes and precise trimming without the frustration of running short.
For instance, a ‘Suede Headliner Fabric’ designed for automotive use often comes with a soft, durable suede surface backed by a thick, high-elastic polyurethane foam. This combination offers both comfort and resilience, making it perfect for replacing damaged headliners. Its lightweight yet strong composition resists sagging, fading, and warping, while being easy to cut and shape, providing a versatile and multi-purpose solution for various interior restoration projects.
10. **The Flexible Option: When to Consider Vinyl for Your Headliner**Among the more unconventional, yet viable, car headliner alternatives is vinyl. For those open to exploring diverse textures and aesthetics, vinyl can present an interesting choice. However, selecting vinyl as your headliner material requires a keen understanding of its properties and careful consideration during installation to ensure a satisfactory outcome.
The primary challenge with vinyl is its weight. Unlike lightweight fabrics typically used for headliners, vinyl can be considerably heavier, which can complicate adhesion. It’s imperative to seek out the absolute lightest vinyl available on the market to mitigate this issue. Using standard spray adhesives might prove challenging for proper bonding; in some cases, you might need to resort to stronger epoxies or specialized high-strength contact cements to secure it firmly to the roof.
Before committing to vinyl, it’s crucial to evaluate whether its look aligns with your vision for your car’s interior. As the context suggests, you should “check and confirm that this is the best-looking material for your headliner.” While vinyl can offer a sleek, modern, or even vintage aesthetic depending on the pattern and finish, ensuring it complements your vehicle’s overall design is paramount to avoid a result that feels out of place or simply doesn’t meet your expectations.
However, there are modern variations that enhance vinyl’s appeal for DIYers. For example, self-adhesive microfiber suede fabric offers a “modern, sporty, high-end look” with the luxurious appearance of suede. Crucially, it’s stretchable and easy to apply, making it flexible for wrapping curves and contours. With its strong adhesive backing, it simplifies installation by eliminating messy glues, allowing for adjustments and providing a seamless fit for dashboards, trim, and even headliner sections.
11. **Empowering Your DIY Spirit: Headliner Installation Kits for Complete Replacement**Sometimes, a quick fix or an alternative material just won’t cut it, and a full headliner replacement becomes necessary. This is where headliner installation kits truly shine, empowering your DIY spirit and offering a comprehensive solution that can transform your car’s interior. Instead of seeing it as a daunting task, these kits make a complete replacement surprisingly accessible and budget-friendly.
These kits typically include the ideal fabric and foam backing used in typical car headliners, ensuring that your replacement will look and feel authentic. They are readily available online and at auto parts retailers, making the acquisition process straightforward. The convenience of having all the necessary materials pre-selected and often pre-cut significantly reduces the complexity of the project, allowing you to focus on the installation itself.
Financially, opting for a DIY headliner installation kit is a smart move. While professional headliner repair costs can range from $150 to $300, a replacement kit can be purchased for a mere $50 to $100. This stark difference allows you to achieve a brand-new headliner look and feel at a fraction of the cost, making it particularly appealing for DIY enthusiasts who enjoy the satisfaction of enhancing their vehicle themselves.
A comprehensive example, like the ‘Mardatt Car Headliner Repair Kit,’ demonstrates the value these packages bring. Such kits often include everything from repair buttons and push pins to clear twist pins, a screwdriver, and even a measuring tape – essentially a complete all-in-one solution for effective repairs. These components are designed for simple DIY installation, restoring your interior ceiling to a smooth, neat look without costly professional interventions and are universally designed to work with almost any car, truck, or SUV.
When weighing these kits against the various alternative materials, the advantages become even clearer. While materials like carpet or foam-backed Alcantara can work, a dedicated headliner installation kit contains materials specifically engineered for the job. This ensures optimal insulation, proper aesthetic integration, and a long-lasting finish, making it the superior choice for a complete and authentic headliner restoration.

12. **Cracking the Code: Understanding Headliner Repair and Replacement Costs**When facing a sagging or damaged headliner, understanding the financial implications is paramount to making an informed decision. While this guide champions budget-friendly DIY fixes, it’s equally important to grasp the broader spectrum of costs associated with both repairs and full replacements, whether you choose to do it yourself or seek professional assistance.
For those considering professional expertise, headliner repairs are generally not overly expensive, with professional repair costs typically ranging from $150 to $300 for minor issues. A full headliner replacement by an expert can range from $500 to $1,000, or even more, depending on the car model. This option provides a new headliner installed by a specialist, ensuring better aesthetics, performance, and often includes a warranty on parts and labor.
If you’re leaning towards the DIY route, your primary costs will be the headliner replacement kit and necessary adhesives or supplies. A quality headliner replacement kit can run anywhere from $100 to $500, with adhesives and other supplies adding another $20 to $50. This means a total DIY replacement can cost between $150 and $600+, offering significant savings on labor fees compared to professional services.
However, these costs can vary dramatically based on your vehicle’s make and model. Smaller economy sedans might see professional replacement costs of $400-$700, while larger SUVs with sunroofs could be $500-$900. Luxury vehicles, especially those with complex designs or high-quality ceilings (like BMWs), can easily push costs into the $1,000 to $6,000 range, underscoring how intricate features influence the final price. Reports from sources like GetJerry and SlashGear align, citing ranges from $100-$500 for shop repairs to $200-$400 for sagging fixes, further emphasizing the variability.
Ultimately, deciding on the best course of action—DIY repair, a full DIY kit replacement, or professional service—comes down to balancing your budget, technical skills, and desired outcome. By understanding these various cost factors, you’re empowered to navigate the world of headliner repair and replacement with confidence, ensuring you choose the most effective and economically sound solution for your car.
No longer does a sagging headliner need to be a source of automotive despair. With the actionable insights and practical solutions detailed in this guide, you’re now equipped to tackle this common issue head-on. Whether you opt for a clever no-removal fix, a creative alternative material, or a full DIY replacement kit, you have the knowledge to restore your car’s interior to its former glory. Reclaim your vehicle’s comfort, quiet, and aesthetic appeal, and enjoy the lasting satisfaction of a well-executed DIY triumph. Your car’s ceiling is no match for your newfound expertise!


