

Maintaining your car’s braking system isn’t just about avoiding a hefty repair bill; it’s fundamentally about safeguarding your life and the lives of others on the road. The humble brake pad, often out of sight and out of mind, is arguably one of the most critical safety components in your vehicle. These hardworking parts create the necessary friction against the brake rotor, transforming your car’s kinetic energy into heat and bringing you to a smooth, controlled stop.
However, like any component subject to constant friction and extreme conditions, brake pads naturally wear down over time. Ignoring this wear can lead to significantly reduced stopping power, increased stopping distances, and in worst-case scenarios, a complete failure of your braking system. But don’t let that thought make you nervous; understanding and checking your brake pads doesn’t require a master mechanic’s degree.
This comprehensive guide will empower you with 14 simple, actionable steps to confidently check your car’s brake pad thickness. We’ll demystify the process, from understanding what healthy pads look like to identifying the subtle (and not-so-subtle) signs that they’re crying out for attention. By the end of this journey, you’ll be equipped with the knowledge to maintain this vital system, ensuring safer, more reliable driving experiences for years to come.
1. **Understand Your Brake Pads: The Foundation of Safe Stopping**Your vehicle’s brake pads are more than just pieces of material; they are the front-line soldiers in your car’s safety system. Positioned within the brake caliper, they are designed to press against the rotating brake rotor when you apply the brakes. This friction is what slows and stops your wheels, making your car respond precisely when you need it most. Without properly functioning brake pads, your car simply cannot stop effectively.
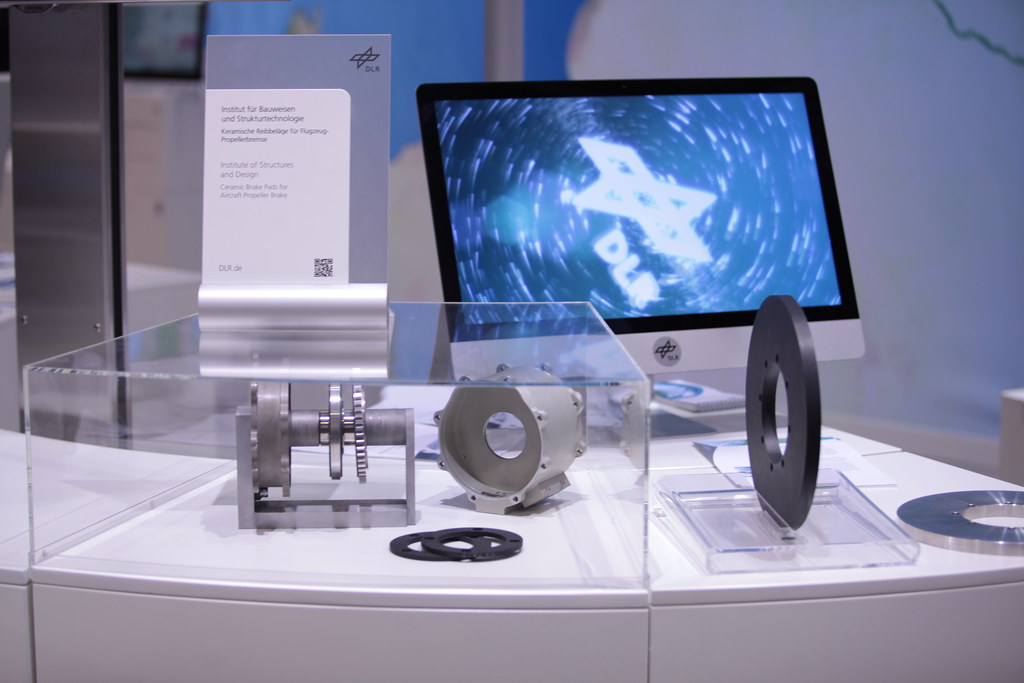
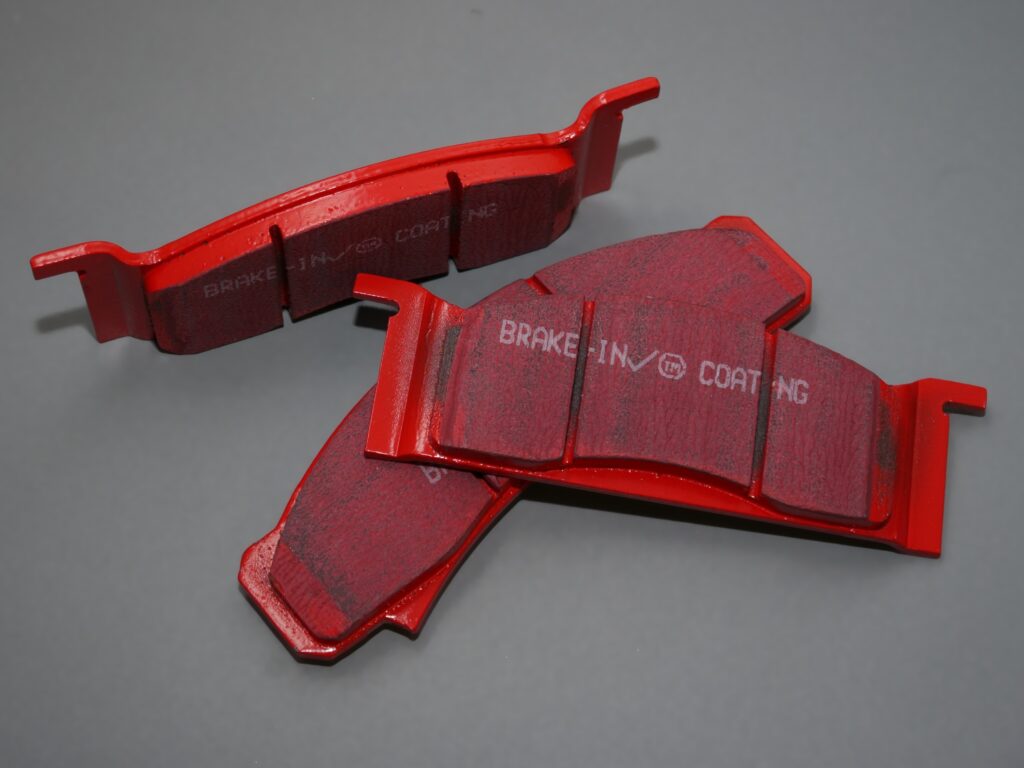
These essential components are engineered from various materials, including organic, semi-metallic, and ceramic composites. Each type offers a unique balance of durability, heat resistance, and braking feel, tailored to different vehicle types and driving conditions. Organic pads, for instance, often provide a softer pedal feel, while semi-metallic pads excel in heat dissipation, making them common in performance or heavy-duty applications. Ceramic pads typically offer a good balance of performance, low noise, and minimal dust, making them popular for many modern passenger vehicles. Understanding these material differences can help you choose the right replacement pads when the time comes, optimizing your vehicle’s specific needs.
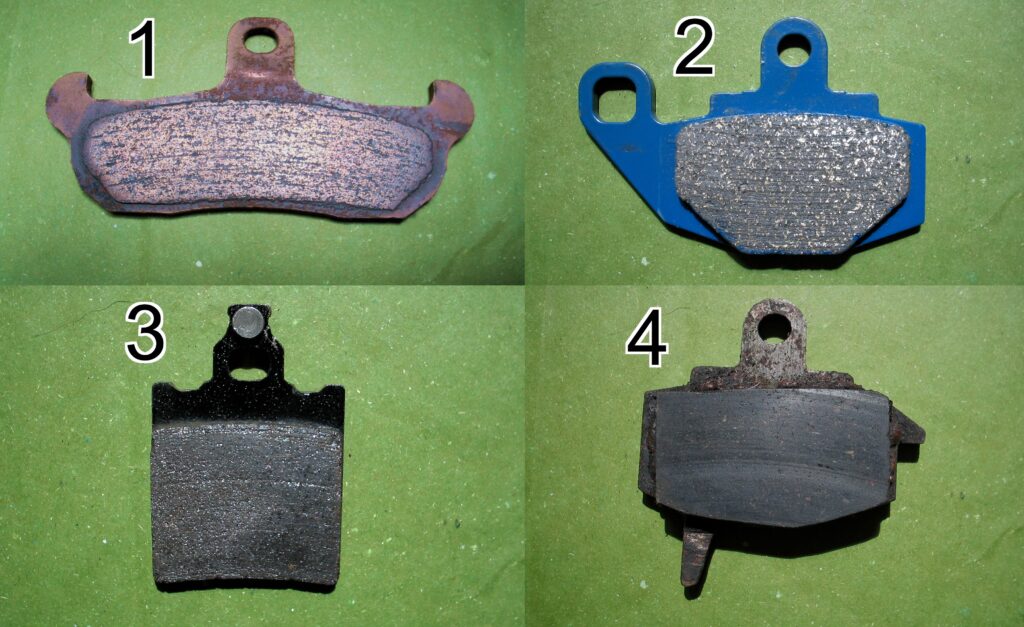
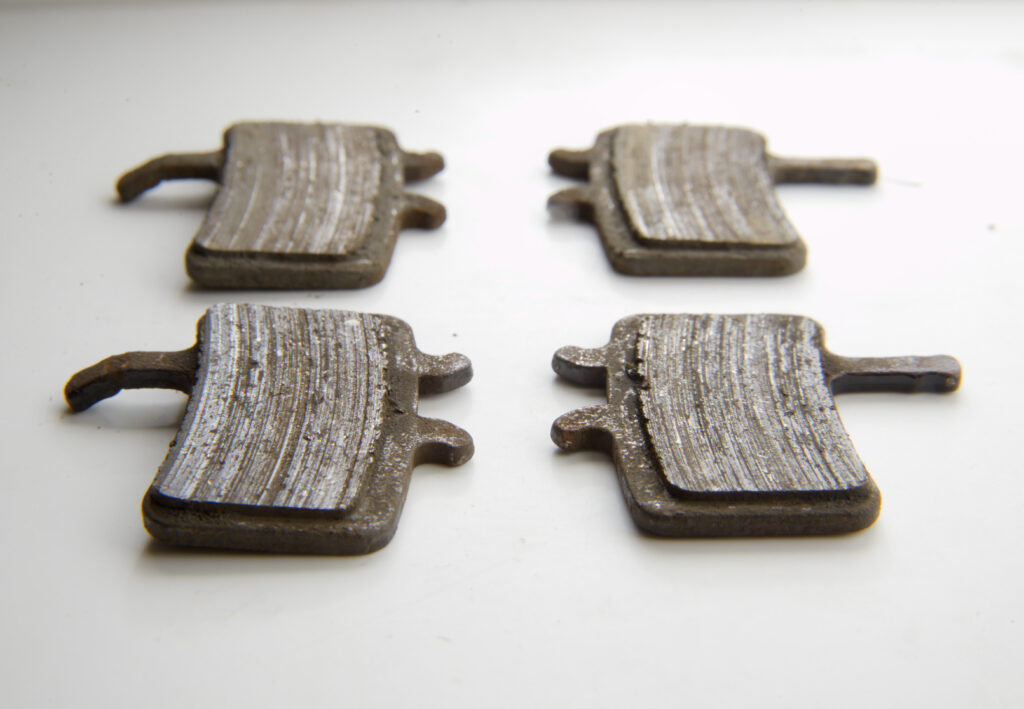
Beyond the materials, the design of brake pads themselves is crucial. They feature a robust backing plate that provides structural integrity, onto which the friction material is bonded. This backing plate is what the caliper pushes against, transmitting the hydraulic force to the friction material. When the friction material wears too thin, this metal backing plate can come into direct contact with the rotor, leading to severe damage.
Regardless of the specific design or material, the core function remains the same: to provide consistent, reliable stopping power. Understanding this fundamental role helps emphasize why their condition is not something to overlook. Regular monitoring ensures these crucial parts can perform their life-saving duty every time you hit the brake pedal, giving you peace of mind on every journey.
Read more about: The Underdog’s Edge: 15 Cheap Car Mods Proving Performance Gains Don’t Require Forever Funds
2. **Recognize the Crucial Role of Thickness: Why Every Millimeter Counts**The physical thickness of your brake pads is a direct indicator of their remaining lifespan and, more importantly, their ability to perform safely. As pads wear down due to friction, their thickness decreases, directly impacting their efficiency. Thin pads have less material to absorb and dissipate the immense heat generated during braking, making them prone to overheating and “brake fade,” where braking power diminishes significantly under heavy use. This can be particularly dangerous when descending long hills or during hard braking maneuvers.
Beyond stopping power, maintaining adequate thickness prevents damage to other, more expensive braking components. When pads become too thin, the metal backing plate can start grinding directly against the brake rotor, which is the large disc your pads squeeze. This not only creates a terrible, alarming noise but rapidly damages the rotor surface, creating grooves or warping. What could have been a relatively inexpensive pad replacement suddenly turns into a much costlier rotor replacement, or even caliper damage if left unchecked.
The integrity of your entire braking system hinges on the condition of your brake pads. Proper thickness ensures that the system works in harmony, from the brake fluid pushing the calipers to the pads gripping the rotors. Any compromise in pad thickness can throw this delicate balance off, leading to unpredictable braking behavior and increased stress on other components like the calipers, which might then seize up.
Think of brake pad thickness as your car’s braking reserve. A healthy reserve ensures you have optimal stopping power in both routine and emergency situations, providing a vital margin of safety. Monitoring this thickness is a proactive measure that saves lives, prevents accidents, and keeps your maintenance budget in check. It’s a small check that delivers massive returns in safety and savings, empowering you as a responsible car owner.
3. **Know the Baseline: What “New” Brake Pad Thickness Means**To understand when your brake pads are worn, you first need a reference point: what do new brake pads look like? Typically, new brake pads come with a substantial amount of friction material, ensuring a long life and optimal performance. For most passenger cars, a brand-new brake pad will measure between 10 to 12 millimeters (mm) thick. This generous thickness allows them to withstand the rigorous demands of daily driving, absorbing friction and heat without immediate compromise.
For larger vehicles, such as light trucks, the initial thickness might be slightly greater, often ranging from 12 to 15 mm. Heavy-duty vehicles, designed for more intense use and heavier loads, can even have pads starting around 15 to 20 mm. This variation accounts for the increased braking forces and heat generation these vehicles experience, requiring more material to dissipate energy effectively and last longer. Always consult your vehicle’s owner’s manual for the precise specifications, as these can vary even within the same vehicle class.
This initial thickness provides the optimal balance of material for efficient heat dissipation and sustained friction, which are key to consistent braking performance. As the pad wears, its ability to manage heat decreases, and the effective friction surface can change. Therefore, starting with the right amount of material is fundamental to the entire lifespan and safety performance of the brake system.
Having this baseline knowledge is incredibly useful. It provides a clear target to aim for when you install new pads and a benchmark against which to compare your current pads during inspections. Knowing the initial thickness helps you gauge the degree of wear accurately, offering a clearer picture of your pads’ remaining life and when proactive replacement might be necessary.

4. **Identify the Tiers of Wear: From Moderate to Dangerously Thin**Brake pads don’t just go from new to completely worn out overnight; they progress through distinct stages of wear. Understanding these “tiers” helps you anticipate replacements and ensure continuous safety. When your brake pads measure around 7-8 mm, they are considered to be in good working condition, though you should begin monitoring them more closely, especially if your driving habits involve frequent braking, such as in heavy city traffic or mountainous terrain. Regular inspections at this stage allow you to track the wear rate.
As they wear further, reaching a thickness of 4-6 mm, your pads are showing moderate wear. At this stage, it’s wise to plan for replacement soon, perhaps within your next few thousand miles, to avoid reaching critical levels unexpectedly. This is your cue to start budgeting and scheduling the service, or gathering the parts for a DIY job. You’re still safe, but you’re definitely on the countdown.
The critical wear level is typically around 3 mm. At this point, replacement becomes urgent and highly recommended. Driving with pads this thin significantly compromises stopping power, as there’s less material to absorb heat and generate friction. This increases the risk of damaging other components, like the rotors, and can lead to significantly longer stopping distances, particularly in emergencies.
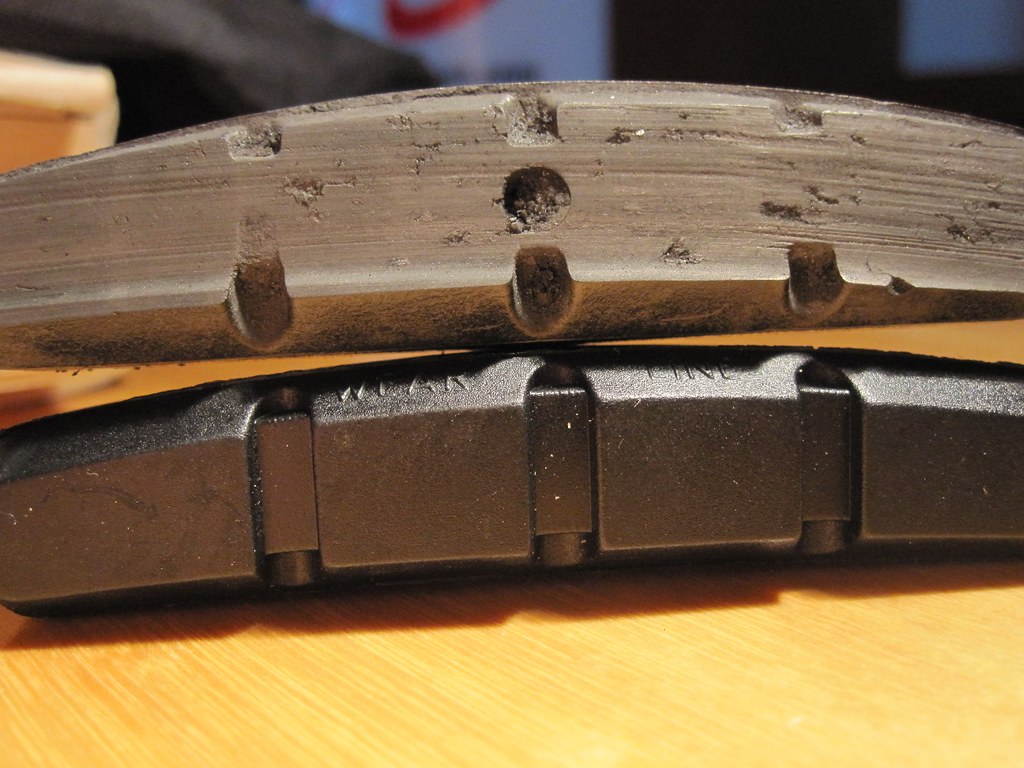
Any thickness less than 3 mm, especially 1-2 mm, is considered dangerously low. These pads are extremely thin, offering minimal friction material. They pose a severe safety risk, as brake failure becomes a real possibility, and almost guarantee damage to your rotors if not replaced immediately. At these levels, the metal backing plate is likely making contact with the rotor, causing irreversible harm that escalates repair costs. Prioritizing replacement at 3mm is a non-negotiable safety step.

5. **Equip Yourself Right: Essential Tools for a Thorough Brake Check**Before you begin inspecting your brake pads, gathering the right tools is paramount for both efficiency and safety. You don’t need a full mechanic’s workshop, but a few key items will make the process much smoother and more accurate. A reliable car jack is essential for safely lifting your vehicle, paired with robust jack stands to secure it once lifted. Never, under any circumstances, rely solely on a jack; safety first, always! Using jack stands properly prevents the car from unexpectedly falling, a critical safety measure.
A lug wrench will be indispensable for loosening and removing your wheel nuts, allowing clear, unobstructed access to the brake assembly. Ensure you have the correct size for your vehicle’s lug nuts. For measuring the pad thickness itself, a dedicated brake pad gauge is the most straightforward tool, often color-coded for quick assessment. However, a standard ruler can also work in a pinch for a rough estimate, though it might be harder to maneuver in tight spaces.
For more accurate readings, particularly when the pads are deep within the caliper, consider using a vernier caliper or even a basic compass. A vernier caliper offers precise measurements in small gaps, while a compass can be used to transfer the pad’s width to a ruler for measurement. And don’t forget a bright flashlight; good visibility is absolutely key when peering into the darker recesses of your wheel wells, ensuring you don’t miss any critical details.
And for those keen on a quick estimate without the hassle of removing the wheel, a simple drinking straw can be surprisingly effective for a preliminary check. Having all these tools ready and organized before you start ensures a straightforward, confident, and most importantly, safe inspection process. Proper preparation is truly half the battle when it comes to vehicle maintenance.
6. **Decipher the Sounds: Listening for Early Warning Signals of Wear**Your car often tries to communicate with you when something isn’t quite right, and worn brake pads are no exception. One of the most common and earliest indicators that your pads are getting thin is a distinctive sound: a high-pitched squeaking or squealing noise that occurs when you apply the brakes. This sound is distinct from a general squeak from suspension or other components, as it specifically happens during braking.
Many modern brake pads come equipped with small metal “squealers,” also known as wear indicators, precisely for this purpose. These squealers are strategically designed tabs of metal that are embedded within the friction material. As the friction material wears down to a predetermined minimum thickness, typically around 2-3 mm, these metal tabs begin to make contact with the rotating brake rotor.
The resulting sound is intentionally loud and irritating, serving as an unmistakable audible warning that it’s time to inspect your pads. This isn’t just a nuisance; it’s your car’s polite, yet firm, request for immediate attention before the problem escalates. Ignoring this squeal can quickly lead to more severe damage and unsafe driving conditions.
If you start hearing this sound, especially consistently when you brake, it’s a clear signal that you should schedule an inspection soon. While it might not indicate immediate danger, it certainly means your pads are nearing the end of their safe operating life and need to be assessed. Listening closely to your vehicle can provide invaluable early alerts, helping you stay ahead of potential problems and maintain peak safety.
7. **Feel the Feedback: Interpreting Pedal Vibrations and Stopping Changes**Beyond audible cues, your brake pedal can provide crucial tactile feedback about the condition of your brake pads and overall braking system. A significant sign of worn pads, or potentially warped rotors due to extreme wear from thin pads, is a vibration or pulsation that you can distinctly feel through the brake pedal when stopping. This sensation often indicates uneven wear on the pads, leading to an inconsistent contact surface, or damage to the rotor’s surface itself, such as warping or scoring, all of which demand prompt investigation.
Furthermore, if you notice your vehicle taking longer to stop than usual, or if the brakes feel less responsive and “spongy” rather than firm, this is a serious red flag. Longer stopping distances dramatically increase accident risk, particularly in emergency situations where every foot matters. This diminished performance directly correlates with thinning brake pad material, which struggles to generate sufficient friction and dissipate heat effectively, leading to a compromised braking effort.
An even more alarming sign, and one that requires immediate action, is a grinding noise that is distinctly harsher and deeper than a mere squeal. This sound means the friction material has completely worn away, and the bare metal backing plate of the brake pad is now scraping directly against the metal brake rotor. This indicates an extremely dangerous situation, as metal-on-metal contact provides very little effective braking and rapidly damages the rotors, calipers, and other vital braking components.
Experiencing any of these tactile or performance changes means your braking system is under severe stress and its integrity is compromised. Ignoring these symptoms can lead to catastrophic brake failure, extensive and costly damage to your vehicle, and significantly heighten the risk of an accident. Trust your senses and prioritize a thorough inspection as soon as you detect these critical warnings from your vehicle.
8. **Estimating Thickness Without Wheel Removal: The Drinking Straw Method**One of the quickest, most preliminary checks you can perform on your front brake pads, bypassing the need for full wheel removal, involves using a surprisingly simple household item: a drinking straw. While this technique won’t provide mechanic-level precision, it’s an excellent initial diagnostic step. It helps you quickly determine if a more detailed inspection is warranted, making it a clever addition to your routine vehicle checks.
To begin, carefully peer through the spokes of your front wheel to locate the brake assembly. You’ll first identify the large, round metal disc, known as the brake rotor, and then the substantial metal component clamped onto its side, which is the brake caliper. Within the caliper, you should be able to spot the friction material of your brake pads nestled against the rotor. For safety, always ensure your vehicle has been turned off and allowed to cool for a sufficient period before attempting this or any inspection.
Once the brake pad is visible, gently insert a clean drinking straw into the narrow gap between the brake caliper and the brake rotor. Push the straw carefully until its end firmly contacts the brake disc, ensuring it’s flush against the friction surface of the pad. This action allows the straw to physically transfer the measurement of the brake pad’s current depth, along with its metal backing plate, providing a tangible point of reference.
With the straw positioned, use a marker or pen to create a clear line on the straw where it meets the outer edge of the brake caliper. Then, carefully withdraw the straw, being mindful not to smudge your mark. Now, using a standard ruler or tape measure, measure the distance from the marked line to the very end of the straw that made contact with the brake disc. This measurement represents the approximate total thickness of both the brake pad material and its backing plate. To isolate the friction material’s thickness, you must subtract the approximate 5 millimeters (0.20 inches) that the metal backing plate typically accounts for, giving you a rough but practical estimate of your pad’s actual wear.
9. **Getting More Precision Without Wheel Removal: The Vernier Caliper**While the drinking straw method offers a useful, quick approximation, for those desiring a greater degree of accuracy without the full wheel-off procedure, a vernier caliper emerges as an indispensable tool. This specialized measuring instrument is meticulously engineered for taking precise measurements in confined spaces, making it perfectly suited for assessing brake pad thickness directly through the narrow confines of your wheel spokes. It delivers a level of measurement exactitude that more informal methods simply cannot achieve.
Acquiring a vernier caliper is straightforward, as these tools are readily available at most hardware stores, automotive supply shops, and through online retailers. To use it effectively, you will carefully insert the slender measuring end of the vernier caliper through the wheel spokes and into the tight gap between the brake caliper and the rotor. Position it so that it makes firm, direct contact with the brake pad’s friction material. The caliper’s clear, graduated scale will then accurately display a precise numerical reading, typically in millimeters, providing a reliable indication of the pad’s thickness.
The significant benefit of employing a vernier caliper lies in its capacity to provide objective, repeatable measurements. This enhanced precision is particularly crucial when your brake pads are approaching critical wear levels, allowing you to monitor their gradual degradation with confidence. By consistently tracking these accurate figures over time, you can forecast upcoming replacement needs much more reliably, ensuring truly proactive maintenance and helping you avoid the unpleasant surprise of dangerously thin pads. It empowers you to maintain a keen eye on your braking system’s health with minimal disruption.
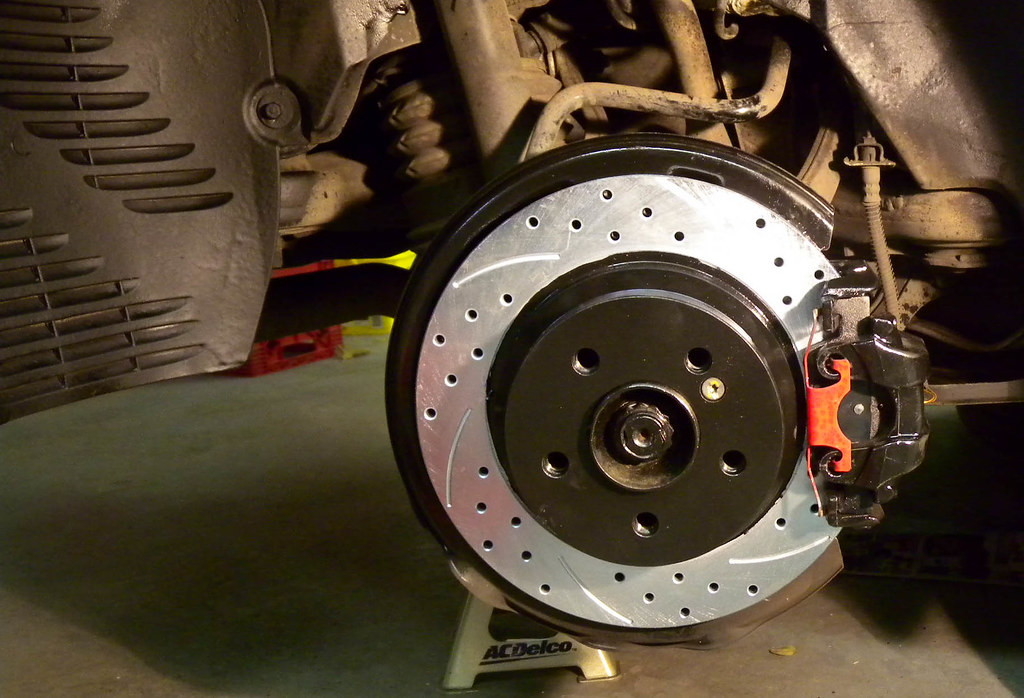
10. **The Definitive Method: Measuring by Removing the Wheel**When it comes to obtaining the most accurate and comprehensive assessment of your brake pads, the definitive and most recommended method invariably involves removing the wheel. This approach completely eliminates all visual obstructions, granting you an unimpeded view of the entire brake assembly, including both the often-overlooked inner and outer brake pads. This complete and unrestricted access is absolutely essential for a truly thorough inspection, allowing you to detect subtle signs of wear, unevenness, or potential issues that might otherwise be missed by less direct methods.
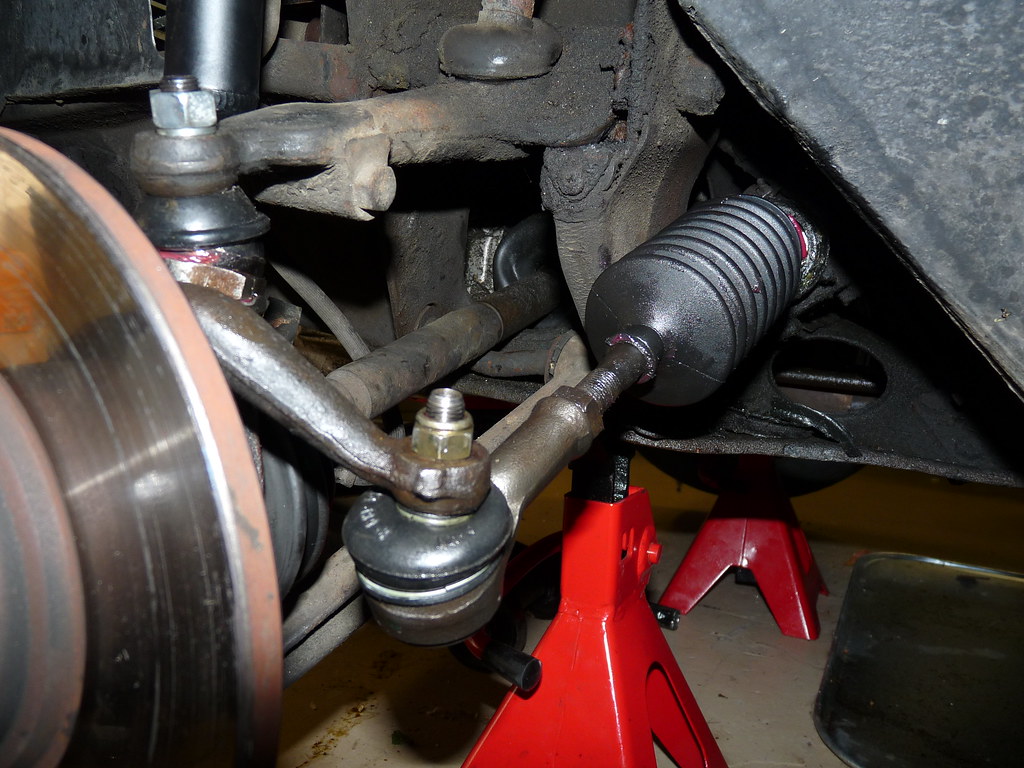
Before you attempt this procedure, your personal safety must be the absolute priority. You will need a robust car jack to safely lift your vehicle, and critically, a pair of sturdy jack stands to securely support the car once it’s elevated. It cannot be stressed enough: never, under any circumstances, rely solely on the jack to hold the vehicle up, as jacks can fail. Locate the designated jack points on your car’s frame, typically found just behind the front wheels, and carefully raise the vehicle until the tire is completely off the ground. Once lifted to the appropriate height, position the jack stands firmly beneath a solid, load-bearing part of the vehicle’s frame and gently lower the car onto them, ensuring maximum stability.
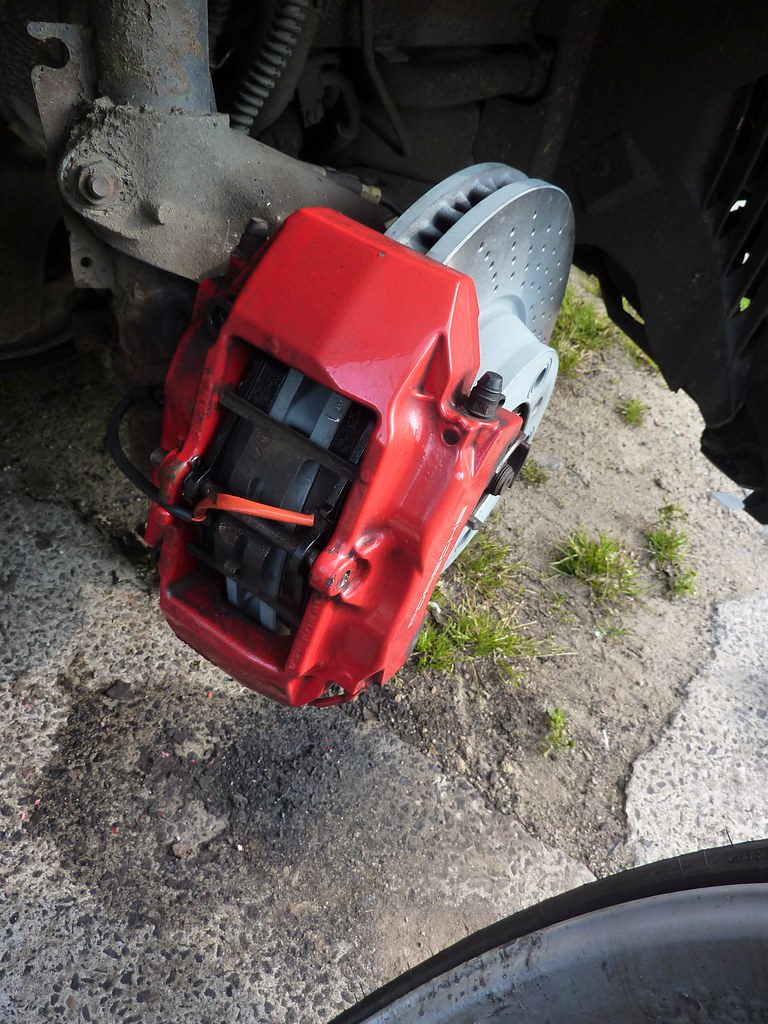
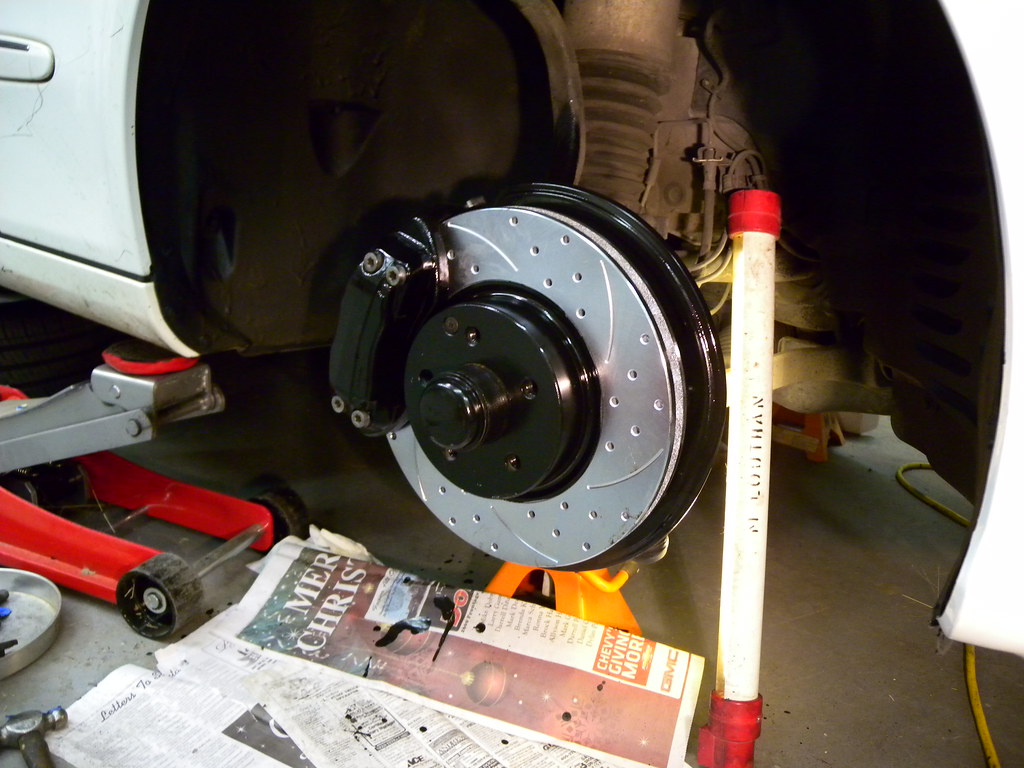
With the vehicle safely and securely supported, use your lug wrench to loosen and then completely remove the lug nuts from the wheel, always turning them counterclockwise. Once all nuts are off, carefully pull the wheel straight towards you, off the hub. At this point, you will have a clear and direct view of the brake rotor—the large, shiny disc that rotates with the wheel—and the brake caliper, which is the metal housing that encloses the brake pads and presses them against the rotor. This unhindered access is the cornerstone of this method, providing optimal conditions for a truly detailed examination.
Now that the wheel is off, you can distinctly see the brake pads positioned within the caliper, appearing as two pieces of friction material pressing against the rotor. It’s imperative to inspect and measure both the internal and external brake pads, as they don’t always wear evenly due to factors like caliper functionality. This direct visual access also allows you to perform an essential secondary check: inspecting the brake rotor itself. Look for any significant grooving, deep scores, or discoloration, which can be tell-tale signs of severely worn pads, overheating, or other brake system malfunctions, providing crucial guidance for your decision-making process regarding replacements.
11. **Accurate Measurement: Using a Brake Pad Gauge or Ruler**With the wheel now removed and you enjoying an unobstructed view of the brake pads, the next crucial step is to obtain a precise measurement of their remaining thickness. While a standard ruler can indeed offer a general idea, a specialized brake pad gauge is the preferred tool for accuracy and user-friendliness. Many of these gauges come equipped with a color-coded system—typically green for optimal, yellow for moderate wear, and red for critical—which instantly translates your measurement into actionable information, significantly simplifying the assessment process.
To measure, carefully place the brake pad gauge or ruler directly against the friction material of the pad. It’s absolutely vital to measure only the actual friction material, making sure to avoid including the metal backing plate in your measurement. For most passenger vehicles, brand-new brake pads typically measure anywhere between 10 to 12 millimeters (mm) thick. Consistency is key here; be sure to measure both the inner and outer pads, as one side may show more wear than the other, which often indicates a caliper issue that demands further attention.
Occasionally, even with the wheel off, the brake pads might be recessed somewhat deeply within the brake caliper, making direct measurement with a conventional gauge or ruler challenging due to limited access. In such situations, an old-fashioned compass can prove remarkably effective for a precise measurement. Simply position one prong of the compass on one edge of the brake pad’s friction material and the other prong on the opposite edge, carefully spanning the entire width. Then, gently withdraw the compass and measure the distance between its two prongs using a ruler. This ingenious trick allows you to accurately capture the pad’s thickness, even in tight or awkward spots.
12. **Interpreting Your Findings: When to Replace**Collecting precise measurements of your brake pads is a significant accomplishment, but the true value of this effort lies in correctly interpreting those numbers to determine their remaining lifespan and, more importantly, when replacement becomes a safety imperative. Understanding these critical thresholds is paramount for maintaining safe driving conditions, as your safety hinges on recognizing when those numerical values signal urgency.
As a golden rule for safe driving, brake pads should consistently possess a minimum thickness of 3 millimeters (mm). This widely accepted industry standard, often equated to approximately 1/8 inch, represents the absolute lower limit for effective and safe braking performance. If your careful measurements reveal that your pads are at or have dipped below this crucial 3mm mark, there should be no delay—immediate replacement is not just recommended, it’s absolutely crucial to prevent significant safety hazards and further, potentially extensive, damage to your vehicle’s braking system.
To provide essential context, brand-new brake pads typically boast a substantial thickness of 10 to 12 mm, offering a generous margin for wear over time. When your pads begin to show moderate wear, measuring in the range of 4-6 mm, this serves as a clear alert to begin planning for replacement in the near future, ideally within the next few thousand miles. However, once that measurement dips below 3 mm, especially reaching a perilous 1-2 mm, your pads are considered dangerously thin. At these critical levels, the metal backing plate of the pad is highly likely making direct, damaging contact with the brake rotor, leading to alarming grinding noises, significantly compromised stopping power, and potentially irreparable harm to your rotors and calipers. Acting swiftly at the 3mm threshold is a proactive and non-negotiable step that safeguards both your vehicle and your well-being.
13. **Understanding Replacement Timelines and Lifespan**The lifespan of brake pads is far from a fixed duration; it’s a highly variable metric influenced by a confluence of factors unique to each driver and vehicle. There’s no single mileage point where all brake pads universally expire. Instead, you’ll typically find a broad average range of 30,000 to 70,000 miles, but it’s crucial to understand that this range is truly just a starting point for your considerations. Understanding what drives this variation is key to accurately anticipating your next brake service.
Chief among the influencing factors is your personal driving style. Aggressive drivers who frequently accelerate rapidly and brake hard will inevitably wear down their pads much faster than those with a more measured, gentle approach. Similarly, driving predominantly in dense city traffic, which demands constant stopping and starting, will deplete pads quicker than long stretches of open highway driving. Environmental conditions, such as driving in mountainous terrain that requires extensive downhill braking, also contribute significantly to accelerated wear.
Beyond driver behavior, the vehicle itself plays a significant role. Heavier vehicles, or those equipped with high-performance engines, naturally exert greater forces and generate more heat on their braking systems, leading to increased wear. The specific material composition of your brake pads also matters profoundly: organic pads might offer a softer pedal feel but tend to wear faster, while semi-metallic or ceramic pads boast different durability and heat resistance characteristics that directly influence their longevity. Even the position of the pads makes a difference; front brake pads, which handle the majority of braking force, typically wear out faster than their rear counterparts. In some older cars, you might encounter rear brake shoes instead of pads, which are known to have a longer average lifespan, often lasting 30,000-40,000 miles or even twice as long as front pads due to their different design and lesser workload. Regular checks, therefore, should encompass all braking components to get a complete picture.
Read more about: Avoid Costly Pitfalls: The Worst Mistakes to Steer Clear Of When Investing in an Excavator
14. **When to Call in the Pros: Consulting a Mechanic**While the knowledge and practical steps outlined in this comprehensive guide empower you to confidently assess your own brake pads, it’s crucial to recognize that there are specific situations where the expertise of a professional mechanic is not just beneficial, but absolutely necessary. Your commitment to DIY maintenance is commendable, but knowing when to defer to a specialist is a hallmark of truly responsible vehicle ownership. Never hesitate to seek professional help when your safety, and the safety of others on the road, is on the line.
One such critical scenario involves detecting a pulsating or vibrating sensation through your brake pedal during stopping. This symptom frequently points towards warped brake rotors, an issue that requires a professional diagnosis and often specialized equipment for correct evaluation and repair. Similarly, if you notice your vehicle consistently pulling significantly to one side when you engage the brakes, it could indicate uneven pad wear, a sticking brake caliper, or an underlying alignment problem—complex issues that demand a mechanic’s trained eye and advanced diagnostic tools for accurate assessment and effective repair.
Furthermore, if your vehicle is an older model or has a rear braking system that utilizes brake shoes instead of pads, inspecting and maintaining these components can be more intricate and specialized than disk brake systems. If you suspect wear in your brake shoes, a professional mechanic possesses the specialized knowledge, experience, and tools to inspect them thoroughly, diagnose any issues accurately, and perform necessary repairs safely. Consulting a professional mechanic also provides invaluable peace of mind, offering an expert confirmation of your findings and ensuring that your entire braking system is meticulously maintained for optimal safety and reliable performance. It’s a smart investment in your safety and the long-term longevity of your vehicle.
**Conclusion: Driving with Confidence, One Check at a Time**
Read more about: Expert Insights: Understanding Why Baby Boomers Are Downsizing Their Classic Car Collections Amidst Market Shifts
Mastering these simple yet vital steps to check your car’s brake pad thickness isn’t merely about ticking off a maintenance item; it’s a fundamental commitment to ensuring your safety and the longevity of your vehicle on every journey. By regularly performing these essential checks, whether through a quick peek with a straw or a more detailed, wheel-off inspection, you gain invaluable insight into the immediate health and future needs of your braking system. This proactive approach helps you anticipate replacements, avoid potential emergency situations on the road, and prevent costly, cascading damage to other vital components. Drive confidently, knowing that you’re well-equipped and informed to keep your vehicle stopping safely and reliably for every mile ahead.


