

Imagine stepping into your car after a long day, eagerly anticipating the calming embrace of your vehicle’s ambient lighting, only to be met with a frustrating flicker, a dim glow, or worse, complete darkness. It’s a common scenario that many car owners face, and it instantly disrupts the carefully crafted atmosphere of your interior. Ambient lighting isn’t just a fancy aesthetic; it’s an integral part of your car’s decor, designed to enhance the visual appeal, elevate your mood, and significantly improve the overall comfort and enjoyment of your driving experience. From subtle accents on the dashboard and doors to illuminated floor mats and around seats, these lights are crucial for creating various atmospheres and making every journey more pleasant.
The good news is that experiencing issues with your car’s ambient lighting doesn’t always necessitate an immediate, costly trip to a professional mechanic. Many of the common problems, from unresponsive lights to inconsistent colors, can be successfully diagnosed and remedied right in your own garage with a bit of methodical troubleshooting and the right guidance. This comprehensive guide, crafted in the spirit of practical, hands-on problem-solving, is specifically designed to empower you, the car owner, with the knowledge and actionable steps needed to restore your car’s stylish glow and bring its interior ambiance back to life.
We understand that the prospect of diving into your vehicle’s electrical system can feel daunting, but rest assured, we’ve broken down the entire diagnostic process into 13 simple, logical steps. We’ll walk you through everything from the most straightforward initial checks to more detailed component inspections, ensuring you’re equipped to pinpoint the root cause of your ambient lighting malfunction. By following our expert-driven advice, you’ll not only save money on potential repairs but also gain a deeper understanding of your vehicle’s inner workings. Let’s embark on this journey to transform your driving space into the soothing, perfectly lit haven you deserve!

1. **Verify Brightness Settings**
Before you reach for any tools or delve into complex diagnostics, the very first step in troubleshooting your car’s ambient lighting should always be to check its brightness settings. This seemingly obvious solution is, surprisingly, one of the most frequently overlooked causes of ambient lights appearing dim or completely non-functional. Many drivers, or perhaps even a previous passenger, might have inadvertently adjusted the intensity to a very low level, leading to the assumption of a deeper problem.
To confirm this, you’ll need to access the settings menu on your car’s display. This interface is typically found on your central infotainment screen or through a dedicated control panel within the vehicle. Navigate through the options to locate “Light” and then “Ambient Lighting.” Within this section, you should find controls to adjust the LED lighting brightness. For instance, Mercedes owners are familiar with adjusting their LED lighting brightness directly via a slide control on the MBUX touchscreen display, offering precise control over the interior glow.
Making sure these settings are properly configured can resolve the issue instantly. It’s a common oversight that can be easily fixed without any tools or extensive technical knowledge. If your ambient lighting still isn’t performing to your expectations after this adjustment, then you know it’s time to move on to the next diagnostic steps, but always begin here. This simple, quick check serves as an important initial filter, saving you valuable time and preventing unnecessary further investigation into more complex potential faults.
Read more about: 2025 Self-Parking Systems: An In-Depth Consumer Reports Analysis of Real-World Safety and Reliability

2. **Inspect Fuses for Blow-Outs**
Once you’ve ruled out brightness settings as the culprit, the next critical area to investigate is your car’s fuse box. A blown fuse stands as one of the most prevalent and straightforward electrical reasons why ambient lights might stop working. These small, often color-coded components act as essential safety devices, designed to protect sensitive electrical circuits from damage due to power overloads or short circuits. When a fuse “blows,” it sacrifices itself to break the circuit, effectively cutting off power to the connected system, including your ambient lighting.
To begin this crucial diagnostic step, you’ll first need to locate your vehicle’s fuse box. Its precise whereabouts can vary significantly depending on your car’s make and model. Common locations include under the dashboard on the driver’s or passenger’s side, within the engine bay, or even in the trunk or side panels. Your vehicle’s user manual is an indispensable resource here, as it will clearly illustrate the fuse box location and, more importantly, provide a detailed diagram that identifies which fuse corresponds specifically to the ambient lighting circuit. Do not skip consulting your manual for this step.
After identifying the correct fuse, carefully extract it using a plastic fuse puller, which is often supplied within the fuse box itself, or a pair of small needle-nose pliers. Once removed, visually inspect the fuse. A blown fuse will typically show a broken metal wire or a dark, burnt appearance inside its clear housing. If it is indeed blown, replace it with a new fuse of the *exact same amperage rating*. Using a fuse with a different rating can lead to further electrical damage or insufficient protection. This simple replacement, a cornerstone of DIY car repair, can often restore functionality and bring your ambient lights back to life, eliminating the frustration of a dark interior.

3. **Check for Loose Wiring and Connections**
With brightness settings confirmed and fuses inspected, the focus shifts to the integrity of the physical connections within your ambient lighting system. Loose wiring or faulty connectors are incredibly common issues that can lead to a range of problems, from intermittent flickering to complete failure of your ambient lights. The constant vibrations and movement inherent to driving, coupled with environmental factors, can gradually loosen connections or even cause wires to become dislodged over time, disrupting the essential flow of power.
Your diagnostic efforts should involve a meticulous visual inspection of all accessible wiring and electrical connectors associated with your ambient lighting. Pay particular attention to areas where these lights are typically installed: along the dashboard, within door panels, underneath floor mats, and around the perimeter of seats. Look specifically for any wires that appear to be hanging freely, are not securely seated in their connectors, or show any visible signs of fraying, crimping, or wear. These poor connections are notorious for causing erratic behavior or a complete cessation of light.
Once you identify any loose wires, the solution is usually straightforward. Gently yet firmly re-seat any dislodged connectors, ensuring they click into place securely. For wires that feel inadequately fastened, a practical and effective solution is to use zip ties or electrical tape to secure them firmly, preventing future dislodgment due to vibration. Furthermore, it’s crucial to inspect the metal terminals within the connectors for any signs of corrosion, which can create resistance and impede electrical flow. A multimeter can be a valuable tool at this stage to test voltage levels across connections, confirming that adequate power is indeed reaching the light units. Ensuring all connections are tight and secure is a fundamental step in maintaining consistent and reliable ambient lighting performance.
Read more about: Your Comprehensive Guide to Installing a Home EV Charging Station: Costs, Process, and Expert Advice
4. **Test the Ambient Light Control Switch**
Even with power flowing correctly through fuses and secure wiring, your ambient lights still won’t function if the command input isn’t working. This brings us to the ambient light control switch, a crucial component that acts as your primary interface for activating and deactivating the lighting system. If your lights stubbornly refuse to illuminate upon selection, despite all prior checks yielding positive results, a faulty switch could very well be the underlying problem. It’s an issue that directly prevents the ambient light from acting erratically or not working at all.
To properly diagnose a potentially faulty switch, you first need to confirm that all other relevant electrical components are functioning as they should. You can try engaging and disengaging the switch multiple times, observing if there’s any momentary flicker or response from the lights. Sometimes, minor internal dirt or sticky contacts within the switch can be temporarily overcome with repeated toggling. However, if the switch consistently fails to trigger any lighting change, or if it feels unusually loose, stiff, or generally unresponsive compared to other working switches in your vehicle, then it becomes a prime suspect.
While an experienced technician might use a multimeter to test the switch’s continuity (confirming if it’s successfully completing the circuit when pressed), for the average DIY enthusiast, a process of elimination is often more practical. If you’ve systematically checked the brightness settings, fuses, wiring, and even the bulbs themselves, and they all appear to be in good order, the control switch gains significant probability as the root cause. Should it be confirmed faulty, replacement is the likely remedy. This typically involves carefully accessing the switch unit, disconnecting the old component, and installing a new, compatible replacement, ensuring all electrical connections are secure for proper system functionality.
Read more about: Your Ultimate Guide: 12 Essential Strategies to Shield Your Car’s Interior from Sun Damage and Summer Heat

5. **Assess Bulb Health for Burnt-Out Units**
The ambient lighting in your car, whether it uses traditional incandescent bulbs or more modern LEDs, relies on individual light-emitting components to produce that desired glow. Therefore, a very direct and common reason for localized or partial ambient lighting failure is simply a burnt-out bulb. Just like any other light source, these bulbs have a finite lifespan, and they can also fail prematurely due to manufacturing defects, power surges, or general wear and tear, leading to dimness, flickering, or complete cessation of light in a specific area.
To effectively assess the health of your bulbs, you’ll need to conduct a thorough visual inspection of each ambient light source within your vehicle’s interior. Pay close attention to areas such as the dashboard, door panels, footwells, and around the seats—anywhere ambient lighting is typically integrated. Look for any bulbs that remain dark when others are illuminated, or those that exhibit physical signs of damage. These signs might include discoloration, a blackened appearance, cracked glass (for older bulbs), or a visible break in the filament.
Once a suspicious bulb has been identified, the next step involves replacing it. Your vehicle’s user manual will be your best friend here, offering specific instructions on how to access and safely replace the bulbs for your particular model. It is absolutely crucial to use replacement bulbs that are compatible with your car’s specifications in terms of type, size, and voltage. Using incompatible bulbs can lead to further electrical issues or simply fail to function. A fresh, correctly installed bulb can often instantly restore illumination, significantly enhancing the aesthetic appeal and comfort of your car’s interior, making your night drives more enjoyable and immersive.
6. **Evaluate Power Supply and Battery Condition**
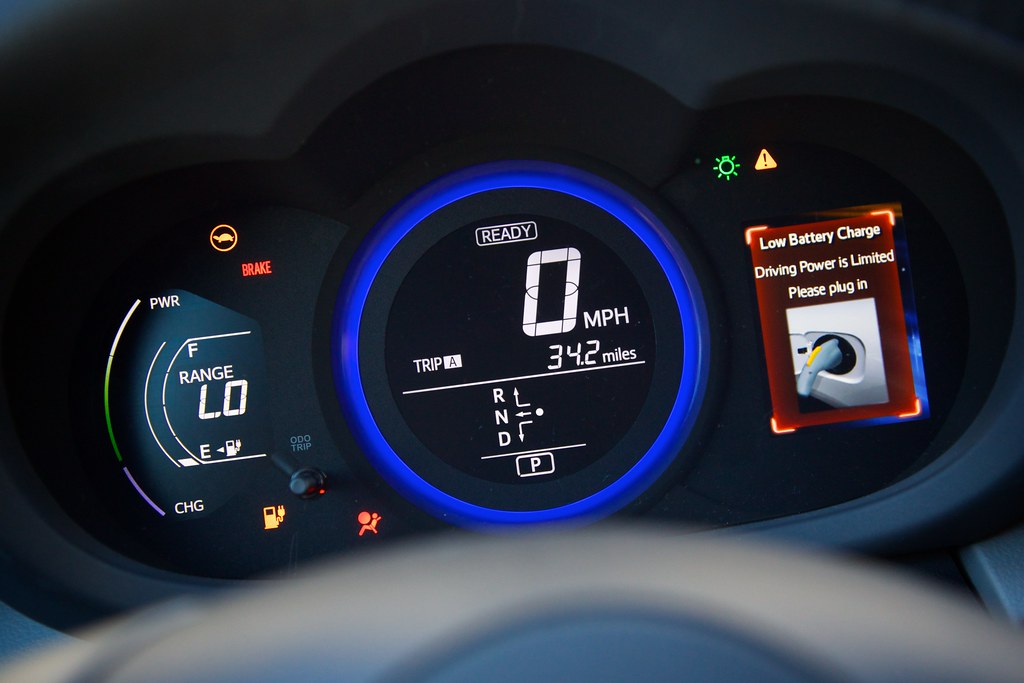
The consistent and vibrant performance of your entire ambient lighting system is fundamentally dependent on a stable and adequate electrical power supply from your car. If the vehicle’s electrical system, particularly its power source, is underperforming, your ambient lights will inevitably suffer. Symptoms like pervasive dimming, noticeable fading of illumination across multiple light units, or even intermittent functionality can strongly indicate a deeper issue with the overall power delivery, with a weak or failing car battery being a prime suspect, especially in vehicles that are older or haven’t been regularly maintained.
A weak car battery struggles to maintain a steady voltage output, which is essential for powering all vehicle systems. Non-critical components, such as ambient lighting, are often among the first to display signs of insufficient power. If you’ve observed other electrical anomalies in your car—such as slow engine cranking, headlights that appear dimmer than usual, or inconsistent operation of other electrical accessories—these are significant red flags that your battery’s health requires immediate attention. It signifies that your ambient lighting isn’t getting the juice it needs to shine consistently.
To thoroughly evaluate the power supply, start by checking your car battery’s voltage using a multimeter. A healthy, fully charged car battery should typically register around 12.6 volts or higher when the engine is switched off. If your readings are consistently lower than this, or if the battery is several years old, it’s a strong indication that it might be nearing the end of its functional life and may require replacement. Beyond the battery itself, ensuring the ambient lighting system’s specific power connections are robust and receiving stable current is vital. In more complex scenarios, seeking professional assistance to assess your car’s charging system—including the alternator—might be prudent, ensuring consistent and reliable power delivery to all components and ultimately revitalizing your car’s ambient lighting.
Now that we’ve laid the groundwork with initial checks and common fixes, it’s time to delve deeper into more persistent and complex ambient lighting issues. Sometimes, the problem isn’t as straightforward as a blown fuse or a misadjusted setting. Advanced diagnostics and system-level troubleshooting are often required to pinpoint the root cause of flickering, color mismatches, or complete system failures. This section will equip you with the knowledge to tackle these challenges head-on, exploring control modules, specialized sensors, and even when to seek expert help, ultimately restoring your car’s interior to its perfectly illuminated state.
Read more about: The Road Ahead: Decoding the Future of Car Technology in the Next Five Years

7. **Address Flickering Lights**
Few things are as distracting as flickering ambient lights. This erratic behavior quickly diminishes the comfort and aesthetic appeal of your car’s interior, turning a soothing glow into a jarring visual disturbance. If your ambient lighting system displays this symptom even after basic checks, it signals a deeper dive into electrical stability.
Flickering often stems from subtle power delivery inconsistencies or intermittent connections. Constant driving vibrations, coupled with environmental factors, can gradually loosen connections or cause wires to become partially dislodged. These minor disruptions create voltage fluctuations that LEDs, in particular, are sensitive to, resulting in that annoying flicker.
To diagnose and remedy flickering, meticulously re-examine all accessible wiring and connectors. Pay extra attention to areas prone to movement, like door panels and seat bases. A multimeter is invaluable here, allowing you to test for stable voltage at various points, pinpointing where the power supply might be breaking down. Reinforcing questionable connections with electrical tape or zip ties can often provide a quick and effective solution, restoring a steady, uninterrupted glow.
Read more about: Shocker Alert: These 10 Once-Lauded Models Transform Into Electrical Nightmares After a Decade
8. **Troubleshoot Inconsistent Light Colors**
Imagine your car’s ambient lighting, set to a calming blue, suddenly displaying a mix of greens and purples. Inconsistent light colors or a complete color mismatch across various ambient light sections is frustrating, undermining your desired aesthetic. This issue rarely stems from a simple fuse but points toward problems within the color-generating or controlling components.
A primary suspect for color discrepancies is a malfunction within the ambient lighting controller. This module sends precise color signals; if it fails, it may transmit incorrect or scrambled instructions. Moreover, light strip quality and compatibility are crucial. Different batches or manufacturers might have inherent color variations, and using incompatible bulbs of varying brands can noticeably disrupt color uniformity.
To address color mismatch, begin by verifying your car’s ambient lighting settings on your infotainment display, ensuring consistent color selection. If the problem persists, inspect the ambient lighting controller; a faulty unit may require replacement. When replacing light components, always ensure they are from the same reputable brand and model to guarantee uniform illumination. Sometimes, a system reset can also clear minor software glitches affecting color output.
Read more about: The 11 Smart TVs That Disappointed Shoppers: A Critical Look at Brands to Avoid

9. **Inspect the Ambient Light Control Module**
Beyond the basic control switch, modern ambient lighting systems rely on a dedicated control module—a sophisticated electronic component orchestrating various lighting settings and dimming functions. When this central ‘brain’ malfunctions, it can cause perplexing issues, from inconsistent light output to complete system unresponsiveness, even if bulbs and fuses appear operational.
Diagnosing a faulty control module is more complex than a visual check. While examining it for physical damage is wise, the problem is frequently internal or software-related. A failing module might improperly send color signals or fail to activate lights upon selection, possibly due to receiver issues or internal interference. For DIY diagnosis, if all other components are verified operational, the module becomes the prime suspect.
However, definitive diagnosis frequently requires specialized diagnostic tools communicating with the car’s onboard computer. These tools read error codes and assess the module’s operational status, identifying software errors or internal component failures. This guides you toward whether a software update or a full module replacement is needed to restore proper functionality and consistency to your car’s sophisticated ambient lighting system.
Read more about: Deciphering Your Tire Pressure Light: Expert-Backed Solutions for Common Causes and Persistent Warnings

10. **Consult Your User Manual and Perform a System Reset**
In your journey to troubleshoot car ambient lighting, one of the most overlooked yet invaluable resources is your vehicle’s user manual. This comprehensive guide contains a wealth of model-specific information, including detailed diagrams, troubleshooting instructions, and unique insights into your car’s electrical systems. For persistent or unusual issues, the manual often provides tailored advice generic steps might miss.
Your user manual typically offers explicit instructions on accessing and adjusting ambient lighting settings, identifying specific fuse locations, and guiding bulb replacement unique to your model. Crucially, it may provide troubleshooting flowcharts or specific error code interpretations pertinent to your vehicle’s lighting system. Understanding how to adjust LED lighting brightness via a specific touchscreen display, as for Mercedes owners, is clearly laid out here.
As a final resort for perplexing issues, performing a system reset can sometimes resolve ambient lighting malfunctions. Much like restarting a computer clears software glitches, resetting your car’s electrical system or a specific lighting module can clear corrupted data or temporary errors. While your manual might offer guidance for a general system reset, disconnecting the car battery for a short period can achieve a similar effect, cycling power and potentially bringing your ambient lighting back to life.
Read more about: Car AC Not Blowing Cold? Diagnose and Fix These 12 Common Automotive Issues for a Cooler Ride
11. **Diagnose Ambient Light Sensor Malfunctions**
Beyond interior ambient lights, many modern vehicles incorporate an external ambient light sensor. This sensor automatically controls headlights, dashboard brightness, and often interior ambient lighting intensity. A faulty sensor can cause confusing problems: headlights staying on during the day, interior lights remaining dim at night, or erratic system behavior without clear cause. Symptoms often manifest as erratic automated lighting—lights turning on/off without reason, or being unresponsive to external light changes. The sensor’s primary function is to respond to ambient light, so any deviation is a significant red flag.
Begin diagnosis with simple visual checks: look for physical damage like cracks or deformities on the housing. Crucially, ensure it’s free from dust or obstructions; a gentle cleaning with a soft cloth is necessary. For more definitive diagnostics, use a multimeter set to measure resistance. With power off and sensor disconnected, probes on terminals should show resistance change as light intensity varies. Alternatively, a functionality test involves powering the sensor and covering it; connected lights should react as if dark. No reaction or unchanged resistance strongly suggests a faulty sensor.
Common problems include sensor-specific wiring issues; inspect all connections for looseness or corrosion. Your user manual provides invaluable manufacturer’s instructions for checking the sensor and interpreting error codes. If DIY methods fail, or if you’re uncomfortable with electrical testing, consult a professional. They possess advanced diagnostic tools to accurately assess sensor health and determine if replacement or system integration repair is needed, ensuring proper function for your vehicle’s smart lighting.
Read more about: Dashboard Warning Lights Decoded: Your Essential Guide to Understanding Vehicle Alerts and When to Act Now
12. **Explore Professional Repair Techniques**
While many ambient lighting issues are DIY-fixable, the complexity of some problems or vehicle electrical systems often necessitates professional intervention. Trusting a qualified technician saves time, prevents damage, and ensures a lasting solution, especially for advanced components or elusive faults. Professionals bring specialized expertise and equipment beyond typical home garage tools.
A key advantage is their use of advanced diagnostic tools. These sophisticated devices connect to your car’s onboard computer, detecting intricate electrical faults and subtle software glitches invisible to the eye. They pinpoint the exact cause, making repair straightforward. Technicians can also reprogram lighting systems, accessing and adjusting software parameters to resolve conflicts and restore harmony to your car’s integrated lighting.
Finally, if existing components are faulty, professionals can advise on and perform upgrades to high-quality replacements. This investment in premium components often translates to better performance, enhanced longevity, and greater reliability for your ambient lighting system. Upgrading ensures consistent illumination and prevents frequent future repairs, offering peace of mind and ultimately enhancing your driving experience.
Read more about: Beyond the Garage: A Deep Dive into the Thriving World of Car Clubs and Automotive Communities

13. **Implement Preventive Maintenance**
Once your car’s ambient lighting is restored, focus shifts to maintaining that perfect glow and preventing future malfunctions. Proactive preventive maintenance is paramount for ensuring longevity and reliability, helping you avoid unexpected issues that could disrupt your driving experience and lead to costly repairs. Adopting a few simple yet effective habits keeps your car’s interior ambiance consistently welcoming and functional.
Routine maintenance should begin with regular system checks. Inspect your lighting system monthly, observing for subtle signs of trouble like dimming, flickering, or unresponsiveness. Testing the system’s response to controls helps identify issues early, allowing timely intervention. Crucially, keeping connections clean is paramount. Dust, grime, and even moisture accumulate around electrical connectors, leading to corrosion and poor contact, which impedes efficient power flow. Regularly use a soft, dry cloth to gently wipe down accessible connections, and ensure all wires are snugly secured, perhaps using zip ties.
Finally, using compatible and quality components is vital. Mismatched parts can fail to function correctly and lead to electrical incompatibilities. Always consult manufacturer guidelines and opt for original or high-quality aftermarket parts when replacements are necessary. When choosing new lighting products, evaluate brand reputation, consider longevity and performance, and select customizable features to meet your aesthetic and functional needs, preventing issues from poor quality components in the long run.
Read more about: Buyer Beware: Unpacking the Suspension Weaknesses of Best-Selling Pickups Under Load and Critical Failure Points
Maintaining your car’s ambient lighting doesn’t have to be a complex chore. By integrating these preventive measures and advanced troubleshooting techniques into your car care routine, you’ll not only preserve the beautiful aesthetic and comfort of your interior but also gain a deeper appreciation for the intricate systems that make your driving experience truly enjoyable. A little attention now saves a lot of hassle later, keeping your car’s interior shining brightly for years to come, and ensuring every drive is a well-lit pleasure.


