

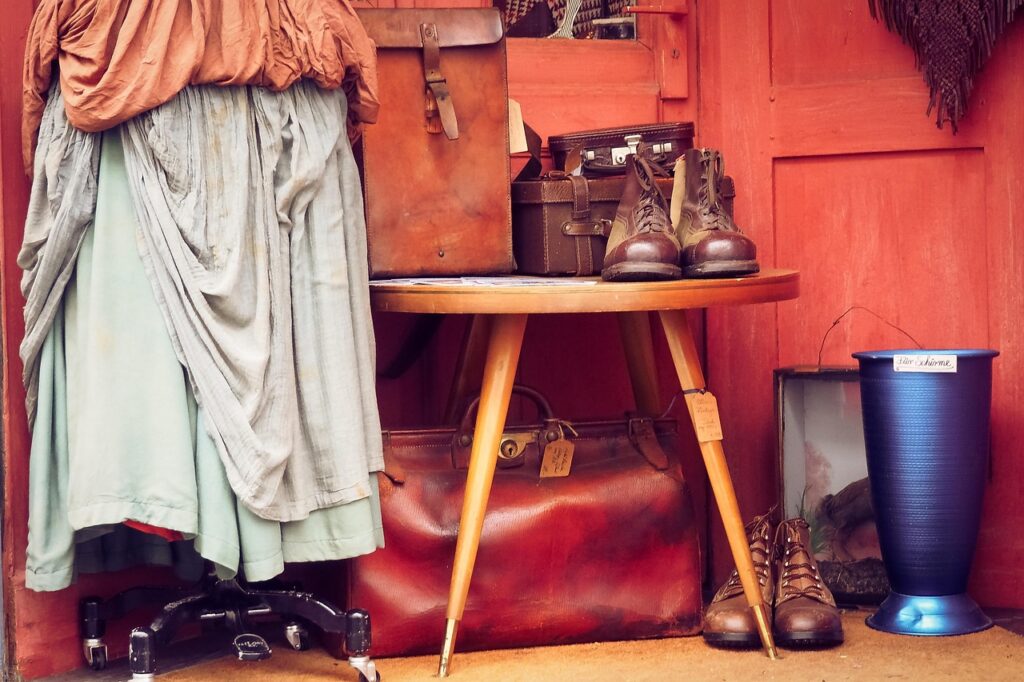
Let’s be real, who doesn’t love the thrill of a good thrift store hunt? There’s nothing quite like unearthing a hidden gem, and when it comes to leather goods, those finds can feel like striking gold. However, sometimes that incredible vintage leather jacket or that stylish-yet-scuffed bag from the secondhand rack might need a little extra love to truly shine.
That’s where the magic happens, and frankly, it’s a goldmine for content creators and bloggers. You don’t need to shell out a fortune for genuine leather when you can transform a thrift store steal into something that looks impressively authentic and utterly luxurious. With a sprinkle of DIY magic and a few clever upgrades, you can take plastic leather, worn-out real leather, or anything in between, and give it a complete glow-up.
So, if you’re a blogger looking to inspire your audience with creative, sustainable, and undeniably chic projects, you’re in the right place. We’re diving deep into 11 game-changing leather goods transformations that will not only make your thrift finds look expensive in photos but also provide practical, actionable advice that your followers will absolutely adore. Get ready to turn those overlooked pieces into photo-ready masterpieces!
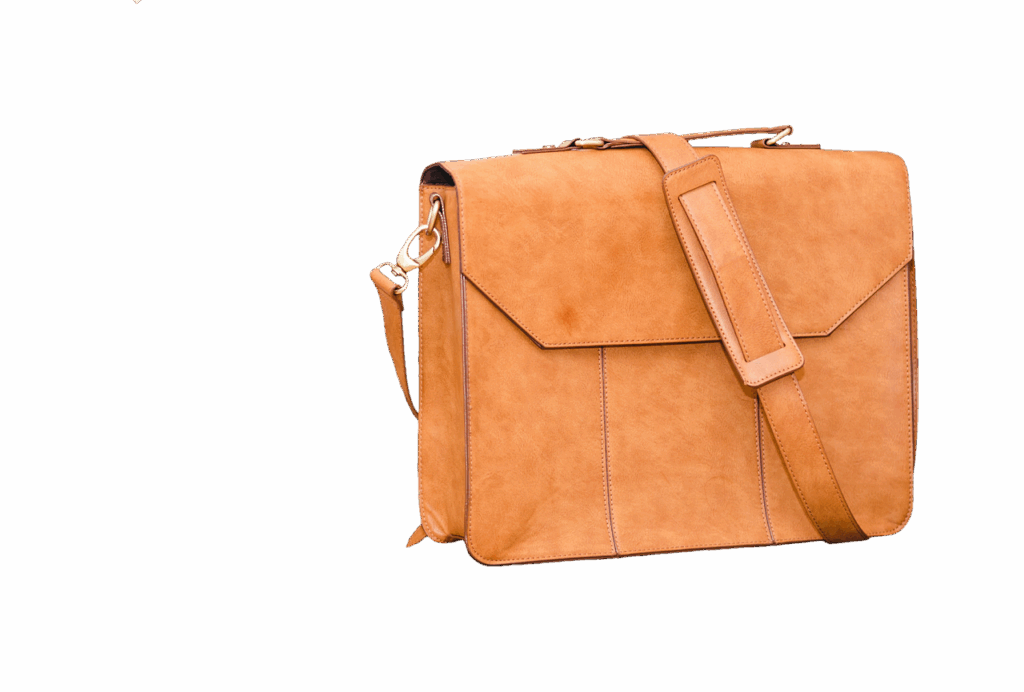
1. **The Art of the Upcycled Leather Bag: Paint & Print Perfection**There’s something incredibly satisfying about taking an old, boring leather bag from a thrift store and giving it a completely new lease on life with a fresh paint job or a vibrant print. This isn’t just a simple craft; it’s an artistic transformation that speaks volumes about your style and creativity. Imagine transforming a scuffed-up, off-white clutch into a statement piece with just a few strokes of color.
To begin this exciting journey, selecting the right bag is paramount. You’ll want to choose one that offers a nice, juicy area to create your design. Look for leather, cotton, or anything that has a good grip for the paint. While patent leather is cool, remember you’ll need to seal it with varnish. It’s also wise to avoid the cheaper types of purses; if you’re putting in all that effort, you want a sturdy bag that will hold up and bring the whole design together, especially if you’re thinking of selling your beautiful creations.
Preparation is key for a flawless finish. Before you even think about brushes and colors, make sure your bag is impeccably clean. A gentle wipe-down with watered-down dish soap and a sponge will remove any dirt or grime, providing a clean canvas for your artistry. Once clean and dry, you might consider priming the bag with a universal primer for optimal paint adhesion, especially if you’re aiming for a bold color change across the entire surface.
Now for the fun part: the paint! The context highlights the importance of using the right type, recommending “Tulip Soft Fabric Paint in a variety of colors.” This isn’t just any paint; it’s “specially formulated to bend and curve – no chipping or flaking from the usage of the purse!” This is crucial for a durable, professional-looking finish that won’t crack as the bag moves. For a dramatic transformation, you can even “paint the bag with Citrus Yellow spray paint,” letting it dry completely before proceeding.
When it comes to design, let your imagination run wild! If you have buckles with straps on the front, use blue painter’s tape to hold them back, ensuring clean lines. A clever trick is to use chalk to sketch your design, like flowers, directly onto the bag. Then, “fill in with white, so you have a nice even base coat. The white will make your colors pop!” Once that base is dry, you can “add the main color of each flower, use contrasting tones,” layering colors for depth. Finish by using black for outlining and white to add that coveted “shine,” bringing your design to life. For a truly unique touch, consider transferring vintage graphics onto the bag using t-shirt transfer paper and an iron, then sealing it all with a layer of Mod Podge for an outdoor finish. These steps, when captured in a visually rich blog post, will clearly demonstrate how a thrifted bag can be elevated to a luxurious, custom accessory.
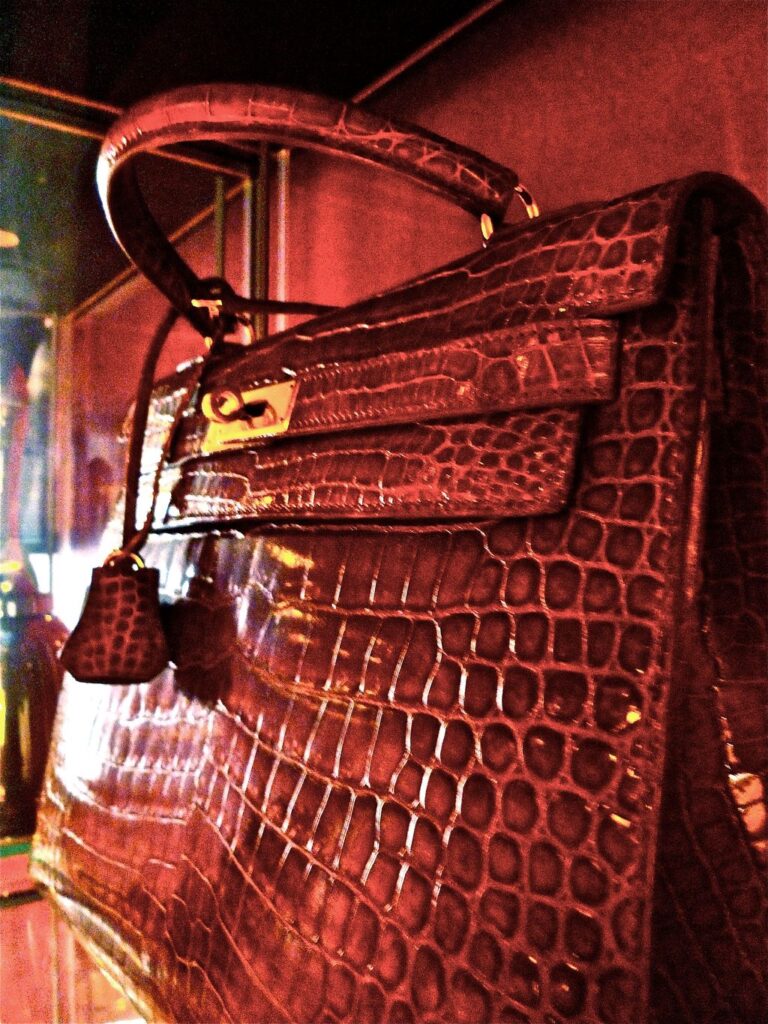
2. **Hardware Hacks for Thrifted Bags, Belts & Footwear: Instantly Elevated**Sometimes, the difference between a thrift store find and a high-end designer piece isn’t the leather itself, but the small, often overlooked, details. We’re talking about stitching, seams, and especially, hardware. “Plastic zippers and shiny buckles instantly cheapen an item,” and addressing these elements can create a major upgrade, transforming your thrifted bags, belts, and footwear into something that looks effortlessly expensive in your photos.
Think about the power of a well-chosen piece of metal. “Replace them with brushed brass, antique gold, or matte black metal hardware.” These finishes exude sophistication and a timeless quality that shiny, cheap-looking hardware simply can’t. You don’t have to break the bank to find these treasures; “you can find realistic-looking hardware on Etsy or at craft stores,” making this an accessible and impactful DIY for any blogger to share.
Beyond just swapping out pieces, consider the impact of decorative stitching. Real leather items often boast visible, strong stitching, indicating quality craftsmanship. You can replicate this handcrafted vibe by sewing in thick thread in key areas. “Use waxed thread and a heavy-duty needle” to add “decorative topstitching in areas like cuffs, bag edges, or panels.” This attention to detail elevates the item significantly, adding a bespoke feel that photographs beautifully.
Another crucial detail, particularly for bags and belts, is the finish of the edges. Exposed plastic seams on faux leather are a dead giveaway that an item isn’t genuine or high-quality. A simple yet incredibly effective trick is to “use edge paint to cover exposed plastic seams.” This creates a clean, polished look that mimics the meticulous finish found on premium leather goods. The contrast between the smooth edge paint and the material itself can add depth and a touch of refinement that’s perfect for close-up shots.
Finally, for that industrial, worn-in look that screams high fashion, don’t shy away from adding metal rivets or buckles. These small additions can dramatically alter the perception of an item, making it appear more rugged, durable, and intentionally designed. Capturing these detailed enhancements – the upgraded hardware, the meticulous stitching, and the refined edges – will undoubtedly make your thrift finds pop with luxurious appeal in every photo.
3. **Distressing & Conditioning: Giving Faux Leather Jackets a Lived-In Luxury Look**New faux leather often feels stiff and has an unnaturally smooth, sometimes overly shiny, appearance – all dead giveaways that it’s not the real deal. But here’s the secret: real leather gains character and softens with age, developing a beautiful patina and a ‘lived-in’ look that’s highly coveted. You don’t have to wait years for your thrifted faux leather jacket to achieve this; you can strategically distress and condition it to mimic that luxurious, aged appearance, making it perfect for your style-focused blog posts.
The first step to achieving that authentic texture is to tone down any excessive gloss or plastic shine. A high-gloss finish is one of the biggest red flags. By reducing this sheen, you create a softer, more realistic surface. You can gently rub down the surface with “isopropyl alcohol or acetone (sparingly) on a cloth” – always patch test first! Alternatively, “apply a matte leather sealer or even a light dusting of baby powder followed by a buff to knock off that artificial sheen.” This instantly makes the material look less plastic and more like genuine leather.
Next, let’s talk texture. Faux leather often looks too smooth, lacking the natural grain variations of real hide. While adding a full grain pattern might be ambitious, you can introduce subtle textures and creases. “Leather texture rollers or stamps can help imprint natural grain patterns,” or for a more organic approach, “use a heat gun and textured cloth to soften and press subtle creases.” This slight imperfection adds immense authenticity and depth, making the material far more visually interesting in photos.
Now for the ‘lived-in’ charm: distressing the surface. No real leather item looks brand new forever, and that’s precisely part of its appeal. Light distressing mimics natural wear and tear. You can “gently sand high-contact areas like seams, corners, or handles with fine-grit sandpaper.” Furthermore, “apply slight pressure or bend the item to encourage creases that look natural over time.” For jackets specifically, “add creasing at elbows and collar for a lived-in feel,” which gives it that perfectly worn-in, vintage luxury vibe.
Finally, conditioning. While faux leather isn’t as absorbent as real leather, the right products can still work wonders. Some PU leathers can absorb lightweight, non-oil-based conditioners, which helps “add a subtle sheen and soften the surface.” Real leather isn’t completely matte; it has a subtle glow from wear. To recreate this aged, buttery-soft look, “use wax-based balms made for synthetic leathers. Apply in thin layers, then buff with a microfiber cloth to give that natural semi-gloss finish.” For budget-friendly options, “a dab of petroleum jelly can mimic that supple, broken-in look,” or “mix a few drops of baby oil with water and mist lightly, then wipe off excess for a subtle glow.” These conditioning steps not only improve the feel but also enhance the visual richness, making your faux leather jacket look like a truly luxurious find ready for its close-up.

4. **Elegant Decanter Tags from Old Leather Belts: Bar Cart Chic**For the blogger who appreciates sophisticated home decor and the art of entertaining, transforming old leather belts into elegant decanter tags is an absolute must-feature. This project effortlessly marries sustainability with luxury, turning a forgotten accessory into a stylish detail that screams bespoke bar cart chic. It’s perfect for showcasing how small, personalized touches can elevate an entire space.
The beauty of this DIY lies in its simplicity and the immediate visual upgrade it offers. Imagine a perfectly styled bar cart, complete with gleaming decanters, each adorned with a custom leather tag that identifies its contents. This not only adds functionality but also a layer of refined aesthetic that looks far more expensive than its thrifted origins. The context beautifully states that these tags are “perfect for a home bar or bar cart, these leather decanter tags started out as a leather belt.”
To embark on this project, your treasure hunt begins at the thrift store for old leather belts. Look for belts with interesting textures, rich colors, or even subtle embellishments. The quality of the leather, even if previously worn, will contribute to the luxurious feel of the finished tags. Once you have your chosen belts, the transformation is surprisingly straightforward. “With some alphabet stamps, a leather punch, and some metal fittings, it’s easy to make an entire set of tags for your bar.”
The process involves cutting the belt leather into appropriate tag shapes – think classic rectangles, elegant ovals, or even unique custom designs. Using a leather punch, create a small hole at the top of each tag. This is where your metal fitting will attach, allowing the tag to hang gracefully around the neck of a decanter. The choice of metal fitting can further enhance the luxurious feel; brushed brass or antique gold would complement the rich tones of most leather.
Finally, personalize each tag with alphabet stamps to clearly label your spirits: “Whiskey,” “Gin,” “Vodka,” or even “House Cocktail.” The stamped letters provide a classic, artisanal touch that immediately communicates quality and thoughtfulness. Photographing these custom tags against the backdrop of a beautifully arranged bar cart, perhaps with some mood lighting, will undoubtedly create visually compelling content that inspires followers to add a touch of custom luxury to their own homes.
5. **Crafting Chic Leather Cuffs from Repurposed Belts: A Statement Accessory**Who doesn’t love a unique accessory that tells a story? For bloggers focused on fashion and sustainable style, creating chic leather cuffs from repurposed belts is an absolute goldmine. This isn’t just a craft; it’s a statement, transforming an old, forgotten belt into a piece of jewelry that exudes effortless luxury and individuality. The context enthuses that this is “such a fabulous way to extend their life in a new, stylish way.”
The inspiration for these cuffs often comes from the thrift store itself. As the context suggests, you can “find an embellished leather belt at the thrift store or have one you adore but can no longer wear?” These belts, with their unique textures, colors, or existing hardware, are perfect starting points. Look for belts that have interesting details you want to showcase, as these will become the focal points of your new accessory. A simple, sturdy leather belt can also be transformed with your own embellishments.
The beauty of this project lies in its customizability and ease. With “a few leather crafting tools,” you can create a cuff that fits perfectly and reflects your personal aesthetic. The key tools usually involve a good pair of scissors or a rotary cutter for precise cuts, a leather punch for creating holes, and fasteners like snaps or rivets to secure the cuff. The goal is to “showcase the prettiest parts of the belt and custom-make them to size.”
To craft your cuff, measure your wrist and cut a section of the belt to the desired length, allowing for overlap for the fastener. Pay attention to any existing embellishments or unique patterns on the belt, positioning them strategically on your cuff. If the belt has a buckle you love, you might even incorporate that into the design, or remove it entirely and replace it with new, luxurious-looking hardware as discussed in a previous point. The context even mentions, “When I had an active Etsy shop, I made a LOT of these leather cuffs and sold them all,” highlighting their broad appeal.
Finally, adding a closure. This could be as simple as two snaps, securely fastened with a snap-setting tool, or a more decorative clasp. The finished cuff can be worn individually as a strong statement piece or layered with other bracelets for a more eclectic look. Photographing these unique, handmade cuffs on a wrist, perhaps paired with a stylish outfit, will instantly communicate an elevated sense of fashion and inspire your audience to embrace personalized, thrifted luxury.

6. **Custom Leather Pockets: Adding a Bespoke Touch to Home Decor**When it comes to elevating home decor, it’s often the subtle, custom details that make the biggest impact. For bloggers looking to showcase inventive ways to use thrifted leather, crafting custom leather pockets offers a sophisticated solution for both organization and aesthetic appeal. This project highlights how “leather is a great accent for wood pieces” and can transform functional items into bespoke design elements.
Imagine transforming a plain wooden panel, a side of a bookshelf, or even the back of a door into a stylish storage solution. The context gives a fantastic example: “these leather scraps were shaped into pockets for business cards and screwed into the wooden holder,” specifically for a brochure/magazine holder in a rental cabin. This shows the versatility and elegance of incorporating leather into functional decor.
To create these custom pockets, your sourcing journey might lead you to thrifted leather scraps, old leather jackets that are beyond repair, or even sections of larger leather goods. The goal is to find pieces that have an interesting color, texture, or thickness that will complement the existing decor. Leather scraps in various colors and finishes are “fun for scrap buster projects,” allowing you to get creative with your material.
The crafting process is quite flexible. You’ll need to cut your leather scraps into the desired pocket shapes and sizes, keeping in mind the items you intend to store. Whether it’s a small pocket for pens and stationery, a larger one for magazines, or even a series of staggered pockets for mail, the design possibilities are endless. The key is to ensure the pockets are functional yet aesthetically pleasing. Once cut, the leather can be folded and secured, often by stitching or using rivets.
Attaching these leather pockets to a wooden surface is relatively simple. For a sturdy and lasting hold, you can “screw them into the wooden holder,” ensuring a professional and integrated look. The contrast between the natural warmth of wood and the rich texture of leather creates a visually appealing dynamic that looks inherently luxurious. Photographing these custom leather pockets, filled with neatly organized items, will beautifully illustrate how thrifted leather can be repurposed into stylish, functional, and undeniably high-end home decor that your audience will be eager to replicate.
7. **Recoloring Faux Leather: A Fresh Palette for Thrifted Finds**After nailing the texture and feel of your faux leather, it’s time to talk about color. While the right distressing can add character, an unnatural, shiny shade can still give away a thrifted piece as, well, *faux*. Real leather boasts rich, earthy tones with subtle variations that scream quality, a far cry from those bright, plastic-looking hues that sometimes pop up on synthetic items. As a blogger, demonstrating how to choose and apply the perfect color can be a total game-changer for your audience, empowering them to create truly authentic-looking pieces.
This isn’t just about covering up a bad color; it’s about making a strategic choice. The context advises us to steer clear of “high-gloss blacks, shiny reds, and neon tones that scream synthetic” if authenticity is your goal. Instead, lean into “earth tones (brown, tan, camel),” “matte black or charcoal,” or “muted greys or olive greens.” These shades inherently carry a more natural, sophisticated vibe that instantly elevates the perceived value of your thrifted find. Imagine transforming a vibrant, but cheap-looking, red faux leather bag into a rich, matte olive green — instant luxury, right?
Recoloring faux leather is absolutely possible, and your blog post can be the ultimate guide. You’ll want to “use leather paints or vinyl dyes designed for synthetics” for the best results, ensuring they adhere properly and don’t crack. Preparation is crucial here; “prep the surface with isopropyl alcohol” to ensure it’s clean and ready to accept the new color. This step removes any lingering oils or residues that could compromise the paint’s adhesion, leading to a much smoother and more durable finish.
Patience truly is a virtue when it comes to painting. The key to a professional-looking result is to “apply multiple thin coats, letting each dry fully before the next.” This layering technique builds up the color evenly and prevents unsightly streaks or clumping, which can totally undo all your hard work. Finally, to protect your masterpiece and ensure its longevity, “finish with a protective matte sealer to keep the color from chipping.” This final touch not only guards against wear and tear but also locks in that authentic, non-glossy finish that mimics genuine aged leather.
By showcasing a stunning before-and-after of a recolored thrifted item, you’ll give your followers a concrete example of how color choice and proper application can completely transform an item, making it look undeniably high-end and perfectly suited for stylish photographs. This practical and actionable advice will inspire them to see past surface imperfections and unlock the true potential of their own thrift store treasures.
8. **The Scent of Luxury: Adding a Realistic Leather Aroma**Okay, let’s talk about something often overlooked but incredibly powerful in the perception of luxury: scent. Your eyes might see a beautifully textured, perfectly conditioned faux leather bag, but if your nose catches a whiff of “plasticky” or a “strong chemical odor,” the illusion can shatter instantly. Real leather, with its distinct scent from “tanning oils and animal hide,” has an unmistakable aroma that signals quality and authenticity. For bloggers aiming for a truly immersive and believable luxury aesthetic in their content, addressing this sensory detail is pure genius.
Think about it: when you pick up a high-end leather item, that rich, earthy smell is part of the experience, isn’t it? It’s a subtle cue that contributes massively to the overall perception of luxury. For your thrifted faux leather finds, replicating this isn’t just a bonus; it’s an essential final touch that can seal the deal, especially in videos where viewers might want to imagine the full sensory experience. Making something *look* real is one thing, but making it *smell* real? That’s next level.
So, how do you infuse that coveted leather fragrance into your thrifted pieces? The context offers some fantastic “how-to” advice. You can “use leather-scented sprays made for cars or jackets.” These products are specifically formulated to mimic that unique aroma and can be applied directly to the item. The trick is to use them “sparingly so it doesn’t feel forced.” A subtle hint of leather is far more convincing than an overpowering burst.
For an even more localized and long-lasting effect, consider using “leather essential oils or cedarwood blends.” The ingenious part is where to apply them: “lightly dab [them] behind seams or inside linings.” These hidden spots allow the scent to slowly release over time, creating an authentic-smelling item without any visible residue. Imagine presenting a thrifted faux leather jacket on your blog, showcasing its new texture, color, and then, almost subconsciously, a viewer can *feel* the luxury because it *smells* right.
This small, yet impactful, detail can elevate your blog content from merely visually appealing to truly immersive. When your followers try this hack, they’ll appreciate the thought you put into every aspect of making thrifted items feel genuinely luxurious. It’s about empowering them to trick not just the eyes, but all the senses, into believing their amazing finds are the real deal.
9. **Mastering the ‘Lived-In’ Look: Aging Faux Leather for Instant Chic**Ever noticed how new faux leather often has that stiff, somewhat artificial feel, completely lacking the supple character of a well-loved, genuine leather piece? That ‘broken-in’ charm, those natural creases and soft folds—they’re the hallmarks of real leather that has gracefully aged over time. But who has years to wait for a thrift store find to achieve that perfect patina? Not us, and certainly not your audience! This is where strategic aging comes in, allowing you to give faux leather an instant, luxurious ‘lived-in’ look that’s perfectly photo-ready for your blog.
The good news is, you can totally fast-track this aging process, and it’s a goldmine for creative content. Think of it as giving your faux leather item a backstory, making it seem like a cherished vintage piece rather than a recent factory output. The context suggests that new faux leather “often feels stiff and artificial,” but with a little strategic intervention, you can bestow upon it the “soft creases, slight folds, and worn-in charm” that mimic natural wear. This is about injecting soul and authenticity into an otherwise rigid material.
One brilliant technique involves “using heat and flexing.” The context explains that “a bit of heat makes faux leather more pliable, helping you mold it to your liking.” You can “use a hairdryer on medium heat to gently soften the material,” then, while it’s still warm and cooperative, “flex, roll, and bend the item by hand to simulate natural wear.” This method is fantastic for creating those organic, soft folds that occur around stress points like elbows on a jacket or the base of bag straps. It’s an empowering tip that demonstrates immediate, visible results.
Beyond heat, manual aging tricks are your secret weapon for those subtle, authentic details. To create “realistic creases or scuffs,” the context recommends “use subtle pressure and shaping to simulate everyday use.” This could involve simply “roll[ing] the item tightly, stuff[ing] it with clothes, or leave[ing] it under weight for a day or two” to encourage those natural-looking wrinkles. A smart piece of advice is also “light sun exposure (no more than 1–2 hours) can soften stiffness and reduce gloss—but don’t overdo it.” This adds a subtle, sun-kissed patina without causing damage.
By demonstrating these easy-to-follow, yet highly effective, aging techniques, you’ll equip your audience with the knowledge to infuse character and a high-end, vintage appeal into their thrifted faux leather. Your photos will tell a story of timeless luxury, and your followers will be thrilled to replicate these hacks, turning their own stiff finds into effortlessly chic, broken-in masterpieces. It’s all about making their items look like they’ve been loved for years, not just bought last week.
10. **Chic Stamped Leather Coasters: Elevating Your Coffee Table Aesthetic**When it comes to home decor, it’s often the little details that make the biggest splash, transforming an ordinary space into something truly curated and luxurious. For bloggers passionate about elegant living and sustainable design, crafting chic stamped leather coasters from thrifted materials is an absolute must-feature. This project is a fantastic way to show your audience how to infuse personality and bespoke charm into their coffee table setup, making everyday items feel incredibly high-end.
Imagine a beautifully styled living room, complete with a cozy throw, a steaming cup of coffee, and beneath it, a coaster that looks like it came from a boutique artisan shop – but you know it started its life as a thrift store leather scrap! The context highlights that “stamped leather coasters are a great option” for a “pretty upgrade to your coffee table decor.” This isn’t just about protecting surfaces; it’s about adding a tangible layer of thoughtfulness and style that elevates the entire aesthetic of a room.
The beauty of this DIY lies in its accessibility and the relatively few supplies required. You’ll need some leather, which can be sourced from “leather scraps in various colors and finishes” from craft stores, creative reuse centers, or even sections of an old, unusable leather bag or belt. The key tools for personalization are “alphabet stamps,” allowing you to imprint initials, monograms, or even small decorative patterns. You’ll also need a leather punch for creating clean edges or decorative holes, and potentially a mallet to ensure clear impressions with the stamps.
The crafting process is wonderfully straightforward, making it perfect for a beginner-friendly blog tutorial. First, you’ll cut your leather into the desired coaster shape – circles, squares, or even unique organic forms. Then comes the fun part: stamping! Carefully arrange your chosen letters or designs on the leather, making sure they are centered and spaced evenly before firmly pressing or malleting the stamps to create clear, lasting impressions. You can experiment with different colors of leather or even ink the stamps for a bolder effect.
Photographing these custom-stamped coasters, perhaps in a flat lay with a designer coffee mug and a chic magazine, will create highly aspirational content. Your blog can inspire readers to create their own personalized sets, turning their coffee table into a stylish focal point. This project is a testament to how thrifted leather, with a touch of creativity, can translate into truly sophisticated and gift-worthy home accents that look far more expensive than their humble origins.
11. **DIY Leather Laptop Case: Personalized Protection with Panache**In our increasingly digital world, a laptop isn’t just a tool; it’s an extension of our style. For bloggers who blend fashion, function, and sustainable living, a DIY leather laptop case is an absolute showstopper. This project isn’t just about protecting precious tech; it’s about crafting a personalized, sophisticated accessory that transforms everyday utility into a statement of panache, proving that thrifted materials can absolutely look runway-ready.
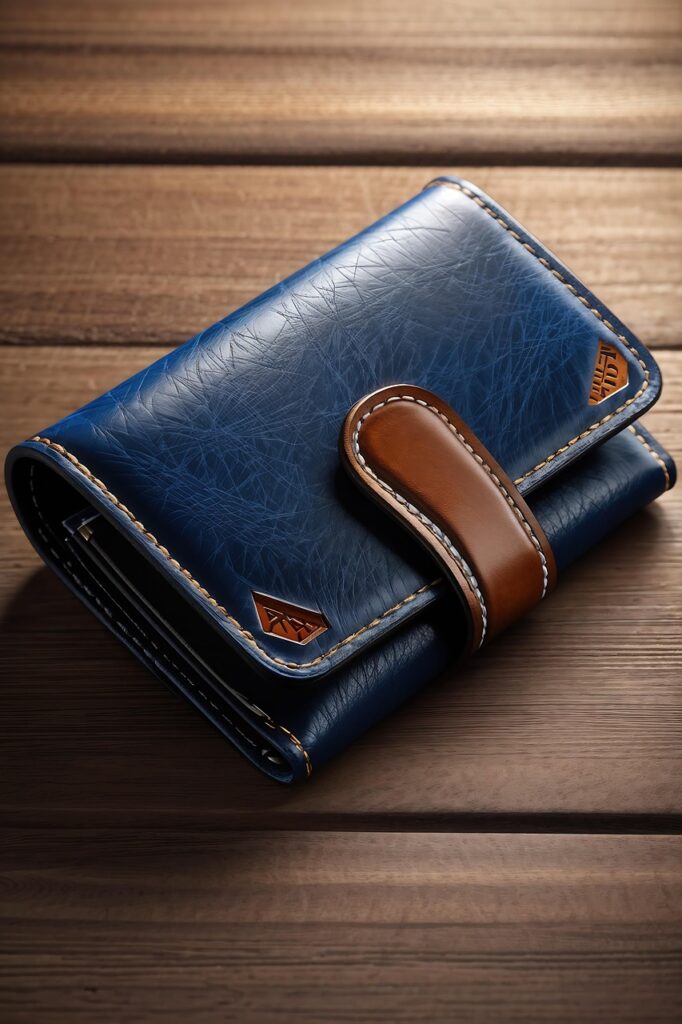
Imagine pulling out your laptop during a coffee shop work session, not from a plain, flimsy sleeve, but from a sleek, custom-made leather case that perfectly fits your aesthetic. The context highlights a “simple guide to making a DIY laptop case out of blue scraps of leather and brass rivets,” resulting in “an elegant and classy-looking case that takes less than an hour to make.” This project is a fantastic opportunity to showcase how thoughtful design, even with repurposed materials, can culminate in an item that looks effortlessly expensive.
The beauty of this DIY lies in its focus on upcycling. It’s described as “a great way to upcycle scraps of leather that would otherwise be thrown away.” Your hunt for materials can lead you to larger leather pieces from thrifted jackets, skirts, or even upholstery remnants. The choice of “blue scraps of leather” suggests an opportunity for a bold, modern look, but you could easily opt for classic browns, blacks, or even a textured faux leather to match your personal style. The “brass rivets” are key here, adding that essential touch of high-quality hardware that elevates the entire piece.
Crafting this laptop case is surprisingly straightforward, making it an excellent tutorial for your audience. You’ll need to accurately measure your laptop to ensure a snug fit, then cut your leather pieces accordingly. The construction often involves simple folding and securing, where the “brass rivets” come into play. A leather punch is essential for creating clean holes for the rivets, and a rivet setter ensures they’re securely fastened, giving the case a polished, professional finish. You might also consider edge paint (as mentioned in a previous point) for seamless edges.
Presenting this DIY leather laptop case on your blog, perhaps with your laptop nestled inside, will resonate deeply with followers who crave both style and practicality. It’s a powerful narrative about how creativity, resourcefulness, and a few key techniques can turn humble thrift finds into a tech accessory that’s not only protective but also a true reflection of their refined, sustainable style.
So there you have it, a treasure trove of innovative leather crafting projects and savvy styling hacks, all designed to transform your thrift store finds into luxurious, blog-worthy masterpieces. From giving faux leather an authentic touch to crafting personalized accessories and sophisticated home decor, these ideas are more than just DIYs—they’re an invitation to rethink, repurpose, and reimagine what’s possible with a little creativity and a lot of heart. Dive in, experiment, and prepare to amaze your audience (and yourself!) with the sheer elegance you can unearth and elevate from the secondhand rack. Happy crafting, and remember: luxury doesn’t always come with a designer price tag; sometimes, it’s just a brilliant idea away!


