
")
Alright, buckle up buttercups, because we’re about to take a seriously delicious (and slightly melancholy) trip down memory lane! The American dinner table, once a bastion of tradition and home-cooked goodness, has undergone some pretty wild transformations over the past few decades. Remember when families gathered around a formal dining room? As early as 2015, HuffPost was already reporting that the traditional dining room might actually be “going extinct.” Builders are even opting for single “flexible” spaces where cooking, screen time, and homework all happen in one glorious, bustling spot. Talk about a shift!
But what exactly happened? A cocktail of cultural changes, that’s what! Television, for instance, completely reshaped dinner time for countless families, pulling meals from the dining room table to TV trays. Then came the monumental shift as women entered the workforce in droves, meaning those traditional, time-consuming meals had to give way to more convenient options. It was all about saving time and effort while still squeezing in some quality family moments, leading to a landscape where “more traditional, time-consuming meals gave way to more convenient options.”
As our eating habits evolved, so did the dishes we loved to make. Remember when casseroles were “all the rage,” but now “they’re not as common anymore”? Some dinners were so similar you could hardly tell them apart, like chicken à la king and chicken tetrazzini. So, grab a fork (and maybe a tissue for the nostalgia!), because we’re about to dive into a list of “14 Once-Classic Dinners America Just Doesn’t Cook Anymore.” These are the old-school eats that deserve a serious comeback, proving that sometimes, “you can’t beat what’s tried and true.” Let’s dust off those aprons and bring the flavor back home!

1. **Chicken Tetrazzini**Oh, Chicken Tetrazzini! Just the name conjures up images of “cozy family dinners” with that delicious, bubbly casserole emerging from the oven. This creamy pasta dish was a true “comforting classic,” bursting with the rich flavors of chicken, savory mushrooms, and just a hint of sherry that elevated it from simple to sublime. It truly felt like a warm hug in a bowl, designed to soothe and satisfy.
Imagine the aroma filling your kitchen as the cheese melted and formed that perfect, golden crust; it was “irresistible.” This wasn’t just a meal; it was a centerpiece that brought everyone together, a delightful blend of “cooked spaghetti, tender white meat chicken, and buttery mushrooms, all mixed in a creamy sauce” and “baked until golden and bubbly.” It efficiently combined simplicity and flavor, promising “comfort in every bite.”
Once a go-to crowd-pleaser for “family gatherings or potlucks,” Chicken Tetrazzini seems to have been relegated to the archives of forgotten recipes. It’s a “classic comfort food that’s often forgotten,” overshadowed by newer, trendier dishes. But honestly, why? It was a hearty meal that still “feels like a warm hug,” and it’s high time we remember this “delightful blend” and give Chicken Tetrazzini the love and recognition it deserves. Don’t you think it’s time to bring this classic back?

Chicken Tetrazzini
Ingredients
Equipment
Method
- Preheat your oven to 375°F (190°C) and butter a 9×13 inch baking dish.
- Bring a large pot of salted water to a boil, add the linguine broken in half, and cook according to package directions until al dente; drain and set aside.
- In a large skillet or Dutch oven, melt 2 tablespoons of butter over medium-high heat, add the sliced mushrooms, and cook until tender and browned, about 8-10 minutes; season with salt and pepper, then remove from the skillet and set aside.
- Melt the remaining 4 tablespoons of butter in the same skillet over medium heat, then whisk in the all-purpose flour and cook for 1 minute to create a roux.
- Gradually whisk in the milk, chicken broth, and dry white wine until smooth; bring to a simmer, stirring constantly, and cook until the sauce thickens.
- Stir 2 cups of the grated Parmesan cheese and the dried thyme into the sauce; season generously with salt and pepper to taste.
- Combine the cooked linguine, shredded rotisserie chicken, sautéed mushrooms, and thawed peas with the creamy sauce in the skillet.
- Pour the mixture into the prepared baking dish, spreading it evenly.
- Sprinkle the remaining 1 cup of Parmesan cheese over the top of the casserole.
- Bake for 20-25 minutes, or until bubbling and the cheese is golden brown; let stand for a few minutes before serving.
Notes
Read more about: Let’s Be Real: What Happened to 14 Beloved U.S. Foods That Faded Away?
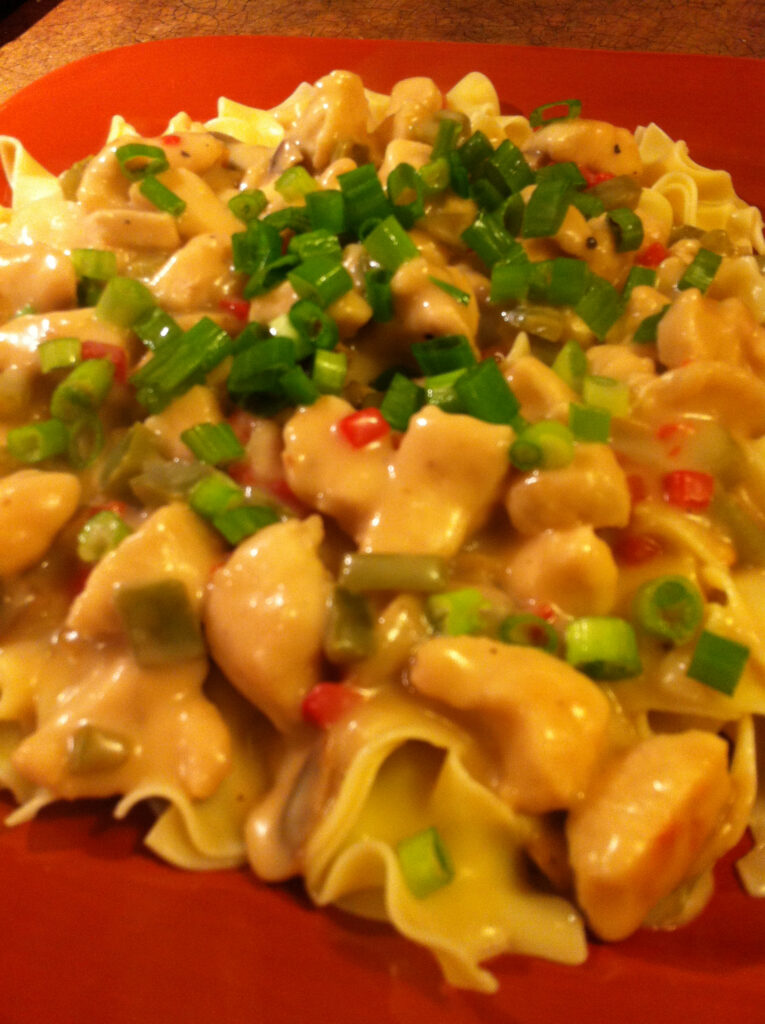
2. **Chicken A La King**Speaking of creamy chicken dishes, let’s talk about Chicken à la King! This was a dish that once “graced elegant dinner parties” and was a staple of “mid-20th century American cuisine.” Tender pieces of chicken mingled with earthy mushrooms and crisp bell peppers, all enveloped in a “luscious cream sauce.” It was the kind of meal that felt sophisticated yet utterly comforting at the same time.
It truly was a “deliciously creamy dinner,” a comfort food favorite for so many. The beauty of Chicken à la King was its versatility; it was “commonly served over rice, pasta, or toast,” offering a different experience depending on how you enjoyed it. This dish offered “a taste of nostalgia,” proving “how simplicity and flavor can create magic” with its “rich and creamy” texture.
The context notes it “started as hotel food, then became home food, then faded quietly.” It seems almost unfair for such a beloved dish to just *poof* disappear. Despite being “extremely popular in its day,” “this dish is long-forgotten now in most households.” You’d be “lucky to spot it now outside a vintage cookbook.” Chicken à la King offers a taste of nostalgia that’s worth revisiting, showcasing that “creamy, chicken-rich sauce” over toast, rice, or noodles.

Tom Yum Goong
Ingredients
Equipment
Method
- Prepare all ingredients: wash and crush lemongrass and galangal, finely chop Bird’s-eye chili, clean and chop oyster mushrooms, wash kaffir lime leaves, and clean the prawns.
- Heat peanut oil in a large stockpot or saucepan over medium heat.
- Add the crushed lemongrass, galangal, and chopped Bird’s-eye chili to the pot; sauté for 1 minute until fragrant.
- Pour in the chicken stock and coconut milk, bringing the mixture to a gentle simmer.
- Stir in the roasted chili paste and kaffir lime leaves until the paste is fully dissolved into the simmering broth.
- Add the chopped oyster mushrooms and fresh coconut meat; simmer for 3-5 minutes.
- Gently add the cleaned king prawns to the simmering soup and cook for 2-3 minutes, or until they turn pink and opaque, ensuring not to overcook them.
- Remove the pot from the heat, then stir in the fish sauce and fresh lime juice.
- Taste and adjust seasoning as needed to achieve your desired balance of spicy, sour, and salty flavors.
- Ladle the hot Tom Yum Goong into serving bowls and serve immediately.
Notes
Read more about: Critical Depression Symptoms You Should Never Ignore: A Deep Dive into the Sleep-Depression Connection for Your Well-being
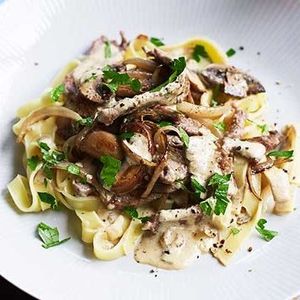
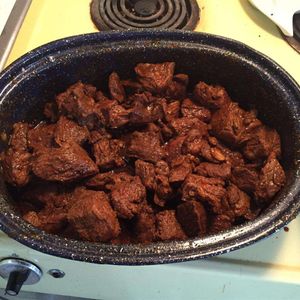
3. **Beef Stroganoff**Ah, Beef Stroganoff! Once a bona fide “popular choice for dinner,” this dish was practically synonymous with cozy, satisfying meals. It masterfully combined “tender beef, mushrooms, and onions in a rich, savory sauce,” all poured generously “over egg noodles.” This, my friends, truly “epitomizes comfort food,” delivering a meal that “warms both the heart and the stomach” with its creamy texture and hearty flavor.
Originating from Russian roots, this tasty dish was “adapted to various cuisines around the world, including America, and became a global favorite.” It was a “dinner-party staple in the 1960s,” a go-to for combining richness with just enough elegance to impress without being overly complicated. The “sautéed beef strips in sour cream and mushroom sauce” were celebrated for being “bursting with flavor.”
However, like many classics, “its popularity has faded since then,” and it’s now often “just a fond memory for many Americans.” The rise of “lighter trends and global cuisines pushed it aside,” leaving it to feel “like a time capsule of mid-century cooking.” But don’t let that fool you; Beef Stroganoff still delivers a punch of flavor and comfort that’s hard to beat. It’s a classic that deserves to be dusted off and savored once again.
Beef stroganoff
Ingredients
Equipment
Method
- Thinly slice the onion, mince the garlic, slice the mushrooms, and slice the fillet steak into strips. Chop the parsley.
- Heat olive oil in a large frying pan over medium heat. Add the sliced onion and cook until softened, about 5-7 minutes.
- Stir in the minced garlic and cook for another minute until fragrant. Remove the onion and garlic from the pan and set aside.
- Add butter to the same pan. Once melted, add the sliced mushrooms and cook over medium-high heat until deeply browned and their liquid has evaporated, about 5-8 minutes. Remove the mushrooms and set aside.
- Increase heat to high. Sear the sliced fillet steak in batches (if necessary to avoid overcrowding) until browned on all sides, but still pink inside. Remove the beef and set aside.
- Reduce heat to medium. Sprinkle the plain flour into the pan juices and cook, stirring constantly, for 1 minute to create a roux.
- Gradually whisk in the beef stock, bringing the mixture to a simmer and stirring until the sauce thickens.
- Return the cooked onions, garlic, mushrooms, and beef to the pan. Stir well to coat everything in the sauce.
- Remove the pan from the heat. Stir in the crème fraîche and English mustard until fully combined and heated through (do not boil after adding crème fraîche).
- Stir in the chopped fresh parsley just before serving. Taste and season with salt and pepper as needed.
Notes
Read more about: Blast from the Past: Unearthing 6 Iconic 80s Frozen Dinners That Pioneered the Microwave Revolution

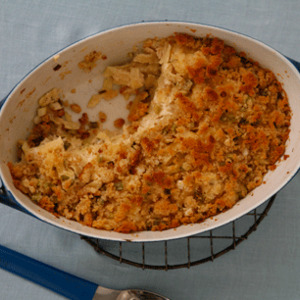
4. **Tuna Noodle Casserole**If there’s one dish that screams “post-war America” and ingenious budget-friendly cooking, it’s Tuna Noodle Casserole! This delightful blend of noodles, canned tuna, and a creamy sauce, often crowned with “crunchy potato chips” or breadcrumbs, was a true “staple.” It was the kind of meal that “promises comfort in every bite,” a testament to making the most of pantry ingredients.
This hearty casserole was often seen as a “pantry-cleaning recipe,” efficiently combining “simplicity and flavor” into one satisfying dish. It was a go-to for “home-cooked cheap and convenient meals,” proving that deliciousness didn’t have to come with a hefty price tag or endless hours in the kitchen. The “older generations knew what they were doing” when it came to stretching a dollar and filling hungry bellies with something truly satisfying.
But sadly, “these days, people tend to rely on ready meals for convenience instead of throwing together something more satisfying.” Tuna Noodle Casserole, despite its ease and deliciousness, has largely been forgotten. It’s a shame, really, because this dish offers a warm, satisfying experience that’s both economical and genuinely comforting. It’s a true unsung hero of the dinner table that deserves a revival.
Tuna–Noodle Casserole
Ingredients
Equipment
Method
- Preheat your oven to 375°F (190°C). Grease a 9×13-inch baking dish.
- Bring a large pot of salted water to a boil. Add the flat egg noodles and cook according to package directions until al dente; drain well.
- While noodles cook, melt 4 tbsp. of butter in a large skillet or saucepan over medium heat. Add the chopped scallions and cook until softened, about 3-5 minutes.
- Stir in the flour and dry mustard into the scallions, cooking for 2 minutes to create a roux.
- Gradually whisk in the milk until the sauce is smooth and thickened. Season generously with salt and freshly ground black pepper.
- Remove the sauce from heat and gently fold in the drained tuna chunks and cooked noodles.
- Transfer the noodle mixture into the prepared baking dish, spreading evenly.
- In a small skillet, melt the remaining 6 tbsp. of butter. Add the fresh bread crumbs and cook over medium heat, stirring frequently, until golden brown and crispy.
- Sprinkle the toasted bread crumbs evenly over the casserole.
- Bake for 20-25 minutes, or until the casserole is bubbly and the topping is golden brown. Let rest for a few minutes before serving.
Notes
Read more about: From Hidden Gems to Hipster Hangouts: 11 Nostalgic Foods Staging a Delicious Comeback

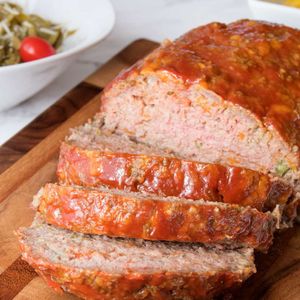
5. **Meatloaf**When we talk about “quintessential American dinner,” Meatloaf immediately springs to mind! This isn’t just a meal; it’s “comfort on a plate.” Imagine ground meat, expertly blended with breadcrumbs and spices, then “baked to perfection” to create a dish that is both “flavorful” and wonderfully “moist.” It’s the kind of hearty meal that instantly makes a house feel like a home.
Often topped with a vibrant “ketchup glaze,” adding a sweet and tangy counterpoint, Meatloaf was traditionally “served with mashed potatoes or vegetables.” It was a universal pleaser, a “favorite for all ages, pleasing both children and grandparents alike,” which is precisely why it was such a “staple at many American dinner tables.” The context even declares, “Maybe we should bring this classic back!”
Its humble, hearty nature made it easy to stretch, a reliable cornerstone of family meals. Ground beef, breadcrumbs, and that signature ketchup glaze — Meatloaf once sat at the “center of countless weeknight dinners.” It was a simple, satisfying solution for busy families, offering a familiar taste that provided warmth and sustenance.
However, in our quest for “fresher proteins and quicker meals,” Meatloaf has become “less common.” But for many, it “still holds a place in Sunday supper memories,” a symbol of uncomplicated, heartfelt cooking. This classic dish, packed with flavor and tradition, truly deserves another moment in the spotlight.
Cracker Barrel Meatloaf
Ingredients
Equipment
Method
- Preheat oven to 350°F (175°C) and lightly grease a loaf pan.
- Finely crush 45 butter crackers. In a large mixing bowl, combine the crushed crackers, 2 pounds ground beef (80 percent lean), 1 cup grated sharp cheddar, 1/2 to 3/4 cup finely diced green bell pepper, 1/2 cup finely diced yellow onion, 1/2 cup whole milk, 2 lightly beaten large eggs, 1 teaspoon salt, and 1/4 teaspoon black pepper.
- Gently mix all meatloaf ingredients until just combined; avoid overmixing to keep the meatloaf tender.
- Shape the mixture into an even loaf and place it into the prepared loaf pan.
- In a small bowl, whisk together 1/2 cup ketchup, 2 tablespoons brown sugar, and 1 teaspoon yellow mustard for the glaze.
- Bake the meatloaf for 45 minutes.
- Remove the meatloaf from the oven, then spread the glaze evenly over the top.
- Return to the oven and continue baking for an additional 15-20 minutes, or until an internal temperature of 160°F (71°C) is reached and the glaze is caramelized.
- Remove from the oven and let the meatloaf rest in the pan for 10-15 minutes before slicing to allow juices to redistribute.
- Slice and serve warm.
Notes
Read more about: Blast from the Past: Unearthing 6 Iconic 80s Frozen Dinners That Pioneered the Microwave Revolution
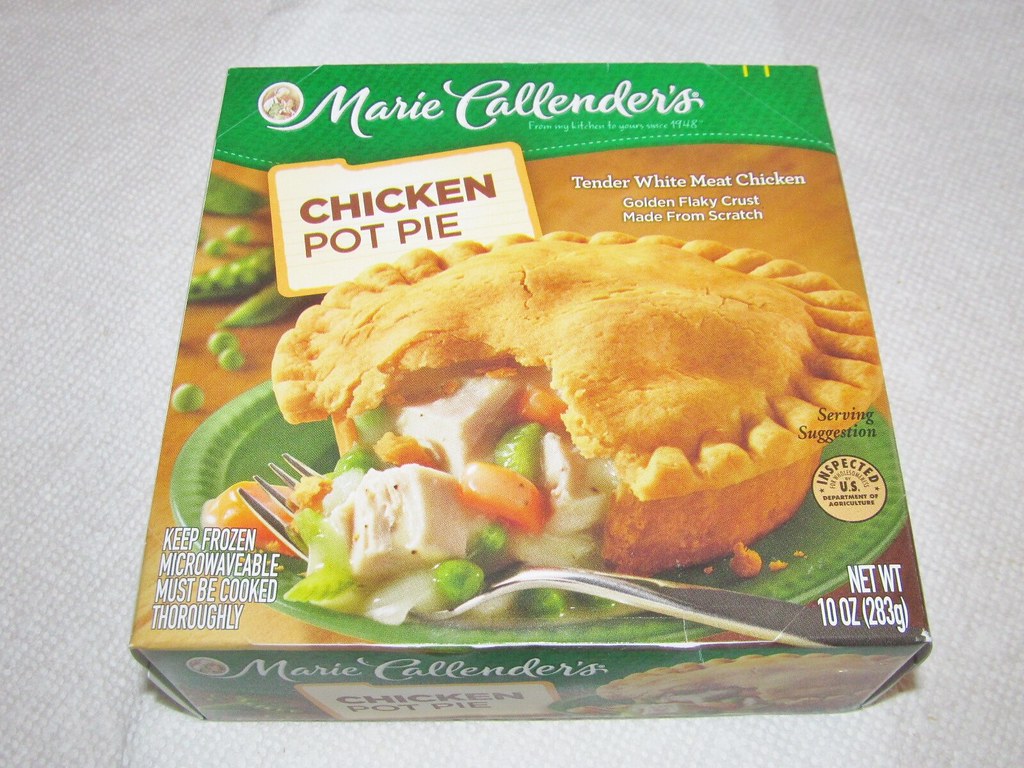
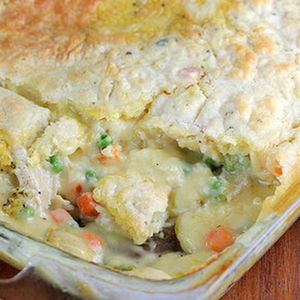
6. **Chicken Pot Pie**Few dishes evoke “pure nostalgia” quite like Chicken Pot Pie. With its “flaky crust and creamy filling,” it’s a culinary hug that warms you from the inside out. The magical combination of tender chicken, mixed vegetables, and a rich, savory gravy, all lovingly “encased in pastry,” is simply unbeatable. It’s a truly iconic dish that “carries the flavor of entire generations.”
This comforting pie was once “a much-loved dish for family dinners in the colder months,” and for good reason! “Served on chilly days,” it would fill “the kitchen with an inviting aroma,” promising a hearty and satisfying meal. The BBC even noted that “old-fashioned dishes like chicken pot pie had a good balance of healthy ingredients, nutrients, and tasty additions,” making it not just delicious, but also quite wholesome.
Imagine breaking through that golden, crispy crust to reveal the steaming, creamy filling beneath – a truly satisfying experience. This “savory mixture of chicken, vegetables, and creamy gravy” was beloved for good reason. It’s a dish that manages to be both rustic and elegant, a perfect example of comfort food elevated, often “served with pride, eaten with joy, and remembered long after.”
Sadly, like many cherished classics, Chicken Pot Pie has become a “nostalgic item” that has quietly slipped from our dinner tables. It’s no longer the staple it once was, perhaps overshadowed by faster, less involved meal options. But for those who remember its comforting embrace, it remains a beloved memory, a dish that truly deserves to be rediscovered and enjoyed by new generations.
Chicken Pot Pie Casserole
Ingredients
Equipment
Method
- Preheat your oven to 375°F (190°C) and lightly grease an 8×8 inch or similar sized casserole dish.
- In a large mixing bowl, combine the Marie Calander’s Chicken Pot Pie Soup, milk, and ground black pepper. Whisk until well combined.
- Stir in 1/4 cup of the shredded cheddar cheese into the soup mixture.
- Add the cooked and drained egg noodles to the soup and cheese mixture, folding gently to ensure the noodles are evenly coated.
- Pour the entire mixture into the prepared casserole dish, spreading it out evenly.
- Sprinkle the remaining 1/4 cup of shredded cheddar cheese over the top of the casserole.
- Bake for 20-25 minutes, or until the casserole is bubbling around the edges and the cheese topping is melted and lightly golden.
- Carefully remove the casserole from the oven and let it rest for 5-10 minutes before serving to allow it to set and prevent burns.
Notes
Read more about: Critical Depression Symptoms You Should Never Ignore: A Deep Dive into the Sleep-Depression Connection for Your Well-being
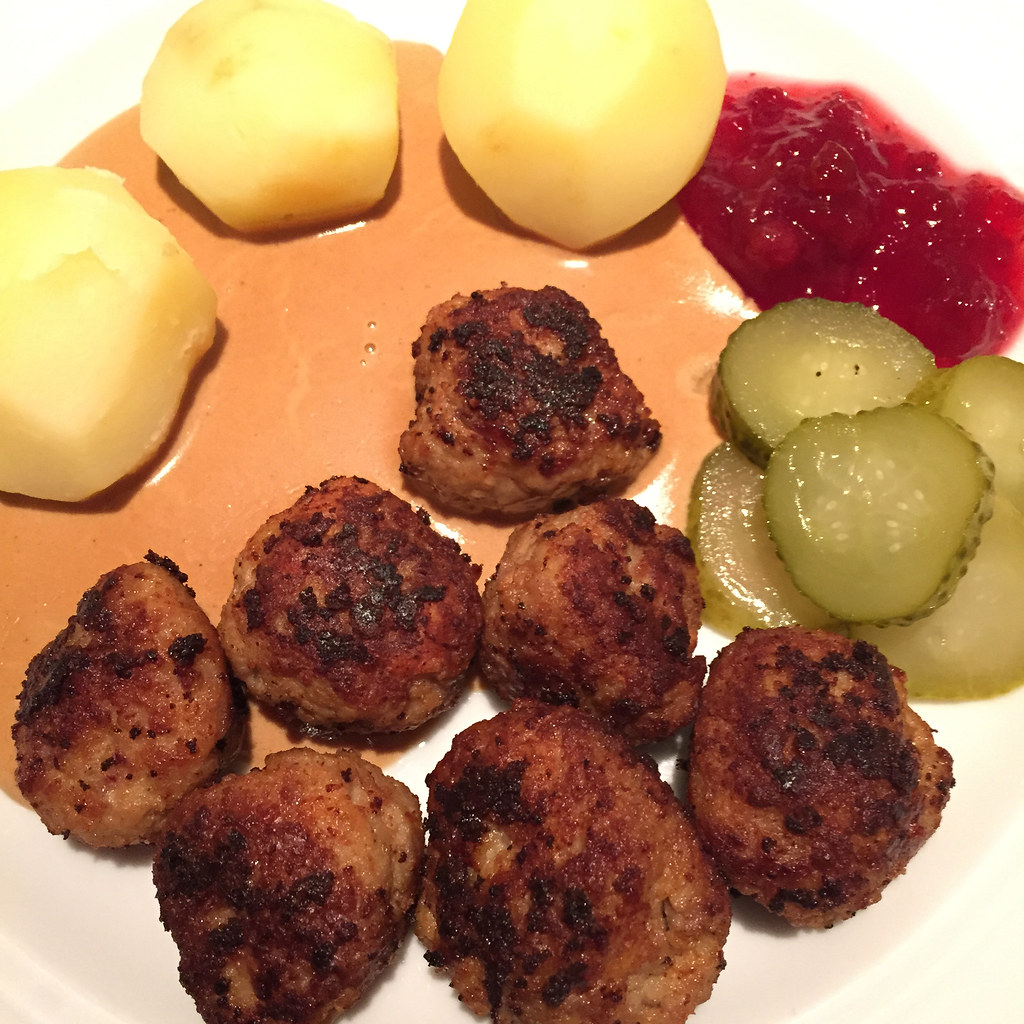
7. **Swedish Meatballs**Get ready to swoon, because next up we have the truly “Iconic and flavorful” Swedish Meatballs! This dish offers “a unique taste experience” that’s both comforting and a little bit exotic. Picture these “small, tender meatballs” served generously “in a creamy sauce,” often “paired with lingonberry jam,” creating an absolutely “harmonious blend of sweet and savory.” It’s a flavor combination that’s just pure genius.
While these delicious morsels are “a nod to Scandinavian traditions,” they were wholeheartedly “adopted by Americans as a tasty comfort food.” This “traditional Scandinavian meal of meatballs served in a rich, creamy gravy” became “a widely popular American dinner,” loved for its satisfying meatballs. It’s the kind of dish that feels special enough for guests, yet comforting enough for a regular family meal.
Its popularity even surged as it became “synonymous with the furniture store IKEA and a best-seller at their food court.” For many, a trip to IKEA wasn’t complete without a plate of those iconic meatballs. They introduced a whole generation to this delightful dish, cementing its place in popular culture, even if it wasn’t always a home-cooked affair.
However, here’s the bittersweet part: “people rarely eat this dish outside of IKEA anymore.” Despite its unique flavor profile and comforting appeal, Swedish Meatballs have largely faded from the home cooking scene. It’s a shame, considering how incredibly satisfying and distinctly delicious they are. Perhaps it’s time we all stopped by the frozen section or, better yet, tried making them from scratch to bring this beloved classic back home!
Alright, so we’ve already taken a glorious (and perhaps slightly tear-inducing) stroll through some truly iconic American dinner classics that have sadly ghosted our plates. But hold onto your spatulas, because our nostalgic trip is far from over! We’re diving back into the culinary archives to unearth seven more beloved dinners that, for reasons unknown, have mysteriously faded from our kitchen rotations. Get ready to have your taste buds tickled and your memories jogged, because these old-school eats deserve a serious shout-out! It’s time to rediscover the unique flavors and comforting vibes they brought to our family meals.
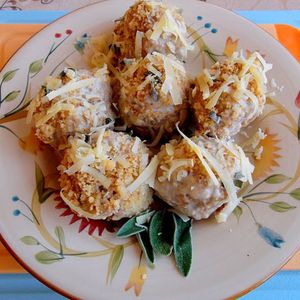
Swedish Meatballs in Walnut and Sage Alfredo Sauce
Ingredients
Equipment
Method
- Soak bread in milk; sauté chopped onion and garlic until softened.
- Grind chuck and veal (if not pre-ground) and combine with soaked bread, sautéed aromatics, egg yolks, salt, pepper, dried sage, and nutmeg in a large bowl, mixing gently to avoid overworking the meat.
- Form the meat mixture into small, uniform meatballs.
- Heat olive oil in a large skillet over medium-high heat and brown the meatballs in batches until golden on all sides, then remove and set aside.
- In the same skillet, melt butter over medium heat.
- Gradually whisk in whole milk, bringing it to a gentle simmer.
- Stir in freshly grated Parmigiano-Reggiano until melted and smooth.
- Add finely ground walnuts and freshly chopped sage to the sauce, stirring to combine.
- Season the sauce with fresh black pepper to taste.
- Return the browned meatballs to the sauce, coating them thoroughly, and simmer gently for a few minutes to heat through and allow flavors to meld.
Notes
Read more about: From Hidden Gems to Hipster Hangouts: 11 Nostalgic Foods Staging a Delicious Comeback

8. **Beef Rouladen**Prepare your senses for a truly artful experience, because Beef Rouladen is not just a dish, it’s a masterpiece of flavors and textures, with its roots deeply planted in German tradition. Imagine thin, tender slices of beef, lovingly rolled around a savory core of tangy pickles, finely chopped onions, and a generous smear of rich mustard. Each little bundle is a promise of pure deliciousness, a testament to thoughtful, slow cooking.
Once these flavorful parcels are expertly seared to achieve that perfect outer crust, they embark on a gentle simmer. This slow dance in the pot allows the beef to become incredibly tender, practically melting in your mouth, while simultaneously absorbing that delightful medley of flavors from the pickle, onion, and mustard within. It’s a symphony of sweet, savory, and tangy notes that combine to create an utterly satisfying bite.
This isn’t just a meal; it’s a warm embrace that speaks to generations of comforting home cooking. Despite its rich history and undeniable deliciousness, Beef Rouladen has, like so many other gems, quietly slipped away from the mainstream American dinner table. It’s a shame, really, because a dish that combines such simple ingredients into such a complex and satisfying flavor profile deserves so much more than to be a forgotten whisper in old cookbooks. Don’t you think it’s time to roll with this classic again?
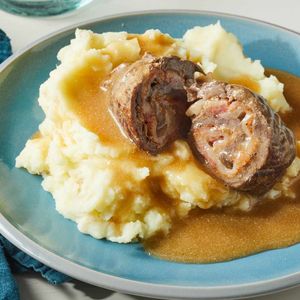
German Beef Rouladen
Ingredients
Equipment
Method
- Pound each piece of round steak to 1/4 inch thickness.
- Spread each pounded steak with 1 tablespoon of Dijon mustard, then sprinkle with a generous pinch of paprika, salt, and pepper.
- Place one slice of bacon and about 2 tablespoons of minced onion on one end of each steak. Roll up tightly and secure with kitchen twine or toothpicks.
- Heat canola oil in a large Dutch oven or heavy-bottomed pot over medium-high heat. Brown the rouladen on all sides until deeply colored, then remove and set aside.
- Pour the beef broth and 1.25 cups of water into the pot, scraping up any browned bits from the bottom. Bring to a boil.
- Return the rouladen to the pot, reduce heat to low, cover, and simmer for at least 2 hours, or until the beef is fork-tender.
- Carefully remove the rouladen from the pot, snip off the twine or remove toothpicks, and keep warm.
- In a small bowl, whisk together the cornstarch and 1 cup warm water until smooth to create a slurry.
- Bring the braising liquid to a gentle simmer. Gradually whisk in the cornstarch slurry and cook, stirring constantly, until the gravy thickens to your desired consistency.
- Remove the pot from the heat and stir in the sour cream until well combined. Adjust seasoning if necessary. Serve the rouladen sliced with the rich gravy.
Notes

9. **Salmon Patties**Who’s ready for a quick and utterly satisfying meal that’s unfortunately been overshadowed by all the trendier fish dishes out there? We’re talking about Salmon Patties, folks! These delightful little discs of flaky salmon, perfectly mixed with crunchy breadcrumbs and a whisper of fresh herbs, are truly a testament to making magic with simple ingredients.
Once formed, these beauties are pan-fried to a golden, crispy perfection, creating a mouth-watering texture that’s hard to beat. The best part? A simple squeeze of fresh lemon juice is all it takes to transform these humble patties into a delightfully bright and flavorful entrée. They’re so easy to whip up, and they immediately bring back those comforting memories of family dinners where deliciousness didn’t have to mean complicated.
It’s a crying shame that these versatile, protein-packed powerhouses aren’t making more regular appearances on our plates today. While modern palates might lean towards other seafood options, there’s an undeniable charm and ease to salmon patties that just begs for a comeback. They’re economical, quick, and genuinely delicious – proof that sometimes, the best things are right under our noses, or rather, in our pantries!

Salmon patties
Ingredients
Equipment
Method
- Drain canned salmon thoroughly and mash it well with a fork in a mixing bowl, carefully removing any large bones or skin if desired.
- Finely grate the sweet potato and add it to the bowl with the mashed salmon.
- Add the eggs, buckwheat flour, and chopped parsley to the salmon and sweet potato mixture.
- Season the mixture with salt and pepper to taste, then mix all ingredients thoroughly until well combined and pliable.
- Using your hands, form the mixture into approximately 8-10 small, uniform patties, about 1-inch thick.
- Heat the coconut oil in a non-stick skillet over medium heat until it shimmers.
- Carefully place the patties into the hot skillet, ensuring not to overcrowd the pan; cook in batches if necessary.
- Fry the patties for 4-5 minutes on each side, or until they are golden brown and cooked through to the center.
- Remove the cooked patties from the skillet and transfer them to a plate lined with paper towels to absorb any excess oil.
- Serve the salmon patties warm, optionally with a fresh lemon wedge or a light herb sauce for added zest.
Notes
Read more about: Unlock Your Freezer’s Potential: 14 Simple Ways Functional Frozen Foods Can Supercharge Your Health and Simplify Your Life
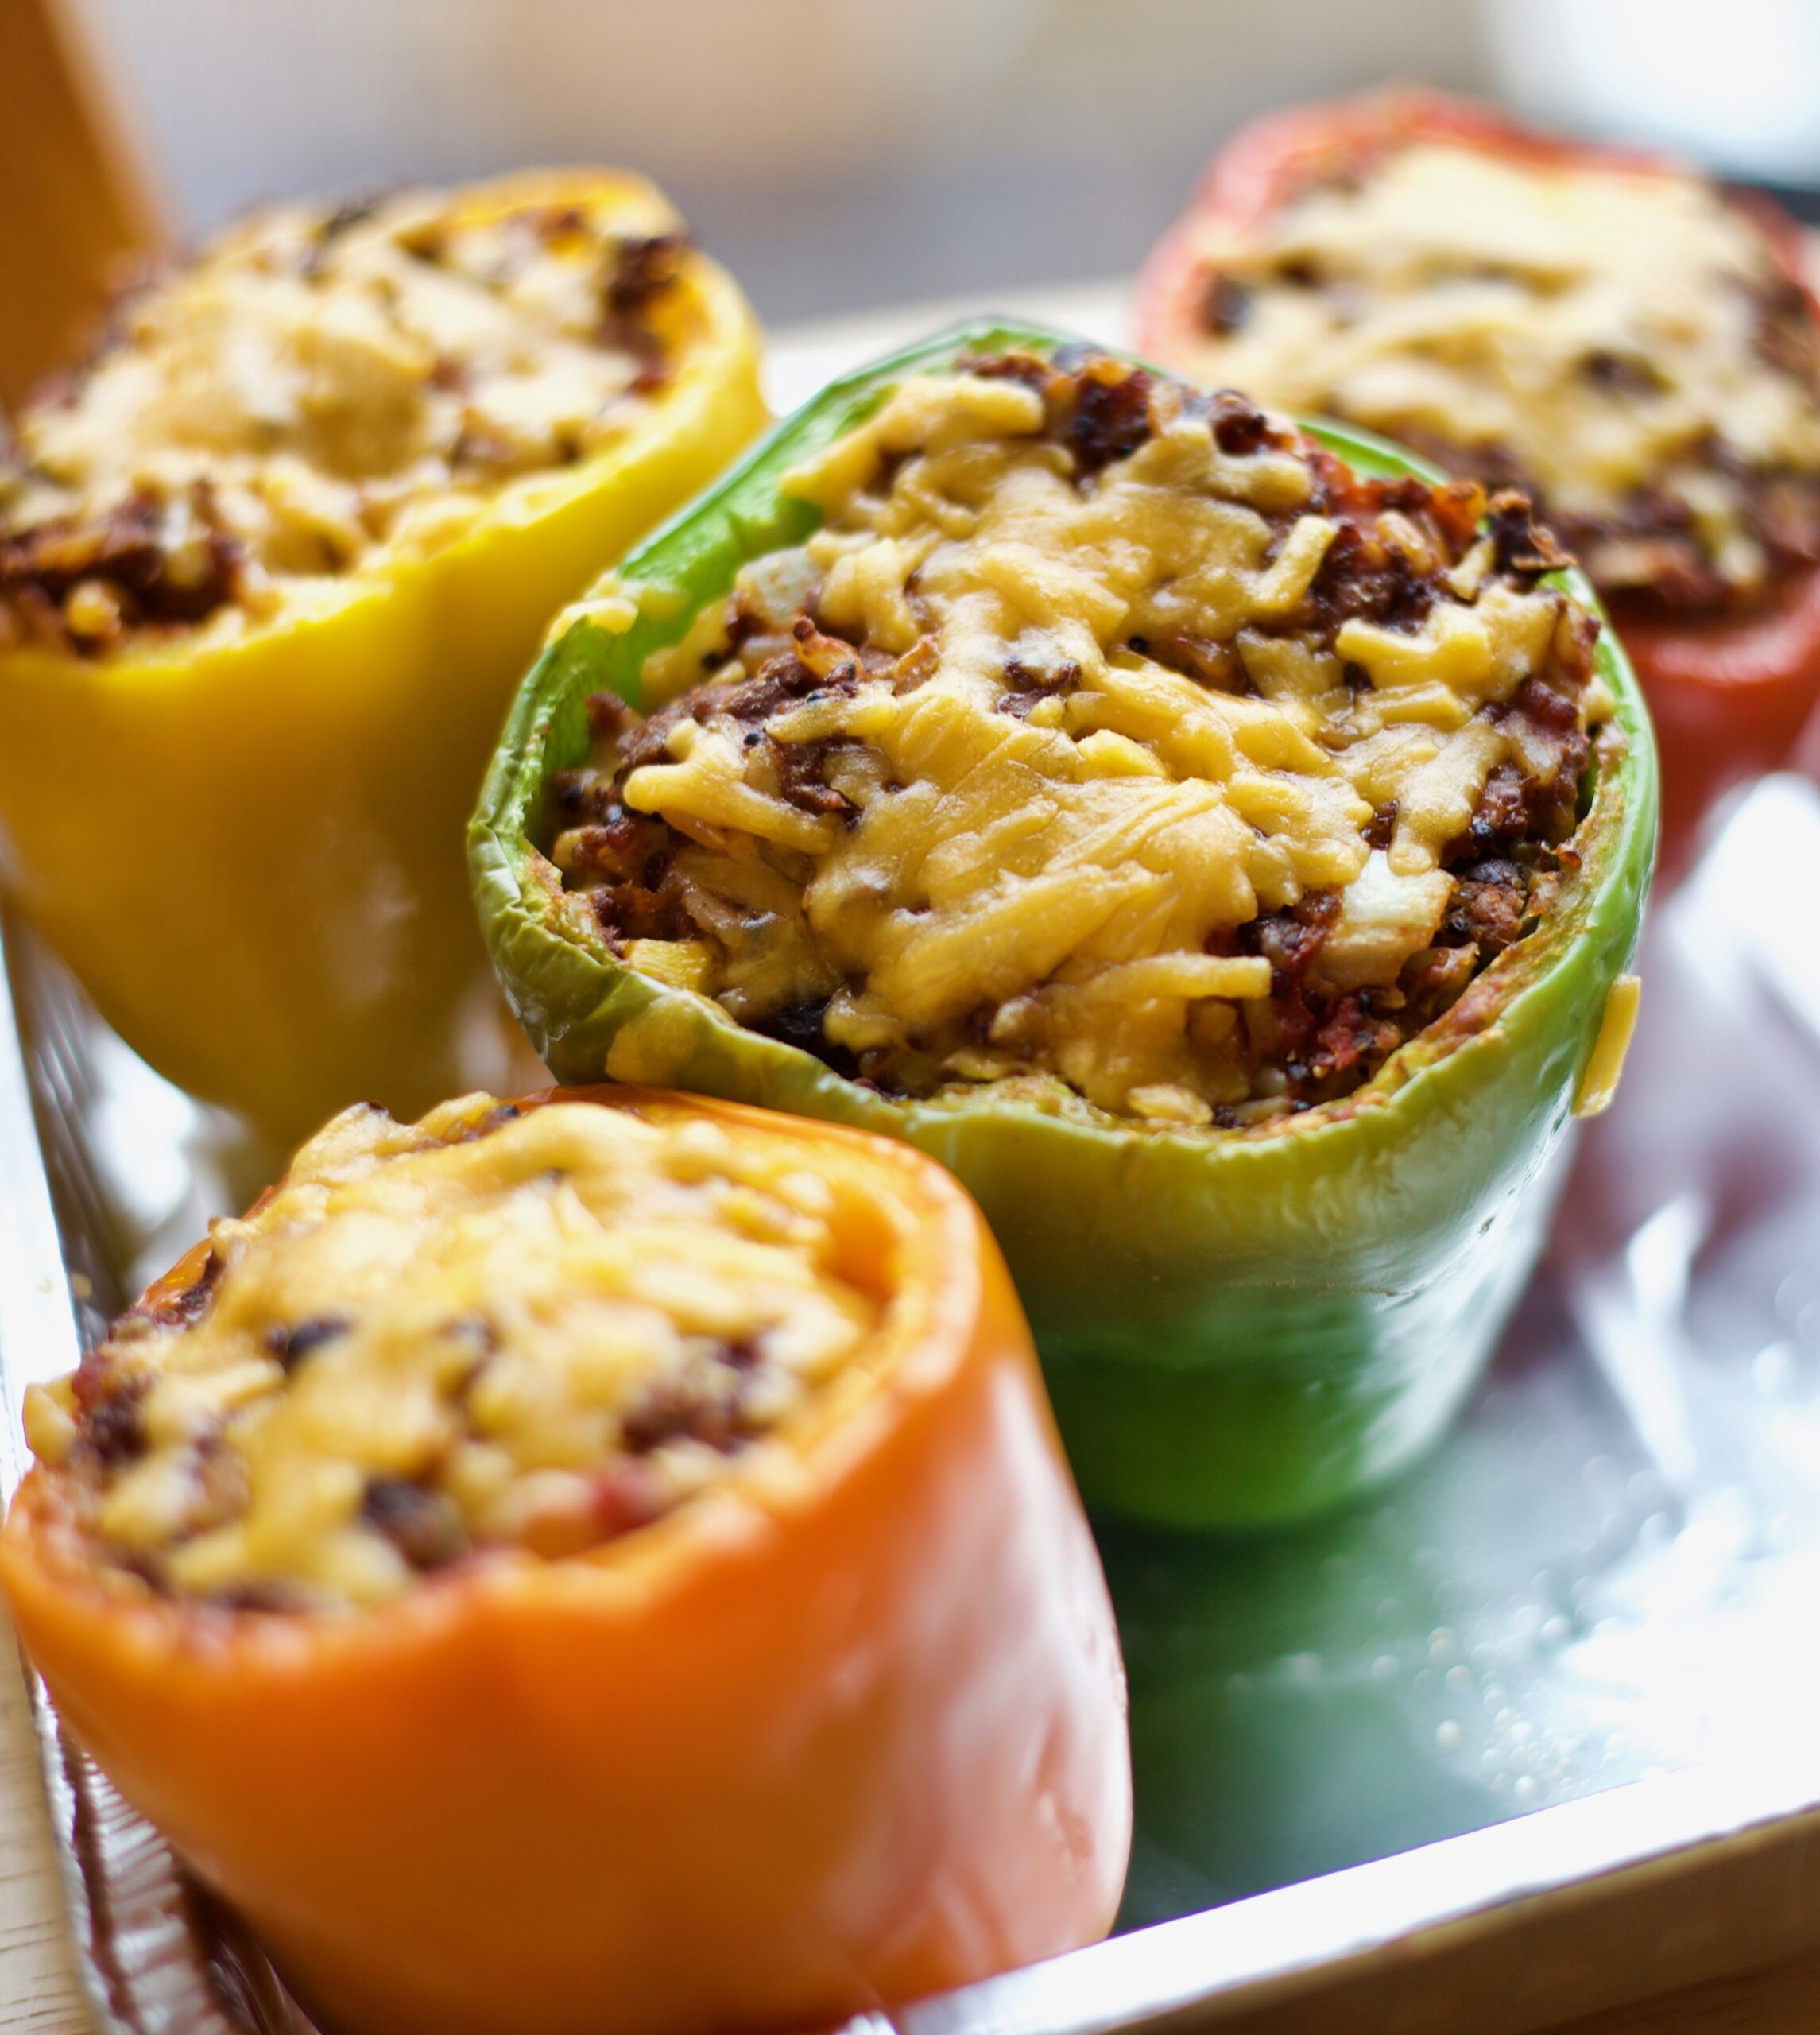
10. **Stuffed Bell Peppers**Talk about a true nostalgic treat! Stuffed Bell Peppers are the kind of dish that not only looks absolutely vibrant and appealing on your plate, but also fills your entire home with the most inviting, mouth-watering aroma as it bakes. Imagine those brightly colored bell peppers, hollowed out and lovingly filled with a hearty mixture of seasoned rice, savory meat, and a blend of aromatic spices. Pure comfort, right there!
This isn’t just a meal; it’s a wholesome experience. Each pepper is baked to tender perfection, becoming a soft, edible vessel for its flavorful interior. The combination of textures – the tender pepper, the soft rice, the well-seasoned meat – makes every single bite a satisfying adventure. It’s the kind of dish that feels substantial and nurturing, ticking all the boxes for a truly fulfilling family dinner.
But alas, this beautiful, balanced meal seems to have taken a backseat in our modern culinary landscape. We’re often rushing through dinner preparations, and perhaps the thought of stuffing peppers feels like an extra step. However, for a dish that offers so much in terms of visual appeal, inviting aroma, and wholesome satisfaction, Stuffed Bell Peppers undeniably deserve a comeback. Let’s get them back on our tables and fill our homes with that incredible smell!
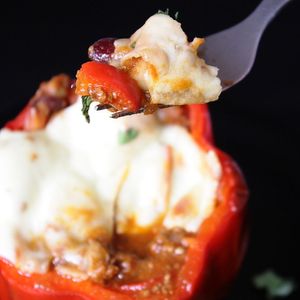
Chili Stuffed Bell Peppers with Melted Cheese
Ingredients
Equipment
Method
- Preheat your oven to 375°F (190°C). Halve the red bell peppers lengthwise, remove seeds and membranes, and arrange them cut-side up in a large baking dish.
- In a large Dutch oven or pot, heat olive oil over medium-high heat. Add diced onion and chopped bell pepper, sautéing until softened, about 5-7 minutes.
- Add ground beef to the pot, breaking it up with a spoon. Cook until thoroughly browned, then drain any excess fat.
- Stir in minced garlic, paprika, cumin, cayenne pepper, and cocoa powder. Cook for 1 minute until fragrant.
- Add diced tomatoes, tomato paste, drained and rinsed black, kidney, and white beans, water, and brewed coffee. Season with salt and pepper to taste.
- Bring the chili to a simmer, then reduce heat to low, cover, and cook for at least 30 minutes, or longer for deeper flavor, stirring occasionally.
- Generously fill each prepared bell pepper half with the hot chili mixture.
- Pour about 1/2 cup of water into the bottom of the baking dish to create steam, helping the peppers tenderize.
- Bake for 25-35 minutes, or until the bell peppers are tender. Remove from oven, place a slice of white cheese on top of each stuffed pepper, and return to the oven.
- Continue baking for 5-10 minutes, or until the cheese is melted and bubbly. Garnish with fresh cilantro, if desired, and serve hot.
Notes
Read more about: Seriously Where Did They Go? 15 Iconic American Foods That Vanished From Our Tables.

11. **Shepherd’s Pie**Oh, Shepherd’s Pie! This isn’t just a dish; it’s a culinary journey that brings a taste of the lush Irish countryside right to your kitchen. Picture this: a rich, savory layer of minced meat (traditionally lamb, but often beef in America, sometimes leading to the term ‘Cottage Pie’), expertly blended with tender vegetables, all crowned with a glorious, golden blanket of fluffy mashed potatoes. It truly is the epitome of comfort food!
Each generous bite provides a wonderfully warm and satisfying experience, instantly transporting you back to simpler times, perhaps to a cozy evening by the fire. The hearty combination of the flavorful meat and veggies beneath that creamy, comforting potato topping makes for a meal that’s both fulfilling and deeply satisfying. It’s the kind of dish that warms you from the inside out, making everything feel just a little bit better.
It’s a bit baffling why this hearty, wholesome classic has become less common on our dinner tables. Maybe it’s the rise of quicker meal solutions, or perhaps it just needs a bit of a marketing makeover! Whatever the reason, Shepherd’s Pie remains a beloved memory for many, and a fantastic option for anyone looking for a meal that offers genuine comfort and a taste of tradition. Let’s bring this warm hug of a dish back into the spotlight, shall we?

Classic Cookbooks: Shepherd’s Pie Recipe
Ingredients
Equipment
Method
- Peel, quarter, and rinse potatoes. Place in a large saucepan, cover with salted cold water, and bring to a boil. Cook until fork-tender, then drain well.
- While potatoes cook, preheat oven to 375°F (190°C).
- In a large skillet or Dutch oven, heat vegetable oil over medium-high heat. Add chopped onion, carrot, and celery; cook until softened, about 5-7 minutes.
- Add ground lamb or beef to the skillet. Break it apart and cook until thoroughly browned, stirring occasionally. Drain any excess fat.
- Stir in flour, thyme, rosemary, and nutmeg. Cook for 1 minute, stirring constantly to cook out the raw flour taste.
- Pour in beef or vegetable stock, scraping up any browned bits from the bottom of the pan. Bring to a simmer and cook until the sauce thickens, about 5 minutes. Season with salt and pepper to taste.
- Return drained potatoes to the saucepan. Add 1 tablespoon of butter, salt, and pepper. Mash until smooth and creamy.
- Transfer the meat mixture to a 9×13 inch baking dish, spreading it evenly across the bottom.
- Carefully spread the mashed potatoes evenly over the meat filling, creating a decorative pattern with a fork if desired. Dot the top with the remaining 2 tablespoons of chilled butter.
- Bake for 25-30 minutes, or until the filling is bubbling and the potato topping is golden brown. If desired, finish under a broiler for a few minutes for extra browning. Let rest 10-15 minutes before serving.
Notes
Read more about: Your Must-Read List: The Top 10 Celebrity Memoirs That Will Transform Your 2025 Reading Journey!
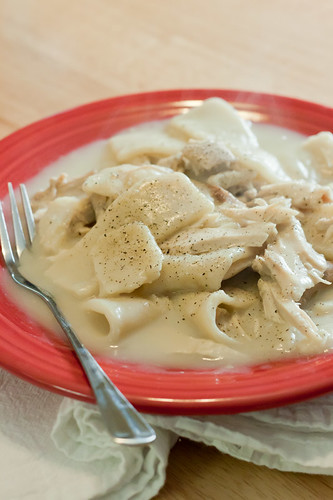
12. **Chicken and Dumplings**Get ready to cozy up, because Chicken and Dumplings are here to deliver a serious dose of warmth and comfort! This isn’t just a Southern classic; it’s a universal symbol of home-cooked goodness. Imagine tender, juicy pieces of chicken swimming in a thick, savory broth, all accompanied by those wonderfully fluffy, cloud-like dumplings. Seriously, could anything sound more inviting?
This glorious dish is more than just a meal; it’s a memory-maker. It evokes those cherished Sunday dinners around the family table, where laughter and good food filled the air. Every single spoonful embeds a feeling of home and heartiness deep within your soul, making you feel loved and nourished. It’s the ultimate comfort food for a chilly evening or whenever you just need a little culinary pick-me-up.
It’s truly a shame that such a soul-satisfying and deeply comforting meal has become less prevalent in today’s kitchens. While the preparation might take a little time, the reward is absolutely worth it. The rich flavors, the tender chicken, and those delightful dumplings create a symphony of comfort that few other dishes can match. So, let’s dust off those old family recipes and get those pots bubbling—Chicken and Dumplings are calling for a comeback!

Chicken and Dumplings
Ingredients
Equipment
Method
- Place the whole chicken in a large stockpot or Dutch oven and cover completely with cold water. Bring to a boil, then reduce heat, cover, and simmer gently until the chicken is cooked through and very tender, approximately 1 to 1.5 hours.
- Carefully remove the cooked chicken from the pot and set aside to cool slightly. Strain the broth through a fine-mesh sieve into a clean pot or bowl, discarding any solids. Skim excess fat from the broth if desired.
- Once the chicken is cool enough to handle, debone and shred all the meat into bite-sized pieces. Set aside.
- In a large mixing bowl, combine the 6 cups all-purpose flour and 1 1/2 cups self-rising flour. Add the 3/4 cup shortening and cut it into the flour mixture using a pastry blender or your fingertips until crumbly.
- Gradually add the 3 cups whole milk to the flour-shortening mixture, mixing gently with a spoon or your hands until a soft, shaggy dough forms. Be careful not to overmix.
- Bring the reserved chicken broth to a gentle simmer over medium-low heat. Season the broth generously with salt and black pepper to taste.
- Drop spoonfuls (or small hand-rolled pieces) of the dumpling dough directly into the simmering broth. Work in batches if necessary to avoid overcrowding the pot, ensuring consistent cooking.
- Cover the pot tightly and continue to simmer for 15-20 minutes, or until the dumplings are puffed, tender, and cooked through. Do not lift the lid during this cooking time.
- Return the shredded chicken meat to the pot with the cooked dumplings and broth. Stir gently to combine and heat through for a few minutes.
- Taste the chicken and dumplings and adjust seasoning as needed before serving hot.
Notes
Read more about: 14 Childhood Comfort Foods That Still Hit Different: A Deep Dive into Nostalgic Flavors
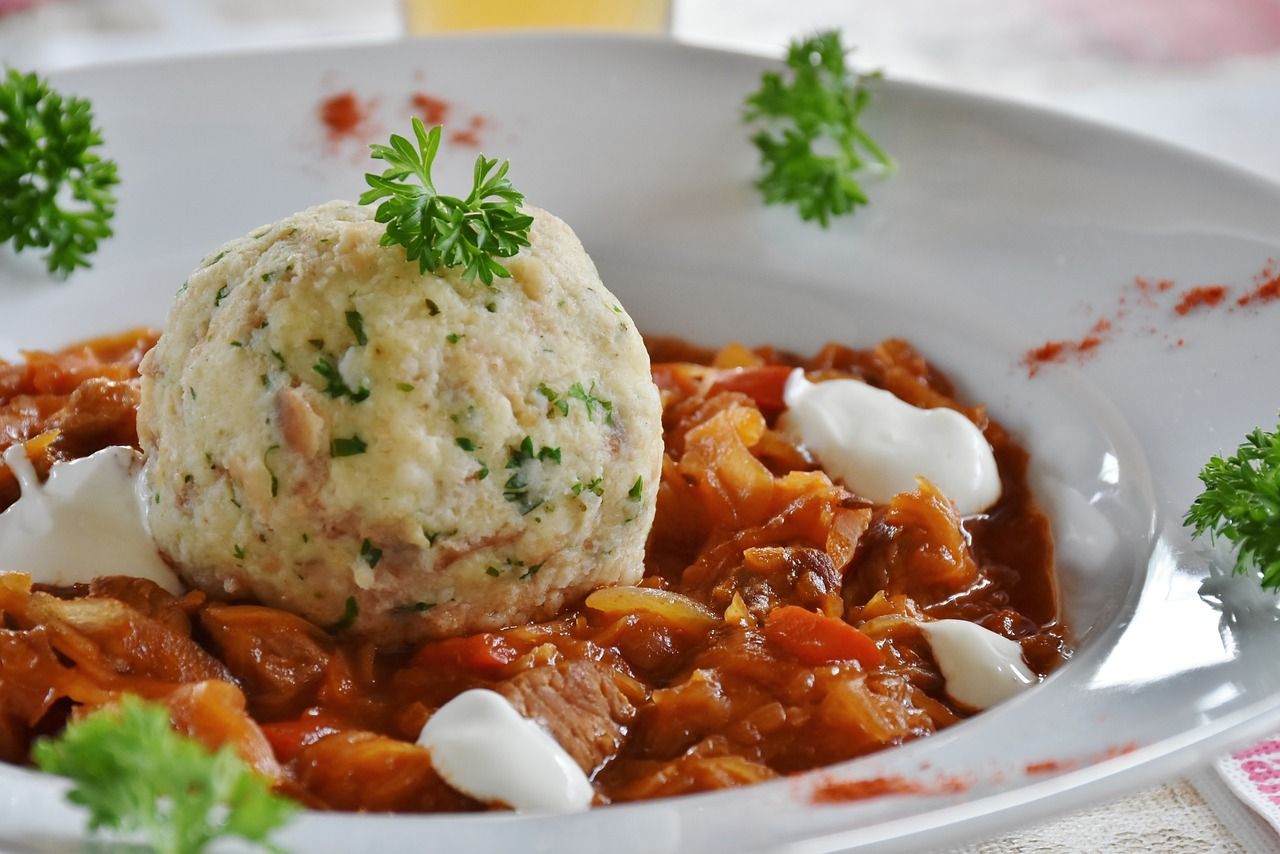
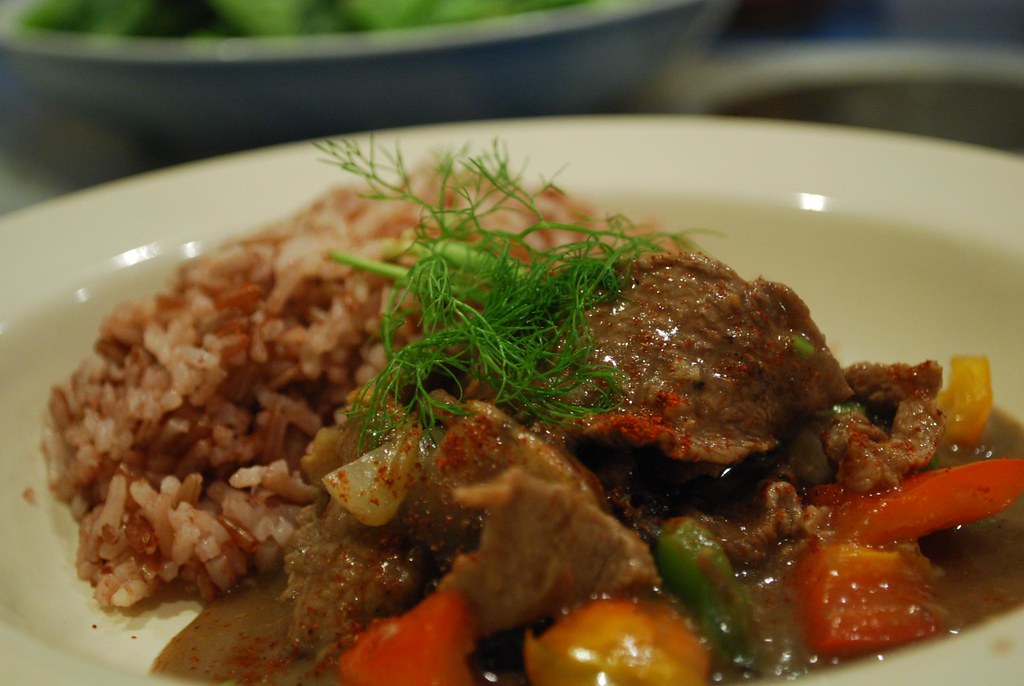
13. **Goulash**Next up, we’re taking a flavorful detour to Eastern Europe with Goulash! While it has deep roots in Hungarian cuisine, this incredible stew of tender beef, hearty vegetables, and the signature warmth of paprika was wholeheartedly adopted by Americans as a truly comforting classic. Its rich and hearty nature makes it an absolutely perfect choice for those cold, blustery days when you need something substantial to warm you up.
Seriously, imagine that first spoonful: it warms you from the inside out, with a complex tapestry of flavors that effortlessly transports you to another continent. The slow-cooked beef, the tender veggies, and that aromatic paprika create a comforting, robust experience that’s both deeply satisfying and incredibly delicious. It’s the kind of dish that makes you want to curl up and just savor every single bite.
Despite its undeniable deliciousness and comforting appeal, Goulash seems to have slipped quietly into the background of modern American cooking. It’s a classic that truly deserves more time in the spotlight, reminding us that some of the best meals are those that are slow-cooked with love, bursting with flavor, and offer a truly unique taste experience. Let’s give this rich, European-inspired stew the recognition it so richly deserves!
Authentic Hungarian Goulash
Ingredients
Equipment
Method
- Melt butter in a large Dutch oven or heavy-bottomed pot over medium heat.
- Add diced onions and sauté until softened and translucent, about 8-10 minutes, ensuring they do not brown too quickly.
- Cut flank steak into 1-inch cubes. Add the beef to the pot, increasing heat slightly, and sear until nicely browned on all sides, about 5-7 minutes. Remove any excess fat if desired.
- Stir in caraway seed, dried marjoram, minced garlic, and paprika, cooking for 1-2 minutes until fragrant, being careful not to burn the paprika.
- Pour in 2 cups of water, scraping the bottom of the pot with a wooden spoon to deglaze and incorporate all the browned bits.
- Bring the mixture to a gentle simmer, then reduce heat to low, cover, and cook for 2-2.5 hours, or until the meat is very tender.
- While the goulash simmers, peel and cube the potatoes.
- After the meat has cooked, add the cubed potatoes to the pot. Stir well to combine.
- Continue to simmer, covered, for another 30-40 minutes, or until the potatoes are fork-tender.
- Season generously with salt and pepper to taste before serving hot.
Notes
Read more about: 14 Childhood Comfort Foods That Still Hit Different: A Deep Dive into Nostalgic Flavors

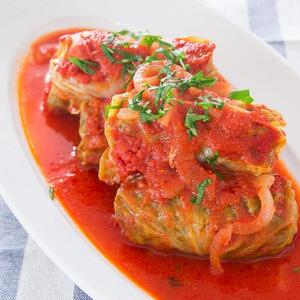
14. **Cabbage Rolls**And last, but certainly not least, we have the humble yet incredibly satisfying Cabbage Rolls! These aren’t just rolls; they’re bundles of pure deliciousness, filled with a savory mixture of perfectly seasoned rice and meat. All of this goodness is then lovingly wrapped in tender cabbage leaves, creating a neat, wholesome package that’s ready to impress.
Once assembled, these beautiful bundles are typically baked to perfection in a flavorful tomato sauce, allowing all those incredible tastes to meld together. It’s a staple in countless Eastern European homes, and for good reason! These rolls are not just packed with flavor; they offer a satisfying and genuinely nutritious meal that feels both comforting and wonderfully complete. They’re a masterclass in making simple ingredients shine.
It’s a real head-scratcher why such a wholesome, flavorful, and incredibly satisfying dish has become less common on our dinner tables. Perhaps the idea of rolling feels a bit intimidating, but trust us, the effort is absolutely worth it for the delicious reward. Cabbage Rolls are a fantastic way to enjoy a meal that’s rich in tradition, packed with nutrients, and delivers a heartwarming experience with every single bite. It’s time to roll them back onto our plates!
Cabbage Rolls
Ingredients
Equipment
Method
- Blanch the whole cabbage head in boiling water until the outer leaves are pliable, then carefully peel them off. Trim the thick ribs of each leaf to facilitate rolling.
- Cook farro according to package directions until al dente; drain and set aside to cool. Rehydrate dried shiitake mushrooms in hot water or chicken stock, reserving the liquid, then finely mince the mushrooms.
- In a large sauté pan, heat olive oil and sauté the chopped onion until translucent. Add minced garlic and cook for an additional minute until fragrant.
- In a large mixing bowl, combine the ground beef, ground pork, cooled farro, sautéed onions and garlic, egg, minced parsley, 1 teaspoon salt, and 1/2 teaspoon black pepper. Mix gently to combine without compacting the meat.
- Prepare the sauce: In a Dutch oven or deep baking dish, combine the whole stewed tomatoes (crushing them by hand), chicken stock (including any shiitake rehydration liquid), minced rehydrated shiitake, 1 tablespoon paprika, and 1 teaspoon salt. Bring to a gentle simmer on the stovetop.
- Lay a cabbage leaf flat, place a spoonful of the meat mixture near the stem end, fold in the sides, and roll tightly into a neat cylinder. Repeat until all filling and leaves are used.
- Carefully arrange the rolled cabbage rolls seam-side down in the simmering tomato sauce in the Dutch oven or baking dish.
- Ensure the rolls are mostly submerged in the sauce. Cover the dish tightly and bake in a preheated oven at 350°F (175°C) for 1.5 to 2 hours, or until the cabbage is very tender and the filling is cooked through.
- Once baked, remove from the oven and let rest for 10-15 minutes before serving.
- Garnish with fresh parsley and a dollop of crème fraîche, if desired.
Notes
Read more about: Feasting on a Budget? 14 LA c That Make Us Question the Price (in the BEST Way Possible!)
Phew! What a ride, right? From Chicken Tetrazzini to Cabbage Rolls, we’ve taken a delicious dive into 14 once-classic dinners that have unfortunately, and quite unfairly, faded from America’s culinary landscape. It’s clear that our eating habits have shifted, favoring speed and convenience, but in doing so, we might have left behind some truly incredible, comforting, and wholesome meals. These aren’t just recipes; they’re memories on a plate, carrying the flavors of entire generations. So, let’s get adventurous, dust off those forgotten cookbooks, and bring back these tried-and-true classics. Your taste buds, and your family, will thank you! Seriously, who’s ready to make some Beef Rouladen tonight?!


