

As the colder months creep in, bringing with them frosty mornings, icy roads, and the undeniable bite of winter, it’s easy to overlook the unsung hero that gets us through it all: our trusty car. For those of us with older vehicles, this oversight can quickly turn into a roadside nightmare. Winter weather isn’t just an inconvenience; it’s a formidable adversary for automotive components, and a little proactive preparation can save you a world of stress, discomfort, and potentially costly repairs.
Think of your car as an extension of your home – you wouldn’t let your furnace go unchecked before a cold snap, would you? The same principle applies here. Bob Lacivita, Family Handyman’s automotive expert, perfectly encapsulates this sentiment: “Your vehicle is usually your second biggest investment, and if you plan to keep it more than five years, maintaining your car or truck is critical, especially if you live in climates where temperatures can remain below freezing… But the ice, snow and fridge temperatures of winter are particularly hard on our vehicles, and the reason prepping for winter is essential.” This isn’t just about avoiding a breakdown; it’s about ensuring your safety and the longevity of your investment.
This guide is designed to empower you with practical, actionable steps to get your older car winter-ready, without necessarily needing a professional mechanic for every single check. We’ll delve into the most crucial areas, drawing from expert advice and time-tested strategies to ensure your vehicle is a reliable companion through the snow and ice. So, grab your microfiber cloth, pull on some nitrile gloves, and let’s get your car squared away for a long winter!

1. **Test Car Battery**Cold temperatures are notorious for slowing down your car battery’s chemical reactions, making it significantly harder for it to hold a full charge and deliver the necessary power to fire up your engine. This is why testing your battery’s voltage before winter truly sets in is not just a good idea, it’s absolutely essential to determine if a replacement is on the horizon.
To perform this crucial check, you’ll need a multimeter set to read volts. With your engine off, touch the red lead of the multimeter to the positive battery terminal and the black lead to the negative terminal post. Your reading should ideally fall between 11.9 volts and 12.8 volts. This initial check gives you a baseline of your battery’s resting charge.
Next, run the same test with the engine running. In this scenario, your alternator is actively charging the battery, so the reading should be higher, typically ranging from 14.1 to 14.6 volts. A car battery generally has a lifespan of around 50,000 to 60,000 miles, but in colder climates, this lifespan can be shortened, sometimes requiring replacement even before the 50,000-mile mark. Remember, keeping those battery terminals clean and secure is paramount for extracting every bit of life from your car battery.
Furthermore, cold winter temperatures mean that your car’s starters and heaters, especially in diesel vehicles, demand more electrical current to function correctly. This increased demand underscores the vital importance of a strong and healthy battery. Many automotive shops offer devices to measure your battery’s strength, providing a clear indication of its readiness. If the test results are poor, it’s a strong signal to replace the battery with a new, reliable one that possesses ample power to start your engine quickly and consistently. A weak battery is precisely the kind of problem you want to avoid when temperatures plummet.
Read more about: Does the New Mercedes-AMG SL Forge a New Legacy or Stray from Its Iconic Past? An In-Depth Look
2. **Inspect Belts and Hoses**When it comes to winter weather, rubber and cold temperatures are far from friendly companions. The frigid air can significantly weaken rubber hoses, making them susceptible to cracking, which inevitably leads to leaks. This is a problem you absolutely want to catch before you’re stranded on a freezing roadside.
Before you begin your inspection, ensure your engine is completely off and has had sufficient time to cool down. Safety first! Once the engine is cool, grab a flashlight and meticulously check all hoses for any signs of surface cracking. Equally important is to gently squeeze the hoses: they should feel soft and flexible, but not mushy. If you detect any signs of cracking or a hose that feels compromised, it’s time for a replacement.
Your vehicle’s belts also require a thorough examination. Use your flashlight to look for specific indicators of wear. These include ribs that appear rounded over or flattened out, which indicate a loss of integrity. While small, isolated cracks might be acceptable, a pattern of spider web-like cracking across the surface is a definitive sign of extreme wear and an urgent need for replacement. Additionally, look for any missing pieces or fraying along the belt edges. If the smoother side of the belt appears glossy or shiny, this suggests it’s slipping due to being worn out. Addressing these issues proactively can prevent a sudden breakdown and much larger repair bills.
Read more about: Unpacking the True Costs of Owning a Land Rover Discovery Sport: A Comprehensive Guide for Consumers

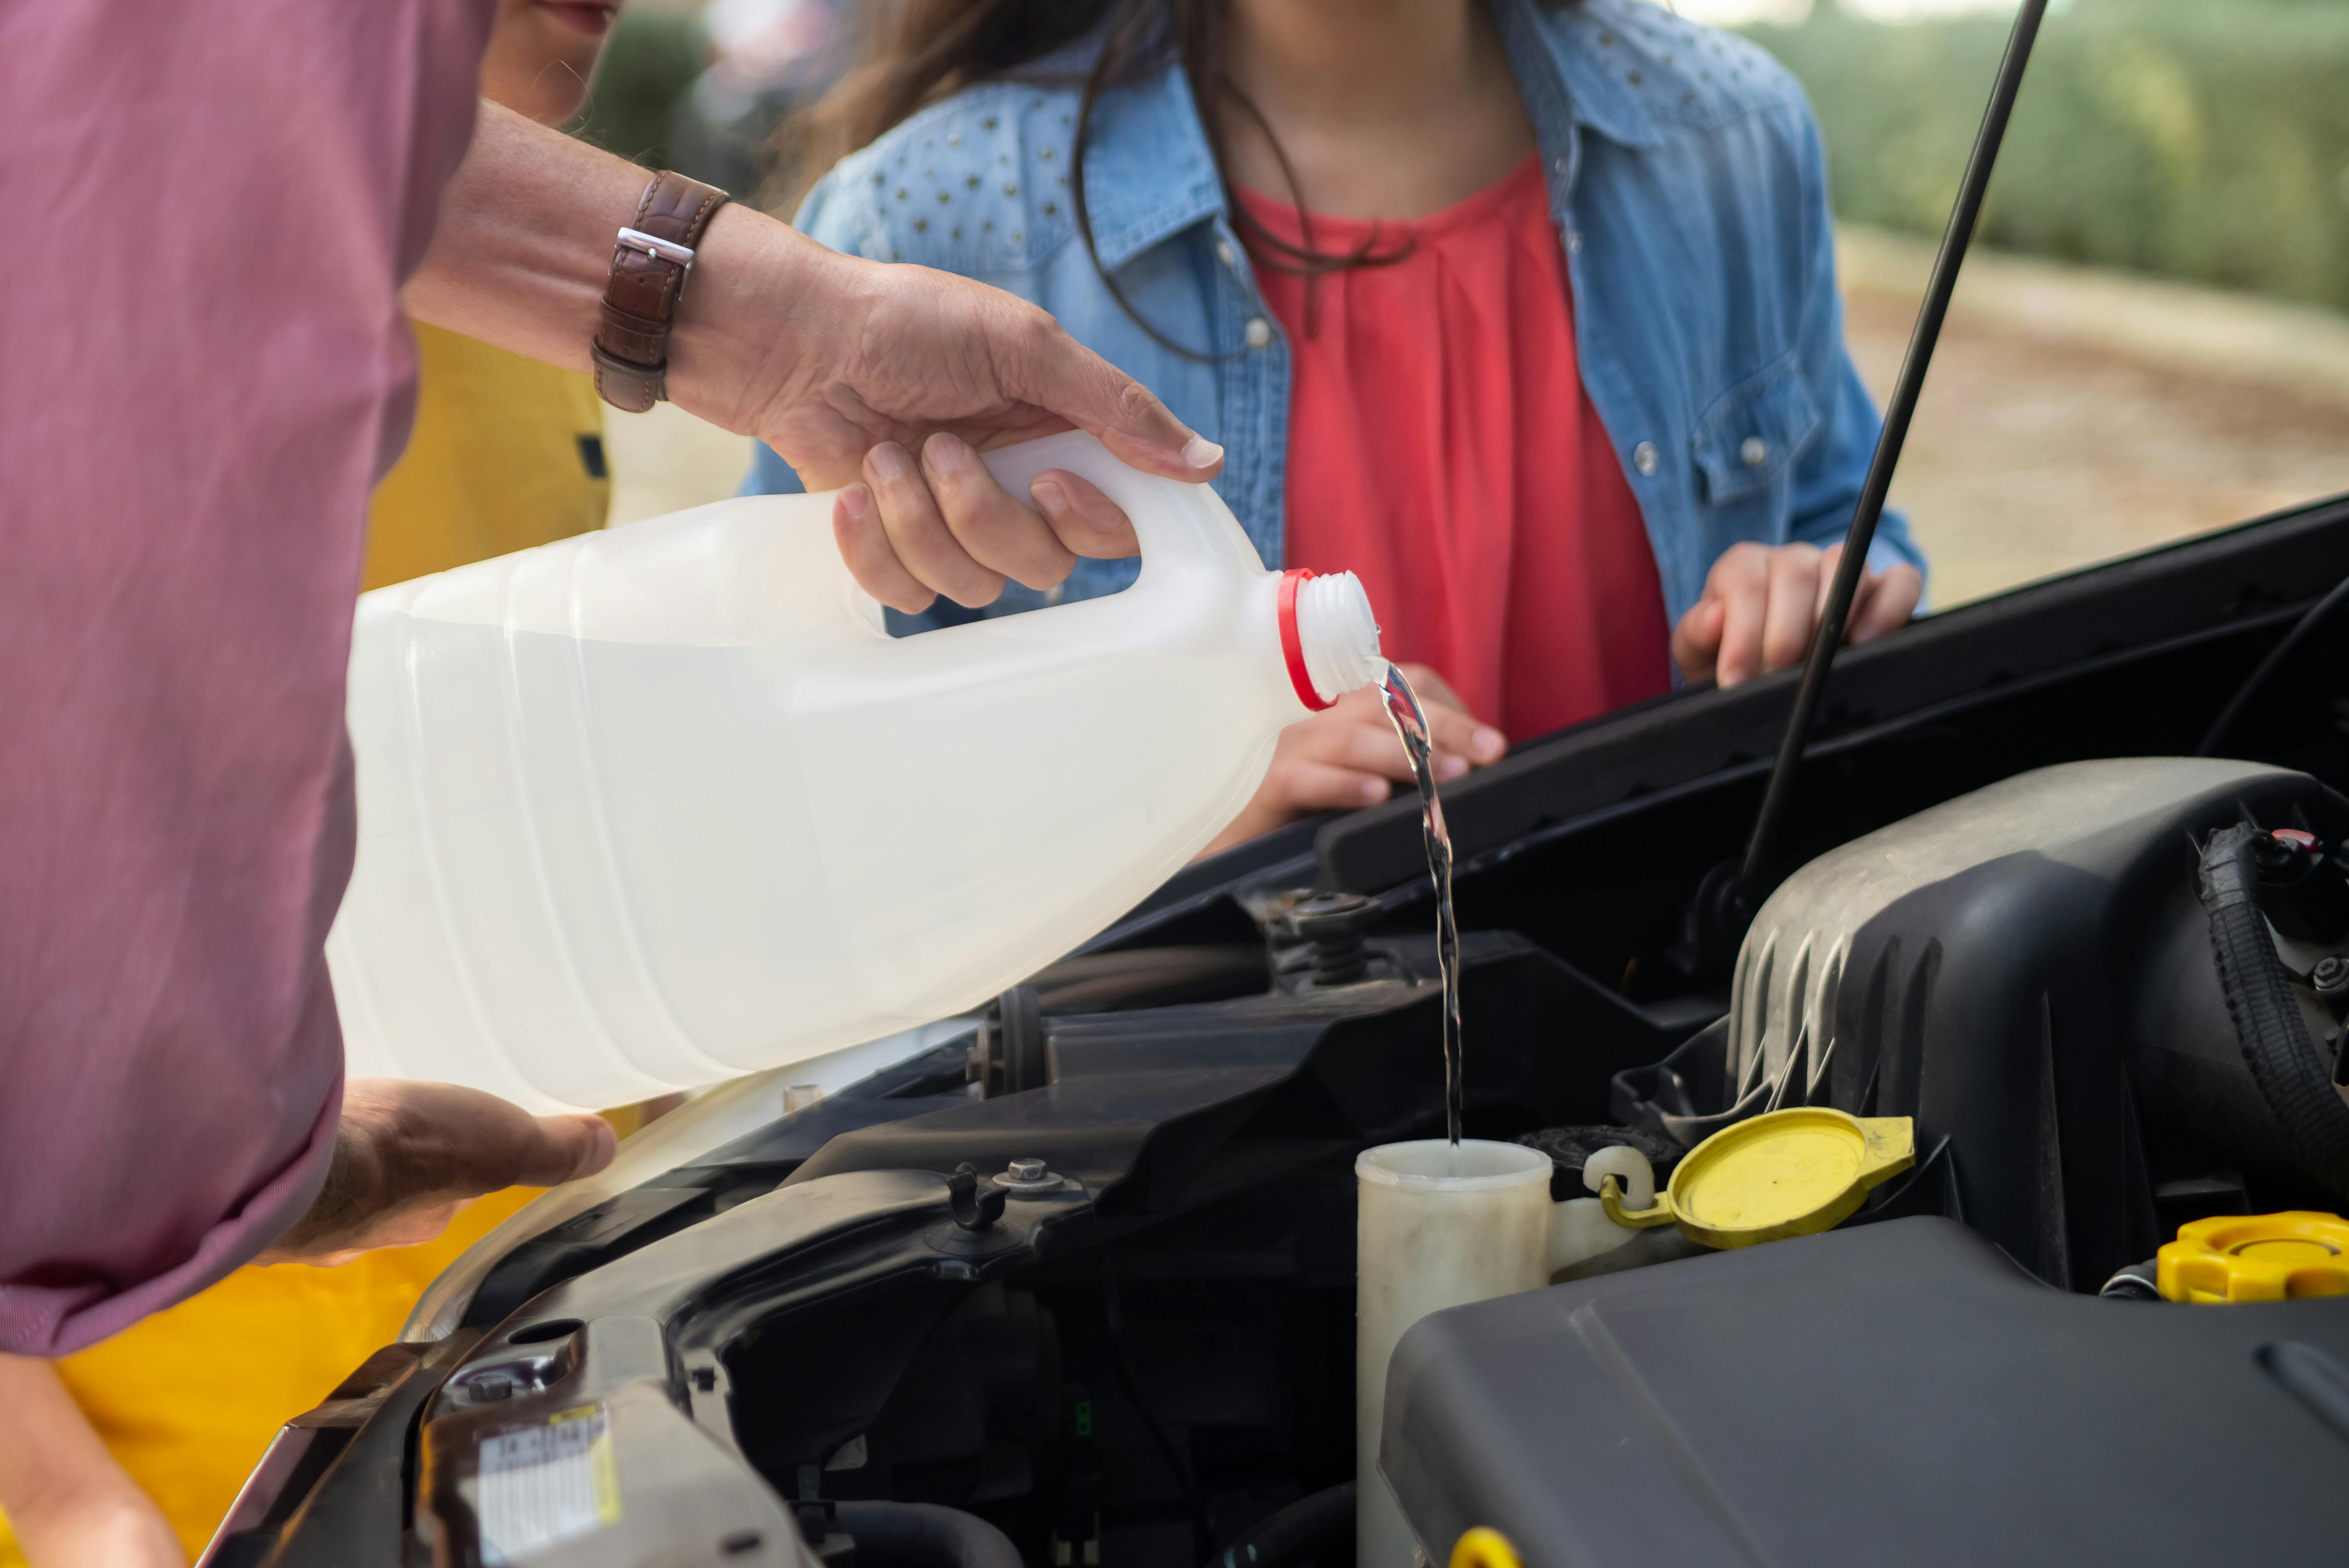
3. **Check Engine Coolant**Engine coolant, often referred to as antifreeze, is an unsung hero in your car’s engine, performing the critical dual role of preventing overheating in warm conditions and, crucially for winter, stopping your engine from freezing solid in extreme cold. Maintaining proper coolant levels and quality is fundamental to your car’s proper functioning and engine longevity.
Start by locating your coolant reservoir, then check if the fluid level is at or below the maximum fill line. If you find your coolant running low, it’s time to top it off. The correct mixture for this is a 50/50 blend of concentrated coolant and distilled water. Add this mixture carefully to the reservoir until it reaches the max fill line. This precise ratio is essential for optimal performance and protection against freezing.
It’s important to understand that coolant doesn’t last forever; it degrades over time, eventually necessitating a radiator flush. Testing your coolant with readily available test strips is a straightforward way to determine if it’s time for this vital maintenance. Bob Lacivita, the automotive expert, advises flushing the coolant system at least one year *before* your vehicle manufacturer’s suggested interval, especially if your driving habits involve lots of harsh conditions, such as short city stop-and-go trips or driving in dusty, dirty environments. This proactive approach ensures your engine is adequately protected against the most punishing winter temperatures.
Read more about: Unpacking the True Costs of Owning a Land Rover Discovery Sport: A Comprehensive Guide for Consumers

4. **Check Engine Air Filter**The engine air filter might seem like a minor component, but it plays a crucial role in your car’s health and performance, especially when facing the challenges of winter. Its primary job is to prevent dirt and dust from entering your engine, ensuring it runs efficiently and reliably. The last thing any driver wants to contend with is engine problems in the bitter cold of winter.
General recommendations suggest replacing your engine air filter every 12,000 to 15,000 miles. However, this interval can be shorter depending on your driving environment. If you frequently drive in dusty or polluted areas, you might need to change it more often. Fortunately, this is a quick and easy maintenance task that most drivers can complete in under ten minutes, making it a perfect DIY winter prep item.
To find the correct replacement engine air filter for your car, consult your car’s manual or search online using your vehicle specifications. Once you have the new filter in hand, locate the engine air filter housing under your hood. This is usually a clearly identifiable box. Open it up and inspect your current filter: if it appears dusty, dirty, or clogged, it’s a clear signal to swap it out for the new one. A clean air filter ensures your engine breathes properly, maintaining optimal fuel efficiency and preventing potential engine issues that could arise when you least expect them in freezing temperatures.
Read more about: Gone But Not Forgotten: 12 Timeless Appliance Fixes Manuals Often Overlook Today
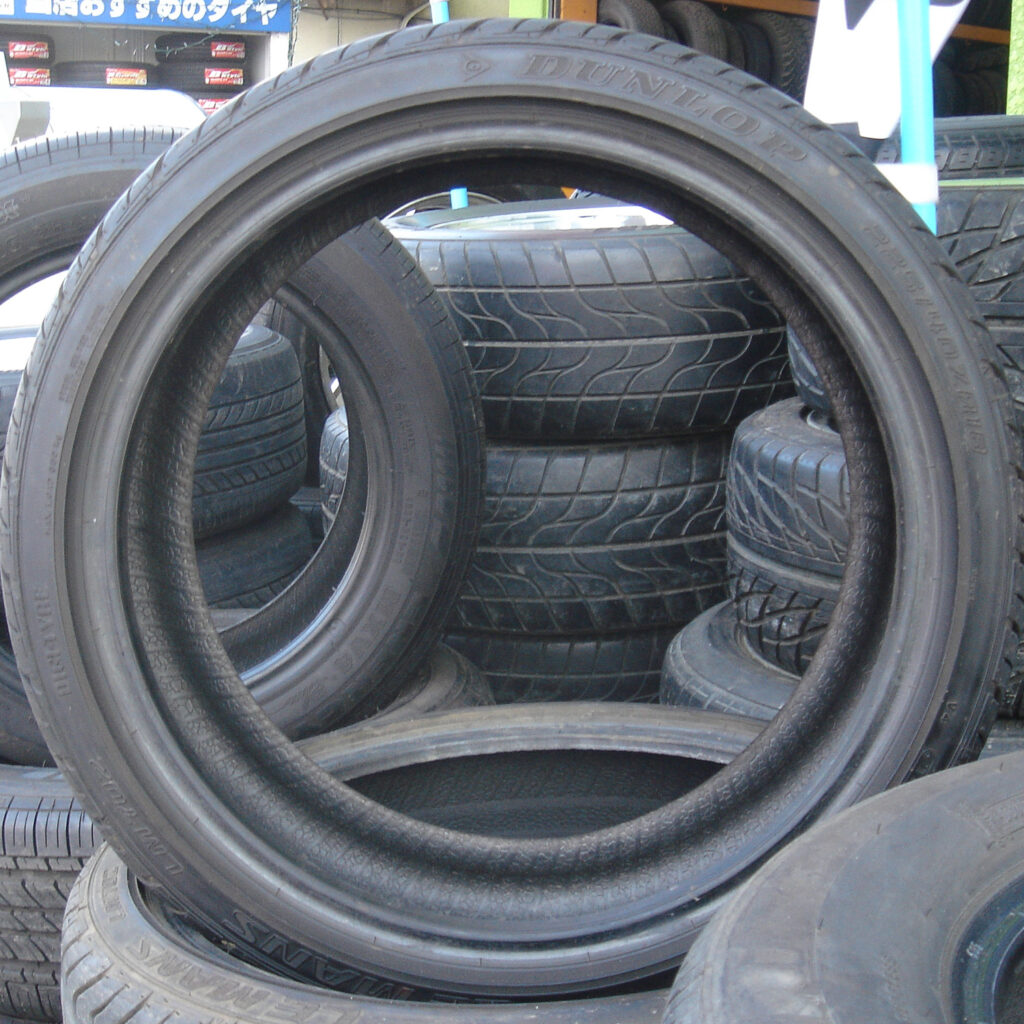
5. **Inspect and Prepare Your Tires**Your tires are the sole point of contact between your car and the road, making their condition absolutely paramount for winter driving safety. This crucial aspect of winter preparation involves several key considerations: tire type, pressure, and tread depth. Neglecting any of these can lead to extremely dangerous driving conditions on icy and snowy surfaces.
First, let’s talk about tire type. For regions experiencing harsh cold and heavy snowfall, switching to dedicated winter tires is highly recommended. As Tim Rodifer, another auto industry expert, notes, “Snow tires are better than all-season tires when driving in icy, snowy winter weather.” Winter tires offer superior traction control, shorter braking distances, and help you turn more smoothly because their materials remain more flexible in cold temperatures, ensuring better road contact. Goodyear suggests swapping all-season tires for snow tires between Thanksgiving and Tax Day, though local conditions should ultimately guide your decision. If you live in an area with milder winters and only occasional cold snaps, all-season tires might suffice, but for consistent cold below 45 degrees Fahrenheit, winter tires are the way to go. Consider all-weather tires as a good compromise if you want to avoid seasonal swaps.
Next up is tire pressure, a factor you should monitor diligently throughout the entire winter season. Cold weather inherently lowers tire pressure, typically by one pound per square inch (PSI) for every 10-degree temperature drop. Incorrect pressure, whether too low or too high, leads to uneven tire wear and compromises your car’s handling and grip on the road. You can find your car’s required PSI on a sticker on the driver’s side door jamb or in your owner’s manual. Use a reliable tire pressure gauge to check levels, and an air compressor to inflate them as needed. Newer vehicles with Tire Pressure Monitoring Systems (TPMS) will alert you, but regular manual checks are still a smart habit.
Finally, assess your tire tread depth. Worn tires with insufficient tread will struggle immensely on ice and snow, lacking the necessary traction to maintain control. Use a tire tread depth gauge by placing it inside one of the center tread grooves and pressing the housing against the tire until the flange touches the surface. If the tread depth measures 4/32” or less, it’s definitively time to replace your tires. For those in hilly areas or places with extreme cold and heavy snow, considering snow chains is also a wise move; they can be mandatory in some states and are invaluable for escaping deep snow and ice, especially for rear-wheel-drive vehicles.
Read more about: Unpacking the True Costs of Owning a Land Rover Discovery Sport: A Comprehensive Guide for Consumers
6. **Inspect Windshield Wipers and Fluid**Clear visibility is not just a convenience; it’s a critical safety requirement, particularly when navigating through a winter storm. Your windshield wipers are your first line of defense against snow, sleet, and freezing rain, and ensuring they are in top working order is a simple yet profoundly impactful step in winter preparation.
Begin by thoroughly inspecting your windshield wipers for any signs of damage. Look for cracks, tears, or broken pieces of rubber on the blades. Summer heat is known to wear out wipers, making a pre-winter replacement a highly recommended practice. If the rubber is hardened or damaged, it won’t effectively clear your windshield, leading to poor visibility and potentially even scratching the glass. If you find any damage, or if the blades are old, it’s time to replace them. There are even specific winter wipers available, which are highly recommended for optimal performance in cold conditions, as their softer rubber compound performs better in low temperatures.
If your wipers appear to be in good condition but still leave streaks on the glass, try cleaning the blades. Dampen a clean microfiber cloth with soapy water and carefully wipe down the blades. Afterward, rinse them off with clean water. This can often restore their effectiveness. Regardless of cleaning, windshield wiper blades should generally last six to twelve months, but for safety during winter, replacing them every six months is a prudent measure.
Equally important is your windshield wiper fluid. Check the fluid reservoir to see if it needs topping off. When replenishing, make sure to purchase wiper fluid that contains de-icer and pour it into the reservoir using a funnel. Using a winter formula is crucial to prevent the fluid from freezing in the lines or on your windshield, which could instantly obscure your vision. Ensuring your wipers and fluid are ready for anything winter throws at them will significantly enhance your safety and driving comfort.
Read more about: The Roadblock Rundown: 12 Common Reasons Your Custom Classic Car Build Might Fail Inspection – And How to Ace It
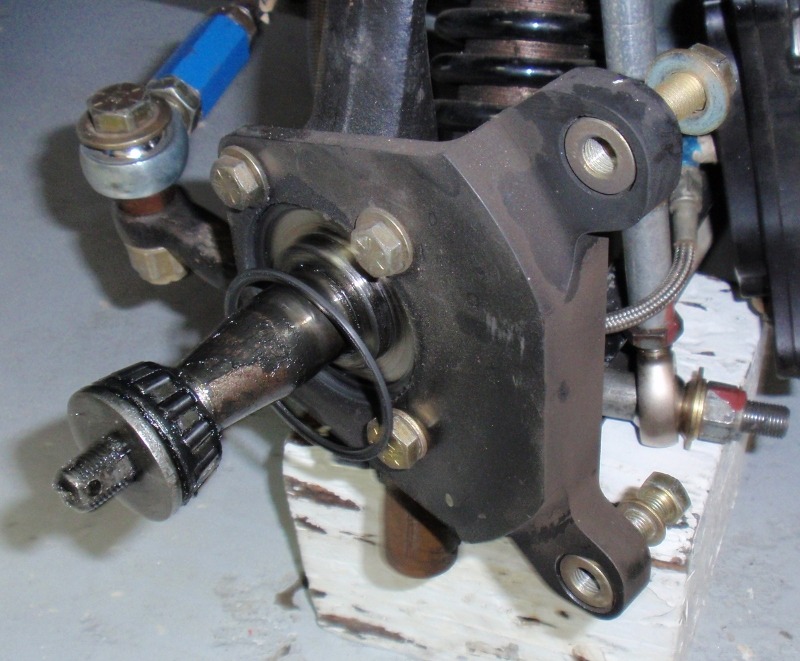
7. **Inspect the Brakes**Your car’s braking system is arguably your most critical safety feature, and its performance becomes even more paramount when navigating the treacherous, often icy and slippery, roads of winter. Proactive brake inspection before the cold truly sets in isn’t just a recommendation; it’s a non-negotiable step to ensure you can stop safely and predictably, no matter the conditions.
Keep an ear and a foot out for common warning signs that your brake pads might be nearing their end. Grinding metal or screeching noises are immediate red flags that demand attention. Additionally, if you notice the brake pad warning light illuminate, feel the brake pedal vibrate when applied, or find yourself needing to press the pedal with extra force to achieve the desired stopping power, these are all strong indicators of wear that should not be ignored.
Ignoring these symptoms can lead to more extensive and costly damage to your vehicle’s braking system, potentially impacting rotors and calipers. While some car designs allow for a visual inspection of the brake pads without removing the wheels, others don’t. If you can see them, look for pads that appear very thin, less than 3mm to 4mm, or if the brake pad indicator slot is no longer visible. These are definitive signs that it’s time for a professional inspection.
Automotive expert Bob Lacivita reinforces this, advising, “No matter what the season or weather, if your brakes are noisy, grinding, locking up, brake pedal fading, or just taking longer than usual to bring your car to a stop, it’s time to have them inspected for wear and tear, overheating and glazing.” If any of these issues are present, it’s a clear signal that replacing the disk brake pads and rotors is in order, ensuring your stopping power is ready for winter’s worst.
Read more about: 12 Savvy Used Car Buys: Surprisingly Low Insurance Premiums That Beat a New Bike

8. **Check Your Car’s Headlights and Other Lights**Winter often brings reduced daylight hours and challenging weather conditions like snowstorms, heavy rain, and fog, all of which can severely diminish visibility. Ensuring that all your car’s lights are functioning flawlessly is a simple yet incredibly effective way to enhance your safety and help prevent accidents, both by improving your view and making your vehicle more visible to others.
The check is straightforward: start your car and systematically test every single light. This includes your headlights (both high and low beams), taillights, brake lights, and turn signals. Have a friend or family member help you verify the brake lights and turn signals are working on both sides. Don’t forget to check your fog lights if your vehicle is equipped with them, as they can be invaluable in dense winter conditions.
If you find any bulbs that are out, consult your car’s manual or search online using your vehicle specifications to find the correct replacement sizes. A practical tip: if one headlight or taillight bulb goes out, it’s often a good idea to replace its counterpart on the other side as well. Bulbs typically have similar lifespans, and if one has failed, the other is likely not far behind, saving you another repair trip down the line.
Read more about: Unpacking the Volvo XC90’s Unrivaled Safety: An In-Depth Look at 11 Essential Features for the Discerning Consumer
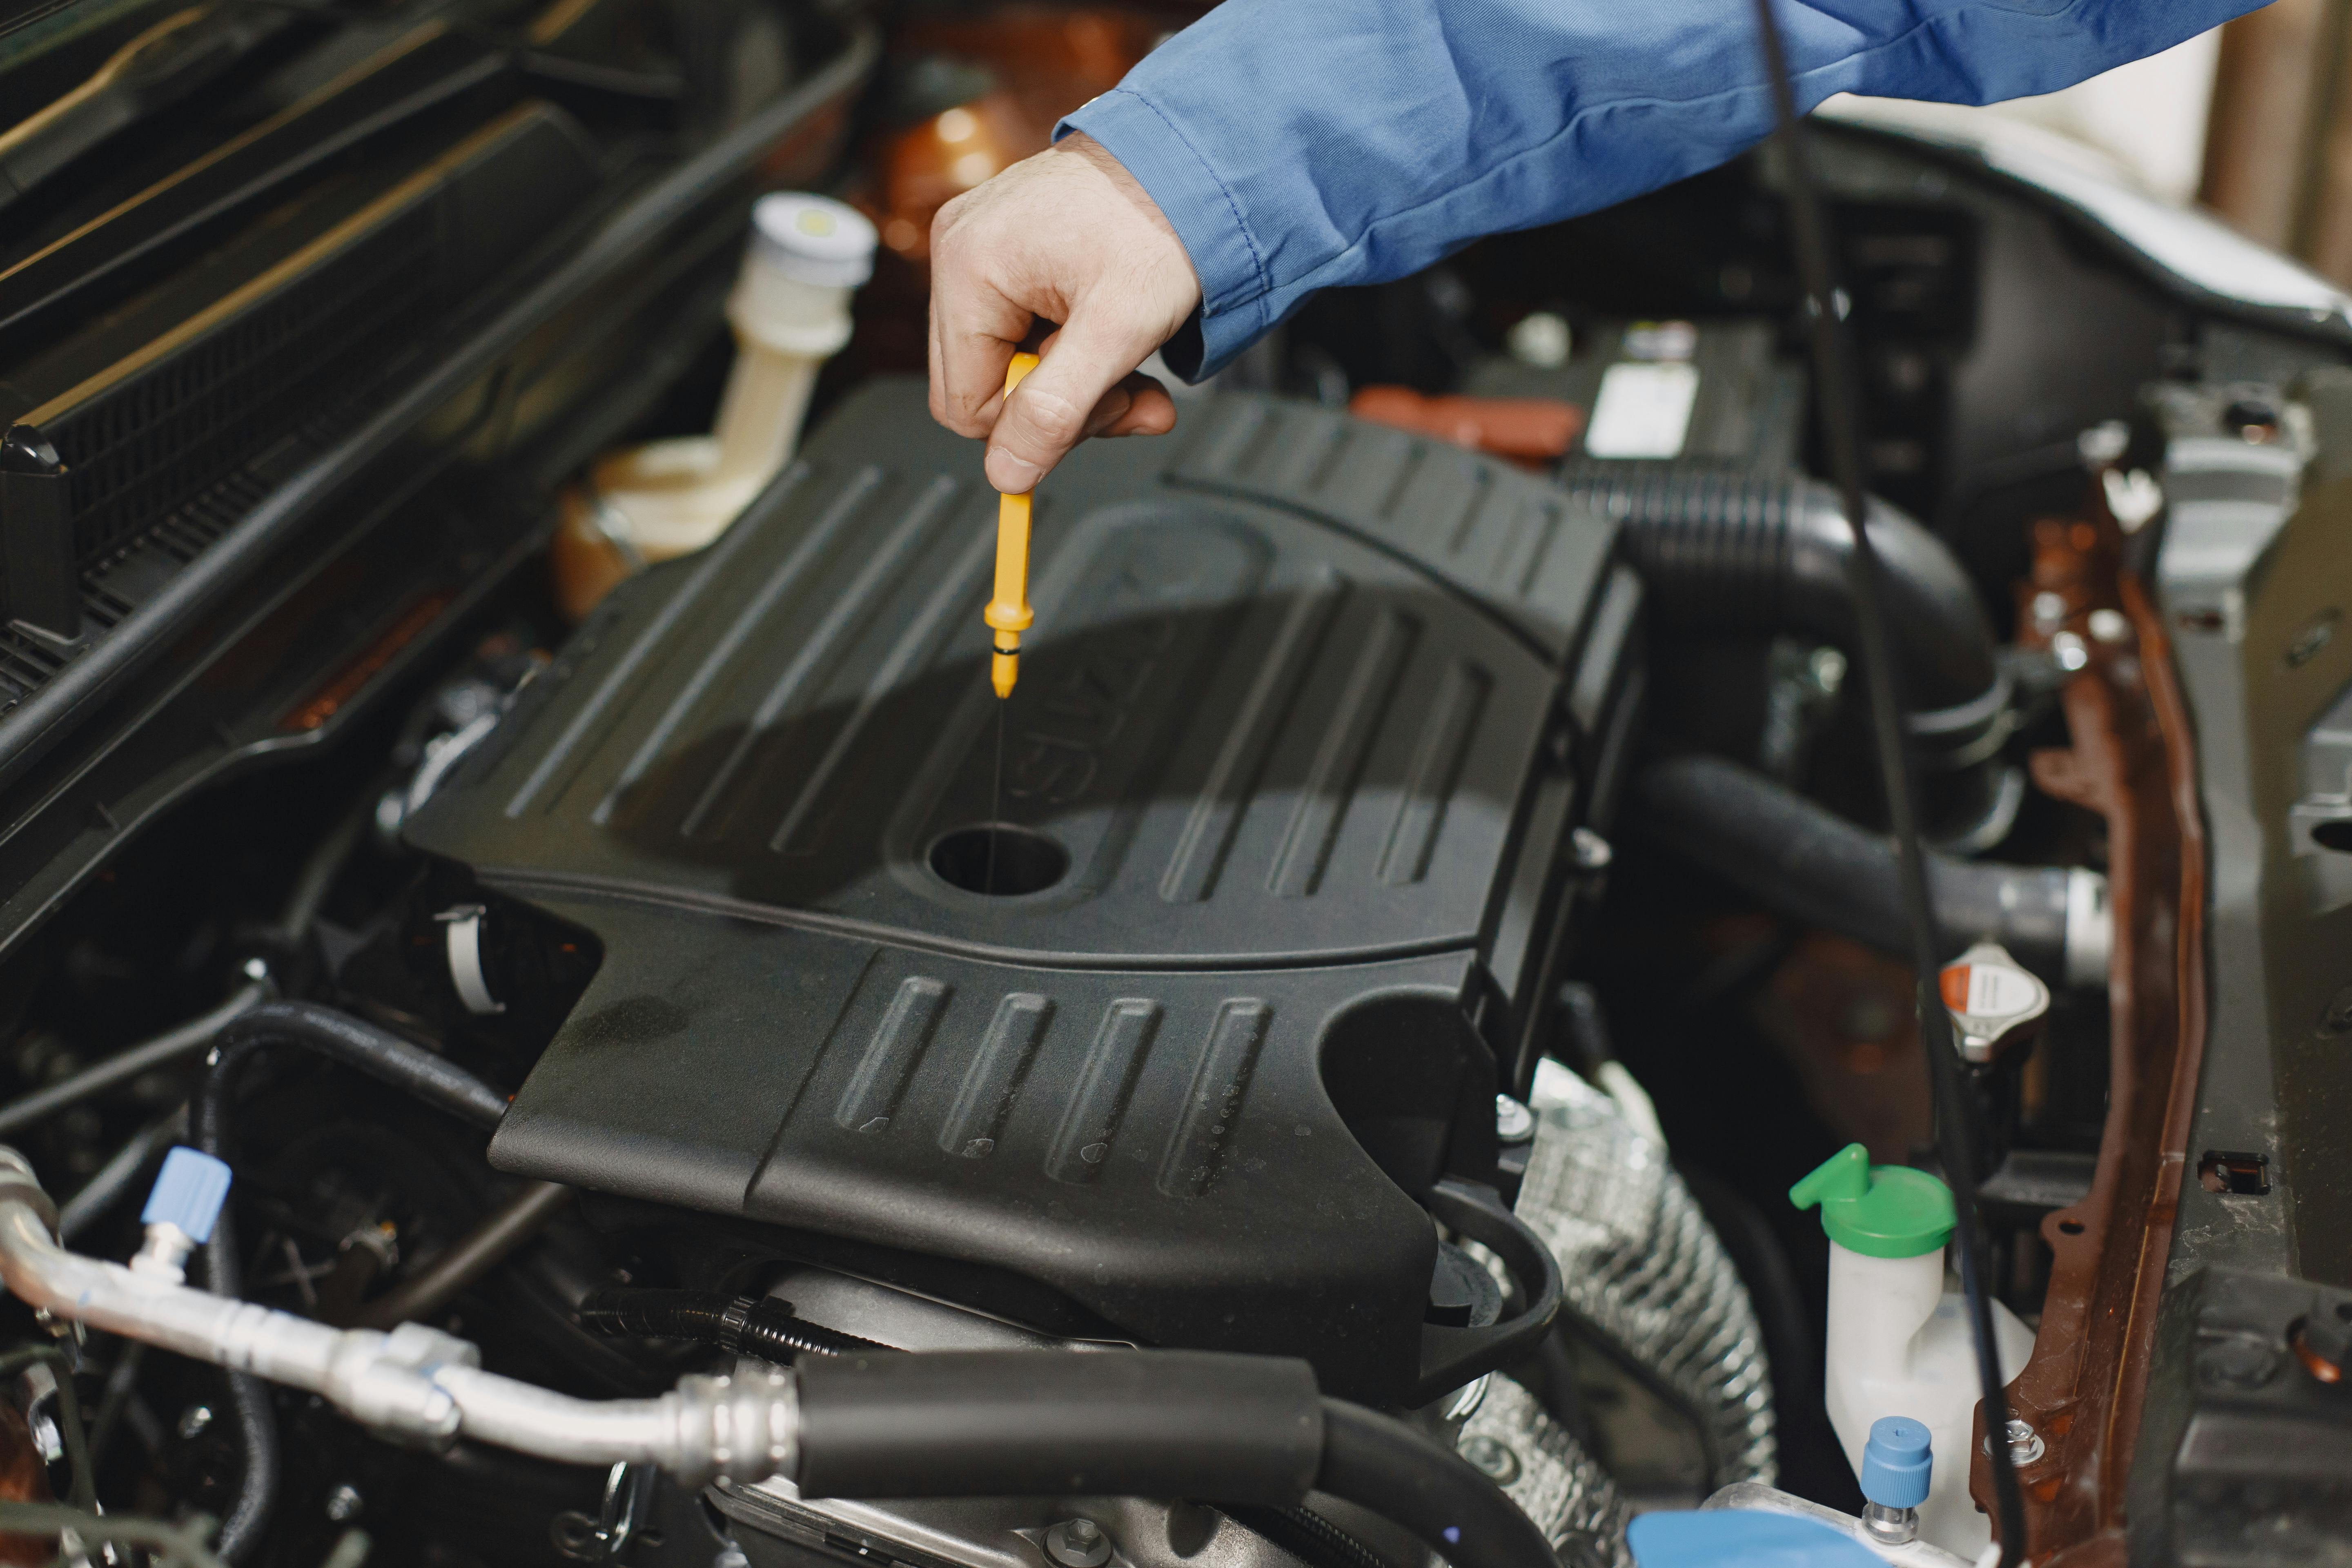
9. **Check Your Engine Oil**Engine oil is the lifeblood of your vehicle, lubricating moving parts and helping to regulate engine temperature. Over time, engine oil naturally degrades and collects contaminants, reducing its effectiveness. Failing to change your oil regularly can lead to premature engine wear or even permanent damage—problems you absolutely want to avoid, especially when facing the additional stresses of freezing winter temperatures.
The general recommendation for oil changes is every 3,000 to 5,000 miles or every three to six months, with a minimum of twice a year. However, this can vary; newer vehicles and those using synthetic oil may require less frequent changes compared to older cars running on conventional oil. Regardless of your vehicle type or oil choice, making it a habit to check your oil at least once a month is a smart move to monitor its level and condition.
Checking your oil is a quick and easy DIY task. First, ensure your engine is off and has had a few minutes for the oil to settle in the pan. Lift the hood and locate the dipstick, typically marked with a bright handle. Pull it out, wipe it completely clean with a paper towel or rag, and then reinsert it fully. Slowly pull the dipstick out again.
Now, read the dipstick. You’ll usually see two indicator marks (dots or lines) at the end. Your oil level should fall between these two indicators. If it’s below the lower mark, you need to add more oil. If it’s above the upper mark, the level is fine. Also, pay attention to the oil’s appearance: if it looks very dark, gritty, or sludgy, it’s a strong sign that an oil change is overdue, regardless of mileage.
Read more about: Beyond Fatigue: Crucial Thyroid Disorder Symptoms You Should Never Overlook, Including Early Signs That Begin in Your Hair and Skin
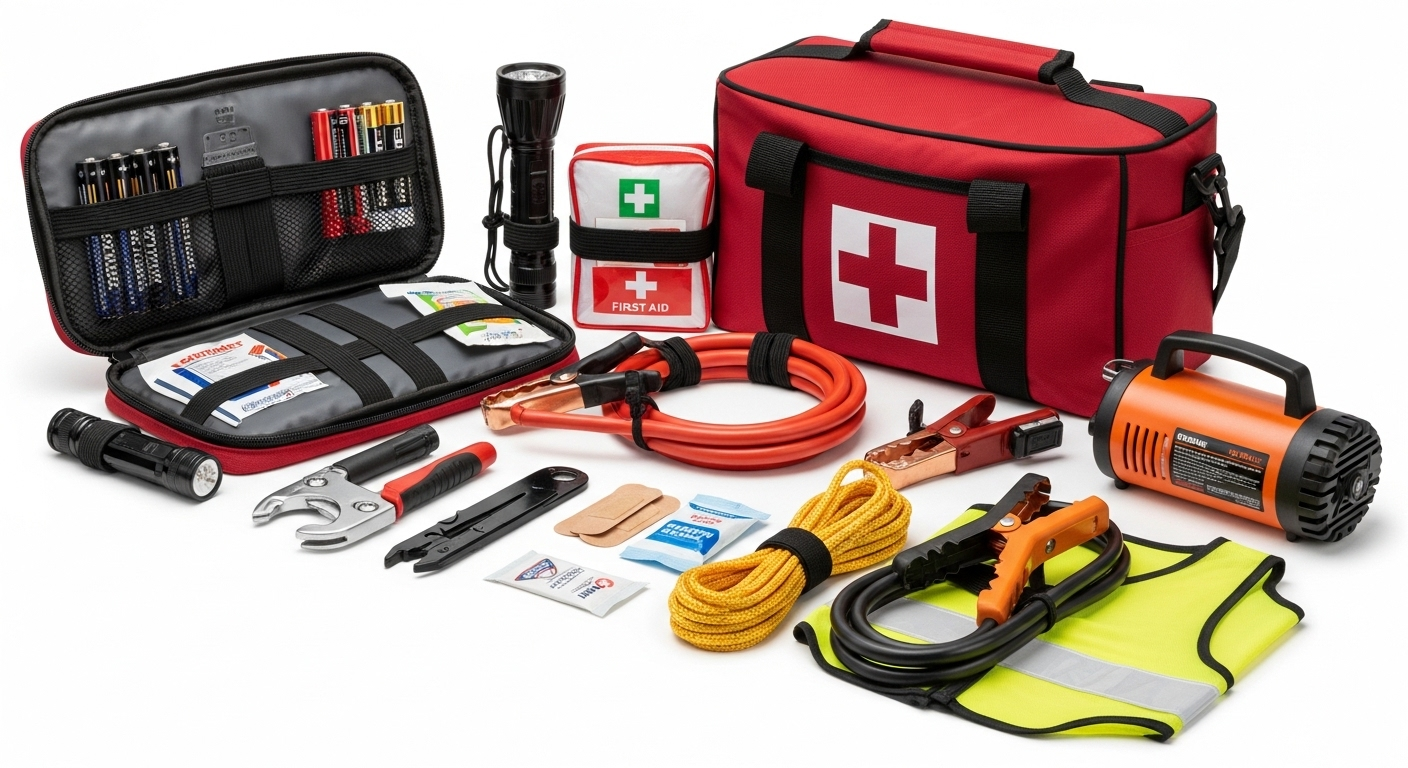
10. **Put Together a Winter Car Survival Kit**Being stranded in freezing temperatures without the right emergency supplies can quickly turn a minor inconvenience into a dangerous situation. Creating a well-stocked winter car survival kit is one of the smartest and most empowering steps you can take to prepare for any unforeseen circumstances, ensuring you’re ready for anything winter throws your way.
Your kit doesn’t need to be massive; all essential items can typically fit into a small plastic storage box in your trunk, making it easily accessible. Focus on items that provide warmth, light, and communication. A candle heater can offer crucial warmth in a stalled vehicle, while a flashlight (with extra batteries!) is indispensable for visibility at night. A portable cell phone charger ensures you can call for help, and a notepad and pen are useful for jotting down important information.
Include tools and supplies for basic vehicle assistance. Jumper cables are a must-have for a dead battery, and a portable air compressor can reinflate a low tire. A small tool kit allows for minor repairs. For traction, consider keeping safety absorbent, sand, or even kitty litter to regain grip if you get stuck on ice or snow. A foldable shovel is invaluable for digging out tires or clearing snow from around your exhaust pipe.
Don’t forget personal comfort and first-aid items. A warm blanket, winter hat, and gloves are essential for staying warm. A basic first aid kit should include bandages, gauze, and pain relievers. Non-perishable snacks and bottled water are also wise additions to keep hunger and thirst at bay while waiting for assistance. For severe weather, extra clothes, duct tape, and even a fire extinguisher can be critical.
Read more about: When Perfection Cracks: Dissecting 13 Inherent Flaws That Lead to Consumer Product Recalls
11. **Do a Car Diagnostics Check**Modern vehicles are marvels of engineering, equipped with sophisticated computer systems that monitor countless functions. Leveraging an On-Board Diagnostics II (OBD2) port check is a proactive, often overlooked, step to ensure your car’s complex systems are winter-ready. This check can pinpoint potential issues before they escalate into major problems, providing peace of mind during the harshest months.
When you connect your vehicle to a diagnostics system, the computer reads error codes that might indicate underlying problems not yet visible through dashboard warning lights. Pay particular attention to results concerning the Anti-lock Braking System (ABS) and traction control systems. These are absolutely crucial for maintaining stability and control on slippery winter roads, and ensuring they are in optimal working order can prevent dangerous skids and accidents.
You don’t necessarily need a mechanic for this initial check. You can even buy your own diagnostics tool for well under $100. Tools like the Foxwell NT301, for instance, offer a cost-effective way to keep tabs on your car’s health. It empowers you to perform quick scans, interpret common trouble codes, and address minor issues yourself or at least go to a mechanic with informed questions.
Regular diagnostic checks aren’t just for winter; they’re an excellent habit year-round to monitor your car’s overall health and efficiency. By proactively identifying and addressing small electronic or system glitches, you can prevent more significant, costly failures, ultimately extending your vehicle’s lifespan and ensuring its reliability, especially when you need it most during winter’s unpredictable conditions.
Read more about: The 14 Best Free Apps for Finding Public EV Chargers

12. **Install Rubber Floor Mats**While perhaps not as high-tech as a diagnostic scan, swapping out your fabric floor mats for heavy-duty rubber ones is a simple, highly practical preparation that makes a surprising difference in winter. This small change offers significant protection for your car’s interior from the relentless onslaught of snow, slush, salt, and mud that winter inevitably brings.
Fabric mats absorb moisture, which can lead to unpleasant odors, mildew, and even rust if the dampness permeates the carpet beneath. Rubber mats, on the other hand, are designed to contain all that winter mess. Their raised edges and durable construction trap melting snow and slush, preventing it from soaking into your vehicle’s carpet. This containment is key to keeping your car’s interior cleaner and drier throughout the season.
Beyond their protective capabilities, rubber mats are incredibly easy to clean. A quick shake, rinse, or wipe is often all it takes to remove accumulated dirt and moisture, unlike fabric mats that might require a thorough scrub and drying time. Their durability also means they stand up to constant exposure to moisture and grit without showing significant wear, offering a long-lasting solution for winter.
If you frequently transport items in your trunk, extending this protection with a rubber liner for that space is also highly recommended. This prevents spills, melting snow from skis or snowboards, and general debris from damaging the trunk lining. While rubber mats might not have the same aesthetic appeal as plush carpeted ones, their practicality and protective benefits in winter far outweigh any perceived cosmetic compromise, making them a smart investment for any older car.
### Ready for Anything Winter Throws Your Way!
Read more about: Revitalize Your Ride: 12 Game-Changing Interior Mods to Make Your Car Look Years Newer for Less
As we’ve explored, preparing your older car for winter is more than just a seasonal chore; it’s an investment in your safety, peace of mind, and the longevity of your trusty vehicle. Each step, from the essential system checks to these advanced preparations, contributes to a robust defense against the unique challenges of cold weather driving. By taking these practical, actionable steps, you’re not just ‘winterizing’ your car – you’re empowering yourself to navigate frosty mornings and snowy commutes with confidence, knowing your vehicle is ready for anything. So, roll up your sleeves, tackle these tasks, and enjoy a worry-free winter on the road!


