
Isn’t it time we all started looking forward to lunch again? For so many of us, the midday meal often becomes an afterthought, a quick grab-and-go coffee, or an expensive takeout habit born out of sheer hunger and lack of planning. But what if I told you there’s a simpler, more delicious way to approach your work lunches, whether you’re at the office, working from home, or constantly on the go?
Embracing the art of meal prepping is a game-changer, promising to save you money, boost your nutrition, and significantly reduce that daily lunch-time stress. Imagine opening your fridge to a perfectly portioned, incredibly tasty meal just waiting for you, instead of wrestling with impulsive, less healthy choices when your hunger pangs hit. It truly makes your entire day run smoother, helping you stay energized and focused.
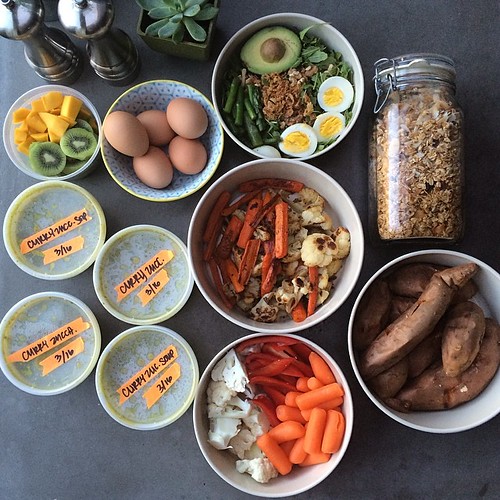
We’re diving deep into some of my absolute favorite healthy lunch ideas for work, designed to add wonderful variety to your routine. These recipes are not only nutritious and absolutely delicious, but they also travel incredibly well and stay fresh in the fridge for days, meaning you can spend as little as 30 minutes to an hour prepping on the weekend and enjoy stress-free, healthy eating all week long! Let’s explore seven fantastic options to kickstart your meal prep journey.

1. **Chickpea Salad Sandwich**
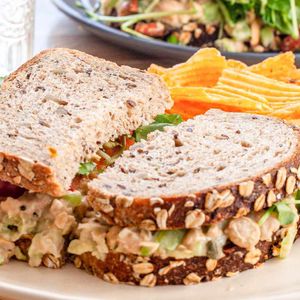
Who doesn’t love a classic sandwich? This isn’t just any sandwich, though; the Chickpea Salad Sandwich is an incredibly easy, vegan-friendly lunch recipe that can be ready in under 10 minutes. It’s truly a fantastic option for anyone looking for a quick and satisfying meal that doesn’t compromise on flavor or health.
What makes it so appealing is its simplicity and the wholesome ingredients it calls for. We’re talking about smashed chickpeas, which provide a hearty and protein-rich base, combined with crunchy celery for texture, fresh dill for a burst of herbaceous flavor, and creamy mayonnaise to bring it all together. It’s a delightful blend that offers both a satisfying chew and a wonderful creaminess in every bite.
This recipe is particularly brilliant for meal prep because you can easily prepare a batch of the chickpea salad ahead of time and store it in the fridge. When lunchtime rolls around, simply scoop your desired amount onto your favorite bread, into a lettuce cup, or alongside some crackers, and you’re good to go. It tastes fresh and delicious even on day four, making it a reliable staple for your weekly rotation.
Chickpea Salad Sandwich
Ingredients
Equipment
Method
- Rinse and drain the canned chickpeas thoroughly, then transfer them to a large mixing bowl.
- Using a fork or potato masher, mash the chickpeas to your desired consistency, leaving some whole for texture or mashing completely smooth.
- Finely dice the celery and thoroughly rinse and drain the capers; add both to the mashed chickpeas.
- In a separate small bowl, whisk together the mayonnaise, lemon juice, Dijon mustard, salt, and black pepper until well combined.
- Pour the dressing over the chickpea mixture in the large bowl and stir gently until all ingredients are evenly coated.
- Taste the chickpea salad and adjust the seasoning (salt, pepper, lemon juice) as needed.
- Prepare the sandwich bread. For added crunch, you may lightly toast the slices.
- Slice the avocado and tomatoes to prepare them for assembly.
- To assemble each sandwich, spread a generous amount of the chickpea salad onto one slice of bread. Top with avocado slices, tomato slices, chopped roasted almonds, and a handful of watercress or other greens.
- Place the second slice of bread on top to complete the sandwich and serve immediately.
Notes

2. **Thai Chickpea Mason Jar Salad**
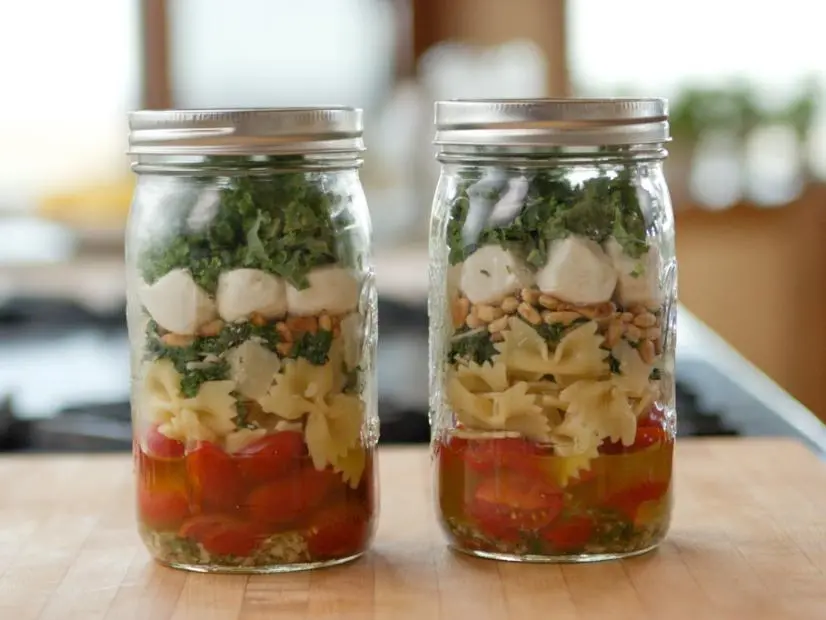
Get ready to revolutionize your salad game with the vibrant and incredibly practical Thai Chickpea Mason Jar Salad. This recipe is a perfect example of how salads don’t have to mean boring lettuce, and it’s a testament to how simple ingredients can create truly extraordinary flavors, especially when you’re looking for a healthy and portable lunch option.
What sets this salad apart is its tangy peanut dressing, which forms the delicious base of the jar, keeping your greens from getting soggy. Layered above are wholesome ingredients like protein-packed quinoa, crisp zucchini, vibrant carrots, and crunchy cabbage. To top it all off, a sprinkling of honey-roasted peanuts adds a wonderful texture and a hint of sweetness, elevating the whole experience.
The beauty of the mason jar method is not just in its visual appeal, but in its ability to keep all the components fresh and separate until you’re ready to eat. With just under 25 minutes needed for prep, you can assemble several of these jars at once, ensuring you have a fantastic and fresh lunch ready for multiple days. It’s a nutrient-dense, flavorful, and incredibly convenient meal prep solution that you’ll look forward to.
Kale-Pasta Mason Jar Salad
Ingredients
Equipment
Method
- For the pasta and pine nuts: Bring a pot of water to a boil and cook the pasta according to the package directions. Drain, rinse with cold water and add to a bowl. Set aside.
- Add the pine nuts to a small skillet over low heat. Toast slowly over the course of 3 to 4 minutes, tossing regularly. Remove from the skillet and set aside.
- For the dressing: In a large skillet, heat the olive oil and garlic over low heat so that the garlic slowly infuses the oil, about a minute. When the garlic begins to sizzle, stir it around so it doesn't get too brown. When the garlic starts to turn golden, add the salt and pepper and stir; set aside for 5 minutes.
- After 5 minutes, pour the oil mixture (scraping out the salt, pepper and garlic) into a small mason jar. Add the lemon juice, lemon zest, basil and parsley, put the lid on and shake it.
- For the kale: Finely slice 1 bunch of the kale. Set the same skillet (without cleaning it) over medium-high heat. Add the sliced kale and cook until partly wilted, about 5 minutes. Let cool, then add the Parmesan shavings and toss. Season with salt and pepper.
- Finely slice the remaining 1/2 bunch kale and set aside.
- For the assembly: Start by pouring 1/4 cup dressing into each quart-size mason jar, followed by 3/4 cup cherry tomatoes, 1 1/4 cups pasta, 1 tablespoon pine nuts, 1/2 cup cooked kale with Parmesan, 8 to 9 mozzarella balls and, finally, 1/2 cup sliced raw kale. Put the lids on the jars and refrigerate until ready to eat.
Notes
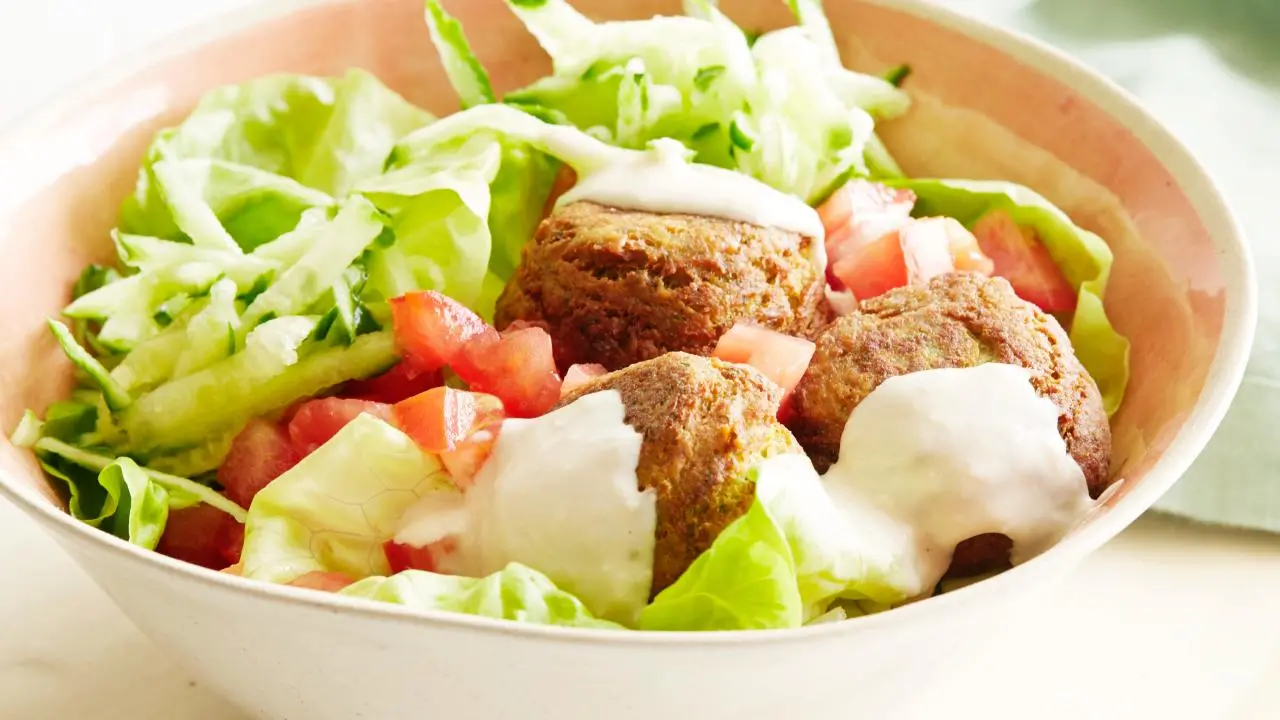
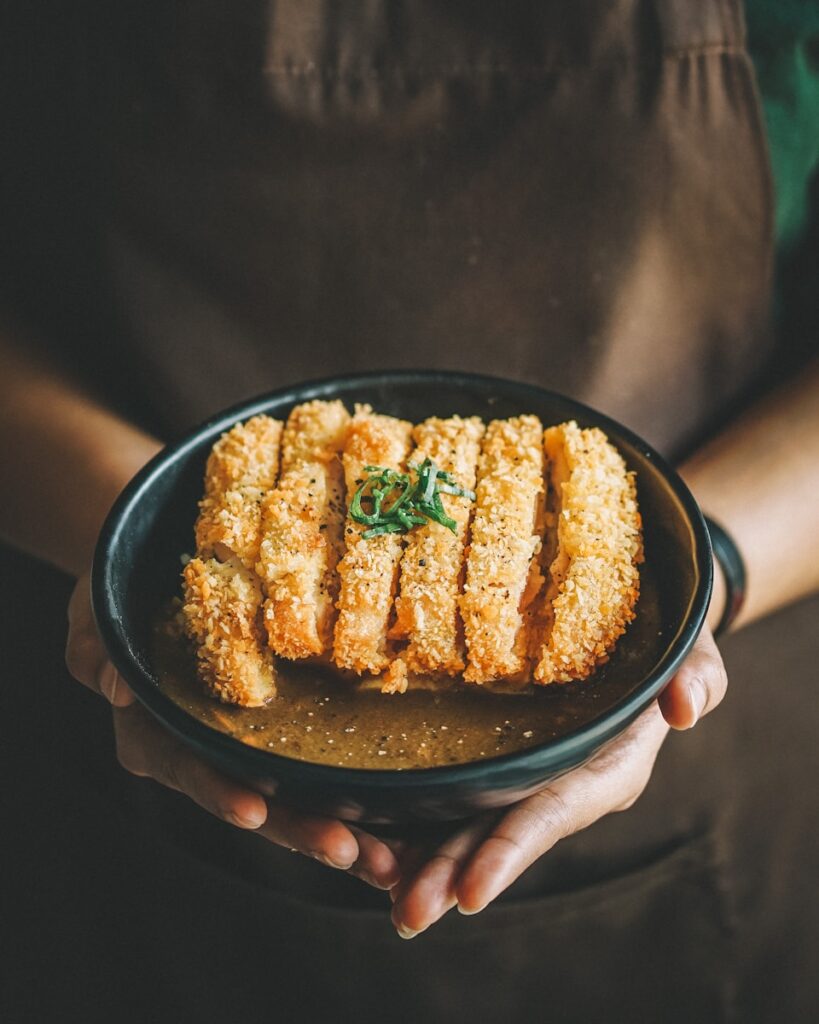
3. **Falafel Salad Bowls (Meal Prep)** For those who crave Mediterranean flavors and a satisfyingly crunchy component in their lunch, these Falafel Salad Bowls are an absolute dream. They are designed with meal prep in mind, ensuring you can enjoy a wholesome and flavorful vegan meal that’s ready whenever hunger strikes. This recipe takes the deliciousness of falafel and turns it into a perfectly balanced bowl.
For those who crave Mediterranean flavors and a satisfyingly crunchy component in their lunch, these Falafel Salad Bowls are an absolute dream. They are designed with meal prep in mind, ensuring you can enjoy a wholesome and flavorful vegan meal that’s ready whenever hunger strikes. This recipe takes the deliciousness of falafel and turns it into a perfectly balanced bowl.
The star of these bowls is undoubtedly the crispy baked falafels, offering that classic savory taste and wonderful texture without the need for deep frying, making them a healthier alternative. These are paired with a medley of fresh veggies, providing essential vitamins and fiber, and a generous drizzle of creamy tahini maple dressing that ties all the flavors together with its nutty and subtly sweet notes.
These bowls are more than just tasty; they are a nutrient-dense vegan meal prep recipe that will keep you feeling full and satisfied throughout your afternoon. Preparing a batch of these falafel salad bowls means you have a vibrant, delicious, and incredibly wholesome lunch waiting for you, making healthy eating both easy and enjoyable. They truly stand out as a fantastic option for a grab-and-go lunch.
Falafel
Ingredients
Equipment
Method
- In a food processor, combine the chickpeas, scallions, garlic, cumin, coriander, cayenne, parsley, cilantro, egg, and lemon juice. Pulse to combine and season with salt. The mixture will not be smooth, but it should not have large chunks.
- Add in the baking powder and 1/3 cup of the flour and pulse to just combine. Remove to a bowl and chill in the refrigerator for 30 minutes.
- Remove the chickpea mixture from the refrigerator. Add enough oil to a large saute pan so it reaches 1/2-inch up the sides and heat it over medium-high heat until an inserted thermometer reads 360 degrees F.
- Meanwhile, drop spoonfuls of the chickpea mixture onto a plate with 1/4 cup flour. Roll into balls on the floured plate and press gently into patties. Fry in batches of hot oil for about 3 to 4 minutes each side and drain on paper towels.
- Serve the falafel on a bed of lettuce with chopped salted tomatoes, grated cucumber and White Bean Yogurt Sauce.
Notes
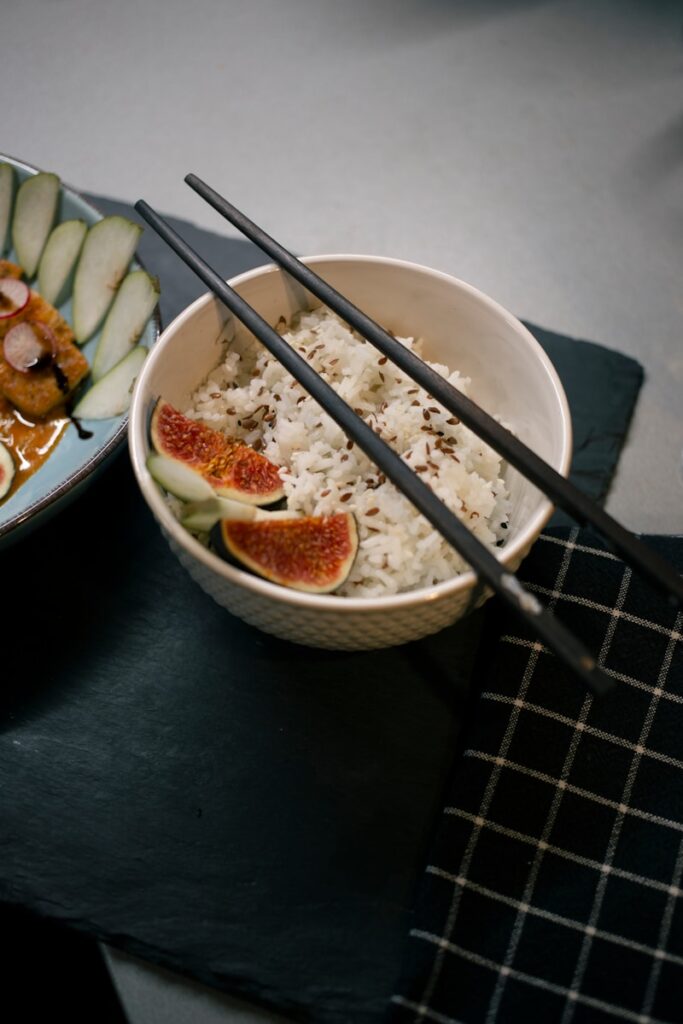
4. **Instant Pot Fiesta Rice Bowls**
Say hello to the ultimate in convenience and flavor with the Instant Pot Fiesta Rice Bowls. If you’re looking for a hot lunch idea that minimizes effort but maximizes taste, this recipe is about to become your new best friend. It’s perfect for those busy weeks when you need something substantial and comforting without spending hours in the kitchen.
The genius of these bowls lies in their simplicity: it’s a vegetarian and gluten-free recipe that works wonderfully for meal prep because it’s a true ‘dump-it-all-in-the-Instant Pot’ kind of meal. You literally add your ingredients, press a button, and let your Instant Pot do all the hard work. This means less active cooking time for you and a quicker path to a delicious, warm lunch.
Once cooked, you have a flavorful, hearty rice base that’s ready to be portioned into your meal prep containers. These bowls are designed to be portable and healthy, providing a good dose of protein to keep you feeling full and energized. They are a fantastic way to ensure you have warm, comforting, and delicious meals throughout the week, making your lunch hour feel like a real treat.
Instant Pot Greek Chicken Bowls
Ingredients
Equipment
Method
- Whisk together the oregano, paprika, red pepper flakes, 1/4 cup olive oil, 2 cloves garlic and 1/2 cup water in the pot of a 6-quart Instant Pot®. Add the chicken, 2 teaspoons salt and a few grinds of pepper and toss until well coated.
- Follow the manufacturer's guide for locking the lid and preparing to cook. Set the pot to pressure cook on high for 3 minutes (see Cook's Note). After the pressure cook cycle is complete, follow the manufacturer's guide for quick release and wait until the quick release cycle is complete. Be careful of any remaining steam and unlock and remove the lid. Transfer the chicken to a medium bowl and turn the pot off. Add the couscous, 1/2 teaspoon salt and a few grinds of pepper to the pot and stir to combine with the hot liquid. Place the glass lid on the top and let the couscous sit until tender and fluffy, 6 to 7 minutes. Fluff with a fork.
- Meanwhile, mix together the yogurt, lemon juice, remaining clove garlic and 2 tablespoons water in a medium bowl until well combined. Spread 1/4 cup of the yogurt sauce on the bottom of a plate. Top with a quarter of the couscous, cucumbers, tomatoes, Kalamata olives and feta. Repeat with the remaining ingredients 3 more times. Garnish each plate with the dill and a drizzle of the remaining 2 tablespoons olive oil.
Notes
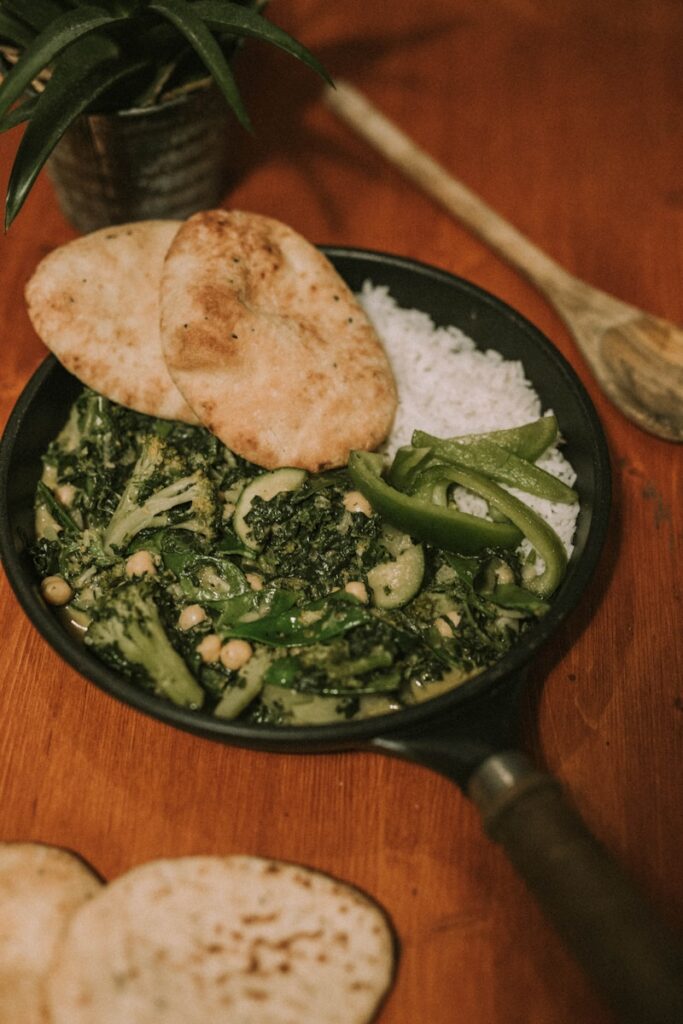
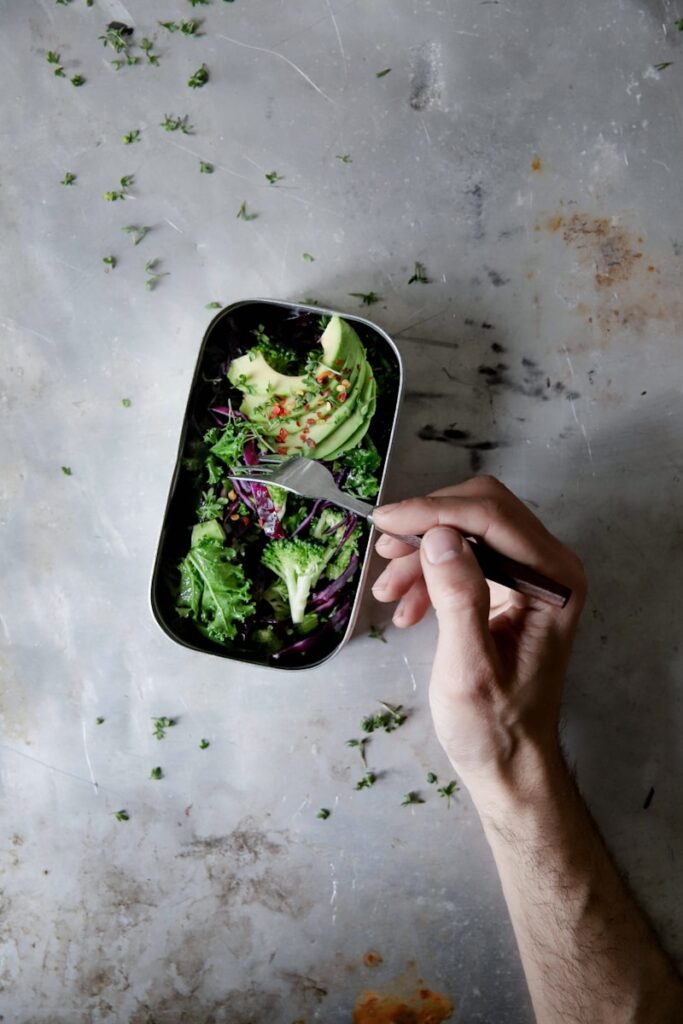
5. **Vegan Roasted Vegetable Meal Prep with Turmeric Tahini Sauce**
For a vibrant, wholesome, and incredibly flavorful plant-based lunch, look no further than the Vegan Roasted Vegetable Meal Prep with Turmeric Tahini Sauce. This recipe is a celebration of nutritious ingredients, artfully combined to create a meal that’s both satisfying and visually appealing, proving that healthy eating can be truly exciting.
The foundation of these meal prep bowls consists of beautifully roasted vegetables, which caramelize and become incredibly sweet and tender in the oven, alongside protein-packed chickpeas and fluffy quinoa. This combination ensures a balanced meal with plenty of fiber and plant-based protein, keeping you satiated for hours.
What truly elevates this dish is the deliciously creamy turmeric tahini sauce. Turmeric not only adds a beautiful golden hue but also brings its anti-inflammatory properties, while the tahini provides a rich, nutty depth. This sauce perfectly coats the vegetables and quinoa, adding an irresistible layer of flavor. It’s a fantastic vegan meal prep recipe that will have you looking forward to lunch with genuine excitement.
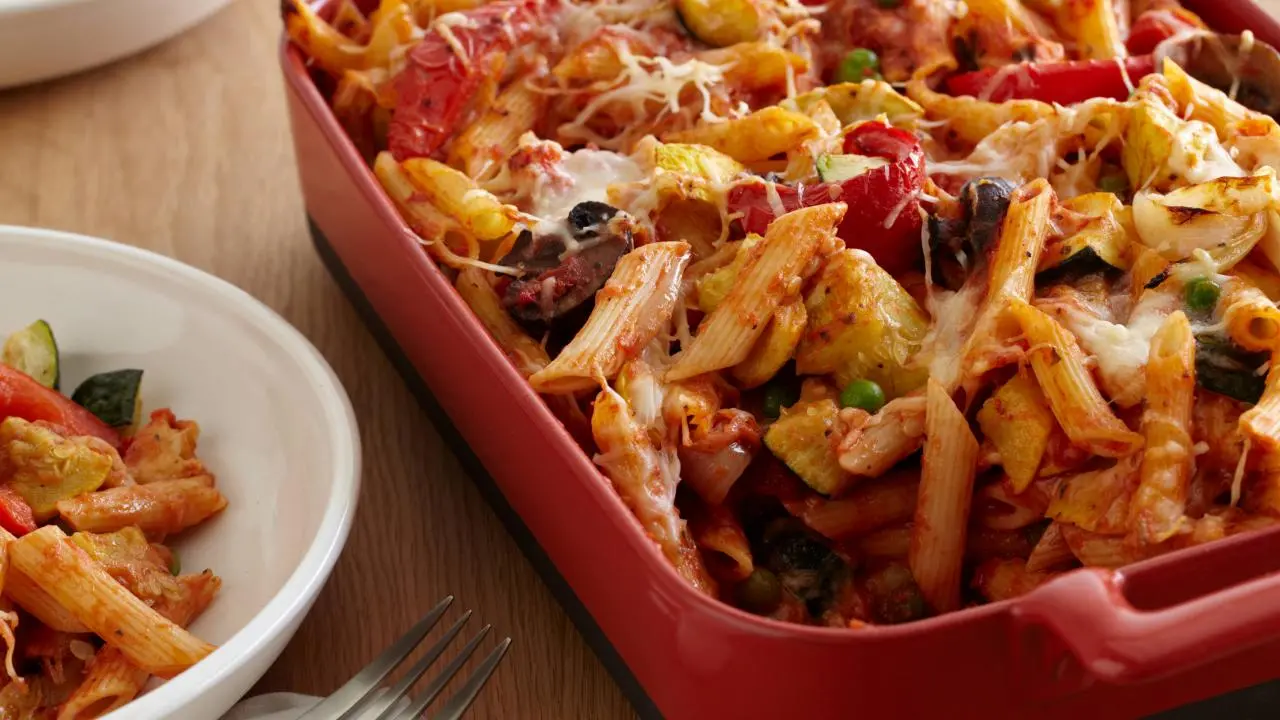
Baked Penne with Roasted Vegetables
Ingredients
Equipment
Method
- Preheat the oven to 450 degrees F.
- On a baking sheet, toss the peppers, zucchini, squash, mushrooms, and onions with olive oil, 1/2 teaspoon salt, 1/2 teaspoon pepper, and dried herbs. Roast until tender, about 15 minutes.
- Meanwhile, bring a large pot of salted water to a boil over high heat. Add the pasta and cook for about 6 minutes. Since you will be cooking the pasta a second time in the oven, you want to make sure the inside is still hard. Drain in a colander.
- In a large bowl, toss the drained pasta with the roasted vegetables, marinara sauce, cheeses, peas, 1/2 teaspoon salt, and 1/2 teaspoon pepper. Using a wooden spoon, gently mix, until all the pasta is coated with the sauce and the ingredients are combined.
- Pour the pasta into a greased 9 by 13-inch pan. Top with the remaining 1/3 cup Parmesan and butter pieces. Bake until top is golden and cheese melts, about 25 minutes.
Notes
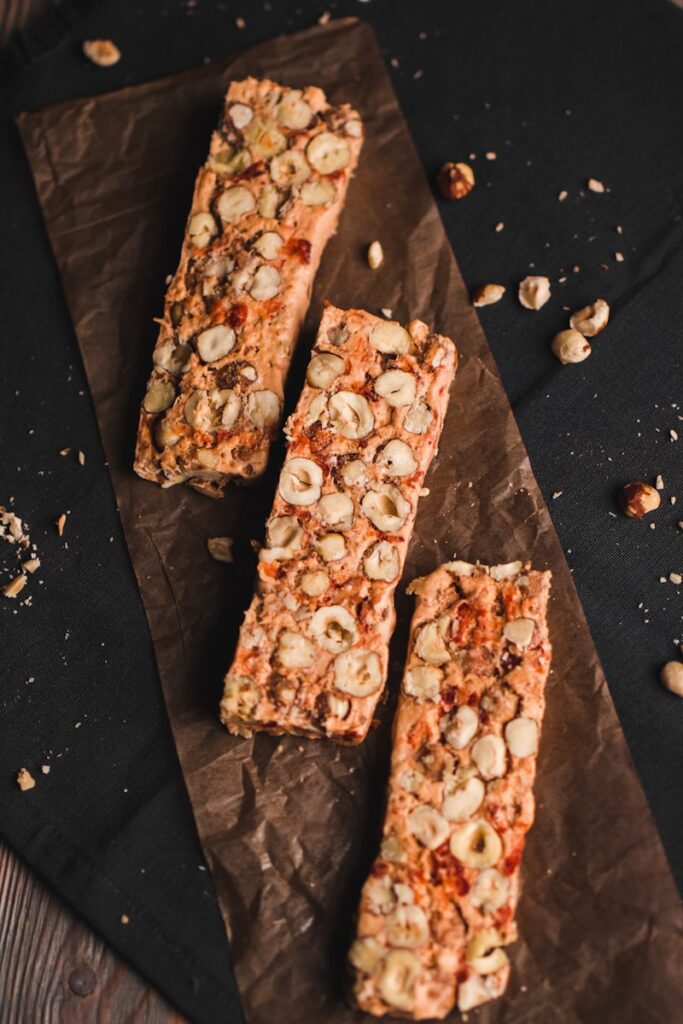
6. **PERFECT Homemade Granola Bars (+ 7 flavors!)**
Are you tired of spending too much money on store-bought granola bars, only to find they often fall short on taste or contain ingredients you’d rather avoid? Well, get ready to wave goodbye to that habit, because making your own is not only incredibly cost-effective but also infinitely more delicious and customizable.
This recipe truly shows you how to make PERFECT homemade granola bars, and the best part is it comes with seven different flavor variations! Imagine the possibilities: from classic oat and honey to more adventurous combinations, you can tailor these bars to your exact cravings. They are the ideal sweet treat to enjoy with your morning coffee, as a midday pick-me-up, or even as a pre-workout snack.
What makes these bars so fantastic for meal prep is their impressive shelf life. They are often both fridge and freezer-friendly, meaning you can whip up a big batch and store them in the freezer for 1-3 months, or keep them in the fridge for up to a week. This convenience, combined with their wholesome ingredients and fantastic taste, makes them a superior choice to anything you’d find at the store.
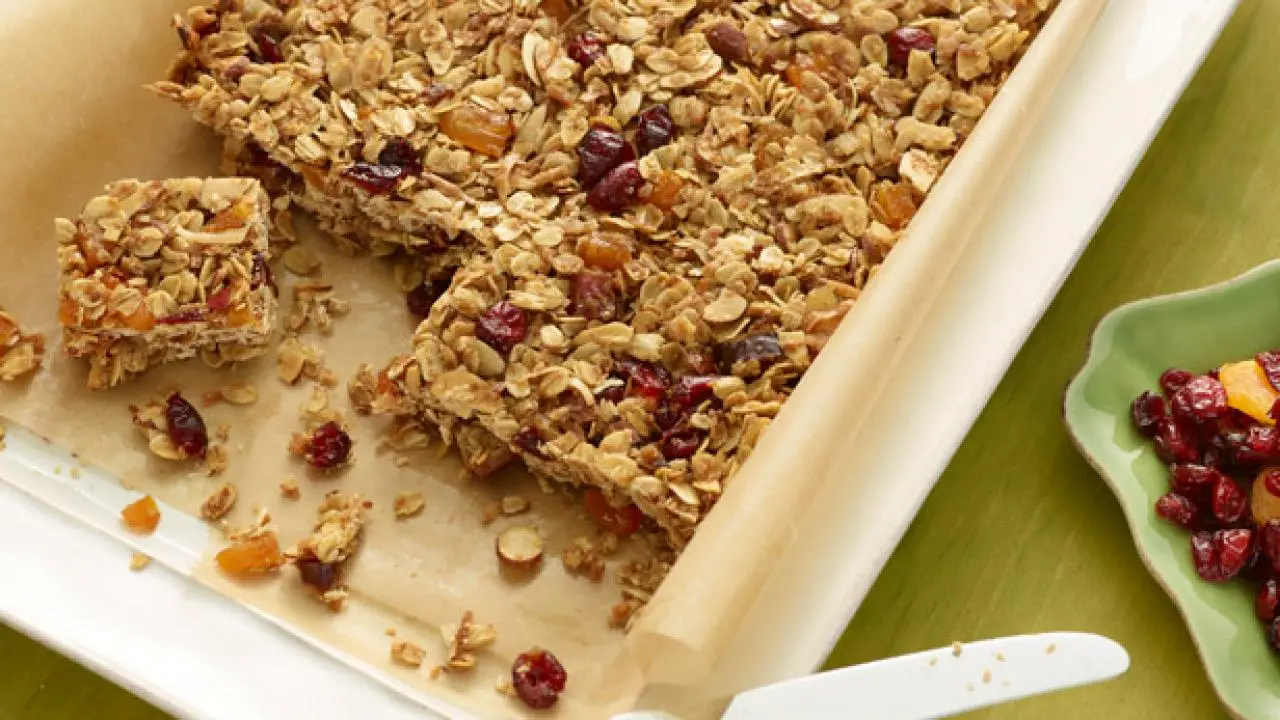
Homemade Granola Bars
Ingredients
Equipment
Method
- Preheat the oven to 350 degrees F. Butter an 8 by 12-inch baking dish and line it with parchment paper.
- Toss the oatmeal, almonds, and coconut together on a sheet pan and bake for 10 to 12 minutes, stirring occasionally, until lightly browned. Transfer the mixture to a large mixing bowl and stir in the wheat germ.
- Reduce the oven temperature to 300 degrees F.
- Place the butter, honey, brown sugar, vanilla, and salt in a small saucepan and bring to a boil over medium heat. Cook and stir for a minute, then pour over the toasted oatmeal mixture. Add the dates, apricots, and cranberries and stir well.
- Pour the mixture into the prepared pan. Wet your fingers and lightly press the mixture evenly into the pan. Bake for 25 to 30 minutes, until light golden brown. Cool for at least 2 to 3 hours before cutting into squares. Serve at room temperature.
Notes
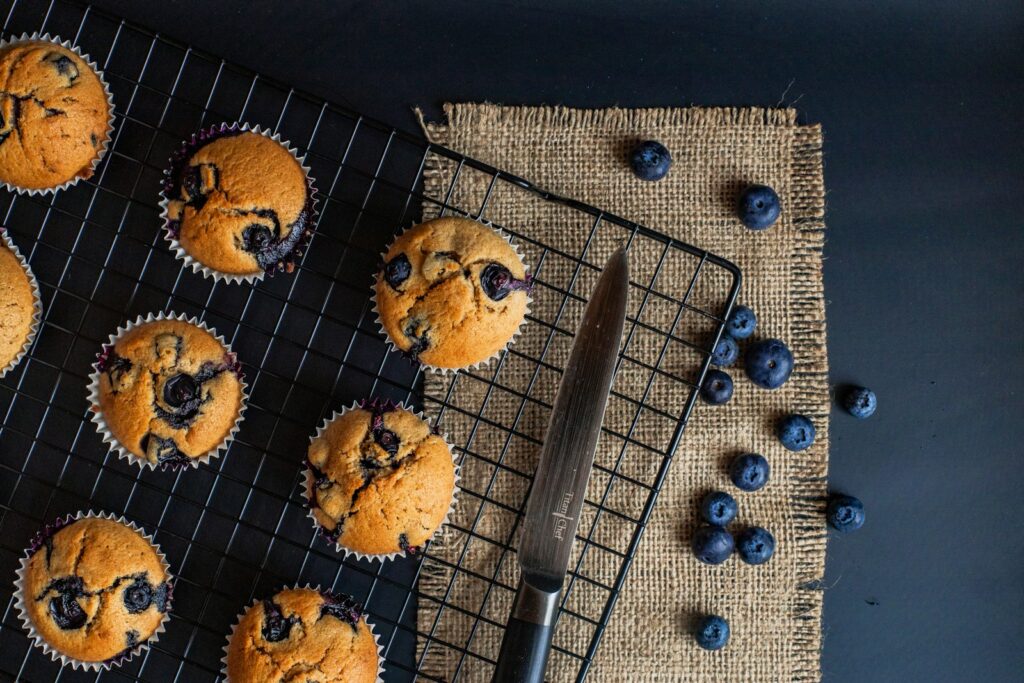
7. **Healthy Blueberry Muffins (Crunchy Tops!)**
Sometimes, you just need a little something sweet and satisfying to round out your lunch or enjoy as a standalone snack, and these Healthy Blueberry Muffins are absolutely perfect for that. They are a delightful deviation from typical meal prep items, proving that healthy treats can be utterly delicious and easy to prepare.
These muffins are a dream come true: tender and soft on the inside, loaded with juicy blueberries that burst with flavor, and — my personal favorite — boasting wonderfully crunchy golden tops. The secret to their healthier profile lies in the use of Greek yogurt for moisture and protein, and whole wheat flour for added fiber, all without any refined sugar. They are packed with a ton of blueberries, ensuring fruity goodness in every bite.
Part of what we affectionately call the ‘misc’ category of snacks, these muffins can be prepped ahead and stored for whenever a craving strikes. They are a fantastic way to enjoy a sweet treat while staying on track with your healthy eating goals. Whether as a breakfast on the go or a delightful afternoon snack, these muffins will become a cherished part of your meal prep routine.”
Continuing our culinary journey to make your work lunches something truly special, we have even more fantastic ideas designed to keep you satisfied, energized, and genuinely excited for your midday break. From robust, flavorful salads to hearty, comforting hot dishes and nourishing, soul-warming soups, these next seven recipes are perfect additions to your weekly meal prep rotation, ensuring variety and deliciousness all week long.

Blueberry Muffins
Ingredients
Equipment
Method
- Preheat oven to 380 degrees F.
- In a large bowl sift together the flour, baking soda, baking powder, and salt and set aside.
- In another large bowl, whisk together the sugar, oil, egg and yogurt. Add the dry ingredients reserving 1 tablespoon of the dry ingredients and toss with the blueberries. Stir mixture for a count of 10. Add 1 cup blueberries to mixture and stir 3 more times. Reserve the 1/2 cup of blueberries.
- Using a #20 ice cream scoop, add the mixture to greased muffin pans. Sprinkle the remaining 1/2 cup of berries on top of muffins and press down lightly. Place into the oven and increase the temperature to 400 degrees. Bake for 20 to 25 minutes, rotating pan halfway through. Remove from oven and turn out, upside down on tea towel to cool completely. Serve immediately or store in airtight container for 2 to 3 days.
Notes
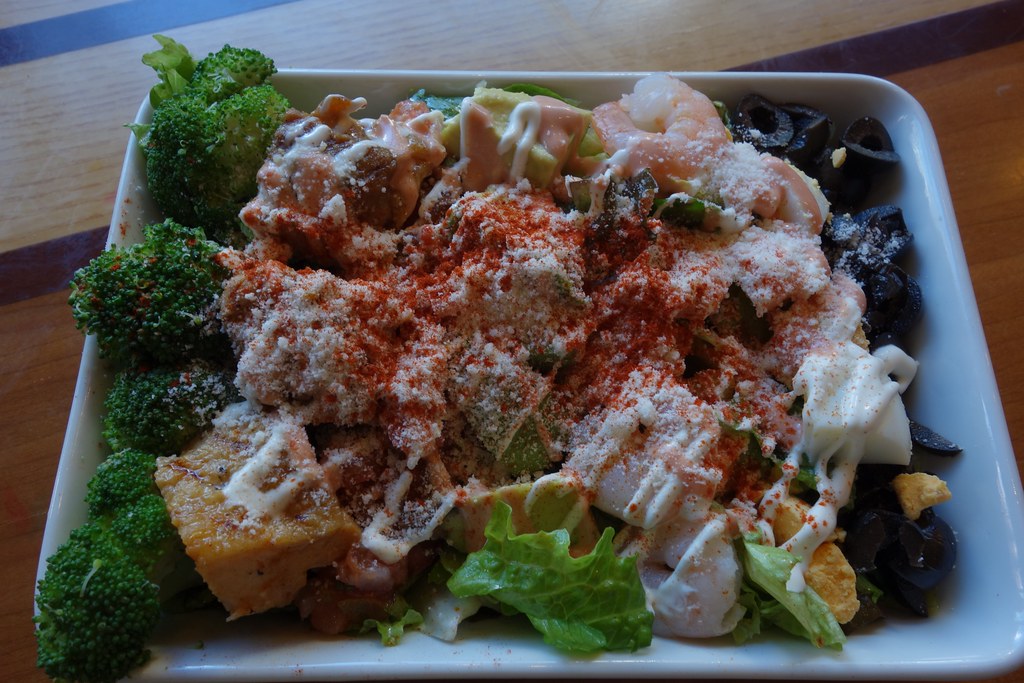
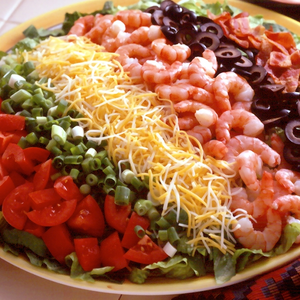
8. **Mexican Cobb Salad**
If you’re looking to put a fresh and exciting spin on a classic, the Mexican Cobb Salad is an absolute must-try. This isn’t just another green salad; it’s a vibrant explosion of flavors and textures, ingeniously designed to work wonderfully for your meal prep and keep you looking forward to lunchtime, even when you’re on the go. It truly transforms the idea of a simple salad into a compelling meal.
What makes this particular Cobb salad stand out is its delightful array of ingredients. We’re talking about creamy, luscious guacamole that adds a rich depth, tangy pickled onions that provide a zesty bite, savory bacon for that irresistible crunch, and the unexpected kick of jalapeno havarti cheese, which introduces a subtle heat and wonderful creaminess. Each component plays a crucial role in delivering a complex and satisfying taste experience.
This salad is a testament to how creative layering and thoughtful ingredient combinations can elevate your everyday lunch. By preparing the components ahead, you can assemble a fresh and flavorful meal in minutes, making healthy eating effortless. It’s a smart way to ensure your lunch is always a highlight of your day, providing both nutrition and immense enjoyment.
Mexican Cobb Salad
Ingredients
Equipment
Method
- Thoroughly wash and dry the romaine lettuce leaves, then tear them into bite-sized pieces.
- Cook the bacon until it is crisply done. Once cooled, crumble the bacon into small pieces.
- Prepare your vegetables: dice the tomato and thinly slice the green onions. If using avocado, dice it as well.
- In a small bowl, whisk together the salsa and light mayonnaise until well combined to form the dressing.
- In a large salad bowl, arrange the torn romaine lettuce as the base.
- Artfully arrange the remaining ingredients over the lettuce in distinct sections or rows: the shredded Mexican cheese, diced cooked chicken or shrimp, diced tomato, thinly sliced green onions, and crumbled bacon.
- If using, add the pitted sliced black olives or diced ripe avocado to the salad.
- Just before serving, generously drizzle the prepared salsa-mayonnaise dressing over all the ingredients.
- Gently toss the salad to ensure all components are well combined and coated with the dressing.
- Serve immediately for optimal freshness and enjoyment.
Notes
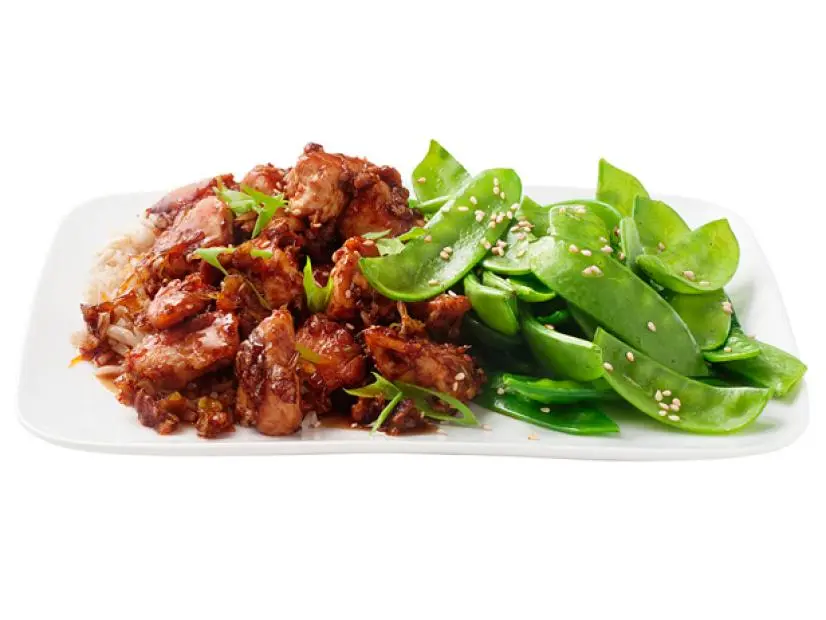
9. **Honey Sesame Chicken Lunch Bowls**
For those craving a hot, savory, and slightly sweet lunch that feels like a treat but is packed with wholesome goodness, the Honey Sesame Chicken Lunch Bowls are an absolute winner. These bowls are specifically crafted to be perfect for healthy meal prep, ensuring you have a deliciously comforting meal ready to reheat and enjoy, no matter how busy your day gets.
The magic in these bowls comes from the harmonious blend of tender chicken breast, vibrant green broccoli, and crisp asparagus, all generously tossed in a sweet and savory honey sesame stir-fry sauce. This irresistible sauce coats every ingredient, infusing the dish with an aromatic and deeply satisfying flavor that makes each bite a delightful experience. It’s a balanced combination of protein and nourishing vegetables.
Preparing these bowls ahead means you’re investing in a week of hassle-free, mouth-watering lunches. They travel incredibly well and reheat beautifully, making them an ideal choice for the office or a comforting meal at your home desk. These lunch bowls prove that healthy eating can be both convenient and incredibly satisfying, adding a touch of gourmet flair to your midday routine.
Sesame Chicken with Snow Peas
Ingredients
Equipment
Method
- Whisk 3 tablespoons soy sauce, 2 teaspoons sesame oil and the honey together in a medium bowl. Add the chicken, toss and marinate 20 minutes.
- Remove the chicken from the marinade using a slotted spoon. Heat 2 teaspoons canola oil in a nonstick skillet over medium-high heat. Cook the chicken in 2 batches, turning once or twice, until browned, 3 to 5 minutes (add 2 more teaspoons canola oil between batches). Transfer the chicken to a plate and wipe out the skillet.
- Heat the remaining 2 teaspoons canola oil in the skillet. Add the scallions, reserving some of the green parts for topping. Add the ginger and garlic and cook, stirring, 1 minute. Whisk the broth, sugar, cornstarch, vinegar, chili paste and the remaining 2 tablespoons soy sauce in a bowl; add to the skillet and cook, stirring, until thickened, 3 to 4 minutes. Stir in the remaining 2 teaspoons sesame oil.
- Meanwhile, cook the snow peas in a steamer basket set over a few inches of boiling water until crisp-tender, 2 to 3 minutes.
- Return the chicken to the skillet with the sauce and heat through. Serve the chicken and snow peas over brown rice, if desired. Top with the sesame seeds and reserved scallion greens.
Notes
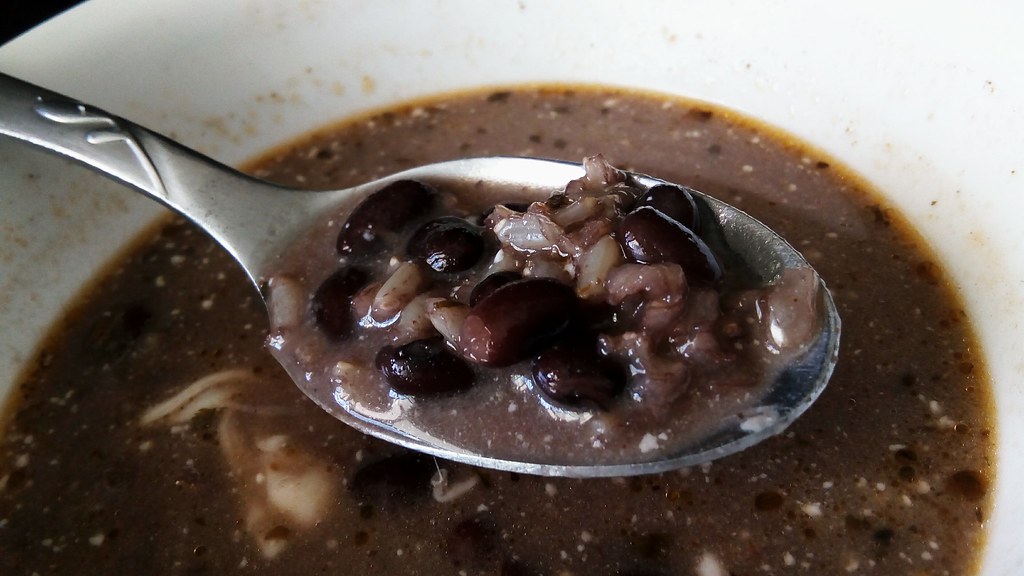
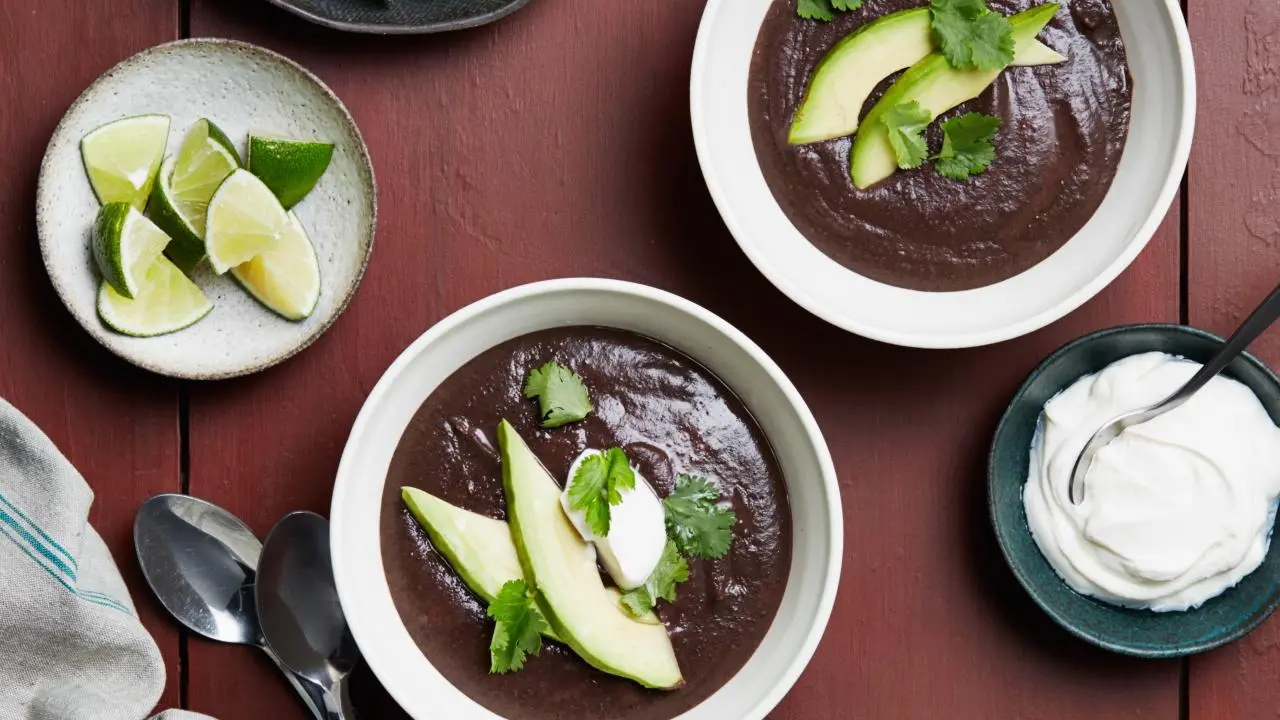
10. **Instant Pot Black Bean Soup**
When it comes to warm, comforting, and incredibly satisfying lunch options, soups often rise to the top of the list, and this Instant Pot Black Bean Soup is no exception. It’s a truly hearty, creamy, and profoundly flavorful soup that brings a wonderful warmth to your midday meal, especially on cooler days, making it a perfect addition to your meal prep repertoire.
One of the greatest benefits of this recipe is its economy and flavor depth, as it encourages cooking the beans from dried, which truly infuses so much extra flavor into the soup compared to using canned varieties. This simple step elevates the soup’s richness, creating a deeply savory and satisfying base that’s both nourishing and incredibly delicious. The Instant Pot convenience also streamlines the process significantly.
Beyond its rich taste, this black bean soup is also wonderfully versatile, being entirely vegan, gluten-free, and remarkably meal prep friendly. You can easily whip up a large batch and portion it out for the week, ensuring you have a wholesome, ready-to-heat lunch waiting for you. It’s a smart and delicious way to stay fueled and satisfied without compromising on your healthy eating goals.
Instant Pot Black Bean Soup
Ingredients
Equipment
Method
- Set the Instant Pot® (see Cook's Note) to normal saute. Add the oil and once shimmering, but not smoking, add the onion and cook, stirring, until translucent and soft, about 5 minutes.
- Add the garlic, chili powder, cumin and oregano and cook, stirring, until fragrant, about 1 minute. Add the beans, bay leaves and 7 cups water. Follow the manufacturer's guide for locking the lid and preparing to cook. Set to pressure cook on high for 1 hour.
- After the pressure cook cycle is complete, follow the manufacturer's guide for quick release and wait until the quick release cycle is complete. Careful of any remaining steam, unlock and remove the lid and remove the bay leaves. Then remove 1 cup of the beans with a slotted spoon and set aside. Use an immersion blender to blend the black beans with 1 tablespoon salt until thick and creamy. Stir in the reserved whole beans and season to taste with salt and pepper. Serve with sliced avocado, cilantro leaves, chopped scallions, lime wedges and sour cream.
Notes
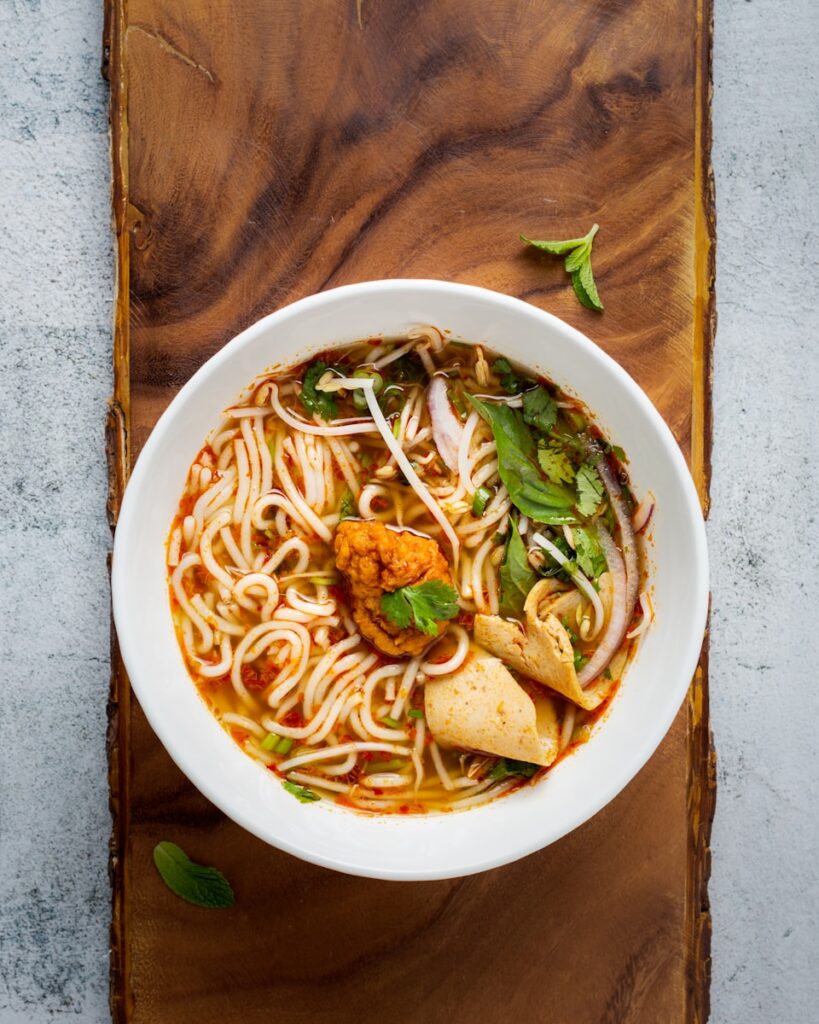
11. **Spicy Tofu Noodles Meal Prep**
For a vibrant, plant-based lunch that truly excites the taste buds, these Spicy Tofu Noodle Meal Prep bowls are an absolute game-changer. They combine a wonderful array of textures and a dynamically flavored sauce to create a meal that’s both incredibly satisfying and perfect for preparing ahead, allowing you to enjoy flavorful vegan meals throughout your busy week.
The heart of this dish lies in its compelling sweet, savory, and spicy sauce, which perfectly coats hearty whole-wheat spaghetti and refreshing zucchini noodles, offering a delightful textural contrast. Paired with protein-rich tofu, which soaks up all that incredible flavor, this bowl delivers a balanced meal that’s both filling and incredibly delicious, proving that healthy can also be bold.
The beauty of this recipe is its adaptability for meal prep; you can easily prepare a batch on your prep day and portion it into containers, knowing you have a fantastic, ready-to-eat lunch. It’s a wonderful way to ensure you have a convenient, nutrient-dense, and exciting meal waiting for you, making healthy eating both easy and enjoyable, even when time is short.
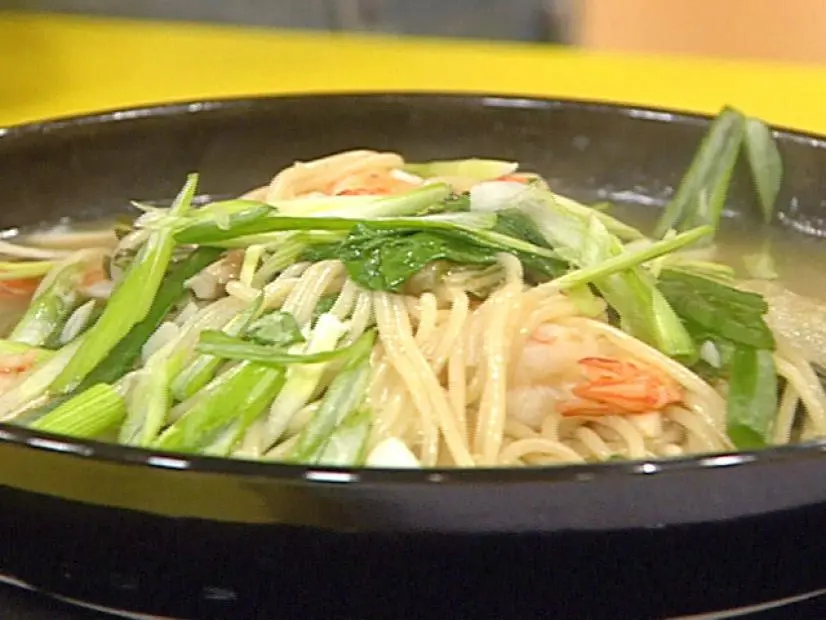
Spicy Shrimp and Bok Choy Noodle Bowl
Ingredients
Equipment
Method
- Heat a medium soup pot over medium-high heat. Add vegetable oil, 3 turns of the pan, crushed red pepper flakes, garlic, ginger, mushrooms, and bok choy, then season with salt and pepper. Add chicken broth and seafood stock or clam juice. Put a lid on the pot and bring soup to a boil.
- Add shrimp and noodles and cook 3 minutes. Add in scallions and cook 2 minutes, then turn off soup and let it sit 2 to 3 minutes more. Adjust salt and serve.
Notes
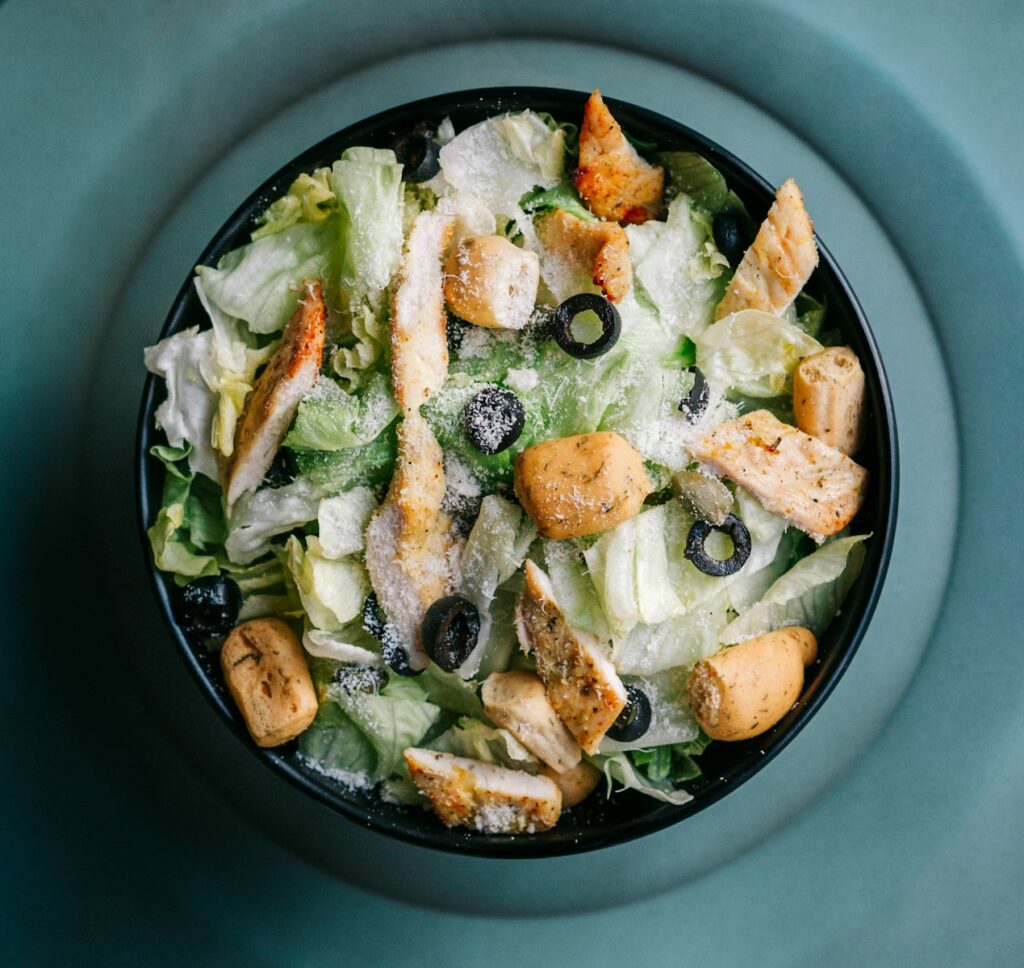
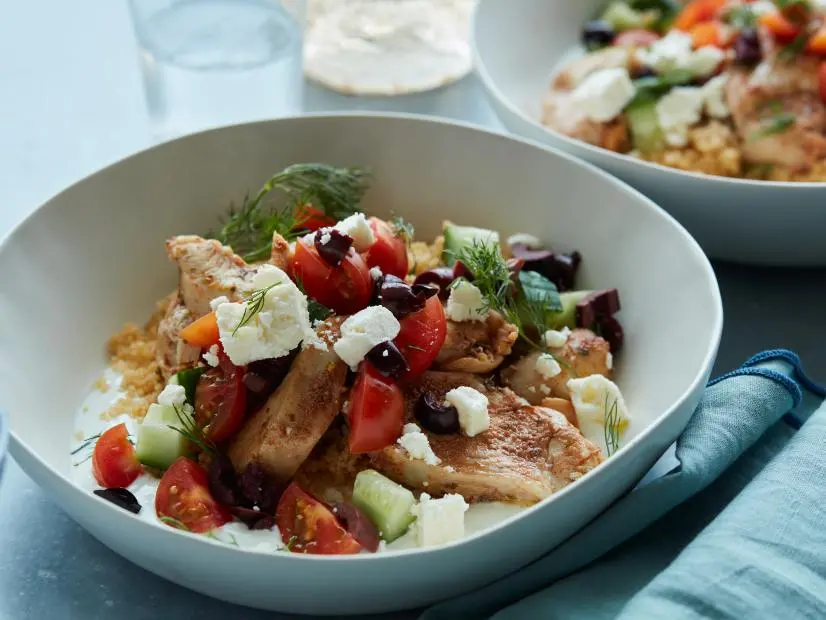
12. **Healthy Greek Chicken Pasta Salad**
If you’re in the mood for a lunch that’s both light and satisfying, bursting with fresh flavors, look no further than the Healthy Greek Chicken Pasta Salad. This dish offers a delightful medley of textures and tastes, making it a tangy, crunchy, cool, and wonderfully refreshing option that’s just as perfect for a packed lunch as it is for a picnic or potluck.
This vibrant salad is built upon a foundation of fresh vegetables, tender chicken, and perfectly cooked pasta, all generously marinated in a bright and zesty Greek red wine vinaigrette. The addition of fresh dill infuses an aromatic herbaceousness, while crumbled feta cheese provides a salty, tangy counterpoint, bringing all the delicious Mediterranean flavors together in a harmonious blend.
Designed with meal prep in mind, this pasta salad holds up beautifully in the fridge, making it an excellent candidate for your weekly batch cooking. It provides a substantial yet refreshing meal that will keep you feeling full and energized throughout the afternoon, allowing you to breeze through your workday with ease and satisfaction.
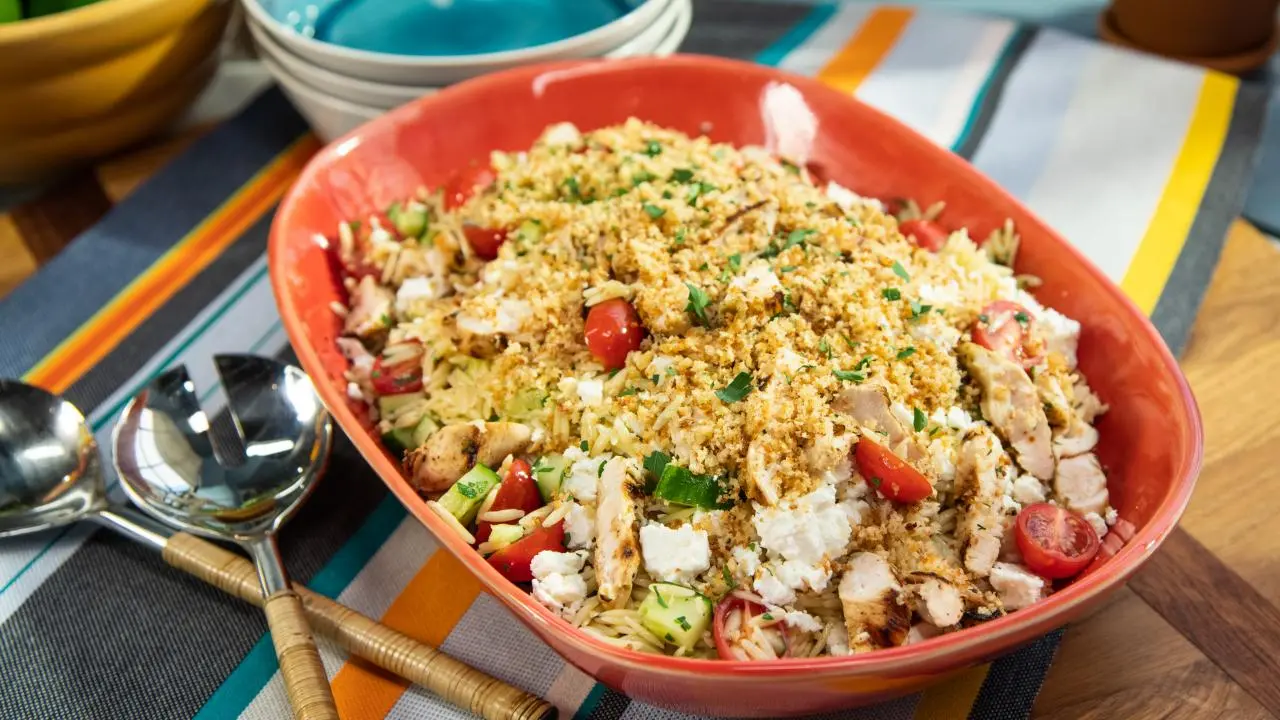
Greek Chicken and Orzo Pasta Salad
Ingredients
Equipment
Method
- For the chicken: In a medium bowl, whisk together the olive oil, salt, oregano, garlic powder, pepper and lemon juice. Add the chicken and toss to coat. Refrigerate for at least 30 minutes and up to 4 hours.
- Preheat a grill or grill pan to medium high.
- Remove the chicken from the marinade. Grill the chicken until cooked through, about 5 minutes per side. Slice the chicken into 1-inch-wide pieces. Set aside.
- For the breadcrumbs: Preheat the oven to 400 degrees F.
- In a medium ovensafe skillet, heat the butter, olive oil and garlic over low heat until the garlic begins to sizzle. Add the breadcrumbs and salt and toss to coat. Transfer to the oven and toast until golden brown, 3 to 4 minutes.
- For the dressing: Whisk together the olive oil, vinegar, salt, oregano, pepper, garlic and lemon juice in a small bowl until combined.
- For the salad: Bring a large pot of salted water to a boil. Add the orzo and cook until al dente, 7 to 8 minutes. Drain and transfer to a large serving bowl. Toss with the dressing while still hot, then let cool to room temperature.
- When cool, stir in the tomatoes, cucumber and parsley. Top with the feta, sliced chicken and breadcrumbs.
Notes

13. **Hearty Lentil Soup**
There’s something incredibly comforting about a bowl of warm, hearty soup for lunch, and this Lentil Soup truly embodies that cozy satisfaction. It’s wonderfully thick and incredibly hearty, making it a perfectly filling and nourishing option that’s loaded with wholesome ingredients, ensuring you feel sustained and content through your busiest afternoons.
This delightful vegan soup is generously packed with tender lentils, a colorful assortment of fresh vegetables, and fragrant fresh herbs, each contributing to its rich flavor profile and impressive nutritional value. The combination creates a robust and satisfying texture, making it far more than just a light starter; it’s a complete meal in itself, brimming with goodness.
Beyond its delicious taste and wholesome ingredients, this lentil soup shines as a fantastic vegan meal prep recipe. You can easily prepare a large batch over the weekend and portion it out for several days, guaranteeing you a convenient, healthy, and incredibly flavorful lunch that’s ready whenever hunger strikes. It’s a simple yet powerful way to nourish your body and soul.

Hearty Lentil Soup
Ingredients
Equipment
Method
- Begin by thoroughly rinsing the green lentils under cold water until the water runs clear; set aside.
- Chop the yellow onion and carrots into uniform pieces to ensure even cooking.
- Heat the canola oil in a large stock pot or Dutch oven over medium heat.
- Add the chopped onion to the pot and sauté until softened and translucent, about 5-7 minutes.
- Stir in the chopped carrots and continue to sauté for another 5 minutes until slightly tender-crisp.
- Add the rinsed lentils, 3 quarts of water, and the kombu strips to the pot. Bring the mixture to a boil.
- Once boiling, reduce the heat to low, cover, and simmer for 45-60 minutes, or until the lentils are tender.
- Carefully remove and discard the kombu strips from the soup.
- Season the soup generously with salt and pepper to taste. If using, stir in the balsamic vinegar.
- Ladle the hot soup into bowls and serve immediately, garnished as desired.
Notes
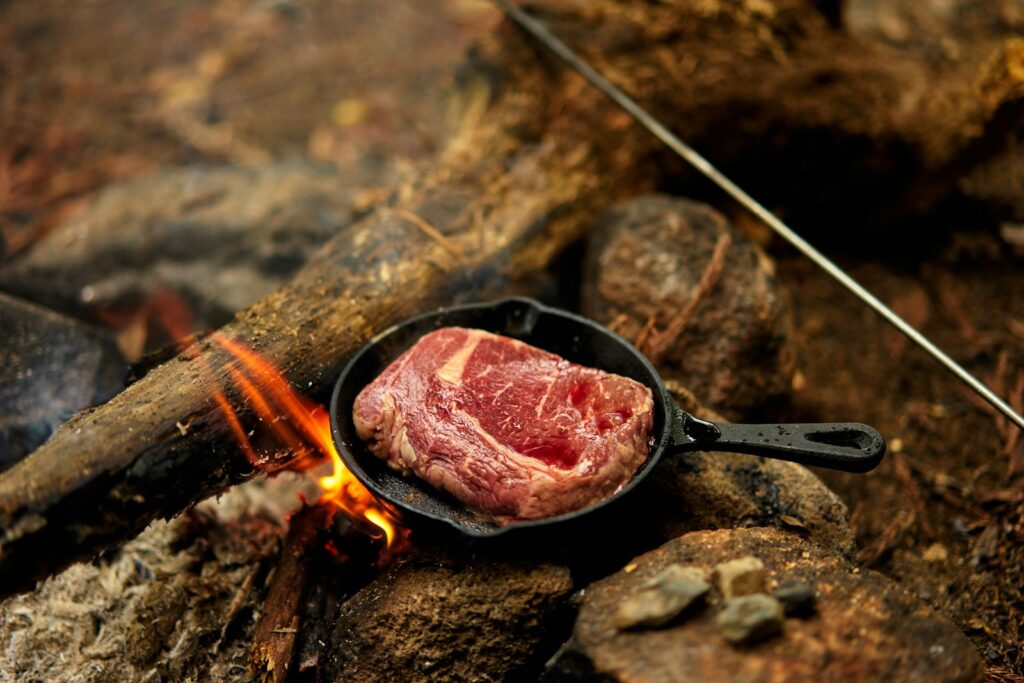
14. **Healthier Mongolian Beef Meal Prep**
For those days when you find yourself longing for the comforting flavors of your favorite takeout but want to stick to your healthy eating goals, these Healthier Mongolian Beef Meal Prep bowls are an absolute revelation. They offer all the deliciousness you crave in a convenient, nutritious format, proving that you can enjoy rich, satisfying meals without derailing your diet.
The star of these bowls is the incredibly tender strips of flank steak, which are perfectly cooked and then generously coated in a deliciously sticky sauce that captures all the classic sweet and savory notes of traditional Mongolian beef. This combination creates an irresistible flavor profile that truly satisfies those takeout cravings, but in a much more balanced way.
These meal prep bowls are designed for ultimate convenience, allowing you to prepare them ahead and have a fantastic, warm lunch ready to go. They’re a brilliant solution for adding excitement to your midday meal while keeping your nutrition on track. Enjoying these bowls means you get to savor a flavorful, comforting dish that makes your lunch hour feel like a truly special occasion.

Mongolian Beef
Ingredients
Equipment
Method
- For the beef: Slice the flank steak across the grain into 3/4-inch (19 millimeters)-thick slices on an angle to make planks then cut the planks into 3/4-inch (19 millimeters) cubes. Combine the cornstarch, baking soda and salt with 2 tablespoons of water in a small bowl and set aside. Place the steak in a shallow bowl and add the water, vegetable, and cornstarch mixture. Massage all the ingredients into the meat. Cover and refrigerate for 2 to 12 hours.
- For the sauce: Combine the oyster sauce, hoisin sauce, soy sauce, cornstarch, vinegar, garlic and half the ginger in a small bowl and set aside.
- For the stir-fry: Heat the oil to medium-high in a wok or medium saute pan. Stir in the beef and cook to medium-rare, stirring constantly, about 3 minutes. Drain off excess oil. Add the garlic and remaining ginger and saute 20 to 30 seconds. Stir in the bell peppers and onions and let them cook until the edges of the onion and bell peppers begin to brown, about 2 minutes. Add the scallion whites, dried chilies and sauce, stir constantly and let it cook for about 2 minutes, until the sauce thickens.
- Transfer to a platter and garnish with the scallion greens.


: 14 Drinks Customers Adore That Bartenders Secretly Can’t Stand Making")