

There is a silent, daily tragedy unfolding in kitchens everywhere: the forgotten half-pot of coffee, the neglected mug in the fridge. For true coffee lovers, the thought of pouring that dark, aromatic nectar down the drain is nothing short of a shame that induces shudders. It is not just about the flavor; it is about the financial waste. Every dumped cup is like shoving dollar bills down the disposal. But what if we told you that your leftover brew is far from finished once it cools?
This often-overlooked liquid gold, and even its humble grounds, possess incredible versatility that extends far beyond your morning pick-me-up. Packed with flavor, acidity, and antioxidants, coffee has hidden potential to become a secret ingredient in your kitchen, a boost for your garden, a secret weapon in your beauty routine, and even a natural cleaner. It is about embracing problem-solving and finding actionable solutions in everyday life.
So, get ready to unleash your inner life hacker. We are about to embark on a journey of discovery, revealing 14 smart, creative, and genuinely fun ways to ensure that not a single drop or grain of your beloved coffee goes to waste. You will be amazed at the practical improvements these simple ideas can bring to various aspects of your life.

1. **Transforming Leftover Coffee into Flavorful Ice Cubes** This is a classic for a reason. If you have ever found your perfectly brewed iced coffee quickly turning into a watery disappointment, this is your ultimate solution. Simply pour any leftover black coffee into an ice cube tray and freeze it until solid. It is an incredibly straightforward hack that immediately upgrades your cold brew experience.
These coffee ice cubes are pure genius because they chill your drink without diluting its rich flavor. Beyond just iced coffee, they are fantastic when blended into frappes or smoothies, adding a deep coffee note without weakening the texture. For a cozy mocha vibe, drop a few into chocolate milk or hot cocoa.
For those who like to get a little fancy, consider adding a splash of vanilla or caramel syrup to your leftover coffee before freezing it. This simple step infuses the cubes with extra flavor, making every sip of your iced beverage a more delightful and enhanced experience. It proves that even a small change can lead to significant improvements.
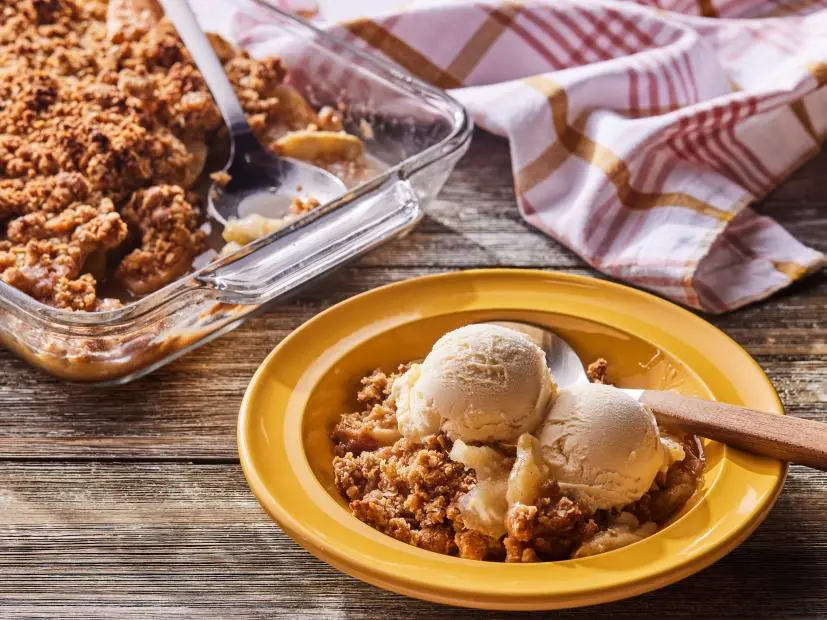
Apple Crisp
Ingredients
Equipment
Method
- For the apples: Preheat the oven to 350 degrees F. Grease a 9-by-13-inch glass baking dish with butter.
- Arrange the apple slices in the prepared baking dish in an even layer. In a bowl, mix together the granulated sugar, flour, cinnamon and salt. Sprinkle the mixture over the apples, then pour 1/2 cup water over top.
- For the topping: In a separate bowl, mix the flour, oats, brown sugar, baking powder, baking soda and a pinch of salt. Stir while drizzling in the melted butter. Sprinkle the topping in an even layer over the apples.
- Bake until the topping is slightly crisp and golden brown, about 43 minutes. Serve warm or at room temperature on its own, with ice cream or with frozen custard.
Notes
2. **Elevating Baked Goods with a Hint of Coffee** It is a universally acknowledged truth that coffee and chocolate are a match made in culinary heaven. This natural partnership renders leftover coffee an exceptional secret ingredient in baking. A splash of coffee in the batter of your brownie or chocolate cake works wonders, intensifying the cocoa flavor and enriching its depth, all without making the dessert taste overtly of coffee.
This trick is effective in a variety of sweet delights. Consider deeply flavored brownies, moist chocolate cakes, or even mocha muffins with an extra layer of complexity. For a traditional treat like tiramisu, leftover coffee (especially if it is strong) can serve as a perfect substitute for espresso, ideal for soaking those ladyfingers.
You can even take it a step further and use coffee as a direct substitute for water or milk in baking recipes that require liquid. This simple substitution allows you to infuse your creations with that elusive “something extra,” creating a more sophisticated and satisfying flavor profile that your taste buds will undoubtedly appreciate.
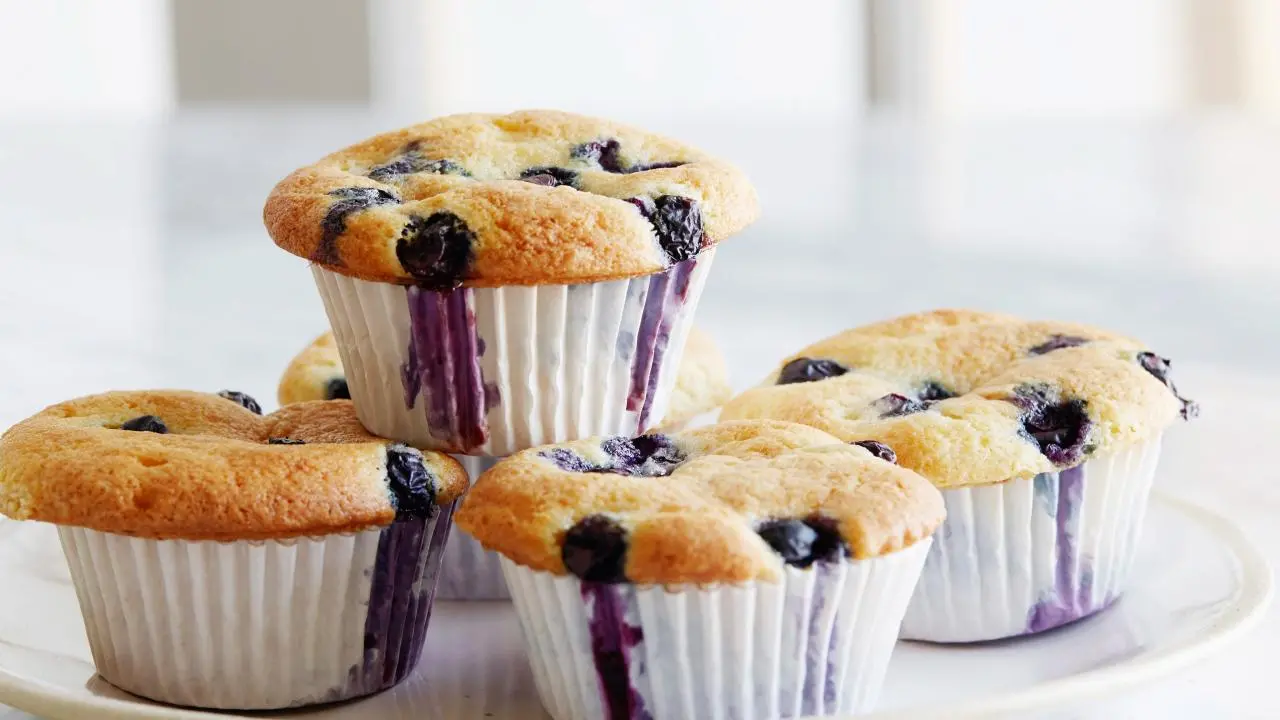
Blueberry Coffee Cake Muffins
Ingredients
Equipment
Method
- Preheat the oven to 350 degrees F. Place 16 paper liners in muffin pans.
- In the bowl of an electric mixer fitted with the paddle attachment, cream the butter and sugar until light and fluffy, about 5 minutes. With the mixer on low speed, add the eggs 1 at a time, then add the vanilla, sour cream, and milk. In a separate bowl, sift together the flour, baking powder, baking soda, and salt. With the mixer on low speed add the flour mixture to the batter and beat until just mixed. Fold in the blueberries with a spatula and be sure the batter is completely mixed.
- Scoop the batter into the prepared muffin pans, filling each cup just over the top, and bake for 25 to 30 minutes, until the muffins are lightly browned on top and a cake tester comes out clean.
Notes
3. **Crafting Versatile Coffee Syrups for Sweet Treats** If you are seeking to add a touch of gourmet flair to your everyday desserts and beverages, a homemade coffee syrup is your secret weapon. It is incredibly easy to prepare and instantly elevates everything from your pancakes to your evening cocktails, rendering them much more refined and special.
To make this delightful syrup, simply simmer one cup of leftover coffee with half a cup of sugar. Stir the mixture gently until it thickens slightly, and then allow it to cool before storing it in the refrigerator. For an extra layer of flavor, consider infusing your syrup with cinnamon, vanilla, or even a hint of orange zest to create unique variations.
Once prepared, the possibilities are limitless. Drizzle this rich syrup over a scoop of vanilla ice cream, stir it into a glass of milk for a quick coffee-flavored treat, or use it to sweeten your cold brew like a seasoned barista. It is a simple yet powerful method to transform ordinary ingredients into something truly extraordinary.
Read more about: 10 Epic Ways to Transform Leftover Chicken: Say Goodbye to Boring Dinners!
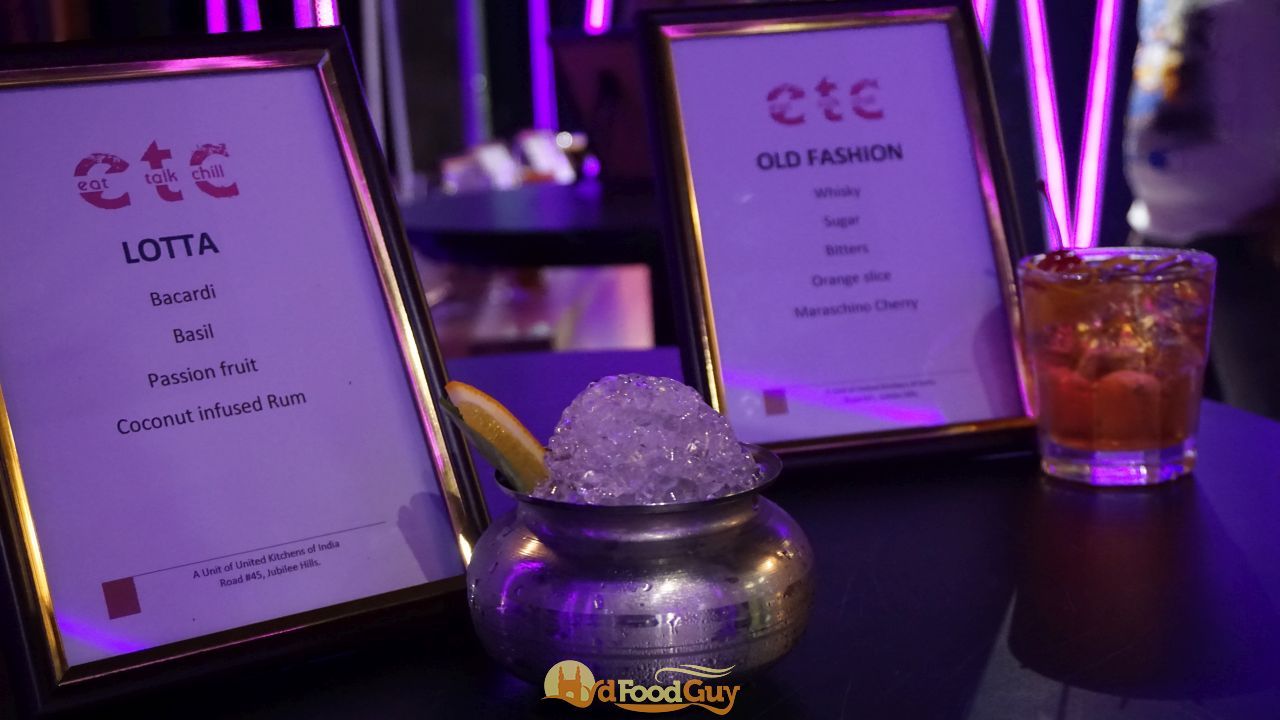
4. **Mixing Up Refreshing Coffee Cocktails and Blended Drinks** For those who enjoy a bit of mixology at home or simply love experimenting with new flavors, leftover coffee unlocks a whole realm of cocktail potential. It serves as an instant ingredient that can add depth and a unique kick to your at-home happy hour creations, demonstrating just how versatile your extra brew can be.
Imagine crafting an espresso martini without the need for an actual espresso machine, or giving a modern twist to a classic such as a coffee old fashioned (which combines coffee, bourbon, and simple syrup). A cold brew white Russian also takes on a different character with the addition of leftover coffee. Even a small splash in a spiked hot chocolate can enhance the experience, adding a sophisticated layer of flavor.
Beyond cocktails, your leftover coffee is ideal for blending into energizing and satisfying beverages. For a quick smoothie, combine half a cup of leftover coffee with a banana, half a cup of milk (or an alternative milk), and a scoop of chocolate protein powder. If you are feeling indulgent, opt for a full milkshake mode with ice cream, chocolate syrup, and whipped cream. You undoubtedly deserve it!
Blended Cherry Mojitos
Ingredients
Equipment
Method
- Place the frozen cherries, crushed ice, mint leaves, lime juice, rum, and simple syrup in a blender. Blend until smooth.
- Pour the mixture into chilled glasses and top with crushed ice. Garnish with lime wedges and cherries.
- Lime Simple Syrup
Notes
5. **Enhancing Savory Dishes with Coffee’s Depth** While coffee is most frequently associated with sweet applications, its role in savory dishes presents a delightful surprise. A small amount of coffee can significantly enhance sauces, stews, and marinades, imparting a deep, smoky flavor that renders dishes noticeably richer and more complex. It is a culinary technique that can transform ordinary meals.
Consider incorporating it into your BBQ sauce for an unexpected twist, adding it to chili or beef stew to deepen their earthy profiles, or utilizing it to create an outstanding steak marinade. Coffee, garlic, soy sauce, and olive oil combine to form a marinade that, owing to coffee’s slight acidity (with a pH of approximately 5.0), facilitates the breakdown of connective tissue in tougher meats, resulting in greater tenderness. Begin with just a tablespoon or two, and increase the quantity as desired.
For chili, coffee contributes a deep earthiness that beautifully complements beef and beans, while its acidity helps balance the richness, enhancing each bite. And for a truly unique flavor, try it in a vinaigrette; a homemade balsamic coffee vinaigrette, particularly when made with a bright, citrusy coffee, pairs exceptionally well with salads featuring a protein such as steak.
Savory Polenta
Ingredients
Equipment
Method
- Preheat oven to 350 degrees F.
- In a large, oven-safe saucepan heat the olive oil over medium heat. Add the red onion and salt and sweat until the onions begin to turn translucent, approximately 4 to 5 minutes. Reduce the heat to low, add the garlic, and saute for 1 to 2 minutes, making sure the garlic does not burn.
- Turn the heat up to high, add the chicken stock, bring to a boil. Gradually add the cornmeal while continually whisking. Once you have added all of the cornmeal, cover the pot and place it in the oven. Cook for 35 to 40 minutes, stirring every
- 10 minutes to prevent lumps. Once the mixture is creamy, remove from the oven and add the butter, salt, and pepper. Once they are incorporated, gradually add the Parmesan.
- Serve as is, or pour the polenta into 9 by 13-inch cake pan lined with parchment paper. Place in the refrigerator to cool completely.
- Once set, turn the polenta out onto a cutting board and cut into squares, rounds, or triangles. Brush each side with olive oil and saute in a nonstick skillet over medium heat, or grill.
Notes
6. **Nourishing Acid-Loving Plants with Diluted Coffee** Here is an application that extends beyond the kitchen entirely: believe it or not, diluted black coffee can prove to be incredibly beneficial for certain plants. It functions as a natural fertilizer, supplying essential compounds to plants that flourish in acidic conditions. This represents a practical and sustainable approach to invigorate your garden.
Many prevalent garden and house plants fall into this category, including roses, azaleas, rhododendrons, ferns, camellias, hydrangeas, daffodils, magnolias, marigolds, holly, gardenias, iris, and begonias, among numerous others. The key lies in careful application: ensure that the coffee is cold, unsweetened, and substantially diluted (at a ratio of 1 part coffee to 3 parts water). Excessive application can render the soil overly acidic, so administering it once a week is generally adequate.
Coffee contains a plethora of dissolved compounds that constitute vital nutrients for these plants, notably magnesium and potassium. While liquid coffee is acidic, it is crucial to note that spent coffee grounds are actually far more neutral in pH after brewing, providing different benefits when utilized in compost or directly in the soil.
7. **Unleashing Creativity Through Coffee-Based Art Projects** Who would have thought that your leftover coffee could serve as your next artistic medium? Just as it leaves stubborn stains on clothing, coffee can be deliberately utilized as a beautiful natural dye. It is ideal for imparting an antique, weathered appearance to paper, fabric, or even wood, rendering it an accessible and aromatic option for various do-it-yourself art projects.
This unveils a realm of creative possibilities. Employ it to age paper for journals or scrapbooks, transforming new sheets into vintage-looking treasures. It is also an enjoyable, safe, and pleasantly scented medium for painting with children, enabling them to experiment with unique earthy tones. You can create handmade cards with a rustic charm or even craft unique wall art.
Beyond painting, contemplate using coffee to dye shirts or other fabrics, embracing the “coffee stain brown” aesthetic for naturally dyed clothing. It is an imaginative and expressive means of engaging with materials, demonstrating that everyday items can inspire wonder and lead to genuinely creative endeavors. The act of creation, even with something as simple as coffee, can be profoundly fulfilling and inspiring.
We have explored how leftover liquid coffee can revolutionize your culinary experiences and even nurture your garden, transforming simple daily routines into opportunities for intelligent savings and delightful new flavors. However, the magic of coffee does not cease when the brewing process stops. Far from it! Your spent coffee grounds, those often-discarded remnants of your morning ritual, are teeming with untapped potential.
These unassuming grounds are replete with surprising benefits and applications, extending their usefulness far beyond the compost bin (although that is a fantastic starting point!). From enhancing your personal care regimen to transforming your home and garden, used coffee grounds embody the ultimate life-hacking spirit. Prepare to discover ingenious ways to maximize the utility of every last bit of your brew, truly ensuring that not a single coffee bean is wasted.
8. **Harnessing Coffee Grounds for Composting and Fertilization** The journey of your coffee bean does not conclude in your cup; it can persist in enriching the very earth that nourishes us. Spent coffee grounds constitute a veritable gift to your garden, presenting a sustainable and exceedingly effective approach to enhancing soil health and supplying vital nutrients to your cherished plants. This represents an immediate and actionable measure for anyone seeking to augment their composting endeavors or directly fertilize their verdant companions.
When you incorporate coffee grounds into your compost pile, you are essentially supplying a valuable source of nitrogen, an essential nutrient that facilitates the luxuriant and vibrant growth of plants. Even if composting is not currently your preference, you can still scatter these grounds directly onto your garden soil. While this method may not deliver the same nitrogen impact as composting, it substantially improves soil structure by adding organic matter, which, in turn, enhances water drainage and even attracts beneficial earthworms.
It is a common misconception that coffee grounds are highly acidic; however, after brewing, they actually become far more neutral in pH. This implies that they are safe for a broader variety of plants than merely the acid-loving ones. For optimal utilization, a swift rinse of your spent coffee grounds in the sink prior to application can ensure that they are ideally suited for direct soil application, providing a mild yet potent boost to your plants’ health.
9. **Venturing into Mushroom Cultivation with Used Grounds** For the adventurous and eco-conscious individual, spent coffee grounds constitute a surprisingly fertile ground for a truly distinctive home project: cultivating one’s own mushrooms! This innovative utilization not only repurposes what would otherwise be considered waste but also provides the gratifying experience of growing one’s own food, right in one’s kitchen or a secluded corner of one’s home. It serves as a testament to the unforeseen versatility of everyday items.
What renders coffee grounds such an ideal substrate for mushroom growth? The brewing process itself naturally sterilizes the grounds, thereby eliminating the necessity for additional, often cumbersome, sterilization steps typically required for other growth media such as sawdust. Furthermore, one has a fresh supply of these ready-to-use grounds virtually every day, rendering mushroom cultivation a perpetually accessible and convenient pursuit.
This method offers a sustainable and captivating alternative to traditional mushroom farming, providing a constant source of substrate directly from one’s morning routine. It is an empowering approach to engaging with nature’s cycles and producing fresh, delectable ingredients while actively participating in a zero-waste lifestyle. Anyone in search of a truly distinctive and practical project should undoubtedly give this a try.
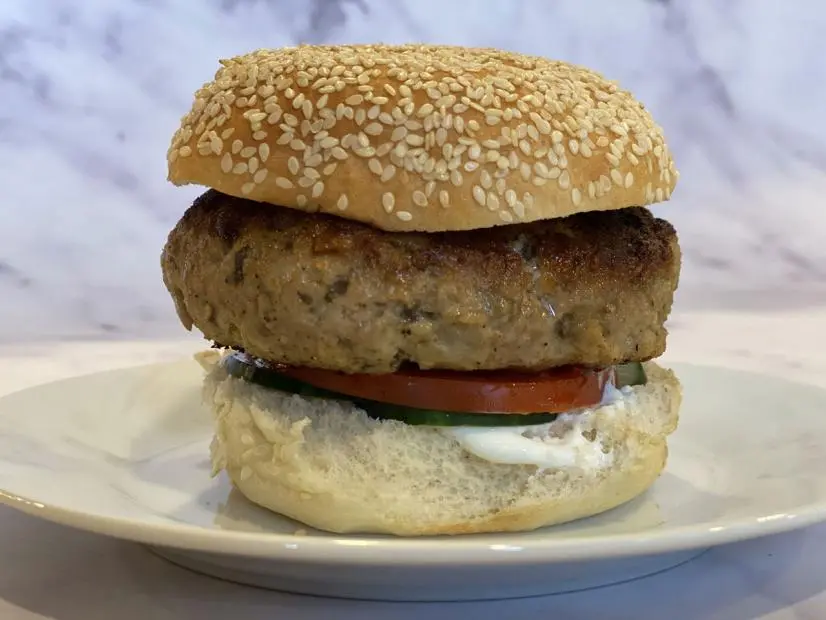
Mushroom Turkey Burger
Ingredients
Equipment
Method
- Add the oil to a medium skillet over medium-high heat. When the oil is hot, add the mushrooms and cook, without stirring, until the undersides are browned, 2 to 3 minutes. Stir and let brown on the other side, about 2 minutes, then reduce the heat to medium and add the shallots and garlic. Cook and stir until the shallots are softened, about 5 minutes. Remove from the heat, then cool the mixture.
- Combine the turkey, yogurt, breadcrumbs, egg and cooled mushrooms in a large bowl. Season with salt and pepper. Mix together lightly with a wooden spoon just to combine; don't overmix. Form into four 1-inch-thick patties. Refrigerate for 2 to 3 hours and up to overnight.
- Preheat a grill or grill pan to medium-high heat. Sprinkle the outsides of the patties with salt and pepper. Brush the grill grates with oil and grill the burgers until nicely marked, cooked through and the internal temperature reads 155 to 160 degrees F, about 6 minutes per side. Serve on the buns with additional yogurt, tomato and cucumber slices.
Notes
10. **Crafting Robust Coffee Grounds Dry Rubs for Meats** If you aim to elevate your grilling prowess or incorporate a secret ingredient into your roasted meats, do not overlook the transformative potential of spent coffee grounds as a dry rub. While the notion of consuming coffee grounds may initially seem unusual, when used in moderation and with proper preparation, they impart a deep, earthy, and complex flavor that can transform an ordinary cut of meat into a culinary masterpiece. It is a daring move that yields rich flavor rewards.
The key to success resides in moderation and texture. When preparing your dry rub, choose finely ground coffee rather than coarse remnants from a French press to ensure a smooth application and even flavor distribution. A light touch is also advisable; commence with a small quantity and gradually adjust according to your taste preferences. This meticulous approach ensures that the coffee enhances, rather than overwhelms, the natural flavors of the meat.
Coffee grounds serve as an ideal complement to the sweetness of brown sugar, creating a delightful balance of flavors in a rub. Their earthy undertones beautifully harmonize with salty and spicy ingredients, making them an exceptional addition to beef marinades and rubs. This unexpected ingredient adds depth and a subtle smoky nuance, guaranteeing a richer and more gratifying dining experience that will impress any food enthusiast.
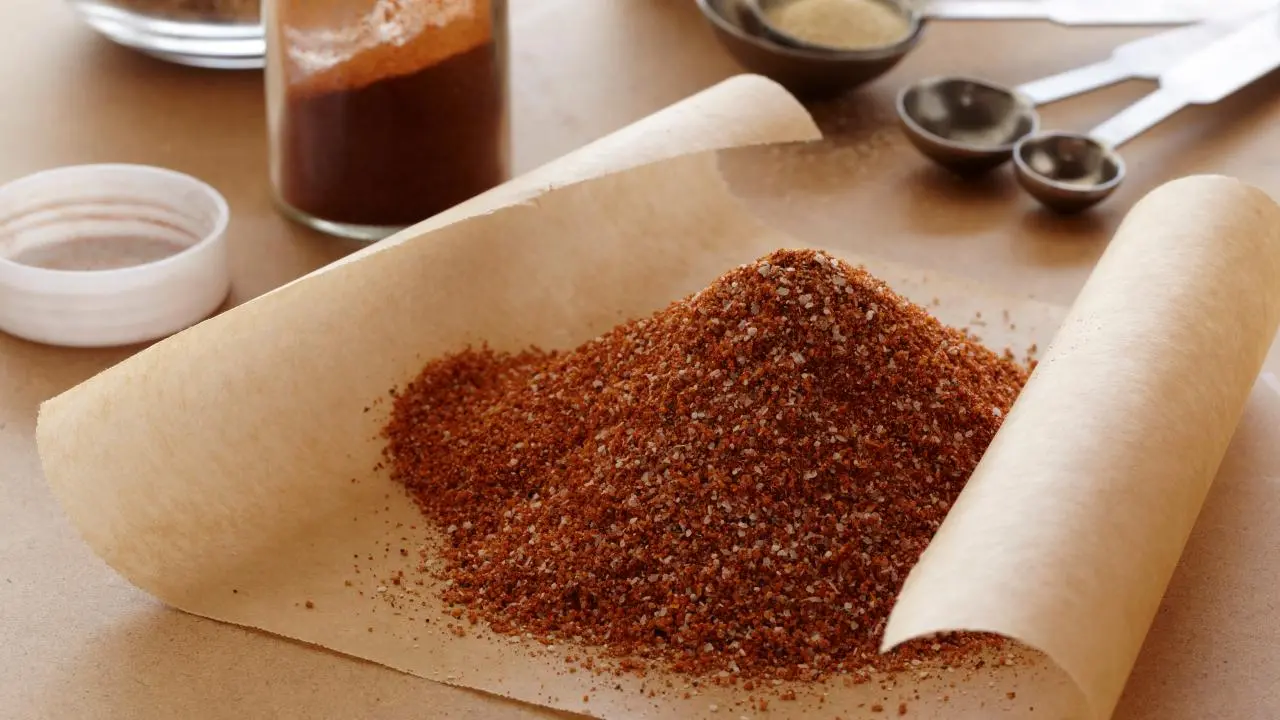
Rib Dry Rub
Ingredients
Equipment
Method
- Combine all ingredients in a large bowl and mix well. Store in an airtight container. Pack on the dry rub onto your next rack of ribs.
Notes
11. **Creating Invigorating DIY Coffee Body Scrubs and Exfoliants** Beyond the confines of the kitchen and garden, coffee extends its benefits to your personal care regimen, providing a natural and revitalizing approach to pampering your skin. The coarseness of used coffee grounds renders them an excellent, eco-friendly ingredient for homemade body scrubs. This straightforward do-it-yourself project enables you to harness the antioxidant properties and exfoliating texture of coffee to unveil smoother, more radiant skin.
Caffeine is not merely for arousing you from sleep; it also possesses beneficial effects on your skin. When employed as a scrub, the granular texture of coffee grounds gently aids in removing dead skin cells, much like a pumice stone, stimulating circulation and leaving your skin with a refreshed and rejuvenated sensation. It constitutes a practical, accessible, and surprisingly luxurious means of upgrading your self-care routine by utilizing an everyday item.
To concoct a more potent exfoliating wash, combine coffee grounds with other natural ingredients. A well-liked recipe entails mixing half a cup of ground coffee with a quarter cup of coconut oil, a quarter cup of brown sugar, a quarter cup of coarse salt, and half a teaspoon of vanilla extract, along with any essential oil of your preference. Alternatively, for a simpler scrub, blend two tablespoons of used grounds with a tablespoon of honey or yogurt and just sufficient leftover liquid coffee to attain a paste-like consistency. Apply this mixture to your face or body, let it remain for approximately ten minutes, and then rinse gently for a luminous finish.

12. **Utilizing Coffee Grounds for Effective Pot and Pan Scouring** Occasionally, even the most assiduous cooks discover that stubborn, caked-on residues remain at the bottom of their pots and pans. For those arduous cleanup endeavors, your used coffee grounds can serve as a remarkably efficacious, non-abrasive scourer. This astute trick offers a natural substitute for harsh chemicals, rendering your kitchen cleanup both more straightforward and more sustainable.
Envision a frying pan following the preparation of multiple batches of bacon, with those delectable yet challenging-to-remove fragments adhering tenaciously to the surface. A conventional sponge may prove insufficient to address this issue. This is precisely where coffee grounds excel: simply scatter a modest quantity into the pan, grasp your sponge, and commence scouring. The finely textured grounds function as a gentle abrasive, assisting in lifting and eliminating the caked-on residue promptly, leaving your cookware gleaming.
While highly efficacious, it is imperative to employ this tip with a measure of prudence. Plumbing experts generally counsel against disposing of substantial amounts of ground coffee down the drain, as it can gradually contribute to blockages over time. Consequently, utilize only a minimal quantity as required for scouring, and consistently ensure that you clean your drains on a regular basis to preclude any problems. This minor consideration guarantees that you can reap the benefits of this ingenious cleaning solution without engendering new complications.
13. **Eliminating Unwanted Odors with Coffee Grounds** Just as coffee imbues your home with an alluring aroma, its used grounds exhibit a remarkable capacity to absorb and neutralize disagreeable odors. This renders them a convenient, natural deodorizer for those malodorous spots around your house, presenting a straightforward yet efficacious solution for common household annoyances. It constitutes an easily executable trick that substantially enhances your home’s freshness.
While baking soda frequently holds sway in the domain of odor absorption, used coffee grounds represent a perfectly feasible alternative, particularly when other solutions are not readily accessible. For expeditious odor hacks, you may pour cold, black coffee into your garbage disposal to refresh it, or soak a sponge in it and position it in your refrigerator to absorb lingering odors. Another efficacious method is to simply place dried, used coffee grounds in a small open bowl and leave it in areas requiring freshening, such as the rear of your fridge or pantry.
A pivotal tip for success: ascertain that the coffee or grounds you are utilizing for deodorizing are devoid of milk or sugar. Introducing dairy or sweeteners can, ironically, result in new, even more disagreeable odors as they deteriorate. By adhering to plain, dried grounds or cold, black coffee, you can exploit their natural absorbent properties to eliminate unwanted odors, leaving behind a pristine, fresh environment.
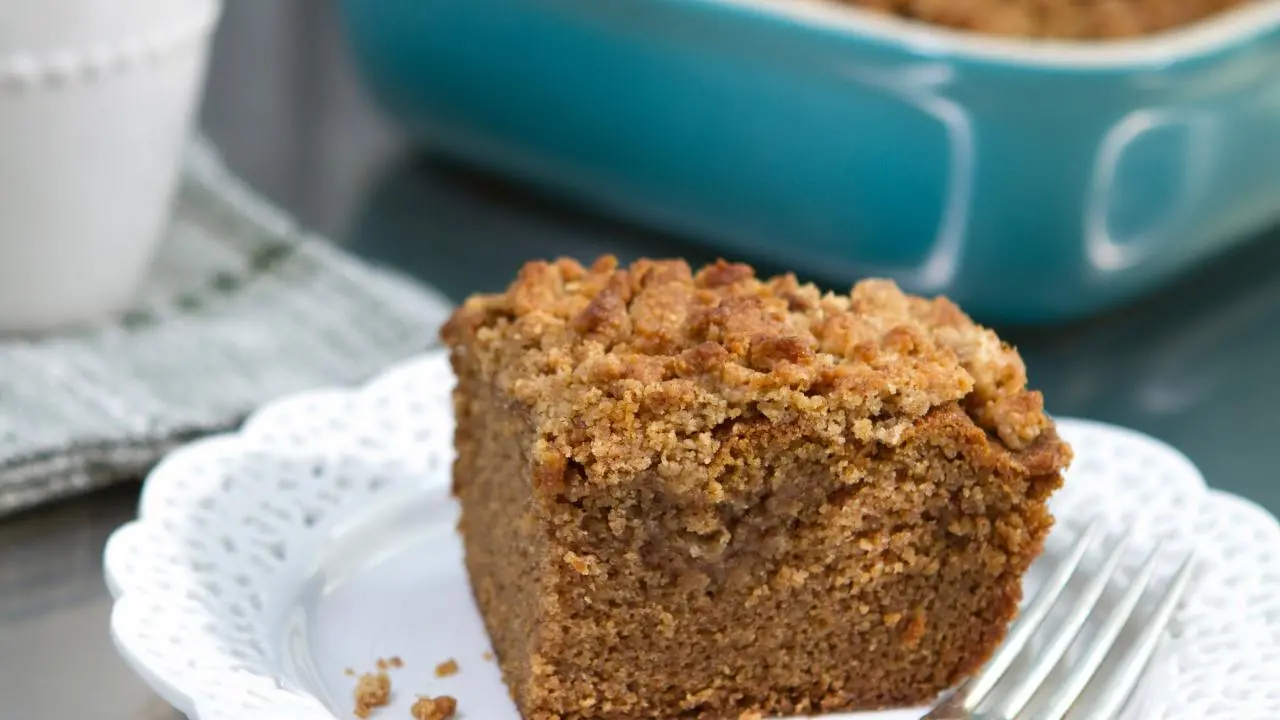
Coffee Coffee Cake
Ingredients
Equipment
Method
- Preheat the oven to 350 degrees F. Spray and line with parchment a 9-by-9-inch baking pan; spray the parchment as well.
- For the crumb topping: In a medium bowl, mix the flour, brown sugar, cinnamon, instant coffee powder and salt. Add the melted butter and mix until crumbs form that you can clump together in your hand. Set aside.
- For the cake: In a medium bowl, whisk together the flour, baking powder, baking soda, cinnamon, salt and cardamom. In a smaller bowl, whisk together the coffee and sour cream until smooth.
- In the bowl of an electric mixer fitted with the paddle attachment, beat the butter and sugar together until light and fluffy. Add the eggs, one at a time, mixing until each is well combined. Then add the vanilla extract and beat until the mixture is light and fluffy.
- Starting and ending with the dry ingredients, alternate adding the flour mixture and the coffee mixture to the stand mixer; mix each addition well, scraping the bowl each additions.
- Pour the batter into the prepared baking pan and top with crumb topping, spreading it evenly. Bake for 45 minutes or until a toothpick comes out clean.
- Remove the cake from the oven and allow to cool for 20 to 30 minutes before cutting and serving.
Notes
14. **Making Fragrant Coffee-Scented Candles and Soaps** Why confine the invigorating scent of coffee to your morning ritual when you can permeate your home and even your body with its comforting aroma? Your used coffee grounds are a remarkable, natural ingredient for creating unique, fragrant items such as candles and soaps, transforming a discarded byproduct into a source of ongoing sensory pleasure. It is a creative and gratifying way to expand coffee’s appeal.
If you relish a warm, inviting ambiance, consider attempting to make your own coffee-scented candles. The process is uncomplicated, enabling you to tailor the intensity of the coffee aroma to your liking. This do-it-yourself project not only yields a beautiful, aromatic addition to your home but also offers a fulfilling creative outlet, demonstrating that crafting can be both practical and highly enjoyable.
But the creativity does not end there. Envision starting your day with soap that provides the gentle exfoliation of coffee grounds and the stimulating scent of your preferred brew. The caffeine in coffee is also advantageous for your skin, and the grounds themselves serve as a gentle exfoliant, making homemade coffee soap a truly luxurious and practical item. This enables you to literally embody the invigorating essence of coffee, adding a touch of artisanal elegance to your daily personal care routine.
From the moment it fills your kitchen with its rich aroma to its ultimate, repurposed existence as a garden enhancer or a skin rejuvenator, coffee truly is the gift that keeps on giving. We have traversed 14 incredible ways to utilize every last drop and grain of your beloved brew, converting potential waste into a wealth of practical applications. Each idea, whether it is enhancing a savory dish or creating a unique piece of art, empowers you to adopt a more resourceful and creative approach to daily life.
So, the next time you encounter that forgotten half-pot or a handful of used grounds, remember this guide. You now possess the ability to unlock coffee’s full potential, saving money, reducing waste, and adding a touch of resourceful ingenuity to your home and life. Go forth and innovate your way to a more caffeinated, creative, and fulfilling existence!


