

Welcome, fellow culinary enthusiasts, to an exploration of one of the kitchen’s most beloved and versatile ingredients: the humble egg! Our journey today delves deep into the art and science of cooking eggs, aiming to arm you with the knowledge and precise techniques to achieve consistently perfect results, every single time you step into the kitchen.
Before we crack into the specifics of eggs, let’s lay a foundational understanding of what it truly means to ‘cook’. In the broad culinary landscape, when we ‘cook’ a meal or a specific type of food, we are actively preparing it for eating, typically by applying heat, whether in an oven or a saucepan. This term, as outlined in our trusted culinary resources, is used exclusively for food, never for beverages. The simple act of Lucas in the kitchen ‘cooking dinner’ or us ‘cooking the pie in the oven’ exemplifies this core concept.
Now, let’s pivot to the star of our show: the incredible egg! Eggs are far more than just a quick breakfast option; they are a nutritional powerhouse and a culinary chameleon, capable of transforming into countless dishes. Their widespread popularity stems from a delightful combination of ease of cooking, nutritional richness, and unparalleled versatility.
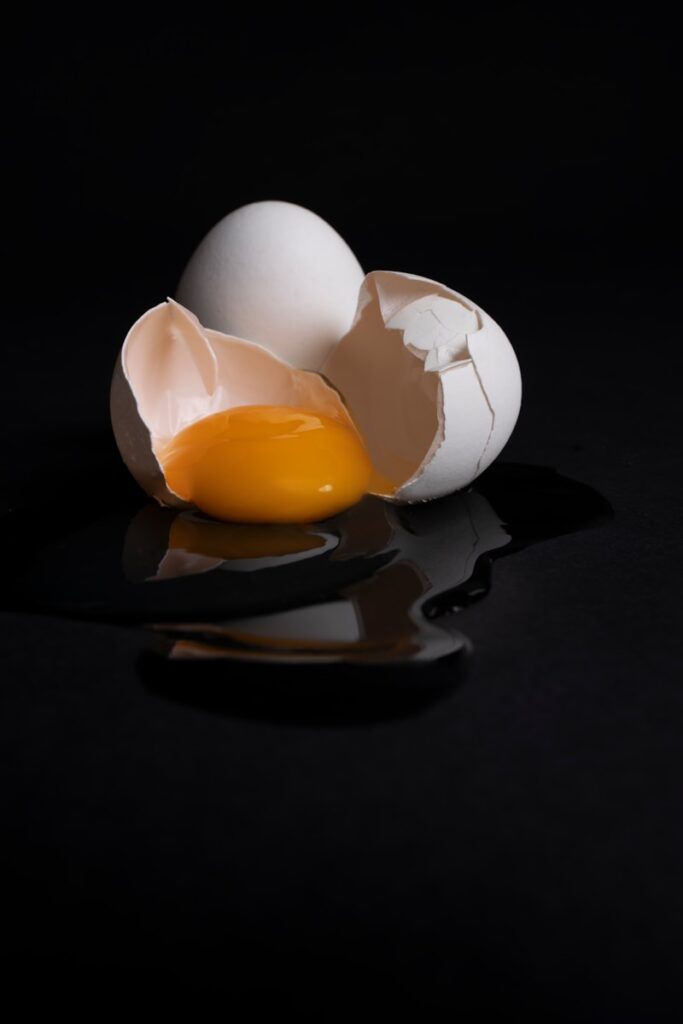
Indeed, eggs are packed with essential nutrients, making them an excellent choice for any meal of the day. They provide a high nutritional value, boasting significant amounts of protein, vitamin B12, vitamin D, and choline. This makes them a fundamental building block for a healthy diet, contributing to our well-being with every delicious bite.
What truly sets eggs apart, however, is their astonishing versatility. From a hearty breakfast omelet brimming with vegetables to a sophisticated dinner frittata, or even integrated into decadent desserts, eggs can be utilized in countless recipes across all meal categories. This inherent adaptability makes understanding the various methods to prepare them an invaluable skill, one that will undoubtedly enhance your cooking repertoire and allow you to whip up something delightful at any moment inspiration strikes.
Our journey to egg mastery begins even before the cooking process: with selection and storage. Choosing the right eggs is a crucial first step, impacting not only the taste and texture of your finished dish but also ensuring food safety. When you’re at the grocery store, you’ll encounter a few different types of eggs, each with its own story. Conventional eggs are the most common, typically sourced from large commercial operations. For those seeking alternatives, free-range eggs come from chickens that are granted some outdoor access, while organic eggs are produced by hens fed organic feed and usually also provided access to the outdoors. Understanding these distinctions allows you to make informed choices that align with your preferences and values.

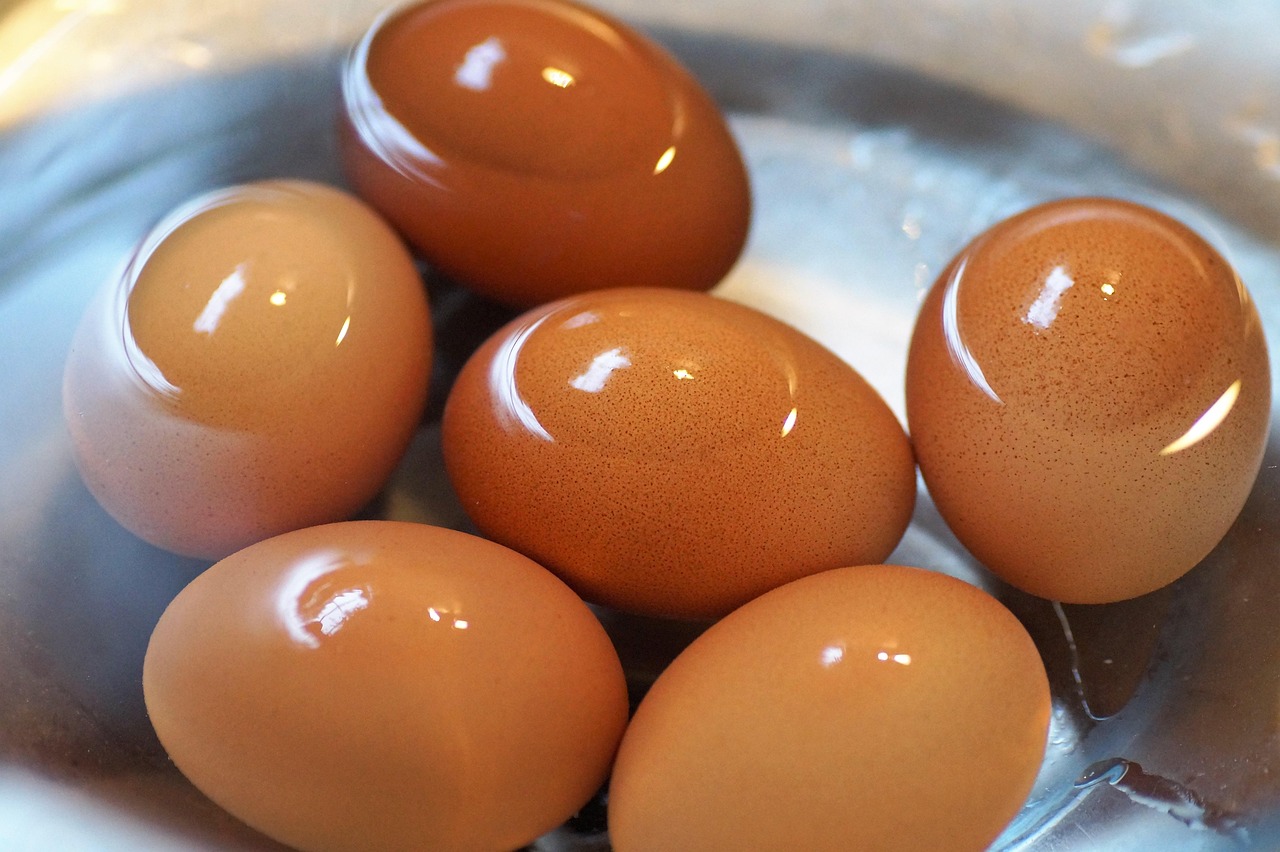
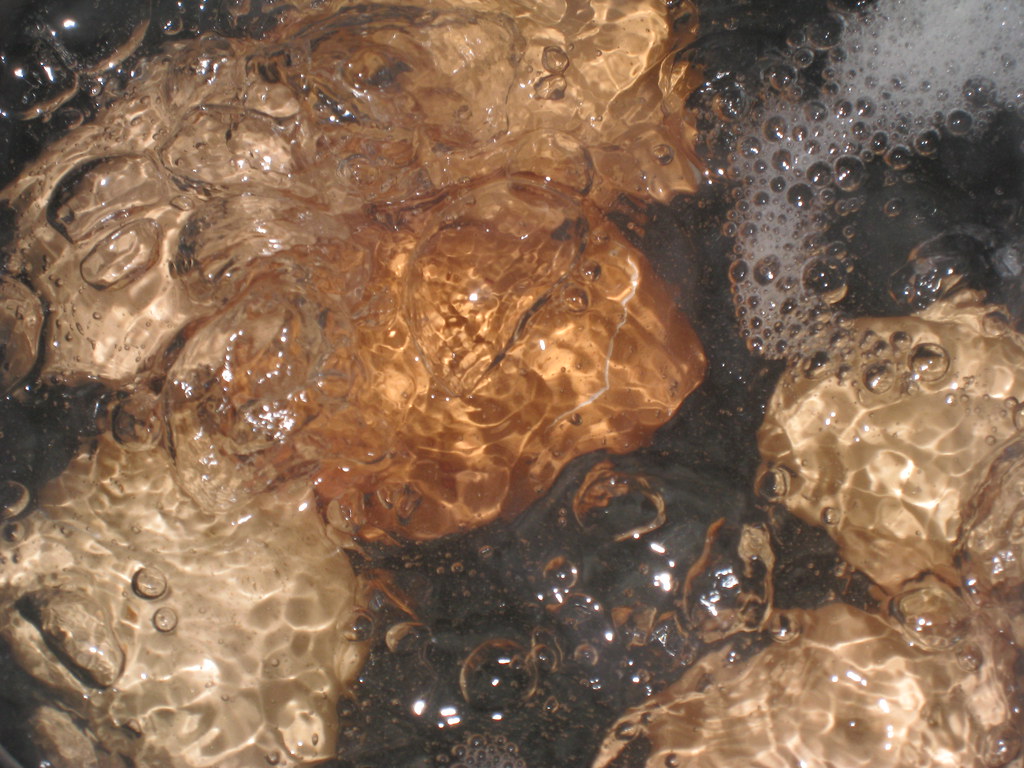
But beyond type, freshness is paramount. To ensure the eggs you select are truly fresh, a simple yet effective method is the float test. This classic technique involves filling a bowl with water and gently placing an egg into it. A fresh egg will obediently sink to the bottom and lie flat on its side, signaling its prime condition. Conversely, an older egg will stand upright on the bottom or, if it’s past its prime, it will float entirely, indicating it should be discarded. This float test works because as an egg ages, its moisture evaporates through the shell, and air enters, causing it to lose density and become more buoyant.
Once you’ve chosen your perfect eggs, proper storage becomes key to maintaining their freshness and ensuring they remain safe for consumption. The best practice is to store eggs in their original carton, placed directly in the refrigerator. The carton serves as a protective barrier, reducing the chances of the eggs absorbing strong odors from other foods in your fridge, which their porous shells are susceptible to. The ideal temperature range for storing eggs is quite specific: between 33°F and 40°F (1°C to 4°C), ensuring their longevity and safety.
Always make it a habit to check the expiration or ‘sell-by’ dates printed on the packaging. While these dates provide a helpful guideline, fresh eggs, when stored correctly under the aforementioned conditions, can generally be consumed for a remarkable three to five weeks after this date. This knowledge empowers you to manage your pantry efficiently, ensuring you always have fresh, ready-to-use eggs at hand.
Now, let’s tackle one of the most fundamental and, surprisingly, often frustrating, methods of egg preparation: hard-boiling. While it seems deceptively simple, achieving consistently perfect hard-boiled eggs—those with bright yellow yolks and whites that peel away effortlessly—can be a challenge. The two most common problems that arise are improper doneness, resulting in the dreaded sulfuric green yolks, and eggshells that stubbornly cling to the white, tearing away precious chunks upon peeling. But fear not, for we have tested solutions to these common culinary conundrums.
One of the most valuable secrets to achieving easy-to-peel hard-boiled eggs is counterintuitive: use eggs that are just past peak freshness. As any seasoned egg aficionado will tell you, the outer membrane in a very fresh egg tends to cling stubbornly to the shell, making the peeling process a nightmare. Older eggs, however, release their shells with far greater ease. So, if you’re planning to make a batch of scrumptious deviled eggs or a rich egg salad, consider buying your dozen eggs a week to 10 days in advance and tucking them away in the back of the fridge. This simple act of foresight will save your fingers, and your sanity, when it comes time to peel.
We’ve identified two highly effective, rigorously tested methods for hard-boiling eggs, each with its own slight nuances, but both delivering consistently excellent results.
The first approach, a headache-free five-step method, advocates for a ‘cold start’:
**Step 1: Use the Right Eggs.** As mentioned, it is best to use eggs that are just past peak freshness, though, of course, never expired or bad. This little detail is crucial for ensuring a smooth peeling process down the line.
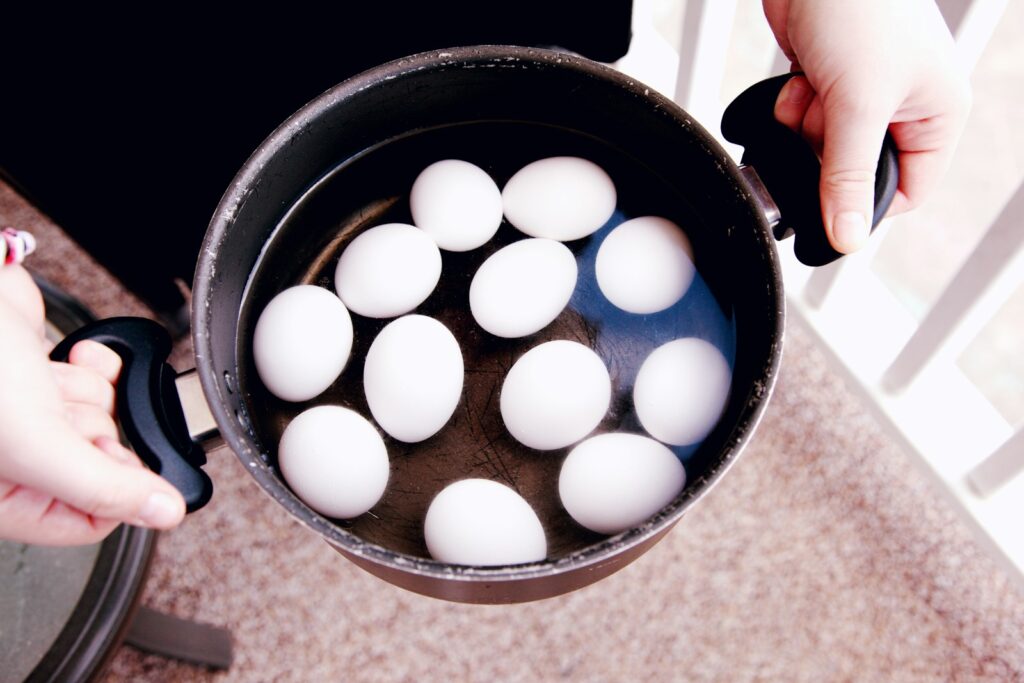
**Step 2: Place the Eggs in a Pot.** Begin by placing your chosen eggs in a pot. Cover them completely with cold water, ensuring they are fully submerged. Then, place the pot on your stove. You may, if desired, add a small splash of white vinegar to the water; it’s rumored to assist with the peeling process, although its efficacy is often debated.
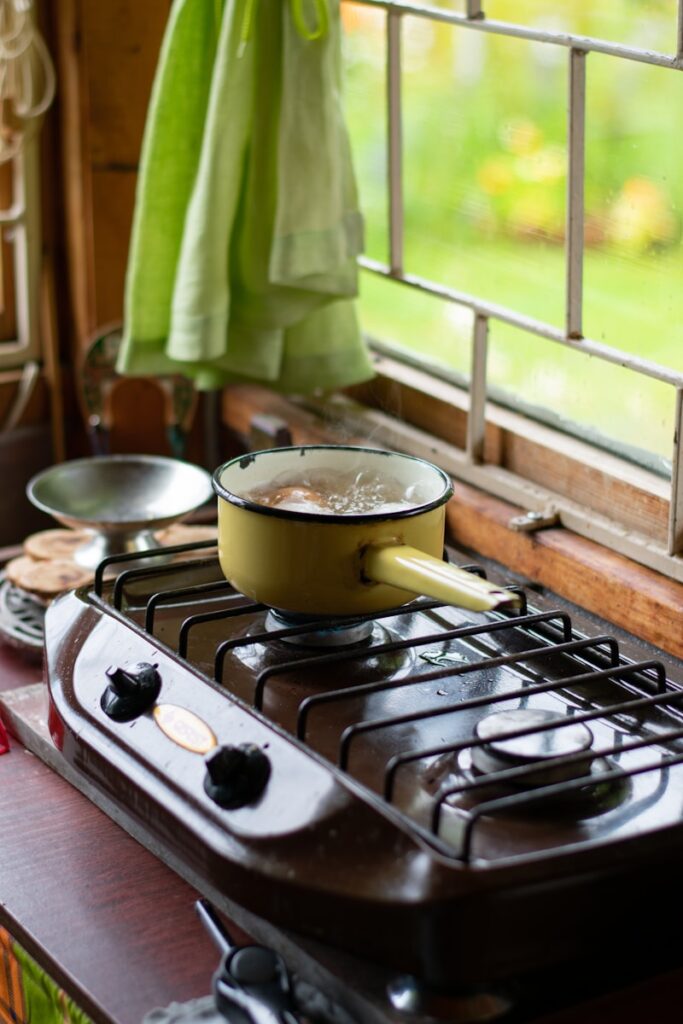
**Step 3: Bring the Cold Water to a Boil Over High Heat.** With your eggs, water, and optional vinegar in the pot, bring the cold water to a boil over high heat, leaving the pot uncovered during this stage. Once the water achieves a rolling, bubbling boil, signifying vigorous activity, immediately turn off the heat. Then, cover the pot tightly and remove it from the heat source altogether. This controlled heat application is key. Allow the eggs to sit in the hot, covered water until they are perfectly cooked. For medium-sized eggs, this typically takes 9 minutes, while large eggs will require 12 minutes. This precise timing, determined through extensive testing, ensures that your eggs will emerge perfectly cooked, boasting vibrant bright yellow yolks and wonderfully non-rubbery egg whites.
**Step 4: Give the Eggs an Ice Bath.** As soon as your timer signals the completion of the cooking time, swiftly remove the eggs from the hot water. Transfer them immediately into a large bowl filled with ice-cold water. This critical step serves a dual purpose: it dramatically halts the cooking process, preventing overcooking, and rapidly lowers the temperature of the eggs. The goal is for the eggs to reach room temperature in this bath; if they become too cold, they will actually be tougher to peel. This careful temperature management is vital for success.
**Step 5: Peel the Eggs.** Once the eggs have cooled sufficiently in the ice bath, it’s time for the moment of truth. Roll each egg under your palm on a counter, applying gentle pressure, so that the shell breaks and cracks all over its surface. Then, here’s a crucial tip: submerge the cracked egg in your bowl of room-temperature water. This submersion significantly helps to loosen the membrane that connects the white to the shell, making peeling remarkably easier. While the egg is still submerged, gently begin to peel it. Alternatively, you can opt to peel the eggs under the running water of your faucet; the added pressure of the water can also work wonders in dislodging those stubborn shells.
Voilà! Following this method, you will be rewarded with perfect hard-boiled eggs, ready for any culinary adventure. Whether you choose to slice them and sprinkle them with salt, layer them on a vibrant Cobb salad, transform them into delightful deviled eggs, or use them as a fundamental building block for countless other dishes, their perfect texture and vibrant yolks will impress.

Now, let’s explore a slightly different, yet equally effective, approach that some prefer, particularly for its precision in timing and peeling. This method advocates for starting with boiling water, rather than cold.
**1. Bring a Large Pot of Water to a Boil.** The first step in this egg-cooking process is to prepare your cooking vessel. Place a large pot of water on the stovetop and bring it to a rolling boil over high heat. It’s worth noting, based on extensive testing, that you only need water for this process; some recipes might suggest salting the water or adding baking soda, but our findings confirm both are completely unnecessary for achieving optimal results. Ensure you add enough water so that your eggs will be covered by a few inches, as eggs that are not totally submerged in the boiling water will not cook evenly. If you are preparing a large batch of eggs, consider using a wide pot, allowing the eggs to lie in a single layer for more uniform cooking. A common myth suggests dropping eggs into room temperature or cold water and then bringing it to a boil; however, our tests have consistently shown that bringing the water to a boil first and then lowering the eggs into the hot bath yields easier peeling and more accurate timing.
**2. Gently Lower Eggs into the Water.** Once the water has reached a vigorous rolling boil, it’s time to introduce your eggs. Crucially, grab your cold eggs straight out of the fridge. The temperature shock they experience upon entering the hot water will contribute significantly to making them easier to peel later. Use a large spoon, or a spider, to gently place each egg into the intensely hot water. This delicate approach is vital; if you drop the eggs in haphazardly, they risk hitting the bottom of the pot and cracking, resulting in undesirable wispy egg whites strewn throughout your pot. Precision and care here prevent culinary disappointment.
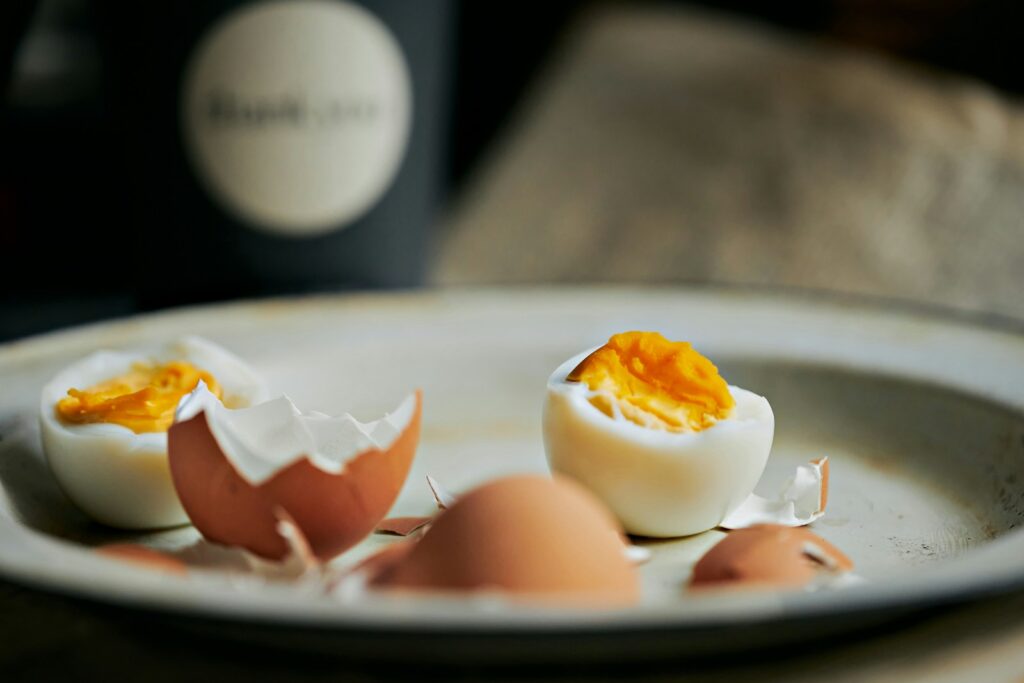
**3. Boil Eggs for 4 to 14 Minutes.** With the eggs now submerged, set a timer according to your desired level of doneness. Let the eggs cook, adjusting the heat as needed to maintain a steady simmer. You want the eggs to cook gently and consistently; too vigorous a boil will cause them to thrash around the pot, much like being ‘dropped into a mosh pit,’ which can lead to cracking and uneven cooking. For those who relish soft-boiled eggs, the kind you might spoon directly from the shell, pull your eggs from the pot at just 4 minutes. At 7–8 minutes, they will be technically hard-boiled but will feature a delightful, slightly jammy yolk, offering a creamy texture. For enthusiasts of drier hard-boiled eggs, you can extend the cooking time up to 14 minutes. Beyond this duration, you are highly likely to encounter an unsightly green ring around the perimeter of the yolk, a hallmark of overcooked eggs. These cooking times are based on large eggs; for medium or extra-large eggs, your results may vary slightly, so expect to experiment a bit to find the perfect total time for your ideal level of doneness.
The appearance of that greenish-gray ring around the egg yolk is a common sight in overcooked eggs, and it’s certainly not the most appealing. This discoloration, often referred to as a ‘sulfur ring,’ is a direct result of a chemical reaction. It involves sulfur from the egg white and iron from the egg yolk, which combine under prolonged heat. This reaction is primarily caused by overcooking the eggs, but it can also be exacerbated by a high amount of iron present in your cooking water. The solution, therefore, is wonderfully straightforward: don’t overcook your eggs!
Additionally, immediate cooling of the eggs after cooking is super important to prevent this unsightly ring. Whether you run cold water over the just-cooked eggs or submerge them in an ice bath until they are completely cooled, this rapid temperature reduction halts the chemical reaction in its tracks. Once cooled, refrigerate the eggs in their shells until you are ready to use them. Hard-cooked eggs, when kept in their shells, can be safely refrigerated for up to one week, making them perfect for meal prep throughout the week.
When it comes to the final act—peeling hard-boiled eggs—remember the cardinal rule: the fresher the egg, the harder it is to peel. This is why the advice to use eggs that are a week to 10 days old for hard-boiling is so critical. Once your eggs are cool, the peeling process becomes much simpler. Begin by gently tapping the egg on a table or countertop to crack the shell all over its surface. Then, roll the egg between your hands; this helps to loosen the shell from the egg white. For the easiest peel, start at the larger end of the egg, where the air pocket is typically located. To further assist, you can hold the egg under running cold water or dip it into a bowl of water while you peel. The water helps to slip the membrane away from the white, making the shell come off in larger, more satisfying pieces.
With these rigorous, tested methods at your disposal, the days of frustratingly difficult-to-peel eggs and unappetizing green yolks are firmly behind you. You are now equipped with the knowledge to consistently produce beautifully cooked hard-boiled eggs. Get ready to impress yourself and your loved ones with flawlessly peeled, perfectly set eggs that are ready for any delightful preparation you can imagine. Your journey to egg mastery is well underway!
Having conquered the nuances of selecting, storing, and mastering the perfect hard-boiled egg, our culinary journey with this incredible ingredient is far from over! Eggs are the quintessential chameleon of the kitchen, ready to transform into countless delightful dishes. Now, let’s broaden our horizons and delve into the precise techniques for cooking eggs in their most popular forms: scrambled, fried, omelets, and poached. Each method, while seemingly simple, holds secrets to achieving that consistent, superior result we always strive for.
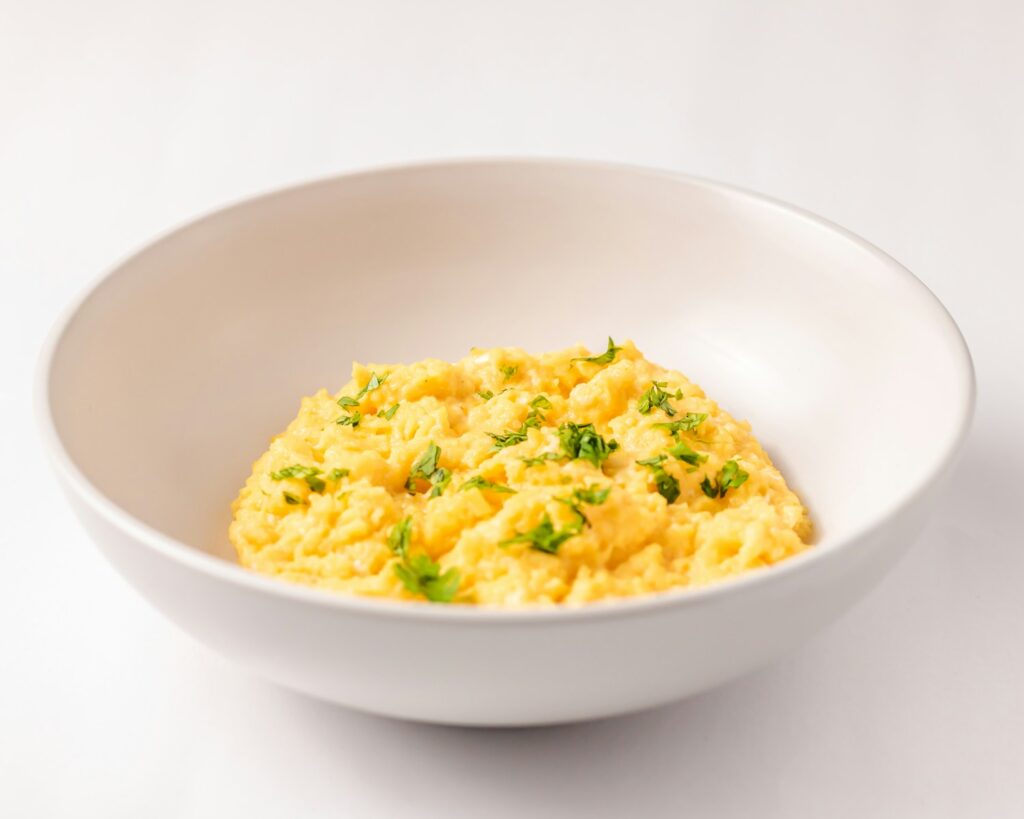
First on our menu: the humble yet often misunderstood scrambled egg. A breakfast classic, scrambled eggs, when done right, should be a symphony of creamy, tender curds, not a dry, rubbery mass. Achieving this velvety texture consistently is where our meticulous testing truly shines. The common pitfalls usually involve overcooking or improper heat management, leading to a less-than-stellar plate. But fear not, for the path to creamy perfection is clear.
Our rigorous testing has shown that the journey to creamy scrambled eggs begins with the whisking. In a bowl, whisk two to three eggs per person with salt and pepper until they are thoroughly combined. For that extra touch of lusciousness, consider adding a splash of milk or cream. This not only enhances the richness but also helps to create a more uniform texture. The aim here is to fully integrate the yolks and whites, ensuring an even consistency throughout your finished dish.
Next, heat a non-stick skillet over medium-low heat. The choice of pan is critical here; a non-stick surface prevents the eggs from stubbornly clinging, allowing for effortless stirring and a beautiful final presentation. The medium-low heat setting is equally important. Too high, and your eggs will cook too quickly on the outside, leaving the inside uncooked and leading to rubbery results. Too low, and they might take too long to set, drying out in the process. A steady, gentle heat is key to control.
Once your skillet is gently warmed, melt a tablespoon of butter or add a small amount of oil. Pour the whisked egg mixture into the skillet. This is where the magic of gentle stirring comes in. Using a spatula, begin to gently stir the eggs, pushing them from the edges toward the center. This technique allows any uncooked portions to flow to the edges, ensuring that every part of the egg mixture cooks evenly and forms those desirable soft, fluffy curds.
The final, crucial step in achieving perfect scrambled eggs is knowing when to stop cooking. You want to cook them until they are just set, but crucially, remove them from the heat while they are still slightly runny. This foresight is vital because eggs continue to cook even after being removed from the heat, thanks to residual warmth. Transferring them off the heat at this slightly runny stage prevents them from overcooking and becoming dry or rubbery, guaranteeing that creamy, tender consistency every time.
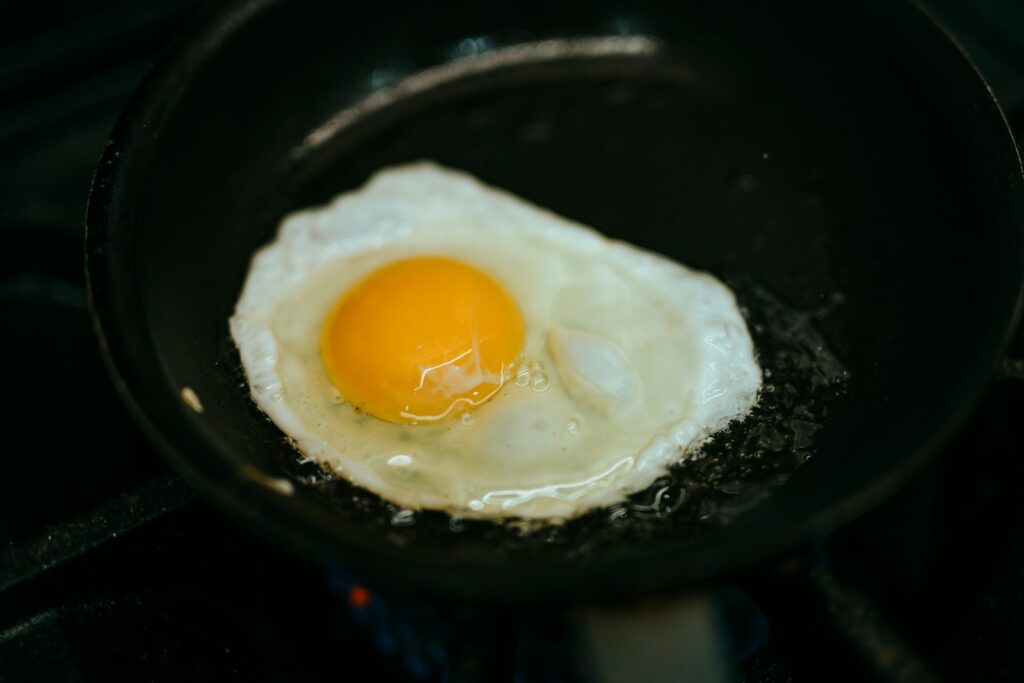
Moving on to another breakfast staple, the fried egg. This seemingly straightforward preparation offers wonderful versatility, allowing for different levels of yolk doneness to suit every preference, from gloriously runny to perfectly firm. Whether you prefer sunny-side up or a quick flip for over-easy, medium, or hard, precision is paramount.
For a classic sunny-side-up egg, the goal is a fully set white with a beautifully runny yolk, resembling the sun itself. Begin by heating a non-stick skillet over medium-low heat. This gentle heat is essential for slow, controlled cooking, allowing the whites to set evenly without browning too quickly, while leaving the yolk gloriously unblemished and fluid. Add a small amount of butter or oil to the skillet; this creates a non-stick surface and contributes to the egg’s flavor.
Carefully crack an egg into the heated skillet, taking utmost care not to break the yolk. The integrity of the yolk is not just for aesthetics; it’s central to the sunny-side-up experience. Allow the egg to cook gently until the whites are completely set. You’ll notice the edges firming up and the translucent parts of the white turning opaque. Once the whites are fully cooked but the yolk remains enticingly runny, your sunny-side-up egg is ready. Slide it onto your plate and enjoy!
Should your preference lean towards a flipped egg, where both sides see the heat, we offer a pathway to perfectly “over” eggs. Once the whites of your sunny-side-up egg are set, it’s time for the gentle flip. This moment requires a confident yet delicate hand. Use your spatula to carefully slide under the egg, then gently but swiftly flip it over in the pan. The timing of the second side’s cook determines your desired doneness.
For an over-easy egg, where the yolk is still wonderfully runny, cook for just another 30 seconds after flipping. This brief exposure to heat slightly sets the top of the yolk, yet it remains fluid. For an over-medium egg, offering a slightly jammy or semi-firm yolk, extend the cooking time to approximately 1 minute. Finally, for an over-hard egg, where the yolk is completely firm and cooked through, continue cooking for about 2 minutes. Our tests have shown these timings deliver consistent results across the spectrum of fried egg preferences, ensuring you always hit your mark.
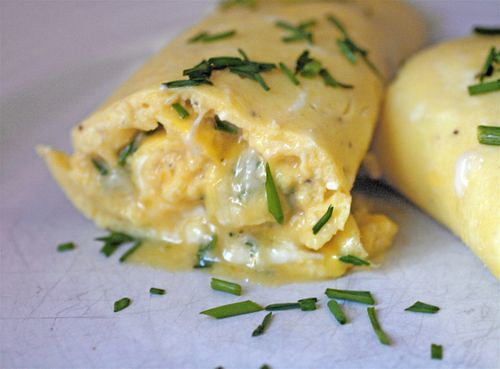
Next, let’s explore the art of the omelet. An omelet is more than just a folded egg; it’s a culinary canvas, a testament to the egg’s incredible versatility, perfect for incorporating vegetables, cheese, or meats into a hearty and satisfying meal. The secret to a truly outstanding omelet lies in its lightness and fluffiness, a texture that can elude many without precise technique.
To achieve that sought-after fluffy omelet, start with well-beaten eggs. For a standard omelet, whisk two to three eggs thoroughly in a bowl until the yolks and whites are completely mixed. This vigorous whisking is crucial because it incorporates air into the mixture, which is the key to fluffiness. Adding a splash of milk or cream can further enhance this airiness, contributing to a lighter texture. Season your whisked eggs with salt and pepper. Allowing the mixture to rest for a few minutes after seasoning can also contribute to optimal fluff, as it gives the proteins a chance to relax and the air bubbles to stabilize.
Now, prepare your cooking environment. Heat a non-stick skillet over medium heat. A non-stick pan is indispensable here, ensuring your omelet releases cleanly and beautifully. Melt a small amount of butter in the pan, allowing it to coat the bottom evenly. Once the butter is melted and slightly foaming, pour the whisked egg mixture into the skillet.
Allow the eggs to cook undisturbed for a moment, letting the edges begin to set. This initial undisturbed cooking forms the base of your omelet. As the edges begin to lift from the pan, gently push them towards the center of the skillet using your spatula. As you do this, tilt the pan to allow any uncooked egg mixture to flow to the now-empty edges. This technique creates those classic, delicate folds and ensures even cooking throughout the omelet’s structure.
Once the omelet is mostly set but still looks slightly moist on top, it’s time to add your desired fillings. Whether it’s a vibrant medley of vegetables, a sprinkle of melty cheese, or savory ham, scatter your chosen ingredients over one half of the omelet. Then, with a confident motion, fold the omelet in half. Allow it to cook for another minute or so, just until the inside sets to your preference. Remember, much like scrambled eggs, omelets continue to cook slightly after removal from the heat, so taking it off the stove just before it’s completely firm will ensure it remains tender and fluffy.
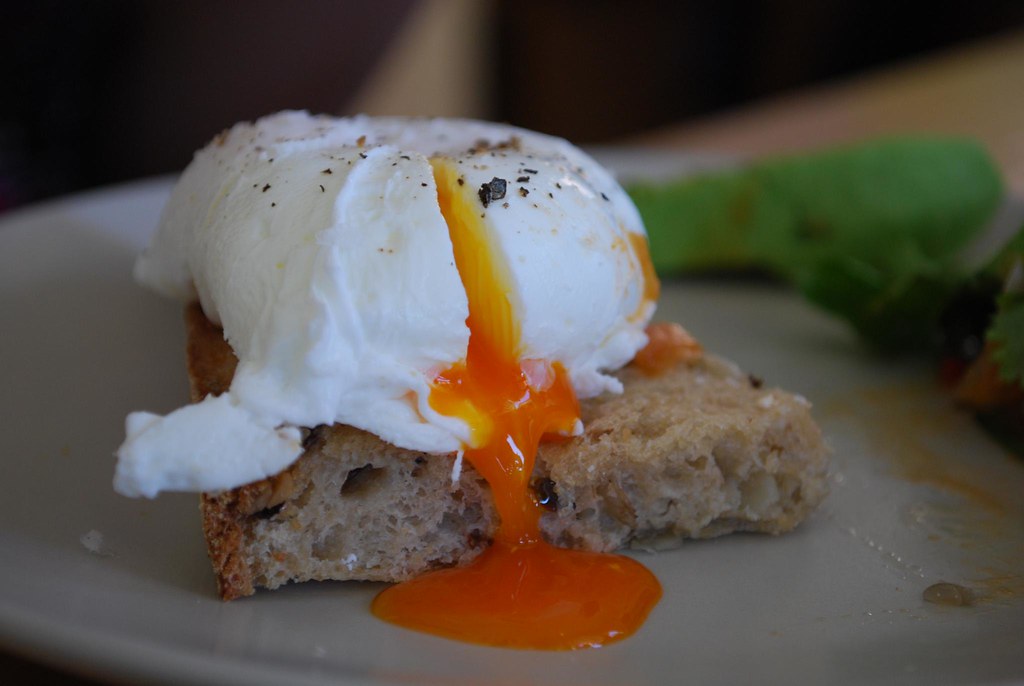
We arrive at the delicate art of poaching eggs. Poached eggs are the epitome of elegant simplicity, perfect atop toast, nestled in a vibrant salad, or as the crowning glory of Eggs Benedict. The challenge often lies in preventing the egg whites from scattering into wispy threads in the water. Our tested method ensures a beautifully intact, tender poached egg every time.
The process begins with the water. Fill a pot with water and bring it to a gentle simmer, not a rolling boil. A gentle simmer, characterized by small, lazy bubbles, is crucial because too vigorous a boil will cause the delicate egg to break apart and disperse. To further aid in the coagulation of the egg whites, add a splash of vinegar to the water. The acidity in the vinegar helps the egg proteins set more quickly and firmly, keeping the egg together.
Before introducing the egg to the simmering water, crack a fresh egg into a small bowl. This pre-cracking step allows for a controlled and gentle slide into the water, minimizing any splash or breakage. Now, here’s a technique that has proven consistently effective in preventing those dreaded wispy whites: Create a gentle whirlpool in the simmering water by stirring it with a spoon. Once the whirlpool is formed, carefully slide the egg into the very center of the motion. The gentle swirling action helps to keep the egg whites contained around the yolk, creating a compact, beautifully shaped poached egg.
Allow the egg to cook for approximately 3 to 4 minutes, depending on how runny you prefer your yolk. Three minutes will yield a very liquid yolk, while four minutes will result in a slightly firmer but still luscious consistency. Once cooked to your liking, carefully remove the poached egg from the water using a slotted spoon. Gently place it on a paper towel to drain any excess water before serving. If you’re particularly concerned about maintaining a perfect shape, some cooks find using an egg poaching cup within the simmering water helpful, though our whirlpool method usually suffices for excellent results.
As we conclude our exploration of mastering egg cookery, it’s important to touch upon the aspect of healthy enjoyment. Eggs are undeniably packed with essential nutrients, including protein, vitamin B12, vitamin D, and choline, making them a fantastic addition to almost any diet. However, how we prepare them can significantly influence their overall health profile.


