

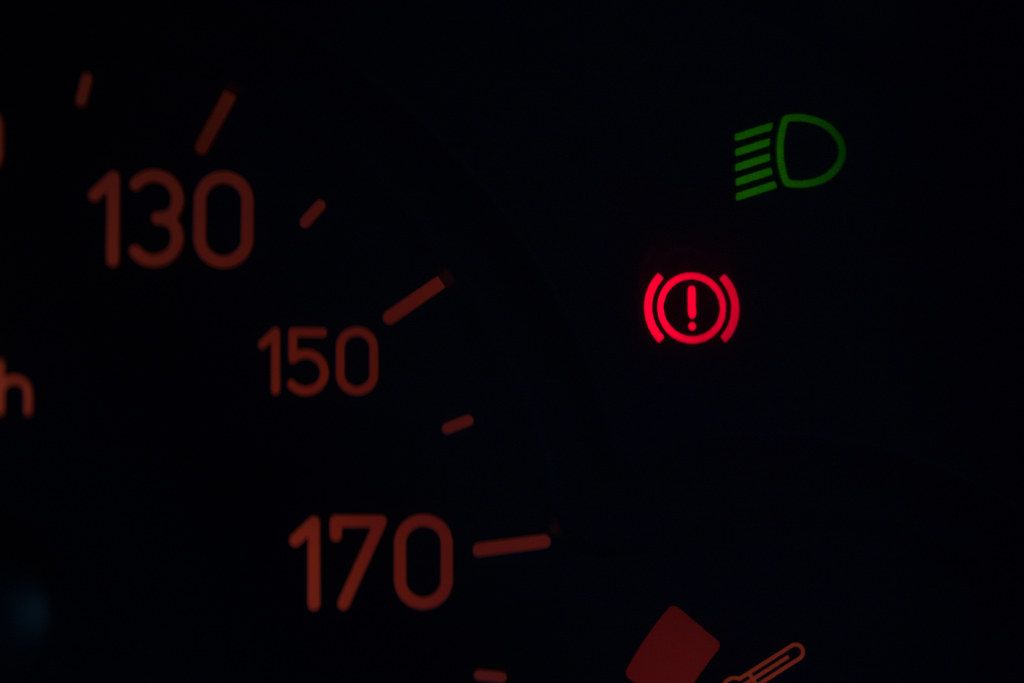
Squeaky brakes have got to be the most annoying thing for any driver. You’ve probably heard it before – that high-pitched screech every time you press your foot on the pedal. It’s like your car is complaining, and you can’t help but wonder if it’s a serious problem or just a normal part of your car’s life. The good news is that, in most cases, squeaky brakes are not an indication of a significant problem, but ignoring the issue may be dangerous down the road. Luckily, many of these issues are fixable, and some don’t even require you to take off a wheel! We’re diving deep into these common causes and effective solutions.
We all know that moment when a loved one asks, “Hey babe, can you come listen to this sound my car is making?” It’s the unofficial start of a project you didn’t plan on, but understanding the root cause is the first step to saving your ears, your sanity, and perhaps even your marriage. This in-depth guide is designed to empower you with the knowledge and practical steps to tackle those dreaded squeaks, turning you into the auto guru your car (and household) needs. You’ll find clear explanations, expert insights, and clever hacks to get your ride running smoothly and silently again.
Whether you’re a seasoned gearhead or just starting your automotive journey, this article will walk you through why brakes squeak, simple ways to fix them, and essential tips to keep your car quiet and safe. We’ll break down complex mechanical concepts into easy-to-understand explanations, empowering you to understand and tackle these challenges yourself. From quick, no-tool solutions to more involved maintenance, get ready to regain the peace and quiet of a well-maintained vehicle. Let’s get this show on the road, shall we?

1. The Cry of Worn-Out Brake Pads
One of the most common culprits behind that irritating high-pitched squeal is simply worn-out brake pads. Just like your favorite sneakers eventually get thin, brake pads wear down over time with every stop you make. When they reach a certain level of wear, a clever piece of engineering kicks in: a metal tab known as a wear indicator. This little tab is specifically designed to squeal and warn you that it’s time for a replacement.
This isn’t just an annoyance; it’s a critical safety alert. The metal-on-rotor contact signifies that your brake pads are getting dangerously thin, meaning reduced stopping power and an increased risk on the road. Ignoring this sound can lead to more severe damage to your rotors, turning a simple pad replacement into a much more expensive repair involving both pads and rotors.
Identifying worn pads is usually straightforward. If the squeak is constant every time you press the pedal, it’s often because these pads have worn down. In one personal experience, the initial squeak from a 2019 GMC Yukon was clearly the wear indicator, classic and unmistakable. Replacing these pads promptly is a straightforward fix that restores your braking performance and peace of mind.
To visually inspect your brake pads, park your car on a flat surface, use a jack to safely lift the car, and remove the wheel. Look at the brake pads within the caliper; if they are thinner than a pencil eraser, it’s definitely time to replace them. Always remember to use jack stands for safety and never work under a car supported solely by a jack. Timely replacement is key to maintaining both quiet brakes and safe stopping power.
Read more about: The Unbiased Truth: Your Definitive Guide to Over 14 Critical Checks Before Buying a Used Car
2. The Annoyance of Dust or Debris Accumulation
Sometimes, the cause of squeaky brakes isn’t a major mechanical failure but something much simpler: dust or debris. Mud, dust, tiny rocks, or grime can sneak into your braking system and get stuck between the brake pads and rotors. This accumulated material then acts like sandpaper, causing a grinding or squeaky noise as the pads rub against the rotor.
This phenomenon is particularly prevalent with semi-metallic brake pads, which tend to create more dust due to the higher heat generated when they rub against the rotors. While you might not be able to visibly see the brake dust from the outside, over time, it can build up and lead to noticeable problems, including that irritating squealing sound. A quick clean can often resolve this issue, making it one of the easiest fixes.
Personal experiences often highlight how a simple pebble or heavy buildup of brake dust can be the sole cause of intense noise. In one instance, a Honda CR-V had a similar issue, which was resolved by gently scuffing the visible part of the pads with coarse sandpaper to roughen the surface. Another user found that spraying down the wheels and calipers with a hose successfully stopped the noise without even removing the tire, demonstrating the effectiveness of a good cleaning.
To tackle dust and debris, you can try a quick spray with brake cleaner, which is specifically designed to remove this buildup. In cases where you want to avoid removing the wheel, a garden hose coupled with a good brake dust cleaner can work wonders. Ensure your brakes are cool, spray the cleaner on the wheels and brake caliper, allowing it to foam and drip out the dust, then thoroughly wash it off with the hose. This simple hack can often provide instant relief.

3. The Morning Squeal: Moisture and Surface Rust
If your car sits outside, especially after a rainy night or a heavy dew, you might be greeted by a brief, high-pitched squeal from your brakes in the morning. This common occurrence is typically caused by moisture, which leads to a thin layer of surface rust forming on the brake rotors. It’s a natural reaction as the exposed metal interacts with humidity and water.
This surface rust is usually harmless and quite temporary. As soon as you start driving and gently apply the brakes, the friction between the pads and rotors quickly scrapes off this fine layer of rust. The squeak should disappear within the first few stops as the surfaces clean themselves. This happened to a Mazda MX-5 Miata owner, who resolved the issue by driving on a clear road and applying the brakes a few times at higher speeds, with the friction and heat clearing the rust.
Understanding this phenomenon can save you unnecessary worry and a trip to the mechanic. It’s an example of how sometimes, the solution requires no tools at all, just a bit of driving. If the squeak persists beyond the first few minutes of driving, however, it might indicate a more deeply rooted issue than just surface rust and warrant further inspection for dust, debris, or other causes.
For persistent morning squeaks that don’t dissipate, it’s worth considering a more thorough cleaning of the brakes. While a light coat of rust will wear off, excessive moisture buildup can contribute to other issues if left unaddressed. A brake cleaner spray, even applied from outside the wheel, might offer a temporary solution if the squeal is specifically from surface dust and moisture, although direct access is always more effective for ongoing problems.

4. **The Slippery Slope of Glazed Pads or Rotors**Beyond simple wear and tear or environmental factors, brake pads and rotors can develop a condition known as glazing. This occurs when the surface of the pads or rotors becomes overly smooth, hard, and polished, often due to excessive heat or improper bedding-in procedures. When pads glaze, they can’t grip the brake rotors effectively, leading to a noticeable reduction in braking performance and, you guessed it, squeaky noises.
Beyond simple wear and tear or environmental factors, brake pads and rotors can develop a condition known as glazing. This occurs when the surface of the pads or rotors becomes overly smooth, hard, and polished, often due to excessive heat or improper bedding-in procedures. When pads glaze, they can’t grip the brake rotors effectively, leading to a noticeable reduction in braking performance and, you guessed it, squeaky noises.
Glazed brake pads often appear glossy and feel very smooth to the touch, and you might even observe tiny grooves on their surface. This hardened, brittle material struggles to create the necessary friction, resulting in a distinct squeal when braking. Low-grade brake pad materials and harsh, aggressive braking, such as slamming the brakes, can significantly contribute to this condition by overworking the pads and causing excessive heat buildup.
In one personal account, the initial squeak was resolved, but two months later, the car started squealing again, specifically when lightly pressing the brake at low speeds. This was attributed to glazing, likely from gentle city driving, which prevented proper bedding-in. My wife’s responsible driving habits, while good for safety, sometimes don’t generate enough heat to properly bed-in new pads, leading to glazing.
To identify glazed brake pads, you’re looking for signs like a squeaking sound when braking, a vibrating brake pedal, and brakes that feel less responsive than they should. If your pads look smooth or discolored, these are strong indicators of glazing. While it’s often best to replace glazed pads as they can harm the more expensive rotor in the long run, a temporary fix involves wetting the pads with isopropyl alcohol and sanding them with 280 to 320 grit sandpaper on a hard, flat surface to remove the glaze.
5. Bedding-In Blues: New Pads and Improper Break-In
It might seem counterintuitive, but newly installed brake pads can sometimes be the source of squeaking noises. This isn’t usually a sign of a problem, but rather a normal part of the ‘break-in’ or ‘bedding-in’ process. New brake pads require a gentle breaking-in period to transfer a thin, even layer of friction material onto the brake rotor. This layer is crucial for ensuring the brakes work smoothly and quietly.
If new brake pads aren’t properly bedded in, they can squeak when braking because the friction material can’t grip the rotor correctly, causing it to squeal as it slides over the rotor’s surface. This improper bedding can lead to uneven pad deposits or glazing, as discussed earlier. The key to avoiding this issue is to follow a specific procedure after installing new pads, ensuring they are properly conditioned for optimal performance and quiet operation.
A proper bed-in involves getting the vehicle up to speed—typically 30-40 mph—and applying hard stops, almost to zero, but without fully stopping. This process should be repeated a few times, allowing the brakes to cool slightly between runs. This controlled heating and cooling helps to burn off any glazing and evenly transfer pad material onto the rotors, effectively marrying the two surfaces for consistent, quiet braking.
An auto guru’s experience highlights the fun—and slightly dramatic—aspect of this process. Taking a Yukon to an empty side street, getting it up to about 35 mph, and slamming the brakes hard enough to make the ABS kick in, repeated 4 or 5 times, proved to be a successful method. This technique, while not for crowded parking lots, is a proven way to heat up pads and rotors, burn off glazing, and properly bed the surfaces together, ultimately eliminating squeaks.
6. The Instant Relief: Cleaning Brake Dust Without Tire Removal
One of the most appealing solutions for temporary squeaky brake relief, especially for those who dread the thought of removing a tire, is cleaning brake dust without complex tools. Many drivers will be thrilled to learn that you won’t need any special tools or waste an entire afternoon to tackle this common cause of brake noise. This clever hack focuses on addressing the buildup of tiny bits of metal and brake pad pieces that accumulate on rotors and pads, which act like sandpaper and cause squealing.
You can utilize a brake dust cleaner and a garden hose to clean the brake dust and eliminate squeaky noise from the brakes without taking the wheel off. It’s important to choose a non-toxic brake dust cleaner, particularly if you have delicate rims or a finish requiring special care. P&S Brake Dust Cleaner is recommended for its foaming action, which helps the brake dust float away, making the cleaning process more effective.
The process is straightforward: first, ensure your brakes are cool to the touch. Then, liberally spray the brake dust cleaner on the wheels and brake caliper, making sure to foam it into the area where the brake pads are located. Allow a few minutes for the cleaner to work its magic, foaming up and dripping out the accumulated brake dust. After this, thoroughly wash the wheel and brake caliper with your garden hose.
This method is a true game-changer for those seeking a quick, accessible fix. User experiences confirm its effectiveness, with one Hyundai Sonata owner successfully stopping a high-pitched squeak, which turned out to be accumulated brake dust, by simply using a hose to spray down the wheels and calipers. It’s a testament to how sometimes, the simplest solutions can yield the most satisfying results, making your drive peaceful and quiet once again.

7. The Road Test: Driving Off Rust and Minor Squeaks
Before you even reach for a wrench or a spray can, some squeaks can be resolved with the simplest of actions: driving your car. This particularly applies to squeaks caused by surface rust, which often forms on rotors when a car sits outside in rain or snow. This rust creates a high-pitched noise until it naturally wears off through friction. It’s a common scenario, especially after parking your car during a stormy week, and it’s usually not a cause for alarm.
If your car has been parked for a while, especially in damp conditions, a good strategy is to simply drive a little. As the wheels turn and you gently press the brake pedal a few times while driving slowly, the friction generated between the pads and rotors will scrape away the light rust. This action should cause the squeak to dissipate as the rust wears off, allowing your brakes to return to their normal, quiet operation. It’s a temporary nuisance with a built-in, no-tools-needed solution.
Beyond rust, sometimes minor squeaks can go away on their own or with minimal intervention. This initial check for simple fixes is always a smart first step. It could be that tiny rocks or dirt are stuck in the brakes, causing temporary noise. A quick visual check around your wheels for any obvious debris can often reveal the culprit, and sometimes, a short drive is all it takes to dislodge it or wear it down.
This “road test” method empowers you to diagnose and potentially resolve issues without immediate mechanical work. It’s about leveraging the car’s own function to fix itself, saving you time and effort. Remember, while minor squeaks can often be driven off, if the noise persists or changes in character, it’s a cue to delve deeper into the potential causes, moving beyond these simple, temporary fixes to ensure lasting safety and quiet. Always start here—sometimes a small realignment can cause bigger issues.
Introduction to Advanced Fixes: Moving Beyond the Basics for Enduring Solutions.
After tackling the immediate annoyances and quick fixes for squeaky brakes, it’s time to look at more robust, long-term solutions. While those initial hacks offer temporary relief, achieving lasting quiet and optimal performance demands a deeper dive into maintenance and component quality. This section empowers you with the knowledge to transform temporary silence into enduring peace, ensuring your braking system is not just quiet, but also reliable and safe for every journey.
We’ll explore core strategies that seasoned auto gurus rely on for consistently smooth and silent stops. These advanced techniques go beyond surface-level interventions, addressing the underlying mechanics to provide solutions that truly last. Get ready to elevate your automotive expertise and enjoy a truly quiet ride.

8. The Lubrication Imperative: Quieting Contact Points with Grease
That persistent squeal often signals a simple need: proper lubrication. Brake components are designed to move and slide against each other precisely. When these metal-on-metal contact points become dry, friction generates vibrations, which then manifest as that high-pitched squeak. A small amount of the right grease in the correct spots can significantly dampen these vibrations, restoring quiet operation to your brakes.
Proper application of brake lubricant is vital for smooth and silent braking, extending the life of your components by reducing wear. It’s particularly effective when squeaks stem from dry contact points or friction between metal parts, a common oversight even by experienced DIYers. This simple step can prevent premature wear and keep your system running optimally.
Crucially, only use high-temperature, rubber-safe brake grease. Standard greases will melt and seep onto the friction surfaces of pads or rotors, severely compromising stopping power and creating a dangerous situation. Also, non-rubber-safe lubricants can damage piston seals. Products like ATE Plastilube grease are recommended for their stability and compatibility, offering both quietness and safety.
Apply a thin layer to the backing plate of the brake pads and their ‘ears’—the edges contacting the caliper or hardware. Never apply grease to the actual friction material of the pad or the rotor surface. This precise lubrication minimizes noise without jeopardizing performance, ensuring your brakes operate as intended: quietly and effectively.

9. The Vibration Dampener: Understanding and Installing Anti-Squeal Shims
Beyond lubrication, anti-squeal shims offer another powerful defense against brake noise. These thin plates, typically metal or rubber, are designed to fit between the brake pad and caliper. Their primary role is to absorb high-frequency vibrations that cause squealing, effectively silencing the noise before it can become an irritation.
Many new brake pads already include these shims, highlighting their importance in noise reduction. It’s always wise to confirm their proper placement during installation. If your current pads lack shims or if existing ones are worn, adding new, correctly fitted ones can dramatically reduce noise, leading to a much smoother stopping experience.
When considering shims, older ones in good condition can be reused after thorough cleaning with brake cleaner and paper towels. However, if they show any wear or damage, replacing them with new, vehicle-specific shims is best. Mismatched shims can paradoxically cause more noise by promoting incorrect pad-to-rotor contact.
Avoid stacking multiple shims, as this can lead to a spongy brake pedal or air spring effect, impairing braking effectiveness. Precision in selection and installation is crucial. Correctly deployed, these small but mighty components harness the full noise-dampening power needed for quiet and consistent braking.
10. The Power of Proper Bed-In: Re-establishing Pad-Rotor Harmony
While essential for new pads, the proper bed-in procedure also serves as a potent remedy for existing systems, especially when addressing issues like glazing. Glazed pads or rotors, smoothed and hardened by excessive heat or gentle braking, reduce friction and create that familiar squeal. Re-bedding helps correct these surface imperfections and optimizes the critical relationship between pads and rotors.
Glazed surfaces compromise stopping power and lead to noise, a common issue even with newer pads due to city driving habits. Re-bedding strategically burns off existing glazing and transfers an even layer of friction material back onto the rotors. This process ensures the surfaces mate perfectly, crucial for consistent, quiet performance and extending component life.
The re-bedding process demands a controlled environment, away from traffic. Accelerate your vehicle to about 30-40 mph, then apply firm, hard stops, almost to zero, but without fully stopping. Repeat this sequence several times, allowing the brakes to cool slightly between each run. This controlled heating and cooling cycle is vital for optimal results.
This method effectively scours surfaces, removing glaze, and precisely deposits a uniform layer of pad material. An auto guru’s anecdote involved taking a Yukon to an empty street, reaching 35 mph, and repeatedly slamming brakes to engage ABS. This aggressive yet controlled technique is a proven way to burn off glazing, properly bed the surfaces, and restore lasting quiet to your brakes.

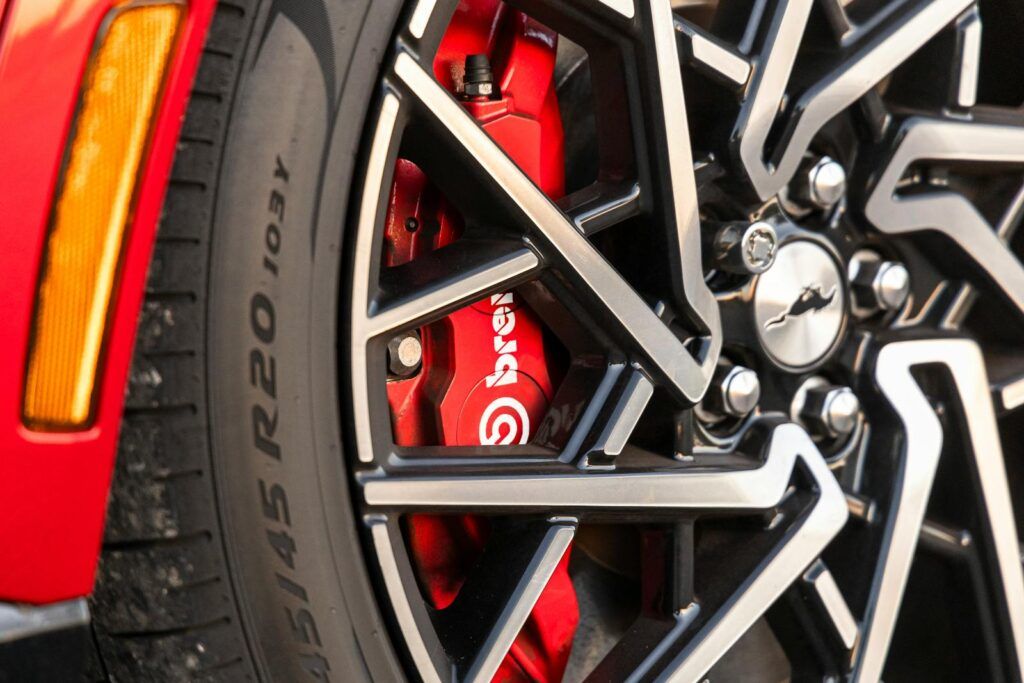
11. The Quality Factor: Why Choosing the Right Brake Pads Matters
The quality of your brake pads is a pivotal decision, directly influencing durability, quietness, and safety. Skimping here can lead to constant headaches and compromise performance. As the saying goes, “cheap pads… seem like a good idea until they start screaming.” Investing wisely in this area forms the bedrock of an effective and silent braking system.
Lower-quality brake pads often contain a higher percentage of metallic compounds. While they might provide decent initial stopping power, these semi-metallic pads are notorious for generating more noise and brake dust. They tend to squeak more, especially if poorly manufactured, and wear out faster, erasing any perceived upfront savings over time.
Quality ceramic brake pads offer a superior experience. They are renowned for their exceptional quietness and impressive durability, lasting significantly longer than cheaper alternatives. While their initial cost might be higher, typically $50-$100 compared to $20-$50 for semi-metallic pads, this investment yields quiet operation, extended longevity, and reduced brake dust. Many drivers find ceramic pads effectively resolve persistent squeaking issues.
Understanding brake pad types guides your choice. Organic pads are quiet but wear quickly. Semi-metallic pads offer good stopping but can be noisy and dusty. Ceramic pads strike an excellent balance: quiet, durable, and strong performance. Selecting the right pads for your vehicle and driving style proactively prevents squeaks and ensures robust, dependable stopping power.
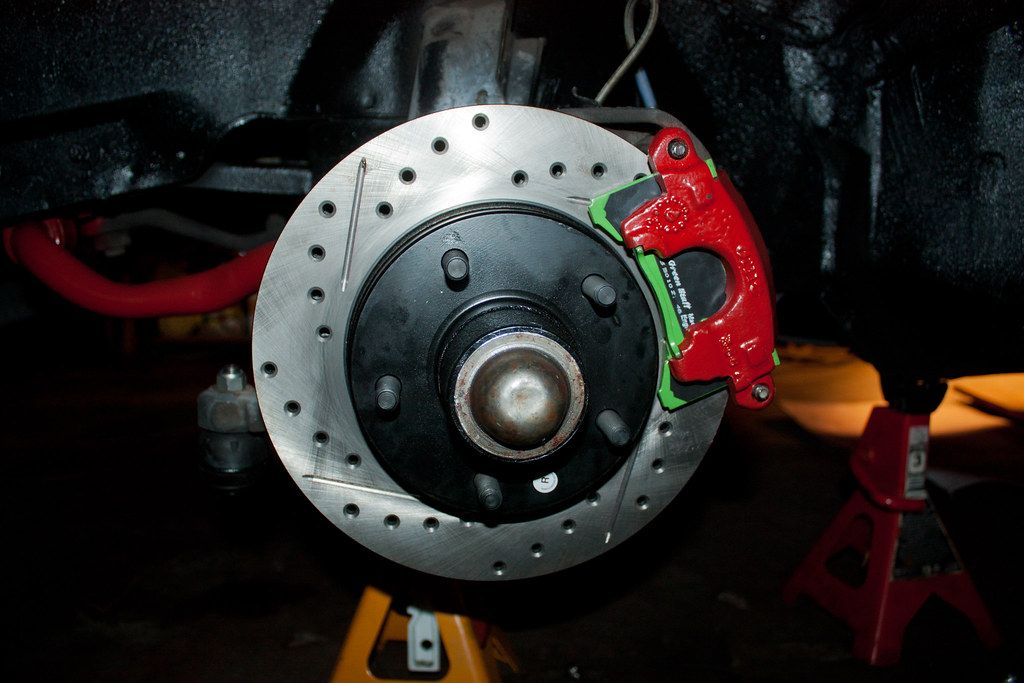
12. Hardware Harmony: Inspecting and Replacing Worn Brake Hardware
Often overlooked, the small components known as brake hardware are critical for a quiet and efficient braking system. These include pad clips, anti-rattle clips, and caliper slide pin boots. They ensure brake pads are securely held yet can move freely within the caliper, preventing vibrations that cause squeaks. Worn or damaged hardware creates slack, directly leading to irritating noises.
A golden rule among mechanics is to always replace brake hardware whenever changing brake pads. This common oversight can lead to persistent squeaking and potential damage. Old hardware can cause pads to drag unevenly or vibrate excessively, producing that signature high-pitched noise, impacting performance and safety.
Replacing brake hardware involves several key steps. Always change the pad clips that secure pads to the caliper bracket. The slide pins, which allow the caliper to float, must be removed, thoroughly cleaned, and inspected for wear; replace them if damaged. Lastly, replace pin boots if they show cracks, as damaged boots compromise protection and can lead to sticky caliper pins.
While many quality brake pad sets include new hardware, confirm this during purchase. If not, these essential components can be bought separately. Ensuring all brake hardware is fresh, clean, and properly installed maintains “hardware harmony,” guaranteeing every component works in sync for smooth, quiet, and consistent braking performance.
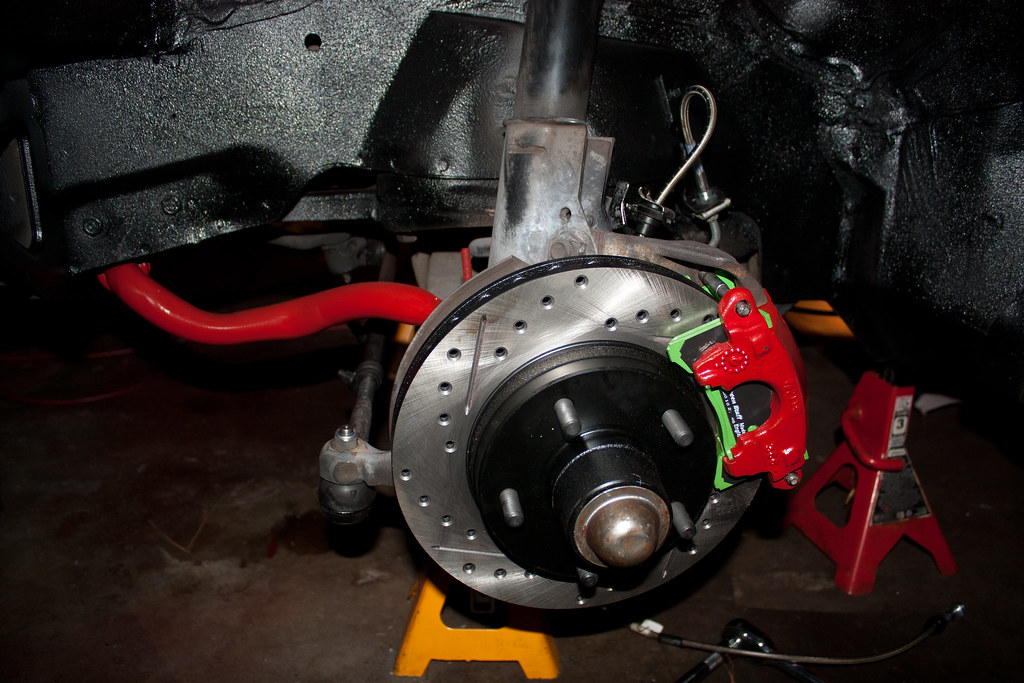
13. Smooth Movement: Addressing Sticky Caliper Pins for Even Braking
Caliper pins are essential for your braking system, allowing the brake caliper to move smoothly and press pads evenly against the rotor. When you brake, hydraulic pressure pushes the piston, engaging one pad. Simultaneously, the caliper slides along its pins, bringing the other pad into contact. This balanced movement is crucial for effective and quiet stopping.
These pins require lubrication to maintain smooth operation. Over time, high-temperature grease wears off, allowing dirt and corrosion to build. This makes pins “sticky,” hindering free movement. Sticky pins cause uneven pad pressure, leading to uneven wear, reduced braking, and that irritating squeak. A hot caliper after driving can signal a sticking pin.
To fix sticky caliper pins, you’ll usually need to remove the wheel and caliper assembly. Carefully take off the rubber boot and bolt from the caliper guide pin, then extract the pin. Meticulously clean all old grease, dirt, and rust from the pin using a rag, brush, or even a small drill bit (turned by hand) for the pinhole, being careful not to damage the bracket.
Lubricate the clean sliding pin generously with a high-quality brake lubricant. However, be cautious: too much lubricant can trap air, creating an “air spring” effect that causes the caliper or pad assembly to drag on the rotor, introducing new problems. Proper cleaning and lubrication unlock full caliper functionality, restoring even braking and, crucially, quiet operation.
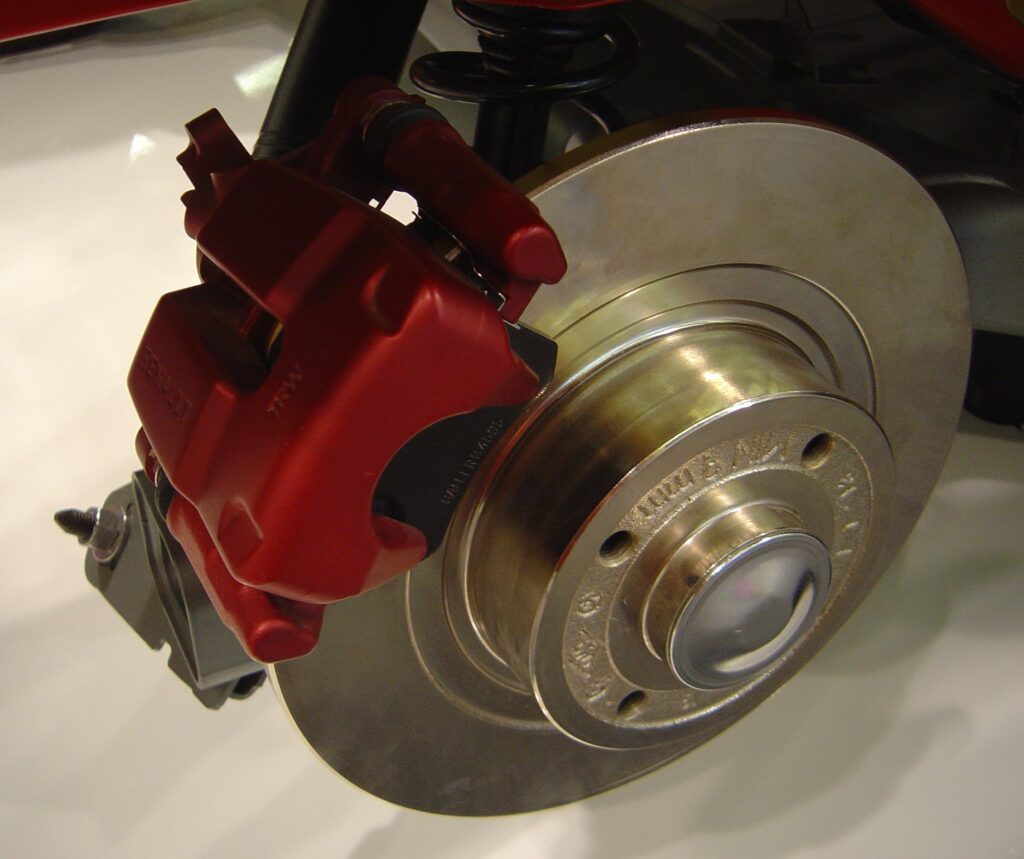
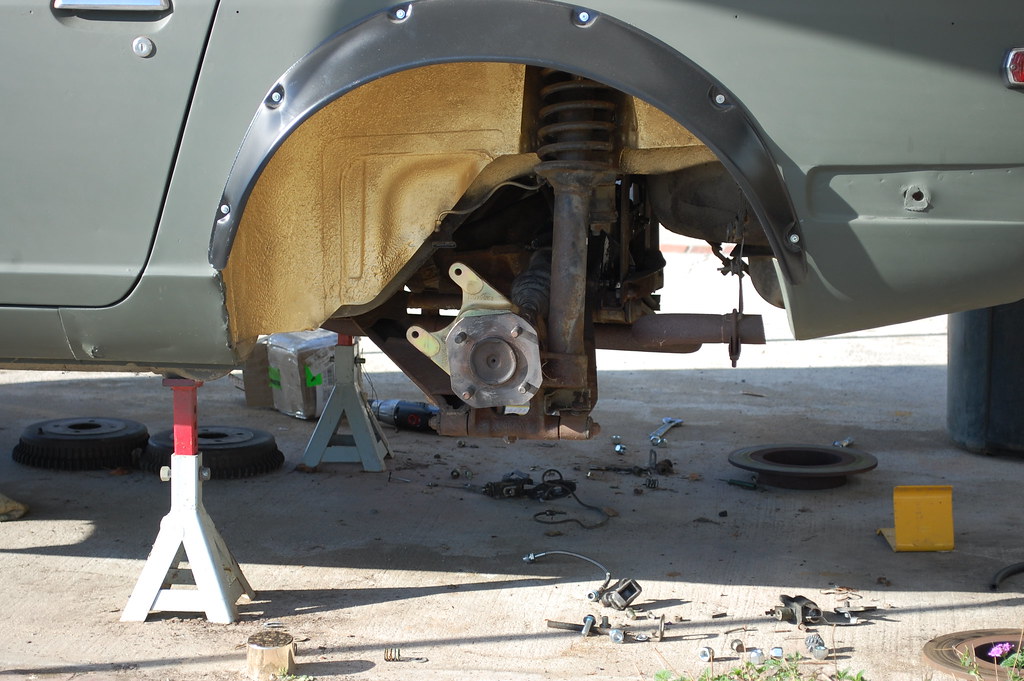
14. The Rotor’s Role: When to Inspect and Replace Your Rotors
While brake pads get much attention for squeaks, brake rotors are the foundational surface for effective and quiet braking. Their condition directly impacts stopping power and noise levels. Just like a compromised foundation affects a building, a faulty rotor can undermine your entire braking system, leading to persistent squeaks, vibrations, and dangerous reductions in stopping ability.
Rotors can cause squeaks due to warping, excessive rust, or uneven surfaces with grooves or “hot spots” from prolonged heat or glazed pads. Warped rotors cause intermittent pad contact, resulting in a pulsing squeal and vibrating pedal. Deep grooves or discolored areas indicate surface damage, preventing flush pad mating and leading to noise and reduced friction. Glazed pads, if unchecked, can severely harm the more expensive rotor.
Regular rotor inspection is vital. During any brake service, visually check rotor surfaces for deep grooves, scoring, heat spots (dark, discolored areas), or any noticeable run-out (wobbling). While light surface rust is typically temporary, extensive or pitted rust is problematic. If rotors show significant damage or are below minimum thickness specifications (checked with a micrometer), replacement is essential.
Minor imperfections can sometimes be “machined” or “resurfaced,” but only if the rotor still meets minimum thickness. For severe damage or when installing new pads, replacing rotors offers the best results and lasting quiet. Ignoring rotor damage can lead to grinding sounds—a serious sign of metal-on-metal contact requiring immediate repair. New rotors provide a pristine surface, the true foundation of a quiet and safe braking system.
An ending paragraph of the article.
So there you have it, fellow auto enthusiasts and problem-solvers! From swift no-tool remedies to strategic advanced maintenance, you’re now equipped with the expertise of a true auto guru. No longer will high-pitched screeches disrupt your drive or spark marital discord. You’ve learned to diagnose, understand, and skillfully address the symphony of brake noises, transforming your vehicle into a bastion of peace and performance. Embrace the journey of maintaining your ride, knowing that every quiet stop is a testament to your knowledge and a smoother, safer drive for everyone. Keep those wheels turning, those brakes quiet, and your inner mechanic thriving!


