

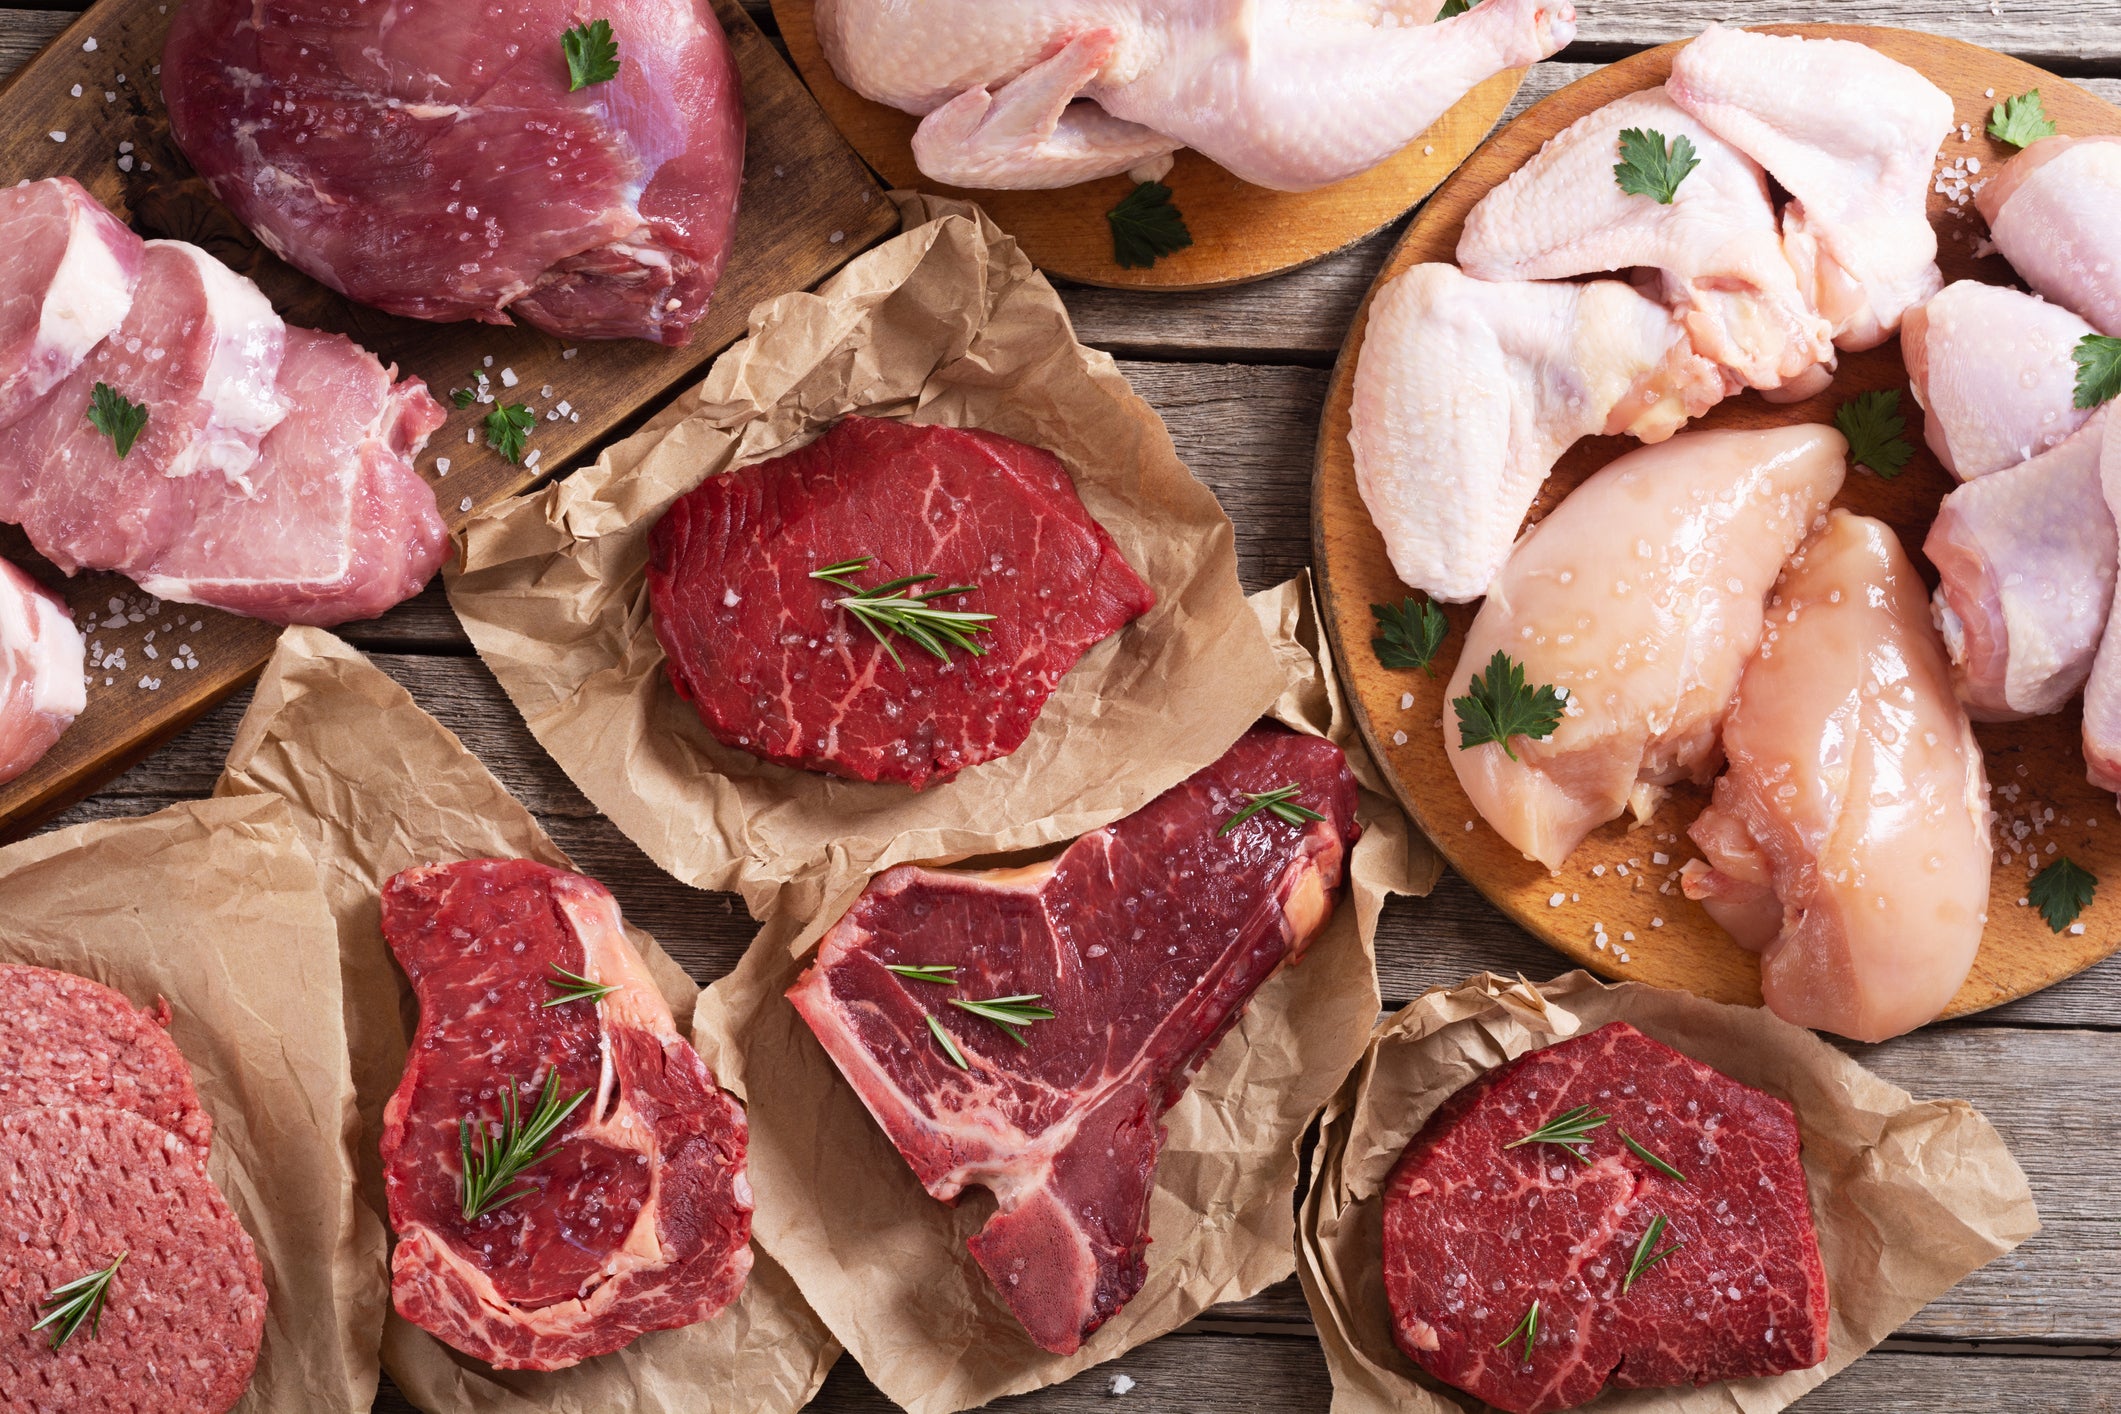
For anyone who’s ever stood proudly by a sizzling grill, tongs in hand, the world of barbecue feels like a sacred space, steeped in tradition and passed-down wisdom. From seasoned pitmasters to weekend warriors, we all want to achieve that perfect char, that tender bite, that unforgettable smoky aroma. Yet, beneath the rising smoke and crackling flames, a surprising number of deeply ingrained beliefs about barbecue are, frankly, dead wrong. These aren’t just minor quibbles; they’re pervasive myths that can actually hinder your quest for grilling greatness, sometimes even compromising safety.
It’s easy to get caught up in the folk wisdom and accepted truths that saturate the barbecue world, often leading to a fear of doing things incorrectly. But what if many of those oft-repeated ‘rules’ don’t actually hold water? What if some of the things you’ve been relying on are exactly what world-renowned barbecue champions and seasoned editors wish you’d simply stop doing? Prepare to challenge your assumptions and transform your grilling game. In this comprehensive guide, we’ll dive deep into some of the most stubborn barbecue misconceptions, revealing the science and expert insights that will empower you to cook like a true professional. Let’s ignite the truth and banish these thirteen barbecue beliefs forever.
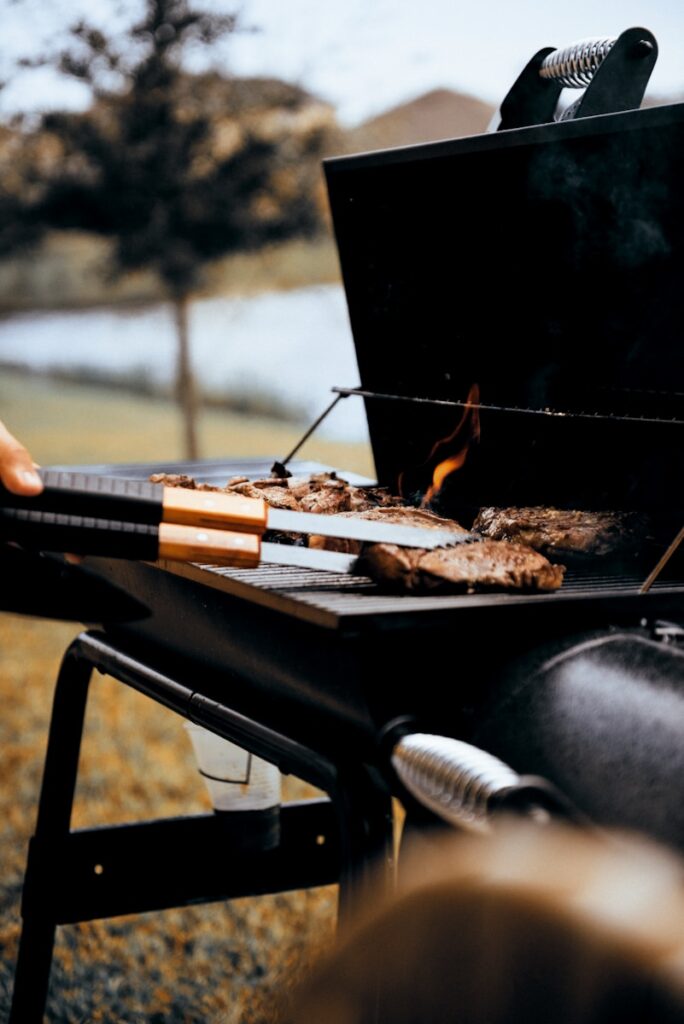
1. **Only Flip Steaks Once**Many chefs and home cooks swear by the rule of flipping steaks only once, believing it’s essential for forming a perfect crust and ‘sealing in juices.’ This method, often treated as culinary gospel, aims to create a deeply caramelized exterior without disturbing the meat. However, experts confirm there is ‘no proven science behind it,’ and this belief can actually prevent you from achieving the best results.
The idea that searing ‘seals in juices’ is itself a myth, as demonstrated by experiments where seared-first meats actually lost ‘1.68% more liquid’ than their counterparts. More importantly, leaving a steak undisturbed for too long on one side creates a significant temperature disparity, leading to uneven cooking. One side gets excessively hot, while the other remains relatively cool, making it difficult to achieve consistent doneness throughout.
Contrary to popular belief, ‘Flipping the steak more often actually allows it to cook more evenly.’ This technique helps to distribute heat more uniformly, preventing hot spots and ensuring the entire cut cooks at a more consistent rate. Frequent flipping also ‘will prevent the steak from curling up on the sides,’ ensuring a flat surface for optimal crust development across the entire steak. Embracing multiple flips is a simple, science-backed way to achieve a steak that’s evenly cooked and beautifully seared, just like the pros.

Pan-Fried Turkey Burgers
Ingredients
Equipment
Method
- Finely mince the shallot.
- In a large mixing bowl, gently combine the ground turkey, minced shallot, mayonnaise, steak sauce, dried parsley, 1/4 teaspoon garlic salt, and ground black pepper until just incorporated.
- Divide the mixture into four equal portions. Form each portion into a 3/4-inch thick patty, creating a small thumbprint indentation in the center to ensure even cooking.
- Lightly coat a large non-stick skillet with cooking spray and heat over medium-high heat until shimmering.
- Carefully place the turkey patties into the hot skillet, ensuring not to overcrowd the pan. Cook for 5 to 7 minutes per side, or until a deep golden-brown crust forms and the internal temperature reaches 165°F (74°C).
- Remove the cooked burgers from the skillet and allow them to rest briefly on a plate to redistribute their juices.
- Adjust seasoning with additional garlic salt and pepper to taste before serving.
Notes
Read more about: Beyond the Fries: 15 Mind-Blowing Dishes You Won’t Believe Your Air Fryer Can Make!
2. **Smoking Meat Adds Flavor (for Short Cooks)**The appeal of smoky flavor in barbecue is universal, leading many to assume that any exposure to smoke will instantly infuse meat with that coveted taste. This often results in frustration when a quickly grilled steak comes off the fire lacking the expected smoky punch. While it’s true that ‘smoking meat does add flavor,’ the context provides a ‘strong caveat’: its impact is highly dependent on the cooking duration.
The critical factor is time. Smoking ‘only really has an effect on meat that you cook for twenty minutes or longer.’ For shorter cooks, the chemical compounds responsible for smoky flavor simply don’t have enough time to penetrate the meat’s surface and interact meaningfully with its proteins. This means that ‘smoking a steak that will only be on the grill for a few minutes is not going to have the impact you are hoping it will.’
For quick-cooking items like thin steaks or chicken breasts, the primary flavors will come from direct heat, seasoning, and caramelization, not a substantial smoke infusion. If you desire a noticeable smoky character, you must commit to longer cooking times, which is why smoking is traditionally reserved for larger, tougher cuts that are cooked ‘low n slow’ for hours. For those quicker grill sessions, focus on robust rubs and high-heat searing to maximize flavor, rather than relying on a fleeting kiss of smoke.
72-Hour Sous Vide Short Ribs
Ingredients
Equipment
Method
- Preheat your sous vide water bath to 135°F (57°C) for tender, medium-rare ribs.
- Generously season the beef short ribs with smoked salt and crushed garlic, ensuring even coverage.
- Place the seasoned short ribs into vacuum seal bags, distributing them in single layers to prevent overcrowding.
- Seal the bags using a vacuum sealer, or use the water displacement method for zipper-lock bags, ensuring no air remains.
- Submerge the sealed bags into the preheated water bath, ensuring they are fully immersed.
- Cook for 72 hours, maintaining the consistent water temperature throughout the entire duration.
- Once cooked, remove the bags from the water bath and transfer the ribs to an ice bath for 15-20 minutes to chill completely if not serving immediately, or proceed to searing.
- Remove ribs from bags, pat them thoroughly dry with paper towels to ensure a good sear.
- Heat a cast iron skillet over high heat with a high smoke point oil until shimmering. Sear ribs on all sides until a deep, golden-brown crust forms, about 2-3 minutes per side.
- Rest the seared short ribs for 5-10 minutes before serving to allow juices to redistribute, then slice and serve.
Notes

3. **Oil Your Grill After Each Use**Many grillers habitually oil their barbecue grates after each use or before cooking, believing this creates a non-stick surface to prevent meat from adhering. This practice, borrowed from indoor pan-frying, seems logical. However, pitmasters universally advise against it, explaining that it’s largely unnecessary and often misguided.
In reality, ‘there is really no need for a lot of oil to be used when barbecuing.’ The true secret to a non-stick surface isn’t a layer of oil, but proper grill maintenance and sufficient heat. A grill that is ‘nice and clean and hot’ will naturally release meats. This involves diligently cleaning your grates to remove food residue and ensuring the grill reaches the correct high temperature before any food is placed on it.
Crucially, ‘It is the heat not the oil that makes the cooking surface non-stick.’ At high temperatures, proteins in the meat denature rapidly and form a crust that detaches cleanly from the grates. If the grill is too cool or dirty, meat will stick regardless of oil. Furthermore, excessive oil can cause hazardous flare-ups as it drips onto the heat source, potentially charring your food and imparting an unpleasant, acrid taste. Prioritize high heat and spotless grates for a genuinely non-stick and superior grilling experience, rather than relying on an ineffective layer of oil.
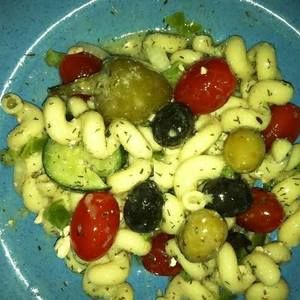
It’s Greek To Me! Pasta Salad!
Ingredients
Equipment
Method
- Cook your chosen pasta according to package directions until al dente; drain thoroughly and rinse with cold water to stop cooking and cool it down.
- In a medium mixing bowl, whisk together the olive oil, fresh lemon juice, red wine vinegar, minced fresh mint, oregano, basil, finely minced garlic, sea salt, ground black pepper, and optional anchovy paste until well combined.
- Prepare your remaining ingredients: halve the grape tomatoes, thinly slice the green onions, pit and halve the Kalamata and green olives, crumble the feta cheese, and slice or cube the grilled chicken breast.
- In a large mixing bowl, combine the cooled pasta, halved grape tomatoes, sliced green onions, pitted Kalamata olives, pitted green olives, crumbled feta cheese, sliced or cubed grilled chicken breast, and Greek-style hot peppers.
- Pour the prepared lemon-herb dressing over the pasta and other ingredients in the large mixing bowl.
- Gently toss all ingredients until the pasta and every component are evenly coated with the dressing.
- Taste the salad and adjust seasoning as needed, adding more salt, pepper, or a squeeze of lemon juice to enhance the flavors.
- Cover the bowl tightly and refrigerate for at least 30 minutes to an hour, allowing the flavors to meld and deepen before serving for the best culinary experience.
Notes
Read more about: Nourish Your Future: 14 Simple Anti-Inflammatory Foods Doctors Recommend for a Healthier You After 40
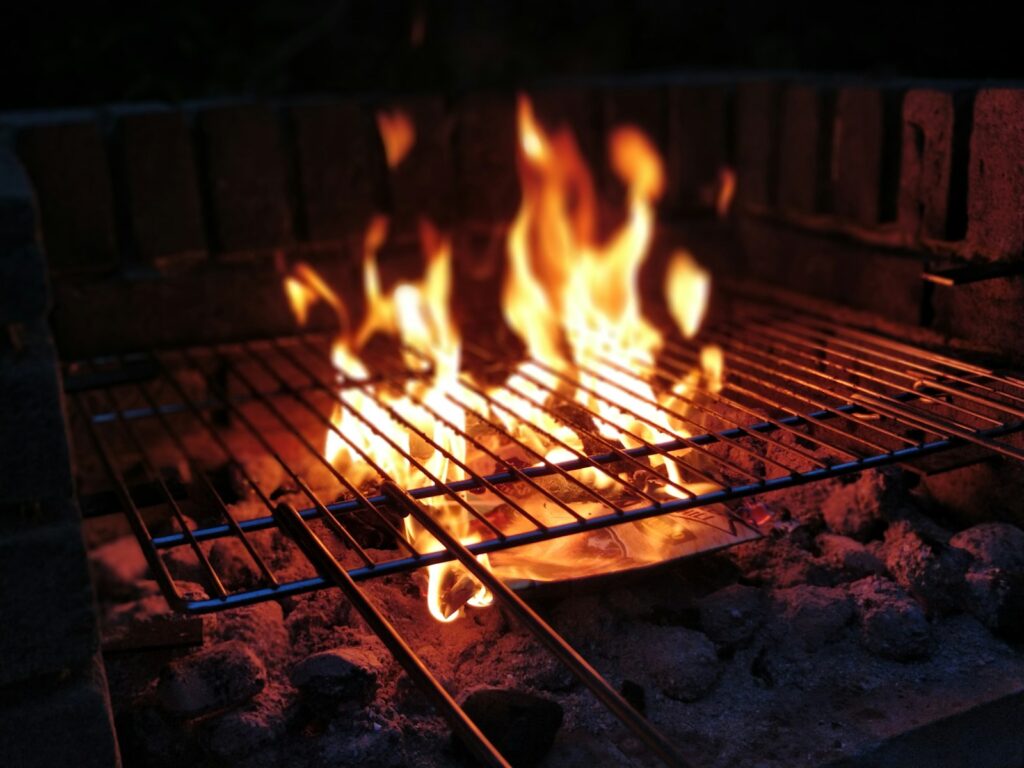
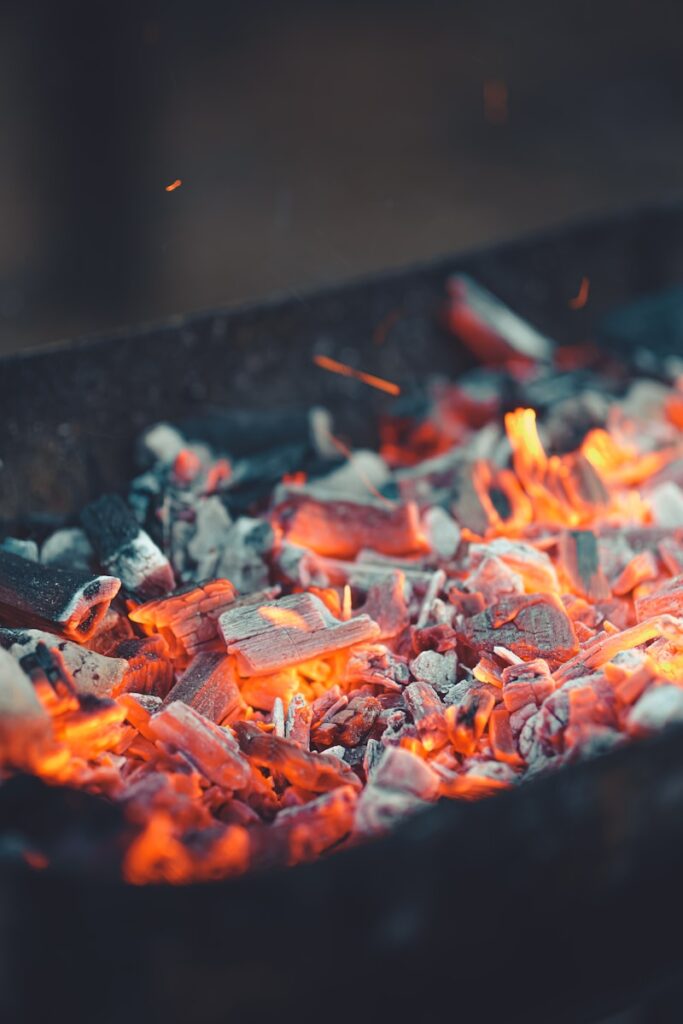
4. **Wet Wood Chips Give Off Better Smoke**One of the most stubborn myths in barbecue is the belief that ‘you should soak wood chips for one hour to get a real smoky flavor.’ This practice, widely disseminated among amateurs, is based on the idea that damp wood smolders longer and produces superior smoke. However, this widely accepted advice is unequivocally debunked by experts like World Barbecue Champion Melissa Cookston and the ’32 commonly believed BBQ myths debunked’ article.
Cookston explicitly states, ‘When you soak wood, it really won’t smoke until it’s dry… soaking wood is really kind of a misconception.’ The visible plumes rising from soaked wood are ‘just steam from the water evaporating,’ not flavor-imparting smoke. The wood must fully dry before it can undergo proper combustion to produce the desirable smoky compounds. During the steaming phase, no true smoky flavor is being imparted to your meat.
Barbecue experts agree that ‘the most flavorful smoke is blue smoke,’ which is characterized by being thin and almost invisible. This ideal smoke is ‘only achieved through the combination of high heat and dry wood.’ Soaked wood, by contrast, often produces thick, white, acrid smoke, which contains heavy molecules that impart a bitter, sooty, and unpleasant taste, often compared to ‘chewing on an ashtray.’ To achieve genuinely delicious, clean-tasting barbecue, always use dry wood chips or chunks. If you desire a longer burn, Cookston recommends using ‘larger chunks of wood,’ which naturally burn slower and produce consistent blue smoke without the detrimental steaming phase.
Read more about: 14 Major Cooking Oils That Flat-Out Refused to Reach a High Smoke Point Safely: A Deep Dive for the Discerning Cook
5. **Rubbing Steak with Salt Hours Before Cooking Is Bad**The proper timing for salting steak is a frequent point of confusion among grillers. Many operate under the belief that ‘if you salt the steak hours before cooking it will dry it out, leaving it tough and hard to chew.’ This fear often leads to salting the steak immediately before it goes on the fire, to avoid potential moisture loss and textural degradation. However, this understanding of salt’s interaction with meat is incomplete.
While salt does initially draw moisture to the surface through osmosis, the concern about immediate drying applies more to a short window of time – say, 1 to 2 hours before cooking. In this brief period, moisture is drawn out but doesn’t have time to be reabsorbed, potentially leading to a less ideal sear and a drier exterior. This explains why ‘It is better to just season the steak right before you put it on the fire’ if you are following this particular timing.
However, there’s a superior technique embraced by pitmasters for thicker cuts: salting much further in advance, typically 12 to 24 hours prior. In this extended timeframe, the salt dissolves into the drawn-out moisture, creating a natural brine. This salty liquid is then reabsorbed into the meat through reverse osmosis, penetrating deeper into the muscle fibers. This process, known as dry brining, significantly enhances internal moisture retention during cooking and seasons the meat thoroughly from within. So, while salting *a few hours* before can be problematic, salting *right before* or *a full day before* are both effective, with the latter often yielding a more tender, flavorful, and juicy result for larger pieces of meat.
6. **Smoke Rings Are a Sign of Quality and Flavor**The pink smoke ring, a vibrant band along the perimeter of smoked meat, is highly prized in barbecue circles, often perceived as the ultimate indicator of a pitmaster’s skill and a guarantee of delicious flavor. This visual aesthetic has become deeply entrenched in the mythology of barbecue, with many believing ‘a bigger smoke ring should intuitively mean more smoke flavor.’ However, experts uniformly debunk this notion, clarifying that it’s largely an aesthetic phenomenon.
Daniel Vaughn, BBQ Editor for The Texas Monthly, unequivocally states, ‘The smoke ring itself is a chemical reaction — a lot of things have to come into play as far as moisture and temperature, so even if it doesn’t have a smoke ring, it can still be plenty smoky.’ World Barbecue Champion Melissa Cookston adds that the smoke ring ‘has not effect on flavor whatsoever.’ The ring forms when nitric oxide (NO) and carbon monoxide (CO) gases from smoke react with myoglobin in the meat, preserving its pink color rather than letting it turn brown.
The formation and prominence of a smoke ring are influenced by factors like cooking temperature, wood type (some woods have more NO), and even the meat’s surface moisture. This means ‘you can create really smoky meat without producing much of a smoke ring at all.’ Conversely, a smoke ring can appear ‘even if there’s absolutely no smoke present’ under certain conditions, such as cooking with nitrate-rich vegetables. Cookston, as a judge, doesn’t consider it imperative: ‘I don’t think it’s imperative to have a smoke ring in order to have a great appearance.’ Therefore, while visually appealing, chasing the smoke ring distracts from the true drivers of exceptional barbecue: proper technique, consistent temperature, and quality ingredients for genuine flavor.
Having dismantled several entrenched barbecue myths, our journey into the science and strategy of superior grilling is far from over. Many more widely accepted ‘truths’ continue to steer aspiring pitmasters astray, often leading to less-than-perfect results or, even worse, unsafe practices. It’s time to peel back the layers of tradition and misconception to reveal even more actionable insights that will empower your barbecue skills. Let’s continue to unpack these overlooked blunders, transforming your approach to fire-cooked food with expert-backed knowledge.
Read more about: Experts And Insiders Reveal The Top 5 Perfumes Of All Time
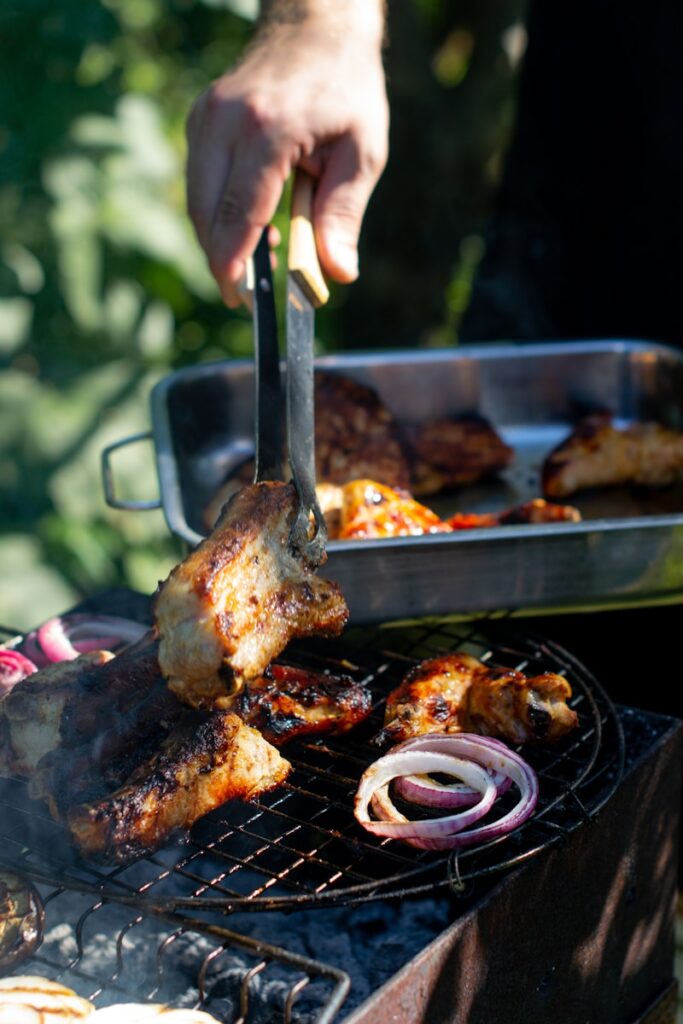
7. **Always Bringing the Highest Heat**There’s a common misconception that when it comes to barbecuing, the hotter the grill, the better the outcome. Many home cooks instinctively crank up the heat to the maximum, believing that intense temperatures are the key to quick cooking and superior results. This “hotter, the better” philosophy, however, often leads to meats that are overly dry or charred on the outside while undercooked within.
BBQ experts, including those consulted in the “9 Common Barbecue Myths Debunked” article, offer a more nuanced approach. They recommend a strategy that involves starting your cook at a higher temperature, but then progressively lowering it as the meat approaches its desired doneness. This measured application of heat is crucial because it helps the meat retain its natural moisture throughout the cooking process, preventing it from drying out prematurely.
The initial high heat can help achieve a desirable sear, creating a flavorful crust. But sustaining that intense heat can rapidly evaporate internal moisture, making for a tough and less palatable product. By reducing the temperature later in the cook, you allow the meat to finish gently, ensuring it remains juicy and tender. This technique is a game-changer for achieving consistently moist and delicious barbecue, proving that finesse with temperature control trumps raw heat every time.
Read more about: The 8 Most Common Reasons Why Your Classic Car’s Heater Fails in Winter: A Comprehensive Guide
8. **Meat Must Sit at Room Temperature Before Grilling**The idea of letting meat sit out at room temperature for an hour or more before it hits the grill is a pervasive piece of barbecue folklore. Proponents believe this step helps the meat cook more evenly, arguing that a cold center will prolong cooking and result in an unevenly done product. It sounds logical, yet this practice is largely unnecessary from a cooking standpoint and, more critically, introduces significant food safety risks.
Experts clarify that the internal temperature of the meat as it first touches the heat does not significantly impact how well it cooks or its final doneness. The minimal temperature change achieved by letting a large cut of meat sit out for an hour or two is negligible compared to the thousands of BTUs of heat radiating from your grill. The surface might warm slightly, but the core remains largely cool, making the effort largely futile for cooking benefits.
The real danger here lies in food safety. Leaving meat unrefrigerated for extended periods—especially “for hours”—creates a prime breeding ground for bacteria and increases the risk of foodborne illnesses. This practice puts your health and that of your guests at risk for a negligible, if any, cooking advantage. For safe and delicious barbecue, keep your meat properly chilled until you are ready to season it and place it on the hot grill, relying on your cooking technique rather than a risky pre-warming ritual.
Read more about: Beyond the Fries: 15 Mind-Blowing Dishes You Won’t Believe Your Air Fryer Can Make!

9. **Feeling Grill Temperature with Your Hand is Reliable**For generations, grill masters have theatrically held their hand over the grill grates, seemingly gauging the perfect temperature with a practiced flick of the wrist. This “cool trick” has become a staple of backyard barbecue bravado, allowing individuals to feel like seasoned pros without the need for fancy gadgets. However, despite its pervasive nature, this method is definitively unreliable and falls squarely into the realm of myth.
The fundamental flaw in this approach is human variability. As the “9 Common Barbecue Myths Debunked” article points out, “All of us react differently to heat so there is no precise science involved.” What feels “medium-hot” to one person might be “scorching” to another, leading to wildly inconsistent temperature assessments. Your pain tolerance, previous exposure to heat, and even the ambient air temperature can all skew your perception, making a definite temperature reading impossible.
To truly cook like a professional, precision is paramount, and that means using reliable tools. Investing in an accurate grill thermometer, or an instant-read meat thermometer for internal temperatures, is a simple yet essential upgrade. This eliminates guesswork and ensures your grill is consistently at the right temperature for optimal cooking, allowing you to achieve predictable, delicious results every time without risking undercooked food or burned exteriors. Ditch the hand-waving and embrace the data!
Read more about: The Definitive Guide: 12 Top-Rated Car Wash Soaps Under $15 for a Professional Shine

10. **More Smoke is Always Better**When it comes to barbecue, the desire for an intensely smoky flavor is perfectly understandable. This often leads to the belief that simply maximizing the amount of smoke billowing from your grill or smoker will automatically translate into a richer, more profound taste. World Barbecue Champion Melissa Cookston, however, emphatically states that “when it comes to smoke, there’s a real danger of having too much of a good thing.”
Cookston emphasizes a crucial principle: smoke should be treated like any other ingredient. Just as you wouldn’t “oversalt your food,” you shouldn’t “over-smoke your food either.” The goal is balance, not saturation. While some smoke is essential, an excess of it can actually impart an unpleasant, acrid, or even bitter flavor to your meat, completely overwhelming the natural tastes and careful seasoning.
The type of smoke matters as much as, if not more than, the quantity. Experts describe the ideal smoke for low-and-slow cooking as “thin blue smoke,” which is almost invisible and carries the cleanest, most desirable flavors. Thick, white, or heavy black smoke, often produced by wood that’s just starting to burn or by a fire starved of oxygen, contains heavy, acrid molecules that can make your barbecue taste “sooty and often likened to chewing on an ashtray.” Focus on quality, clean smoke, not just sheer volume, for truly exceptional barbecue.
Baked chicken meatballs
Ingredients
Equipment
Method
- Preheat your oven to 200°C (400°F) and line a large baking sheet with parchment paper.
- Tear the sourdough bread into small bits (about 1 cup) and soak them in the milk in a small bowl; set aside to soften.
- In a large frying pan, cook the bacon pieces over medium heat until crispy. Remove the bacon with a slotted spoon, leaving the rendered fat in the pan.
- Add the finely chopped onion to the pan and sauté until softened, about 5 minutes. Add the roughly chopped garlic and cook for another minute until fragrant, then remove from heat.
- In a large mixing bowl, combine the soaked bread mixture, crispy bacon, sautéed onion and garlic, the large egg, minced chicken, sundried tomato paste, smoked paprika, grated nutmeg, lemon zest, chopped basil, and a generous seasoning of salt and pepper.
- Gently mix all ingredients until just combined, being careful not to overmix, as this can lead to tough meatballs.
- Roll the mixture into golf-ball sized meatballs (approximately 30-35g each) and arrange them in a single layer on the prepared baking sheet, ensuring they are not overcrowded.
- Bake for 20-25 minutes, or until the meatballs are golden brown, cooked through, and reach an internal temperature of 74°C (165°F).
- Remove the meatballs from the oven, let them rest briefly for a few minutes, and serve immediately with your preferred accompaniment.
Notes
Read more about: Nourish Your Future: 14 Simple Anti-Inflammatory Foods Doctors Recommend for a Healthier You After 40
11. **Soaking Wood in Flavorful Liquids Boosts Taste**It’s a romantic idea: soaking your smoking wood in red wine for spicy notes, apple juice for fruity undertones, or rum for a caramel finish, as suggested by some sources. The thought of infusing your barbecue with these sophisticated flavors directly from the wood is certainly appealing to many. Unfortunately, this widely circulated ‘hack’ is another barbecue myth that simply doesn’t hold up to scientific scrutiny or practical application.
The reality is that wood, being a dense material, does not absorb significant amounts of liquid, especially not deep enough to make a noticeable difference in the smoke produced. As studies have shown, even prolonged soaking barely penetrates below the wood’s surface. What moisture is absorbed primarily turns into steam, which, as we discussed with wet wood chips, does not impart smoky flavor. The flavorful compounds in the liquids simply evaporate with the steam, rarely reaching or affecting the meat in any meaningful way.
Barbecue pundits are mostly “silent on this one” because the science is quite clear: there will be “so little in the way of liquid in the wood that it just isn’t realistic to think juice, or liquor-soaked wood will make any noticeable difference.” Instead of trying to infuse wood with external flavors, focus on the inherent qualities of different wood types (hickory, cherry, oak, etc.) and their natural smoke profiles. The true flavor of your barbecue comes from the wood’s natural combustion and the chemical reactions it facilitates, not from a fleeting soak in a beverage.
12. **Searing Seals in Juices**This is perhaps one of the most stubborn and widely believed myths, even championed by some celebrity chefs: that searing meat at high temperatures creates a protective crust that “seals in juices,” preventing moisture loss. The rationale seems intuitive – a hardened exterior must surely act as a barrier. However, extensive scientific experiments and expert consensus unequivocally prove this notion to be an “old wives’ tale.”
The crust formed during searing is indeed delicious and contributes significantly to flavor through the Maillard reaction (the browning process). But, as Professor McGee, author of “On Food and Cooking: The Science and Lore of the Kitchen,” explains, this crust is “not waterproof.” The continuous “sizzle of meat in the pan or oven or on the grill is the sound of moisture continually escaping and vaporizing,” demonstrating that juices are, in fact, still being lost.
Experiments conducted by culinary experts like Alton Brown and Kenji Lopez-Alt further debunk this myth. Their findings showed that “seared-first meats lost 1.68% more liquid than their counterparts,” directly contradicting the idea of juice retention. Searing is invaluable for developing complex flavors and appealing textures, but its role is not to seal in moisture. Understanding this allows you to appreciate searing for its true culinary benefits – creating that desirable caramelized exterior – rather than relying on a false premise.

Pan Seared Shrimp & Scallops Over Bacon-Corn-Chile Relish
Ingredients
Equipment
Method
- Dice bacon, bell pepper, and red onion. Mince garlic. Blanch corn ears for 1 minute in boiling water, then strip kernels. Roughly chop cilantro.
- In a large skillet, render the diced bacon over medium heat until crispy. Remove bacon with a slotted spoon and set aside, reserving the rendered fat in the pan.
- Add the diced bell pepper and red onion to the bacon fat in the skillet. Sauté over medium heat until softened, about 5-7 minutes. Add minced garlic and cook for another minute until fragrant.
- Stir in the corn kernels, chipotle, New Mexico chile, Ancho chile, and cumin to the skillet. Cook for 3-5 minutes, allowing the spices to toast and flavors to meld.
- Return the crispy bacon to the skillet with the relish mixture. Stir in the juice of one lime and the chopped cilantro. Season generously with salt and pepper to taste. Keep warm.
- Pat the shrimp and scallops very dry with paper towels. Season both sides of the seafood with salt and pepper.
- Heat a separate clean large skillet (or wipe out the first one) over high heat. Add 1/4 cup olive oil and heat until shimmering and almost smoking.
- Add scallops in a single layer, ensuring not to overcrowd the pan. Sear for 1.5-2 minutes per side until deeply golden brown and caramelized. Remove and set aside.
- Add more olive oil to the hot pan if needed, then add the seasoned shrimp. Sear for 1-2 minutes per side until pink and cooked through. Remove from pan.
- To serve, spoon a generous portion of the warm bacon-corn-chile relish onto serving plates. Artfully arrange the seared scallops and shrimp on top of the relish. Garnish with additional fresh cilantro and lime wedges.
Notes
Read more about: For Real, What’s Up? 15 Formerly Beloved American Eats That Have Quietly Disappeared from Our Plates

13. **Meat Should Fall Off the Bone**For many barbecue enthusiasts, the ultimate sign of perfectly cooked meat, especially ribs or pulled pork, is when it literally “falls off the bone.” This texture is often celebrated as the pinnacle of tenderness and a mark of a truly masterful cook. However, World Barbecue Champion Melissa Cookston challenges this widely held belief, asserting that “if it falls off the bone it can tend to be a little overcooked on the palate.”
Cookston highlights the importance of “mouthfeel” in barbecue. While extremely tender meat might seem desirable, meat that completely detaches from the bone often lacks the satisfying texture and slight “tug” that signifies ideal doneness. Daniel Vaughn, BBQ Editor for The Texas Monthly, echoes this, stating, “For me, I’d rather it not fall off the bone… I want there to be a little tug — you gotta know this thing was once an animal.” This slight resistance allows you to experience the meat’s texture and natural fibers, rather than it feeling “already chewed.”
Achieving that fall-off-the-bone texture often requires cooking meat past its optimal point, sometimes even resorting to methods like parboiling ribs before grilling, which Cookston does not recommend for championship-level barbecue. She aims for a finish “a few degrees back from falling off the bone,” where the meat is incredibly tender yet still retains its integrity and a pleasant bite. So, the next time you’re aiming for barbecue perfection, remember that a little tug isn’t a sign of failure, but rather a hallmark of expertly cooked meat.
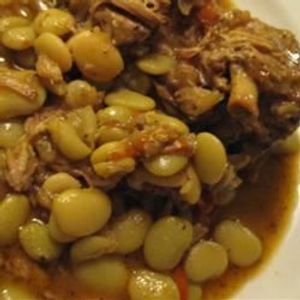
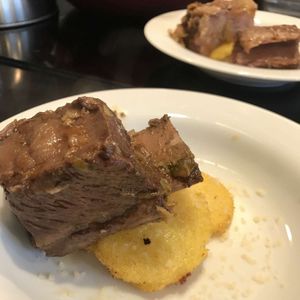
Neck Bones and Lima Beans
Ingredients
Equipment
Method
- Combine garlic powder, onion powder, cayenne pepper, rubbed sage, ground nutmeg, seasoned salt, salt, and pepper to create a spice rub.
- Thoroughly coat the pork neck bones with the prepared spice rub, ensuring even coverage.
- Heat olive oil in a large stockpot or Dutch oven over medium-high heat. Sear the seasoned neck bones in batches until well-browned on all sides, then remove and set aside.
- Add diced onion and chopped red bell pepper to the pot, scraping up any browned bits from the bottom. Sauté until softened, about 5-7 minutes.
- Return the seared neck bones to the pot. Add the dried lima beans and 10 cups of water (or preferred stock).
- Bring the mixture to a boil, then reduce heat to low, cover, and simmer gently for at least 1.5 to 2 hours, or until the neck bones are very tender and the meat easily falls off the bone.
- Check lima beans for doneness; they should be creamy and tender but not mushy. Adjust cooking time if necessary.
- Skim any excess fat from the surface of the stew if desired for a cleaner finish.
- Taste and adjust seasoning with additional salt, pepper, or cayenne as needed to balance the flavors.
- Serve hot, perhaps garnished with fresh parsley or cilantro for added freshness.
Notes
Read more about: Beyond 50: 8 Foods Americans Should Seriously Consider Cutting Back On
So there you have it, pitmasters and aspiring grill gods! We’ve journeyed through thirteen of the most pervasive, yet ultimately misleading, barbecue safety beliefs and cooking myths. From the precise science of heat management to the subtle art of smoke, and from debunking dangerous room-temperature practices to setting the record straight on what true tenderness feels like, you now hold the keys to transforming your barbecue game. It’s about knowledge, not just tradition. Embrace these insights, ditch the outdated advice, and prepare to ignite a new era of truly exceptional, safe, and flavorful barbecue. Your taste buds—and your guests—will thank you.


