

Woodworking is an incredibly rewarding journey, a creative pursuit that lets you bring your visions to life with your own hands. However, just like any craft, it comes with its unique set of challenges. Whether you’re a seasoned pro with years under your belt or just starting out with your first project, mistakes are an inevitable part of the learning curve.
But here’s the good news: many of these common woodworking blunders are entirely avoidable with a little forethought and the right know-how. Think of this as your shortcut, a way to skip the frustration, wasted materials, and countless do-overs that often accompany learning the hard way. We’re here to equip you with the practical advice and straightforward solutions you need to build smarter, faster, and with far more confidence.
So, if you’re ready to master your craft and ensure your woodworking projects not only look fantastic but also stand the test of time, let’s dive into the first seven crucial mistakes that can quickly turn your DIY dreams into project failures. We’ll break down why they happen and, more importantly, how to fix them and prevent them from ever derailing your efforts.
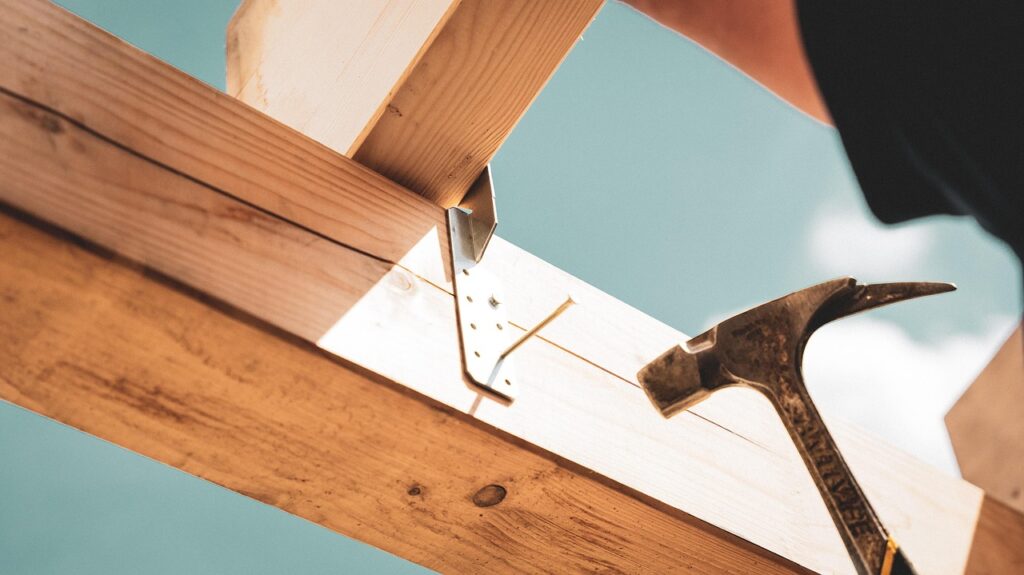
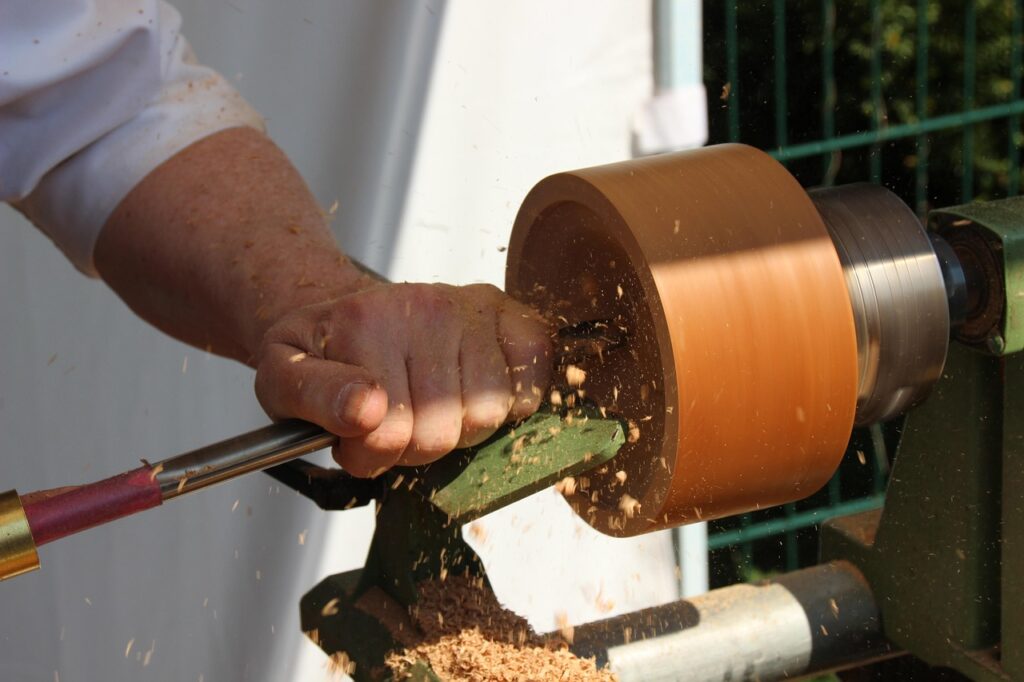
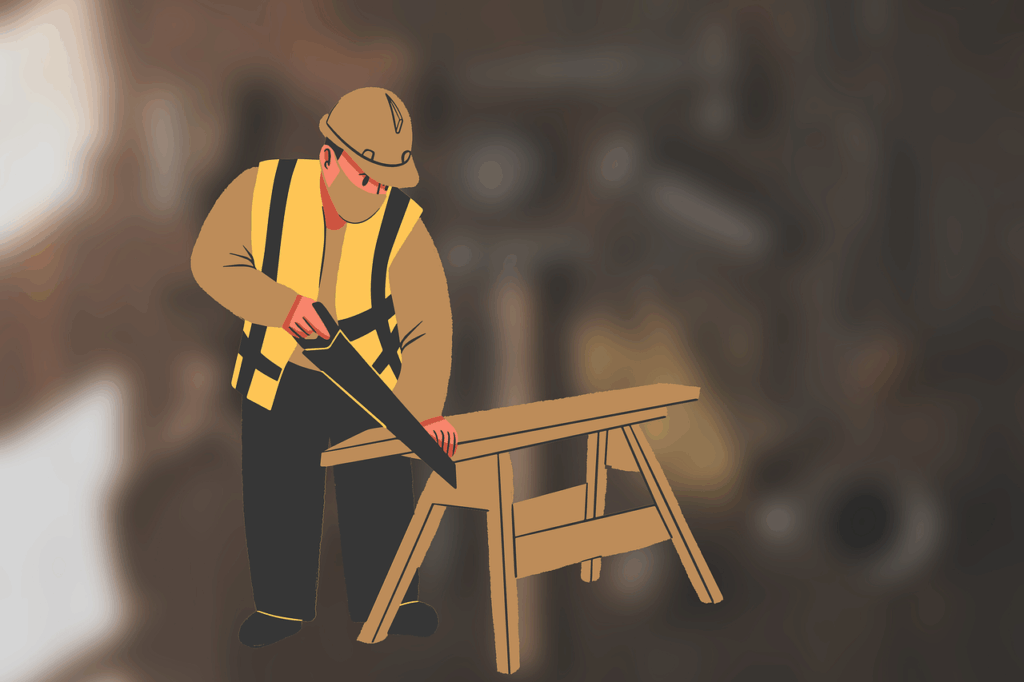
1. **Ignoring Safety Precautions**No project, no matter how exciting or urgent, is worth a trip to the emergency room. Ignoring safety precautions is, without a doubt, one of the most fundamental and perilous mistakes woodworkers make. It’s easy to get caught up in the flow of creation, but a moment of carelessness can have lasting consequences.
Essential gear like safety goggles and hearing protection isn’t just recommended; it’s absolutely crucial. They are designed to protect your eyes from flying debris and your ears from the loud, damaging noises generated by power tools. Likewise, using guards on power tools is critical; these are designed to shield users from sharp blades and moving parts. Removing or bypassing them greatly increases the risk of injury, and it’s a gamble you should never take.
Often overlooked, proper ventilation is another key safety aspect. Sawdust and fumes, while seemingly harmless in small doses, can be harmful when inhaled over time. It’s important to work in a well-ventilated area or wear a mask to avoid respiratory issues, ensuring your lungs stay as healthy as your projects.
Before you even power on a tool, make it a habit to check its condition. Dull blades or loose parts aren’t just inefficient; they are accidents waiting to happen. Regular maintenance and inspections can prevent these issues, keeping your tools (and you) in prime working order. And remember, wearing appropriate clothing is crucial; loose clothing or jewelry can get caught in machinery, so always opt for fitted, protective clothing while working.
Read more about: Unlock Years of Flavor: Your Definitive Guide to Restoring Any Cast Iron Pan to Pristine Condition
2. **Incorrect Measuring**”Measure twice, cut once” isn’t just a catchy cliché in woodworking; it’s a golden rule born from countless hours of frustration and wasted materials. Incorrect measuring is a common mistake many woodworkers make, often due to rushing or simply not double-checking their work. This inevitably leads to parts that don’t fit together properly, throwing off your entire build.
The fix for this seemingly small error can save you enormous headaches. Always use a reliable measuring tape or ruler, ensuring it’s placed correctly and precisely on the wood. Mark lightly with a sharp pencil or marking knife to avoid errors and ensure clarity. Fuzzy lines lead to fuzzy results, so clarity in your marking is paramount.
Before you even think about making a cut, double-check your measurements. It literally takes five extra seconds but can save hours of frustration later on. As experienced woodworkers can attest, wood doesn’t stretch, so getting it right the first time is essential. Using a square tool can also help ensure perfectly right angles, especially for projects requiring precise joints. Consistency in your measuring method is absolutely key.
By embracing these meticulous habits, many measuring mistakes can be avoided, leading to a much smoother and more enjoyable woodworking experience. Precision here is not just an ideal; it’s a foundational step for success.
Read more about: The Ultimate Guide to Washing Machine Longevity: 15 Expert-Backed Tips for Years of Trouble-Free Laundry
3. **Poor Glue Application**Glue is the unsung hero of many woodworking projects, providing the invisible strength that holds everything together. However, poor glue application is a common mistake that can significantly affect both the integrity and the appearance of your work. Applying too much glue can lead to unsightly squeeze-out, which is a pain to clean up and can interfere with finishes, while applying too little can result in weak joints that won’t hold up over time.
The secret lies in balance and technique. It’s important to use the right amount of glue and apply it evenly across both surfaces that will be joined. Tools like brushes or glue spreaders work exceptionally well for this, ensuring a consistent layer that maximizes adhesion without excess. Moreover, pay close attention to the type of glue being used. Different glues have different properties, open times, and drying requirements. Using the wrong type can lead to bonding issues or noticeable gaps in your joints.
Clamp pressure is another critical factor in successful glue application. Too much pressure can squeeze out virtually all the glue from the joint, leading to a starved joint that is inherently weak. Conversely, too little pressure won’t adequately hold the pieces together, preventing a strong bond from forming. You need to find that sweet spot—a balance that ensures firm contact without expelling all the adhesive.
Finally, cleaning excess glue promptly is crucial. Once it dries, especially with certain types of wood or glue, it becomes much harder to remove and can leave a visible residue or affect how a finish penetrates the wood. Regular practice and careful attention to these details will help you avoid these common pitfalls, ensuring strong, clean joints every time.
Read more about: Car Enthusiast’s Brilliant Tricks: Remove Scratches Easily—No Expensive Kits Needed for a Flawless Finish

4. **Not Clamping Properly**Even with perfect cuts and flawless glue application, your project can fall apart if you neglect proper clamping. Not clamping wood pieces securely can lead directly to alignment issues, leaving you with crooked components or frustrating gaps. This mistake often results from using the wrong type or size of clamp for the task at hand. It is crucial to have the right clamp for the job to ensure that the pieces stay precisely in place during the critical gluing and drying stages.
Another significant issue arises from applying uneven pressure. Wood needs consistent, uniform pressure across its entire joint surface to bond correctly and strongly. Too much force on one side can inadvertently create gaps on another, or worse, cause weak spots that undermine the overall strength of the project. Ensuring even distribution of pressure is as important as having the clamps themselves.
Furthermore, leaving clamps on for too short a time is another common error that can compromise your work. Glue needs adequate time to set and cure, not just to feel dry to the touch. Removing clamps too early, before the glue has achieved its full strength, can cause pieces to separate or shift, completely negating all your careful work. Always consult the glue manufacturer’s recommendations for clamping times.
To ensure even pressure and prevent damage to your carefully prepared wood, using a clamping caul is incredibly helpful. This simple tool helps distribute pressure from the clamps evenly over a larger area, avoiding dents, crushing, or other imperfections that can occur from direct clamp contact. A caul ensures that the pressure is spread out, leading to a much stronger and cleaner bond.
Read more about: Beyond the Call: A Tow Truck Driver’s Guide to Dominating Sand and Snow Without Outside Help
5. **Ignoring Grain Direction**Wood is a natural material with a distinct personality, and ignoring its grain direction is a huge mistake that many woodworkers make, often without realizing the profound impact it has. The grain dictates how the wood will respond to various cuts, sanding, and finishes. Going against the grain, whether with a saw, plane, or sandpaper, can result in unsightly tear-out, splintering, and a noticeably rough surface that’s difficult to rectify.
Think of wood as having a natural “flow,” a direction in which its fibers are aligned. When you are planing or sanding, heeding this grain direction can make the vast difference between achieving a glass-smooth finish and ending up with a jagged, splintered mess. Cutting perpendicular to the grain, particularly with certain tools, can lead to significant chipping and a much less clean edge than desired.
Understanding how to “read” the grain of a piece of wood requires practice and observation, but it is an invaluable skill that significantly improves the quality of your work. Cutting with the grain reduces resistance, resulting in cleaner, smoother cuts that require less subsequent sanding and finishing. It’s about working *with* the material, not fighting against it.
By making grain direction a priority in your approach, your woodworking projects will not only become more efficient but also yield significantly higher quality results. It’s a subtle detail that truly elevates your craftsmanship, transforming ordinary pieces into exceptional ones.
Read more about: Hold Up! These 10 Hollywood Stars Are Seriously The Toughest To Work With On Set

6. **Using the Wrong Finish**After all the careful cutting, shaping, and sanding, selecting and applying the correct finish for your woodworking project is the final, crucial step that can make or break its appearance and durability. A poor choice here can effectively ruin the entire piece, obscuring the wood’s natural beauty or failing to provide adequate protection. Different finishes offer different benefits; some excel at providing robust protection against moisture, while others are better suited for enhancing sheen and depth.
It’s absolutely important to match the finish to the specific wood type you’re working with and, crucially, to the project’s intended use. A finish perfect for an indoor decorative piece might be completely inadequate for outdoor furniture exposed to the elements. Using a finish that’s too thick can obscure the wood’s natural beauty and grain patterns, making the piece look artificial. Conversely, a finish that’s too thin might not provide the necessary protection or depth, leaving the wood vulnerable.
Therefore, one of the most critical pieces of advice is to always test the finish on a scrap piece of the very same wood you’re using for your project. This simple step ensures it produces the desired effect—color, sheen, and texture—without any unpleasant or project-ruining surprises. It’s a quick test that provides invaluable insight.
Applying the finish correctly matters just as much as choosing the right one. Inadequate surface preparation, like not sanding properly, or inconsistent application can lead to blotching, streaking, or an uneven absorption of the finish. With the right finish and careful, methodical application, a project can transform from good to stunning, lasting for years while showcasing the wood’s true character. Remember, the finish should complement the wood, not overpower it.
Read more about: The 14 Most Common Mistakes 15 Out of 20 First-Time Car Buyers Make: A Lifehacker’s Guide
7. **Rushing the Drying Process**Patience is a virtue in woodworking, and nowhere is this more evident than in the drying process for glues and finishes. Rushing the drying process is a common mistake that many woodworkers make, often tempted by the desire to quickly see the final product. However, skipping this crucial wait can severely compromise the strength and aesthetics of your work.
When glue or finish isn’t given enough time to dry and cure properly, it can lead to weak joints that fail prematurely, and uneven surfaces that look unprofessional. This directly compromises both the structural integrity and the visual appeal of your project, meaning all your previous efforts in measuring, cutting, and assembling could be undone by impatience. The bond simply won’t be as strong or durable as it should be.
Another significant issue stemming from premature handling is the risk of causing smudges, fingerprints, or other imperfections on a still-tacky surface. These blemishes can be incredibly difficult, if not impossible, to remove without damaging the finish, resulting in a less professional and polished final piece. It’s a frustrating setback that’s easily avoided.
To sidestep these problems, always diligently check the manufacturer’s recommended drying and curing times for both your glues and finishes. Set aside adequate time for each step, treating the drying phase as an integral part of the crafting process, not just dead time. Using a well-ventilated area for drying speeds up the process naturally, and fans can help, but make sure they don’t blow dust onto the wet surface. Remember, patience in drying means a stronger, more beautiful final piece; it’s absolutely worth the wait!
Now that we’ve tackled the foundational errors that can trip up even the most enthusiastic DIYer, it’s time to elevate our game. The next set of pitfalls often emerge as projects grow in complexity, or when we simply overlook seemingly minor details that have a monumental impact. These aren’t just about technique; they’re about foresight, understanding your materials, and respecting the process. Mastering these advanced considerations will not only refine your craftsmanship but truly transform your woodworking journey from good to genuinely great, ensuring your creations are as enduring as they are beautiful.
Read more about: The 14 Best Reusable Storage Bags: Still Leak-Proof After 11 Dishwasher Cycles

8. **Poor Project Planning**One of the most insidious ways a woodworking project can veer off course is right at the beginning: poor project planning. It’s incredibly tempting to dive straight into cutting and assembling, fueled by excitement for the final product. However, jumping into a project without a clear, detailed plan is a surefire path to miscalculations, wasted materials, and a frustrating series of do-overs that can quickly sap your enthusiasm. A well-thought-out plan acts as your blueprint, guiding every step and preventing costly errors.
Effective planning extends far beyond merely choosing what you want to build. It involves a systematic approach, starting with gathering all the necessary tools and materials before you make your first cut. This proactive step is crucial for preventing interruptions that can break your workflow and lead to rushed decisions. Crucially, accurate measurements must be confirmed and reconfirmed; any miscalculations at this stage will inevitably result in pieces that don’t fit, creating a domino effect of problems throughout your build. Double-checking these measurements rigorously can save you hours of frustration and wasted effort down the line.
Beyond just materials and measurements, creating a step-by-step plan or even a rough drawing can be incredibly beneficial. Visualizing each stage of the project helps you identify potential issues and challenges early on, allowing you to address them proactively rather than scrambling for a fix mid-project. Furthermore, setting realistic timelines is paramount. The urge to rush completion can lead to shortcuts and mistakes. Allowing ample time for each step—from cutting to drying—ensures precision, quality, and ultimately, a finished product you can be proud of.
Read more about: The 12 Most Blatant Failures: Unmasking ‘As Seen on TV’ and Detailing Products That Crumbled Under Scrutiny
9. **Misaligned Cuts**Few things are as instantly frustrating as making misaligned cuts, a common woodworking blunder that can undermine both the aesthetics and structural integrity of your project. This issue often stems from an improperly set up saw or, once again, incorrect measurements that were not thoroughly double-checked. The ripple effect of a single misaligned cut can throw off an entire assembly, leaving you with gaps, crooked components, or worse, weakened joints that compromise the piece’s longevity.
To prevent misaligned cuts before they ever happen, woodworkers must prioritize precision at every stage. This begins with meticulously double-checking all measurements before any wood meets blade. Employing accurate marking tools, such as a sharp pencil or a marking knife, coupled with precise techniques, helps ensure your cut lines are exactly where they need to be. Consistent use of a guide or a fence on your saw can also dramatically improve the straightness and accuracy of your cuts, providing a stable reference point that minimizes deviation.
Should a cut unfortunately go awry, it’s not necessarily the end of the world for your piece. Minor misalignments can sometimes be remedied with wood shims or fillers, carefully applied to adjust the fit. In other cases, a more precise re-trimming of the piece to match the intended dimensions might be necessary, though this option often requires re-calibrating other components. For hand tool users, maintaining sharp, properly maintained blades is key, as a keen edge reduces splintering and ensures a cleaner, more controllable cut. Ultimately, cultivating patience and an unwavering attention to detail are your best allies in achieving perfectly aligned, professional-quality cuts every time.
Read more about: Steering Clear of Costly Car Button Blunders: Essential DIY & Key Fob Mistakes That Could Drain Your Wallet
10. **Choosing the Wrong Wood**Selecting the right wood for your project is far more critical than many beginners realize. Choosing the wrong type of wood can introduce a host of significant issues, fundamentally impacting the project’s durability, appearance, and workability. Every species of wood possesses unique properties, including varying levels of hardness, distinct grain patterns, and specific moisture content responses. Failing to account for these characteristics can set your project up for failure before it even begins.
Consider the intended use of your piece. Using softwoods like pine, while often cost-effective and easy to work with, for projects that demand high durability—such as a kitchen countertop or a heavily used piece of furniture—will inevitably lead to early wear and tear. Conversely, attempting delicate carvings or intricate joinery with exceedingly hard woods like oak or maple might prove overly challenging, potentially leading to frustration or even damage to your tools. Furthermore, wood reacts to its environment; humidity fluctuations can cause certain species to warp or swell dramatically. It is absolutely crucial to consider the final location and environmental conditions of your project when making your wood selection.
Different woods also respond uniquely to various woodworking processes. Some are notoriously difficult to cut cleanly, others present challenges during sanding, and many absorb finishes in unpredictable ways. Beginners might find certain hardwoods intimidating due to their density and resistance, while experienced woodworkers are adept at handling their complexities. This variation extends to finishing; specific finishes adhere better to certain woods, directly influencing the final look and the longevity of the protective coating. Always, always test your chosen finish on a scrap piece of the exact wood you plan to use. By understanding the purpose of your project and the inherent characteristics of different wood species, you make informed decisions that are vital for success, ensuring your efforts result in a piece that is both functional and beautiful.
Read more about: Understanding Unimaginable Loss: Celebrities Who’ve Endured the Heartbreak of Losing a Child
11. **Skipping Sanding**In the realm of woodworking, skipping sanding is a tempting shortcut that many succumb to, driven by a desire to save time and accelerate the project’s completion. However, this seemingly minor omission is a grave mistake that inevitably leads to a rough, uneven, and ultimately amateurish finish. The critical role of sanding extends far beyond merely smoothing the surface; it is a foundational step that prepares the wood for a flawless final appearance.
Sanding meticulously removes any lingering imperfections left by cutting or shaping, such as blade marks, glue squeeze-out, or minor dents. More importantly, proper sanding opens the wood’s pores, allowing stains and finishes to be absorbed evenly and consistently across the entire surface. Without this crucial preparation, finishes will appear blotchy, streaky, and uneven, failing to enhance the wood’s natural beauty and often highlighting, rather than concealing, any remaining flaws. Even wood that appears smooth to the eye can harbor tiny, raised fibers and grain patterns that will stubbornly stand out once a stain or finish is applied.
To achieve genuinely professional results, a methodical approach to sanding is essential. This means starting with a coarse grit sandpaper to quickly remove major imperfections and shape the wood, then progressively moving through finer grits. Each subsequent grit should be used to meticulously remove the scratches left by the previous, coarser one, culminating in a smooth, silky surface (typically around 180-220 grit for most projects). Taking the time to sand properly is a small investment of effort that yields a monumental difference in the final outcome, transforming a good project into a truly polished and professional masterpiece.
Read more about: The Essential DIY Car Maintenance Tasks That Can Save You $3,000 (Or More!) In Repairs
12. **Failing to Test Stains and Finishes**After investing countless hours into careful cutting, shaping, and sanding, many woodworkers make the regrettable mistake of failing to test stains and finishes on a scrap piece of wood. The allure of seeing the final product can lead to directly applying these products to the project, often resulting in profound disappointment when the outcome doesn’t match expectations. This oversight can quickly undermine all previous efforts, leaving you with a finish that’s blotchy, too dark, too light, or simply not what you envisioned.
The critical importance of testing stems from the unique interaction between different woods and various stains or finishes. A stain that achieves a stunning effect on one type of wood can look entirely different, even undesirable, on another, due to variations in grain density and absorption rates. Testing allows you to accurately preview these variations. Furthermore, experimenting with multiple layers of finish on scrap pieces reveals how layering affects the final appearance—whether it deepens the color, enhances the sheen, or adds a desirable depth that a single coat wouldn’t provide.
Beyond aesthetics, testing is also invaluable for spotting potential compatibility issues. Certain finishes may not adhere properly to specific wood types, or they might react poorly with previous treatments, leading to flaking, bubbling, or an uneven cure. Occasionally, a finish might inadvertently highlight unwanted grain patterns or minor imperfections that were imperceptible on the raw wood. Discovering these issues on a scrap piece gives you precious time to adjust your approach, preventing project-ruining surprises. By meticulously testing and even recording your results, you equip yourself with the confidence to choose the right products and techniques, ensuring your final finish is exactly as intended, every single time.

13. **Overlooking Wood Movement**Wood, being a natural and hygroscopic material, is constantly in flux. Overlooking wood movement—its inherent tendency to expand and contract with changes in ambient humidity and temperature—is a fundamental mistake that can lead to catastrophic project failures down the line. Ignoring this dynamic behavior can result in unsightly cracks, severe warping, and disastrous joint failures, compromising both the structural integrity and aesthetic appeal of your cherished creations.
Successful woodworking absolutely demands that you account for wood movement during both the design and assembly phases of your projects. The goal is not to prevent movement entirely, as that is impossible, but rather to accommodate it. This means incorporating design elements that allow the wood to expand and contract freely without undue stress. Practical techniques include using floating panels in table tops or cabinet doors, which are secured in grooves that permit lateral movement, and elongating screw holes to give fasteners room to slide as the wood swells and shrinks. These deliberate allowances help keep furniture and other pieces in robust, good shape for generations.
Moreover, the choice of wood species plays a significant role in mitigating movement. Some woods are inherently more stable than others, exhibiting less dramatic changes in dimension. Properly seasoning or drying wood before use is also paramount, as it reduces the material’s initial movement tendencies. Finally, while you can’t control nature, keeping your finished woodworking projects in environments with stable humidity and temperature levels can significantly minimize the effects of wood movement, ensuring their beauty and functionality endure. Understanding and respecting wood movement is a hallmark of skilled craftsmanship, turning potential failures into lasting successes.
Read more about: Level Up Your Watchlist: The Ultimate Guide to the Best Movies Streaming on Amazon Prime Right Now
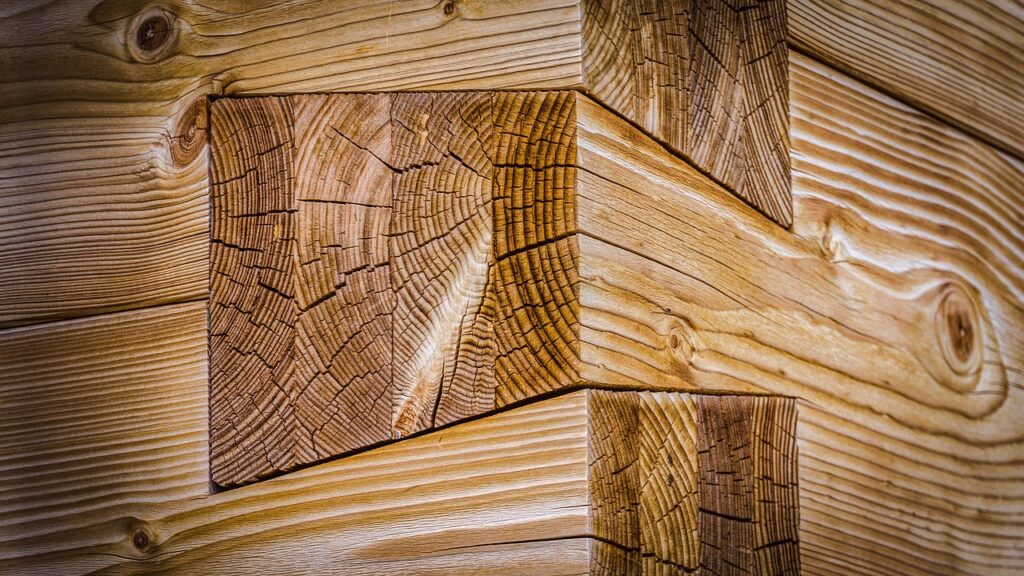
14. **Incorrect Joinery**At the very heart of any durable woodworking project lies strong, precise joinery. Incorrect joinery is a remarkably common pitfall, leading not only to visually unappealing results but, more critically, to a weakened overall structure that will fail prematurely. The precision with which joints are cut and assembled is paramount, as it directly dictates the stability, strength, and longevity of your work.
One significant aspect of proper joinery is selecting the right type of joint for the specific application. Each joint—be it a mortise and tenon, dovetail, dado, or butt joint—serves a distinct purpose and possesses varying degrees of strength and resistance to different forces. Using a simple butt joint, for instance, in an area requiring significant load-bearing capacity would be a glaring mistake, whereas a robust mortise and tenon joint is ideally suited for such demands. Selecting the appropriate joint is absolutely essential for creating a strong, lasting bond.
Beyond choosing the correct joint, precision in execution is non-negotiable. Incorrect measurements during layout or cutting frequently lead to a poor fit, resulting in gaps and inherently weak joints. Double-checking every measurement before making a cut, and consistently using reliable measuring tools like a woodworking square or a precise ruler, helps maintain accuracy. Additionally, the application of glue is vital; not using enough adhesive, or choosing the wrong type for the wood and joint, will compromise the bond, causing the joint to fail. Finally, remember to account for wood movement within your joinery, allowing for expansion and contraction to prevent joints from cracking or pulling apart over time. Mastering joinery is where true craftsmanship shines, transforming disparate pieces into a cohesive, enduring whole.
There you have it—a comprehensive tour through the most common woodworking pitfalls, from the basics of safety to the nuances of joinery and wood movement. Woodworking is an incredible journey of learning and creation, and every mistake is simply a lesson in disguise, a chance to refine your skills and deepen your understanding of this beautiful craft. By embracing these insights and applying the practical advice we’ve shared, you’re not just avoiding failures; you’re building a foundation of confidence and skill that will empower you to tackle any project with precision and pride. So, grab your tools, remember these lessons, and go create something amazing – happy woodworking!

")
