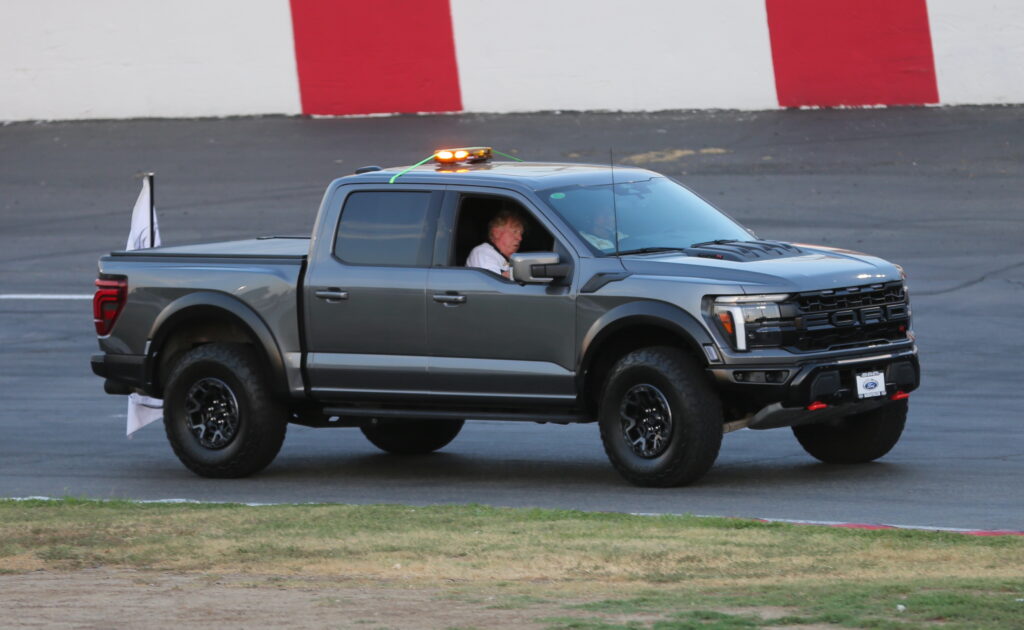
Ever started a DIY lift kit installation only to realize halfway through that you’re missing a critical tool or torque spec? You’re not alone. Many DIYers jump in excited to boost their ride’s performance and stance, only to hit frustrating roadblocks that could’ve been avoided with the right guidance. But what if you could transform your vehicle, giving it that aggressive look and enhanced off-road capability, all with your own two hands and without professional help?
This lift kit installation guide is your ride-or-die companion from unboxing to final torque checks. We’ll walk through every step—tool prep, safety must-dos, and those make-or-break torque specs—so you can tackle the project with confidence. Getting it right comes down to preparation, patience, and following the steps closely. Whether you’re lifting a Toyota Hilux or Ford Ranger, these universal principles apply, ensuring you not only avoid common pitfalls but finish with a professional-grade install that enhances both capability and curb appeal.
A successful DIY job comes down to the prep work you do before jacking up your rig. Getting this part right separates a smooth weekend project from a total nightmare. Trust me, a weekend of frustration can almost always be traced back to skimping on planning. We need to go beyond a simple tool list and dig into why certain gear is non-negotiable. This isn’t just about bolting on new parts; it’s about equipping you with the knowledge and skills to tackle this project independently, leading to a satisfying outcome and a truly empowered ride. Let’s get your rig sitting right and ready for adventure.
1. **Understanding Lift Kits: Defining Your Project’s Foundation**
Ever wondered how off-road vehicles get that extra height and rugged look? A lift kit is the answer. It’s a modification that raises your vehicle’s suspension or body, giving you better ground clearance and a more aggressive stance. Installing a lift kit boosts off-road performance and enhances your vehicle’s appearance, making it a popular upgrade for adventure seekers. It’s not just about looks—higher clearance means fewer scrapes on rocks or deep ruts when you’re out on the trails.
A lift kit increases the distance between your vehicle’s frame and the ground. This extra space allows for larger tires, which in turn improves traction and handling on uneven terrain. Beyond the obvious height advantage, lift kits offer practical perks. They improve approach and departure angles, letting you navigate steep inclines without damage. If you’re serious about off-roading, understanding the technical details of a lift kit installation is the first crucial step toward transforming your vehicle.
Not all lift kits work the same way, as there are two primary types: suspension lift kits and body lift kits. Suspension lift kits raise the truck’s frame above its axles by modifying components like shocks, springs, and possibly control arms. These kits provide a true height increase and are typically chosen for serious off-roading, offering significant performance gains. On the other hand, body lift kits elevate the body from the frame using spacers, keeping the original suspension intact. These are generally easier to install, cheaper, and often chosen for aesthetic upgrades or a modest height increase.
There are also other options like leveling kits, which typically provide 1-2 inches of lift for front-end alignment, and coil spacers, which offer a budget-friendly lift of 1-2 inches. Your choice of kit depends on your desired height increase, your intended use (whether chasing an aggressive look or building a serious trail rig), and your budget. Understanding these fundamental differences is key to making an informed decision before you even think about turning a wrench.
2. **Choosing the Perfect Lift Kit for Your Truck and Goals**
Before you dive into the installation process, the most critical decision you’ll make is selecting the right lift kit for what you actually want to do. Are you chasing an aggressive look for street presence or building a serious trail rig for rock crawling? Answering that question guides you toward a spacer lift, a full-suspension system, or something in between. Your vehicle model and how you plan to use it determine the best lift kit.
Aesthetic lifts often use simple spacers to raise the body or suspension. They’re cheaper and easier to install but offer little in performance gains for off-road capability. These are ideal if you’re primarily seeking to fit larger tires for a more imposing look without extensively modifying your vehicle’s ride dynamics. For those budget-conscious builders, a DIY lift kit installation with these simpler kits can be a great entry point into vehicle modification.
Performance lifts, however, involve a bigger job, often including new springs, beefier shocks, and upgraded control arms. These kits transform your off-road handling and capability, providing a true suspension lift that allows for more articulation and better ground clearance on challenging terrain. Professional-grade kits, like those specializing in custom solutions, ensure durability and are designed for extreme terrain. Matching the kit to your specific needs is paramount for satisfaction and safety.
Beyond the type, you must lay out every part from the box and check it against the packing list. This crucial step ensures nothing is missing before you begin. Remember, while a DIY lift kit might suit budget-conscious builders, the right kit from a reputable source ensures you get exactly what you need. Taking the time to properly research and select your kit based on your goals, vehicle model, and expected performance will prevent many headaches down the road.
Read more about: 14 Wild Ways Cycling Is More Than Just a Ride (Plus, How You Can Join the Fun!)
3. **Assembling Your Essential Toolkit and Safety Arsenal**
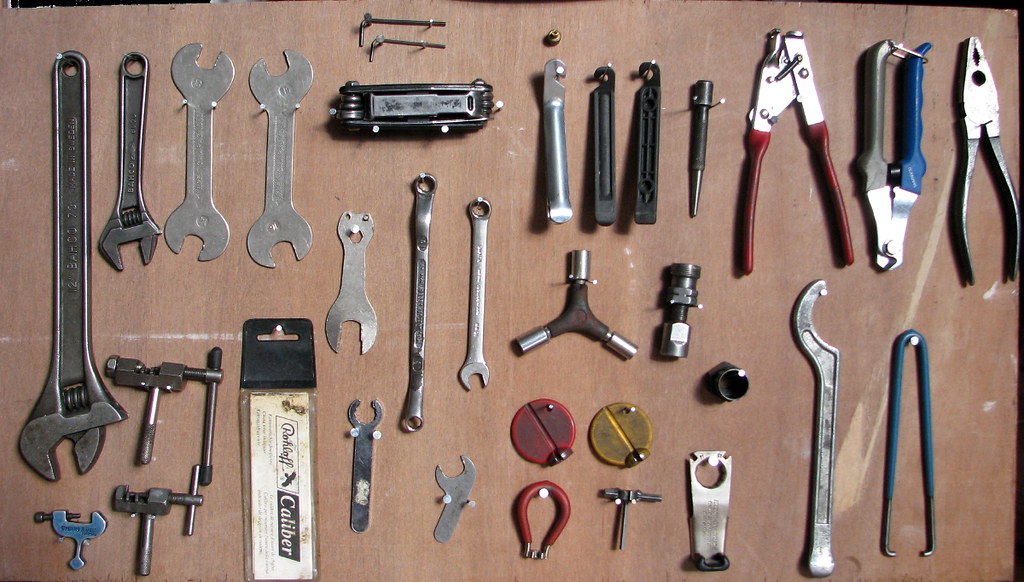
Getting ready to install your lift kit? Having the right tools and setup makes all the difference, turning what could be a weekend headache into a satisfying project. A good set of basic mechanics tools is non-negotiable. You’ll need a complete socket set (both metric and SAE sizes will be your best friend for stubborn, factory-torqued bolts), a breaker bar for extra leverage, and various wrenches. These core items form the foundation of your lift kit toolbox.
Beyond the basics, certain specialty tools are absolutely essential for both efficiency and safety. A torque wrench is non-negotiable; overtightening or undertightening suspension components is a massive safety risk. This tool ensures every nut and bolt is tightened to the manufacturer’s exact specifications. If your kit involves swapping coil springs, spring compressors are essential. If you don’t own a quality set, you can rent them from an auto parts store – never try to remove or install coil springs without them, as they hold serious amounts of stored energy.
Safety is paramount when working on your truck. You must have sturdy jack stands rated well above your vehicle’s weight. Never, ever work under a vehicle supported only by a jack; always use stands. Thick gloves protect your hands from flying rust, debris, and pinched fingers, while safety glasses shield your eyes from the same hazards. A well-stocked first aid kit should also be within reach. Protecting yourself is a given, so don’t cut corners on safety gear.
Finally, a pro tip that will save you hours of cussing: penetrating oil (like PB Blaster). Start soaking all the bolts you’ll be removing a day or two in advance. This one small step can be the difference between a seized-bolt nightmare and a bolt that spins right off. Having all this gear ready turns a frustrating job into a straightforward process. Don’t start the project until you can check off every box in your essential tools checklist, ensuring proper sizing to prevent rounding bolts and ensuring safe operation.
Read more about: Unlocking Peak Performance: A Deep Dive into Mark Wahlberg’s Ultimate Home Gym & How You Can Build Your Own Fitness Sanctuary
4. **Setting the Stage: Preparing Your Workspace for a Smooth Install**
Alright, you’ve got your tools and the kit is waiting. Now it’s time to get the truck ready for surgery. This is about setting yourself up for a smooth, safe, and less frustrating installation. First, find a good spot. Park your rig on a perfectly flat, level surface like a concrete garage floor or driveway. Never try this on soft ground or an incline, as it’s a recipe for disaster. A flat, hard surface ensures stability and safety throughout the entire process.
Good lighting is crucial for any detailed automotive work. Consider work lights if your space is dim, as visibility will be key when working under the vehicle and identifying various components and bolt locations. Proper ventilation also matters, especially if you’re using lubricants, paints, or penetrating oils, as these can produce fumes. Keep flammable materials away from your immediate workspace to maintain a safe environment.
Before lifting the truck, it’s vital to organize your workspace. Unbox your lift kit and lay out all components. Check everything against the parts list to ensure nothing is missing or damaged – better to spot issues now than mid-installation. Designate an area for removed components like old springs and shocks; a tidy workspace makes reassembly much cleaner and prevents lost parts. This organization saves you time and searching later on, keeping you focused on the task at hand.
Here’s a pro tip that will save you hours of cussing: The night before you start, soak every single bolt you plan on touching with a quality penetrating oil. This one small step can be the difference between a seized-bolt nightmare and a bolt that spins right off. This pre-soaking allows the oil to work its magic, significantly easing the removal of stubborn, factory-torqued bolts. Adopting a safety-first, plan-ahead mindset is the most important factor in any DIY lift, and a well-prepared workspace is the foundation for success.
Read more about: Decoding the Lexus RX Engine: A MotorTrend Analysis of Lifespan, Common Issues, and the Intricacies of Replacement

5. **Initial Vehicle Prep: Crucial Safety Measures Before Lifting**
With your workspace meticulously set up, it’s time to prepare your truck itself for the lift kit installation. Safety is paramount when working on your vehicle, and these initial steps are non-negotiable for preventing accidents. Begin by parking your truck on the perfectly flat, level surface you prepared, and engage the parking brake firmly. Then, use wheel chocks to prevent any movement; this is a simple yet critical step to ensure the vehicle remains stationary throughout the process.
Next, disconnect the battery. This is non-negotiable. Always disconnect the negative battery terminal first to prevent electrical shorts and accidental deployment of airbags or other electrical issues while you’re working on the suspension. This small action safeguards both you and your vehicle’s electrical system. Once the battery is disconnected, you can proceed with other preparations with greater peace of mind.
Before lifting the truck completely, loosen the lug nuts on the wheels without removing them completely. This seemingly minor step will make it significantly easier to remove the wheels once the truck is lifted and its weight is off the tires. Trying to loosen lug nuts on a lifted vehicle can be challenging and unstable, so tackling this while the wheels are firmly on the ground is the safest and most efficient approach.
Finally, lift the vehicle using the manufacturer’s recommended jacking points. Once it’s up, slide heavy-duty jack stands under the frame rails. Those rails are the strongest part of the chassis and the only place to trust for supporting the vehicle’s weight. Never, ever work under a vehicle supported only by a jack. It’s also recommended to have a friend assist you during the process, as some components can be heavy or cumbersome to handle alone, further enhancing safety.
Read more about: Paint Expert’s “Magical” Remedy: Effortlessly Erase Tree Sap Stains Without Damaging Your Car’s Clear Coat – A Popular Mechanics Guide
6. **Removing Existing Front Suspension Components with Precision**
Alright, this is where the fun really starts. With the truck securely lifted using a jack and supported by jack stands, you can now begin the meticulous process of removing the existing front suspension components. The first step involves removing the wheels entirely, giving you unrestricted access to the suspension system. Keep track of all nuts and bolts as you remove them; designating an area for old parts helps maintain a tidy workspace and ensures you don’t lose anything you might need later.
Next, you’ll need to disconnect key components of the front suspension. This typically includes items like sway bar links and tie rod ends. A little finesse goes a long way in preventing stripped threads or torn rubber boots. Use your penetrating oil again if any of these bolts are particularly stubborn, as rushing can damage components. Documenting original positions with photos can be incredibly helpful for reassembly later, especially if this is your first time tackling such a project.
You’re now on to one of the most critical parts: removing the factory springs and struts. Those coil springs hold a serious amount of stored energy, and you absolutely must respect that by using proper safety gear and techniques, specifically spring compressors. These tools are essential for safely compressing the spring before you remove the strut assembly, preventing it from rapidly decompressing and causing serious injury. Never attempt to remove or install coil springs without the appropriate spring compressor.
Carefully follow the instructions provided with your lift kit, as each model may have specific requirements for removing components. Disconnecting the shocks and U-bolts (if applicable to the front suspension design) will be part of this process. This step requires patience and attention to detail, as proper removal sets the stage for a smooth installation of your new lift kit components. Having your tools organized and within reach makes the whole process smoother and keeps you focused on the task at hand.
Continuing your DIY lift kit journey, the focus now shifts to completing the installation with the rear suspension, executing vital final checks, and ensuring your newly lifted rig performs safely and reliably for years to come. This phase requires the same attention to detail and commitment to safety that guided you through the front end, ensuring a comprehensive upgrade that truly enhances your vehicle’s capability and stance. By tackling these steps methodically, you’ll solidify your professional-grade installation, cementing both your mechanical skills and your truck’s commanding presence.
Read more about: Ebike Prices Are Rising: Your Essential Guide to Smart Shopping, Identifying Value, and Securing Unbeatable Deals Before 2025’s Tariff Hikes
7. **Conquering the Rear Suspension Install**
After expertly navigating the intricacies of the front end, you’ll likely find the rear suspension installation to be a more straightforward, almost celebratory phase of your project. The front suspension often presents the most complex challenges, making the rear feel like a victory lap. Typically, this part of the job involves working with lift blocks, add-a-leaf kits, or a complete replacement of the leaf spring pack, each offering a distinct path to achieving your desired rear lift height.
To begin, position your floor jack beneath the rear axle, providing just enough support to relieve the suspension’s tension. This isn’t about lifting the truck completely off its stands; rather, it’s about allowing the suspension to relax so components can be removed and installed with greater ease. Once the axle is adequately supported, you can proceed to carefully remove the old U-bolts and shocks, which secure the axle to the leaf springs. Remember, patience here prevents stripped bolts and damaged parts.
It’s absolutely crucial to replace your U-bolts during this process. They are considered a one-time-use component, designed to stretch and conform to the suspension components upon initial torque. Reusing old U-bolts can lead to hardware failure, compromising the structural integrity and safety of your rear suspension. Always invest in new, high-quality U-bolts to ensure your lift kit performs as intended and remains secure, a small but significant detail that separates a truly professional DIY job from a risky shortcut.
The growing enthusiasm for such modifications is reflected in market trends. The suspension lift kit market, for instance, was valued at a substantial $1.5 billion in 2024, according to Verified Market Reports. This robust market underscores the passion and investment many enthusiasts dedicate to transforming their vehicles, proving that the effort you’re putting in now is part of a much larger, vibrant community dedicated to enhancing off-road performance and vehicle aesthetics.
Read more about: Beyond Expectations: 14 Recent Autos That Prove Their Worth, From Future Tech to Retained Value

8. **Positioning New Rear Components**
With the old components carefully removed, it’s time for the satisfying task of installing your new rear lift kit hardware. This is where you truly start to see your truck’s elevated stance take shape. If your kit includes lift blocks, precision is key: ensure they are perfectly seated on the axle pad, paying extremely close attention to properly aligning the center pin. This pin is essential for maintaining the axle’s correct position relative to the leaf springs, preventing potential issues like axle wrap or instability under load.
For those utilizing an add-a-leaf system, a slightly different approach is required. You’ll need a set of robust C-clamps to compress the existing leaf spring pack, allowing you to effectively slide in the new, longer center pin that accommodates the additional leaf. This step ensures that the entire spring pack remains tightly integrated and functions cohesively, providing the intended lift and support. Proper compression and alignment of the leaves are vital for the integrity of the spring assembly.
As you work, maintaining the proper centering and alignment of the axle is paramount. Utilize your floor jack to make small, controlled adjustments, raising or lowering the axle as needed to perfectly line up the bolt holes for your new, longer shocks. This meticulous alignment ensures that all components fit without undue stress and that the suspension geometry remains correct, which is critical for both ride quality and safety once the truck is back on the road.
Once all the new hardware is in place, snug up all nuts and bolts by hand or with a wrench, but resist the urge to apply final torque just yet. It’s essential to wait until the truck’s full weight is back on the suspension before performing the final torque sequences. This allows all components to settle into their natural loaded positions, ensuring that the bolts are tightened accurately and securely, preventing premature wear or potential loosening down the line. This patience at the end pays dividends in long-term durability.
Read more about: Ignored No More: Unearthing the 16 Most Underrated Foreign Classic Cars of the 1990s
9. **The Final Checks That Guarantee a Safe Ride**
Completing the physical installation of your lift kit is a monumental achievement, but the job isn’t truly finished until you’ve performed these crucial final checks. These steps are what transform a collection of new parts into a safe, reliable, and high-performing vehicle. Once your truck is safely lowered to the ground, allowing its full weight to settle onto the newly installed suspension, immediately grab your torque wrench. Every single nut and bolt that was loosened or installed must be re-torqued to the manufacturer’s precise specifications. Components naturally shift and settle under load, making this re-torquing step absolutely critical for safety and preventing future issues.
A professional wheel alignment is not merely a strong suggestion after a lift kit installation; it is an undeniable requirement. Skipping this step guarantees accelerated wear and tear on your expensive new tires, and more importantly, it will result in an unsafe, wandering, and unpredictable ride. A lift kit fundamentally alters your truck’s suspension geometry, affecting camber, caster, and toe angles. Without proper adjustment, your steering will be off, and your tires will scrub prematurely. This is a non-negotiable final step for a safe, high-performing, and durable installation.
The enthusiasm for off-road culture, particularly in North America, plays a significant role in the booming suspension lift kit market. This region consistently leads the market, driven by a massive community of dedicated enthusiasts who value performance and customization. This collective passion fuels innovation and support within the industry, ensuring that resources and expertise are readily available for DIYers and professionals alike. You can explore more detailed market insights and trends from reputable sources like Wise Guy Reports.
For reference, understanding critical torque specifications is paramount. For strut tower nuts, aim for 45-60 ft-lbs, often requiring thread locker, with a recheck interval of 500 miles – these are safety critical. Control arm bolts require 80-100 ft-lbs, without thread locker, and a 1000-mile recheck. Leaf spring U-bolts need 75-90 ft-lbs, with thread locker, and should be rechecked at 300 miles, also being safety critical. Sway bar links usually need 35-45 ft-lbs, no thread locker, rechecked at 500 miles. Finally, wheel lug nuts are typically 90-110 ft-lbs, no thread locker, and must be rechecked at 100 miles, another safety critical component. Always consult your kit’s specific instructions for exact values.
Read more about: Avoid Costly Pitfalls: The Worst Mistakes to Steer Clear Of When Investing in an Excavator
10. **Critical Post-Installation Adjustments**
With all bolts torqued down and your truck back on its feet, there are a few more essential adjustments you must make before confidently hitting the road. Your truck’s geometry has undergone significant changes, and accounting for these alterations is vital for both safety and optimal function. These final tweaks ensure that every aspect of your vehicle is properly adapted to its new stance, from how it handles to how its lights illuminate the path ahead.
One of the first things you’ll notice after a lift is that your headlights are likely pointed towards the sky. This isn’t just an inconvenience; it’s a safety hazard that reduces your visibility and blinds oncoming drivers. You must re-aim them down to the proper level for safe nighttime driving. This adjustment ensures that your headlights effectively illuminate the road without causing glare, a small but critical step for responsible driving post-lift.
Perhaps the most crucial follow-up task is the ‘100-Mile Re-Torque.’ After driving your freshly lifted truck for approximately 100 miles, you need to get that torque wrench out again and meticulously re-check every single bolt associated with the lift kit. Components will have settled and shifted under real-world driving conditions, and this re-check ensures everything remains securely fastened. This level of attention to detail is a hallmark of the strong off-road culture, where thoroughness directly translates to safety and reliability on any terrain.
These critical post-installation adjustments are not merely optional; they are fundamental steps in ensuring the longevity and safe operation of your newly modified vehicle. Neglecting them can lead to premature wear, handling issues, or even dangerous situations. Taking the extra time now to fine-tune these elements will save you headaches and potential repair costs down the road, allowing you to fully enjoy the enhanced capabilities of your lifted truck.
Read more about: Mastering the Dark: Driving Pro’s Essential Guide to Enhancing Night Driving Visibility with Easy, Actionable Adjustments for Every Driver
11. **Ongoing Maintenance: Keeping Your Lift Kit in Top Shape**
Congratulations again on completing your lift kit installation! The journey doesn’t end with the final bolt, however. Proper post-installation checks and ongoing maintenance are crucial to ensure your hard work pays off with lasting performance, safety, and durability. A thorough post-installation inspection, coupled with a consistent maintenance regimen, will catch potential issues early, safeguarding both your investment and your peace of mind.
Begin your post-installation care with a careful test drive. Start with slow, careful driving in an empty parking lot or a quiet street. Listen intently for any unusual noises – clunks, squeaks, or groans – especially when turning, accelerating, or going over small bumps. Gently test braking performance, and check for proper clearance at full suspension compression and steering lock to ensure no parts are rubbing or binding. This initial drive helps you identify any immediate issues that might need attention.
After your initial drive, and critically again after 50-100 miles, double-check all torque specs. Re-torque every critical bolt to the specifications provided with your kit, paying special attention to suspension components and wheel lugs. These components are under constant stress and can settle or loosen slightly after initial use. Having a detailed lift kit installation checklist, which includes these torque values, handy for reference makes this essential task straightforward and ensures long-term security.
Professional alignment is, as stated earlier, mandatory immediately after installation. It’s also wise to have your alignment checked periodically as part of your ongoing maintenance. When you take your vehicle in, make sure to explain to your alignment technician that you have a new lift kit installed, as this will influence the specific adjustments they need to make. Correct alignment prevents uneven tire wear and ensures your truck handles predictably and safely, an investment in both safety and the lifespan of your tires.
For ongoing maintenance, implement a regular inspection schedule. Inspect all components monthly for any loose bolts, signs of wear, or damage. Keep all moving parts, especially bushings and joints, clean and lubricated as needed, referring to your kit’s specific maintenance schedule. If you frequently engage in demanding off-roading, consider upgrading to heavy-duty components to withstand the extra stress. Regular attention ensures your lift kit remains in top condition and continues to provide peak performance.
12. **Troubleshooting and Common Mistakes to Avoid**
Even the most meticulously planned DIY lift kit installations can present unexpected challenges. Anticipating common problems helps new and experienced DIYers alike complete their installations confidently, avoiding costly mistakes and ensuring safety. Knowing how to troubleshoot on the spot can save you significant time, frustration, and potential damage, empowering you to tackle issues as they arise without losing momentum.
One of the most frequent installation challenges is component misalignment or fitment issues. If parts simply won’t line up or seem impossible to install, resist the urge to force them into place with excessive leverage. Instead, double-check that you have the correct components for your specific vehicle model and that they are oriented correctly according to the installation diagrams. For stubborn bolts, reapply penetrating oil and allow it more time to work its magic before attempting to reapply torque; rushing can strip threads or damage hardware. If suspension components bind or seem restricted, verify their proper orientation and ensure all bushings are seated correctly.
Beyond fitment, several common mistakes can derail your project or compromise safety. Over-tightening bolts is a serious error that can strip threads, deform components, or even lead to catastrophic failure. Always use a calibrated torque wrench and adhere strictly to the manufacturer’s specified values. Crucially, never, ever skip safety steps like properly placed jack stands; working under a vehicle supported only by a jack is an unacceptable risk. Shortcuts on safety are never worth the potential consequences, reminding you that patience and adherence to protocol are your best allies.
Knowing when to seek professional help is also a sign of a smart DIYer. If you encounter complex drivetrain modifications, persistent alignment issues that you can’t resolve, or simply feel uncertain about any step, don’t hesitate to consult a professional mechanic or a certified installer. They possess specialized tools and expertise to tackle intricate problems safely and efficiently, ensuring your project is completed correctly and securely. Recognizing your limits is a crucial aspect of responsible vehicle modification.
Before embarking on this project, many common questions arise. The most frequent one is whether a professional wheel alignment is necessary: the answer is an unequivocal yes, it is 100% mandatory to prevent terrible handling and shredded tires. As for installation time, for a first-timer, blocking off a full weekend is wise, as a typical install can take 8 to 12 hours. Regarding warranties, a lift kit can potentially void claims on related parts, so discussing it with your dealership beforehand is recommended. Finally, the most dangerous mistake is not using a torque wrench, as guessing torque can lead to parts loosening on the road, emphasizing the critical role of precision in every step.
After guiding countless DIYers through lift kit projects, it’s clear that getting it right ultimately comes down to meticulous preparation, unwavering patience, and faithfully following every step. It’s more than just raising your truck; it’s about profoundly boosting its capability, creating an aggressive stance that commands attention, and achieving a truly personalized ride. You’re not just bolting on new parts; you’re building a more robust, more capable machine, directly with your own hands.
From years of experience, I’ve seen firsthand how the right kit and the proper guidance can utterly transform a vehicle, whether its destiny is conquering tough off-road trails or simply cruising city streets with an undeniable presence. By diligently adhering to those critical torque specs and prioritizing all safety checks, you’ll undoubtedly achieve a setup that is not only visually impressive but also durably engineered to withstand the test of time and terrain.
Read more about: Avoid the Pitfalls: The 14 Most Common Mistakes People Make When Installing Aftermarket Car Stereo Systems
So, embrace this project with unwavering confidence. If you’re truly ready to elevate your rig, trust me—it’s a ‘no-brainer’ decision. And remember, should you encounter any snag or question along the way, I’m genuinely here to help you roll through any challenge. Your lifted adventure awaits, built by you, for you.


