

There’s nothing quite like a perfectly cooked steak. That juicy, tender, flavor-packed bite can turn any ordinary evening into a special occasion, whether it’s a birthday celebration or simply the end of a long week. Yet, for many home cooks, what should be a culinary triumph often ends up as a dry, tough, or underwhelming experience. It’s a frustrating reality when you invest in good meat and still don’t get those restaurant-quality results you crave.
But here’s the exciting news: achieving steak perfection isn’t some secret art reserved for professional chefs. The truth is, many of us are making a handful of surprisingly common blunders that sabotage our efforts, often without even realizing it. These aren’t complex techniques; they’re fundamental missteps that, once identified and corrected, can dramatically transform your steak game from disappointing to utterly delicious.
So, if your steaks tend to come out less than stellar, or you’re ready to finally cook that dream fillet at home, you’re in the right place. We’re about to walk you through the most frequent pitfalls and, more importantly, equip you with simple, actionable fixes that will have you cooking perfect, juicy, and flavorful steaks every single time. Get ready to elevate your home cooking and impress everyone at your table!
1. **Not Bringing Your Steak to Room Temperature**
One of the most common missteps home cooks make is pulling steak straight from the fridge and throwing it onto a hot pan or grill. This seemingly small oversight can lead to significant problems, primarily uneven cooking. When a cold steak hits high heat, the outside sears quickly while the inside struggles to catch up, often resulting in a beautifully charred exterior but an undercooked, cool, or even raw center.
Beyond uneven doneness, cooking a cold steak can also impact its texture. The muscle fibers in cold meat tend to tighten up drastically when exposed to sudden heat, making the steak tougher and less tender than it should be. It’s a simple biological reaction that, unfortunately, can ruin the juiciness and melt-in-your-mouth quality you’re aiming for. This rush to cook can prevent the meat from reaching its full potential, leaving you with a less-than-ideal eating experience.
The good news is, this mistake has an incredibly easy fix: patience! Plan ahead and allow your steak to sit on the counter, unwrapped on a plate, for 30 to 60 minutes before you start cooking. For thicker cuts, it might even need up to two hours. This crucial resting period allows the meat to gradually come up to room temperature, ensuring it cooks evenly from edge to center, resulting in a consistently tender and perfectly cooked steak. Remember, food safety guidelines suggest meat shouldn’t be left out for longer than two hours, so keep that in mind.

2. **Cooking a Wet Steak**
Imagine trying to get a crispy crust on something that’s still damp. It’s simply not going to happen! This brings us to another prevalent mistake: cooking a steak that hasn’t been properly dried. When there’s excess moisture on the surface of your meat, whether it’s water or natural meat juices, that moisture will turn into steam the moment it hits the hot cooking surface. Instead of achieving that beautiful, flavorful brown crust, your steak will essentially steam or boil, leading to a pale, rubbery, and utterly disappointing texture.
This steaming effect prevents the crucial Maillard reaction, which is the chemical process responsible for creating that rich, caramelized, savory crust that makes a steak so irresistible. Without this reaction, your steak will lack depth of flavor and that satisfying textural contrast between a crispy exterior and a juicy interior. It also means your steak might take longer to cook, potentially drying out the inside as you wait for some semblance of browning to appear.
The fix here is both simple and non-negotiable: pat your steak thoroughly dry with paper towels before you do anything else. You want to absorb all surface moisture until the meat feels visibly dry. For an extra edge, especially if you have time, some pros even suggest placing your salted steak uncovered in the refrigerator for a few hours or overnight. This allows air circulation to dry the surface even more intensely, guaranteeing an outstanding crust when it hits the heat. Remember to dispose of used paper towels immediately to avoid spreading bacteria.

3. **Not Seasoning Properly or Early Enough**
Many home cooks approach seasoning steak with a cautious hand, fearing they’ll make it too salty or overpower it with spices. This apprehension is a major mistake! Since you can’t season the steak’s interior, playing it too safe with salt and pepper will deprive you of the rich, bold flavors and the development of that delicious, coveted crust. A light sprinkle just before cooking only flavors the very surface, and the seasonings don’t have enough time to penetrate the meat.
The timing of your seasoning also plays a pivotal role. Seasoning right before cooking means the natural juices remain locked inside, but the salt doesn’t get to work its magic. Conversely, if you season and let it sit for a short period, the salt can draw moisture out to the surface without allowing it to reabsorb, which can hinder crust development. The sweet spot for seasoning is crucial for maximum flavor and tenderness.
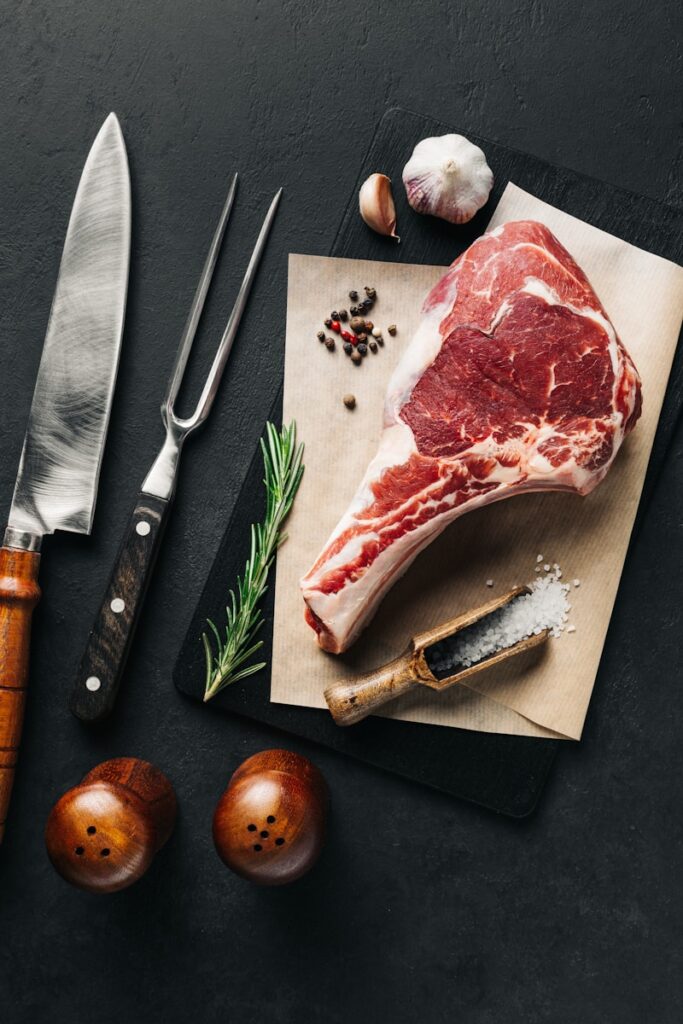
What to do instead? Be generous with your seasoning! Use kosher or sea salt, which have larger crystals that cling better to the meat surface, along with freshly ground pepper. Apply the seasoning heartily on both sides at least 30 to 40 minutes before cooking. Even better, season it the day before and leave it uncovered in the fridge. This acts like a “dry brine,” drawing moisture to the surface and then allowing it to be reabsorbed, making the steak juicier and carrying the seasoning deeper into the meat for a more profound flavor. Don’t be afraid to add garlic powder, onion powder, or fresh rosemary for extra aromatic notes.
4. **Choosing the Wrong Cut or a Lean Cut**
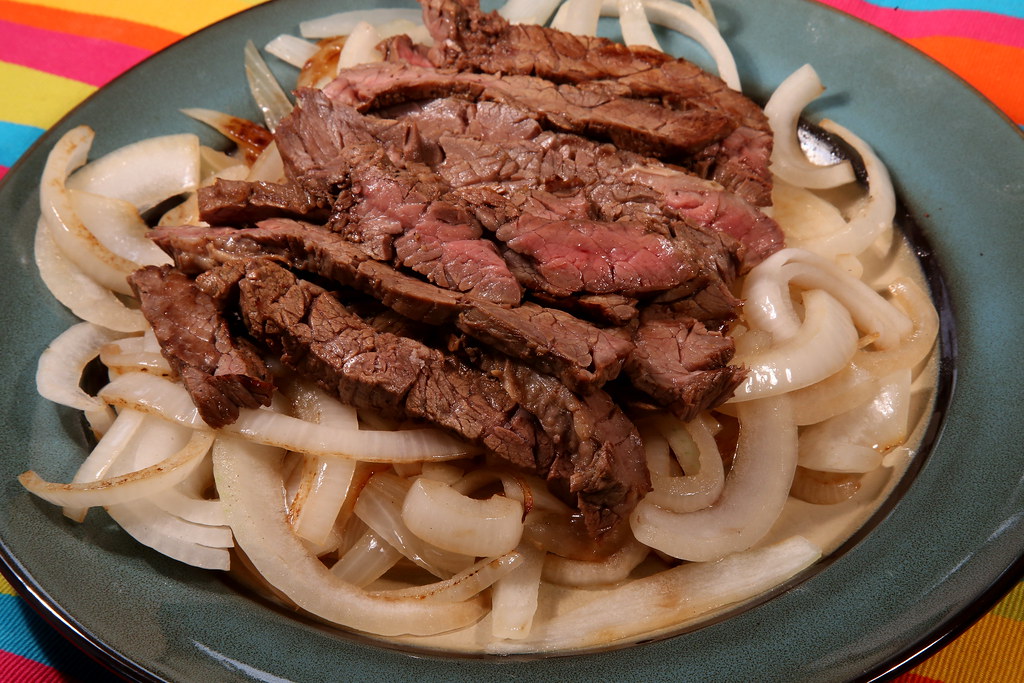
Picking out a steak at the grocery store isn’t always as straightforward as just grabbing the first one you see. There are numerous varieties of steak, and crucially, not all of them should be cooked the same way. A common error is treating all steaks identically, or worse, opting for lean cuts on steak night. Lean cuts, while healthier for some diets, tend to be tougher and drier because fat is what provides most of the flavor, tenderness, and juiciness in a steak. If you use a lean cut for grilling, you might end up with something chewy and unappetizing.
Similarly, certain cooking methods truly bring out the best in specific cuts. For instance, a thin flank steak might be fantastic for a stir-fry or sliced for sandwiches, but it won’t yield the same results on a grill as a thick-cut ribeye. Conversely, trying to pan-sear a very thick, tough cut that’s better suited for low-and-slow methods can also lead to disappointment. Not understanding these distinctions means you might be depriving yourself of the best possible flavor and texture from your chosen piece of meat.
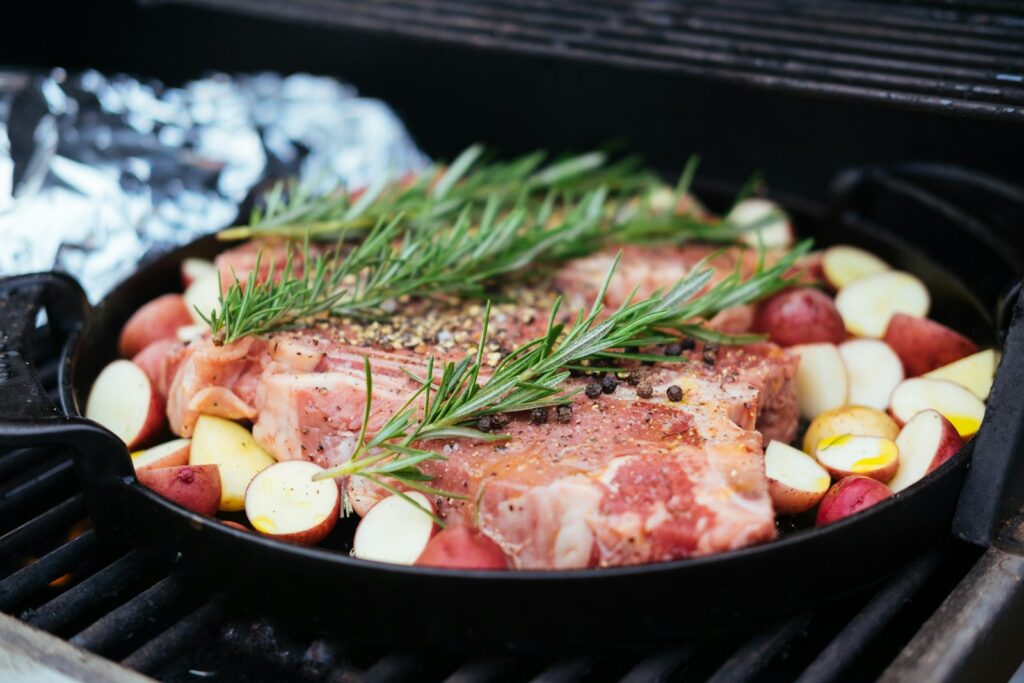
To avoid this pitfall, educate yourself on the different cuts and their ideal cooking styles. For high-heat grilling, opt for cuts like ribeye, New York strip, or T-bone, which boast ample marbling and thrive under direct heat, developing a beautiful golden-brown crust. For pan-searing, thinner cuts like flank or sirloin work wonderfully, especially as their drippings make a fantastic pan sauce. Always look for a steak with a healthy amount of marbling – those white flecks and lines of fat – as this is where the majority of the flavor and tenderness comes from. It might be a bit more expensive, but the enhanced taste and juiciness will be well worth the investment for your special meal.

5. **Not Buying From a Local Butcher**
While the convenience of picking up steaks during your weekly grocery run is undeniable, relying solely on supermarket selections can be a significant mistake if you’re aiming for truly knockout steak. Many standard grocery stores offer a limited variety, and the pre-packaged cuts might not always be the freshest or of the highest quality. You also typically don’t get the opportunity to ask detailed questions about the meat’s origin, specific aging, or optimal cooking methods.
This lack of specialized knowledge and personalized selection means you might miss out on superior cuts or unique options that could transform your steak experience. It’s like trying to find a tailored suit off the rack – sometimes it works, but a professional can make all the difference. The pre-cut, pre-packaged nature of supermarket meat means you’re often limited to what’s available, without the benefit of custom cuts or expert advice tailored to your needs.
To truly cook like a pro, it pays to trust a pro to help you get started. Make the extra effort to head to a local butcher shop. They often have a wider selection of higher-quality meats, including lesser-known options you might never find at a supermarket. A good butcher will not only be able to tell you how the steak was sourced and whether it’s dry-aged, but they’ll also be happy to cut it to your desired thickness right in front of you. Furthermore, they can offer invaluable advice on specific cooking techniques for different cuts, suggest alternatives if you’re on a budget, and even share tips on how to get the most flavor out of your purchase. Think of your butcher as your culinary consultant for all things meat – a resource that can significantly elevate your home cooking.

6. **Flipping Steak Incorrectly or Too Often**
There’s a persistent myth that flipping a steak only once is the best way to keep it tender and juicy, ensuring those coveted photo-worthy grill marks. While a single flip can certainly produce prominent char lines, sticking rigidly to this method can actually lead to uneven cooking and potentially a drier steak. The desire to constantly check and move the steak, or conversely, to leave it untouched for too long, are both common mistakes that interfere with optimal results.
When you flip a steak only once, one side is exposed to high heat for an extended period, creating a very strong crust but potentially overcooking that side while the other struggles to catch up. Too much flipping, on the other hand, prevents a proper, deep crust from forming because the meat isn’t in constant, undisturbed contact with the hot surface long enough. This prevents the Maillard reaction from fully developing, resulting in a less flavorful and less visually appealing steak.
The secret to a beautifully browned, evenly cooked, and juicy steak lies in a more dynamic flipping strategy. While you initially want to leave the steak untouched for the first few minutes to establish a good sear, once that initial crust forms, get into the habit of turning your steak multiple times as it cooks, especially when the heat is high. Flipping every 30 seconds or so allows the steak to cook more quickly and evenly – some studies even suggest up to 30% faster than the one-flip method. This frequent turning helps the meat cook consistently throughout, develops a more uniform crust, and prevents the edges from curling up, ultimately giving you a juicier, more tender result. Always remember to use sturdy tongs or a metal spatula for flipping, never a fork, as piercing the meat allows precious juices to escape.
We’ve already tackled some of the most fundamental errors that can hold back your steak-cooking prowess, from temperature mishaps to seasoning blunders. But the journey to truly perfect, restaurant-quality steak doesn’t end there. There are a few more common pitfalls that many home cooks unknowingly fall into, preventing them from achieving that ultimate juicy, flavorful, and perfectly seared result. Let’s dive into six more crucial mistakes and, more importantly, how you can easily avoid them to truly elevate your steak game, making every bite a celebration!
7. **Cutting Into It Too Soon**
A sizzling, perfectly seared steak fresh off the heat is undeniably tempting. The aroma alone is enough to make anyone’s mouth water, and the instinct to slice right in and taste your masterpiece is incredibly strong. However, succumbing to this immediate gratification is one of the quickest ways to undermine all your hard work and ruin what could have been a truly spectacular piece of meat.
When your steak cooks, its muscle fibers contract, pushing the precious, flavorful juices toward the center. If you cut into the steak immediately after removing it from the heat source, all that concentrated, hard-earned moisture will gush out onto your cutting board. This leaves you with a significantly drier, less tender, and ultimately less flavorful steak, turning a potential triumph into a disappointing damp squib. It’s a tragic waste of good meat and all the effort you put into cooking it perfectly.
The fix for this common error is simple but requires a touch of patience: let your steak rest. After cooking, transfer the steak to a warm plate or cutting board and loosely tent it with foil. For thinner cuts, five minutes of resting is usually sufficient, while heartier pieces might need up to 10 to 15 minutes. This resting period allows the muscle fibers to relax and the juices to redistribute and reabsorb throughout the entire steak, ensuring every single bite is as juicy and flavorful as possible. Think of it as the steak taking a well-deserved nap before its grand debut!
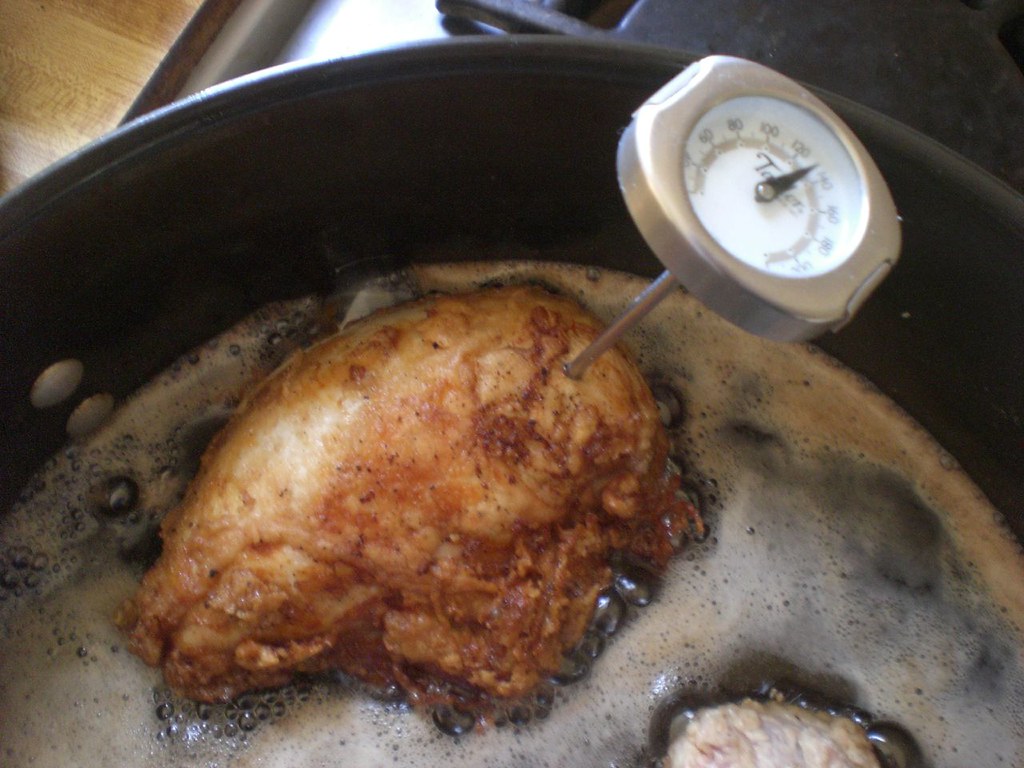
8. **Skimping on a Meat Thermometer**
Many home cooks pride themselves on their intuition, trying to gauge steak doneness by touch, by poking it with a fork, or simply by eye. While these methods might seem convenient, relying on such non-scientific approaches is a significant mistake that often leads to inconsistent results or, worse, an undercooked or overcooked steak. Visual cues can be incredibly deceiving; a steak might look beautifully seared on the outside, yet still be raw or very rare in the center.
Poking the steak with a fork, a common habit, is particularly detrimental. Each time you pierce the meat, you create an escape route for those precious, flavorful juices that you’ve worked so hard to retain. This means you’re not only guessing at doneness, but you’re actively contributing to a drier steak, sacrificing tenderness and flavor in the process. It’s a double whammy of inaccuracy and juice loss that can prevent your steak from reaching its full potential.
The solution to this guesswork is incredibly straightforward and a true game-changer: invest in a reliable instant-read digital meat thermometer. This simple tool takes all the uncertainty out of steak doneness, providing an accurate internal temperature in mere seconds. For a rare steak, aim for 125 degrees Fahrenheit; for medium-rare, 135 degrees; for medium, 145 degrees; and for medium-well, 150 degrees. Remember to insert the probe into the thickest part of the steak, avoiding bone or large pockets of fat. It’s also important to factor in “carryover cooking,” as the steak’s internal temperature will rise a few degrees as it rests, so remove it from the heat 5 to 10 minutes before your target final temperature. This tool is your secret weapon for consistent perfection.
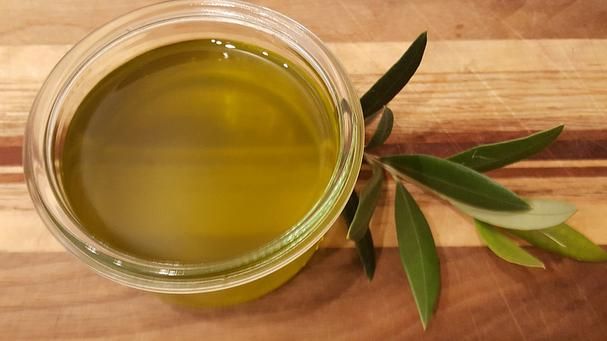
9. **Using an Oil with a Low Smoke Point**
When it comes to cooking steak, especially with high-heat methods like searing or grilling, the type of cooking oil you choose is far more critical than many home cooks realize. A common mistake is reaching for oils like extra virgin olive oil or butter to start your sear. While these are fantastic for lower-heat applications, they have relatively low smoke points – around 320 to 350 degrees Fahrenheit, respectively. Steak, however, is often cooked at much higher temperatures, sometimes up to 500 degrees Fahrenheit.
What happens when an oil surpasses its smoke point? It starts to break down, releasing unpleasant flavors, acrid smoke, and potentially toxic chemicals. This means your beautifully seasoned steak will be cooked in burnt oil, leading to a bitter, charred taste instead of a rich, savory crust. It also creates a smoky kitchen environment and can even pose a fire hazard if cooking on a grill with potential flare-ups. This mistake directly sabotages the very crust development you’re aiming for, leaving your steak tasting less than ideal.
To avoid this pitfall and ensure a clean, perfect sear, always opt for oils with high smoke points. Lighter oils like canola, vegetable, grapeseed, or cold-pressed peanut oil are excellent choices for searing and grilling, as they can withstand the intense heat required to develop that coveted golden-brown crust without burning. You can brush a small amount of oil directly onto the steak before cooking, or add it to the seasoning. If you love the flavor of butter, you can still incorporate it! Just add a knob of butter along with aromatics like garlic and thyme towards the *end* of the cooking process, allowing it to baste the steak and infuse it with rich flavor without the risk of burning.
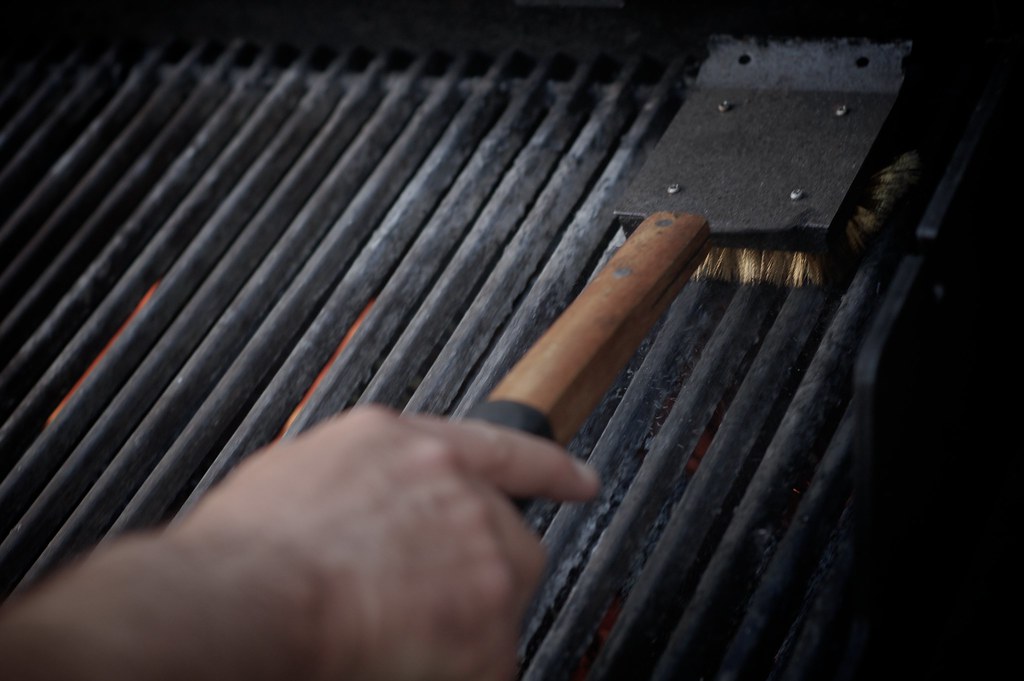
10. **Not Cleaning the Grill**
The thought of scrubbing a grill after a satisfying steak dinner isn’t exactly glamorous, and it’s a chore many home cooks procrastinate on. However, neglecting to clean your grill grates regularly is a significant mistake that can severely impact the quality and safety of your steak. Accumulated food debris, grease residue, and charred bits from previous cooks create a sticky surface. When your fresh steak hits these dirty grates, it’s highly likely to stick, tear, and lose its beautiful crust as you try to flip it.
Beyond the aesthetic and textural issues, a dirty grill can also pose health and safety risks. Old food particles and grease can harbor bacteria, and if left for extended periods, even mold can grow. Furthermore, excessive grease buildup can become a fire hazard, especially with gas grills. You’ve invested time and effort (and money!) into selecting and preparing a quality steak, so letting a little neglect stand in the way of cooking a perfect, clean, and delicious result is truly a shame.
The solution is consistent and thorough cleaning. Make it a habit to clean your grill grates each time you use it. For frequent cleaning, scrape off the grates while they are still warm, using a wire brush or scraper to remove any built-up grime. If you forgot to clean it last time, heat the grill with the lid closed until it’s warm, then scrape. For gas grills, remember to remove and clean the grease tray weekly with dish soap. A deep cleaning every six months for both charcoal and gas grills is also highly recommended, involving cleaning all parts with degreaser and a scrub brush. A clean grill ensures your steak cooks evenly, develops a perfect non-stick sear, and tastes its absolute best.
11. **Not Marinating Tougher Cuts of Steak**
While premium, well-marbled cuts like ribeye and New York strip often need little more than salt and pepper to shine, not all steaks are created equal. A common mistake is treating leaner, tougher cuts – such as flank, skirt, or hanger steak – as if they possess the same natural tenderness and flavor as their fattier counterparts. These cuts have denser muscle fibers and less intramuscular fat, which means they can be naturally chewy if not given a little extra help. Skipping a marinade for these particular cuts is a missed opportunity to transform them from tough to tender and infuse them with deeper flavor.
Without the tenderizing power of a marinade, these cuts might remain unpleasantly fibrous and lack a vibrant taste that complements their texture. You might end up chewing through a delicious flavor that’s just too much work. The purpose of marinating isn’t just to add surface flavor; it’s to actively break down those connective tissues and muscle fibers, making the meat significantly more palatable and enjoyable. It’s about coaxing the best out of cuts that require a bit more attention.
The fix is to embrace the marinade! For these tougher cuts, marinate them for at least four to six hours, using a balanced mix of acid (like citrus juice or vinegar), oil, and your chosen spices and aromatics. The acid gently breaks down the muscle fibers, resulting in a more tender steak, while the oil helps to carry and deepen the flavors throughout the meat. Be mindful, however, not to marinate for too long; leaving the meat in an acidic marinade for over 24 hours can actually have the opposite effect, turning the steak mushy. This simple step unlocks the hidden potential of more economical cuts, ensuring they’re just as tender and flavorful as their pricier cousins.

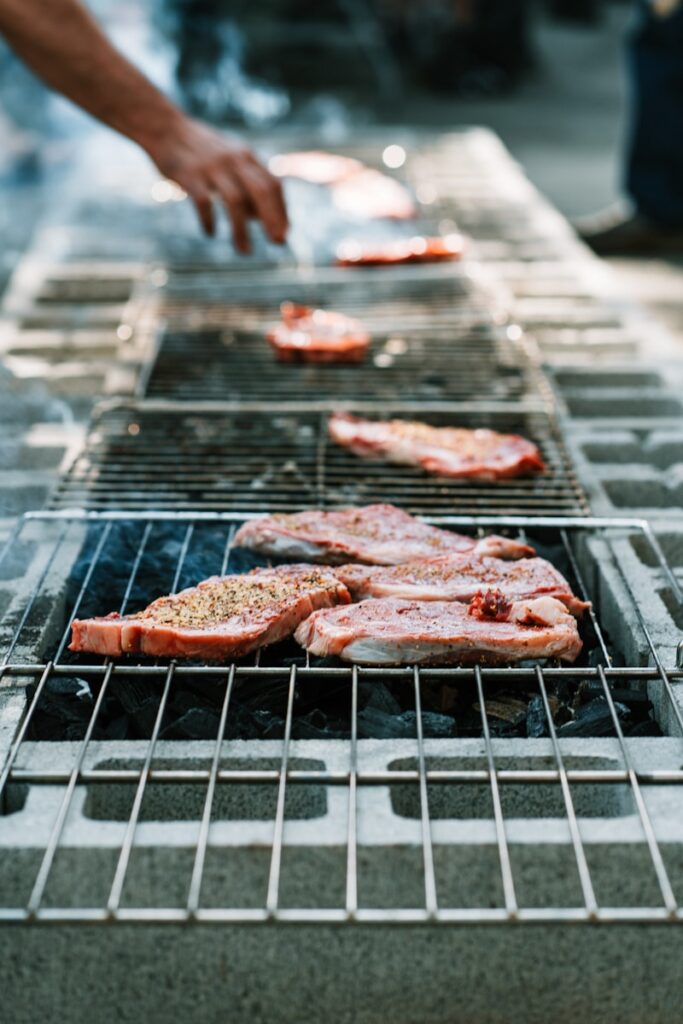
12. **Crowding the Pan or Grill**
You’re eager to get dinner on the table, so you might be tempted to load up your skillet or grill with as many steaks as possible to cook them all at once. This is a very common and easily avoidable mistake that can completely derail your quest for a perfect crust and juicy interior. When too many steaks are crammed into a limited cooking space, whether it’s a pan or a grill, moisture gets trapped around the meat instead of evaporating.
This trapped moisture turns into steam, effectively steaming your steak instead of searing it. Instead of that coveted Maillard reaction—the chemical process responsible for creating that rich, caramelized, savory, golden-brown crust—you’ll end up with a pale, gray, and rubbery piece of meat. The result is a steak that lacks both the depth of flavor and the satisfying textural contrast that makes a perfectly cooked steak so irresistible. It’s like trying to get a tan in a sauna; it just doesn’t work.
The simple yet crucial fix is to give each steak its personal space. Cook your steaks in batches if necessary, ensuring there’s at least an inch of space between each piece on the pan or grill. This allows moisture to escape freely and heat to circulate properly around the meat. Furthermore, always make sure your pan or grill is ripping hot before you add the steaks – it should be nearly smoking. For stovetop cooking, a heavy cast iron skillet is ideal as it retains heat exceptionally well. If grilling, preheat for at least 15 minutes and keep the lid closed to maintain that high, consistent temperature. By following this rule, you guarantee your steaks develop that beautiful, deep, and savory crust without sacrificing moisture or flavor.


