

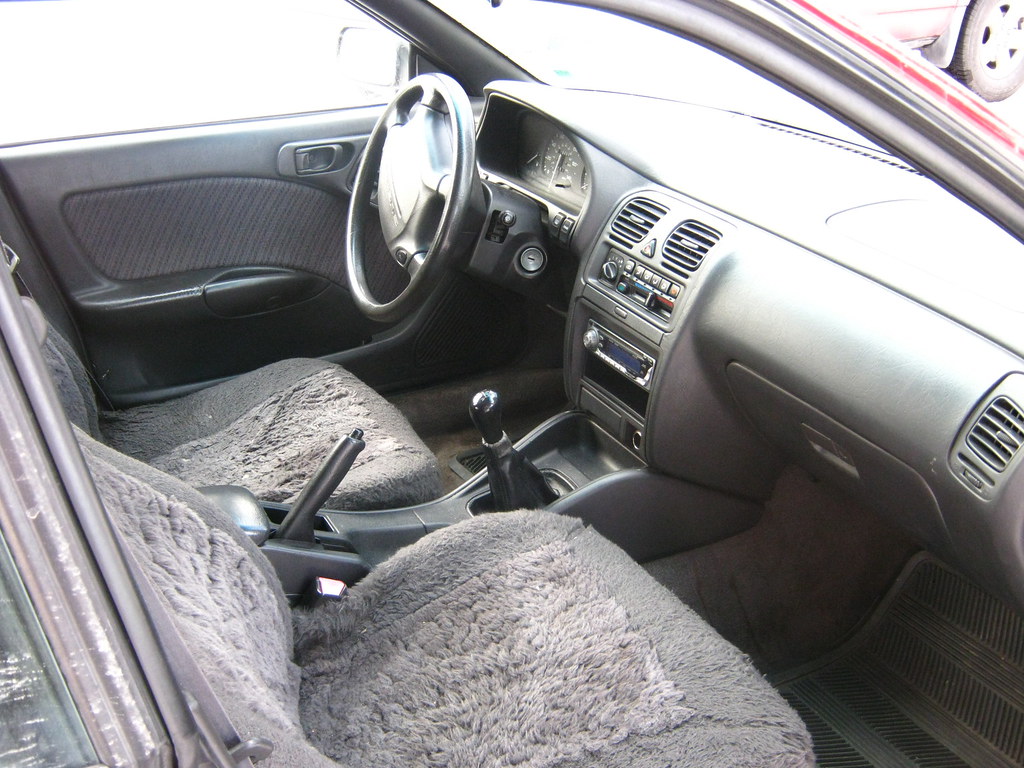
Restoring a classic car is a truly rewarding endeavor, and while the exterior often captures the immediate gaze, the interior plays an equally crucial role in the vehicle’s overall aesthetics, functionality, and inherent value. A meticulously reconditioned interior not only elevates comfort but also significantly contributes to the car’s historical accuracy and appeal. For classic car enthusiasts, understanding the intricacies of interior restoration, particularly when it comes to luxurious leather, is key to truly bringing a timeless beauty back to life.
At the heart of any successful classic car project lies a deep appreciation for the era the car represents, combined with meticulous attention to detail and sound technical knowledge. This journey of interior restoration requires a thoughtful approach, from comprehending the original materials and techniques to employing the correct tools and methods. We’re not just fixing things; we’re preserving a piece of automotive history, ensuring that every stitch and surface honors its heritage while providing a delightful driving experience.
Whether you’re a seasoned restorer with countless projects under your belt or a novice eager to delve into the captivating world of classic car interiors, this guide is crafted for you. We will walk you through a comprehensive, step-by-step process specifically designed for reconditioning your classic car’s leather interior. By following these insights and techniques methodically, you’ll be empowered to transform worn leather into a vibrant centerpiece, ensuring the heart and soul of your classic car shine through in every detail.

1. Thorough Assessment of Leather Condition
Before embarking on any restoration work for your classic car’s interior, a thorough and meticulous assessment of its current state is absolutely essential. This initial examination lays the groundwork for your entire project, allowing you to accurately identify areas that need attention, whether it’s simple cleaning or a more involved repair. Begin by carefully inspecting all leather elements, including seats, armrests, and door panels, searching for any signs of wear, damage, or deterioration.
As you assess, look for various types of damage that commonly affect classic leather. Scratches and scuffs are frequently found on high-traffic areas like seat bolsters and armrests. Light scratches might be remedied with a good leather conditioner, but deeper indentations or surface breaks will likely require the application of specialized leather filler to smooth out the area and prepare it for further restoration. Document the location and severity of each scratch, as this detail will be invaluable during the repair phase.
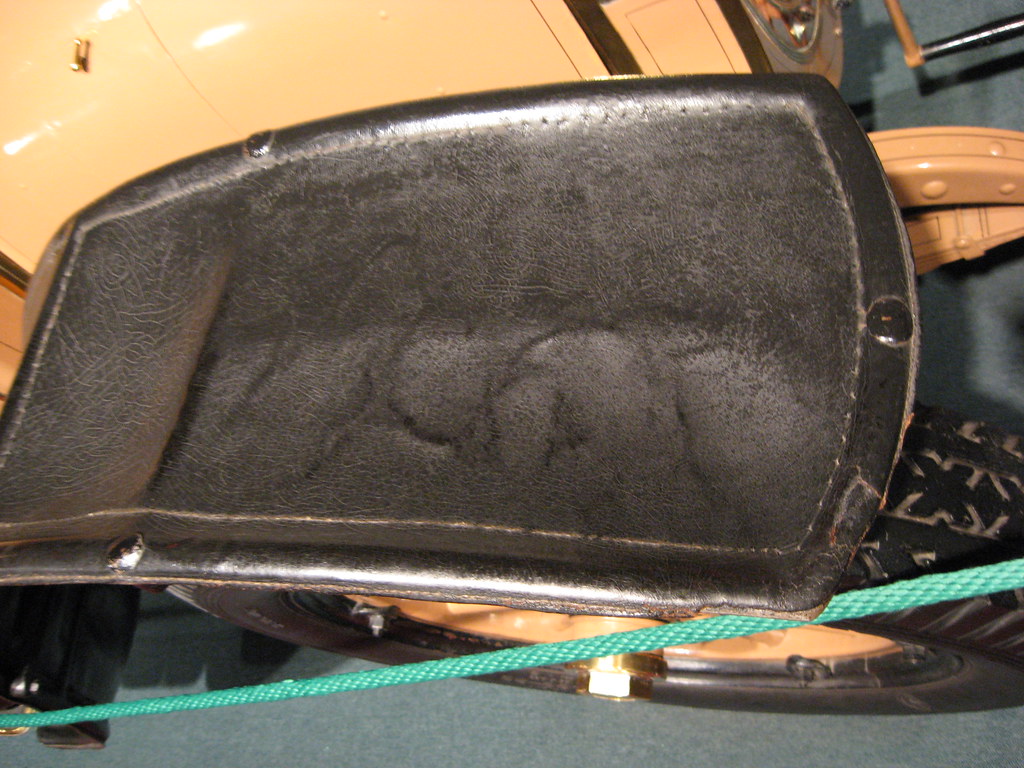
Next, examine the leather for cracks, which typically appear when the material loses its natural oils and dries out over time. These can range from superficial hairline fissures that affect only the surface appearance to deep, unsightly splits that penetrate the leather’s texture. Even more severe are tears and rips; these forms of damage demand immediate attention. While small tears can often be mended using leather patches and specialized adhesive, larger or more complex rips may necessitate professional intervention to achieve a durable and aesthetically pleasing repair.
Lastly, pay close attention to discoloration and stains. Prolonged exposure to sunlight can cause leather to fade or develop uneven coloring, diminishing its original vibrancy. Stains from food, drinks, or other substances, if not promptly treated, can penetrate deeply into the leather fibers, requiring specialized cleaning products and potentially re-dyeing. By meticulously documenting all forms of damage, you create a comprehensive reference point that will guide your restoration techniques and product selection, ensuring a targeted and effective approach.
Read more about: 13 Essential Red Flags: Your Step-by-Step Guide to Inspecting a Used Performance Car Like a Pro

2. Planning Your Restoration Project
With a comprehensive assessment of your classic car’s leather interior complete, the next critical step is to develop a detailed and well-thought-out restoration plan. This plan acts as your roadmap, ensuring that your efforts are efficient, effective, and ultimately lead to a high-quality finish that honors the vehicle’s original character. Your strategy should balance necessary repairs with any desired enhancements, always prioritizing the preservation of its vintage charm.
Begin by considering the specific materials originally used in your car’s interior. Classic cars often featured unique leather types, textures, and colors that may not be readily available in modern markets. Researching the vehicle’s original specifications is paramount; this will guide you in sourcing authentic replacements or suitable upgrades that maintain the aesthetic integrity. Create a meticulous list of all materials required for each component needing restoration or replacement, which might include specific types of leather, dyes, fillers, conditioners, and various adhesives.
Beyond just materials, evaluate the overall design and functionality of the interior. Look for opportunities to enhance comfort or usability without compromising the car’s vintage character. This might involve replacing worn foam padding under the leather to restore seat comfort, or refurbishing original hardware. Establishing a realistic timeline for your project is also crucial; break down tasks into manageable sections—such as tackling upholstery, or detailed cleaning—to maintain focus and prevent overwhelm, making the restoration process smoother and more enjoyable.
For leather components specifically, your plan should detail the approach for testing flexibility and softness, and assessing the extent of cracking or dryness. It’s often beneficial to conduct a small cleaning test on an inconspicuous area to gauge how well the material responds to restoration products. This crucial step helps determine whether re-dyeing, conditioning, or more extensive repairs are needed to restore the original appearance, ensuring that every decision contributes to a lasting and authentic restoration.
Read more about: The Absolute Worst Financial Missteps Supercar Owners Make (and How to Avoid Them)
3. Gathering Essential Materials and Tools
Embarking on the reconditioning of a classic car’s leather interior demands more than just enthusiasm; it requires a carefully curated collection of materials and specialized tools. Having the right resources at your disposal is fundamental to ensuring a high-quality finish that significantly impacts both the appearance and the functionality of your vehicle’s interior. Investing in proper equipment from the outset will streamline your process and elevate the final results.
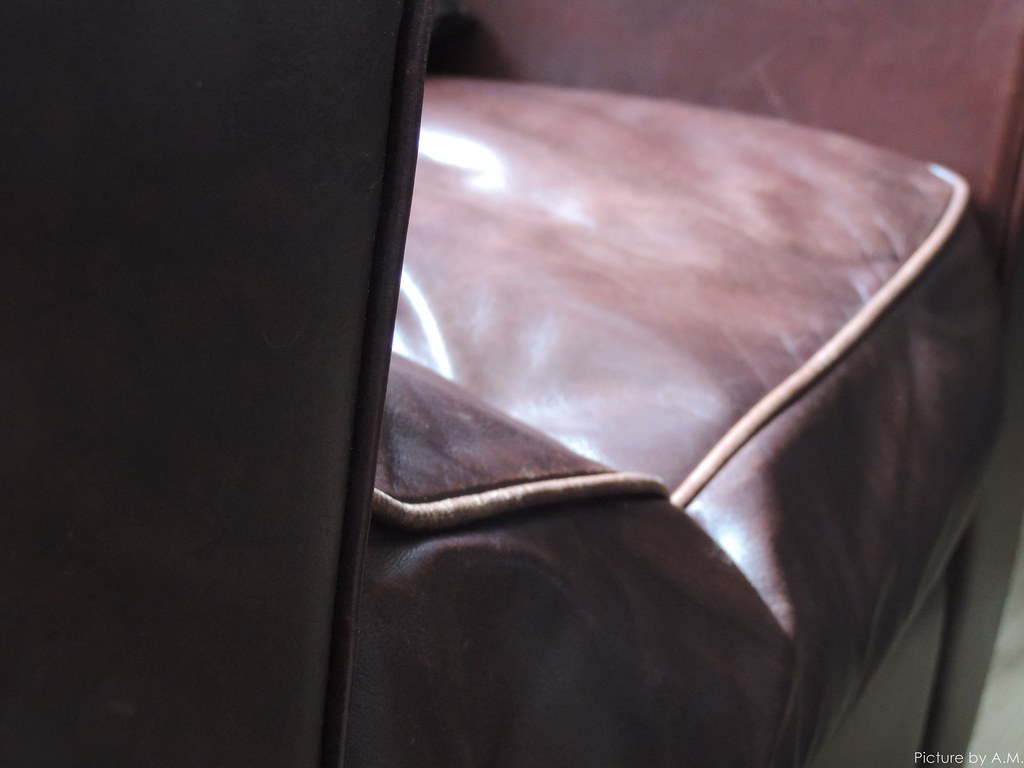
Foremost among your materials is the upholstery fabric itself. For leather interiors, this means selecting high-quality leather that either matches the car’s original period for authenticity or offers a suitable, period-correct upgrade. Full-grain leather is often the material of choice for high-end restorations due to its durability and how beautifully it ages, developing a unique patina over time. Alongside the leather, high-density foam padding is crucial for seat restoration, providing both comfort and long-lasting support, with various thicknesses available to achieve the desired contour and feel.
Beyond the primary leather and foam, consider ancillary materials such as carpet and insulation. While our focus is leather, a complete interior often requires attention to these areas too. Selecting carpet that perfectly matches the car’s period-appropriate color and texture can rejuvenate the entire interior. Furthermore, insulation materials, like sound-deadening mats, are essential for minimizing road noise and improving temperature regulation, thereby enhancing the overall driving experience, ensuring your classic feels as luxurious as it looks.
Your toolkit will be equally vital. A sturdy staple gun is indispensable for securely attaching new upholstery to seat frames, ensuring a taut, professional finish. For custom work or repairing intricate seams, a sewing machine capable of handling heavy materials will be a significant asset. Complementing these, tailoring scissors are necessary for achieving clean, precise cuts on various fabrics and leather, which is critical for a seamless fit. Additionally, specialized adhesives, such as spray adhesive or contact cement, are crucial for bonding foam to surfaces and securing trim pieces firmly. A heat gun can be incredibly useful for molding upholstery, allowing it to fit snugly around complex curves and contours.
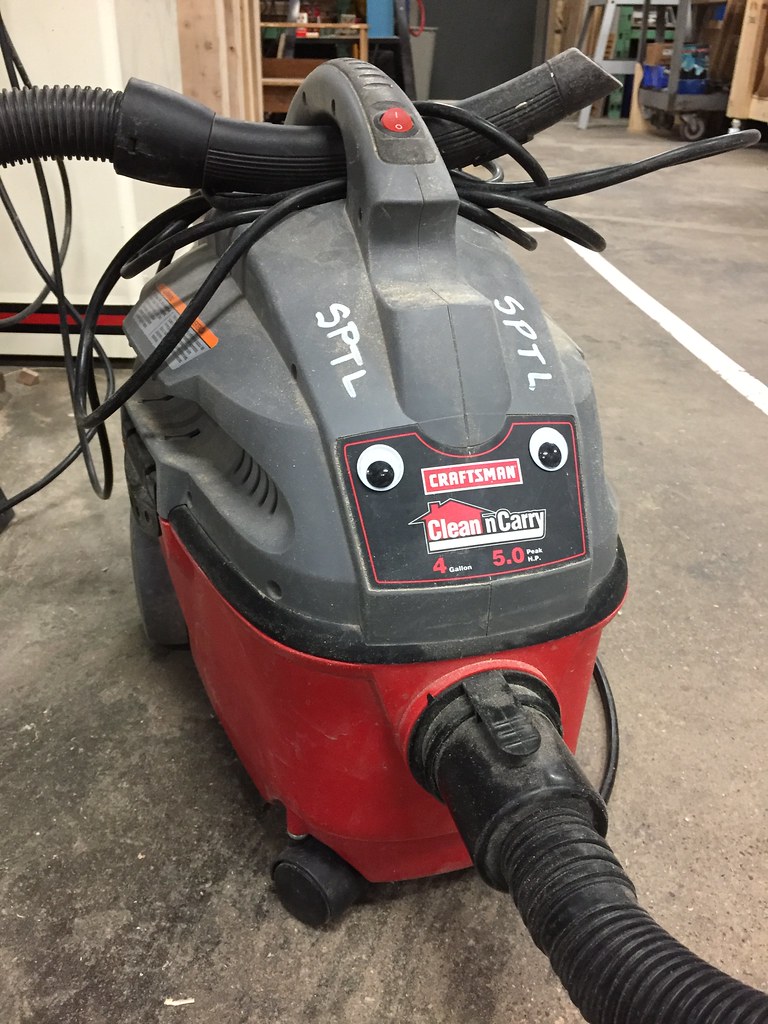
For thorough cleaning and preparation, a diverse set of tools is necessary. You’ll need an array of mild, pH-neutral cleaning agents specifically designed for leather, along with various brushes of different stiffnesses and plenty of clean microfiber rags. A detailing vacuum with soft brush attachments will help you reach intricate areas and crevices without causing damage. Finally, for delicate finishing touches and minor repairs, a sewing awl can be invaluable for hand-stitching, and an upholstery hammer aids in gently folding and bending fabrics to achieve a perfectly tailored look.
Read more about: Mastering Classic Car Valuation: A MotorTrend Guide to Unlocking Your Collection’s True Worth
4. Initial Vacuuming and Debris Removal
Cleaning is not merely a preliminary step; it is the fundamental and most important stage in the entire process of reconditioning your leather car interior. This initial cleansing ensures that all subsequent restoration products can perform optimally, adhering properly and penetrating the leather effectively. The very first action in this critical phase is a thorough vacuuming of all leather surfaces.
The goal of this initial vacuuming is to meticulously remove all loose dirt, dust, crumbs, and any other debris that has accumulated on and around the leather. Over time, these particles can embed themselves into the leather’s grain or settle into seams and crevices. Leaving them in place can cause significant problems; during the application of cleaners or conditioners, these abrasive particles can be rubbed into the leather, potentially causing new scratches or further damage to the delicate surface.
To ensure both effectiveness and protection, use a vacuum cleaner equipped with a soft brush attachment. This type of attachment is designed to gently agitate the surface, dislodging stubborn dirt without posing a risk of scratching or marring the leather. Pay particular attention to seat crevices, stitching lines, and the areas where the leather meets other interior components, as these spots are notorious for collecting grime. A thorough vacuuming sets the stage for a truly deep clean, preparing the leather to absorb conditioners and dyes more effectively and resulting in a much more refined and lasting finish.
Read more about: Unlock the Secrets: 15 Essential Ways to Keep Your Luxury Car Looking Showroom New
5. Selecting and Testing Leather Cleaner
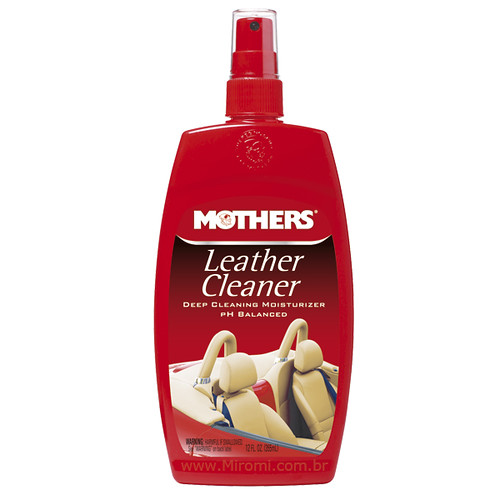
Once all loose debris has been meticulously removed, the next crucial step in revitalizing your classic car’s leather interior involves selecting and carefully testing the appropriate cleaning solution. This choice is pivotal, as using the wrong product can inflict irreparable damage on your vintage leather. It is imperative to choose a cleaner that is specifically formulated for automotive leather.
Resist the temptation to use general household cleaners, harsh detergents, or all-purpose degreasers. These products are often too aggressive and can strip the leather of its natural oils, leading to excessive dryness, stiffness, and accelerating the cracking process. Leather, especially older leather, is a delicate material that requires a gentle, pH-neutral cleaner designed to lift dirt and grime without compromising its integrity or chemical balance. Look for cleaners that explicitly state they are safe for car leather.
The importance of testing your chosen cleaner on a small, inconspicuous area cannot be overstated. Before applying it to an entire seat or panel, find a hidden spot—perhaps beneath a seat, on a less visible part of a door panel, or in a seam—and apply a small amount of the cleaner. Allow it to sit for a few minutes, then gently wipe it away. Observe the area closely for any signs of discoloration, dullness, stickiness, or adverse reactions. This critical test ensures that the cleaner is compatible with your specific type of leather, preventing potential damage or an undesirable aesthetic outcome and providing you with the confidence to proceed with the full cleaning process.
Read more about: The Apex of All-Terrain: 14 Expert-Vetted Off-Road Machines Engineered for Snow, Mud, and Rocks
6. Deep Cleaning the Leather Surfaces
With your leather meticulously vacuumed and your chosen cleaner successfully tested, you are now ready to perform a comprehensive deep clean of all leather surfaces. This step is fundamental to remove ingrained dirt, body oils, and stubborn residues that the initial vacuuming couldn’t address, creating a pristine canvas for subsequent restoration work. The effectiveness of future conditioning and recoloring treatments hinges significantly on the thoroughness of this cleaning phase.
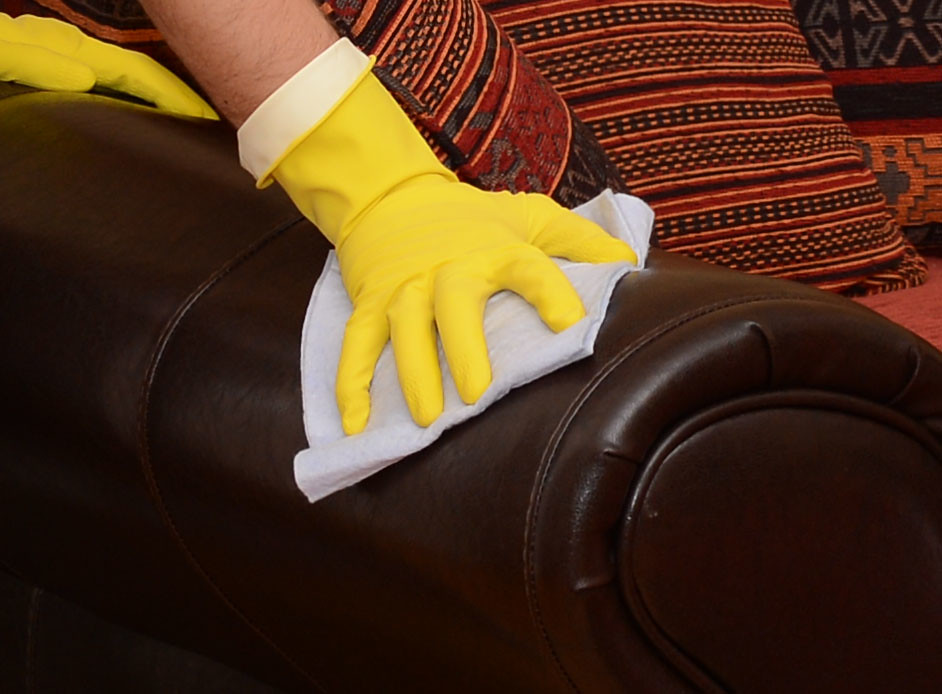
To apply the cleaner, use a clean, soft microfiber cloth or a dedicated leather cleaning brush. Gently apply the cleaning solution in small sections, working in circular motions. Focus your efforts particularly on heavily soiled areas, such as the seating surfaces, armrests, and areas where skin contact is frequent. These spots tend to accumulate more grime and body oils, which can degrade the leather over time. The microfiber cloth will help to lift and trap dirt, while a soft brush can gently work the cleaner into the leather’s grain without causing abrasion.
It is critically important to avoid saturating the leather with cleaner. Excess moisture, especially on older or compromised leather, can be detrimental, leading to water stains, mildew, or even weakening the leather’s internal structure. Instead, apply just enough product to effectively clean the surface. After working a small section, immediately use a separate, clean, and dry microfiber cloth to wipe away any residue and lifted dirt. This prevents the dirt from redepositing and ensures the leather is left clean and ready.
Once all sections have been cleaned and wiped, allow the leather to air dry completely. Avoid using direct heat, such as a hairdryer, as this can dry out the leather too quickly and cause damage. A completely dry, clean surface is essential before moving on to any repair, recoloring, or conditioning steps. This thorough cleaning not only prepares the leather beautifully but also allows conditioners and dyes to absorb much more effectively, maximizing the positive impact of your restoration efforts.
Read more about: 13 Essential Red Flags: Your Step-by-Step Guide to Inspecting a Used Performance Car Like a Pro
7. Repairing Minor to Deep Leather Damage
With your leather surfaces pristine and thoroughly cleaned, the restoration journey moves into a critical phase: addressing and repairing all forms of damage, from superficial blemishes to more significant structural issues. This step is where meticulous care transforms worn-out sections into smooth, integrated parts of your classic car’s interior, ensuring a seamless aesthetic and enhanced durability.
For common surface imperfections like scratches, scuffs, cracks, and small holes, specialized leather filler or compound is essential. Begin by lightly sanding the affected area with fine-grit sandpaper to smooth it and ensure product adherence. Apply the filler with a small spatula, working it into the damaged area in thin, even layers. Allow each layer to dry completely according to the product’s instructions, ensuring a smooth finish.
Once the filler has fully dried, gently sand the area again with fine-grit sandpaper to achieve an absolutely smooth finish, feathering the edges. For more severe damage, such as tears and rips, small leather patches and strong, flexible adhesives can mend them. For larger or complex rips, professional intervention may be necessary to ensure a durable and aesthetically pleasing repair.
Read more about: Beyond the Shine: Unmasking the Realities of Vintage Convertible Ownership and How to Conquer Common Maintenance Headaches
8. Prepping the Surface for Recoloring
After successfully mending and smoothing out all forms of leather damage, the next critical phase is preparing the surface for recoloring. This preparatory stage fundamentally determines how well the new dye adheres, its uniformity, and the overall longevity of your vibrant finish, ensuring a factory-fresh appearance.
The initial step involves a final, thorough cleaning and degreasing of all leather surfaces to be recolored. Use a specialized leather prep solution or a mild degreaser with a clean microfiber cloth, removing any lingering contaminants. Following this, the surface needs careful abrasion using a very fine-grit sanding pad to create a fine texture for optimal dye anchorage, ensuring a consistent, matte finish.
After abrasion, a critical wipe-down is necessary. Use a tack cloth or a clean microfiber cloth dampened with isopropyl alcohol to remove all sanding dust and remaining surface impurities. This final wipe ensures no particles interfere with the dye application, leaving a perfectly smooth, clean, and ready-to-dye surface, crucial for a professional-grade finish.
9. Professional Recoloring Techniques
Once your leather interior is impeccably prepped, clean, and smooth, you’re ready to embark on the truly transformative phase of professional recoloring. This is where your classic car’s leather regains its lost vibrancy and original charm, significantly enhancing the vehicle’s aesthetic appeal and value.
The very first decision is selecting the right high-quality leather dye that either precisely matches the car’s original color specifications or offers your desired custom shade. Authenticity is often key for classic cars, so sourcing a period-appropriate dye is highly recommended. Products from reputable brands, like Angelus Direct, are often favored for their long-lasting and vibrant results.
Before applying the dye to the entire surface, conduct an essential patch test. Apply a tiny amount of dye to a small, inconspicuous area and allow it to dry completely. This crucial test verifies color accuracy and confirms no adverse reactions on your specific leather type, preventing costly mistakes on visible areas.
The actual application of leather dye requires a systematic approach. Using a sponge or an applicator brush, apply the dye in thin, even coats, working methodically in small sections. Build up the color gradually, allowing each coat to dry thoroughly before applying the next. This layered approach ensures deep, uniform color penetration and a durable, professional finish, which can then be gently buffed with a clean cloth to enhance texture and blend the color.

10. Essential Conditioning for Leather Health
Once the recoloring is complete and the dye has fully set, the next indispensable step is applying a high-quality leather conditioner. This process restores the leather’s natural oils, suppleness, and resilience, fundamental to preventing future cracks and significantly extending its lifespan.
Leather needs constant nourishment to remain soft and flexible, especially after intensive cleaning and repair. A premium leather conditioner replenishes essential oils, hydrating the material from within to restore its original elasticity and softness. Opt for pH-neutral, water-based formulations specifically designed for automotive leather, avoiding silicones or waxes that can leave greasy residues.
To apply effectively, use a clean, soft microfiber cloth, dispensing a moderate amount of product. Gently work it into the leather surfaces using circular motions, ensuring even treatment. Pay particular attention to high-wear zones like seat bolsters and armrests, as these areas dry out quickly and require deeper nourishment.
Allow the conditioner to absorb into the leather for the time recommended by the product’s instructions, typically from 10 minutes to several hours. After absorption, use a separate clean, dry microfiber cloth to gently buff the leather, removing any excess product and bringing out a soft, natural sheen, completing this critical step in preserving your classic car’s revived interior.
Read more about: Beyond the Arena: Unearthing the Brutal and Ingenious Ways Ancient Civilizations Mastered Combat Sports
11. Applying Protective Sealants
Following meticulous leather conditioning, the final protective barrier is a high-quality leather sealant or protectant. This crucial step locks in conditioning, preserves the recolored finish, and guards against environmental aggressors, ensuring the longevity and pristine appearance of your restored interior.
A robust leather sealant creates a barrier that helps repel spills, stains, and daily grime, making clean-ups easier and preventing liquid penetration. It also offers crucial defense against friction and abrasion, common causes of wear on frequently used areas, actively prolonging the life and beauty of your leather.
Equally important, sealants protect against damaging UV radiation, a primary cause of fading and discoloration. Many quality sealants are formulated with UV inhibitors to block harmful rays, maintaining color vibrancy and structural integrity, especially vital for classic cars exposed to sunlight. When choosing, select non-greasy, breathable products designed for automotive leather, and always patch test first.
For application, use a clean, soft microfiber cloth, applying the sealant evenly in thin coats across all leather surfaces. Allow each coat to dry completely per manufacturer’s instructions before applying additional layers if recommended. A gentle buff with a separate clean, dry cloth will ensure an even finish and remove any excess product, securing your reconditioning success.
Read more about: The Science of Pristine: 12 Foundational Principles for Restoring Your Car’s Headlights to ‘Brand New’ Clarity

12. Implementing a Strategic Long-Term Maintenance Plan
Congratulations! Your classic car’s leather interior has been meticulously reconditioned, transforming it back to its luxurious glory. To truly preserve the beauty, suppleness, and value of your revived leather for years to come, implementing a strategic and consistent long-term maintenance plan is absolutely essential.
Regular cleaning is the cornerstone of effective maintenance. Make it a habit to wipe down leather surfaces with a soft, damp microfiber cloth weekly. For a deeper clean, use a mild, pH-neutral leather cleaner every few months. Consistent, gentle cleaning prevents grime from embedding and causing abrasive wear, preserving the leather’s integrity.
Conditioning should remain a vital part of your routine, planned every three to six months depending on usage and climate. This replenishes natural oils, maintaining softness and preventing dryness and cracking. Always use a high-quality leather conditioner, ensuring proper absorption without residue. Furthermore, protect from UV rays by using sunshades or parking in shaded areas, a simple habit that significantly extends leather life and color vibrancy.
Read more about: Shield Your Ride: Simple, Effective Ways to Banish Rust from Your Truck’s Undercarriage This Winter and Beyond
Beyond routine care, adopt habits that actively prevent damage. Be mindful of sharp objects, avoiding scratches or punctures. Refrain from placing heavy objects on seats to prevent indentations or tears. In case of spills, act immediately to clean up liquids or food residues with a clean cloth, preventing stains from setting in. Regularly inspect for early signs of wear and tear, as prompt attention to minor issues prevents escalation, ensuring your classic car’s leather interior remains a source of pride and comfort for many enjoyable years and miles to come.


