

Taking charge of your car’s maintenance can be one of the most rewarding and empowering aspects of vehicle ownership. In an era where rising service costs are a constant concern, the ability to perform routine tasks like an oil change yourself not only translates into significant savings but also grants you an unparalleled understanding and connection with your vehicle. Far from being an intimidating chore, changing your own oil is a practical skill that, with the right guidance, is well within the grasp of any enthusiastic DIYer, regardless of experience level. It’s about more than just saving money; it’s about gaining control, ensuring the job is done right, and fostering a sense of accomplishment that comes from hands-on work.
At its core, performing a DIY oil change is a commitment to your engine’s long-term health and efficiency. This comprehensive guide, crafted in the spirit of ‘Popular Mechanics’, will demystify the process, breaking down each step into clear, actionable instructions. We believe that by providing detailed explanations and emphasizing critical precautions, we can empower you to tackle this essential maintenance task with confidence and competence. From understanding the ‘why’ behind regular oil changes to the meticulous ‘how-to’ of each practical step, our goal is to equip you with the knowledge and techniques required to keep your engine running smoothly for years to come.
So, whether you’re looking to cut down on garage visits, deepen your mechanical understanding, or simply enjoy the satisfaction of maintaining your own ride, you’ve come to the right place. We’re here to walk you through every critical phase of an oil change, ensuring you’re well-prepared, safe, and efficient. Let’s dive in and transform what might seem like a complex procedure into a straightforward, empowering skill, starting with the fundamental reasons why this task is so vital for your car’s heart: its engine.
1. **Why Regular Oil Changes Are Crucial**The engine oil is, quite literally, the lifeblood of your vehicle’s engine, performing multiple critical functions that are essential for smooth operation and longevity. Its primary role is lubrication, creating a thin film between the engine’s rapidly moving metal components. This protective layer drastically reduces friction, which if unchecked, would lead to excessive heat, rapid wear, and ultimately, catastrophic engine failure.
Beyond lubrication, engine oil acts as a vital cleaning agent. As it circulates through the engine, it picks up dirt, sludge, and microscopic metal particles—byproducts of combustion and normal wear. The oil filter then traps these contaminants, preventing them from recirculating and causing abrasive damage. Over time, however, the oil itself breaks down, becoming less effective at lubricating and accumulating so much dirt and debris that its ability to protect the engine is severely compromised.
Neglecting regular oil changes allows this degradation to accelerate. As oil ages and becomes saturated with contaminants, it turns into a thick, gritty substance that actually contributes to engine wear rather than preventing it. This compromised oil cannot dissipate heat efficiently, leading to potential overheating, reduced fuel efficiency, and a significant drop in engine performance. In extreme cases, a severely neglected engine can seize up entirely, leading to immensely costly repairs or the need for a complete engine replacement.
Regular oil changes are a proactive measure that safeguards your investment. By consistently replenishing your engine with fresh, clean oil, you ensure optimal lubrication, superior cooling, and effective cleaning. This commitment translates directly into a healthier, more efficient engine that operates at peak performance, delivers better fuel economy, and is protected from premature wear and costly repairs, significantly extending your car’s overall lifespan. It’s a small investment in time and resources that yields substantial returns in reliability and peace of mind.
Read more about: Unearthing the Untamed: 2025’s Premier Factory Off-Road Vehicles Engineered for American Terrain

2. **Essential Tools and Materials for Your DIY Oil Change**Before you begin the hands-on process of changing your car’s oil, proper preparation is paramount. Having all the correct tools and materials readily available will not only make the procedure safer and more efficient but also prevent frustrating delays. A well-stocked workspace ensures a smooth workflow, allowing you to focus on the task at hand rather than scrambling for missing items.
First and foremost, selecting the correct engine oil is critical. You must consult your car’s owner’s manual to determine the recommended oil type and viscosity—such as 5W-30 or 10W-40. The manual specifies whether your car needs conventional or synthetic oil, both of which have distinct properties. Synthetic oil, for instance, offers superior performance in extreme temperatures and provides longer-lasting engine protection, making it ideal for modern vehicles or harsh climates. Conventional oil is a more budget-friendly option, typically suitable for older cars or those with lower mileage. Using the wrong oil can compromise engine performance and protection, so this step cannot be overlooked.
Equally important is a new oil filter, compatible with your specific car model. Replacing the oil filter each time you change your oil is crucial because it traps contaminants, preventing them from circulating and damaging the engine. Beyond the oil and filter, you’ll need an oil drain pan to safely collect the used oil as it drains from the engine, ensuring a clean process and efficient disposal. A wrench set, specifically the correct size for your oil drain plug and oil filter, is indispensable; using the wrong size can strip bolts or damage components. Additionally, a funnel is essential for accurately pouring new oil into the engine without making a mess around the oil filler cap.
For safety and accessibility, you might also require a jack and jack stands if your car’s oil pan is difficult to reach. These tools provide the necessary clearance to access the drain plug and oil filter comfortably and safely. Don’t forget protective gear: rubber gloves are essential to shield your hands from oil, grime, and harmful chemicals. Lastly, keep plenty of rags or paper towels on hand for immediate cleanup of any spills, helping to maintain a tidy and safe work area. If your car uses a crush washer on the oil drain plug, be sure to have a new one ready, as this ensures a secure, leak-free seal upon reinstallation. Gathering these items before you start ensures you’re fully equipped for a successful and trouble-free oil change.
Read more about: Why 2025 Compact Trucks Are Igniting Urban Interest: A Deep Dive for Savvy Buyers
3. **Crucial Safety Guidelines Before You Start**Safety should always be your top priority when performing any automotive maintenance, especially when working underneath a vehicle or handling hot liquids. Adhering to established safety guidelines not only protects you from injury but also prevents potential damage to your car. Taking a few moments to review and implement these precautions can make all the difference between a smooth DIY project and a regrettable incident.
First, always ensure your car is parked on a flat, stable, and level surface. This simple step is fundamental to preventing the vehicle from shifting, rolling, or becoming unstable while you are working. Engaging the parking brake is mandatory, and for added security, placing wheel chocks behind the rear tires, particularly if the ground has even a slight incline, will provide an extra layer of stability. Never attempt to work on your car on an uneven or soft surface, as this significantly increases the risk of an accident.
If you need to lift the car for better access, which is often the case, the proper use of a jack and jack stands is non-negotiable. While a hydraulic jack is used to lift the vehicle, it is crucial to *never* rely solely on the jack to support the car’s weight. Jack stands are designed for long-term support and stability; once the car is lifted to the desired height, position the jack stands securely under designated jacking points and then lower the car onto them. Always give the car a gentle shake or push on the hood to ensure it is stable on the stands before crawling underneath.
Another critical safety measure involves personal protective equipment and managing engine heat. Always wear rubber gloves to protect your hands from oil, grime, and the various chemicals present in motor oil, which can irritate your skin. More importantly, allow the engine to cool down for at least 10 to 15 minutes, or even 20-30 minutes if it has been running extensively. Hot oil can cause severe burns, and engine components can retain significant heat. Patience in this waiting period is not just a recommendation; it’s a safety imperative.
Finally, maintaining a clean and organized workspace is crucial. Keep rags or paper towels nearby to clean up any oil spills immediately, as oil can create slippery hazards. Also, be mindful of over-tightening the drain plug and oil filter, as this can damage threads or components and lead to leaks, which are both safety and maintenance issues. By diligently following these safety guidelines, you create a secure environment, allowing you to perform your oil change with confidence and minimizing risks.
Read more about: Above the Clouds: 15 Foods Pilots and Experts Strictly Avoid on Airplanes for a Smoother, Healthier Flight

4. **Preparing Your Vehicle and Workspace**With your tools at the ready and safety guidelines firmly in mind, the next logical step in your DIY oil change journey is to prepare your vehicle and the surrounding workspace. This initial preparation phase is pivotal for both your safety and the overall efficiency of the task, setting the foundation for every subsequent action. A well-prepared vehicle ensures smooth access and a stable environment for your work.
Begin by ensuring your car is parked on a flat and stable surface. This foundational step is not just about convenience; it prevents any unexpected shifting or movement of the vehicle while you’re working, significantly enhancing safety. If your car possesses low ground clearance, which is common in many modern vehicles, you will need to lift it. Use a quality hydraulic jack to raise the car to a comfortable working height. Once lifted, secure the vehicle firmly with jack stands. Remember the cardinal rule: never work under a car that is supported only by a jack. Jack stands are engineered to safely bear the vehicle’s weight and are absolutely essential for your protection.
For those who prefer an alternative to jacks, steel ramps are an excellent option. Drive your vehicle slowly and carefully up onto the ramps until its wheels settle into the depressions at the top, which are designed to hold the car securely. Ramps offer two points of suspension, providing robust stability. Regardless of whether you use a jack and stands or ramps, always place a wheel block, such as a piece of wood, behind at least one of the rear tires to prevent any backward roll. If your parking surface has even a slight incline, it’s a smart practice to block both rear wheels. After securing the vehicle, give it a gentle push on the hood a couple of times to confirm its stability before you position yourself underneath.
Another critical preparatory step involves the engine itself. Allow the engine to cool down for approximately 10 to 15 minutes if it has been recently running, or 20-30 minutes if it was hot. Working with hot oil can cause severe burns, so this waiting period is non-negotiable for your safety. While the engine cools, take a moment to consult your car’s owner’s manual. This invaluable resource will provide specifics such as the precise location of the oil drain plug and filter, the exact type and quantity of oil required, and crucial torque specifications for the drain plug. Taking these preparatory steps ensures a safe, accessible, and hassle-free environment, setting you up for success as you move to the core process of draining the old oil.
Read more about: The Comprehensive Guide: Protecting Your Car’s Undercarriage from Winter Salt Damage
5. **Draining the Old Oil Effectively**Once your vehicle is safely elevated and the engine has cooled sufficiently, the next critical phase is to effectively drain the old, contaminated engine oil. This step requires precision and attention to detail to ensure that as much of the old oil as possible is removed, paving the way for fresh lubricant. A thorough draining process is essential for maximizing the benefits of your new oil.
Crouch down and locate the oil drain plug, which is typically found underneath your car, on the oil pan. This pan is usually a large, flat reservoir at the lowest point of the engine, and the drain plug is a prominent bolt designed specifically for oil removal. If you’re uncertain of its exact location, your owner’s manual will provide a clear diagram. Position your oil drain pan directly beneath the plug. It’s crucial that this pan is large enough to hold the entire volume of oil your engine contains, often between four and eight quarts, as specified in your manual, to prevent any overflow or spills.
Before you loosen the drain plug, open the vehicle’s hood and locate the oil filler cap on top of the engine. Unscrew this cap and set it aside. Removing the oil cap creates an open vent, allowing air to enter the system. This airflow is vital because it enables the oil to drain out more quickly and completely, preventing a vacuum effect that could impede its flow. This small but important step ensures a more efficient draining process, making it less likely for old oil to remain trapped within the engine’s passages.
Now, with the oil pan in place and the filler cap removed, use the correctly sized wrench (either a socket or box-end wrench) to carefully loosen the drain plug. Turn it counterclockwise. To minimize oil spilling onto your arm, apply a slight inward force on the plug as you unscrew it. When you feel the bolt is fully unscrewed, quickly pull it away from the opening. Be prepared for the oil to gush out, often in a strong stream initially, so keep the drain pan perfectly centered. You’ll also find a metal crush washer between the oil pan and the drain plug; remove this and set it aside, as it will need to be replaced.
Allow the oil to drain completely. This process can take several minutes, as engine oil is a thick liquid. Patience is key here; wait until the flow slows to a mere drip, ensuring that as much of the old, dirty oil as possible has exited the crankcase. As the oil drains, take a moment to observe its condition. If you notice any metal particles or unusual debris mixed within the draining oil, it could be a sign of internal engine damage, which may warrant professional attention. Once the oil has finished draining, you are ready to move on to replacing the oil filter, a crucial step for maintaining engine cleanliness.
Read more about: Chew Wiser, Feel Lighter: The 14 Worst Snacks for Your Liver According to Hepatology Consultants
6. **Replacing the Oil Filter Correctly**Replacing the oil filter is an absolutely essential part of every oil change, as it plays a critical role in maintaining engine health by continuously trapping contaminants. A clean filter ensures that dirt, debris, and microscopic particles, which inevitably accumulate in the oil, are effectively removed, preventing them from circulating through the engine and causing abrasive wear. Without a functional filter, even fresh oil would quickly become compromised.
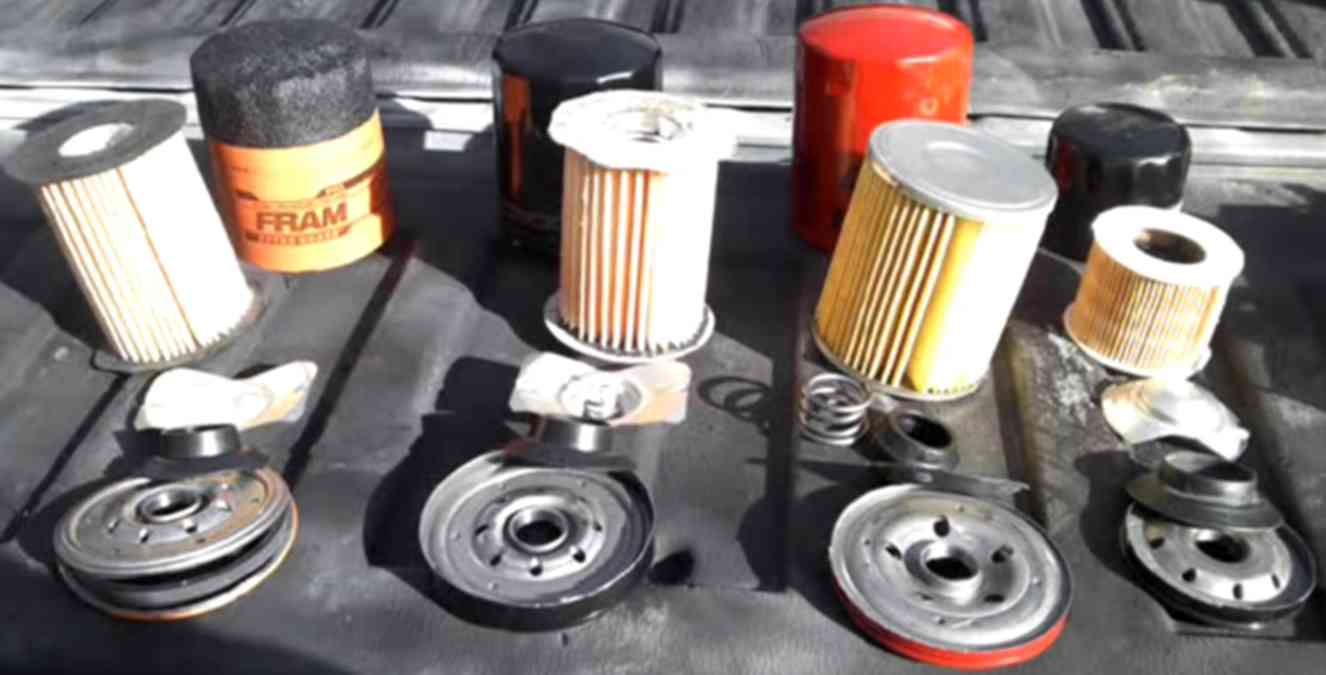
To begin, you’ll need to locate the oil filter. Its position can vary significantly between car models, so consulting your owner’s manual or referencing your new replacement filter is highly recommended. Typically, oil filters are cylindrical components, often white, blue, or black, about the size of a large soup can. They are usually situated near the engine, sometimes on the front, back, or side, and might require a bit of searching. Once located, position your oil drain pan directly beneath it to catch any residual oil that might spill out during removal.
With the drain pan ready, it’s time to remove the old filter. Use an oil filter wrench, which is specifically designed to grip the filter effectively. Turn the wrench counterclockwise to loosen the filter. Once it’s loose enough, you can carefully unscrew it by hand. Be cautious during this step, as some oil will almost certainly spill out as the filter is removed. Allow any remaining oil within the filter to drain into the pan for a few moments, then carefully set the old filter aside, ideally in a plastic bag, to prevent further mess.
Before installing the new filter, take a moment to prepare the mounting area and the filter itself. Wipe the area around the oil filter mount on the engine block to remove any excess oil or debris. This ensures that the new filter will seat properly and form a leak-free seal. Next, apply a thin layer of fresh, clean oil to the rubber gasket on the top of your new filter. This lubrication helps the gasket seat correctly, creates a tighter seal, and makes the filter much easier to remove during your next oil change, preventing it from sticking.
Finally, screw the new filter onto the engine by hand. Turn it clockwise until it is snug. The key here is to tighten it securely but *never* to over-tighten it with a wrench. Most manufacturers recommend hand-tightening only, sometimes with an additional quarter or half turn. Over-tightening can crush the gasket, damage the filter housing, or make future removal exceedingly difficult, potentially leading to leaks. Once installed, give the filter a quick wipe to remove any spilled oil and ensure it’s snugly in place. With a fresh filter in position, your engine is now ready for the addition of new, clean oil, marking a significant milestone in your DIY oil change process.
Building upon the foundational steps, we now move into the heart of the oil change process, focusing on precision, best practices, and troubleshooting to ensure your vehicle receives the meticulous care it deserves. This section will guide you through the critical final stages, from securely sealing your engine with the drain plug to infusing it with fresh, vital lubricant. We’ll also cover essential post-maintenance checks and environmental responsibilities, culminating in expert tips and common pitfalls to ensure your DIY oil change is not only successful but also safe and truly empowering. Let’s delve into these crucial steps with the authoritative detail you expect from Popular Mechanics.
Read more about: NWS Extreme Cold Alert: A Comprehensive Consumer’s Guide to Winterizing Your Home and Car for Ultimate Safety and Preparedness
7. **Put the Drain Plug Back On**Once the old, contaminated oil has fully drained from your engine, the immediate next step is to securely reinstall the oil drain plug. This is a critical moment in the oil change process, as an improperly sealed drain plug can lead to costly leaks and significant engine damage down the road. It’s imperative that this component is handled with precision and care, ensuring a tight, leak-proof seal that will protect your newly added engine oil.
For vehicles that utilize a crush washer on the oil drain plug—and many do—this is the point where you must replace it with a new one. This small, often overlooked component is absolutely vital. The crush washer is designed to compress when the drain plug is tightened, creating a perfect seal that prevents oil from seeping out. Reusing an old, compressed washer significantly increases the risk of leaks, so always have a fresh one ready before you begin screwing the plug back in.
Carefully reinsert the drain plug, along with its new crush washer, into the oil pan opening and begin to tighten it clockwise by hand. Once it’s finger-tight, use the correctly sized wrench to snug it down. The key here is to apply sufficient force to secure the plug firmly, but **never** to over-tighten it. Over-tightening can strip the threads of the oil pan or the plug itself, leading to severe damage that is both difficult and expensive to repair. Tighten it until it feels secure, then give it a final quarter turn with the wrench, keeping in mind that ‘snug’ is the goal, not ‘cranked down’.
Double-checking the drain plug’s security is a non-negotiable step. A loose or improperly sealed plug, even if it’s just a slight misalignment or a worn washer, will inevitably lead to oil leaks. These leaks not only create a mess in your garage or driveway but can also cause dangerously low oil levels, potentially leading to catastrophic engine failure if left unaddressed. By paying close attention to this seemingly minor detail, you safeguard your engine and ensure the integrity of your freshly added oil.
Read more about: Navigating the 2025 Car Warranty Changes: A Consumer Reports Guide to Protecting Your Used Car Investment

8. **Add the New Oil**With the drain plug securely in place and a fresh oil filter installed, your engine is now primed and ready for its new, clean oil. This stage is immensely satisfying, as you’re literally breathing new life into your vehicle’s most vital system. However, it’s a step that demands accuracy, particularly in selecting the right oil type and quantity, to ensure optimal engine performance and longevity.
Before you pour, always consult your car’s owner’s manual. This invaluable resource specifies the exact recommended viscosity grade, such as 5W-30 or 10W-40, which is crucial for your engine’s design. It also dictates whether your vehicle requires conventional or synthetic oil and, critically, the precise quantity needed. For instance, as Kevin Oliff, general manager at AutoNation BMW Buena Park, states, “In cold weather, a lower viscosity oil (like 0W-20) is better because it flows more easily at low temperatures, helping with better engine protection for starting a car in the cold.” Conversely, he advises, “A higher viscosity oil (like 10W-30) should be used in warmer weather because it has better lubrication at higher temperatures.”
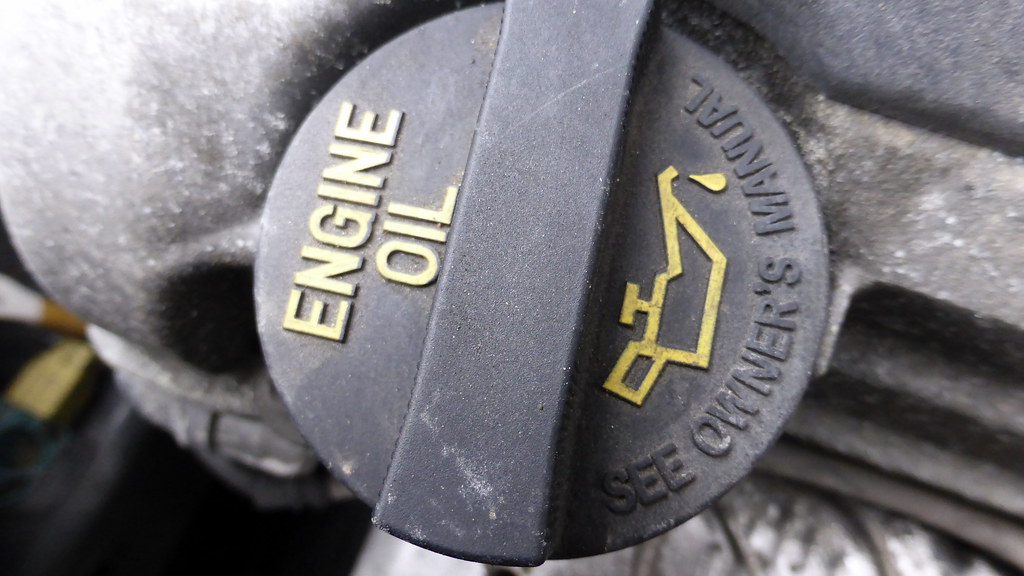
Locate the oil filler cap on top of your engine, usually marked ‘Engine Oil’ or with an oil symbol, and remove it. Place a clean funnel into the opening to prevent any accidental spills. Now, slowly and steadily pour the new oil into the engine. It’s often a smart practice to start with slightly less than the manual’s recommended amount. For example, if your manual says five quarts, pour in four and a half. This cautious approach helps you avoid the significant problem of overfilling, which can cause its own set of issues.
After pouring in the initial amount, remove the funnel and reinsert the dipstick fully into its tube. Pull it out again and check the oil level. The oil mark should ideally fall within the marked range on the dipstick—usually indicated by two dots or a cross-hatched area. If the level is low, add more oil in small increments, rechecking with the dipstick after each addition until the level is just right. Remember, overfilling can lead to excessive pressure, damaging seals and potentially causing oil leaks, so precision is paramount here.
Once the oil level is spot-on, securely replace the oil filler cap and wipe away any oil that might have spilled onto the engine or surrounding components. Then, start your engine and let it run for a minute or two. This allows the fresh oil to circulate throughout the engine’s intricate passages, ensuring it’s properly distributed and coatings all moving parts. This brief run also helps to fill the new oil filter, which will slightly reduce the level in the pan, making the next check even more accurate.
Read more about: Used Car Buyers Beware: These 7 Vehicle Brands Are Most Often Reported as ‘Lemons’ – Your Guide to Avoiding Costly Mistakes

9. **Double-Check and Clean Up**After the satisfying moment of adding fresh oil to your engine, the task isn’t quite complete. A crucial final phase involves a thorough double-check for any potential leaks and a responsible cleanup of your workspace. These steps are not merely about tidiness; they are fundamental for safety, verifying the integrity of your work, and upholding environmental stewardship.
With the engine briefly run to circulate the new oil, turn it off and take a careful look underneath your vehicle. Inspect the area around the newly installed oil filter and, crucially, around the oil drain plug. Look for any drips, seeps, or puddles that could indicate a leak. Even a small leak can become a significant problem over time, so identifying and addressing it now is paramount. If you spot any leaks, re-tighten the relevant component (but remember, don’t over-tighten!) or re-evaluate your installation process.
Once you’ve confirmed there are no leaks, the next step is to thoroughly clean your workspace. Used oil, even small drips, can create slippery hazards, posing a risk of falls or accidents. Have plenty of rags or paper towels on hand to immediately wipe away any oil spills from the ground, your tools, and any engine components. A clean environment is a safe environment, and it also makes the entire process feel more professional and organized.
Beyond immediate cleanliness, proper disposal of the used oil and filter is an environmental imperative. Used motor oil is a hazardous waste; if poured down the drain, into the ground, or into regular trash, it can severely contaminate soil and water, harming ecosystems and human health. This is a crucial area where responsible DIYers make a real difference. As Xavier Sabastian, an auto expert with Way.com, advises, “Most auto parts stores will take used oil for free and ensure it is recycled properly.”
Collect the drained oil in a sealed container—the old oil bottles work perfectly for this—and place the used oil filter in a plastic bag to prevent any lingering drips. Then, take these items to a certified oil recycling center, an auto parts store that accepts used oil (like most O’Reillys and AutoZones), or a community hazardous waste collection event. Websites like Earth911.com can help you locate a nearby drop-off point. This simple act of responsible disposal ensures that the toxic waste is processed correctly, protecting our planet for future generations while completing your oil change with full confidence and integrity.
Read more about: Time-Tested Treasures: 15 Vintage Hand Tools That Have Endured, Becoming Surprisingly Valuable to Collectors Today
10. **Tips for a Truly Successful Oil Change**Beyond the step-by-step mechanics, a truly successful DIY oil change often hinges on adopting a few expert-level tips and best practices. These insights, gleaned from years of hands-on experience, can elevate your maintenance routine, making it safer, more efficient, and ultimately more effective. Implementing these additional recommendations can turn a basic oil change into a masterclass in automotive care.
First and foremost, always re-emphasize the importance of consulting your car’s owner’s manual. This document is your ultimate authority on everything from the precise type and viscosity of oil your engine needs to crucial torque specifications for the drain plug. Using the correct oil type ensures optimal lubrication and performance, directly impacting engine health and longevity. Additionally, adhering to recommended oil change intervals, typically between 3,000 to 7,500 miles depending on oil type and vehicle, is paramount for preventing premature engine wear.
Preparation extends beyond just having the right materials; it also involves the right approach. If your engine is cold, a quick five-minute run can warm the oil slightly, making it thinner and allowing it to drain more completely. However, if the engine is already hot from recent driving, patience is key: wait at least 30 minutes for it to cool down significantly to avoid serious burns from hot oil or engine components. Safety should always be your immediate concern, and rushing this step can have painful consequences.
Regarding tools, precision is critical. Experts firmly advise, “Never use an adjustable wrench or socket on the drain plug. Use the properly sized box-end wrench, usually metric, for the plug.” This prevents stripping the bolt or damaging the oil pan, which can be a costly repair. Similarly, when installing the new oil filter, remember to “Always hand-tighten the filter. Never use a filter wrench” to avoid over-tightening and crushing the gasket.
Furthermore, for an extra layer of protection, ensure you “Use new oil to coat the oil filter gasket before spinning it on.” This lubrication facilitates a tighter seal and makes future filter removal much easier. When adding new oil, consider lining up all the bottles you’ll need beforehand; this simple visual cue helps you keep an accurate count and avoids under- or overfilling, which are common errors that can impact engine health.
Finally, solidify your safety foundation by consistently using jack stands whenever you elevate your vehicle. The consensus among experts is clear: “Always use jack stands. Never work under a car that’s supported by a jack only.” Jack stands provide indispensable stability, preventing catastrophic accidents. And remember your environmental responsibilities: find a local oil and oil filter recycling center by visiting earth911.com or performing a quick internet search, ensuring proper disposal and protecting our environment.
Read more about: NWS Extreme Cold Alert: A Comprehensive Consumer’s Guide to Winterizing Your Home and Car for Ultimate Safety and Preparedness

11. **Common Mistakes to Avoid While Changing Oil**Even with the best intentions and a detailed guide, certain common errors can undermine your DIY oil change, potentially leading to leaks, damage, or compromised engine performance. Being aware of these pitfalls is just as crucial as knowing the correct steps, allowing you to proactively prevent issues and ensure a flawless maintenance job.
One of the most frequently made mistakes is over-tightening the oil filter. While it might seem logical to tighten it as much as possible to prevent leaks, this can be counterproductive and damaging. Over-tightening can crush the rubber gasket, leading to leaks, or even damage the filter housing or the filter itself, making future removal incredibly difficult. The golden rule is always to hand-tighten the filter securely, possibly with an additional quarter turn if recommended by the manufacturer, but never to use a wrench for final tightening.
Another critical oversight involves the oil drain plug washer. Many cars use a crush washer or a similar gasket between the drain plug and the oil pan to create a secure, leak-proof seal. This washer is designed to be a single-use component, deforming to fill any microscopic gaps. Failing to replace this washer with a new one during every oil change is a common cause of persistent oil leaks, despite the drain plug appearing tight. Always ensure you have a fresh crush washer on hand and install it correctly.
Neglecting to check the oil level after adding new oil is another significant error. It’s easy to assume that pouring in the recommended quantity is enough, but variations in draining efficiency, residual oil, or even slight inaccuracies in measurement can lead to under- or overfilling. Both scenarios are detrimental to your engine: too little oil leads to insufficient lubrication and potential overheating, while too much oil can cause excessive pressure, damage seals, and lead to foaming, all of which compromise engine health. Always use the dipstick to confirm the level is within the proper range.
Lastly, rushing the process or neglecting safety precautions can turn a simple task into a dangerous situation. Working on a hot engine, failing to use jack stands, or not adequately securing the vehicle can result in severe injuries. Always prioritize safety, allow sufficient cooling time, and double-check all securements before working underneath your car. By diligently avoiding these common mistakes, you significantly enhance the safety and effectiveness of your DIY oil change.
Read more about: Mastering Canine Companionship: Your Essential Guide to Effective Dog Obedience Training Methods for Every Home and Backyard

12. **Frequently Asked Questions (FAQs)**As with any hands-on automotive task, questions naturally arise, even for experienced DIYers. Addressing these common inquiries provides clarity and reinforces confidence, ensuring you’re fully equipped to handle your oil changes with informed decision-making. Let’s tackle some of the most frequently asked questions about this essential maintenance task.
One common question is, ‘Can I just add oil instead of changing it?’ The unequivocal answer is no. While topping off low oil levels is a good practice between changes, simply adding new oil won’t solve the fundamental problem of degraded and contaminated old oil. Over time, engine oil breaks down, losing its lubricating properties and accumulating dirt, sludge, and microscopic metal particles. Adding fresh oil on top won’t remove these contaminants or restore the original effectiveness of the entire oil supply, making a full change essential for proper engine lubrication and preventing damage.
Another frequently asked question concerns maintaining oil health between changes and how often you should change your oil. To maintain oil health, regularly check the oil level and color using the dipstick. If the oil appears dark, gritty, or if the level is low, it’s advisable to top it up or consider an earlier oil change. As for frequency, ‘Most cars require an oil change every 3,000 to 7,500 miles,’ though this can vary significantly based on your vehicle’s age, the type of oil (conventional or synthetic), and your manufacturer’s specific recommendations. Always consult your owner’s manual for precise intervals.
Many wonder about the exact quantity of fresh oil needed. ‘How much fresh oil do I need for my car when I do an oil change?’ The answer is entirely dependent on your vehicle’s specifications, with most cars typically requiring between four and seven quarts. As Tomer Ruderman, founder and owner at Car Keys Ottawa, advises, ‘Smaller cars with compact engines usually take closer to four quarts, while bigger vehicles like trucks or SUVs might need up to eight quarts.’ He adds, ‘If you’re not 100% certain, start with less than you think you need, check the dipstick, and add more as needed.’ The owner’s manual remains the definitive source for this information.
Disposal of used oil is a critical environmental consideration, leading to the question, ‘How do I dispose of the old oil?’ As expert Xavier Sabastian confirms, you should ‘Put it in a sealed container and take it, along with your used oil filter, to an oil recycling center or a business that accepts used oil, such as an auto repair shop or parts store (including most O’Reillys and AutoZones).’ He stresses, ‘Never pour it down the drain, into the ground, or regular trash, as this can damage the environment.’ Websites like Earth911.com are excellent resources for finding local recycling facilities.
Finally, what if you ‘can’t remove the oil filter?’ This can be a frustrating hurdle. As JR Luna of DMC Automotive explains, ‘It’s possible that the filter is overtightened, cross-threaded or stuck. “You may need an oil filter wrench to get a good grip.”’ He also suggests, ‘A clean rag for extra traction can also help.’ If these methods fail, it’s wise to consider taking it to a professional to avoid damaging the oil filter housing, which can be a much more costly fix than the oil change itself.
Read more about: Navigating the 2025 Fuel Economy Landscape: An In-Depth Analysis for Discerning Automotive Purchases
Taking charge of your vehicle’s maintenance, particularly essential tasks like oil changes, offers a profound sense of accomplishment and tangible benefits. By diligently following these expert-backed steps, from meticulous preparation to responsible cleanup, you’re not just saving money; you’re building a deeper connection with your vehicle and ensuring its long-term health and reliability. Embrace the satisfaction of hands-on care, and enjoy the smooth, confident rides that come from a well-maintained engine. Your car will thank you for it, mile after mile.


