
:quality(85):upscale()/2018/08/14/714/n/24155406/b5fc8acc5b72fe9de893b8.76519217_.jpg "Protecting Our Little Ones: 14 Essential Steps for Flawless Car Seat Installation")
Ensuring your child’s safety while traveling begins with a properly installed car seat. This essential task can often seem daunting, especially for new parents, but it is one of the most critical responsibilities a caregiver undertakes. The difference between a correctly installed seat and one that is improperly secured can be life-saving in the event of an accident.
Sadly, the stakes are incredibly high. According to NHTSA research, while 8,325 lives have been saved by the proper use of child restraints during the past 30 years, NHTSA has also found that three out of four child safety seats are improperly installed. This widespread issue highlights a critical need for clear, actionable guidance that empowers parents and caregivers with the knowledge to make informed decisions and ensure their children are as safe as possible.
Failing to properly install a child safety seat, or neglecting to secure a child correctly within it, can lead to serious injury or even death. This guide aims to demystify the process, breaking down the crucial steps into manageable, understandable advice. By adhering to these proven methods and expert recommendations, you can achieve the peace of mind that comes from knowing your child’s car seat is installed correctly and ready to protect them on every journey.

1. **Understand Car Seat Types**To begin your journey into car seat safety, it is fundamental to understand the different types available on the market. Each car seat is designed with specific age ranges, weights, and heights in mind, offering tailored protection for various stages of a child’s development. Making the right initial choice is the cornerstone of effective car seat safety.
The three main categories you will encounter are infant seats, convertible seats, and booster seats. These distinctions are not arbitrary; they reflect significant differences in design, function, and the level of protection they offer. Familiarizing yourself with these types ensures you select the most appropriate restraint for your child’s current needs.
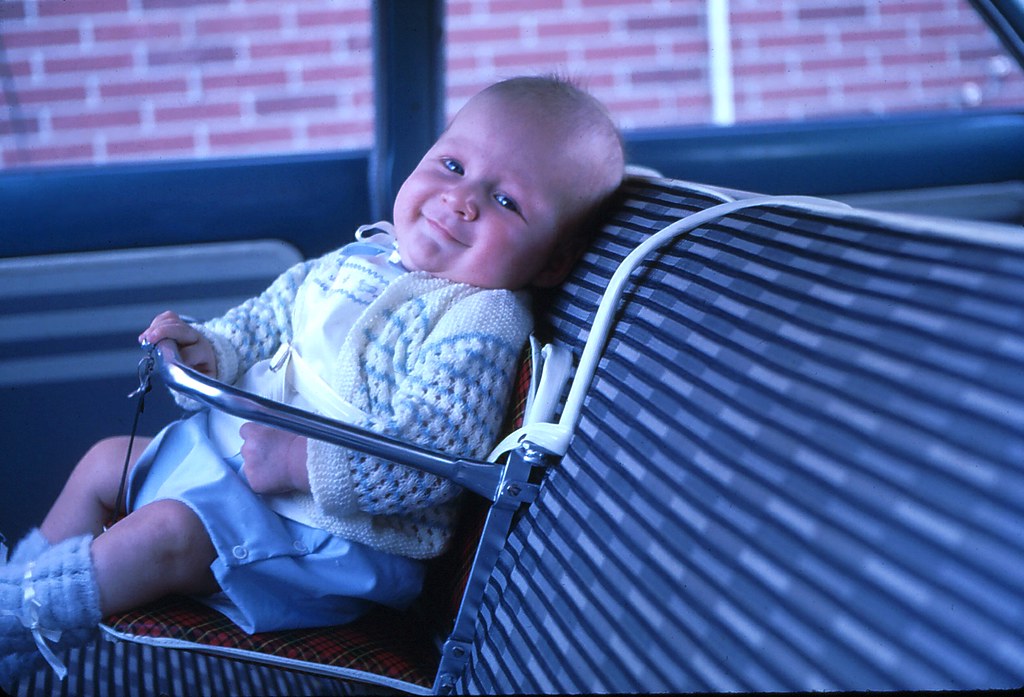
Infant seats are exclusively rear-facing and are meticulously designed for newborns and very small babies. Their primary purpose is to provide optimal support for a baby’s delicate head, neck, and spine, which are particularly vulnerable in a collision. These seats often come with a detachable carrier that clicks into a base, offering convenience for parents.
Convertible seats offer greater longevity, as they can transition from a rear-facing orientation to a forward-facing one. This adaptability allows them to accommodate children from infancy through toddlerhood, growing with your child as they reach different developmental milestones. They represent a versatile investment, but require careful adherence to manufacturer instructions for each mode of use.
Finally, booster seats are intended for older children who have outgrown their forward-facing car seats. Their main function is to elevate the child, ensuring that the vehicle’s own seatbelt fits properly across their chest and hips. We will delve into these further, but knowing the basic types helps frame your safety strategy from the outset.
Read more about: Are You Driving a ‘Show-Off’ Vehicle? The Top 10 Car Brands Prone to Speeding Tickets
2. **Match Child to Seat (Age/Weight/Height)**Selecting a car seat is not a one-size-fits-all endeavor; it critically depends on your child’s individual physical characteristics. Matching the car seat to your child’s specific age, weight, and height is paramount for providing the highest level of protection. A seat that is too large or too small can compromise safety significantly.
Each car seat comes with strict age, weight, and height guidelines set by the manufacturer. These limits are determined through rigorous testing and are non-negotiable for ensuring safety. Ignoring these specifications can lead to severe consequences, as the seat may not perform as intended in a crash scenario.
For infant seats, these are typically suitable for babies up to approximately 1 year old, usually supporting weights ranging from 4 to 35 pounds. It is crucial that your baby remains within these limits, as exceeding them means they are no longer adequately protected by that specific seat. The design of an infant seat is optimized for the smallest passengers.
Convertible seats boast a wider range of applicability. In their rear-facing configuration, they can often accommodate children up to 40 pounds. When converted to forward-facing, they might support children up to 65 pounds. Always check your specific model’s manual for its unique limits, as these can vary significantly between brands and models.
Booster seats are generally for children aged 4 and older, or those weighing between 40 to 100 pounds, and are used until a child is typically 8 to 12 years old, or reaches a height of 4’9″. The goal here is to ensure the adult seat belt fits correctly. Always, without exception, consult your specific car seat’s manual for its precise age, weight, and height limits to guarantee the best fit and utmost safety for your child.
3. **Thoroughly Read the Car Seat Manual**Before you even attempt to install a car seat, the most foundational and non-negotiable step is to meticulously read the car seat manufacturer’s manual. This document is not merely supplementary; it is your primary instruction guide for safe and correct installation and usage. Skipping this step is a common mistake that can have dire consequences.
The car seat manual contains highly specific instructions tailored to your particular model. It provides precise details on how to install the seat properly, including critical information on harness routing, recline angles, and attachment methods. Every car seat is unique, and what works for one model may not apply to another, even from the same brand.
Within the manual, you will find vital sections such as a parts list, which identifies all components of the car seat. More importantly, it outlines the detailed, step-by-step instructions for installation. These steps are engineered to ensure the seat is secured optimally within your vehicle, preventing common errors that compromise safety.
Furthermore, the manual includes crucial safety tips that extend beyond basic installation, offering guidance on maintenance, cleaning, and when to discontinue use due to expiration dates or recalls. It may also provide troubleshooting advice for common installation challenges. Investing the time to fully comprehend every word of this manual is a direct investment in your child’s safety and well-being.
Read more about: Emergency Ready: Your Step-by-Step Guide to Safely Changing a Tire on a Busy Highway
4. **Consult Your Vehicle Manual**Just as crucial as reading your car seat’s manual is understanding the specific requirements and features of your vehicle regarding child restraint systems. Your vehicle manual is not just for understanding dashboard lights or maintenance schedules; it holds vital information on how to properly and safely secure a car seat in your particular car model.
This manual provides essential details on where child restraint systems can be installed, which positions are safest, and whether certain seating areas have specific limitations. It often includes diagrams that visually demonstrate the recommended placement of car seats within your vehicle. This guidance is indispensable for a secure installation.
One of the most important pieces of information you will find relates to LATCH (Lower Anchors and Tethers for Children) anchors. Your vehicle manual will clearly indicate the locations of these dedicated attachment points, if equipped, and how to use them correctly. Knowing exactly where these anchors are is key to utilizing this widely recommended installation method.
Beyond LATCH, the vehicle manual also provides instructions for installing car seats using the vehicle’s seat belts, detailing proper belt routing and locking mechanisms specific to your car. Crucially, it contains important warnings about airbags and car seat placement, particularly emphasizing why car seats should never be placed in front of an active frontal passenger airbag. Consulting both your car seat and vehicle manuals ensures a comprehensive and proper installation, maximizing your child’s safety.
Read more about: Don’t Get Scammed: 14 Car Services and Accessories That Are a Total Waste of Your Money

5. **Prioritize Rear-Facing for Young Children**When it comes to the safety of infants and young toddlers, prioritizing the rear-facing car seat position is universally recognized as the safest practice. Experts strongly advocate for keeping children in a rear-facing car safety seat for as long as possible, up to the maximum height and weight limits allowed by their specific seat. This includes virtually all children under 2 years of age and most children up to age 4.
The rationale behind this recommendation is profoundly rooted in biomechanics and child physiology. In the event of a frontal collision, a rear-facing car seat excels at supporting your child’s delicate head, neck, and spine. It cradles these vulnerable areas, distributing the crash forces across the child’s entire back, which is significantly better equipped to absorb impact than their neck or head.
Conversely, if young children are moved forward-facing too soon, they are at a much higher risk of injury in a crash. The forces generated would be absorbed by the child’s shoulders, head, neck, and spine in a much less protected manner. This early transition can lead to severe head and spinal cord injuries that are largely preventable with continued rear-facing use.
Manufacturers recommend that children remain in a rear-facing car seat until they reach the top height or weight limit allowed by the car seat. For example, California law requires children under 2 years old to be rear-facing in a car seat unless they weigh 40 pounds or more or are 40 inches tall or more. Remaining rear-facing for an extended period is a critical decision that significantly enhances your child’s safety, offering unparalleled protection during the most vulnerable years of their development.
Read more about: Road-Tested Comfort: A Definitive Guide to the 12 Best Car Seats for Your Family’s Peace of Mind in 2025
6. **Always Use the Back Seat**An absolute rule in child passenger safety is that child car seats should always be positioned in the backseat of a vehicle, without exception. This principle is not merely a recommendation; it is a fundamental safety mandate based on decades of research and accident data. Never, under any circumstances, should a child car seat be installed in the front seat.
The primary reason for this strict guideline is the presence of frontal airbags. The force with which a frontal airbag deploys is immense, designed to protect an adult in a severe collision. However, this same force can be lethal for a child, particularly an infant or young child in a car seat. Even a simple fender bender can trigger an airbag, causing serious injuries or even paralysis to a child positioned in the front seat.
While some vehicles may offer airbag deactivation switches, relying on these is not a foolproof solution, and it is always safer for children to travel in the back of the car. The back seat provides a buffered zone away from these powerful safety devices, drastically reducing the risk of airbag-related injuries. For instance, the back seat in the middle position is usually cited as the safest place for children 12 and below, offering maximum distance from potential side impacts as well.
California law strictly prohibits a child from being transported in a rear-facing car seat in the front seat that is equipped with an active frontal passenger airbag. While there are very specific and rare exemptions for a child under age 8 to ride in the front seat (e.g., no rear seat, all rear seats occupied by other children), these are exceptions to a critical rule. Prioritizing the backseat for all children up to age 13 remains the best practice for optimal safety.
Read more about: America’s Most Treacherous Turns: Unpacking the 10 Worst Intersections in the US for 2025 and Essential Safety Tips

7. **Master LATCH System Installation**For many modern vehicles and car seats, the LATCH (Lower Anchors and Tethers for Children) system offers an alternative and often simpler method for secure installation compared to using the vehicle’s seat belt. Mastering this system is key to ensuring your car seat is firmly anchored and provides maximum protection for your child.
The LATCH system utilizes a series of anchors built directly into your vehicle and corresponding connectors on your car seat. To begin, you’ll need to locate the lower anchors, which are typically found in the crease between the backrest and the seat cushion of your vehicle’s backseat. Your vehicle manual will specify which seating positions are equipped with LATCH anchors, often indicated by small symbols.
Once located, take the lower anchor connectors, usually in the form of hooks or clips attached to the car seat’s base or the seat itself, and securely snap them onto the metal bars of your car’s designated LATCH spots. It is crucial to ensure a firm connection, listening for a definitive click or testing the connection by pulling on it. These anchors are designed to hold the car seat rigidly in place.
After connecting both lower anchors, the next vital step is to tighten the anchor belt attached to the car seat base. Pull the strap firmly until the car seat base is snug against the vehicle seat. There should be no more than 1 inch (2.5 cm) of movement from side to side or front to back when tested at the belt path. This tightness test is a fundamental check for all installation methods.
Some car seats, particularly forward-facing ones, may also utilize a top tether in conjunction with the lower anchors. This tether feeds over the top of the vehicle’s seat and latches onto a metal anchor point typically found on the back of the vehicle seat or parcel shelf. Using both lower anchors and the top tether significantly enhances stability and reduces head movement in a crash, making the LATCH system a comprehensive approach to securing your child’s car seat.
Mastering Advanced Car Seat Installation and Child Securing Techniques for Ongoing Safety
Moving beyond the foundational steps of car seat selection and initial setup, the journey to complete child passenger safety requires a deeper dive into installation specifics and the ongoing commitment to securing your child correctly. This section focuses on advanced techniques, crucial checks, and vital considerations that ensure your child remains optimally protected throughout their car-riding years.
Read more about: Master Your Ride: 14 DIY Car Maintenance Tasks to Save Thousands and Empower Your Inner Mechanic
8. **Installing with the Vehicle’s Seat Belt**While the LATCH system offers a convenient installation method for many modern vehicles, understanding how to properly use your vehicle’s seat belt to secure a car seat is equally crucial. This method serves as the primary attachment when LATCH anchors are not available, or as an additional layer of security in some setups.
If your specific car seat does not utilize the dedicated LATCH anchor system, or if your vehicle is not equipped with LATCH in the desired seating position, the vehicle’s own seat belt becomes your key tool for installation. It is vital to feed the seat belt through the designated openings in the car seat’s base or shell. These pathways are specifically designed by the manufacturer to ensure the belt provides maximum stability.
After routing the seat belt correctly, buckle it firmly. Crucially, the seat belt should lie flat and smoothly, without any twists or bunches, as it passes through the car seat’s belt path. Not latching the seat belt correctly can significantly increase the risk of injury in an accident, underscoring the importance of meticulous attention to detail at this stage.
For forward-facing car seats, the process is similar: thread the seat belt through the specific openings in the back or bottom of the seat. Once buckled, push down on the car seat and pull on the belt to lock it into place, ensuring the car seat is pressed firmly against the vehicle seat. This locking mechanism is essential for maintaining tension and preventing movement during travel, providing a robust anchor for your child’s protection.
Read more about: Beyond the Bite: 12 Simple, Actionable Ways to Rodent-Proof Your Car’s Engine and Wiring
9. **Performing the “Inch Test” for Tightness**Regardless of whether you use the LATCH system or the vehicle’s seat belt for installation, the ultimate indicator of a secure car seat is its tightness. The “inch test” is a fundamental, universally recommended check that confirms your car seat is firmly anchored and ready to protect your child.
Once your car seat is installed, whether rear-facing or forward-facing, grasp the car seat base at the belt path—the area where the LATCH strap or vehicle seat belt passes through it. Firmly try to move the seat from side to side and front to back. A properly installed car seat should not move more than 1 inch (2.5 cm) in any direction at this point.
If the car seat moves more than 1 inch, it is not securely installed, and you must tighten any straps or belts that are too loose. This could involve re-engaging the LATCH strap, pulling the vehicle’s seat belt tighter, or ensuring the seat belt’s locking mechanism is activated. Persistent movement indicates a critical safety flaw that must be corrected before every trip.
The inch test is not a one-time procedure; it should be performed regularly, especially after any adjustments or if the car seat has been removed and reinstalled. This simple yet effective test empowers parents and caregivers to ensure the car seat remains tightly secured, providing consistent and reliable protection for their child against the forces of a sudden stop or collision.

10. **Adjusting the Recline Angle (Especially for Rear-Facing)**Beyond mere tightness, the correct recline angle of a car seat, particularly for rear-facing installations, is paramount for a child’s safety and well-being. For the youngest infants, an appropriate recline ensures their delicate airways remain open and supports their underdeveloped head and neck.
Rear-facing car seats are designed with bases that typically offer different recline positions. Newborns and very young infants require a more reclined position, which helps prevent their heads from falling forward and obstructing their breathing. This specific angle is critical for their respiratory safety, making it a non-negotiable aspect of installation.
Most infant carriers and convertible car seats feature built-in level indicators to assist caregivers in achieving the correct angle. Once the car seat base is in place, consult this level to verify that the seat is set at the appropriate recline for your baby’s specific weight, height, and age as specified in the manufacturer’s instructions. If the level is not correct, adjustments must be made.
Adjusting the base angle usually involves rotating a piece or engaging a mechanism built into the car seat. Should your car seat not support such a feature or if minor adjustments are needed, a rolled towel or a pool noodle may be placed under the seat crease, but only if explicitly permitted by the car seat manufacturer. Remember to continually check and change the angle as your baby grows and outgrows one setting, transitioning to a less reclined position when appropriate.
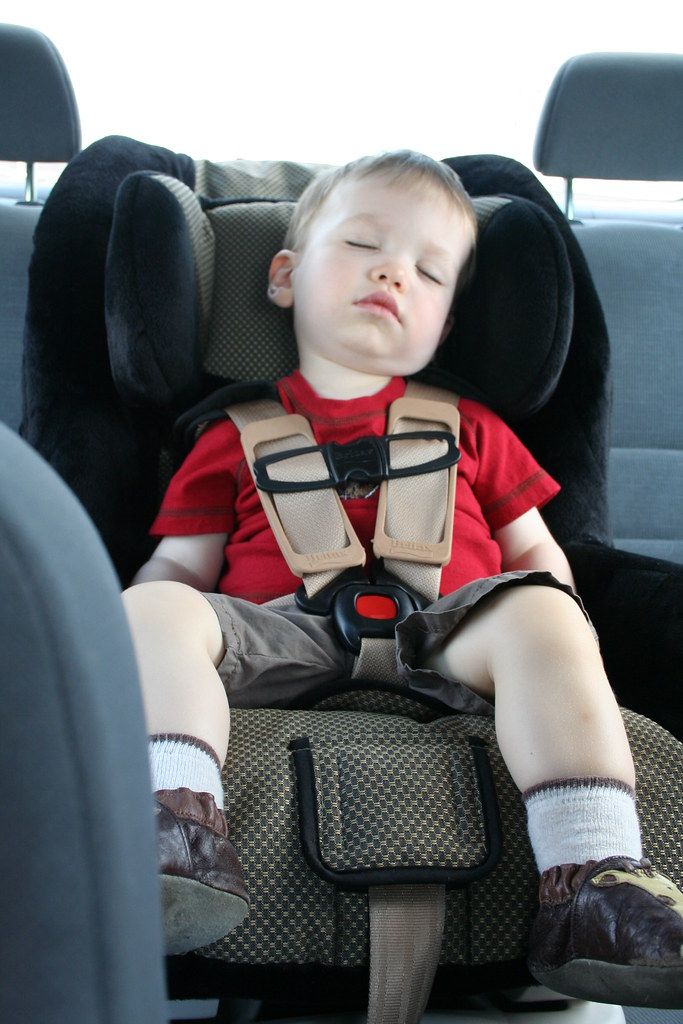
11. **Correctly Securing Your Child in the Harness**Once the car seat itself is securely installed in the vehicle, the next vital step is to ensure your child is properly restrained within the seat’s harness. This involves several critical adjustments that directly impact their safety in the event of a crash.
After placing your child into the car seat, bring the two shoulder straps over their shoulders and buckle them into the lap harness. The harness straps themselves must be flat and untwisted. For rear-facing car seats, the harness straps should be positioned at or slightly below your child’s shoulders. When the car seat is forward-facing, the harness straps must be at or slightly above your child’s shoulders.
The chest clip, a small but essential component, plays a crucial role in keeping the shoulder straps correctly positioned. It must always be at armpit level. Placing it too high or too low can allow the straps to slip off the shoulders, compromising the child’s restraint. Ensure the lap buckle is snug across their hips, providing a stable foundation for the harness system.
Finally, conduct the “pinch test” to verify harness snugness. Tighten the straps until you cannot pinch any excess material at your child’s shoulders between your thumb and forefinger. This indicates the harness is tight enough to hold your child securely. It is imperative for safety reasons to avoid placing any bulky clothing, blankets, or after-market products underneath the harness straps, as these can create slack and reduce the harness’s effectiveness in a collision. If you want to cover your child, buckle them in first, then add the cover over the straps.
Read more about: $300,000: Unpacking Its Multifaceted Significance in Finance, Language, and Lifestyle

12. **Understanding and Using the Top Tether (For Forward-Facing Seats)**For all forward-facing car seats, the top tether is a critical, often overlooked component that significantly enhances safety by limiting head and torso movement in a crash. Its proper use is mandatory to ensure the car seat performs as intended.
Many forward-facing car seats are equipped with an attached tether strap that extends from the top of the car seat. This strap feeds over the back of the vehicle’s seat and connects to a designated metal anchor point typically found on the back of the vehicle seat, the parcel shelf, or even the floor. Your vehicle’s manual will provide precise locations for these top tether anchors.
After locating the anchor, securely latch the top tether belt to it. Once connected, tighten the tether strap firmly, pulling out any slack. This action ensures the car seat is pulled back tightly against the vehicle seat, preventing excessive forward movement during a collision. Without using the top tether in the forward-facing position, a child’s head and torso will move forward significantly more in a crash, increasing the risk of serious injury.
The top tether works in conjunction with either the LATCH lower anchors or the vehicle’s seat belt to provide comprehensive stability. It is not an optional accessory but a fundamental safety feature for forward-facing car seats, drastically reducing the forces exerted on a child’s head and neck. Always make certain this tether is correctly attached and tightened every time you use a forward-facing car seat.

13. **Transitioning to Booster Seats and the “5-Step Test”**As your child grows and eventually outgrows their forward-facing car seat with a harness, the next crucial step in child passenger safety is transitioning them to a booster seat. This stage requires careful consideration to ensure they continue to receive appropriate protection until they are ready for the vehicle’s seat belt alone.
Booster seats are designed to elevate your child, ensuring that the vehicle’s lap and shoulder seat belt fit correctly across their body. The shoulder strap should comfortably cross the center of the chest, not the neck, and the lap belt should rest low on their hips, touching the upper thighs. This proper belt positioning is vital for distributing crash forces across the strongest parts of a child’s body.
Children should remain in a booster seat until they are big enough to pass the “5-Step Test,” which objectively determines if the adult seat belt fits properly without a booster. This test is a critical benchmark: 1. Is the child sitting tall so his/her whole back is touching the seatback? 2. Do the child’s knees bend comfortably at the edge of the seat? 3. Does the belt cross the shoulder between the neck and arm? 4. Is the lap belt touching the tops of the legs? 5. Can the child sit like this for the whole trip?
If you answer “no” to any of these questions, the child needs to continue riding in a booster seat. All children are safest when properly restrained and riding in the back seat until at least age 13. Furthermore, it is imperative never to place the shoulder belt under the arm or behind the back, as this can lead to severe injuries in a crash by concentrating impact forces on vulnerable areas.
14. **Regular Checks and Avoiding Common Pitfalls**Car seat safety is not a one-time installation; it is an ongoing commitment that requires vigilance and regular checks. Ensuring your child’s car seat remains safe means staying informed and actively avoiding common errors that can compromise their protection.
Periodically check your car seat for any recall notices, as manufacturers may issue alerts for defects that require repair or replacement. It is also crucial to be aware of the car seat’s expiration date, typically found on a label. Most car seats expire 6 to 10 years after the date of manufacture, as materials can degrade over time, reducing their effectiveness. Purchasing used car seats is not recommended due to potential missing parts or an unknown crash history, which could render them unsafe.
Beyond the car seat itself, consider factors like bulky winter clothing. Such attire can create slack in the harness straps, preventing a snug fit. It is safer to buckle your child snugly in regular clothes and then place a blanket or coat over the harnessed child. Additionally, never leave a child who is 6 years old or younger alone in a car if the keys are in the ignition or the car is running, or if there is a significant risk to the child, a practice legally enforced in places like California by Kaitlyn’s Law.
Be mindful of the dangers in and around cars, including blind zones when moving forward or backing out of a driveway. Always perform a “Look Before You Lock” check to ensure a child has not been accidentally left in the back seat, as heatstroke is a preventable tragedy. For any questions or doubts about your car seat installation or proper usage, leverage available resources such as local Child Passenger Safety (CPS) programs or certified car seat inspection stations. These experts can provide individualized education and hands-on assistance to ensure your child is as safe as possible on every journey.
Read more about: The 12 Most Common Mistakes People Make When Jump-Starting a Dead Battery
Ensuring your child’s car seat is installed correctly and used properly is one of the most significant safety measures you can take as a parent or caregiver. While it demands diligence and attention to detail, the peace of mind knowing your child is protected is invaluable. By understanding these 14 essential steps, from selecting the right seat to mastering advanced installation and securing techniques, you are empowering yourself with the knowledge to make every trip a safe one. Your commitment to these guidelines is a testament to your child’s well-being, securing their safety on all of life’s adventures.


