

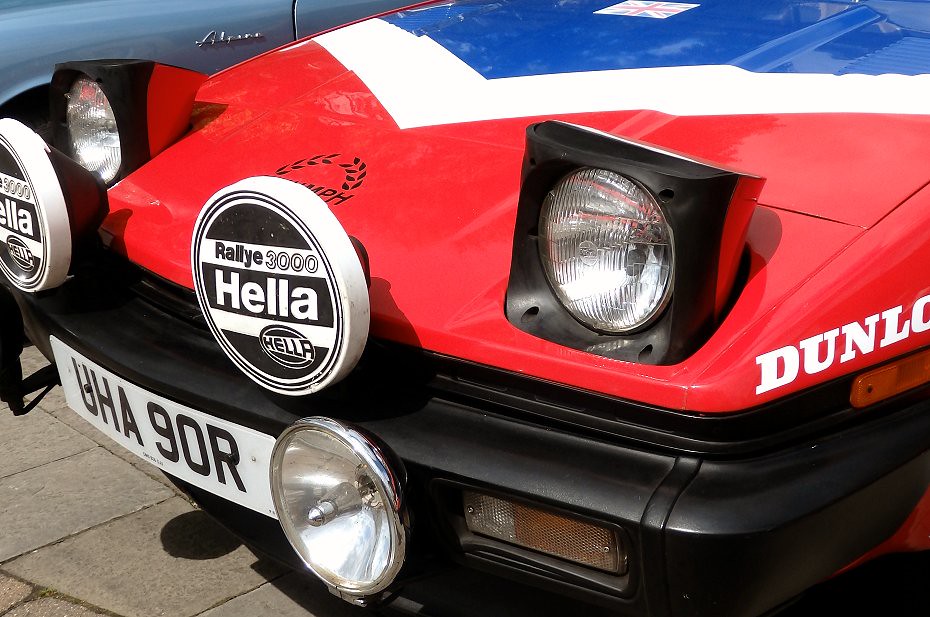
Headlights are undeniably among the most vital components on any vehicle, serving a dual purpose that goes far beyond mere aesthetics. These powerful beams are not only essential for illuminating the road ahead, granting you the necessary visibility to navigate safely, but they also play a critical role in ensuring other motorists can see your vehicle, drastically reducing the risk of accidents during nighttime or adverse weather conditions. Their importance to road safety simply cannot be overstated.
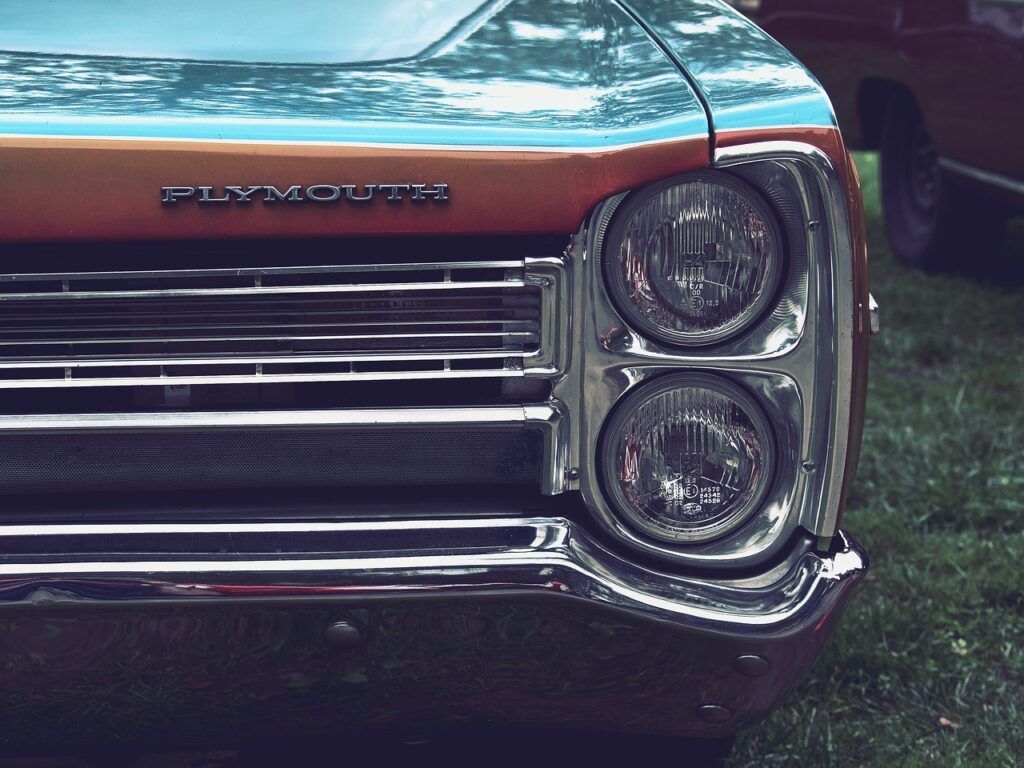
Over time, however, these indispensable components often fall victim to the elements. Most headlight lenses are crafted from polycarbonate plastic, a robust material perfectly suited to withstand harsh road conditions without breaking. Yet, this strength comes with a weakness: an incompatibility with the sun. Manufacturers initially apply a UV protective film to shield the lenses, but relentless exposure to UV rays gradually destroys this film, leaving the plastic vulnerable to oxidation. This process leads to the familiar hazy, yellowed appearance that diminishes both the look of your car and, more importantly, its night vision capabilities.
But there’s no need to fret if your headlights have started to haze over or take on a yellowish tint, indicating that oxidation has begun. Getting those headlights looking new again is a surprisingly easy DIY task that can restore your night vision to factory fresh in a remarkably short time. This comprehensive guide will walk you through the essential steps to bring clarity back to your lenses, ensuring not only an improved aesthetic but also a significantly safer driving experience for you and everyone else on the road. Let’s dive into the practical and actionable steps you need to take.
1. **Buy What You’ll Need**
The very first and most crucial step in embarking on your headlight restoration journey is to ensure you have all the necessary supplies at hand. Without the right tools, even the simplest DIY task can become frustrating and inefficient. The most straightforward approach to gathering your materials is to purchase a dedicated headlight restoration kit, which conveniently bundles all the required components into one package. Many popular kits are available on the market, and while they may vary slightly in their specific contents, they generally operate on the same fundamental principles we’ll be outlining.
Alternatively, for those who might already possess some of the items or prefer to customize their arsenal, individually buying the products found in these kits is a smart and economical choice. Essentially, you’ll need various grits of sandpaper; for most situations, 1000, 2000, and 3000 grit are typically safe bets, though some guides suggest starting as low as 400 or 800 grit for heavily damaged outer layers. A polishing compound, a wax specifically designed for automotive use, and a UV sealant are also non-negotiable for achieving a lasting, clear finish.
To complement these core materials, a few other items should definitely make it onto your shopping list. A roll of painter’s tape is essential for protecting surrounding areas of your car, and clean microfiber cloths are indispensable for applying cleaners, polishes, and sealants without scratching the delicate lens surface. A water spray bottle will prove invaluable for wet sanding, helping to minimize dust and prevent sandpaper from clogging. Having these tools and materials ready will streamline your headlight restoration process, ensuring optimal results and improved driving visibility.
Specific products mentioned in the context that you might consider include RYOBI Corded 10 in. Orbital Buffer for faster polishing (if you plan to use it in the future), VERONES Sandpaper (400 to 3000 Grit), Turtle Wax Polishing Compound Light to Medium Cleaner, Turtle Wax Super Hard Shell Paste Wax, Blue Magic Headlight Lens Restorer, and Chemical Guys Professional Grade Premium Microfiber Towel. For cleaning solutions, a mild soap or dedicated automotive cleaner is ideal, and for a DIY approach, toothpaste or baking soda can also serve as powerful headlight cleaners, containing mild abrasives to break down oxidation. However, for serious restoration, a dedicated kit or individual components are best.
Read more about: Rev Up Your Restoration: The Ultimate Guide to the Best Free Online Forums for Classic Car Enthusiasts

2. **Get Your Headlights Clean**
Before any sanding or polishing can begin, a thorough cleaning of your headlight lenses is an absolutely critical first step. Dull, cloudy headlights don’t just look bad; they are a significant safety hazard, and polishing alone won’t effectively cut through embedded grime. Imagine trying to paint a wall without first cleaning off the dirt and dust – the new coat wouldn’t adhere properly, and the imperfections would still show through. The same principle applies here: you wouldn’t apply a fresh polish over dirt and dust.
Start by rinsing the headlights with plenty of clean water to remove any loose debris, such as dirt, bugs, and road grime. After this initial rinse, the next phase is a comprehensive washing of the headlight lenses using car soap and water. It’s often beneficial to extend this washing to the surrounding areas of the car as well, as this will help ensure that the painter’s tape adheres properly and effectively during the subsequent step, providing a clean surface for it to stick.
For this cleaning, grab a bucket, a mild car shampoo (it’s important to use a pH-balanced formula, as dish soap can sometimes be too harsh for automotive paint and plastics), and a clean microfiber cloth. Avoid using sponges, as they can trap grit particles that might inadvertently scratch the lens. Mix your soap solution according to the manufacturer’s instructions, typically a few tablespoons of shampoo per gallon of warm water. Dip your cloth in the soapy water, wring it out so it’s damp but not soaking, and gently wipe the lens in straight, overlapping strokes. Pay extra attention to areas around the edges and vents where bugs and grime tend to accumulate. Allow the solution to sit for 2–3 minutes to loosen stubborn contaminants, then rinse thoroughly with plenty of clear water to ensure no underlying dirt interferes with the restoration process. This crucial preparation step guarantees a smooth surface for the subsequent sanding and polishing stages.
Read more about: Undervalued ’80s Imports: 9 Easy-to-Maintain Restoration Gems You Need to Know About

3. **Tape Off the Headlights**
With your headlights thoroughly cleaned, the next pivotal step is to meticulously tape off the surrounding areas of your vehicle. This seemingly simple action is incredibly important because you will soon be sanding the headlight lenses, and it is absolutely essential that you sand only the lenses themselves, and not the adjacent paintwork or trim. This protective barrier is your safeguard against accidental damage to your car’s finish.
To achieve this, use high-quality painter’s tape to completely block off the headlight assembly. The goal is to create a secure perimeter around the lens, ensuring that any stray sandpaper strokes, dust, or polishing compound remain confined to the headlight area. When applying the tape, press down firmly along the edges to create a tight seal. This will prevent any sanding debris or product from seeping underneath and potentially affecting the paintwork. Ensure that the edges are sealed well to prevent any sanding debris from affecting the paintwork.
You’ll be grateful you took the time for this step later. It’s remarkably easy for your hand to slip or for the sandpaper to inadvertently graze an unintended surface during the sanding process. That momentary lapse, without the protection of painter’s tape, could result in unsightly scratches on your car’s paint or trim, which are far more difficult and costly to fix than faded headlights. Therefore, take your time, apply the tape carefully, and ensure every vulnerable surface around the headlight is adequately protected. This preparation is a small investment of time that offers immense peace of mind and protection for your vehicle’s pristine appearance.
Read more about: Inside Eddie Van Halen’s Dream Garage: 15 Iconic Cars Owned by the Rock Legend

4. **Sand Away**
Welcome to what many consider the pivotal step in headlight restoration: the sanding process. Whether you’ve opted for a comprehensive restoration kit or gathered your materials individually, the fundamental technique for sanding remains consistent. This stage is where you physically remove the damaged, oxidized outer layer of plastic, preparing the lens for clarity.
You’ll want to begin with the most abrasive sandpaper option you have. If you followed the advice to acquire 1000, 2000, and 3000 grit, reach for the 1000 grit first (remember, lower numbers indicate a more abrasive grit, designed for tougher initial removal). Before you begin, wet both the sandpaper and the headlight lens thoroughly. This is crucial for wet sanding, as it minimizes dust, prevents the sandpaper from clogging, and helps prevent severe scratching due to grit particle buildup. As you work, sand the lens in straight, horizontal strokes, maintaining a consistent direction throughout this initial grit. Spend a good 5 to 10 minutes hunched down there, ensuring you keep the surface wet as you work. The quality of your results largely depends on the thoroughness of this stage, so don’t be afraid to take your time and apply consistent, firm pressure.
After completing the first pass with the most abrasive grit, rinse the headlight clean to remove any residue and inspect your progress. Now, repeat the process with the next less abrasive sandpaper—in our example, the 2000 grit, and then subsequently the 3000 grit. The only significant difference with these finer grits is the direction of your sanding motion. Since you used horizontal strokes with the initial 1000-grit sandpaper, you should now sand diagonally across the headlight for the 2000-grit stage. For the final 3000-grit sanding, you will use the opposite diagonal motion from the one you just completed. This change in direction with each progressively finer grit helps to eliminate the scratch patterns left by the previous, coarser grit, ensuring an even and smooth surface.
Throughout these subsequent sanding stages, continue to keep both the sandpaper and the lens generously wet with water. A hose or a spray bottle works wonders here, allowing for continuous lubrication. Rinse frequently to check your progress and to prevent the buildup of abrasive particles. As you move to finer grits, you will notice the lens becoming progressively clearer. This step-by-step approach ensures a thorough restoration, gradually refining the surface until it is ready for polishing.
Read more about: Diesel Durability Unveiled: 10 Engines That Redefine Longevity — And Those That Don’t

5. **Polish and Wax**
Once the extensive sanding process is complete, it’s time for the immensely satisfying stage of polishing and waxing – where you truly reveal the fruits of your elbow grease and restore the headlight’s original clarity. First, thoroughly wipe off and dry your headlights, ensuring no sanding residue or water remains on the surface. A clean microfiber cloth is perfect for this, as its soft, lint-free fibers will not introduce new scratches to the now-smooth plastic.
Next, squeeze a small amount of your chosen polishing compound onto a clean section of a microfiber towel. Begin rubbing the polish into the headlight lens using firm, consistent circular motions. The goal here is to gently abrade the microscopic imperfections and haziness left by the sanding, bringing out a brilliant clarity and shine. Dedicate a few minutes to this step for each headlight, maintaining even pressure across the entire surface. If you possess and are comfortable using an orbital buffer, you can certainly expedite this process, though it’s not necessary to purchase one solely for this task unless you anticipate future uses.
Continue buffing until the desired clarity is achieved, often requiring a few minutes of consistent polishing. You’ll visibly notice the lens transforming from a somewhat frosted appearance to a crystal-clear state. Once you’ve successfully restored the lenses to their clear condition, the final touch for this stage is the application of wax. Treat the headlight lens much like you would the painted surfaces of your car: apply a thin, even coat of car wax. This step serves to thoroughly clean and, more importantly, provides an initial layer of protection to the newly exposed plastic surface, preparing it perfectly for the crucial final step of sealing. The wax adds a temporary shine and a light barrier, making the lens look pristine.
Read more about: Unleash Your Inner Mechanic: 15 Essential DIY Car Hacks to Save a Fortune on Maintenance

6. **Use UV Sealant**
Applying a UV sealant is not merely an optional extra; it is a critical and absolutely essential step in the headlight restoration process. After all your meticulous cleaning, sanding, and polishing, you have effectively removed not only the old oxidized plastic but also the original UV protective coating that initially guarded the lens. If you skip this final protective layer, all your hard work will be for naught, as the newly clear plastic will quickly re-oxidize and haze over again when exposed to the sun’s harsh UV rays. The sealant acts as the vital protective layer that keeps lenses from hazing over again.
This step typically involves wetting a paper towel or a clean microfiber cloth with the UV sealant and applying it to the headlight lens in sweeping, broad strokes. The key here is to ensure full and even coverage across the entire lens surface. However, it is paramount to pay close attention to the specific instructions provided with the kit or sealant product you purchased, as application methods and curing times can vary. A general rule of thumb is to apply only one thin, even layer of sealant unless the product instructions explicitly state otherwise.
After applying the sealant, you must allow it sufficient time to cure properly. The best results are usually obtained by parking the car in a dry, shaded space, away from direct sunlight and moisture, for the duration recommended by the manufacturer. Adhering strictly to the directions printed for your chosen restoration kit or sealant will yield the best and most long-lasting results. This protective coating is your vehicle’s sunscreen, shielding the headlights from future yellowing and fading caused by sun exposure and preserving their newfound clarity for years to come. By investing in a UV-resistant sealant and following proper care practices, you can keep your headlights looking clear and bright for years to come.
Read more about: Consumer Alert: Unmasking the Crossovers and Cars That Succumb to Winter Rust Versus Those Built to Last

7. **Test It Out**
This step is critical for evaluating the success of your restoration efforts and determining if any further action is required. After all your diligent work through the cleaning, sanding, polishing, and sealing stages, it’s only natural to want to see the transformation. The immediate visual improvement should be significant, but a practical test confirms full restoration.
To properly test your headlights, wait until dusk or nightfall, or find a dimly lit area like a garage. Turn on your vehicle’s headlights and observe the light pattern and intensity. Are they significantly brighter than before? Is the light spread even, without dark spots or haziness? You should notice a dramatic improvement in both the brightness and the clarity of the beam, allowing for much better visibility on the road.
If, after meticulously following all the previous steps, you still find that your headlights aren’t as clear or bright as you expected, don’t despair. It might be worthwhile to repeat the entire sanding and polishing process, perhaps spending a bit more time with each grit of sandpaper to ensure maximum oxidation removal. Sometimes, heavily neglected headlights require a second pass to achieve optimal results.
However, it’s also important to acknowledge that some lenses might be beyond DIY repair. If repeated attempts yield minimal improvement, or if you notice internal damage like peeling reflective coating, the lens might be too far gone for simple restoration. In such cases, professional help or ultimately replacing the entire headlight assembly might be the only viable solutions to ensure safe night driving conditions. A professional can assess the damage and advise on the best course of action, saving you time and effort on a potentially irreparable lens.
Read more about: Rev Up Your Restoration: The Ultimate Guide to the Best Free Online Forums for Classic Car Enthusiasts

8. **Tips for Maintaining Clear Headlights Post-Restoration**
Once you’ve successfully restored your headlights to their former glory, the journey isn’t over. Keeping them clear and preventing future deterioration requires ongoing care and attention. Think of it as protecting your investment; a little proactive maintenance goes a long way in preserving the clarity and functionality of your newly restored lenses.
Regular cleaning is paramount. Make it a habit to wash your headlights frequently using a gentle automotive cleaner and a soft microfiber cloth. This routine helps to remove dirt, grime, and environmental contaminants that can accumulate over time and lead to fogging. Just as you wash the rest of your car, your headlights deserve the same gentle care to keep them sparkling.
When performing these regular cleanings, it’s crucial to avoid harsh chemicals or abrasive cleaners. Products not specifically formulated for automotive plastics can damage the protective coating you’ve just applied, undoing your hard work. Stick to mild soaps and dedicated automotive cleaners to ensure the longevity of your restoration.
Applying UV protection is another essential practice. After restoration, consider reapplying a UV protection sealant every 6-12 months, depending on how much sun exposure your vehicle gets. This acts as a crucial barrier against ultraviolet rays, which are the primary culprits behind yellowing and oxidation. It’s like giving your headlights their own regular sunscreen. Finally, strategic parking can make a significant difference. Whenever possible, park your vehicle in a shaded area or use a car cover, especially during peak sunlight hours. Prolonged sun exposure accelerates the deterioration of headlight lenses, even with a sealant. Regular inspections for any signs of hazing or discoloration, combined with wiping them dry after rain or snow, will help ensure your headlights remain clear and functional for years to come.
9. **A Detailed Look at Headlight Cleaning Supplies**
While we touched upon gathering supplies earlier, let’s take a more in-depth look at the specific cleaning agents that play a pivotal role in headlight restoration, beyond what’s typically included in a standard kit. Understanding the purpose and effective use of each can elevate your DIY results, especially for those preferring a more customized approach.
Microfiber cloths are truly the unsung heroes of this entire process. Their soft, lint-free fibers are designed to prevent scratching, making them indispensable for applying cleaners, polishes, and sealants. Unlike paper towels or ordinary rags, microfiber traps dirt and grime efficiently without leaving behind any residue, guaranteeing a streak-free, pristine finish. For optimal results, keep at least two on hand: one for cleaning and another specifically for drying or buffing. Remember to wash them separately and avoid fabric softeners, as these can diminish their effectiveness over time.
Car shampoo forms the foundation of a thorough pre-restoration cleaning. Its pH-balanced formula is specifically designed to safely remove surface dirt, grease, and road grime from the plastic lens without causing damage. To use, mix about one tablespoon of car shampoo with a quart of warm water. Apply this solution with a microfiber cloth, using gentle circular motions, and allow it to sit for two to three minutes. This brief soak helps loosen stubborn contaminants, ensuring the surface is perfectly prepped before any abrasive work begins, preventing underlying dirt from interfering with subsequent steps.
Interestingly, common household items like toothpaste and baking soda can also serve as surprisingly effective headlight cleaners, particularly for lighter oxidation. Non-gel toothpaste, with its mild abrasives, can gently break down the oxidized layer. Similarly, baking soda’s alkaline nature helps lift stains. For a DIY paste, you can mix two tablespoons of baking soda with just enough water to create a thick consistency, or simply apply a pea-sized amount of toothpaste directly to the lens. Scrub gently with a microfiber cloth for five to seven minutes, then rinse thoroughly. While cost-effective, these methods do require more manual effort and may not achieve the same professional-grade results as dedicated restoration kits for severely damaged headlights. Finally, the UV sealant, while mentioned as a crucial step, deserves a deeper dive into its role as a specialized cleaning supply for *future* protection. It’s the protective coating that shields the lens from UV damage, oxidation, and yellowing, essentially ‘cleaning’ your headlights of future harm. Choosing a high-quality automotive sealant specifically for plastic surfaces is key. Its application, a thin, even coat using a clean microfiber, followed by buffing and reapplication every 6-12 months, is integral to maintaining that restored clarity and functionality for years.
Read more about: Beyond the Basics: 12 Simple Steps to Achieve a Professional Car Engine Bay Detail

10. **Exploring Effective Polishing Techniques**
Polishing is the stage where the magic truly happens, transforming a dull, sanded surface into a crystal-clear lens. While the basic principle involves rubbing a compound, the technique itself can significantly impact the final outcome. Mastering effective polishing techniques will ensure you achieve maximum clarity and shine.
The core of effective polishing lies in the careful application of a suitable polishing compound. Car headlights lose clarity not just from oxidation, but also from microscopic scratches and imperfections left by the sanding process. Polishing compounds contain fine abrasives that gently abrade this surface layer, smoothing it out and revealing the clear substrate beneath. Always select a compound specifically formulated for automotive plastics, as general-purpose compounds might be too abrasive and cause further damage.
To begin, dispense a quarter-sized amount of your chosen compound onto a clean, soft cloth or a foam applicator pad. The key is to work in small, manageable sections, typically four to six inches at a time, to ensure even coverage and consistent pressure. Apply the compound using firm, overlapping circular motions. This circular action is crucial because it helps to distribute the compound evenly and prevents the formation of new scratches, maximizing its restorative effect across the entire surface.
Patience is undeniably a virtue during this phase. Resist the urge to rush, as hasty polishing can lead to uneven results or even introduce swirl marks. Dedicate at least two to three minutes per section, adjusting the time based on the severity of the remaining oxidation or haziness. For headlights that were particularly oxidized, repeating the polishing process two to three times, allowing the compound to dry slightly between applications, can yield superior results. After each pass, use a clean microfiber cloth to thoroughly wipe away any residue, which allows you to assess your progress before continuing. While manual polishing with a microfiber cloth is perfectly effective, especially for mild to moderate cases, an orbital buffer can significantly expedite the process and ensure a more uniform finish. If you already own an orbital buffer and are comfortable using it, it can be a valuable tool for this step. However, it’s generally not necessary to purchase one solely for headlight restoration unless you anticipate frequent use for other automotive detailing tasks. Regardless of whether you use manual or machine polishing, the objective remains the same: to progressively refine the lens surface until it is impeccably clear and gleaming.
Read more about: Dusty Relic to Road-Worthy Legend: Your Ultimate Guide to Reviving a Classic Car After Years in Storage
11. **DIY vs. Professional Headlight Restoration Services**
When facing faded, cloudy headlights, car owners often ponder whether to tackle the restoration themselves or enlist the help of professionals. Both approaches offer distinct advantages and disadvantages, primarily concerning cost, durability, and the level of effort required. Making an informed decision hinges on understanding these differences, especially considering that clear headlights are not just an aesthetic concern but a critical safety feature.
DIY headlight restoration kits present a cost-effective solution, typically ranging from $20 to $50. These kits usually come equipped with various grits of sandpaper (often starting from 400-grit for heavy oxidation and progressing to 2000-grit for a smooth finish), a polishing compound, and a sealant. The process is designed for individuals comfortable with basic car maintenance, involving manual sanding to strip away the oxidized layer, followed by polishing and sealing to bring back clarity. This method empowers you to restore your headlights at a fraction of the cost of professional services, and the satisfaction of a job well done is an added bonus.
However, the effectiveness and longevity of DIY results can be variable. The outcome largely depends on the severity of the oxidation and the meticulousness of your technique. While DIY kits can dramatically improve clarity, the restored effect might not last as long as a professional job, typically requiring reapplication or touch-ups every six months to a year. Consistent maintenance, including regular cleaning and periodic reapplication of sealant, is essential to extend the lifespan of your DIY restoration. It’s a trade-off: lower initial cost and hands-on effort versus potentially shorter-term results.
On the other hand, professional headlight restoration services, offered by auto detailers and body shops, provide a more comprehensive and durable solution. These services typically cost between $50 to $150 per headlight, a higher investment justified by specialized tools, advanced techniques, and superior quality products. Professionals often employ wet sanding with industrial-grade abrasives, followed by machine polishing that ensures an incredibly smooth and even finish. Critically, they often apply high-quality, long-lasting UV sealants that offer extended protection, sometimes coming with warranties guaranteeing clarity for several years. Choosing a professional service is ideal for those seeking a hassle-free, long-term solution or for headlights that are severely deteriorated and require expert attention. While the upfront cost is higher, the extended durability and peace of mind can make it a worthwhile investment, particularly if you prefer to avoid the manual labor or are concerned about achieving optimal results yourself. Ultimately, the decision boils down to your budget, your comfort level with DIY projects, and your expectations for how long the restoration should last. Regardless of the path you choose, restoring headlight clarity is a vital step towards enhancing both your vehicle’s appearance and, more importantly, your safety on the road.
Read more about: Unmasking the Mystery: Why Even a Minor Bumper Scratch Can Cost a Fortune to Fix, Explained by a Body Shop Owner
12. **The Crucial Role of Protective Coating**
We’ve emphasized the importance of the UV sealant in Step 6, but it warrants a deeper exploration as a fundamental “protective coating” strategy that ensures your restoration efforts endure. Understanding *why* this layer is so crucial and how to maintain it is key to long-term headlight clarity. Without it, even the most meticulous cleaning, sanding, and polishing would be merely a temporary fix.
The primary adversary of clear headlights is UV radiation. Over time, the sun’s harsh ultraviolet rays systematically break down the polycarbonate plastic from which most headlight lenses are made. This degradation process manifests as the familiar yellowing, haziness, and cloudiness that diminishes both your vehicle’s appearance and its vital light output. A UV-resistant sealant acts as a resilient shield, creating a protective barrier that absorbs or reflects these harmful rays, thereby preventing the plastic from re-oxidizing and degrading. It’s essentially “sunscreen for your car’s eyes,” safeguarding the structural integrity and clarity of the lens.
When selecting a protective coating, it’s imperative to choose a product specifically formulated for automotive headlights. These specialized sealants are designed to be compatible with polycarbonate plastics and offer robust, long-lasting UV inhibition. Many also provide a durable, scratch-resistant finish that further guards against minor abrasions from road debris. Application, while straightforward, demands attention to detail: ensuring the headlights are thoroughly clean and dry before applying an even coat with a clean microfiber cloth or applicator pad. Following the manufacturer’s curing instructions is critical, as some sealants may require multiple coats or a specific drying period for optimal protection.
While DIY application of these sealants is entirely feasible with the right product and technique, professional application can sometimes offer a flawless finish and potentially longer-lasting results. Auto detailers often have access to higher-grade, two-part coatings or specialized spray-on formulas that create an exceptionally durable barrier. If achieving a showroom-quality finish is paramount or if you’re uncertain about your application skills, considering professional assistance for the final protective layer might be a wise decision.
Crucially, the effectiveness of any protective coating is directly tied to ongoing maintenance. Avoid using harsh chemicals or abrasive cleaners on your headlights, as these can inadvertently strip away or damage the sealant layer. Instead, routine cleaning with mild soap and water is sufficient. Furthermore, to ensure continuous, robust protection, plan to reapply the UV sealant every one to two years, or more frequently if your vehicle is consistently exposed to intense sunlight and harsh weather conditions. By embracing this proactive approach to protective coatings, you can significantly extend the lifespan of your restored headlights, keeping them brilliantly clear and fully functional for many years of safer driving.
Read more about: Buyer Beware: Unpacking the Suspension Weaknesses of Best-Selling Pickups Under Load and Critical Failure Points
As we’ve journeyed through these essential steps, it’s clear that restoring faded headlights is much more than a cosmetic upgrade; it’s a vital investment in road safety. From gathering your supplies to meticulous sanding, polishing, and crucially, applying that protective UV sealant, each step plays a pivotal role in bringing back your night vision. Whether you choose to embark on a hands-on DIY adventure or opt for the seasoned expertise of a professional, the ultimate goal remains the same: ensuring those vital beams cut through the darkness with crystal clarity. By understanding the processes and committing to ongoing maintenance, you’re not just revitalizing your vehicle’s appearance, you’re actively enhancing your safety and that of everyone else sharing the road. So, go forth, restore with confidence, and enjoy the brilliantly clear vision ahead!


