
")
Alright, foodies, gather ’round! There’s something undeniably magical about a dinner party, isn’t there? The clinking of glasses, the hum of conversation, the tantalizing aromas wafting from the kitchen… it’s all part of the charm. But let’s be real, while some dishes are always the first to disappear, practically vanishing before they even hit the table, others sometimes just… linger. You know the ones. They’re the well-meaning, perfectly delicious classics that, for reasons we can only guess at, seem to get a polite nod but not quite the same ravenous attention they once commanded.
We’re talking about those “old favorites” that, according to the wisdom of the internet, “never really go out of style, especially when they taste this good.” These are the true MVPs of nostalgic comfort food, dishes that were once the undisputed stars of every family gathering and formal-ish dinner. They represent a beautiful blend of tradition and flavor that simply refuses to fade completely from our culinary landscape. Yet, in our quest for the new, the trendy, and the Insta-worthy, do we sometimes overlook the quiet brilliance of these reliable standbys?
So, let’s embark on a delicious, slightly cheeky journey down memory lane. We’re going to shine a spotlight on eight once-standard dinner party dishes. These are the recipes that, despite the context assuring us they “still hold their own at any table” and “bring a mix of nostalgia and practicality,” might find themselves politely bypassed in favor of something flashier. We’ll celebrate their enduring appeal while playfully asking: Seriously, what happened? Why aren’t these getting the love they deserve from today’s discerning guests? Don’t worry, we’re still totally here for them, and by the end, you might be too!
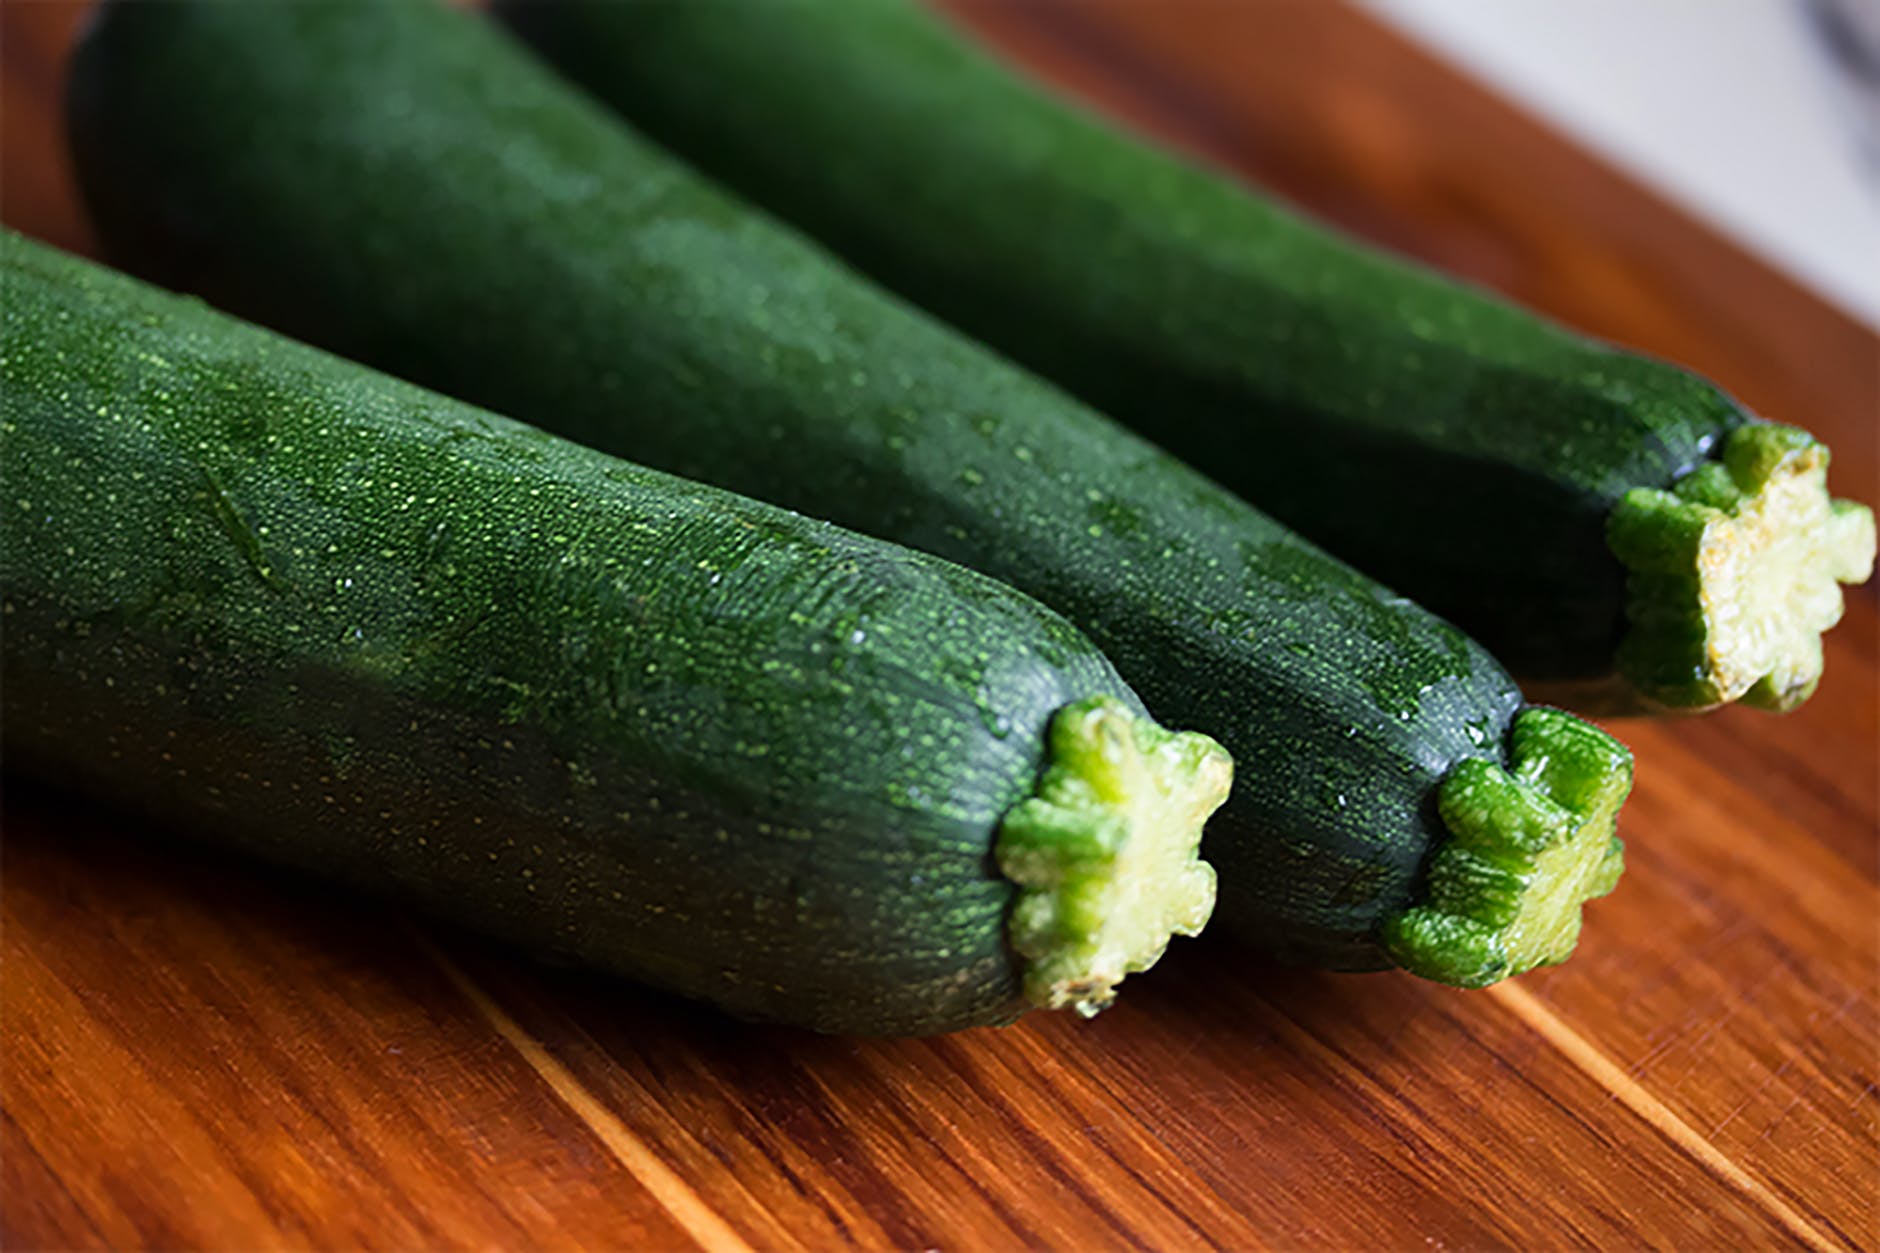
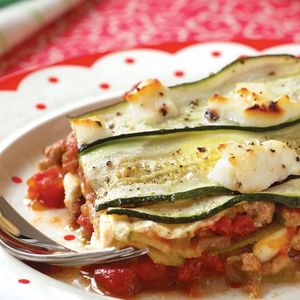
1. **Zucchini Lasagna**Ah, Zucchini Lasagna, the darling of the health-conscious yet comfort-food-craving crowd! The genius behind this dish lies in its clever swap: “Lasagna doesn’t always have to be made with traditional pasta layers. Zucchini Lasagna trades out pasta for thin slices of zucchini, creating a lighter alternative to the classic dish.” This brilliant modification means you can indulge in those familiar, cheesy layers without the heavy, carb-induced food coma, making it an appealing option for many looking to balance indulgence with wellness.
It’s not just about cutting carbs, though. This dish brings its own unique magic to the table. The context highlights that “It’s a great way to enjoy familiar cheesy layers while switching things up a bit.” Imagine the tender, slightly al dente zucchini slices perfectly complementing the rich, creamy ricotta, savory meat (or veggie) sauce, and bubbling mozzarella. “Packed with a balance of textures,” it truly “stands as a crowd-pleaser for nostalgic comfort food fans,” delivering all the cheesy, saucy goodness one expects from a lasagna, but with a fresh twist.
So, if it’s lighter, packed with flavor, and a textural delight, why might this glorious creation be left behind? Perhaps the very mention of “zucchini” triggers a certain dietary expectation among guests, making them wary that it might sacrifice flavor for health points. In an age where authenticity often trumps innovation for traditional dishes, some might cling to the belief that ‘real’ lasagna must involve pasta, full stop.
Then there’s the perception game. While it offers a “lighter alternative,” some dinner partygoers might secretly yearn for the full-throttle, unapologetic pasta experience of a traditional lasagna. The zucchini version, despite its undeniable merits, could be seen as a compromise rather than an enhancement, especially for those who view dinner parties as an occasion for pure, unadulterated culinary abandon. It’s a dish that needs to overcome preconceived notions to truly shine in the modern spotlight.
But let’s not be fooled; Zucchini Lasagna is a champion in its own right. Its ability to deliver profound satisfaction while offering a refreshing departure from the norm makes it a versatile player. It proves that comfort food can evolve, still tasting amazing, still being a “crowd-pleaser,” and still worthy of a hearty scoop (or two!) onto your plate. Don’t let the green fool you – this dish is a winner that deserves another look, even if it has to fight a little harder for attention these days.
Zucchini Lasagna
Ingredients
Equipment
Method
- Slice zucchini lengthwise into thin, uniform strips (about 1/8-inch thick). Lay them on paper towels, sprinkle with salt, and let sit for 30 minutes to draw out moisture; pat dry thoroughly.
- In a large skillet, heat extra-virgin olive oil over medium heat. Add finely chopped onion and red pepper flakes, sauté until softened, about 5 minutes.
- Add ground turkey to the skillet, breaking it up with a spoon. Cook until browned, about 8-10 minutes. Drain any excess fat.
- Stir in diced tomatoes, chopped fresh oregano, and 1 teaspoon of salt. Bring to a simmer, then reduce heat and cook for 15-20 minutes, allowing the flavors to meld and the sauce to thicken slightly.
- In a medium bowl, combine part-skim ricotta cheese with the remaining 1 teaspoon of salt and 1/4 teaspoon of freshly ground black pepper. Mix well.
- Preheat oven to 375°F (190°C). Lightly grease a 9×13 inch baking dish.
- Spread about 1 cup of the turkey sauce at the bottom of the prepared baking dish. Arrange a single layer of zucchini slices over the sauce, overlapping slightly.
- Dollop half of the ricotta mixture over the zucchini, then top with another layer of sauce. Repeat with remaining zucchini, ricotta, and sauce.
- Sprinkle the remaining 1/2 cup of freshly grated Parmesan cheese evenly over the top layer.
- Bake covered with foil for 30 minutes, then remove foil and bake for an additional 15-20 minutes, or until bubbling and lightly browned. Let rest for 10-15 minutes before serving.
Notes
Read more about: The 10 Most Comforting Homemade Soup Recipes for Cold Days & Cozy Nights 2025

2. **Baked Ziti**Next up, we have Baked Ziti, a true icon of Italian-American comfort food, a dish that has practically defined “feeding a crowd” for generations. “Pasta dishes have always been central to comfort food,” the context reminds us, “and this one is no different.” It’s the kind of meal that instantly transports you to a cozy Sunday dinner, a bustling family reunion, or even a casual weeknight feast that feels anything but ordinary. Its appeal is deeply rooted in its straightforward, hearty deliciousness.
The magic of Baked Ziti lies in its masterful assembly: “Baked Ziti combines soft noodles with layers of creamy sauce and a golden finish to top it off.” Imagine perfectly cooked ziti pasta, swimming in a rich, savory tomato sauce, often intertwined with creamy ricotta and mozzarella, all crowned with a glorious, golden-brown blanket of melted cheese. It’s an edible hug, a symphony of textures and flavors that is both profoundly satisfying and utterly familiar.
One of its most endearing qualities, and certainly a factor in its past popularity as a dinner party staple, is its incredible practicality. “Whether made ahead for busy dinners or enjoyed fresh out of the oven, it’s easy to love this recipe.” Hosts could prepare it hours in advance, pop it in the oven just before guests arrived, and emerge victorious with a bubbling, aromatic masterpiece. It’s a dish that genuinely takes the stress out of entertaining, allowing for more mingling and less last-minute panic.
Yet, despite being “easy to love” and a fantastic option for “feeding a crowd or enjoying solo,” why might this once-ubiquitous baked pasta find itself patiently waiting its turn at the buffet? Perhaps it’s precisely its ubiquity. In an era where culinary adventures and unique flavors are highly prized, a dish as familiar as Baked Ziti might be perceived as a little… safe. Guests might be looking for something more unexpected, a dish they haven’t had a dozen times before, even if those dozen times were delicious.
Another factor could be the shifting preferences towards lighter fare or more ‘gourmet’ pasta preparations. While Baked Ziti is undeniably comforting, its richness and carb-heavy nature might make some modern diners pause, especially if they’re saving room for multiple courses or adhering to specific dietary choices. But let’s be clear: “Every bite feels familiar yet exciting in the easiest way possible,” and that enduring charm is why Baked Ziti, despite any perceived modern snub, will always have a place in our hearts and, hopefully, on our dinner plates. It’s a classic for a reason, and a little golden-finished goodness never truly goes out of style.

Copy Cat Recipe – Olive Garden Five-Cheese Ziti Al Forno recipes
Ingredients
Equipment
Method
- Preheat your oven to 375°F (190°C) to ensure it is ready for baking.
- Cook the ziti pasta according to package instructions until al dente. Drain thoroughly and set aside.
- In a large mixing bowl, combine the Alfredo sauce and marinara sauce, stirring until a smooth, uniform pink sauce is achieved.
- Add the cooked ziti to the sauce mixture and gently toss until all pasta is evenly coated.
- In a separate bowl, combine the mozzarella, Fontina, and Parmesan cheeses. Reserve about 1/2 cup of mozzarella and a sprinkle of Parmesan for the top layer.
- Spread half of the sauced pasta mixture evenly into a 9×13 inch oven-safe baking dish.
- Dollop spoonfuls of ricotta cheese over the first layer of pasta, then sprinkle generously with half of the combined mozzarella, Fontina, and Parmesan cheeses.
- Carefully spoon the remaining pasta mixture over the cheese layer, spreading it evenly.
- Finish by sprinkling the reserved mozzarella and Parmesan cheese over the entire top surface of the ziti.
- Bake for 25-30 minutes, or until the cheese is melted, bubbly, and lightly golden brown. Let rest for 5-10 minutes before serving.
Notes
Read more about: Cracking the Code: 13 Restaurant Favorites We Thought We’d Never Replicate at Home

3. **Smothered Pork Chops**Now, let’s turn our attention to Smothered Pork Chops, a dish that epitomizes hearty, soul-satisfying cooking and a testament to the power of a good, rich sauce. “Hearty recipes with rich layers of flavor often make a meal unforgettable,” and this dish certainly lives up to that promise. It’s the kind of meal that makes you feel taken care of, wrapped in warmth, and utterly content. This isn’t fast food; this is food with feeling.
The essence of this classic lies in its tender perfection: “Smothered Pork Chops pair tender meat with a warm sauce that ties everything together beautifully.” Imagine succulent pork chops, seared to a golden-brown, then slow-simmered in a luxurious, often onion-and-mushroom-infused gravy. The process transforms a simple cut of meat into something melt-in-your-mouth delicious, with every fiber infused with deep, savory flavor. It’s a comforting masterpiece that looks and tastes far more complex than the effort it demands.
What makes this dish so special for gatherings or even a personal treat? The context beautifully summarizes it: “It’s a plate that feels special without needing much fuss in the kitchen.” This is a huge win for any host. You can achieve an impressive, flavorful main course without being chained to the stove. It’s “ideal for family dinners or treating yourself after a long day,” offering that perfect balance of elegance and ease that makes for truly memorable meals.
So, if Smothered Pork Chops are so undeniably good and relatively easy, why might they sometimes be politely sidestepped at a modern dinner party? Perhaps it’s the word “smothered” itself. In an age of lighter preparations, grilled lean proteins, and vibrant, fresh flavors, a “smothered” dish might conjure images of something overly heavy or old-fashioned. Guests might be gravitating towards dishes that feel more contemporary or visually striking on their plates.
Another subtle factor could be the changing perception of pork chops themselves. While incredibly versatile and delicious, they sometimes get overshadowed by trendier cuts of meat or more exotic protein options. However, dismissing smothered pork chops would be a grave mistake. The context reminds us, “Sharing it is always nice, but keeping the last bite for yourself is worth it too.” That’s the true mark of a dish that’s too good to ignore, a dish that continues to offer profound satisfaction and rich, comforting flavor, even if it takes a moment to remind everyone just how fantastic it really is.

Smothered Pork Chops
Ingredients
Equipment
Method
- Combine the all-purpose flour, kosher salt, black pepper, garlic powder, paprika, and cayenne pepper in a shallow dish.
- Dredge each pork chop thoroughly in the seasoned flour mixture, ensuring it’s evenly coated, then shake off any excess.
- Heat the bacon grease (or other fat) in a large, heavy-bottomed skillet or Dutch oven over medium-high heat.
- Sear the dredged pork chops until deeply golden brown on both sides, about 3-4 minutes per side. Work in batches to avoid overcrowding the pan, then remove chops and set aside.
- Reduce the heat to medium, add the sliced onion to the skillet, and cook, stirring occasionally, until softened and lightly caramelized, about 5-7 minutes.
- Stir in any remaining seasoned flour from the dredging mixture into the skillet with the onions, cooking for 1-2 minutes to create a light roux.
- Gradually whisk in the chicken stock and Dijon mustard, scraping up any browned bits from the bottom of the pan to deglaze and build the gravy. Bring to a gentle simmer.
- Return the seared pork chops to the gravy, nestling them into the sauce so they are mostly submerged.
- Reduce the heat to low, cover the skillet, and simmer gently for 20-30 minutes, or until the pork chops are tender.
- Taste the gravy and adjust seasoning with additional salt and pepper if needed before serving hot.
Notes
Read more about: The Timeless Call of the Open Road: 15 Iconic American Drives Perfect for Your Classic Car

4. **German Meat Patties (Frikadellen)**Stepping into a different culinary tradition, we encounter German Meat Patties, affectionately known as Frikadellen. This is a dish that proves “Ground meats can transform into something special with the right approach.” Far from being mere meatballs, Frikadellen are a celebrated staple in German cuisine, offering a comforting, robust, and utterly delicious experience that belies their humble origins. They embody a rustic charm that’s hard to resist.
What makes these patties a standout? “German Meat Patties (Frikadellen) bring a rich and sturdy texture paired with classic flavors.” Unlike their Italian counterparts, Frikadellen often incorporate stale bread or breadcrumbs soaked in milk, finely chopped onions, and a blend of spices, resulting in a patty that is wonderfully moist, flavorful, and holds its shape beautifully. They are pan-fried to a perfect golden-brown, creating a delightful crust that locks in all that savory goodness.
Their versatility is another reason for their long-standing popularity. The context notes, “They’re great for serving as the star of a dinner plate or tucked into bread for a sandwich.” Imagine them alongside a creamy potato salad or a tangy sauerkraut for a full meal, or nestled in a crusty roll with some mustard for a satisfying lunch. They’re adaptable, unfussy, and always hit the spot, making them a fantastic choice for many different occasions.
Furthermore, Frikadellen offer a satisfying experience that caters to a desire for wholesome, hearty fare. They are “perfect for when you want something filling but not overwhelming.” This balance is key—they’re substantial enough to leave you feeling content, but not so heavy that they weigh you down. It’s a dish that respects both your appetite and your desire for good, honest food.
So, why might these delightful German patties not be the first thing guests reach for at a modern dinner party spread? Perhaps it’s their perceived simplicity or the fact that they might not carry the same exotic allure as other international dishes. Some might see them as a ‘meatball’ variant and overlook their unique texture and distinct, “classic flavors.” However, to pass on Frikadellen is to miss out on a truly satisfying experience. This is “a dish that feels hearty and nostalgic all at once,” a testament to timeless European comfort food that absolutely deserves a place at any table, reminding us that sometimes, the simplest traditions are the most profoundly delicious. They are proof that even ground meat, handled with the right care, can be utterly special and completely memorable.
Alright, buckle up, food fanatics, because our nostalgic culinary road trip isn’t over yet! We’ve already explored some true MVPs that might just be collecting polite smiles instead of eager scoops. But trust us, the journey into the heart of classic comfort food continues, and these next four dishes are just as deserving of our unwavering affection and perhaps, a triumphant comeback on your next dinner party menu. Get ready to rekindle your love for the familiar, because these “old favorites never really go out of style, especially when they taste this good.” Seriously, prepare for some delicious revelations!

Frikadellen German Meat Patties
Ingredients
Equipment
Method
- Finely dice the onions. In a pan, sauté the onions with a half tablespoon of oil until translucent and softened, then let them cool slightly.
- In a large mixing bowl, combine the cooled sautéed onions, ground meat (a mix of pork and beef), breadcrumbs, egg, milk, dried basil (or marjoram), salt, and white pepper.
- Gently mix all ingredients until just combined. Avoid overmixing, as this can make the patties tough and dense.
- Form the mixture into approximately 18 small, flat, oval-shaped patties.
- Heat a large skillet over medium-high heat with a small amount of oil (if the onions were not sautéed in the same pan).
- Place a few patties in the hot skillet, ensuring not to overcrowd the pan, which can lower the temperature and prevent proper browning.
- Cook for 4-6 minutes per side, or until deeply golden brown and cooked through, with an internal temperature of 160°F (71°C).
- Remove cooked patties and place them on a plate lined with paper towels to drain any excess fat.
- Repeat with the remaining patties, adding more oil to the skillet if needed between batches.
- Serve the Frikadellen warm with your desired side dishes.
Notes

5. **Classic Knackwurst & Sauerkraut**Oh, Knackwurst and Sauerkraut! This dynamic duo is a hearty, no-fuss German classic that brings serious flavor to the table without, well, any serious fuss at all. It’s the kind of dish that practically screams “tradition” and “comfort” in the most deliciously straightforward way possible. The context totally nails it, reminding us that “Meals that mix bold flavors with traditional touches often stand the test of time.” And honestly, this one’s a champion of that idea, embodying a rustic deliciousness that’s hard to beat.
What’s not to love about plump, flavorful knackwurst—those juicy, wonderfully spiced sausages—snuggled up next to a generous pile of tangy, savory sauerkraut? The beauty is absolutely in the balance. The sauerkraut provides that essential zesty counterpoint to the richness of the sausage, creating a harmony of flavors that is both profoundly satisfying and incredibly comforting. It’s an uncomplicated dish that relies on quality ingredients and robust tastes to make a big impression, a truly honest meal that is “great as a centerpiece for casual dinners with minimal effort to prepare.”
This dish isn’t just about taste; it’s about making life easier while still delivering a memorable meal, a true win-win for any host. “Every forkful feels balanced without needing too much dressing up,” meaning you don’t need a culinary degree or fancy techniques to make it shine. Its strength lies in its unpretentious presentation and its ability to deliver consistent, delicious satisfaction, perfectly embodying the “mix of nostalgia and practicality” we’re all secretly craving for effortless entertaining.
So, why might our beloved Knackwurst and Sauerkraut not be the star of *every* modern dinner party? Perhaps its rustic charm, while appealing to many, might seem a bit too… traditional for guests seeking more “elevated” or globally adventurous cuisine. In an age of fusion flavors and intricate plating, a humble plate of sausage and cabbage, despite its undeniable deliciousness, might sometimes be underestimated or perceived as less “exciting,” leading some to overlook this hearty classic.
But here’s the unshakeable truth: sometimes simple is exactly what we crave, and what truly hits the spot. This is “a perfect way to embrace timeless recipes that still feel relevant,” offering a delicious escape from culinary over-complication. Knackwurst and Sauerkraut is a warm, inviting hug on a plate that absolutely deserves its spot in the spotlight, reminding us all that true comfort food never, ever truly goes out of style. Don’t let its straightforward nature fool you; this dish is a flavor powerhouse that’s always ready for its close-up!
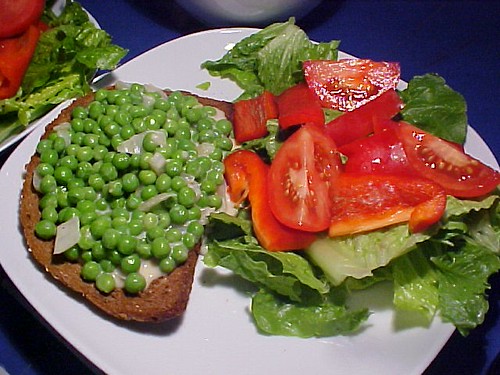
6. **Grandma’s Creamed Peas**Okay, prepare for a major throwback, because Grandma’s Creamed Peas are about to whisk you straight back to childhood, or at least to a time when every family meal had that one dependable, creamy green side dish. This isn’t just a side; it’s a legitimate nostalgic experience, a culinary warm hug from the past. The context captures it perfectly: “Soft textures and comforting flavors often remind us of simple meals we love.” And truly, what’s simpler and more lovingly comforting than a bowl of perfectly creamed peas, made just the way grandma would?
The magic here is truly in its understated elegance and surprising depth of flavor. We’re talking about sweet, tender green peas, often freshly shelled or perfectly frozen, enveloped in a rich, velvety cream sauce that’s seasoned just right with a touch of onion or herbs. It’s a harmonious blend of textures and tastes that adds a delicate sweetness and a luxurious creaminess to any plate, lifting even the simplest main course. This dish showcases how seemingly basic ingredients can be transformed into something truly delightful and satisfying.
“Grandma’s Creamed Peas bring a creamy, nostalgic touch to any dinner or lunch spread,” making it that versatile, feel-go od addition we often forget we desperately need. It has a way of grounding a meal, providing a familiar and soothing counterpoint to more elaborate dishes. One of its greatest virtues for hosts is its incredible flexibility: it’s “Easy to make ahead or serve fresh for quick meals,” and “Great as a side dish, they pair well with almost anything on the table,” proving its MVP status quietly but effectively.
So, why, oh why, might a dish so charmingly simple and utterly comforting sometimes find itself patiently waiting its turn at a modern dinner party spread? Perhaps it’s the humble pea itself, often dismissed as a mere vegetable sidekick, or perceived as less “exciting” than flashier vegetable options. In an era of vibrant, crunchy preparations, a creamy, cooked-down dish might seem a little too… well, vintage, leading guests to glance past it, not realizing the deep well of comfort and quiet deliciousness waiting.
But let’s be real, a really good creamed pea recipe is pure, unadulterated gold. It’s the kind of dish that, once you take that first spoonful, you remember exactly why it was (and still absolutely should be) a staple. “Sharing them feels heartwarming, but keeping a bowl close isn’t a bad idea either,” because sometimes, you just need all that creamy goodness for yourself. Don’t sleep on Grandma’s Creamed Peas; they’re a timeless classic deserving of all the love, all the time!
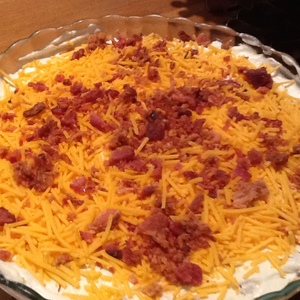
Grandma’s Layered Salad
Ingredients
Equipment
Method
- Shred romaine lettuce and chop bell pepper, slice green onions and celery.
- Hard-boil eggs, then cool, peel, and slice them.
- Cook bacon until crispy, then drain excess fat and crumble.
- Drain canned peas and slice water chestnuts.
- In a small bowl, whisk together mayonnaise, sour cream, and sugar until smooth.
- Begin layering in a large, transparent serving bowl: start with shredded romaine lettuce.
- Continue layering with bell pepper, green onions, celery, sliced hard-boiled eggs, sliced water chestnuts, and drained peas.
- Carefully spread the prepared dressing evenly over the layer of peas, ensuring it covers thoroughly.
- Garnish the top layer with grated cheddar cheese and the crumbled crispy bacon.
- Cover the bowl and refrigerate for at least 2-3 hours before serving to allow flavors to meld and the salad to set.
Notes
– this also helps the dressing set. When preparing the dressing, adjust the sugar to balance the tang of sour cream with the richness of mayonnaise. Cook bacon until perfectly crisp and crumble it just before layering or serving to maintain its texture. For an extra touch, lightly salt and pepper each vegetable layer before adding the next.
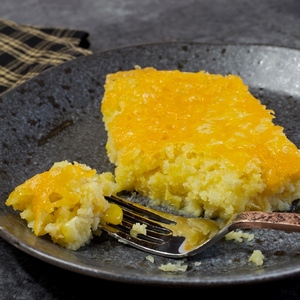
7. **Corn Pudding Casserole**Hold up, casserole fans, because Corn Pudding Casserole is here to proudly remind us why these baked delights ruled the roost for generations of dinner parties and potlucks! There’s just something inherently satisfying about a casserole, isn’t there? That warm, bubbling, all-in-one dish that effortlessly feeds a crowd and delivers pure comfort with every scoop. And this one, my friends, is a symphony of soft textures and sweet, creamy goodness that truly stands out. The context says it best: “Casseroles are staples for good reason, and this one is no exception.” Preach!
This isn’t just any side dish; it’s a revelation of corn-infused deliciousness. Imagine a dish where sweet, plump corn kernels, bursting with natural sweetness, are suspended in a rich, custardy, slightly savory base, often made with a touch of butter, eggs, and milk. It’s then baked until golden and bubbling, developing a unique texture that’s delightfully somewhere between a soft pudding and a hearty, moist bread. “Corn Pudding Casserole delivers soft layers and a slightly sweet flavor that stands out with every bite.”
For those who love to entertain, or simply adore easy comfort food that feels special, this casserole is an absolute dream come true. It’s truly “great for gatherings or larger dinners,” providing a substantial and universally loved side that requires minimal active cooking time. The best part? “It’s easy to make and even easier to love,” meaning even novice cooks can master this crowd-pleaser, offering the perfect blend of being both effortlessly impressive and deliciously unpretentious for any occasion.
Plus, it holds up beautifully! You can totally whip it up ahead of time, and it’ll still deliver that comforting, home-style touch, whether served fresh out of the oven or reheated gently. This makes it an undeniable win for practicality, especially when juggling the complexities of a larger meal, and a true hero for pure deliciousness. It’s the kind of dish that becomes a cherished family recipe, passed down through generations, exactly because it’s so reliable and tasty.
So, with all that going for it—its creamy texture, its delightful sweetness, its ease, and its crowd-pleasing nature—why might this creamy, dreamy Corn Pudding Casserole sometimes get a polite pass at a modern potluck? Perhaps the word “pudding” might throw people off, conjuring images of dessert rather than a savory side, leading to delicious confusion. Or it’s seen as a bit too “old school” for current lighter dining trends, but don’t let the trends fool you! This casserole is “perfect for offering something extra to the table,” proving that a well-made casserole, particularly one as delightful and inviting as Corn Pudding Casserole, will always find its way into our hearts (and hopefully, straight onto our plates!).
Corn Pudding Casserole
Ingredients
Equipment
Method
- Preheat your oven to 350°F (175°C) and lightly grease a 9×13 inch baking dish.
- Melt the stick of butter in a small microwave-safe bowl or saucepan and set aside to cool slightly.
- In a separate small bowl, slightly beat the two eggs.
- In a large mixing bowl, combine the cooled melted butter, beaten eggs, and sour cream, mixing until smooth.
- Stir in the drained whole kernel corn and the can of cream-style corn into the wet mixture.
- Add the Jiffy Corn Muffin mix and the shredded sharp cheddar cheese to the bowl.
- Mix gently with a rubber spatula until all ingredients are just combined. Be careful not to overmix.
- Pour the mixture evenly into the prepared baking dish, spreading it out if necessary.
- Bake for 45-60 minutes, or until the casserole is golden brown and set in the center.
- Remove from the oven and let it rest for 5-10 minutes before serving to allow it to firm up slightly.
Notes
Read more about: Zero-Waste Kitchen: 14 Simple Hacks to Transform Food Scraps into Delicious Dishes
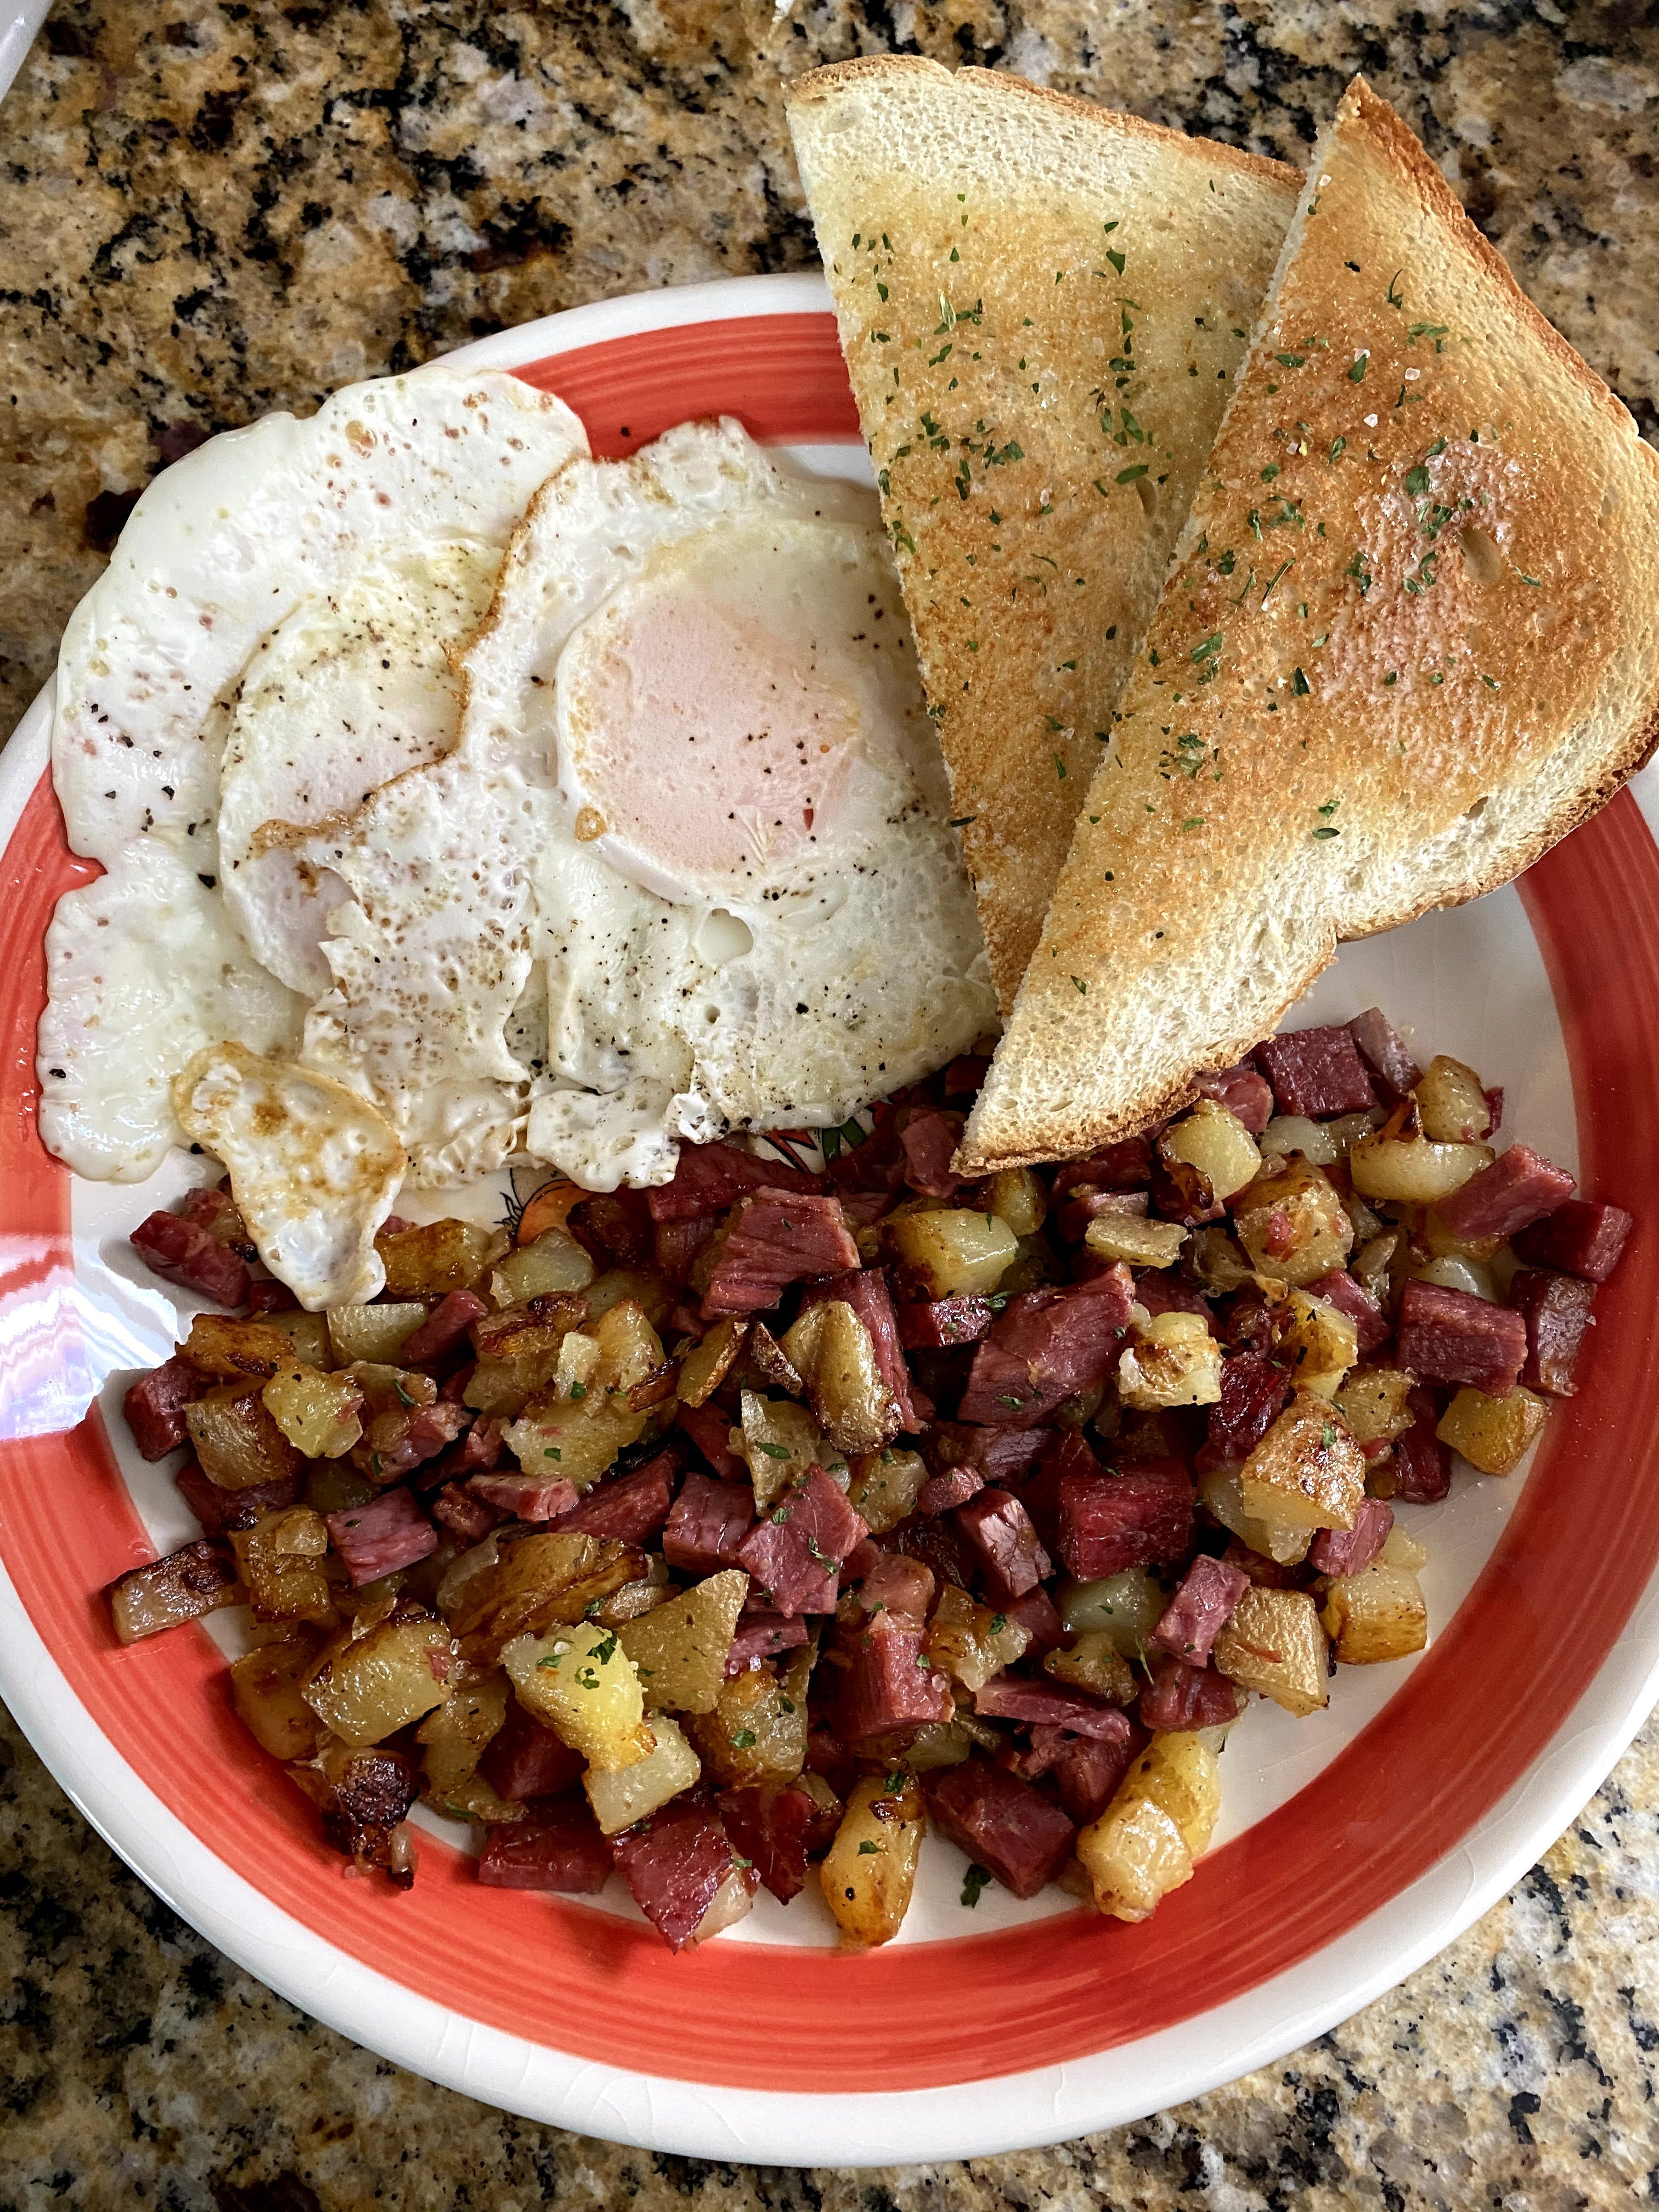
8. **Homemade Corned Beef**Last but certainly not least on our delicious retrospective, we have Homemade Corned Beef. Now, this isn’t just a meal; it’s a robust, flavorful event, steeped in tradition and brimming with hearty satisfaction. “Traditional dishes often bring a comforting nostalgia to the table,” and Homemade Corned Beef is practically the poster child for this sentiment, embodying generations of culinary heritage. It’s a dish that historically took time and care to prepare, but oh, the rewards of that patience are so, so worth it!
The true beauty of corned beef lies in its incredible transformation. A humble cut of beef, typically a brisket, undergoes a magnificent metamorphosis through a long brining process with an aromatic blend of pickling spices. Then, slow-cooked to tender, falling-apart perfection, it emerges as something truly magnificent. “Homemade Corned Beef offers robust, heartwarming flavors that make it a staple in many homes,” creating a savory, slightly salty, and richly spiced meat that is incredibly tender, practically melting in your mouth, making every bite a truly luxurious and deeply satisfying experience.
It’s a dish that’s practically built for celebration, for those significant moments when you want to gather loved ones around a table laden with wholesome, impressive, and deeply flavorful fare. “Perfect for family dinners or festive occasions, it’s a recipe that always impresses,” commanding attention as the centerpiece of your spread. Its distinctive flavor profile and melt-in-your-mouth texture guarantee a memorable meal that guests will absolutely rave about, making it a reliable showstopper for any gathering.
And let’s not forget the incredible, delicious bonus that makes this dish even more appealing: its amazing versatility for leftovers! The context hints at it perfectly: “Enjoy it hot or save some for delicious sandwiches the next day.” A dish that gives you incredible, flavorful leftovers for Reubens or other delightful creations is truly a gift that keeps on giving, making future meals just as delightful, if not more so! It’s a meal that offers multiple delicious acts, stretching your efforts across several satisfying meals.
So, given its impressive flavor, its celebratory status, its ease of feeding a crowd, and its amazing versatility, why might Homemade Corned Beef sometimes be overlooked in today’s fast-paced dinner party circuit? Perhaps it’s the perceived time commitment involved in making it from scratch, or simply that some might associate it primarily with specific holidays like St. Patrick’s Day, making it feel less like an everyday, go-to dinner party option. But for those in the know, Homemade Corned Beef is “an old favorite that continues to delight,” a culinary powerhouse that delivers profound satisfaction and proudly reminds us of the power of patience in cooking, and how truly special homemade can be.

Homemade Corned Beef
Ingredients
Equipment
Method
- Combine coarse salt, sugar, and pink curing salt with 2 quarts water in a large non-reactive container, stirring until dissolved.
- Using a mortar and pestle or spice grinder, crush the cinnamon stick, cloves, bay leaves, mustard seeds, coriander seeds, and black peppercorns.
- Add the crushed spices to the brine mixture and stir well to combine all ingredients.
- Submerge the 5-pound flat cut beef brisket into the prepared brine, ensuring it is fully covered. Use a plate or weight to keep it submerged if necessary.
- Refrigerate the brisket in the brine for 5-7 days, flipping it daily to ensure an even cure.
- After the brining period, remove the brisket from the brine and rinse it thoroughly under cold running water to remove any excess salt and spices.
- Place the rinsed brisket in a large stockpot and cover it with fresh cold water. Bring the water to a boil over high heat.
- Once boiling, reduce the heat to a gentle simmer, partially cover the pot, and cook for 3-4 hours, or until the brisket is fork-tender.
- Remove the cooked brisket from the pot and let it rest on a cutting board for at least 15-20 minutes before slicing against the grain.
- Slice the homemade corned beef thinly against the grain and serve warm.
Notes
Read more about: Hit the Highway: Our Ultimate Guide to America’s Most Iconic Roadside Diners for the Perfect Throwback Meal
Wow, what a delicious trip down memory lane, right? We’ve laughed, we’ve pondered, and hopefully, we’ve reignited a spark for some truly fantastic dishes that sometimes get lost in the shuffle. It’s abundantly clear that while culinary trends will always ebb and flow, making way for new fads and flavors, the very heart of good food—that undeniable comfort, the sweet embrace of nostalgia, and the sheer joy of sharing a delicious meal—remains absolutely timeless. So next time you’re planning a fabulous get-together, don’t be afraid to proudly pull out one (or two!) of these “old favorites” from the archives. You might just find that these once-standard dishes, with their perfect “mix of nostalgia and practicality,” are ready to reclaim their rightful, delicious place on your dinner table, proving once and for all that some flavors are simply too good, too comforting, and too beloved to ever be forgotten. Who knows, you might just spark a delicious new trend by triumphantly bringing back the old!


