

America’s dinner tables have always reflected the nation’s shifting tastes, evolving health trends, and changing cultural influences. Over the decades, numerous once-beloved foods have faded from the spotlight, some quietly vanishing from shelves, others replaced by trendier or healthier alternatives. It’s a bittersweet truth that even our most cherished culinary creations can become relics of a bygone era.
Remember those days when a dinner party wasn’t complete without a shimmering, gravity-defying gelatin creation? Or when a simple spread on your sandwich was the highlight of your lunchbox? Times, they are a-changin’, and so are our plates! We’re diving deep into the culinary archives to explore the mysteries of what happened to some of the most iconic American foods that, for one reason or another, just aren’t gracing our tables like they used to.
Get ready to feel a wave of nostalgia (and maybe a little hunger for the past) as we kick off our journey through the delicious, sometimes baffling, history of American cuisine. We’re about to uncover why these once-staple eats have either vanished completely or become so rare you’d need a culinary archaeologist to find them. Seriously, where *did* they go?

1. **Jell-O Salad**Jell-O Salad. Just the name conjures images of vibrant, jiggly concoctions that were once the undisputed kings and queens of American dinner parties. This beloved Jell-O was an unmistakable fixture of dinner parties in the 1950s, with elaborate molded salads incorporating everything from whipped cream and pineapple to mini marshmallows. These weren’t just desserts; they were edible architecture, painstakingly assembled to impress guests and showcase the hostess’s domestic prowess.
But, as with all fleeting trends, their reign was not eternal. By the mid-1970s, their popularity had crashed so dramatically that several flavors were discontinued entirely. Can you imagine a world where lime Jell-O was just… gone? Younger Americans today have likely never experienced the polarizing textures of lime Jell-O, cottage cheese, and canned pears all mingling in one wobbly dish. It’s truly a texture adventure many are missing out on (or, perhaps, are secretly thankful to avoid!).
The decline of the Jell-O salad can be directly attributed to the rise in women joining the workforce in larger numbers, who demanded quicker and simpler meal solutions than labor-intensive molded gelatin masterpieces. Who had time for a multi-layered Jell-O creation when there were deadlines to meet and careers to build? These colorful, quivering towers, once a symbol of domesticity, simply couldn’t keep up with the pace of modern life. They remain a whimsical, if somewhat perplexing, artifact of a bygone culinary era.

Ambrosia Salad with Jell-O
Ingredients
Equipment
Method
- Ensure the frozen whipped topping is completely thawed in the refrigerator before beginning.
- Using a can opener, open the can of crushed pineapple.
- In a large mixing bowl, combine the strawberry-flavored gelatin powder with the crushed pineapple, including its juice. Stir thoroughly with a rubber spatula or large spoon until the gelatin powder is mostly dissolved.
- Gently fold in the thawed whipped topping into the gelatin-pineapple mixture until just combined, taking care not to deflate the whipped topping.
- Add the chopped walnuts and miniature marshmallows to the bowl.
- Carefully fold all ingredients together until they are evenly distributed throughout the mixture.
- Transfer the mixture to a clean serving dish or bowl.
- Cover the serving dish and refrigerate for at least 4 hours, or preferably overnight, to allow the salad to set completely and the flavors to fully meld.
- Serve chilled.
Notes
Read more about: Seriously, Where Did They Go? 12 Iconic American Foods That Vanished From Our Tables

2. **Cottage Cheese**Oh, cottage cheese! Once touted as the ultimate slimming food, this curdled dairy delight enjoyed a spectacular run in American diets. Marketed heavily as a slimming food throughout the 1970s and well into the 1990s, its consumption increased rapidly throughout the country, reaching approximately 4.6–5.3 pounds per capita in the early 1990s. It was the go-to for dieters, often paired with fruit or a sad-looking piece of melba toast.
Fast forward to the early 2020s, and the story is vastly different. Statista reports that the figure declined to about 2 pounds of cottage cheese per person per year, with a decline of as much as 58%. That’s a pretty dramatic nosedive for a food that once held such a prominent place in our refrigerators. What happened to our chunky friend?
The culprit? The yogurt industry! With its superior taste, smoother texture, and more charming marketing, yogurt has been directly responsible for cottage cheese’s fall from grace. While cottage cheese is still around, it’s certainly not the reigning champion of the dairy aisle anymore, relegated to a quieter corner while the trendy, flavorful yogurts steal the spotlight. It’s a classic tale of innovation and savvy marketing trumping tradition!
Cheese Stuffed Peppers
Ingredients
Equipment
Method
- Wash and dry the green peppers. Cut each pepper in half lengthwise and carefully remove the seeds and membranes.
- Finely chop the small onion and the fresh dill.
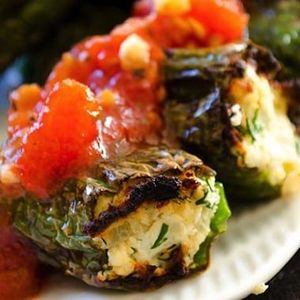
- In a mixing bowl, combine the cottage cheese (or ricotta), finely chopped onion, and fresh dill. Season generously with salt and black pepper.
- Carefully spoon the cheese mixture into each pepper half, ensuring they are well-filled but not overflowing.
- Heat the corn oil in a large skillet or frying pan over medium heat until shimmering.
- Place the stuffed pepper halves into the hot oil, cheese-side up. Do not overcrowd the pan; cook in batches if necessary.
- Fry for 5-7 minutes per side, or until the peppers are tender and slightly charred, and the cheese filling is warmed through and lightly browned.
- Using a slotted spoon or tongs, carefully remove the cooked peppers from the pan and place them on a plate lined with paper towels to drain any excess oil.
- Serve the cheese-stuffed peppers hot, garnished with additional fresh dill if desired.
Notes
Read more about: Unlocking Adventure: 14 Must-Try, Affordable Weekend Getaways Near New York City for Every Explorer

3. **Fruitcake**The fruitcake. A holiday tradition, a festive offering, and, let’s be honest, the subject of countless jokes. It seems this dense, boozy confection, studded with candied fruits and nuts, is no longer at the center of American celebrations. In a recent Mashed survey, a whopping 43% of participants chose fruitcake as the holiday dessert they’d least like to see at a Christmas party, making it the most disliked dessert in the ranking. Ouch!
Families once devoted entire afternoons to assembling and baking fruitcakes or placed orders with specialty bakeries months in advance. It was a serious undertaking, a labor of love that symbolized the holiday spirit. The rich, often alcohol-soaked cake was meant to be a decadent treat, carefully prepared and savored.
However, its decline in popularity can be attributed to changing tastes and the unfortunate reputation fruitcakes have earned as the quintessential unwanted gift, often regifted for years, and the subject of countless jokes. It’s the gift that keeps on giving… to someone else’s pantry! This once-beloved dense, boozy fruitcake now largely serves as a punchline, a sad reminder of a holiday tradition that, for many, has gone stale.
Fruitcake Parfaits
Ingredients
Equipment
Method
- Thaw the frozen blueberries in a bowl and drain any excess liquid to prevent a watery parfait.
- Using a chef’s knife and cutting board, carefully cut the fruitcake into small, bite-sized pieces or crumble it into a bowl.
- If desired, lightly sweeten the plain yogurt with a touch of honey or maple syrup and stir until well combined.
- Take your chosen parfait glasses or serving dishes and prepare them for layering.
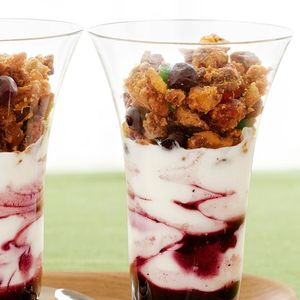
- Begin by placing an even layer of crumbled fruitcake at the bottom of each glass.
- Follow with a generous layer of the prepared plain yogurt.
- Next, add a layer of the thawed blueberries over the yogurt.
- Repeat the layers: fruitcake, then yogurt, then blueberries, until the glasses are full.
- Ensure the top layer is aesthetically pleasing, typically ending with blueberries for color.
- For best results, chill the parfaits for at least 15-20 minutes before serving to allow flavors to meld. Serve immediately.
Notes
Read more about: Seriously, Where Did They Go? 12 Iconic American Foods That Vanished From Our Tables

4. **Ambrosia Salad**Speaking of festive dishes, who remembers Ambrosia Salad? This colorful Southern potluck mainstay was once an impressive treat to set before dinner guests. The trifecta of citrus, coconut, and marshmallows created a sweet, creamy, and visually appealing dish. Its name, ambrosia, is of Greek origin and translates as “food of the gods”—a lofty title for a fruit salad, indeed!
This fruit salad remained popular for a long time because coconut and citrus were luxuries for most Americans. Imagine the delight of having such exotic ingredients gracing your table! It was a symbol of indulgence and celebration, a dish that truly lived up to its divine namesake in a time when fresh tropical produce wasn’t readily available year-round.
But like many of its potluck peers, Ambrosia salad’s widespread presence has dwindled. It is currently only visible at Thanksgiving and Christmas feasts, transforming from an everyday special occasion dish to a seasonal treat. While it still holds a special place in some holiday traditions, its general visibility and popularity have significantly decreased, becoming a dish that truly embraces its “food of the gods” status by being a rare, cherished appearance.

Ambrosia Salad
Ingredients
Equipment
Method
- Thoroughly drain the 11-ounce can of mandarin oranges in a colander, pressing gently to remove all excess liquid.
- Similarly, thoroughly drain the 8-ounce can of pineapple chunks in the colander, ensuring no residual juice remains.
- In a large mixing bowl, combine the drained mandarin oranges, drained pineapple chunks, 1 cup of miniature marshmallows, and 1 cup of flaked coconut.
- Add 1 cup of sour cream to the bowl with the fruit and marshmallow mixture.
- Using a rubber spatula or large spoon, gently fold all ingredients together until they are evenly distributed and coated with the sour cream. Be careful not to overmix, which can break down the fruit.
- Cover the mixing bowl tightly with plastic wrap to prevent any air exposure.
- Refrigerate the ambrosia salad for at least 1 hour, or preferably 2-4 hours, to allow the flavors to meld and the marshmallows to soften slightly, achieving the optimal texture.
- Before serving, give the salad another gentle stir.
- Transfer the chilled ambrosia salad to a decorative serving bowl.
- Serve cold as a refreshing dessert or a sweet side dish.
Notes
Read more about: Seriously, Where Did They Go? 12 Iconic American Foods That Vanished From Our Tables
5. **Liver and Onions**Now for a dish that really divides the room: Liver and Onions. For generations, this was a symbol of hearty, nutritious home cooking. However, it has largely disappeared from restaurant menus, as younger generations are far less inclined to order or eat them. It seems the robust, earthy flavor of liver just isn’t hitting the mark for modern palates.
This shift is tied to a general aversion among younger people toward liver and offal, despite liver being one of the most nutritionally dense foods available. Our ancestors knew a thing or two about making the most of every part of an animal, and liver was a powerhouse of vitamins and minerals. But in an age of abundant, convenient cuts of meat, the appeal of organ meats has waned considerably.
While it rarely features in modern meal choices, be it breakfast, lunch, or dinner, the global demand for beef liver tells a different story. According to the Research Nester, the global beef liver market was valued at approximately USD 5.4 billion in 2024 and is projected to grow to USD 15.03 billion by 2037, with a robust compound annual growth rate (CAGR) of 7.7%. So, while it’s not on *our* plates, someone out there is still enjoying this nutrient-rich delicacy! It seems our tables are truly reflecting a specific cultural shift.
Crackling Coppa Roast with Fennel and Onions
Ingredients
Equipment
Method
- In a mixing bowl, combine the Diamond Crystal kosher salt, light brown sugar, toasted and crushed fennel seeds, crushed black peppercorns, and crushed red pepper to create the rub.
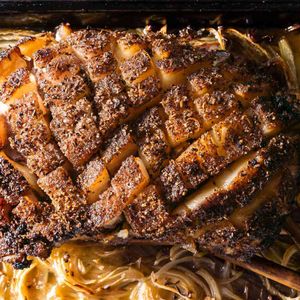
- Score the thick fat cap of the bone-in pork shoulder in a crosshatch pattern, cutting through the fat but not into the meat, then pat the pork dry thoroughly with paper towels.
- Generously rub the prepared spice mixture all over the pork shoulder, ensuring it adheres well, especially working it into the scored fat.
- Place the seasoned pork in a roasting pan or on a wire rack set over a tray. Refrigerate, uncovered, for 8-12 hours (or overnight) to allow the rub to penetrate and dry the skin.
- Remove the pork from the refrigerator at least 1 hour before roasting to bring it closer to room temperature. Preheat your oven to 300°F (150°C).
- Spread the sliced yellow onion and sliced fennel evenly in the bottom of a large roasting pan, creating a bed for the pork.
- Place the pork shoulder, fat cap up, directly on top of the vegetables in the roasting pan. Roast for 4-5 hours, or until the internal temperature reaches 195-200°F (90-93°C) and the meat is very tender.
- Increase the oven temperature to 400-425°F (200-220°C). Continue roasting for an additional 20-30 minutes, or until the fat cap is deeply golden brown and crackling.
- Remove the roast from the oven and transfer it to a cutting board. Tent loosely with foil and let it rest for at least 20-30 minutes before carving.
- Slice the tender pork and serve with the caramelized fennel and onions from the pan, spooning any accumulated pan juices over the top.
Notes
Read more about: Unlock a Healthier Future: 13 Science-Backed Lifestyle Changes to Significantly Lower Your Cancer Risk

6. **Aspic and Savory Gelatin Salads**If you thought Jell-O salad was wild, get ready for its savory cousin: Aspic and Savory Gelatin Salads! The ability to serve shimmering towers of gelatin containing vegetables, meats, or seafood was a huge status symbol at dinner parties in the first half of the 20th century. These weren’t just food; they were edible centerpieces, showcasing an almost architectural flair that would make modern food stylists blush.
Aspic and Savory Gelatin Salads were a hot trend in the 20th century and demonstrated one’s sophistication and access to modern conveniences. Imagine, only a small percentage of the population had electricity in their homes, let alone refrigerators and freezers! To craft a complex gelatin mold required not only skill but also the cutting-edge technology of refrigeration. It was the ultimate flex for a hostess.
These wobbly, often perplexing creations have almost entirely vanished from American tables. While the desire for convenience remains, the specific aesthetic and taste profile of savory gelatin molds have fallen out of fashion. They stand as a testament to an era where culinary innovation often intertwined with domestic displays of status, leaving us to wonder about the taste of a seafood-infused gelatin tower. Maybe some things are better left in the past!
Read more about: Seriously, Where Did They Go? 12 Iconic American Foods That Vanished From Our Tables
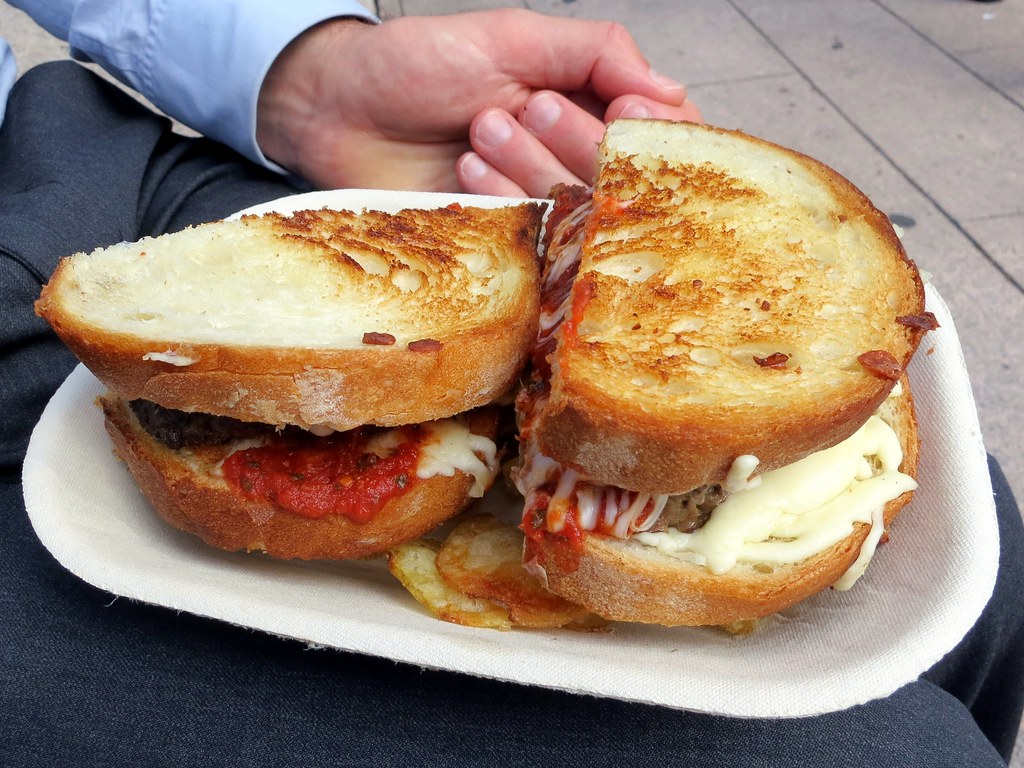
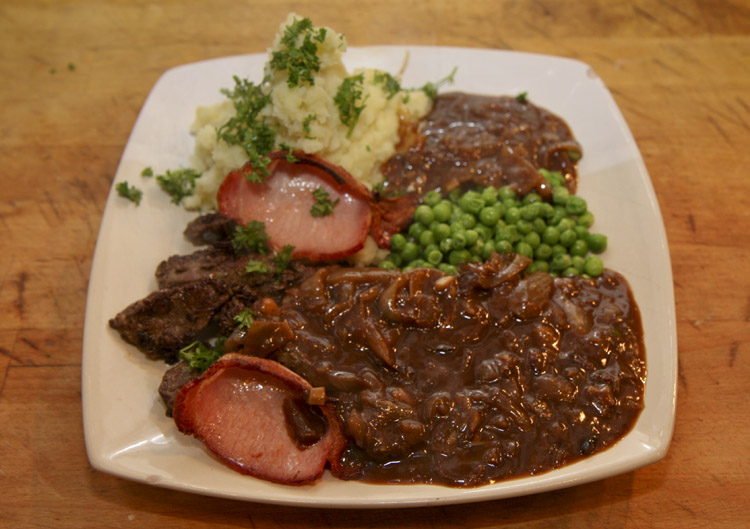
7. **Meatloaf**Ah, meatloaf! The quintessential comfort food, a dish that brings to mind cozy family dinners and hearty portions. The ground beef and breadcrumb concoction, once the weekly centerpiece that allowed families to make a small amount of pricey meat last for several days, has been a staple in American kitchens for generations. It was economical, filling, and versatile, often served with mashed potatoes and a comforting gravy.
However, much like other traditional red meat dishes, meatloaf’s star has dimmed. In the United States, red meat consumption, particularly beef, has decreased significantly in recent decades. According to USDA data, in 1976, Americans consumed about 89 pounds of red meat per capita. This shift reflects a broader change in dietary preferences and increased awareness about health and sustainability.
The rise of a far wider variety of options than in previous generations has also played a role in meatloaf’s decline. With so many diverse culinary choices available, the humble meatloaf sometimes gets overlooked. Although restaurants in the United States continue to offer meatloaf as part of their menus, it is becoming a relic of a bygone era. It’s still loved by many, but its once-prominent place on the weekly dinner rotation is a thing of the past.
Alright, grab your metaphorical magnifying glass because we’re not done sifting through the culinary cold cases! Our journey continues, digging up more iconic American foods that, for better or worse, have ghosted our dinner tables. Get ready for another dose of delicious nostalgia and perhaps a few “wait, people actually ate that?” moments as we investigate these next eight forgotten favorites.
I Made Chrissy Teigen’s Spicy Meatloaf & Here’s What I Thought
Ingredients
Equipment
Method
- Tear bread into small pieces, place in a large bowl, and pour milk over it; let soak for 5 minutes.
- Add mushrooms, hot Italian sausage (casings removed), ground beef, finely chopped onions, grated carrots, large egg, Worcestershire sauce, kosher salt, red pepper flakes, and black pepper to the bowl with the soaked bread.
- Gently mix all ingredients with your hands until just combined, being careful not to overmix, which can lead to a tough texture.
- Transfer the mixture to a loaf pan or form it into a compact loaf shape on a parchment-lined baking sheet.
- In a small bowl, whisk together the ketchup and brown sugar to create the sweet and tangy glaze.
- Evenly spread the prepared glaze over the top and sides of the meatloaf.
- Bake the meatloaf in a preheated oven (typically 375°F/190°C) until the internal temperature reaches 160°F (71°C).
- Remove the meatloaf from the oven and let it rest for 10-15 minutes before slicing.
- Slice the rested meatloaf into portions.
- Serve hot.
Notes
Read more about: Cooking Up Stardom: A Deep Dive into 15 Best-Selling Celebrity Cookbooks You Need in Your Kitchen

8. **Tuna Noodle Casserole**Oh, Tuna Noodle Casserole! This postwar staple, a creamy, comforting hug in a dish, was once a dinnertime hero for countless American families. It relied on a trio of pantry powerhouses: canned tuna, egg noodles, and that trusty canned cream of mushroom soup, often topped with crunchy bits of breadcrumbs or potato chips. It was the epitome of quick, economical, and filling, a true lifesaver for busy households.
But alas, even culinary icons can fall from grace. The mid-1980s saw a significant shift in consumer preferences, with U.S. tuna sales plummeting by almost 40%. This wasn’t just about tuna; it was a broader distrust of canned and heavily processed ingredients in general. People started craving fresher, less sodium-heavy options, and unfortunately for our beloved casserole, its core ingredients suddenly felt a bit dated.
The decline in tuna’s popularity, fueled by growing concerns over mercury levels and a desire for more minimally processed foods, effectively dragged the tuna noodle casserole out of the weekly dinner rotation. While you might still find a retro recipe making the rounds, this classic symbol of postwar convenience now largely exists in the nostalgic corners of our culinary memory. It’s a bittersweet farewell to a dish that fed a generation!
Tuna–Noodle Casserole
Ingredients
Equipment
Method
- Preheat your oven to 375°F (190°C). Grease a 9×13-inch baking dish.
- Bring a large pot of salted water to a boil. Add the flat egg noodles and cook according to package directions until al dente; drain well.
- While noodles cook, melt 4 tbsp. of butter in a large skillet or saucepan over medium heat. Add the chopped scallions and cook until softened, about 3-5 minutes.
- Stir in the flour and dry mustard into the scallions, cooking for 2 minutes to create a roux.
- Gradually whisk in the milk until the sauce is smooth and thickened. Season generously with salt and freshly ground black pepper.
- Remove the sauce from heat and gently fold in the drained tuna chunks and cooked noodles.
- Transfer the noodle mixture into the prepared baking dish, spreading evenly.
- In a small skillet, melt the remaining 6 tbsp. of butter. Add the fresh bread crumbs and cook over medium heat, stirring frequently, until golden brown and crispy.
- Sprinkle the toasted bread crumbs evenly over the casserole.
- Bake for 20-25 minutes, or until the casserole is bubbly and the topping is golden brown. Let rest for a few minutes before serving.
Notes
Read more about: 14 Canned Foods Younger Shoppers Are Seriously Skipping (And Why You Should Too)

9. **Salisbury Steak – Frozen**Before the era of gourmet meal kits and instant delivery, the Salisbury Steak TV dinner reigned supreme as the ultimate convenient meal. It was the star of many a frozen tray, featuring those delightful ground beef patties smothered in rich brown gravy, usually accompanied by some mashed potatoes and a few sad-looking peas or corn kernels. Named after Dr. James Salisbury, who advocated for ground beef patties as a nutritious solution, it perfectly fit the bill for busy households.
However, the humble Salisbury Steak, particularly in its frozen TV dinner format, has seen better days. The American Frozen Food Institute reported a significant downturn in the frozen meal category between 2010 and 2020. Consumers began to ditch convenience for healthier, organic, and fresh alternatives, leaving the old-school TV dinner in the dust. Our palates evolved, craving variety and quality over mere speed.
Today’s diners are looking for global flavors, lighter options, or even elevated versions of comfort food. The classic Salisbury Steak, once a beacon of modern convenience, struggled to adapt to these changing tastes. While you might still spot it lurking in the freezer aisle, its glory days as a go-to family meal are definitely behind it, making way for a new generation of frozen-yet-fancy options.
Veggie Salisbury Steak
Ingredients
Equipment
Method
- Season the ground beef patties generously with the peppered seasoned salt.
- In a large skillet, brown the seasoned patties over medium-high heat for 3-5 minutes per side, until a deep crust forms. Remove the browned patties from the skillet and set aside.
- Add the chopped onion to the same skillet and sauté over medium heat for 3-5 minutes, until softened and translucent.
- Stir in the frozen mixed vegetables and drained sliced mushrooms into the skillet with the onions, cooking for an additional 2-3 minutes.
- Pour in the beef gravy, ketchup, and Worcestershire sauce, stirring well to combine all ingredients.
- Bring the gravy mixture to a gentle simmer, ensuring all flavors are well integrated.
- Return the browned beef patties to the skillet, nestling them into the simmering gravy.
- Reduce the heat to low, cover the skillet, and let it simmer for 5-7 minutes, allowing the patties to heat through and absorb the rich flavors of the gravy.
- Taste the gravy and adjust seasoning with additional salt or pepper if desired.
- Serve the Veggie Salisbury Steak hot, accompanied by your favorite side dish.
Notes
Read more about: Totally Tubular! If You Grew Up in the ’80s, These 14 Iconic Meals Were Definitely On Your Family’s Menu

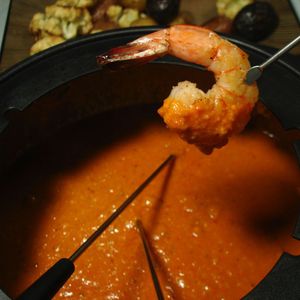
10. **Fondue**Picture this: a cozy gathering, laughter echoing, and everyone dipping delicious morsels into a bubbling pot of cheesy (or chocolaty!) goodness. That’s fondue, baby! Once the height of sophistication and a must-have for elaborate dinner parties, fondue pots were practically a wedding gift staple. It wasn’t just a meal; it was an interactive, shared experience, encouraging conversation and connection over a communal pot, a symbol of togetherness.
But as lifestyles sped up, the charm of spending hours over a bubbling pot started to wane. The intricate setup, the leisurely pace, and the somewhat specialized equipment simply didn’t fit into the “quick and easy” mantra of the new millennium. Home fondue-making experienced a steady decline throughout the 2000s, turning those gleaming fondue pots into nostalgic relics rather than everyday kitchen essentials.
While fondue can still be found in supermarkets or from online retailers, its presence in American homes has become scarce. It’s now more of a special occasion novelty, a retro piece reserved for throwback parties, rather than the centerpiece of a regular dinner gathering. It’s a testament to how even the most engaging dining experiences can fade when convenience and changing social dynamics take center stage.
Fondue Español
Ingredients
Equipment
Method
- Rehydrate the dried ancho chile in 1 cup of hot water until softened (about 20-30 minutes). Remove seeds and stem, reserving the soaking water.
- Roast bell peppers and tomatoes in the oven until softened and slightly charred, then peel tomatoes if desired.
- Toast slivered almonds and day-old French bread slices until golden brown; set aside.
- In a blender or food processor, combine the rehydrated ancho chile, roasted peppers, tomatoes, toasted bread, minced garlic, toasted almonds, salt, and black pepper. Blend until a smooth purée forms, adding some reserved chile water or red wine vinegar to aid blending if needed.
- Grate the Manchego Curado cheese.
- In a medium saucepan, gently warm the puréed mixture over medium-low heat.
- Gradually add the grated Manchego cheese to the saucepan, stirring continuously with a whisk or wooden spoon until the cheese is completely melted and the fondue is smooth.
- Stir in 1/4 cup dry white wine.
- Adjust the fondue’s consistency by adding additional warm water or white wine, one tablespoon at a time, until it reaches your desired dipping consistency. Taste and adjust seasoning with salt, pepper, or optional cayenne pepper.
- Transfer the Fondue Español to a preheated fondue pot and serve immediately with your choice of dippers.
Notes
Read more about: The Future is Flavorful: 14 Cutting-Edge Food Trends Set to Dominate Your Plate in 2025

11. **Baked Alaska**If you wanted to truly “wow” your dinner guests back in the day, you pulled out all the stops with a Baked Alaska. This dessert was the magnum opus of ambitious home cooks, a theatrical showstopper that screamed elegance and culinary prowess. It’s a symphony of textures: cake, ice cream, and a perfectly torched meringue topping, all requiring serious skill to assemble and present. It was a true labor of love and a visual spectacle.
The sheer technical difficulty and labor involved in creating a Baked Alaska contributed significantly to its decline. This isn’t a whip-it-up-in-five-minutes kind of dessert. It requires careful cooking, freezing of multiple components, and then that dramatic final torching at the table. In a world increasingly valuing simplicity and efficiency in the kitchen, such an elaborate production became impractical for most home cooks.
Today, you’d be hard-pressed to find Baked Alaska on a restaurant menu. Tastewise reports that only a tiny fraction, 0.04%, of restaurants actually offer it. The movement away from fussy, over-the-top desserts towards simpler, more straightforward sweet endings sealed its fate. Baked Alaska remains a beautiful, albeit rarely seen, reminder of an era when dessert was truly a grand performance and a testament to culinary artistry.

Baked Alaska
Ingredients
Equipment
Method
- Cut the pound cake into desired serving-sized pieces, typically squares or rounds.
- Place each piece of pound cake onto a baking sheet lined with parchment paper.
- Scoop approximately 2 ounces of firm chocolate ice cream onto the center of each pound cake piece, shaping it neatly.
- Immediately transfer the baking sheet to the freezer and freeze for at least 2 hours, or until the ice cream is rock solid.
- In a very clean mixing bowl, combine egg whites and cream of tartar.
- Using an electric mixer, whip the egg whites on medium-high speed until soft peaks form.
- Gradually add the sugar, one tablespoon at a time, continuing to whip until stiff, glossy peaks form. Beat in the vanilla extract.
- Remove the frozen cake and ice cream from the freezer. Working quickly, cover each with a generous layer of meringue, ensuring the cake and ice cream are completely sealed to prevent melting.
- If desired, return the meringue-covered desserts to the freezer for a few minutes to firm up the meringue slightly.
- Using a kitchen blowtorch, carefully brown the meringue until golden all over, or place under a preheated broiler (highest setting) for 1-2 minutes, watching constantly. Serve immediately.
Notes
Read more about: Unlock a Year of Birthday Bliss: 14 Must-Know Freebies from Your Favorite Restaurants and Retailers!
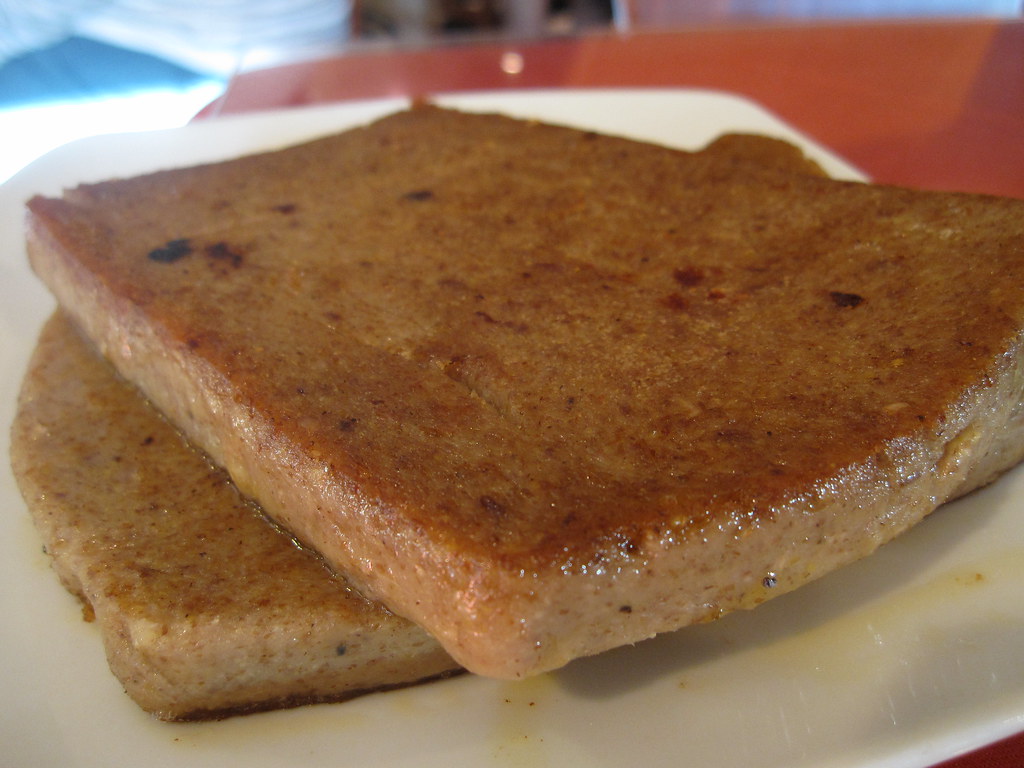
12. **Scrapple**Hold onto your breakfast plates, folks, because we’re talking about Scrapple! This Pennsylvania Dutch delicacy, a mash-up of pork trimmings, cornmeal, and flour, was originally the ultimate thrifty solution. It was a clever, resourceful way to ensure every part of the pig was utilized, transforming what might otherwise be discarded into a filling and flavorful breakfast sausage. Talk about nose-to-tail eating before it was cool, a true symbol of rural ingenuity!
However, the very origins that made scrapple a celebrated, economical choice are precisely what contributed to its downfall in modern America. Let’s be honest: the idea of “pig parts” isn’t exactly appetizing to the contemporary consumer, leading to scrapple developing a rather “bad reputation” among those unfamiliar with its heritage. Our collective palates and perceptions of food have definitely shifted away from such explicit ingredient transparency.
Since the turn of the millennium, grocery store sales of scrapple have steadily decreased. Modern Americans, often disconnected from the necessity of such thrifty culinary practices, have largely abandoned this traditional treat. It’s a true regional gem that struggled to find mainstream appeal in an age of abundant, often less “challenging” breakfast options, remaining a beloved taste for a dedicated few who appreciate its unique character.

Scrapple
Ingredients
Equipment
Method
- Brown the ground pork sausage in a large pot or Dutch oven over medium heat, breaking it apart as it cooks.
- Once the sausage is fully cooked, drain any excess fat from the pot.
- Add the sweetened condensed milk to the pot with the cooked sausage.
- Gradually whisk in the yellow cornmeal and coarsely ground black pepper, ensuring no lumps form.
- Continue to cook the mixture over medium-low heat, stirring constantly with the whisk or a sturdy spoon, until it thickens considerably and pulls away from the sides of the pot.
- Remove the pot from the heat and carefully transfer the thick scrapple mixture into a loaf pan, pressing it down firmly and evenly with the back of a spoon or spatula.
- Allow the scrapple to cool to room temperature, then cover the loaf pan and refrigerate for at least 4 hours, or preferably overnight, until completely firm.
- Once thoroughly chilled, unmold the scrapple onto a cutting board.
- Using a sharp knife, slice the firm scrapple into ½-inch thick pieces.
- Heat a lightly oiled skillet over medium heat and fry the sliced scrapple for 3-5 minutes per side, or until golden brown and crispy.
Notes
Read more about: Honestly, What Happened? 15 Once-Beloved American Foods That Vanished from Our Tables

13. **Rocky Mountain Oysters**Speaking of adventurous eating, let’s dive into the fascinating, if slightly intimidating, world of Rocky Mountain Oysters. If you’re wondering, yes, we’re talking about testicle fries here! Once a significant part of the American diet, particularly during resource-scarce periods like the Great Depression and World War II, these were a prime example of making the most of available food sources. It was about survival, sure, but also about hearty, protein-rich sustenance for those in need.
However, the postwar era brought massive changes to American tables. Rapid industrialization and the rise of large-scale meat production meant that conventional cuts of meat became readily available and affordable. The necessity, and thus the tradition, of eating offal began to fade as consumers no longer needed to rely on every part of an animal for sustenance. Suddenly, specialized organ meats felt less essential, even unusual to the growing urban population.
Younger generations, growing up with an abundance of choices and often disconnected from the small, family-run farms where such practices were common, have largely contributed to the declining prevalence of Rocky Mountain Oysters. These once-popular dishes, which embodied a certain rugged American pragmatism, have now become increasingly rare, largely confined to niche culinary experiences or novelty menus in specific regions.
Read more about: Honestly, What Happened? 15 Once-Beloved American Foods That Vanished from Our Tables
14. **Fried Brain Sandwich**And if Rocky Mountain Oysters didn’t get your taste buds tingling, how about a Fried Brain Sandwich? This was a genuine Midwest specialty, once served in diners and eateries across the country, especially popular in the early 20th century. This dish, which gained popularity in the early 20th century, offered a unique texture and flavor that appealed to a segment of the population, a true dive into adventurous eating from a bygone era.
However, the fate of the fried brain sandwich took a dramatic turn, largely due to a widespread public health scare. The fear of “mad cow disease,” a neurological disorder linked to consuming the brains of infected cows, swept the nation. Understandably, this had a direct and devastating effect on the popularity of dishes featuring animal brains. When safety concerns intertwine with food, preferences shift rapidly and dramatically, and often permanently.
Today, this once-popular dish has become a historical relic. Few places still dare to offer it, transforming it from a regional specialty into a culinary curiosity. It stands as a stark reminder of how public health concerns can swiftly and permanently alter the trajectory of even deeply embedded food traditions, truly marking it as a “food of the past” that is unlikely to see a resurgence.
The Secret to the Perfect Salsa Verde
Ingredients
Equipment
Method
- Thoroughly wash and dry the large bunch of flat leaf parsley; remove any thick stems, keeping mostly leaves and tender stems.
- Peel and finely mince or grate the garlic clove.
- If using capers in salt, rinse them thoroughly under cold running water and finely chop them.
- Roughly chop the parsley.
- Combine the chopped parsley, minced garlic, and chopped capers (if using) in a mixing bowl or the bowl of a food processor.
- Gradually add the virgin olive oil to the parsley mixture.
- If using a food processor, pulse until the desired consistency is reached; for a more traditional, rustic texture, continue chopping by hand or use a mortar and pestle.
- Stir well to combine all ingredients, ensuring the oil is fully incorporated.
- Taste and adjust seasoning if necessary, though with good quality ingredients, salt may not be needed, especially if using capers.
- Serve immediately or allow to sit for 30 minutes for flavors to meld. Store any leftovers in an airtight container in the refrigerator.
Notes
Read more about: From Hollywood to Your Table: 14 Celebrities Who Are Quietly Rocking the Restaurant Scene Across the US!
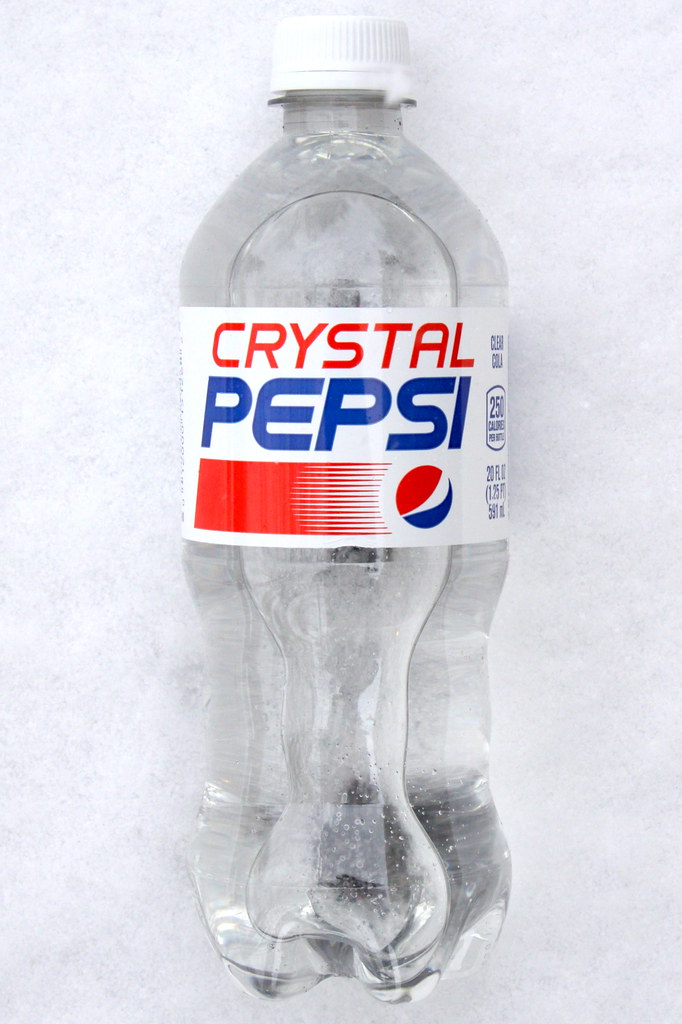
15. **Crystal Pepsi**Remember the early 90s? The era of grunge, dial-up internet, and… clear cola? That’s right, Crystal Pepsi dared to challenge the very definition of a soft drink with its transparent, caffeine-free allure. It burst onto the scene with a tantalizing curiosity, symbolizing purity and a supposed healthier alternative to the murky brown standard colas. It was bold, it was different, and it wanted to redefine our soda experience with its striking visual.
Despite a strong advertising push and an initial wave of intrigue, Crystal Pepsi ultimately fell victim to its own ambitious vision. Consumers, accustomed to the familiar taste and color of traditional colas, were often puzzled by its indistinct flavor profile. The transparency, while initially captivating, couldn’t mask the fact that it tasted… well, just like regular Pepsi, but without the visual cue. The disconnect was too great for long-term loyalty, leaving many consumers scratching their heads.
Its brief but memorable burst of popularity became a fascinating case study in marketing and consumer psychology. It illustrated perfectly how innovation, particularly when it challenges deeply ingrained perceptions, can sometimes lead to ephemeral brilliance rather than lasting success. Crystal Pepsi shimmered brightly for a moment, then fizzled out, leaving behind a legacy as one of the most iconic “clear sodas” that tried to make its mark, and vanished.
**Conclusion:**
Read more about: 14 Shocking Celebrity Gaffes That Erased Millions in Brand Deals
Our culinary landscape is a vibrant, ever-changing tapestry, and this journey through America’s vanished foods truly highlights that. From jiggly Jell-O molds to the bold clarity of Crystal Pepsi, each dish, whether a comforting staple or a daring novelty, tells a story of evolving tastes, societal shifts, and the relentless march of time. While we might never again savor some of these flavors, their stories remind us that what we eat is more than just sustenance; it’s a reflection of who we are, where we’ve been, and where we’re headed. So, next time you’re enjoying your favorite meal, take a moment to appreciate it – because even the most beloved dishes can become echoes of the past, mere whispers in the grand feast of history.


