

The world of culinary innovation often conjures images of complex techniques, exotic ingredients, and hours spent perfecting intricate dishes. Yet, as any seasoned home cook or professional chef will tell you, true brilliance sometimes lies in the most unexpected places—the simple, singular addition that elevates an entire meal. We’ve all encountered those moments in the kitchen where a dish feels like it’s missing “something,” a subtle note that could transform it from good to truly unforgettable.
It’s a sentiment echoed across online communities, with Reddit threads brimming with shared kitchen wisdom revealing how just one carefully selected component can remarkably enhance a dish. This collective genius highlights a fundamental truth: you don’t need a pantry full of rare spices or elaborate equipment to achieve restaurant-quality flavors. Sometimes, all it takes is a single, often overlooked, ingredient to unlock a new dimension of taste, texture, or aroma.
This collection of one-ingredient cooking hacks, gleaned from sprawling discussions and diverse experiences within the passionate cooking community, is a goldmine for anyone eager to refine their culinary craft with minimal effort. From introducing an unexpected hint of spice to a distinct splash of flavor, these brilliant tips serve as a powerful reminder that sometimes, one ingredient is truly all it takes to escalate your cooking endeavors to the next level. Let’s embark on a journey to discover some of these powerful, yet incredibly simple, culinary secrets that chefs swear by.
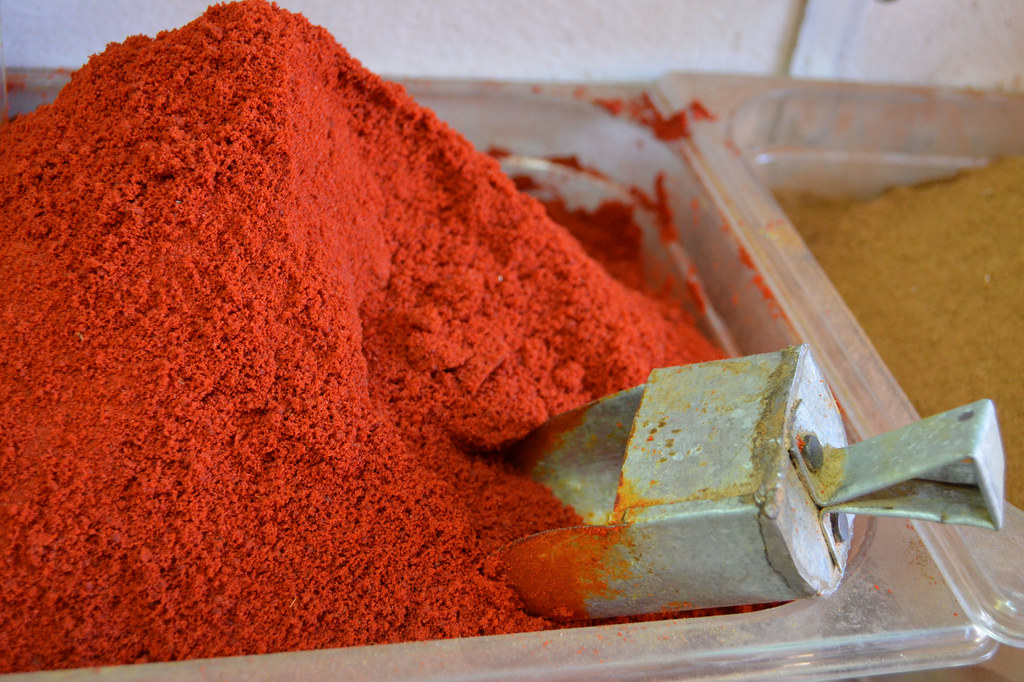
1. **Smoked Paprika**When we talk about depth and warmth in cooking, smoked paprika often stands out as a hidden gem, capable of transforming a dish with just a sprinkle. This vibrant red spice, derived from pimento peppers that are dried and smoked, offers a complex flavor profile that goes far beyond mere heat. It introduces a smoky, slightly sweet, and earthy essence that can mimic hours of slow cooking or the rich char of a grill, all from a tiny jar in your spice rack.
Think about the difference it can make in a simple stew or a roasted vegetable medley. Instead of a flat, one-dimensional taste, smoked paprika infuses a robustness that makes everything feel more substantial and satisfying. It’s particularly effective in dishes where you want to impart a rustic, hearty character without resorting to actual smoking or lengthy preparation. Its ability to create an illusion of depth makes it an indispensable tool for the ingenious cook.
This ingredient isn’t just for Spanish paella or goulash; its versatility extends to countless cuisines. Try it in your next batch of scrambled eggs for a gourmet breakfast, or sprinkle it over roasted potatoes to give them a captivating aroma and flavor. It can even be rubbed onto chicken or fish before baking to develop a beautiful, flavorful crust. Smoked paprika truly demonstrates how a single, well-chosen ingredient can act as a catalyst for profound flavor transformation.
The beauty of smoked paprika lies in its subtlety when used correctly. You’re not looking to make everything taste explicitly smoky, but rather to add an underlying layer of savory richness that makes people wonder what your secret is. It rounds out flavors, bridging gaps and adding a sophisticated edge to even the most humble ingredients. It’s a testament to the power of thoughtful seasoning.

Baked chicken meatballs
Ingredients
Equipment
Method
- Preheat your oven to 200°C (400°F) and line a large baking sheet with parchment paper.
- Tear the sourdough bread into small bits (about 1 cup) and soak them in the milk in a small bowl; set aside to soften.
- In a large frying pan, cook the bacon pieces over medium heat until crispy. Remove the bacon with a slotted spoon, leaving the rendered fat in the pan.
- Add the finely chopped onion to the pan and sauté until softened, about 5 minutes. Add the roughly chopped garlic and cook for another minute until fragrant, then remove from heat.
- In a large mixing bowl, combine the soaked bread mixture, crispy bacon, sautéed onion and garlic, the large egg, minced chicken, sundried tomato paste, smoked paprika, grated nutmeg, lemon zest, chopped basil, and a generous seasoning of salt and pepper.
- Gently mix all ingredients until just combined, being careful not to overmix, as this can lead to tough meatballs.
- Roll the mixture into golf-ball sized meatballs (approximately 30-35g each) and arrange them in a single layer on the prepared baking sheet, ensuring they are not overcrowded.
- Bake for 20-25 minutes, or until the meatballs are golden brown, cooked through, and reach an internal temperature of 74°C (165°F).
- Remove the meatballs from the oven, let them rest briefly for a few minutes, and serve immediately with your preferred accompaniment.
Notes
Read more about: Beyond the Flames: 13 Barbecue Myths Pitmasters Want You to Stop Believing for Safer, Tastier Grilling

2. **MSG (Monosodium Glutamate)**Few ingredients spark as much debate and misunderstanding as MSG, yet it remains a cornerstone of umami-rich cooking, often hailed by professional chefs as a secret weapon. This naturally occurring amino acid salt is responsible for the fifth basic taste—umami—a savory, brothy, and intensely satisfying flavor. Despite past misinformation, science has repeatedly affirmed its safety, clearing its name from fabricated health concerns.
Adding just a sprinkling of MSG powder can profoundly elevate a dish, intensifying its savory notes and creating a more harmonious flavor profile. It doesn’t add a distinct flavor of its own but rather amplifies the inherent deliciousness of other ingredients. Imagine a simple chicken stir-fry or a hearty mushroom soup; with a touch of MSG, these dishes gain an inexplicable depth, making them more rounded and deeply satisfying without changing their core identity.
The reluctance to use MSG often stems from historical misrepresentations, but as the culinary community increasingly embraces ingredient transparency and scientific understanding, its value is being rediscovered. Chefs like Eugene Wong highlight its effectiveness, noting, “a sprinkling can really elevate a dish. But people can be so afraid of it because they’ve been fed misinformation about its health effects. So unless a guest specifically mentions an allergy, I’ll keep adding MSG to my food without telling anyone.” This sentiment underscores its undeniable impact.
Its power lies in its ability to enhance existing flavors, making them bolder and more lingering on the palate. Whether it’s in savory stews, rich gravies, or even vegetable preparations, MSG can bring out the best in your ingredients. It’s a remarkable example of how a singular, misunderstood component can quietly revolutionize the taste experience, proving that sometimes, the most effective hacks are the ones that challenge preconceived notions.

Kentucky Fried Chicken
Ingredients
Equipment
Method
- In a shallow dish or bowl, beat the egg with the milk until well combined to create the wet dredge.
- In another large shallow dish, combine the all-purpose flour, salt, black pepper, and MSG, mixing thoroughly to create the dry dredge.
- Pat the chicken pieces dry with paper towels to ensure better adhesion of the coating.
- Dip each chicken piece first into the egg-milk mixture, allowing excess to drip off, then thoroughly dredge in the seasoned flour mixture, pressing to ensure full coverage. Set aside.
- In a large, heavy-bottomed pot or deep-fryer, heat the Crisco cooking oil to 325-350°F (160-175°C) using a deep-fry thermometer.
- Carefully place chicken pieces into the hot oil in batches, ensuring not to overcrowd the pot. Fry for about 6-8 minutes per side, turning occasionally, until golden brown and cooked through.
- Maintain the oil temperature throughout the frying process. If it drops too low, the chicken will absorb too much oil; if too high, the exterior will burn before the interior cooks.
- Chicken is done when it reaches an internal temperature of 165°F (74°C).
- Using tongs or a slotted spoon, remove the fried chicken from the oil and transfer it to a wire cooling rack set over a baking sheet to drain excess oil.
- Allow to rest for a few minutes before serving hot.
Notes

3. **Chicken Broth (instead of water)**This hack seems almost too simple to be revolutionary, yet substituting chicken broth for water in nearly any savory recipe is a game-changer that professional cooks consistently advocate. When a recipe calls for water – whether for cooking rice, pasta, or creating a sauce base – reaching for chicken broth instead instantly injects a layer of richness, complexity, and savory depth that plain water simply cannot provide. It’s a fundamental upgrade.
Consider your everyday staples: cooking rice in chicken broth transforms it from a neutral side dish into a flavorful accompaniment, absorbing all the nuanced savory notes of the broth. Similarly, when making soups or stews, using broth as the liquid base lays a much more robust foundation for all the other ingredients to build upon. It’s an effortless way to ensure that every component of your meal is imbued with maximum flavor.
One Reddit user perfectly encapsulates this sentiment, stating, “Anytime a recipe calls for water, I always use chicken broth instead. It makes just about anything taste richer, more complex, and better.” This straightforward swap eliminates blandness, ensuring that even the background elements of your dish contribute significantly to the overall taste experience. It’s a testament to the fact that every ingredient, no matter how seemingly minor, plays a vital role.
The beauty of this hack lies in its universal applicability and immediate impact. It requires no additional cooking time, no special techniques, just a conscious choice of liquid. This simple substitution dramatically elevates the baseline flavor of countless dishes, proving that sometimes the biggest improvements come from the smallest, most logical adjustments. It’s an essential tool for creating food that tastes profoundly more intentional and delicious.

Dinner Tonight: Chicken Soup with Jasmine Rice and Ginger Recipe
Ingredients
Equipment
Method
- Thoroughly rinse the jasmine rice under cold running water until the water runs clear.
- In a medium pot, combine the rinsed jasmine rice with 4 cups of water. Bring to a boil, then reduce heat to low, cover, and simmer for 12-15 minutes, or until the water is absorbed and the rice is tender.
- While the rice cooks, peel and finely grate or mince the fresh ginger. Thinly slice the green parts of the scallions and chop the fresh cilantro.
- Once the rice is cooked, add the low-sodium chicken broth, grated ginger, Asian fish sauce, salt, and sugar to the pot. Stir well to combine.
- Bring the soup to a gentle simmer over medium heat and cook for 5-7 minutes, allowing the flavors to meld and the ginger to infuse properly.
- Stir in the shredded cooked chicken and continue to simmer for another 2-3 minutes, just until the chicken is heated through.
- Taste the soup and adjust the seasoning with additional fish sauce or salt if necessary, balancing the savory, sweet, and tangy notes.
- Ladle the hot soup into individual serving bowls.
- Garnish generously with the fresh sliced scallions and chopped cilantro.
- Serve immediately and enjoy the warming, aromatic flavors.
Notes

4. **Salt in Hot Chocolate**Prepare to have your perception of hot chocolate completely transformed with this ingenious one-ingredient hack: adding a tiny pinch of salt. It sounds counterintuitive; why add salt to an already sweet beverage? Yet, the magic that unfolds is nothing short of extraordinary. This seemingly minor addition doesn’t make your hot chocolate salty at all; instead, it performs a remarkable feat of flavor chemistry.
A small amount of salt acts as a powerful flavor enhancer, particularly when paired with sweet ingredients. In the case of hot chocolate, the sodium doesn’t introduce a salty taste but rather amplifies and deepens the inherent chocolate flavor. It brings out the cocoa’s nuances, making it taste richer, more robust, and incredibly decadent. It’s the difference between a pleasant sweet drink and a truly profound chocolate experience.
As one enthusiastic home chef shared, “I add a pinch of salt to hot chocolate, and people go crazy for it. But it’s only hot cocoa mix, milk, and salt. The extra sodium doesn’t make it salty at all. It somehow brings out more of the chocolate flavor.” This simple trick elevates store-bought mixes or homemade concoctions alike, providing that elusive “bakery taste” quality without any extra effort or exotic ingredients.
This hack isn’t limited to hot chocolate; the principle of balancing sweet with a hint of salt is a cornerstone of professional baking and confectionary. It’s what makes salted caramel so irresistible, or a pinch of salt in cookie dough so effective. By understanding this fundamental interplay of flavors, you can apply similar logic to other sweet preparations, proving that sometimes the best way to enhance sweetness is not by adding more sugar, but by introducing its flavorful opposite.

Sea Salt & Caramel Hot Chocolate Bombs
Ingredients
Equipment
Method
- Melt 6 ounces of milk chocolate using a double boiler or microwave in short intervals, stirring until completely smooth.
- Carefully spread the melted chocolate into the silicone sphere molds with a small spoon or pastry brush, ensuring an even, opaque coat. Chill for 15-20 minutes until firm.
- Gently unmold the chocolate shells, creating 8 perfect halves. Set aside on a clean surface.
- Fill 4 of the chocolate halves with 2 tablespoons granulated sugar, 2 tablespoons cocoa powder, 1/4 cup dehydrated marshmallow bits, and a small pinch of flaky sea salt.
- Heat a clean, dry plate in the microwave for a few seconds, or warm a small pan over very low heat. Briefly press the rim of an empty chocolate half onto the warm surface to slightly melt the edge.
- Immediately press the melted-edge half onto a filled half to create a sealed chocolate bomb. Repeat this process for the remaining bombs.
- Melt the remaining 1 ounce of semisweet chocolate. Drizzle this melted chocolate decoratively over the assembled bombs.
- While the drizzle is still wet, sprinkle the bombs with additional flaky sea salt for enhanced flavor and visual appeal. Allow them to set at room temperature or chill briefly.
- To serve, heat 6 cups of low-fat milk in a saucepan until it’s hot but not boiling.
- Place one hot chocolate bomb in a mug, pour about 3/4 cup hot milk over it, and stir gently until the chocolate bomb completely dissolves, then garnish with extra marshmallow bits and sea salt if desired.
Notes
Read more about: Your Ultimate NYC Foodie Bucket List: 14 Must-Visit Restaurants That Are Absolutely Slaying the Culinary Scene!

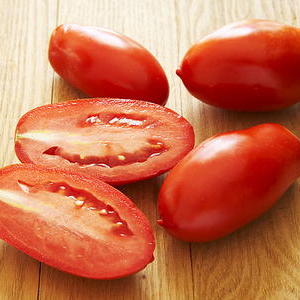
5. **Pureed Carrots in Tomato Sauce**For anyone who has struggled with an overly acidic tomato sauce, reaching for a spoonful of sugar might seem like the obvious fix. However, a far more elegant and nutritious solution exists in the form of pureed or shredded carrots. This one-ingredient hack is a testament to natural sweetness and balancing flavors, leaving your pasta sauce rave-worthy without any added refined sugars.
Carrots, when cooked down, release their natural sugars, which effectively cut through the sharp acidity often found in canned tomatoes. Instead of masking the acidity with an artificial sweetness, the carrots neutralize it, leaving behind a mellow, balanced, and subtly sweet sauce. It’s a technique that adds depth and body to your sauce, making it feel more homemade and complex, even if it started from a jar.
One Redditor enthusiastically endorsed this, stating, “I add pureed or shredded carrots to my tomato sauce. It cuts the acidity without the extra added sugar. Everyone always raves about my pasta sauce.” This approach not only improves the flavor profile but also sneaks in an extra serving of vegetables, a bonus for any health-conscious cook. It’s a smart, simple way to enhance both taste and nutrition.
Beyond just balancing acidity, the carrots also contribute a beautiful, natural color and a silky texture to the sauce as they break down. This hack exemplifies how a single vegetable can perform multiple roles, acting as a sweetener, a thickener, and a flavor rounder all at once. It’s a clever trick that demonstrates how understanding the inherent properties of ingredients can lead to remarkable culinary improvements.
Light Pureed Fresh Tomato Sauce
Ingredients
Equipment
Method
- Core the fresh plum tomatoes, make a small ‘X’ incision on the bottom of each, and blanch them briefly in boiling water (about 30 seconds) before transferring to an ice bath to stop cooking. Peel and roughly chop the tomatoes.
- In a large pot or Dutch oven, melt the unsalted butter or heat the extravirgin olive oil over medium heat.
- Add the grated carrot and finely sliced or chopped onion to the pot and sauté gently until softened and translucent, about 5-7 minutes, without browning.
- Add the roughly chopped tomatoes, torn basil leaves, and salt to the pot. Stir to combine.
- Bring the mixture to a gentle simmer, then reduce the heat to low, cover partially, and let it cook for 30-40 minutes, stirring occasionally, until the tomatoes have completely broken down and the sauce has thickened slightly.
- Remove the pot from the heat. Using an immersion blender, carefully puree the sauce directly in the pot until it reaches your desired consistency, or transfer to a regular blender and blend in batches.
- For an exceptionally smooth sauce, pass the pureed mixture through a fine-mesh sieve, pressing firmly on any solids with a spatula to extract all the liquid. Discard the remaining pulp and seeds.
- Return the strained sauce (if applicable) to the pot, taste, and adjust the salt if necessary.
- Gently reheat the sauce if serving immediately.
- Serve warm, garnished with additional fresh basil leaves.
Notes
Read more about: Seriously, What Happened? 12 Once-Beloved Foods Americans Just Don’t Eat Anymore (And Why We Kinda Miss ‘Em)
6. **Soy Sauce in Tuna or Chicken Salad**When crafting a classic like tuna or chicken salad, many home cooks stick to the traditional mayonnaise, celery, and seasoning blend. However, a surprising yet incredibly effective one-ingredient addition can elevate these simple salads to a whole new level: a dash of soy sauce. This unexpected twist introduces an umami-rich, salty tanginess that transforms the ordinary into the extraordinary.
The saltiness of soy sauce doesn’t just add sodium; it brings a profound savory depth that complements the inherent flavors of tuna or chicken. It also provides a subtle fermented tang that brightens the richness of mayonnaise, creating a more dynamic and interesting flavor profile. This isn’t about making your salad taste Asian-inspired, but rather about enhancing its overall deliciousness in a subtle, yet impactful, way.
A former Jimmy John’s employee revealed this as a trade secret, sharing, “Add a little bit of soy sauce to your tuna or chicken salad. It gives it that extra salty tanginess. I worked at Jimmy John’s for a while, and that was their secret. I’ve been making mine this way for 10 years now, and I could never go back.” Such an endorsement from a professional setting speaks volumes about its effectiveness and how quickly it becomes an indispensable habit.
This hack highlights how a staple condiment, typically associated with one cuisine, can be cross-pollinated into another to surprising effect. It’s about breaking free from conventional pairings and experimenting with flavors to discover new synergies. The result is a salad that is far more complex and satisfying, proving that sometimes the best flavor boosts come from the least expected corners of your pantry.

South Sea Salad
Ingredients
Equipment
Method
- In a large bowl, whisk together mayonnaise, sour cream, lemon juice, curry powder, soy sauce, and garlic salt until smooth; set aside.
- If using tuna, drain it very well. If opting for chicken, cook, cool, and shred or dice it into bite-sized pieces.
- Prepare the vegetables and fruit: Pull apart the lettuce, coarsely chop the celery, and thoroughly drain the cocktail onions and your chosen fruit (mandarin oranges, pineapple tidbits, or wash grapes).
- In a separate large mixing bowl, gently combine the prepared lettuce, drained cocktail onions, chopped celery, and your choice of protein (tuna or chicken).
- Add the drained fruit and the frozen English peas directly to the salad mixture; do not thaw the peas beforehand.
- Pour the prepared dressing over the salad ingredients and toss gently until everything is evenly coated.
- Cover the salad bowl and refrigerate for at least 30 minutes to allow the flavors to meld and the salad to chill thoroughly.
- While the salad chills, you may lightly toast the slivered almonds in a dry pan over medium heat until fragrant, then let them cool.
- Just before serving, gently fold in the Chinese noodles and the slivered almonds (toasted or plain) to maintain their crisp texture.
- Serve the chilled South Sea Salad as a vibrant side dish or a light, satisfying meal.
Notes
Read more about: Seriously, What Happened? 12 Once-Beloved Foods Americans Just Don’t Eat Anymore (And Why We Kinda Miss ‘Em)
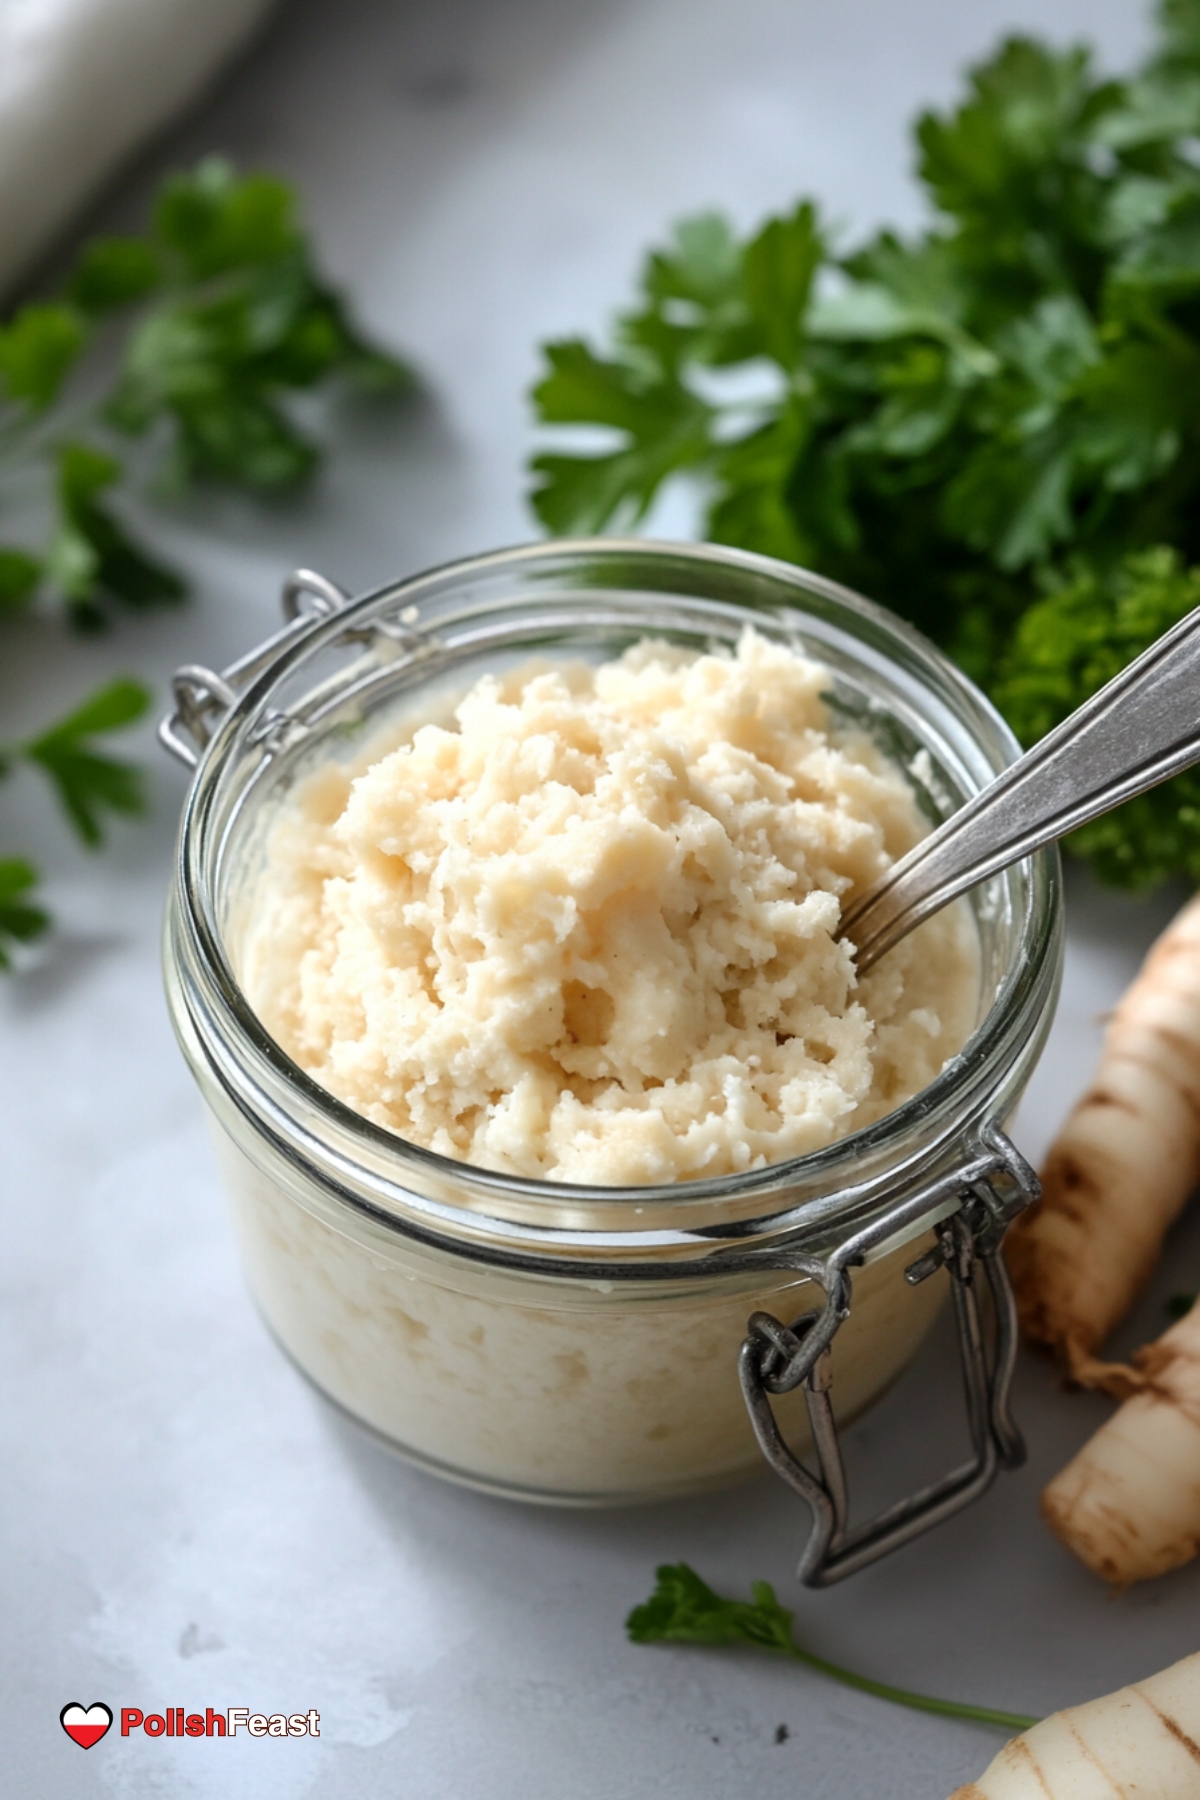
7. **Horseradish in Mashed Potatoes**Mashed potatoes are a comforting classic, but they can sometimes lean towards blandness, especially if not adequately seasoned. Enter horseradish: a pungent, spicy root that, when added judiciously, becomes a game-changer for this beloved side dish. This one-ingredient hack introduces a vibrant kick and an aromatic complexity that elevates mashed potatoes from simple to sophisticated.
The beauty of horseradish in mashed potatoes, especially garlic mashed potatoes, is its ability to add a ton of flavor without being overtly spicy or overpowering. It’s not about making your potatoes taste like horseradish; rather, it’s about infusing them with a bright, peppery warmth that cuts through the richness of the butter and cream, adding an invigorating layer to each bite. It awakens the palate and makes the dish more dynamic.
As one Redditor enthusiastically advised, “Try adding a touch of horseradish to your mashed potatoes…especially garlic mashed potatoes. It’s a game-changer. It adds a ton of flavor without being too noticeable or overpowering.” This subtle infusion transforms the entire experience, turning a familiar side into something memorable and unexpectedly exciting. It’s a clever way to introduce complexity without much effort.
This hack demonstrates how a strong, distinct flavor can be harnessed to enhance a dish without dominating it. The key is moderation: a “touch” is often all that’s needed to achieve that elusive “something extra.” It’s an expert-level move that showcases ingenuity and an understanding of how robust flavors can be used to complement rather than compete, leaving guests wondering about your secret ingredient.
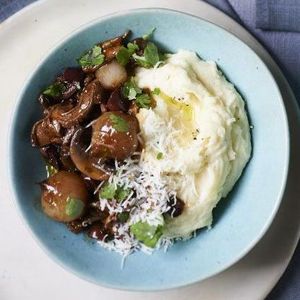
Horseradish mashed potatoes
Ingredients
Equipment
Method
- Peel and cut the potatoes into even chunks to ensure uniform cooking.
- Place the potato chunks in a large pot, cover with cold salted water, and bring to a boil. Cook until fork-tender, approximately 15-20 minutes.
- While potatoes are cooking, gently heat the whipping or double cream and unsalted butter in a small saucepan over low heat until the butter is melted and the mixture is warm, not boiling.
- Once the potatoes are tender, thoroughly drain them and return them to the empty hot pot to allow any residual moisture to evaporate for a minute or two.
- Using a potato ricer or masher, mash the potatoes until smooth, taking care not to overwork them.
- Gradually pour the warm cream and butter mixture into the mashed potatoes, mixing gently until just combined and creamy.
- Stir in the grated fresh horseradish or creamed horseradish, starting with 1 tablespoon and adding more to taste, depending on desired pungency.
- Taste and adjust seasoning with salt and freshly ground white pepper as needed.
- Serve immediately as a rich and flavorful side dish.
Notes
Read more about: Beyond the Burn: Gordon Ramsay’s Secret Comfort Foods That Will Surprise and Delight You!

8. **Seltzer or Carbonated Beverage in Waffles**Who doesn’t love a perfectly fluffy waffle, golden-brown and crisp on the outside, yet wonderfully airy on the inside? While many factors contribute to waffle perfection, there’s one incredibly simple, single-ingredient hack that chefs and home cooks alike swear by for achieving that elusive cloud-like texture: a carbonated beverage. Forget complicated leavening agents; the secret to your lightest, most delectable waffles might just be hiding in your refrigerator.
The magic behind this ingenious trick lies in the bubbles. When you replace a portion of the liquid in your waffle batter with seltzer, club soda, or even a subtly flavored carbonated drink like ginger ale, you’re introducing a wealth of tiny air pockets. As the batter cooks on the hot waffle iron, these bubbles expand, creating a remarkably delicate and open crumb structure. It’s a scientific marvel in your kitchen, ensuring that every bite is not just delicious, but also incredibly light and ethereal, a stark contrast to denser, traditional waffles.
It’s an effortless swap that yields truly remarkable results, as one delighted Reddit user pointed out, “Replace some of the liquid in your waffle batter with seltzer or another carbonated beverage, like ginger ale. It’s the key to the fluffiest, airiest waffles ever.” This isn’t just about making them “good”; it’s about transforming them into an elevated breakfast experience. Next time you’re whipping up a batch, reach for that bubbly bottle, and prepare to be amazed by the “super airy, fluffy waffles” that emerge, ready to be adorned with your favorite toppings.

9. **Anchovy**Mention anchovies to some, and you might see a wary look or hear protests about “fishiness.” Yet, for many discerning chefs and adventurous home cooks, this small, briny fish is a true powerhouse, a single ingredient capable of adding profound depth and an incomparable umami punch to a vast array of dishes. It’s an ingredient that challenges preconceptions, promising a flavor transformation that often goes undetected in the final product.
The beauty of anchovies, particularly when finely minced or dissolved into hot oil, is their ability to meld seamlessly into sauces, dressings, and braises, imparting a rich, savory complexity without ever asserting a distinct “fishy” taste. Instead, they enhance and amplify the other flavors around them, creating a more harmonious and deeply satisfying profile. As one enthusiastic cook shared, “Anchovy. Works wonders in pasta sauces and all kinds of dressings. I used to fear funk and now I embrace it.” This sentiment perfectly captures the journey many take with this humble ingredient.
Whether you’re building a robust tomato sauce, crafting a vibrant Caesar dressing, or even adding a secret layer to a hearty stew, a small addition of anchovy can make a world of difference. It’s the kind of subtle genius that makes people wonder what your secret is, without ever guessing the oceanic origin. For those looking to “take the complexity up a notch by incorporating an umami-ness,” anchovies, whether jarred or as a paste, are an indispensable tool in the pursuit of truly exceptional flavor.
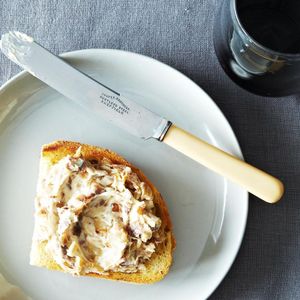
Anchovy Onion Butter
Ingredients
Equipment
Method
- Finely dice the large onion and set aside. Roughly chop the anchovies.
- In a medium sauté pan, heat the anchovy oil over medium-low heat.
- Add the diced onion and a pinch of sugar to the pan. Cook slowly, stirring occasionally, until the onions are deeply caramelized and tender, about 15-20 minutes.
- Add the chopped anchovies to the caramelized onions in the pan. Continue to cook for another 2-3 minutes, mashing the anchovies with the back of your spoon until they have completely dissolved into the onions.
- Remove the pan from the heat and allow the onion-anchovy mixture to cool slightly, about 5-10 minutes.
- In a small mixing bowl, combine the softened butter with the cooled anchovy-onion mixture.
- Using a fork or spatula, mash and mix thoroughly until all ingredients are well combined and the butter is uniform in color and texture.
- Taste the butter and adjust seasoning if necessary; anchovies are salty, so additional salt is typically not needed.
- Transfer the compound butter onto a piece of parchment paper or plastic wrap, shaping it into a log.
- Roll tightly and chill in the refrigerator for at least 30 minutes, or until firm, before serving or storing. Alternatively, spoon into a small ramekin and chill.
Notes
Read more about: Beyond the Flames: 13 Barbecue Myths Pitmasters Want You to Stop Believing for Safer, Tastier Grilling
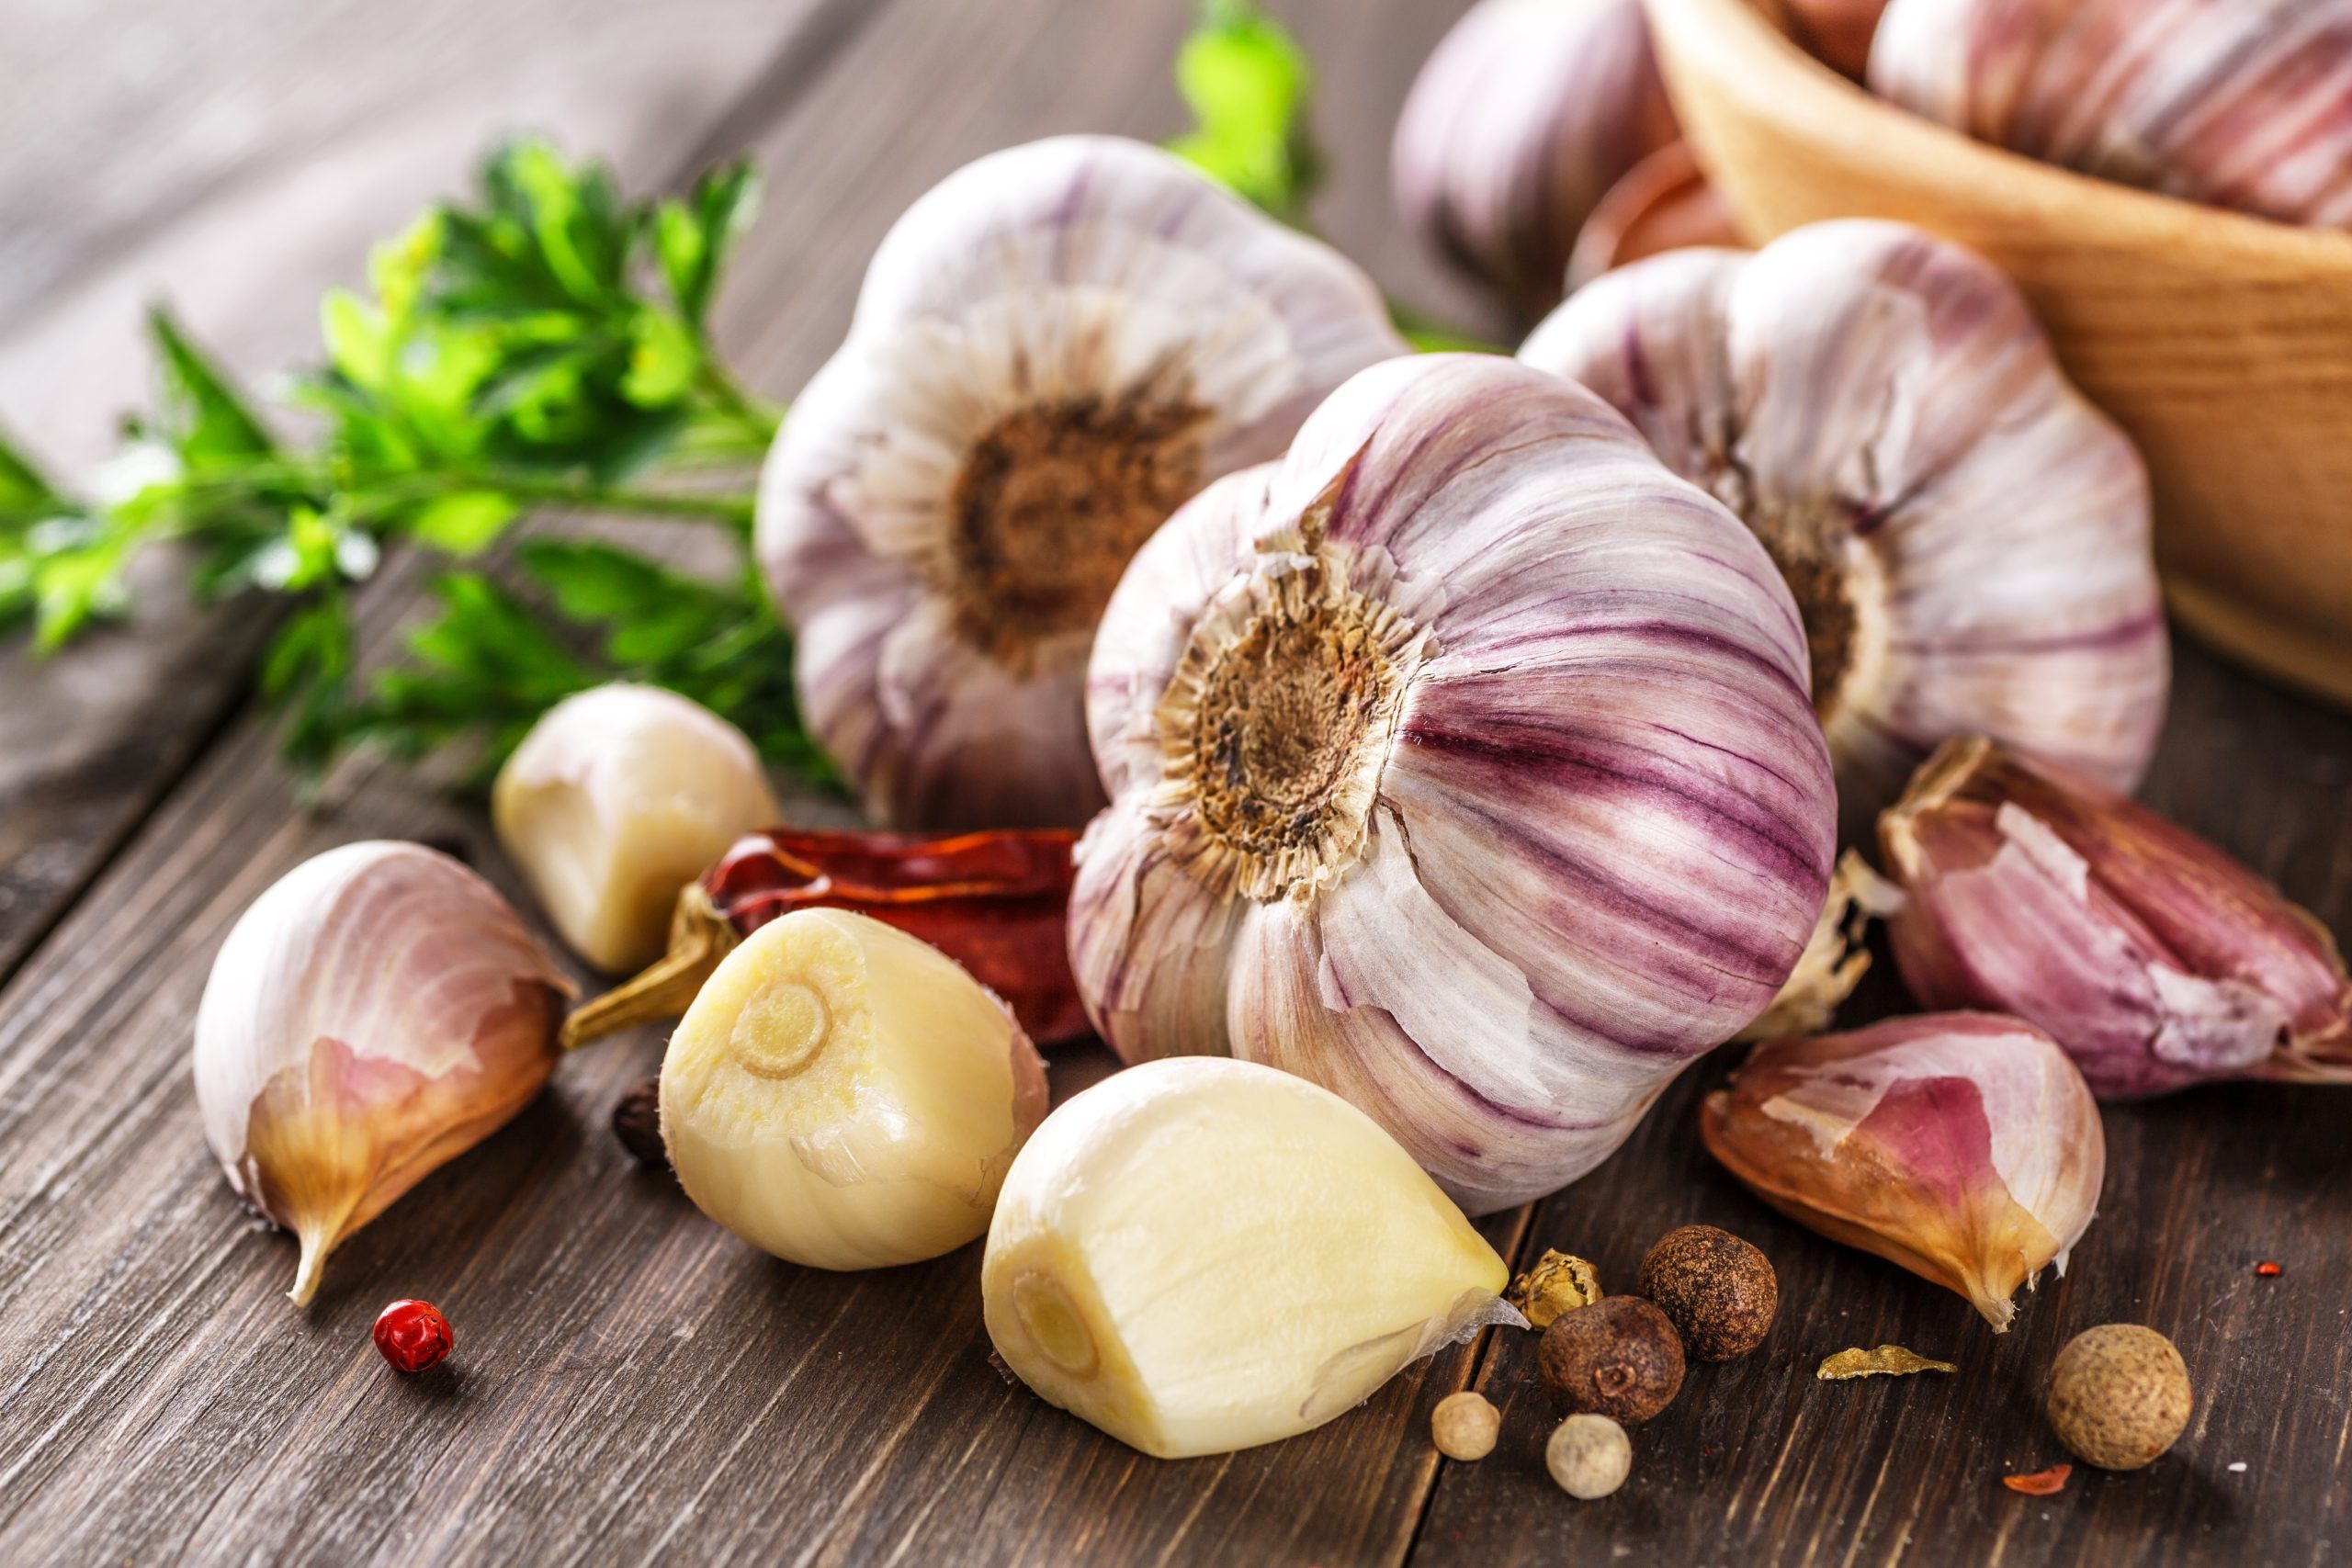
10. **Garlic**Ah, garlic. The undisputed king of flavor enhancers, a pungent, aromatic cornerstone in virtually every cuisine around the globe. While its presence in countless recipes is undeniable, a common refrain among seasoned cooks is that most recipes simply don’t call for *enough* of it. This isn’t just about adding flavor; it’s about building a robust, unforgettable foundation for your dishes that truly sings.
“Lots of garlic, recipes always say to use little garlic. And I mean the real deal, not the garbage they sell in those jars.” This passionate call to action from the cooking community underscores a fundamental truth: fresh, aromatic garlic is a game-changer. It’s not merely a spice; it’s an experience, offering nuanced heat, sweetness when roasted, and a savory depth that can transform the simplest ingredients into culinary masterpieces. For Chef Eugene Wong, it’s a non-negotiable “must-have” ingredient, a testament to its foundational importance in the kitchen.
From infusing olive oil for a quick pasta dish to providing the aromatic backbone of a slow-cooked stew, garlic’s versatility is boundless. It elevates roasted vegetables, brightens marinades, and provides a crucial counterpoint in rich, creamy sauces. Embracing a generous hand with this fragrant bulb means unlocking layers of flavor that often remain dormant when used sparingly. It’s about cooking with confidence and allowing this beloved allium to truly shine, making every meal a more vibrant and satisfying affair.
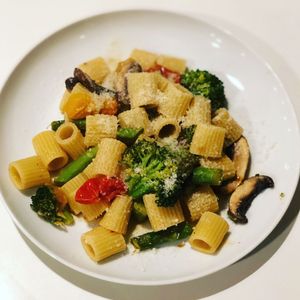
Pasta Primavera
Ingredients
Equipment
Method
- Bring a large pot of salted water to a rolling boil. Cook the pasta according to package directions until al dente.
- Before draining, reserve 1 cup of the starchy pasta water. Drain the cooked pasta and set it aside.
- While the pasta cooks, finely mince the garlic and prepare the vegetables: cut broccoli into florets, asparagus into 1-inch pieces, slice mushrooms, and halve the grape tomatoes.
- Heat the olive oil in a large sauté pan or skillet over medium-high heat. Add the minced garlic and red pepper flakes, sautéing for about 30 seconds until fragrant, being careful not to burn the garlic.
- Add the broccoli florets and asparagus to the pan, sautéing for 2-3 minutes until they are bright green and tender-crisp.
- Stir in the sliced mushrooms and grape tomatoes. Continue to sauté for another 3-4 minutes until the mushrooms are lightly browned and the tomatoes begin to soften.
- Pour in the chicken stock, bringing it to a gentle simmer. Cook for 1-2 minutes, allowing the liquid to slightly reduce and the flavors to meld.
- Add the cooked pasta to the sauté pan with the vegetables and sauce. Toss everything together thoroughly to coat the pasta evenly.
- Stir in the Parmesan cheese. If the sauce appears too dry, gradually add a tablespoon or two of the reserved pasta water until a light, cohesive sauce forms, beautifully coating the pasta.
- Taste and adjust seasoning with salt and freshly ground black pepper as needed. Serve immediately, garnished with additional Parmesan cheese if desired.
Notes
Read more about: Seriously, What Happened? 12 Once-Beloved Foods Americans Just Don’t Eat Anymore (And Why We Kinda Miss ‘Em)

11. **Freezing Overripe Bananas**Banana bread is a beloved classic, often seen as the perfect solution for those forgotten, browning bananas on the counter. But what if there was a way to elevate your banana bread, or any banana-infused baked good, beyond its already delicious potential? The answer, surprisingly, is to give those overripe bananas a little chill time. This simple, one-ingredient hack promises to unlock an even deeper, sweeter flavor profile.
The magic happens when you freeze overripe bananas first, then thaw them when you’re ready to bake. As one Reddit user eloquently put it, “Most people use overripe bananas for banana bread, but I have another great trick. I freeze the overripe bananas first, then I thaw them when it’s time to bake. Freezing them first somehow makes them taste even sweeter.” The freezing and thawing process breaks down the cell walls of the banana, intensifying its natural sugars and concentrating its flavor. This results in a more pronounced banana taste and a naturally sweeter outcome for your baked goods.
Beyond the flavor boost, this hack also offers immense practicality and efficiency. It allows you to preserve those perfectly ripe-for-baking bananas indefinitely, preventing waste and ensuring you always have the ideal ingredient on hand, regardless of your current banana supply. It’s a clever solution that not only enhances taste but also streamlines your kitchen workflow, making impromptu baking sessions a breeze and ensuring your banana creations consistently taste “next level.”

Egg-Free Chocolate Banana Muffins or Bread
Ingredients
Equipment
Method
- Preheat oven to 375°F (190°C). Prepare your muffin tin by greasing or lining with paper, or grease a 9×5 inch loaf pan if making bread.
- In a large mixing bowl, whisk together the whole wheat flour, AP flour, Splenda Granulated, unsweetened natural cocoa powder, baking soda, and salt.
- In a separate medium bowl, mash the ripe bananas until smooth. Overripe or previously frozen and thawed bananas work best for enhanced sweetness and texture.
- Add the low fat buttermilk, canola oil, and vanilla extract to the mashed bananas; whisk until all wet ingredients are thoroughly combined.
- Pour the wet ingredients mixture into the bowl containing the dry ingredients.
- Gently fold the batter with a spatula until just combined. Be careful not to overmix; a few small lumps are perfectly acceptable and help ensure a tender crumb.
- Evenly divide the batter among the prepared muffin cups, filling each about two-thirds full, or pour into the greased loaf pan.
- Bake muffins for 18-22 minutes, or bread for 45-55 minutes, until a toothpick inserted into the center comes out clean.
- Allow the muffins or bread to cool in the pan for 5-10 minutes before carefully transferring them to a wire rack to cool completely.
- Serve warm or at room temperature, enjoying the rich chocolate and banana flavors.
Notes
Read more about: The 12 Everyday Staples That Defy Your Fridge’s Freshness Promises
12. **Fish Sauce**For many home cooks, fish sauce remains an intimidating bottle in the ethnic foods aisle, often associated primarily with Southeast Asian cuisine. However, those in the know—including many professional chefs—understand its profound potential as a universal umami booster. This fermented condiment, rich in savory depth, is a true flavor game-changer that, when used correctly, doesn’t make dishes taste “fishy” at all, but rather amplifies their inherent deliciousness.
Think of fish sauce as the umami counterpart to salt, capable of enhancing savory notes in a way that plain salt cannot. A small dash can transform a bland stir-fry, invigorate a marinade, or add incredible depth to a simple broth. As one Reddit user enthusiastically stated, “Fish sauce. Used properly, it doesn’t make anything taste like fish, and it’s a huge flavor boost in almost any kind of cuisine. I use it in almost anything savory I make.” Its strength lies in its ability to contribute a complex, fermented savoriness that rounds out flavors and adds a mysterious richness, much like MSG, but with its own distinct character.
Embracing fish sauce means opening up a world of intensified flavors across diverse culinary landscapes. While it’s a staple in Thai and Vietnamese cooking, don’t hesitate to experiment with it in unexpected places—a hearty chili, a rich stew, or even a simple vinaigrette can benefit from its profound savory boost. It’s a testament to the power of thoughtful seasoning and the cross-cultural potential of singular ingredients, proving that sometimes the biggest leaps in flavor come from stepping outside your comfort zone.
Read more about: Your Ultimate NYC Foodie Bucket List: 14 Must-Visit Restaurants That Are Absolutely Slaying the Culinary Scene!

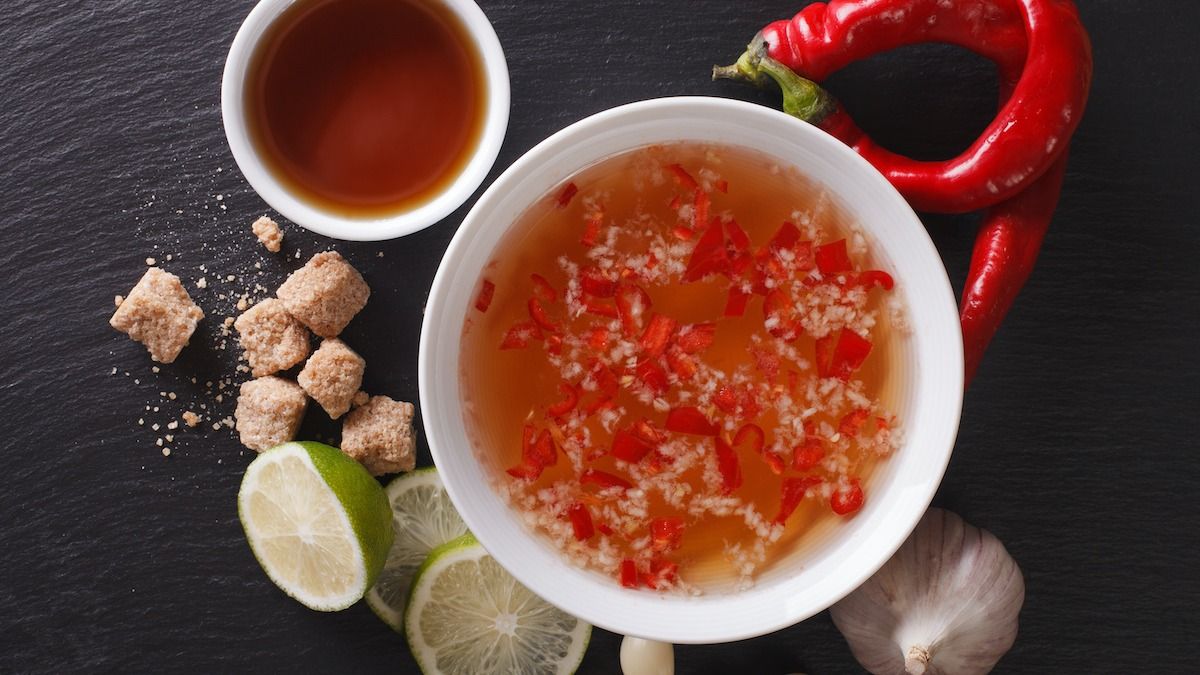
13. **Acids (Lemon/Shallots)**Have you ever tasted a dish and felt it was missing something, a certain sparkle or balance? Often, the answer lies in the judicious application of acid. While many reach for salt, acid is a critical component for cutting through richness, brightening flavors, and adding that elusive “pop” that elevates a meal. A squeeze of lemon or a splash of vinegar can be the single ingredient that transforms a dish from merely good to truly spectacular, acting as a crucial counterpoint to savory and sweet notes.
One home cook perfectly captured this revelation: “Started when I was making a sauce that just…it needed something. I added a squeeze of lemon, even though it seemed odd, and it was magic.” This “magic” is the power of acid to balance and harmonize, preventing dishes from feeling heavy or one-dimensional. Beyond citrus, the subtle, sweet pungency of shallots offers another dimension of flavor. Unlike their bolder onion cousins, shallots provide a delicate, aromatic foundation that can profoundly enhance sauces, dressings, and sautés.
The transformative power of shallots truly hit home for another chef who shared, “I had thought they were the same as onions. Then I had a recipe for saltimbocca from Maggiano’s and the sauce was shallot based. Oh. My. God. They’re one of my favorite ingredients to cook with.” Learning to integrate acids and shallots effectively is a hallmark of an intuitive cook, demonstrating that understanding how ingredients interact is often the simplest and most effective “hack” for elevating your cooking.
Zesty Lemon Vinaigrette
Ingredients
Equipment
Method
- Zest the lemon and extract the juice. Grate the garlic clove and finely chop the shallot, ensuring all ingredients are prepped.
- In a small mixing bowl, combine the lemon juice, lemon zest, Dijon mustard, honey, grated garlic, chopped shallot, and kosher salt.
- Whisk these initial ingredients together thoroughly until they are well incorporated.
- While continuously whisking vigorously, slowly drizzle in the extra-virgin olive oil in a steady stream.
- Continue whisking until the vinaigrette is fully emulsified, appearing slightly thickened and opaque.
- Taste the vinaigrette and adjust the seasoning as necessary, adding more salt, honey, or lemon juice to achieve your desired balance of sweet, savory, and tart.
- Serve immediately over your favorite greens, vegetables, or use as a light marinade for proteins.
- Store any leftover vinaigrette in an airtight container in the refrigerator and re-whisk or shake well before each subsequent use to re-emulsify.
Notes

14. **Instant Mashed Potatoes (as thickener)**We’ve all been there: a homemade soup or sauce, simmering beautifully, but stubbornly refusing to achieve that desired velvety thickness. Or perhaps you’ve added a touch too much liquid, leaving your culinary creation feeling thin and watery. Before you despair or resort to a bland flour-and-water slurry, consider this brilliant, single-ingredient kitchen hack: instant mashed potatoes. It’s a lifesaver for rescuing dishes and achieving perfect consistency with minimal fuss.
This ingenious trick leverages the absorbent power of dehydrated potato flakes. A spoonful or two, stirred into a thin sauce or soup, will quickly plump up and dissolve, thickening the liquid without adding any discernible potato flavor to your dish. “If your homemade sauces or soups seem too thin or watery, try adding instant mashed potatoes as a thickener. Since I learned this trick, I’ve started keeping a box around for lazy days or emergencies.” This user’s testimony perfectly encapsulates the practicality and efficiency of this hack.
It’s a secret weapon that professional chefs and clever home cooks keep in their pantry for good reason. Unlike cornstarch or flour, which can sometimes leave a starchy taste or require careful mixing to prevent lumps, instant mashed potatoes integrate smoothly and almost invisibly. They provide an effortless way to adjust consistency, ensuring your gravies are glossy, your soups are hearty, and your sauces cling perfectly. It’s about achieving restaurant-quality texture with a simple, pantry-staple ingredient.

Oh So Southern Potato Soup
Ingredients
Equipment
Method
- Peel and cube the russet potatoes.
- In a large pot or Dutch oven, combine the cubed potatoes, chicken broth, water, salt, and celery salt.
- Bring the mixture to a boil over medium-high heat, then reduce the heat to low, cover, and simmer until the potatoes are fork-tender, about 15-20 minutes.
- Using a potato masher or the back of a spoon, gently mash some of the cooked potatoes directly in the pot to your desired consistency; leave some chunks for texture.
- Stir in the milk until well combined.
- Gradually whisk in the instant mashed potatoes, a little at a time, until the soup reaches your desired thickness.
- Remove the pot from the heat and stir in the sour cream until it is fully incorporated and smooth.
- Taste the soup and adjust the salt and celery salt seasoning as needed.
- Ladle the hot soup into serving bowls.
- Garnish with shredded cheese and chopped green onions/scallions, if desired, before serving.
Notes
As we’ve journeyed through these ingenious single-ingredient transformations, it becomes abundantly clear that culinary mastery isn’t solely about elaborate techniques or exotic finds. True brilliance in the kitchen often stems from a deep appreciation for the inherent power of individual ingredients and the clever ways they can be harnessed. From the airy lift of seltzer in waffles to the hidden umami of anchovies and fish sauce, each hack we’ve explored empowers you to elevate your everyday cooking with minimal effort and maximum flavor. So go ahead, embrace these culinary secrets, experiment with confidence, and discover your own pantry treasures. Your taste buds—and your dinner guests—will thank you for it!


