


In the vast and delectable universe of culinary pursuits, few undertakings are as gratifying and deeply rewarding as crafting a truly exceptional pizza right within the confines of your own kitchen. This isn’t just about feeding a craving; it’s an opportunity to engage with a profound culinary tradition, to experiment, and to ultimately achieve a triumph that rivals the finest pizzerias. To embark on this journey, one must first appreciate the very essence of what ‘homemade’ truly signifies, and then, with meticulous care, delve into the foundational pillars of any stellar pizza: the dough and the sauce.
Our expedition begins by dissecting the term itself – ‘homemade’. While seemingly straightforward, this single word carries a surprising linguistic complexity that, when understood, reflects a commitment to precision. Interestingly, various spellings, such as ‘homemade’, ‘home-made’, and even ‘home made’, have found their way into common usage. For many, ‘homemade’ as one word is the preferred spelling, especially in American English (AE). Conversely, British English (BE) frequently favors the hyphenated ‘home-made’. This subtle difference highlights a broader tendency for BE to employ more hyphens than AE.
Some might even suggest that the choice of spelling could subtly depend on the context of usage. For instance, one might encounter “All of their pies are homemade” as a single word when used as an adjective describing the pies, yet see “Grandma’s home-made rhubarb crisp is to die for” with a hyphen, perhaps when the term acts more directly as a compound adjective. However, this distinction is not universally applied, with many users admitting to employing both without giving it much thought. Still, a common informal preference appears to be ‘homemade’ for food items, and ‘home-made’ for objects, such as “A homemade pie” versus “A home-made lamp.” Such linguistic intricacies, while minor, underscore the precise and thoughtful approach that defines culinary mastery.
The true soul of any pizza, whether linguistic or gastronomic, resides in its crust. Far from being a mere base, the dough is the very foundation, the canvas upon which all other flavors are painted. Mastering your dough from scratch is not just a challenge; it is a critical step towards elevating your pizza from good to truly extraordinary. This commitment to scratch-made dough unlocks levels of freshness and flavor that pre-made alternatives simply cannot match.
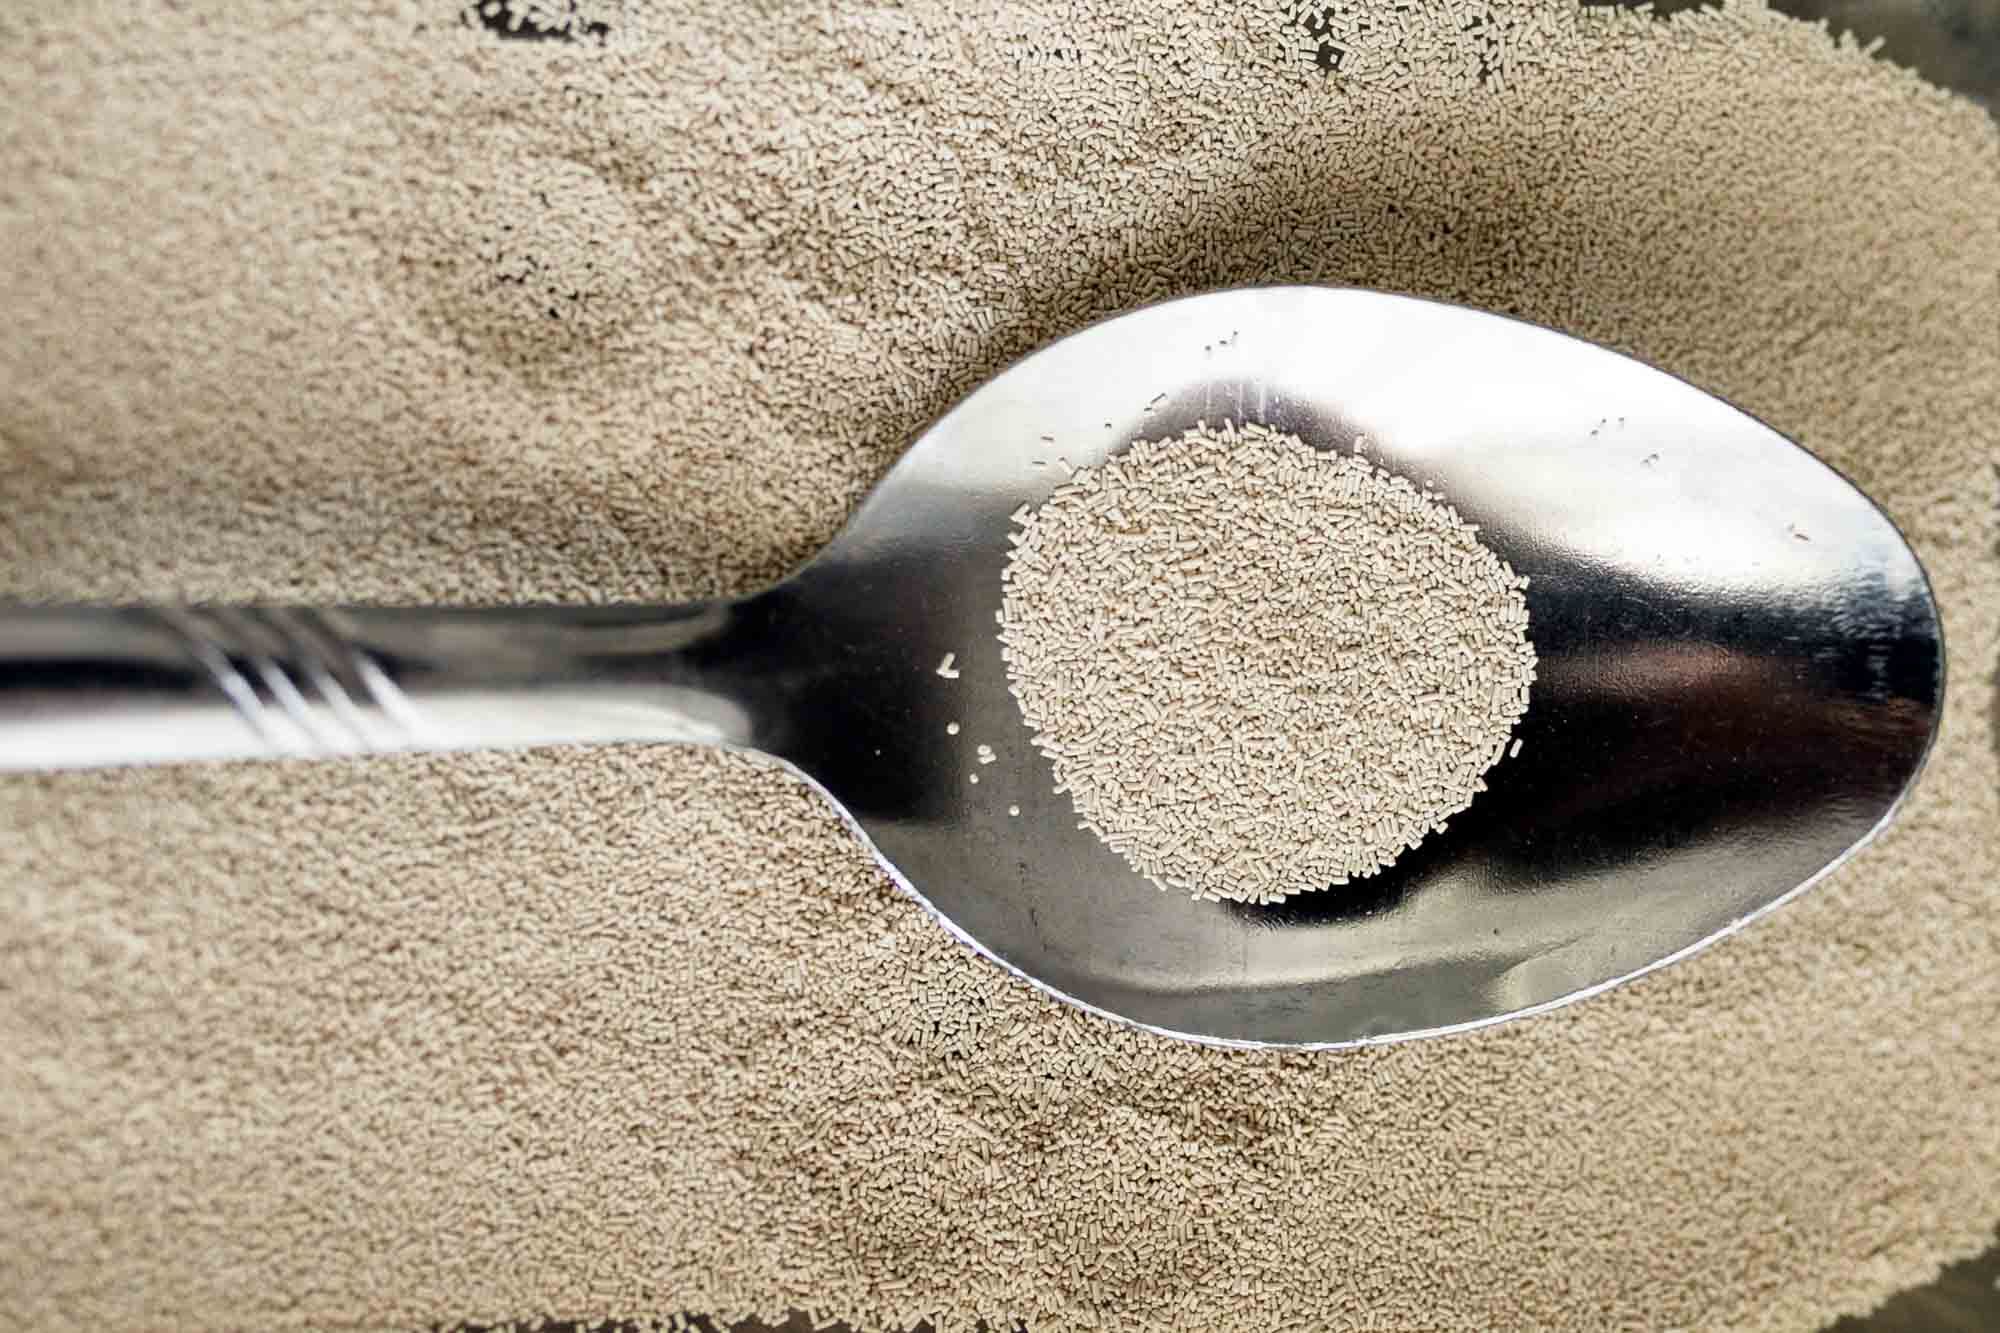
Understanding the science behind the rise and fermentation is paramount to achieving the perfect crust. The active dry yeast, when combined with warm water (around 110°F) and a touch of sugar, begins a magical transformation. This activation period, lasting about 5-10 minutes, is crucial; you’ll know it’s ready when the mixture becomes frothy. This frothing is the visible sign that the yeast is alive and ready to leaven your dough, producing the gases that give your crust its characteristic airy texture.
Once activated, the yeast mixture is combined with dry ingredients – primarily flour and salt – along with a tablespoon of olive oil. The subsequent kneading process, ideally for about 5-7 minutes on a floured surface, is where the magic of gluten development occurs. Through kneading, the proteins in the flour form elastic strands, giving the dough its smooth, pliable texture and ultimately contributing to the chewiness of the baked crust. This elasticity is what allows the dough to stretch without tearing, whether you’re rolling it out or attempting the more adventurous art of tossing.
The initial rise, typically about an hour in a lightly greased, cloth-covered bowl in a warm place, allows the dough to double in size. This primary fermentation is essential for developing flavor and texture. However, for those seeking to truly elevate their crust, the world of cold fermentation beckons. This advanced technique involves allowing the dough to rise slowly in the refrigerator, often for 24 to 72 hours. This extended, low-temperature fermentation process is a game-changer, resulting in a more delicate texture and a significantly more complex, nuanced flavor profile that is simply spectacular.
For a home oven, a dough with a 68% hydration level that has undergone cold fermentation strikes an optimal balance, promising a perfect crust that is both tender and flavorful. This meticulous approach to dough preparation, from the precise measurements of ingredients to the patient art of fermentation, is what distinguishes a truly masterful homemade pizza from a merely passable one. It underscores the Serious Eats philosophy: understanding the ‘why’ behind the ‘how’ ensures optimal results.
Recipe details: Yeast Rolls
Prep time: 30 min Inactive time: 3 hr 30 min
Cook time: 15 min Total time: 4 hr 15 min
Level: Intermediate Servings: 24 rolls
Total weight: 909.5 g Calories: 2555.0 kcal
Energy: 2555.0 kcal Protein: 65.5 g
Carbs: 385.7 g Fat: 82.2 g
Dish Tags: eastern europe, bread, lunch/dinner, Balanced, Sugar-Conscious, Low Potassium, Kidney-Friendly, Vegan, Vegetarian, Sulfites
Ingredients:
1/2 cup sugar, plus a pinch
1/2 cup warm water (105 to 115 degrees F)
2 packages active dry yeast
2 teaspoons salt
1/3 cup solid vegetable shortening
1 cup cold water
1 egg, well beaten
4 1/2 cups all-purpose flour
2 tablespoons butter, melted
Cooking steps:
1. In a large bowl, add a pinch of sugar to the warm water. Sprinkle the yeast over the top and let stand until foamy, about 5 minutes. Stir to dissolve yeast. Beat in the remaining sugar, salt, shortening, cold water, and egg until well blended. On low speed, beat in 2 cups of flour and beat for 2 minutes. Beat in enough of the remaining flour, 1/2 cup at a time, to make soft dough. Place the dough in a well-greased bowl and turn to coat the dough. Cover with a towel and let rise until doubled in bulk, about 1 1/2 hours.
2. Punch the dough down and refrigerate for 2 hours. The dough will almost double in bulk. Grease 2 (9-inch) cake pans. Turn the dough out onto a floured surface. Pull off pieces of the dough, about a 1/4 cup each and shape into 24 rolls. Place 12 rolls, sides touching in each of the 2 prepared pans. Brush with butter. Let rise in a warm place for 1 hour or until doubled.
3. Preheat oven to 425 degrees F. Bake the rolls until well browned on the top, about 15 minutes. Transfer the pan to wire racks to cool for 5 minutes.
Get the recipe: Yeast Rolls
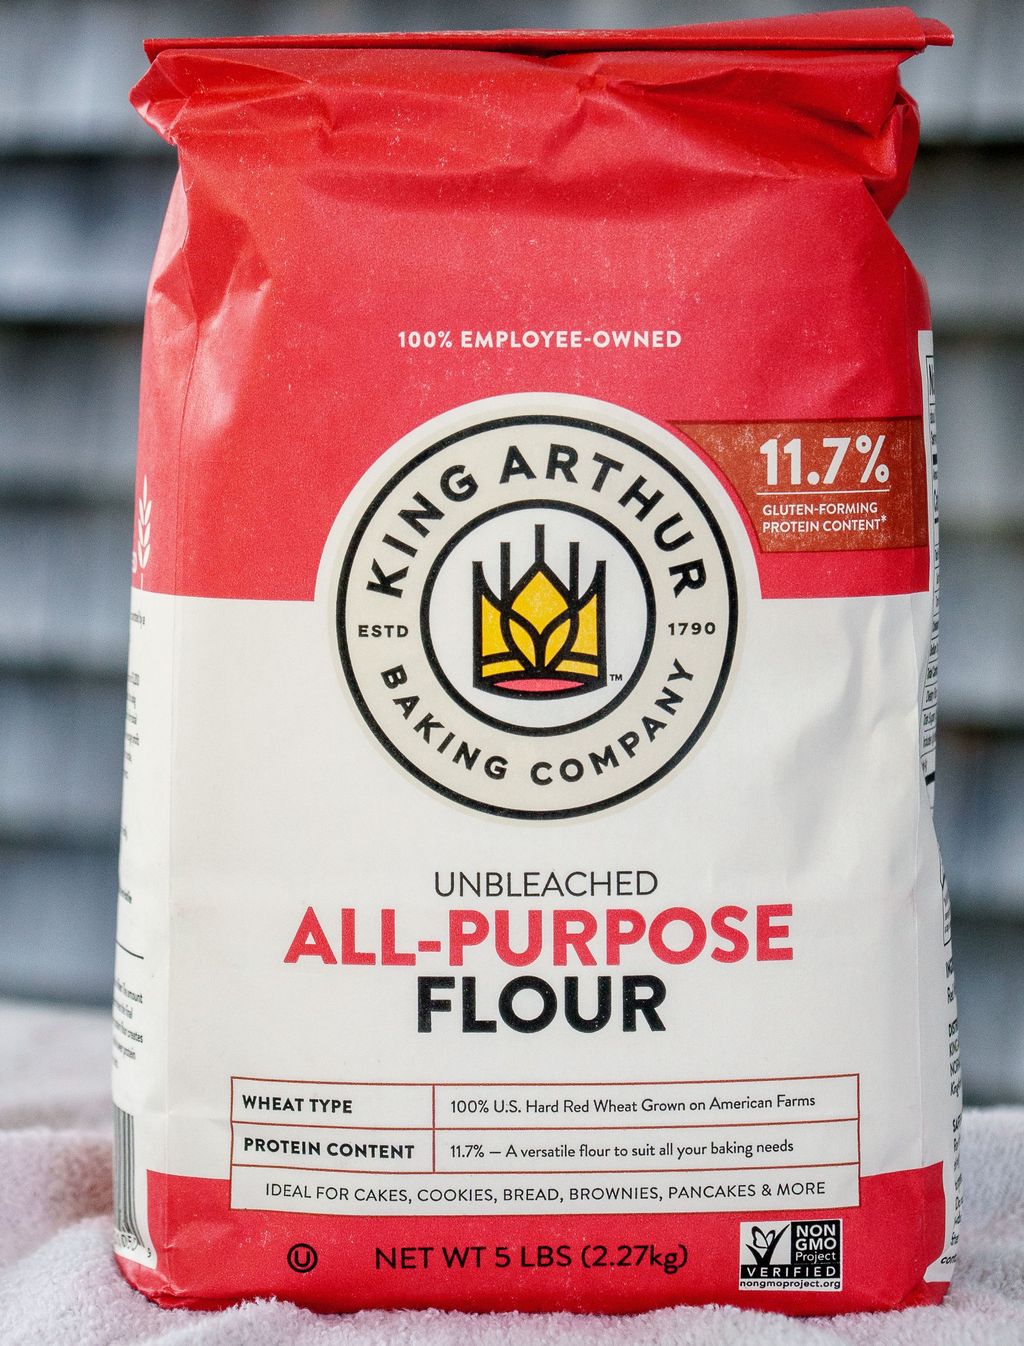
The choice of flour is another critical component in the pursuit of the perfect dough, directly influencing the final texture of your crust. While all-purpose flour is versatile and yields a good balance of tenderness and chewiness, bread flour, with its higher protein content, is often preferred by enthusiasts. This increased protein promotes greater gluten development, leading to a chewier crust – a characteristic many pizza aficionados desire. For those aspiring to an authentic Neapolitan experience, ’00’ flour, a finely milled Italian flour specifically designed for pizza, is the choice. It consistently produces a softer, airier crust, emblematic of traditional Italian pizzas.
Beyond the basic recipe, the universe of pizza doughs is vast and varied, offering options for every preference and culinary ambition. Our basic pizza dough, with its manageable 90-minute rise time, serves as an excellent starting point for quick weeknight meals. For those who crave spontaneous pizza nights, the refrigerator pizza dough is a revelation; it can be mixed, forgotten, and then pulled from the fridge whenever the craving strikes, ready to transform into a delicious pie. For the patient perfectionist, the Italian-style dough, requiring a 4-5 hour rising time, promises a reward that is truly worth the wait, delivering unparalleled depth of flavor.
The versatility of these base doughs is impressive; any of them can be adapted to create a deep dish-style crust, offering a satisfyingly thick and hearty foundation. And for those adhering to specific dietary needs, low-carb options like the cauliflower pizza crust provide an ingenious alternative, ensuring that no one is left out of the homemade pizza experience. Further specializations exist, ranging from whole wheat dough for a healthier profile to gluten-free options, and even unique crusts like cracker, cornmeal, no-knead dough with Jim Lahey’s method, New York style, and creative variations like skillet tortilla pizza, lavish pizza, and puff pastry pizza.
The exploration doesn’t stop there; one can venture into basic Sicilian dough, polenta crust, zucchini crust, five-ingredient quinoa crust, or even beer pizza dough, each offering a distinct texture and flavor profile. This vast array of dough choices underscores the meticulous testing and research that goes into perfecting homemade pizza, ensuring that every palate and preference is catered to. Regardless of the chosen dough, the fundamental principles of ingredient quality and precise preparation remain sacrosanct.
Recipe details: Pizza Dough
Prep time: 20 min Inactive time: 1 hr 10 min
Cook time: 1 hr 10 min Total time: 1 hr 30 min
Level: Easy Servings: 2 (14-inch) pizza crusts
Total weight: 843.3 g Calories: 1926.6 kcal
Energy: 1926.6 kcal Protein: 52.3 g
Carbs: 382.3 g Fat: 16.4 g
Dish Tags: italian, main course, lunch/dinner, Low-Fat, Sugar-Conscious, Low Potassium, Kidney-Friendly, Vegan, Vegetarian
Ingredients:
3 1/2 to 4 cups bread flour, plus more for rolling
1 teaspoon sugar
1 envelope instant dry yeast
2 teaspoons kosher salt
1 1/2 cups water, 110 degrees F
2 tablespoons olive oil, plus 2 teaspoons
Cooking steps:
1. Combine the bread flour, sugar, yeast and kosher salt in the bowl of a stand mixer and combine. While the mixer is running, add the water and 2 tablespoons of the oil and beat until the dough forms into a ball. If the dough is sticky, add additional flour, 1 tablespoon at a time, until the dough comes together in a solid ball. If the dough is too dry, add additional water, 1 tablespoon at a time. Scrape the dough onto a lightly floured surface and gently knead into a smooth, firm ball.
2. Grease a large bowl with the remaining 2 teaspoons olive oil, add the dough, cover the bowl with plastic wrap and put it in a warm area to let it double in size, about 1 hour. Turn the dough out onto a lightly floured surface and divide it into 2 equal pieces. Cover each with a clean kitchen towel or plastic wrap and let them rest for 10 minutes.
Get the recipe: Pizza Dough
Once the dough is perfected, the next pivotal element is the pizza sauce – the “heart of your pizza” that truly marries the crust with the chosen toppings. A thoughtfully crafted sauce can elevate even a basic pizza into something extraordinary, providing that essential layer of tangy, savory, or even sweet goodness. The options for sauce are as varied as the pizzas they grace, ranging from traditional red sauces to creamy white or zesty barbecue bases.
For a classic red sauce, a 2-minute pizza sauce can be a winner, providing quick, bright flavor. Alternatively, a creamy alfredo offers a rich, luscious white base, while a no-cook barbecue sauce can be whipped up in 10 minutes or less, providing a convenient and flavorful foundation. But for those seeking to truly understand the ‘why’ behind a great sauce, a deeper dive into its components and preparation is essential.
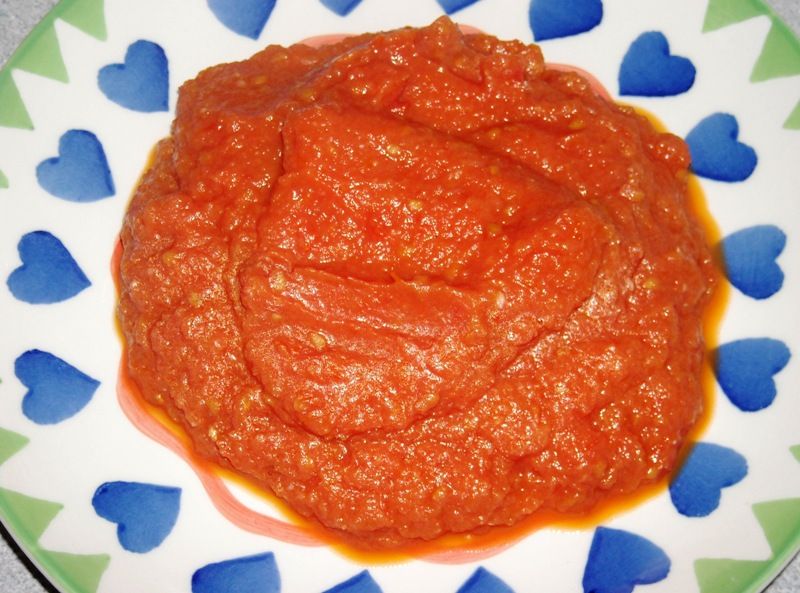
Our fan-favorite Homemade Pizza Sauce offers a prime example of culinary innovation and flavor maximization. The secret lies in the use of canned fire-roasted tomatoes. These tomatoes, unlike standard canned varieties that can sometimes be bitter, possess a sweet and subtly smoky flavor right out of the can, providing an immediate advantage in taste. The process is deceptively simple: blend fire-roasted tomatoes with fresh garlic, olive oil, oregano, and salt. The result is a sauce that tastes like a dream with “pure tangy, garlicky goodness,” requiring no cooking whatsoever.
For those who prefer a simmering approach, a simple homemade pizza sauce involves sautéing minced garlic in olive oil until fragrant, then adding crushed tomatoes, oregano, basil, and seasoning with salt and pepper. This mixture is then allowed to simmer for about 15-20 minutes, giving the flavors ample time to meld and deepen. Cooling the sauce before spreading it on the dough is a crucial step to prevent sogginess and ensure optimal texture. This attention to detail, whether through a quick blend or a slow simmer, is indicative of the authoritative and educational tone that guides culinary exploration.
The world of sauces extends far beyond these staples, inviting endless experimentation. From a five-minute tomato sauce or more robust canned tomato sauce, to white pizza sauce, pesto, or various homemade BBQ sauces (including unique cherry BBQ and key lime BBQ varieties), the possibilities are extensive. Even adventurous choices like yellow tomato sauce, rich tomato bacon jam, sweet caramelized onion jam, or a spicy chipotle sauce can redefine the pizza experience, demonstrating that every element, down to the last drop of sauce, contributes to the overall symphony of flavors in a truly homemade pizza.
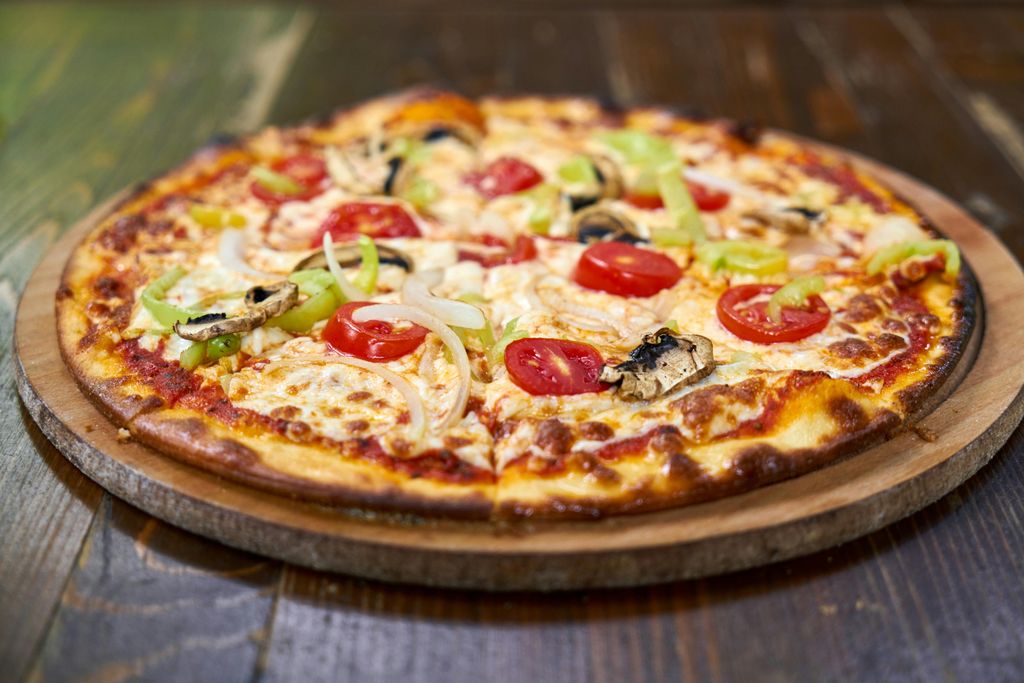
Having meticulously prepared your foundational elements – the perfect dough and the divine sauce – the true alchemy of homemade pizza now awaits. This is where your individual creativity truly shines, as you transform simple components into a culinary masterpiece. The journey from a mere ball of dough to a bubbling, golden-crusted pizza involves precise assembly techniques, strategic topping choices, and a keen understanding of your home oven’s capabilities. It’s an art form, undeniably, but one deeply rooted in the science of heat transfer and ingredient interaction, ensuring every bite is a triumph.
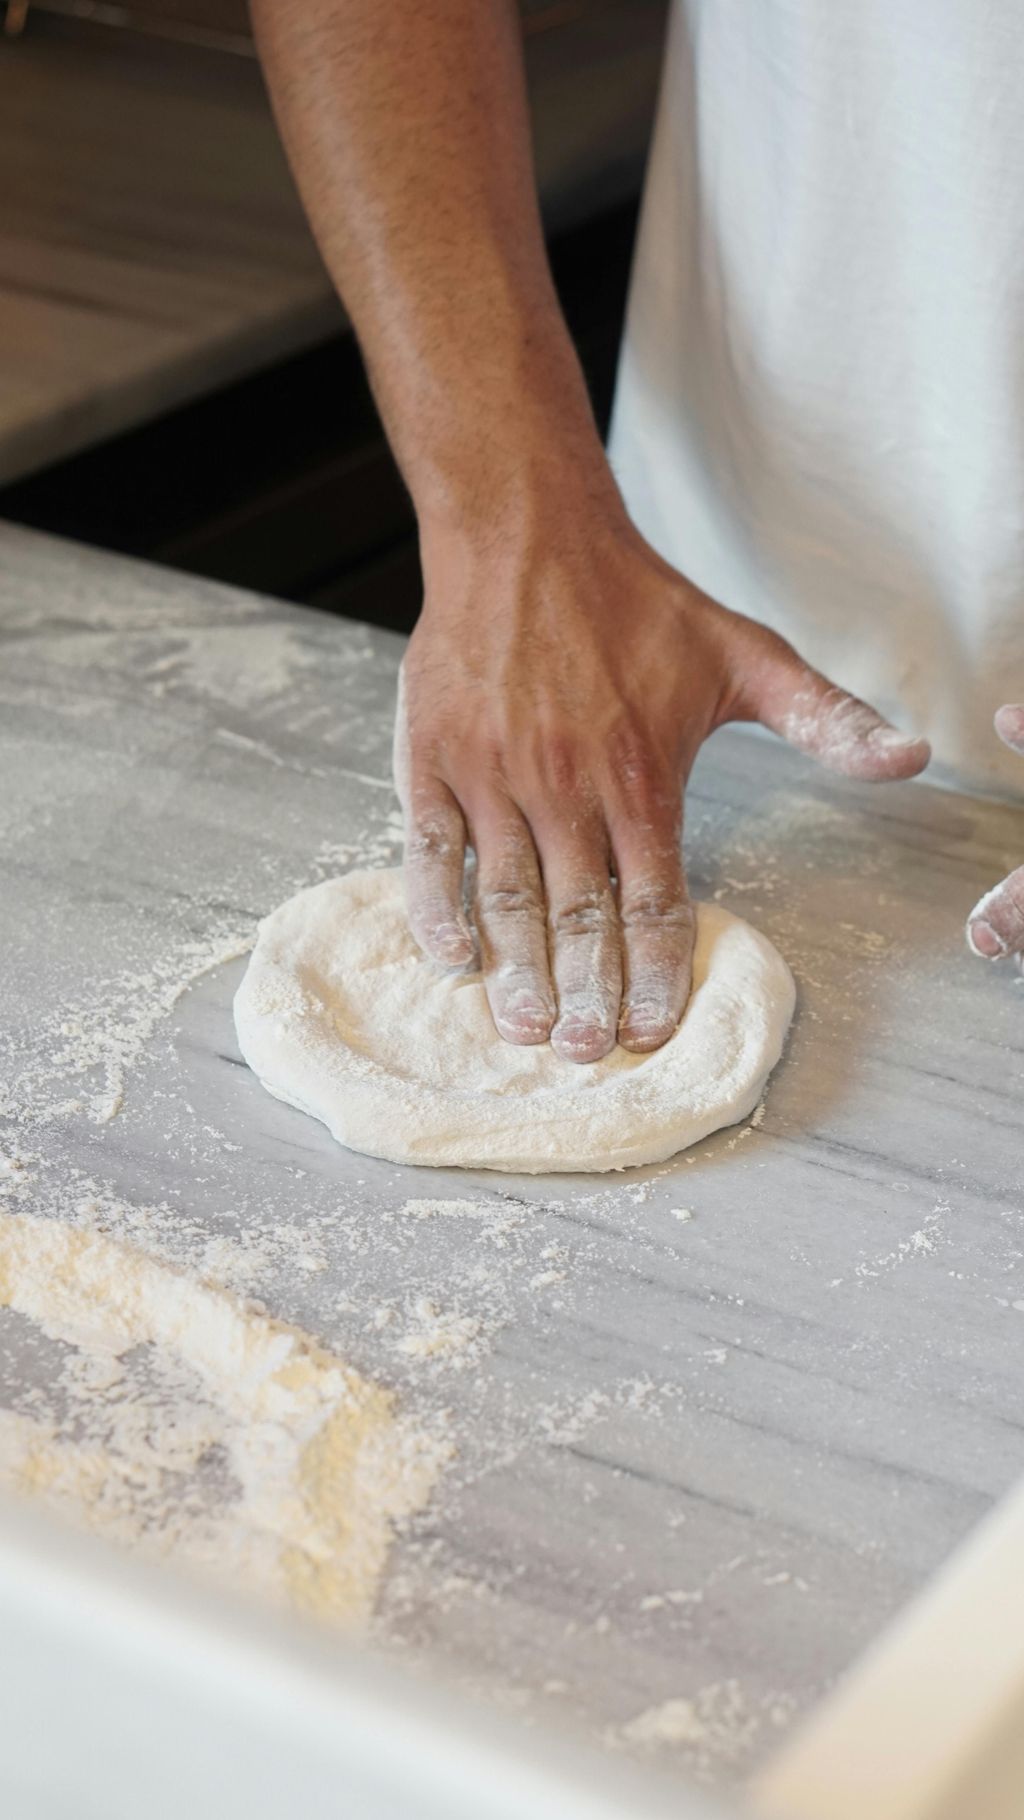
Our expedition into the art of assembly begins with the critical step of preparing your dough. Once your chosen dough has completed its rise, you’ll need to shape it for baking. For those aiming for an artisan-style pizza, stretching the dough is a technique that, while requiring practice, yields unparalleled results. You can place the dough on a lightly floured surface, dusting the top with flour, and then use your fingers to gently press it into an 8-inch circle, flipping several times and adding a pinch of flour if it is too sticky. Then, for a more traditional stretch, carefully pick up the dough and gently drape it over the knuckles on both of your hands, slowly rotating it around and allowing gravity to stretch it into a circle about 11 inches in diameter. The elasticity developed during kneading will make this process a joy, allowing the dough to yield beautifully without tearing.
Alternatively, for a simpler approach or for thinner crusts, rolling out the dough on a floured surface with a rolling pin works perfectly. Once shaped, the dough is ready to be transferred to your pizza peel or baking sheet. This is the moment to quickly apply your chosen sauce, spreading a thin, even layer over the dough while leaving a slight edge for the crust. Follow this with a generous sprinkling of mozzarella, or your preferred blend of cheeses. The temptation to overload your pizza can be strong, but exercise restraint; adding too many toppings can lead to a soggy crust and uneven baking. A judicious hand ensures the crust remains crispy and the flavors are balanced.
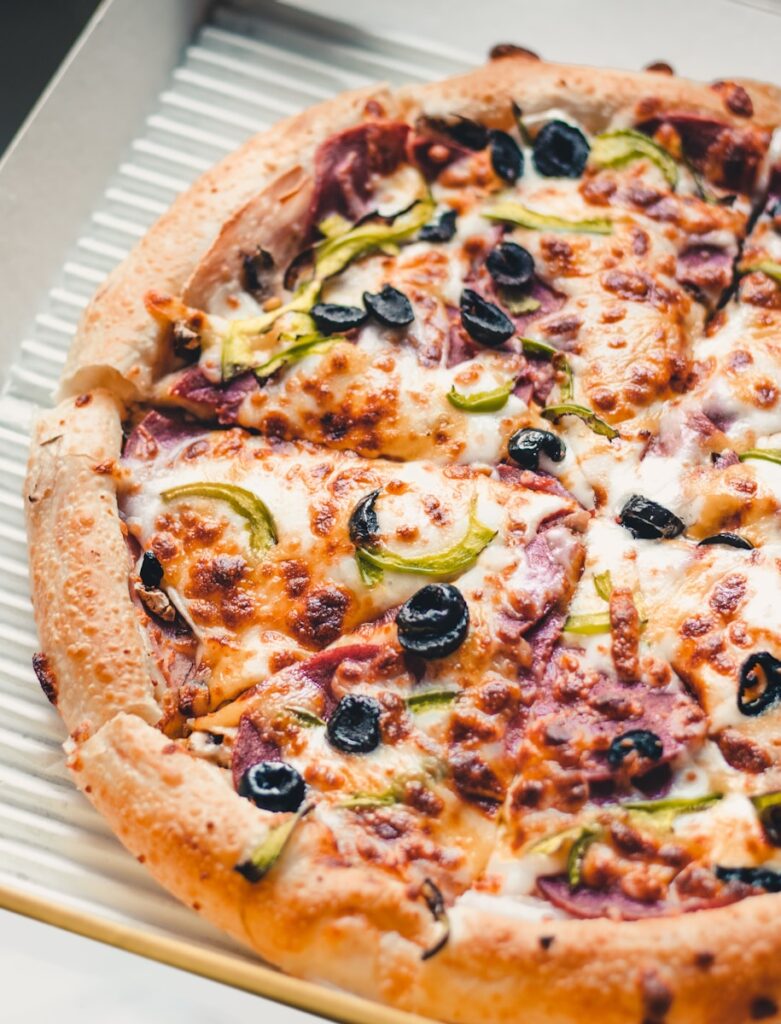
Now, for the thrilling part: selecting your toppings! This is where you can truly let your imagination run wild, crafting a pizza that perfectly reflects your preferences. Of course, you can never go wrong with the classics – the tried-and-true combinations that have earned their place in every pizzeria globally. Think the elegant simplicity of a Margherita, with its vibrant red sauce, fresh mozzarella, Parmesan, and fragrant basil; the universally loved Pepperoni Pizza; or the comforting familiarity of an Easy Cheese Pizza. For meat enthusiasts, the robust Meat Lover’s Pizza or the savory allure of Chicken Alfredo Pizza are always crowd-pleasers. And for those seeking a tangier profile, the ever-popular BBQ Chicken Pizza delivers a delightful kick.
Beyond these beloved staples, the world of pizza toppings offers an astonishing array of innovative and exciting flavor profiles. Many of these have become fan favorites for their unexpected yet harmonious combinations. Our most popular flavor, consistently garnering high praises, is the Blackberry Basil Ricotta Pizza – a true testament to adventurous culinary spirit. The team at Serious Eats is particularly obsessed with the mind-blowingly good Chicken Tikka Masala Pizza, a fusion masterpiece that expertly marries bold, aromatic spices with the comforting canvas of pizza. Rachel, a seasoned pizza seller, recalls the Cilantro-Lime Chicken Pizza as a perpetual customer favorite, highlighting its bright, zesty character.
For those who haven’t yet discovered the magic of potatoes on pizza, our Jalapeño Scalloped Potato Pizza is a match made in heaven, offering a uniquely satisfying texture and flavor; simply omit the jalapeño if you prefer to skip the spice. Speaking of spicy, the divine Buffalo Chicken Pizza is a must-try for lovers of heat and tang, while the Chicken Bacon Ranch combination is universally irresistible. And for a truly loaded, flavorful vegetarian option, our Greek Pizza fits the bill perfectly. These diverse offerings underscore the philosophy of meticulous testing and research, ensuring every palate finds its perfect pie. You can even venture into more exotic territory with toppings like fig and prosciutto, roasted eggplant and za’atar, or even sweet variations featuring summer peach and balsamic, blueberry, or grape.
Recipe details: Basil Pesto
Prep time: 5 min Inactive time:
Cook time: Total time: 5 min
Level: Easy Servings: 1 cup
Total weight: 647.5 g Calories: 478.4 kcal
Energy: 478.4 kcal Protein: 7.3 g
Carbs: 60.2 g Fat: 25.6 g
Dish Tags: italian, main course, lunch/dinner, Vegetarian, Pescatarian, Mediterranean, Gluten-Free, Wheat-Free, FODMAP
Ingredients:
2 cups packed fresh basil leaves
2 cloves garlic
1/4 cup pine nuts
2/3 cup extra-virgin olive oil, divided
Kosher salt and freshly ground black pepper, to taste
1/2 cup freshly grated Pecorino cheese
Cooking steps:
1. Combine the basil, garlic, and pine nuts in a food processor and pulse until coarsely chopped. Add 1/2 cup of the oil and process until fully incorporated and smooth. Season with salt and pepper.
2. If using immediately, add all the remaining oil and pulse until smooth. Transfer the pesto to a large serving bowl and mix in the cheese.
3. If freezing, transfer to an air-tight container and drizzle remaining oil over the top. Freeze for up to 3 months. Thaw and stir in cheese.
Get the recipe: Basil Pesto
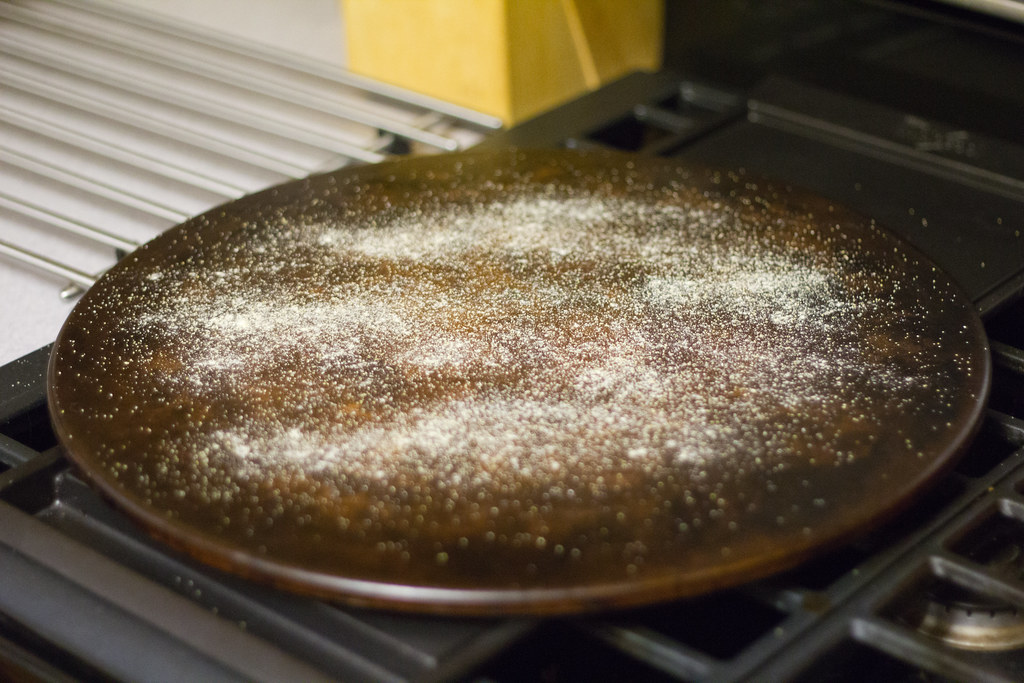
For those without a pizza stone, a heavy baking sheet, ideally inverted to create a flat surface, can serve as a worthy substitute. Or, for a different crust style altogether, a cast iron skillet can create a wonderfully thick and fluffy dough, requiring no pizza stone at all. When ready to bake, if using a pizza peel, dust it with a fine layer of cornmeal or flour to ensure the pizza slides off easily onto the hot stone or pan. A quick shake on the peel before adding toppings can confirm no spots are sticking, making adjustments easier. Carefully transfer your assembled pizza to the preheated oven.
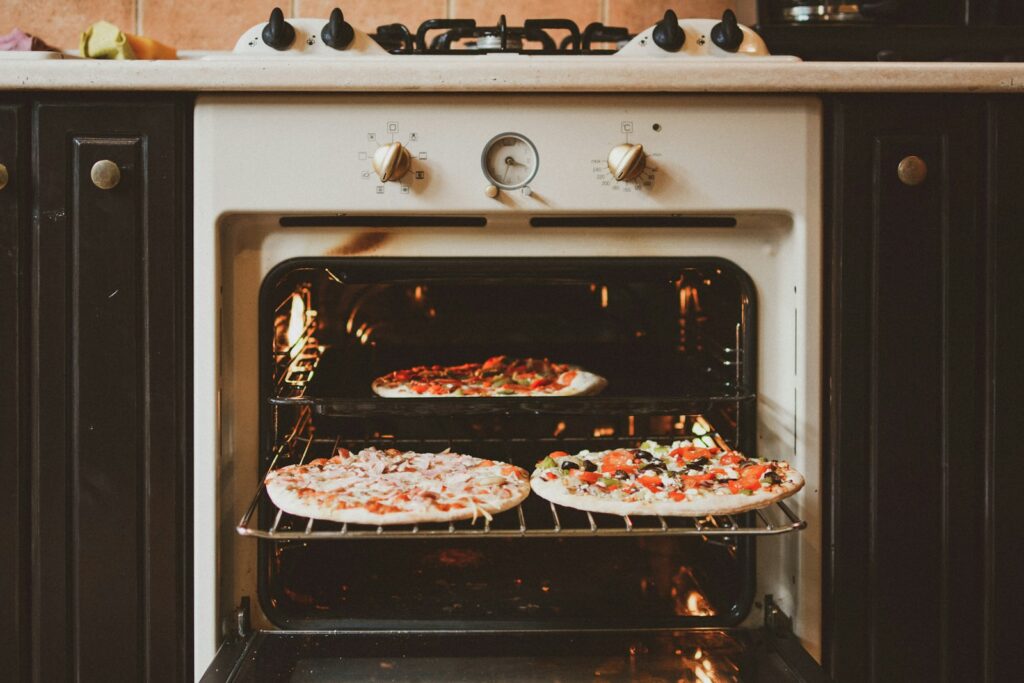
Once the pizza is in, bake it for about 5 to 7 minutes, or until the crust is golden brown and the cheese is beautifully melted and bubbling. A clever trick for achieving a perfectly cooked top is to change the oven setting to broil towards the end of the baking cycle. This creates a powerful top heat, allowing the broiler heating element to cook the top of your pizza while the residual heat from the stone or the airflow from the perforated pan continues to cook the bottom. Keep a close eye on your pizza during this stage, as broilers can brown toppings quickly. You’ll know the crust is likely done if you gently shake the pizza pan and it moves freely. After taking the pizza out of the oven, allow it to cool for a few minutes before slicing; this brief cooling period helps the cheese set and prevents the toppings from sliding off.
To ensure your homemade pizza journey is as smooth and successful as possible, having the right equipment can make a significant difference, although fancy tools are not always necessary. While you can certainly make dough by hand and bake on a plain baking sheet, certain items will elevate your experience and the quality of your pie. A pizza stone, as discussed, is a game-changer, fostering a crisp exterior and chewy interior thanks to its ability to maintain high temperatures. For handling the pizza with ease, a pizza peel is indispensable – it’s a paddle used to precisely slide your pie onto and off the hot stone in the oven. Both standard and conveyor pizza peels are available, with the latter making transfers incredibly effortless and often justifying the investment.

While not strictly essential, a stand mixer can significantly ease the dough-making process, making it more hands-off. A rolling pin is fundamental for flattening your dough, and a sharp pizza cutter is a must for cleanly slicing your masterpiece once baked. A dough scraper can also be surprisingly useful for managing and portioning dough. Remember, too, that for certain crust styles like Cast Iron Pizza or Sheet Pan Pizza, you won’t need a pizza stone at all; these methods produce a fluffy, tall crust as opposed to a round, artisan style, demonstrating the versatility of your home kitchen setup. These tools are investments in your culinary passion, promising years of delicious homemade pizzas.
Even with the most meticulous preparation, the path to pizza perfection can sometimes present minor challenges. The quest for a truly crispy crust is a common goal, and it hinges on a few key principles. As reiterated, preheating your oven to the highest possible temperature and utilizing a preheated pizza stone or inverted baking sheet are paramount. This high heat rapidly cooks the base of the crust before moisture from the toppings can lead to sogginess. An additional trick involves dusting your pizza peel or baking surface with a little cornmeal or semolina; this not only helps prevent sticking but also adds a delightful crunch to the bottom of the crust. Crucially, resist the urge to overload your pizza with toppings, as excess moisture is the arch-nemesis of crispiness.
Understanding your oven’s nuances is also vital; every oven behaves differently, so monitoring your pizza closely the first few times you bake is advisable, adjusting temperature or baking time as necessary. And for those rare instances where you find yourself with leftover pizza (a true rarity, indeed!), proper storage and reheating techniques are key to maintaining quality. Refrigerate leftover slices in an airtight container for up to 3-4 days. For longer storage, slices can be wrapped in aluminum foil and placed in a freezer-safe container for up to three months. To reheat, the best method to preserve crispiness is in an oven: preheat to 375°F (190°C) and bake for about 10-15 minutes, or until heated through. Similarly, homemade pizza dough can be frozen after it has risen, divided into portions, tightly wrapped, and then thawed overnight in the refrigerator before coming to room temperature for shaping. By embracing these insights and techniques, you are well on your way to orchestrating your very own symphonies of flavor, consistently producing pizzas that will delight and impress every time.
Indeed, mastering the art of homemade pizza is a deeply gratifying endeavor. It’s an ongoing culinary education, where each pie offers new lessons and new opportunities for perfection. From the satisfying stretch of the dough to the aroma of bubbling cheese and savory toppings, every step of the assembly and baking process is a rewarding experience. With the right techniques and a spirit of experimentation, you can confidently turn your kitchen into a pizzeria, creating memorable meals that are far superior to any takeout option. So, fire up your oven, gather your ingredients, and prepare to elevate your homemade pizza game to extraordinary new heights!
:max_bytes(150000):strip_icc()/whataburger-db771b6af2334cedb154c6d5d8996272.jpg "Whataburger Elevates Loyalty: A Fresh Look at the New Rewards Program That’s Revolutionizing How Fans Get Their Favorites")

