

Are you feeling frustrated because your new water softener isn’t performing as expected? Many homeowners face challenges when adjusting their water softener settings, leading to continued hard water issues. It’s a common scenario to feel overwhelmed by the dials, buttons, and settings, unsure of how to truly fine-tune your system for the best results. But don’t worry, you’re not alone, and with a little guidance, you can absolutely master your water softener.
Adjusting your water softener settings is crucial for optimal water quality and performance. This isn’t just about avoiding hard water spots; it’s about prolonging the lifespan of your appliances, enjoying better drinking water, and having a more refreshing shower experience. By taking control and understanding the nuts and bolts of your system, you can ensure your household enjoys soft water without stress, day in and day out.
In this comprehensive guide, I’ll walk you through the essential steps, from understanding your new water softener’s settings to making precise adjustments and maintaining its optimal performance. We’ll uncover how to fine-tune your system, ensuring you can quickly address common concerns and keep your water softener running smoothly. Let’s dive in and empower you to become the expert of your home’s water quality!
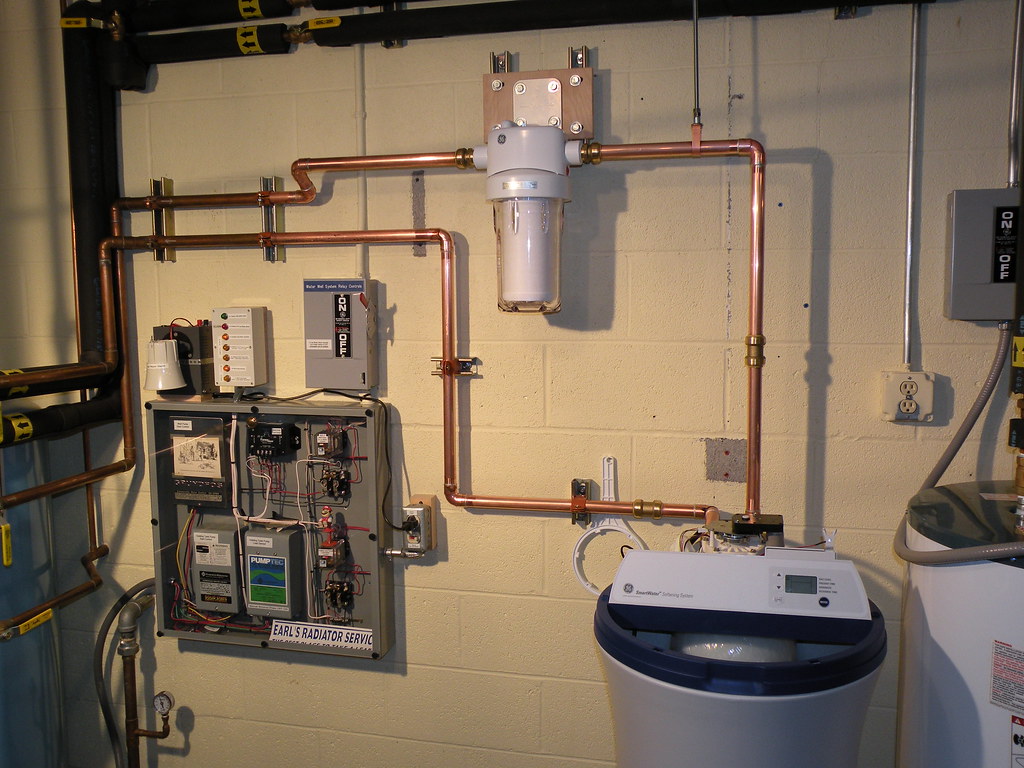
1. **Understanding Your Softener’s Key Components**
Getting to know your new water softener installation settings is crucial for optimal performance, and it all starts with understanding the key components that affect these settings. Factors like dose, grain capacity, and drain frequency are fundamental to a proper initial setup. By grasping how these elements interact, you can significantly improve your water treatment process and enjoy better water quality throughout your entire home.
When setting up your water softener, it’s essential to consider factors like the pump efficiency and the grain capacity of the system. The pump is responsible for moving water through the system, and a well-adjusted pump ensures that the water softening process operates effectively. If your water has high total dissolved solids (TDS) due to hard minerals, it may require more frequent regeneration cycles, making proper pump settings critical for optimal water quality.
Another crucial component to keep in mind is the hardness level of your water itself. Testing the hardness in your home’s water will help you determine the appropriate settings on your softener. The more hardness minerals present, the more resin your system will need to remove, which means you’ll have to adjust the settings accordingly to avoid inefficiencies. Being proactive about understanding these key components ensures your system runs smoothly and benefits your home with consistent, high-quality softened water.
For instance, the pump’s importance lies in water movement, so checking for proper settings based on your water pressure is a smart move. Grain capacity determines the amount of hardness minerals removed, necessitating adjustments according to local water hardness levels. Lastly, drain frequency affects how often the system regenerates, and this should be set to match your household’s water usage patterns. Each of these components plays a vital role in the overall efficiency and effectiveness of your water softener.

2. **The Criticality of Proper Initial Setup**
Getting your water softener set up correctly from the very beginning is absolutely essential for maintaining a reliable water supply throughout your home. When I first installed our system, I made sure to adjust the settings meticulously to account for the specific levels of hardness, chloride, and manganese present in my water. This attention to detail during the initial setup truly pays off in the long run, as it prevents numerous headaches and ensures optimal performance.
A proper initial setup ensures that you’ll enjoy better drinking water quality and a refreshing shower experience without the irritation that hard minerals can cause to your skin and hair. By fine-tuning the settings from the start, I found that our softener performed optimally, significantly reducing the amount of time spent on maintenance and prolonging the lifespan of our appliances. This proactive approach saves both time and money over the years.
Conversely, if the settings are incorrect right from the start, you might experience frustrating issues like inefficient regeneration cycles or persistent residual hardness in your water. These problems can negate the benefits of having a softener and even lead to premature wear on your plumbing and appliances. Taking the time to set everything up properly means less hassle, greater peace of mind, and better overall water quality every single day.
Ensuring that factors like the pump efficiency and the grain capacity are accurately configured during installation is not just a recommendation; it’s a fundamental requirement for the system’s longevity and effectiveness. This initial investment of time in precise calibration directly impacts how well your water softener will serve your home for years to come, making it a step you definitely don’t want to rush or overlook.
3. **How Softener Settings Directly Impact Water Quality**
The settings on your water softener play a truly significant role in determining the quality of water you receive in your home, far beyond just reducing hardness. For example, adjusting the grain per gallon settings accurately, according to the precise hardness of your water, is absolutely essential. This single adjustment can make a world of difference in the feel and function of your water.
If I notice a high level of iron or other specific minerals in the water, I make careful adjustments to ensure the valve operates accurately, effectively removing these unwanted substances for cleaner, purer water. It’s not just about softening; it’s about comprehensive water treatment. Incorrect settings can lead to a cascade of problems, including annoying leaks or improper regeneration cycles that leave your water partially treated.
When I first set up my softener, I took the time to meticulously optimize the settings, and I observed an immediate and direct impact on our water’s clarity and taste. The difference was remarkable. By being proactive about these precise adjustments, I noticed a significant improvement in my home’s overall water quality, making every drink and shower feel truly refreshing and clean.
Think of your water softener as a finely tuned instrument; each setting adjustment is like tweaking a string. If one setting is off, the whole symphony of soft water can be disrupted. Regular monitoring and thoughtful adjustments based on your specific water conditions ensure that your system is always performing at its peak, delivering the consistent, high-quality water your household deserves.
Read more about: You Won’t Believe How Gross These 14 Common Household Items Actually Are: Your Ultimate Germ Hotspot Guide!

4. **Mastering Regeneration Frequency Configuration**
Configuring the regeneration frequency of your water softener is undoubtedly one of the most important steps in ensuring its optimal performance. When I first set up my unit, I quickly learned that this specific setting dictates how often your system will cleanse the resin tank, which in turn directly impacts its overall efficiency and ability to deliver consistently soft water. It’s a critical balance to strike.
A good rule of thumb is to adjust the frequency based on your household’s actual water usage. If you have a larger family or tend to use more water daily, you might need to set it to regenerate more frequently to consistently maintain the desired quality of softened water. Conversely, a smaller household might require fewer regenerations, saving on salt and water consumption. It’s about tailoring the system to your lifestyle.
Additionally, I found it incredibly helpful to observe the system for a week or two after installation to see how it genuinely handled our daily needs. This real-world observation provided valuable insights that helped me fine-tune the settings. I noticed that optimizing the regeneration frequency not only enhanced our water quality but also significantly optimized the salt usage in the brine tank, leading to greater efficiency.
It’s all about finding that “sweet spot” – the ideal balance between softening performance and resource conservation. Don’t hesitate to make slight adjustments and monitor the results until you feel your water softener is working just right for your home. This ongoing calibration ensures you get the most out of your system without unnecessary waste, guaranteeing a continuous supply of soft, clean water.
5. **Precisely Setting Your Water Hardness Level**
Setting the hardness level on your water softener is one of the most critical adjustments you can make for truly optimal performance. To do this effectively, the first crucial step is to accurately test your home’s water supply. Knowing the exact hardness measurement allows you to program your softener with precision, ensuring it effectively tackles the mineral content in your water.
When I first tackled this step, I used a simple home testing kit, which proved to be an invaluable tool. It revealed high levels of calcium and magnesium in our water, confirming the need for a robust setting to ensure our softener worked efficiently. This direct measurement eliminates guesswork and provides a solid foundation for your adjustments, leading to superior results.
Once you have the precise hardness value, simply enter that number into your system’s control panel. I found that taking the time to accurately adjust this setting not only dramatically improved the quality of water we enjoyed but also significantly reduced common issues like scale buildup in our valuable appliances. This simple yet vital step protects your investments and enhances your daily life.
Remember, regularly checking your water hardness can help you maintain the best settings and keep your water softener functioning at its absolute best. This ongoing vigilance ensures your continuous enjoyment of soft, clean water every day. It’s a proactive measure that guarantees your system remains perfectly calibrated to your home’s unique water conditions over time, adjusting as circumstances change.
Read more about: Unveiling the Secrets: How Ancient Egyptians Mastered the Art of Cutting Through Solid Rock
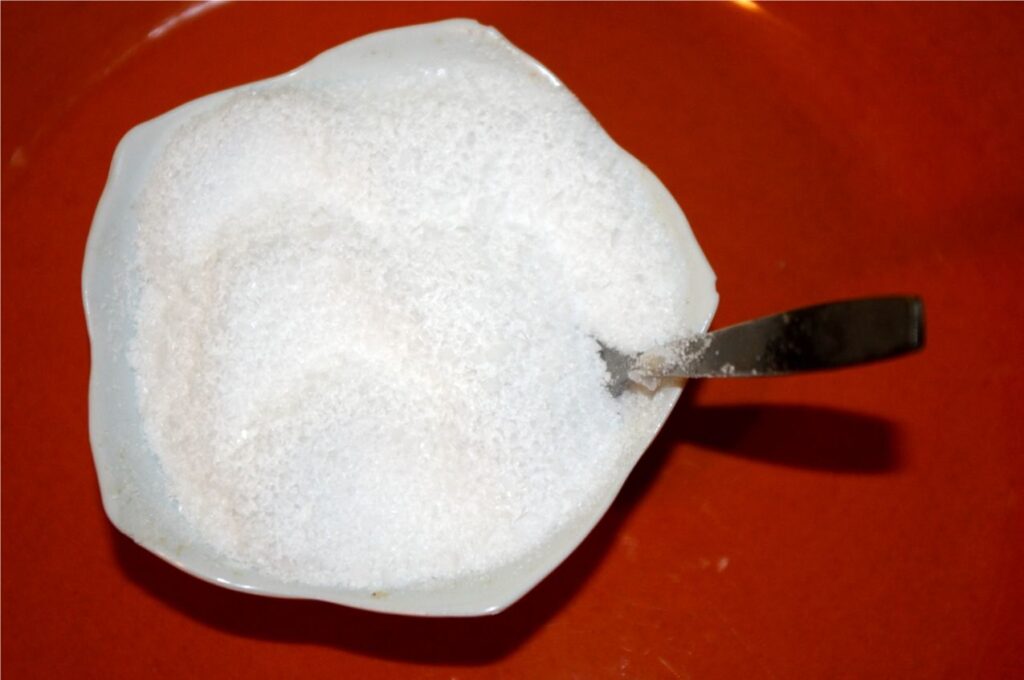
6. **Optimizing the Salt Dose Settings**
Adjusting the salt dose settings on your water softener is essential for achieving the very best performance and efficiency. When I first got my softener, I quickly learned that using the right amount of salt helps to optimize the regeneration process, which is the heart of how your system removes hardness minerals. This precise balance is key to both effectiveness and economy.
Using too little salt can lead to inefficient softening, meaning your water won’t be as soft as it should be, and you might still experience hard water symptoms. Conversely, using too much salt can waste valuable resources and, over time, potentially damage the system. It’s a delicate balance where more isn’t necessarily better, and less can be detrimental.
To set the optimal salt dose, I highly recommend checking your manufacturer’s guidelines first, as these will provide specific recommendations tailored to your particular unit and model. These guidelines are your best starting point. I found it helpful to begin with a moderate setting based on our household’s typical water usage and then tweak it incrementally depending on the results and observed water quality.
If I noticed persistent hard water spots or scaling returning on fixtures and dishes, I knew it was time to adjust the dose until we achieved that perfect balance of quality softened water. This iterative process of adjustment and observation ensures that your system is using just the right amount of salt to keep your water consistently soft and your system running efficiently, minimizing waste and maximizing performance.
Read more about: Decoding the Display: Everything You Need to Know Before Buying Your Next TV in 2025
7. **Programming the Timer or Clock**
Programming the timer or clock on your water softener is a surprisingly impactful step that directly controls when your system regenerates. I’ve found it incredibly useful to set this to run during off-peak hours, usually late at night. This way, the regeneration cycle doesn’t interrupt our daily water usage, and we consistently have softened water available when we need it most, such as for morning showers or during dinner preparations.
A well-timed regeneration process isn’t just about convenience; it also helps manage your home’s water and energy consumption. By scheduling the cycle for times when no one is typically using water, you ensure that the discharge goes to your septic system or municipal drain during a less demanding period. This thoughtful approach can simplify your routine and ultimately enhance your overall water quality in the home, contributing to a more efficient household.
To set the timer, the manufacturer’s instructions are your best friend; they typically guide you through entering the current time and then selecting the desired regeneration time. On many older models, this involves lifting and turning a clock dial, often with silver sections for daytime and black for nighttime, to align the correct hour with an indicator arrow. For electronic displays, it usually involves pressing “Time Set” buttons until the correct AM/PM time appears.
It’s crucial to consider your household’s unique water usage trends when deciding on the regeneration schedule. If you know certain days see higher water consumption, you might adjust the timer accordingly or consider a manual regeneration if needed. This proactive approach ensures your water softener consistently meets your family’s demands, providing peace of mind and great water every single day without fail.

8. **Troubleshooting: Identifying Signs of Incorrect Settings**
Even after careful calibration, your water softener might not always perform as expected, and recognizing the signs of incorrect settings is your first line of defense. For instance, if you start noticing those stubborn hard water stains reappearing on faucets, dishes, or inside your shower, it’s a strong indicator that the hardness level settings might be off. Or, if your soap isn’t lathering as well as it used to, that could signal insufficient salt dosage or regeneration.
Another tell-tale sign of an improperly configured system can be observed in its regeneration cycle itself. If your softener seems to be regenerating much too often, it could be wasting salt and water, suggesting an overly aggressive frequency setting. Conversely, if it regenerates too rarely, your resin beads won’t be effectively cleansed, leading to a noticeable drop in water softness and continued hard water issues throughout your home.
I’ve learned through experience that regularly checking for these subtle shifts in water quality or system behavior can help you catch potential problems early. Maintaining a keen eye on how your water feels, how soap performs, and the frequency of regeneration empowers you to make timely adjustments. This proactive vigilance is essential for enjoying consistent, high-quality softened water and for preventing minor issues from escalating into more significant problems.
It’s helpful to keep a mental checklist or even a small log of your water softener’s performance. Have you had to clean mineral buildup more frequently? Is the water feeling different on your skin? Are there changes in your utility bills that might suggest increased water or salt usage? Asking these questions and correlating them with the softener’s settings can help you pinpoint exactly where adjustments are needed, ensuring your system operates at its peak.
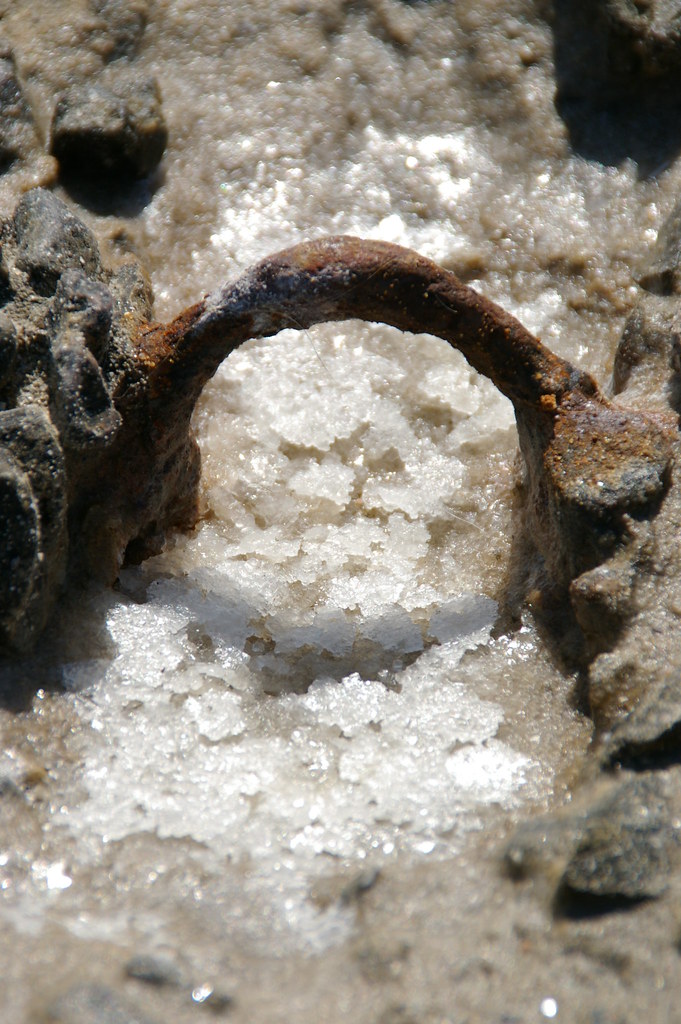
9. **Troubleshooting: Resolving Salt Bridging and Mushing**
Two of the most common, yet frustrating, issues that homeowners encounter with their water softeners are salt bridging and mushing in the brine tank. Salt bridging occurs when the salt in the tank hardens into a solid crust or mass, typically forming an arch that prevents the salt from dissolving into the water below. This crust tricks the system into thinking there’s plenty of salt, even if the lower portion of the tank is empty, leading to regeneration failures and hard water.
When I first faced salt bridging, I discovered the simple solution was to physically break apart the hardened salt bridge. Using a sturdy stick or a similar blunt tool, I gently poked and pried the salt mass until it broke up and fell into the water. After doing so, it’s always a good idea to add fresh salt to ensure the tank is adequately filled, resetting the necessary conditions for proper and effective softening during the next regeneration cycle.
Mushing, on the other hand, describes a condition where the salt at the bottom of the brine tank turns into a slushy, sticky mess, sometimes due to using evaporated salt or incorrect humidity. This gooey layer can also prevent proper brine solution formation, hindering the softener’s ability to regenerate effectively. If you detect mushing, the most effective approach is to promptly empty the brine tank entirely and thoroughly clean it out.
After cleaning, refill the tank with fresh, high-quality water softener salt, ideally solar or rock salt, which is less prone to mushing than evaporated salt pellets. Regularly checking your brine tank – perhaps once a month or every time you add salt – can go a long way in preventing both salt bridging and mushing. This simple maintenance step ensures a seamless softening process and guarantees better water quality throughout your entire home without unexpected interruptions.
10. **Resetting Your System: Restoring Factory Settings**
There might come a time when your water softener’s performance is so inconsistent or problematic that a full system reset, particularly to factory settings, becomes the most sensible solution. This “clean slate” approach can often resolve a myriad of underlying issues that regular adjustments couldn’t fix. The first crucial step in this process is safely accessing the control panel, which involves turning off the power to the unit to prevent any accidental changes or electrical hazards.
Once the power is safely off, you can gently open the access panel to reveal the control system. Taking a moment to familiarize yourself with the buttons and display, or even snapping a quick photo of the existing setup, can be incredibly helpful for future reference. Restoring factory settings typically involves pressing a specific button or sequence, as detailed in your manufacturer’s instructions. This action will revert all programmable settings back to their default values, preparing the system for a fresh calibration.
After successfully restoring the factory settings, the next vital step is to re-enter all your specific settings, such as water hardness, regeneration frequency, and salt dose, as if you were setting up the softener for the very first time. It’s a comprehensive re-calibration. Once these have been painstakingly re-entered, the final, and arguably most important, part of the process is verifying these adjustments through water testing.
I always recommend using a home water testing kit to check for hardness levels after a factory reset. By testing your water, you can immediately see if your newly entered settings are effectively delivering soft water. If the hardness levels are still not ideal, don’t hesitate to tweak the settings again and re-test. This iterative process of adjustment and verification ensures that your softening system is working optimally and providing the high-quality water your household deserves.
11. **Maintaining Optimal Performance: Routine Checks and Monitoring Salt**
To keep your water softener running at peak efficiency and ensure a consistent supply of soft water, implementing routine checks and proactive maintenance is absolutely indispensable. One of the most fundamental tasks is to regularly inspect the salt levels in the brine tank. I’ve found that maintaining a full salt level is crucial, not just for efficient regeneration, but also to prevent common nuisances like salt bridging, which we discussed earlier.
Beyond just checking levels, it’s also smart to monitor your overall salt usage over time. Tracking how quickly your salt supply diminishes can provide valuable insights into your softener’s efficiency. For instance, a sudden, unexplained increase in salt consumption might signal that your settings need tweaking, or perhaps the brine tank needs a thorough cleaning to remove any residue or mushing that’s impacting performance. This proactive monitoring helps identify issues before they become major problems.
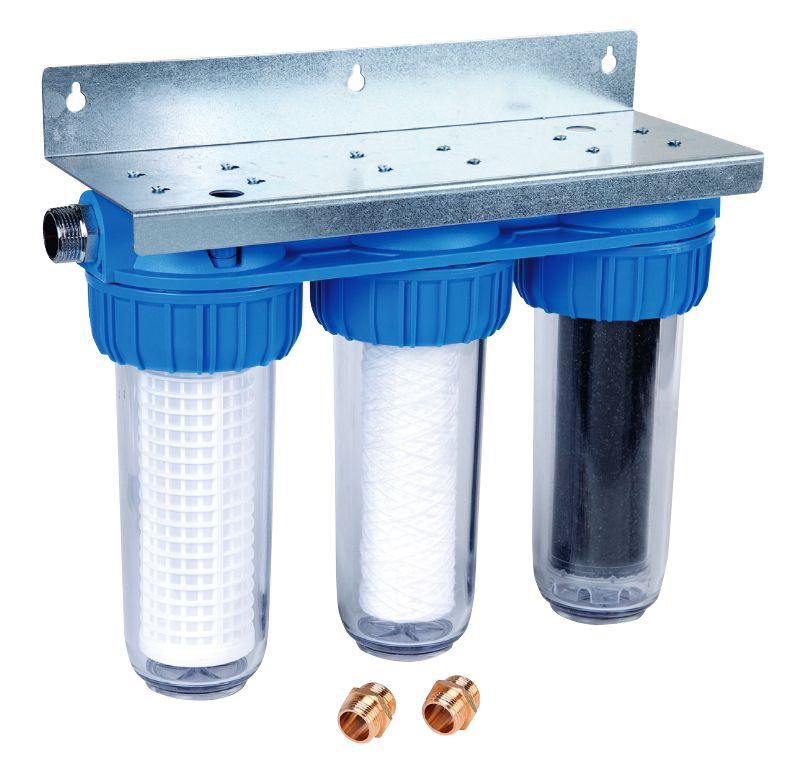
Another key aspect of routine maintenance involves periodically inspecting the resin beads and replacing any filters your system might have. Over several years, resin beads can gradually lose their ability to effectively exchange ions, leading to a noticeable decrease in water softness. If you start experiencing inconsistent water quality or an increase in hard water spots, it could be a sign that the resin needs refreshing or replacement, typically every 3 to 5 years.
Additionally, don’t forget about any pre-filters or post-filters your system may have. These components play a vital role in protecting your softener and further enhancing water quality. I usually replace filters based on the manufacturer’s recommendations or sooner if I observe changes like reduced water pressure or unusual tastes. Taking action promptly on these routine checks ensures your water softening system continues to deliver fresh, high-quality water, making daily life more enjoyable.

12. **When to Seek Professional Assistance**
While many water softener issues can be resolved with DIY troubleshooting and adjustments, there are certain complex technical problems that unequivocally signal it’s time to call in the experts. Recognizing these red flags can save you significant time, frustration, and potentially costly repairs in the long run. For example, if your unit completely fails to regenerate despite your best efforts at adjusting settings and checking the brine tank, it might indicate a more serious underlying problem with the control board or motor, which requires specialized knowledge to diagnose and fix.
Another clear sign that professional help is warranted is persistently hard water, even after you’ve diligently worked through all the troubleshooting steps, including resetting the system and verifying settings. This consistent hardness could point to issues such as severely degraded resin beads, a malfunctioning valve, or other internal component failures that are beyond a homeowner’s typical repair capabilities. A qualified technician can thoroughly evaluate the entire system, ensuring all components are functioning efficiently.
Investing in professional calibration can offer immense benefits, far beyond just fixing a problem. Experts can fine-tune your settings to optimize regeneration cycles, helping you save on salt and water. They can also identify hidden issues like mineral buildup in pipes or improper salt dosage that might go unnoticed by an untrained eye. This level of insight ensures your system operates at its absolute best, providing consistently softened water and extending the lifespan of your unit.
When seeking professional assistance, it’s vital to find qualified service technicians. I always recommend checking online reviews, asking for referrals from trusted friends or family, and looking for certifications from reputable industry associations. A skilled technician with experience across various water softening systems and an understanding of local water quality challenges will provide personalized service, ensuring your system remains in top shape and delivers the high-quality water your family deserves for years to come.
Read more about: Why American Drivers Are Shifting Away From Sedans: An In-Depth Analysis of Market Dynamics and Consumer Preferences
Mastering your home’s water softener truly empowers you to take control of your household’s water quality, leading to a host of benefits from healthier skin and hair to prolonged appliance life. By understanding the components, diligently adjusting settings, proactively troubleshooting common issues, and knowing when to call in the experts, you transform from a frustrated homeowner into a confident water quality manager. Embrace these steps, and you’ll ensure a continuous supply of perfectly softened water, making every drop in your home a pure delight and a testament to your newfound expertise!


