

Our washing machines are the unsung heroes of our homes, tirelessly tackling laundry loads day in and day out, making our lives undeniably simpler. They don’t just clean our garments efficiently; they save us an incredible amount of time, freeing us up for other important tasks or even just a moment of peace. But just like any hardworking appliance, these essential machines require adequate care and attention to truly perform at their best and last for the long haul.
It’s a common misconception that once you buy a washing machine, your responsibility ends with loading and unloading. However, neglecting routine tasks can lead to premature wear and tear, resulting in frustrating and costly repairs, or even the dreaded need for an early replacement. The good news is that by adopting some simple, yet powerful habits and maintenance practices, you can significantly extend your washing machine’s life, ensuring it remains a reliable and efficient part of your household for many years to come.
This isn’t about complex engineering or professional-only fixes. This is about empowering you with practical, actionable knowledge that you can immediately apply. We’re diving deep into the secrets of washing machine longevity, sharing 15 expert-backed tips designed to help your appliance not only last longer but also perform better, ultimately saving you money and hassle. Let’s transform your laundry routine into a masterclass of machine preservation!
1. Avoid Overloading Your Machine
One of the most common, yet easily avoidable, pitfalls that can severely shorten your washing machine’s life is overloading it. When you cram too many clothes into the drum, you’re not doing your laundry any favors; instead, you’re placing immense, undue strain on the machine’s motor, bearings, and other critical internal components. This excessive strain is a primary culprit behind premature wear and tear, leading directly to costly damage and a significantly reduced lifespan for your appliance.
Think of your washing machine like a car engine – it has a recommended capacity for a reason. Overloading causes the water level to rise too high, exerting additional pressure on the motor and various parts. This forces the machine to work much harder than it’s designed to, struggling to agitate clothes effectively or even spin them properly. The result isn’t cleaner clothes; it’s a stressed machine that’s inching closer to a breakdown with every overstuffed cycle.
To safeguard your washing machine and ensure it operates efficiently for years, always respect its recommended capacity. The key is to leave a decent amount of space inside the drum – enough so that your clothes can move around freely and agitate without resistance. This not only allows for a more thorough clean but also significantly reduces the strain on your machine, preventing potential malfunctions and expensive repair bills down the line. It’s a simple adjustment that makes a monumental difference in your machine’s longevity.
Read more about: Unmasking the Silent Destroyers: 14 Everyday Driving Habits Secretly Wrecking Your Ride
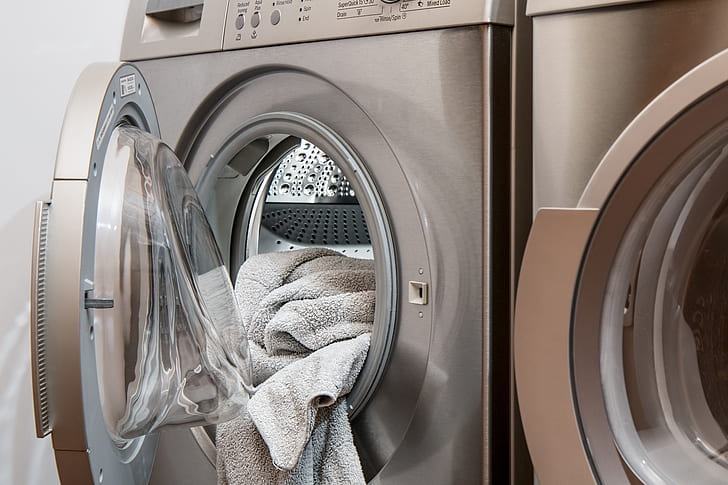
2. Promptly Remove Clothes After Cycles
Leaving clothes to languish in the washing machine after a cycle is complete is a habit that can surprisingly undermine your appliance’s health and lead to several undesirable outcomes. While it might seem harmless to let a load sit for a while, this practice creates an ideal breeding ground for mold and mildew. These unwelcome guests thrive in the dark, damp environment of a closed washing machine drum, leading to unpleasant odors that can permeate your laundry and, more importantly, the machine itself.
Beyond the issue of odors and potential stains on your clothes, the prolonged presence of damp, heavy items in the drum can also contribute to mechanical stress on your appliance. The sheer weight of wet laundry, especially if it’s left to sit for extended periods, can cause the drum to become unbalanced. This imbalance, over time, leads to excessive wear on the machine’s components, including the drum bearings and motor, which are essential for smooth operation.
While the impact may not be immediate, this accumulated damage from an unbalanced, heavy drum can eventually lead to malfunctions or necessitate expensive repairs. To prevent these issues, it is absolutely essential to remove clothes promptly once the wash cycle has finished. Additionally, making it a habit to leave the machine door open after emptying the drum allows for crucial air circulation, helping the interior to dry completely and significantly reducing the risk of mold and mildew growth. This simple step preserves both your laundry and your machine.
Read more about: Unlock the Secret to Amazingly Fresh Laundry: 15 Simple Tricks for an Incredible Scent Every Time

3. Choose and Use the Right Detergent
The type and amount of detergent you use might seem like minor details, but they play a crucial role in your washing machine’s long-term health and performance. Believe it or not, consistently using the wrong detergent or, more commonly, too much detergent, can cause your washing machine to malfunction over time. While the adverse effects may not manifest immediately, the buildup inside the internal parts can slowly accumulate, leading to clogs and damage that impact efficiency and shorten lifespan.
Using the right detergent is not just about getting your clothes clean; it’s about protecting your appliance. Different washing machines—whether they are front-loading, top-loading, or high-efficiency (HE) models—are designed to work optimally with specific types of detergents. High-efficiency machines, for instance, require low-sudsing HE detergents to prevent excessive foam buildup, which can confuse sensors and lead to inefficient rinsing cycles or even pump damage.
Therefore, always make it a point to read the label on your detergent bottle and, crucially, consult your washing machine’s user manual. These resources provide vital information on the recommended detergent type and, equally important, the correct dosage for your specific machine and load size. Measuring your detergent correctly is paramount to preventing clogs and ensuring your washing machine runs efficiently, avoiding the sticky residue that excessive soap can leave behind. This diligent approach helps improve washing performance, reduces wear and tear, and prevents blockages, ensuring your machine stays in peak condition.
Read more about: 12 Car Maintenance Myths That Are Costing You Money: A Consumer Reports Deep Dive
4. Guard Against Pocket Hazards
It’s an easily overlooked step in the laundry routine, yet failing to thoroughly check pockets and zips before tossing clothes into the washing machine can unleash a surprising amount of havoc on your appliance. Small, seemingly innocuous items like coins, keys, hairpins, or even stray screws can become dangerous projectiles or get lodged in the delicate mechanisms of your machine’s drum or pump. Such incidents often result in alarming loud noises, internal damage, and potential blockages that compromise your washing machine’s functionality.
Beyond solid objects, zippers present their own unique set of risks. If left unzipped, the teeth of a zipper can snag on other garments, causing them to tangle or tear. More critically, an open zipper can scrape against the interior of the machine’s drum or agitator, leading to scratches, dents, or even more significant structural damage over time. This kind of cumulative wear can impair the machine’s performance and necessitate repairs that could have been easily avoided.
The key to safeguarding your washing machine from these potential damages lies in a simple, proactive action: a quick but thorough inspection of all pockets and zippers before each wash cycle. Taking a moment to empty pockets of any small objects and ensuring all zippers are securely closed can prevent these items from wreaking costly internal damage. This small habit is a powerful line of defense, ensuring your machine’s delicate mechanisms remain intact and your laundry cycles run smoothly, without unexpected interruptions or expensive repairs.
Read more about: Global Ford Recall Alert: Essential Guide to Rearview Camera Failures Impacting Millions of Mustang, F-150, and Super Duty Models
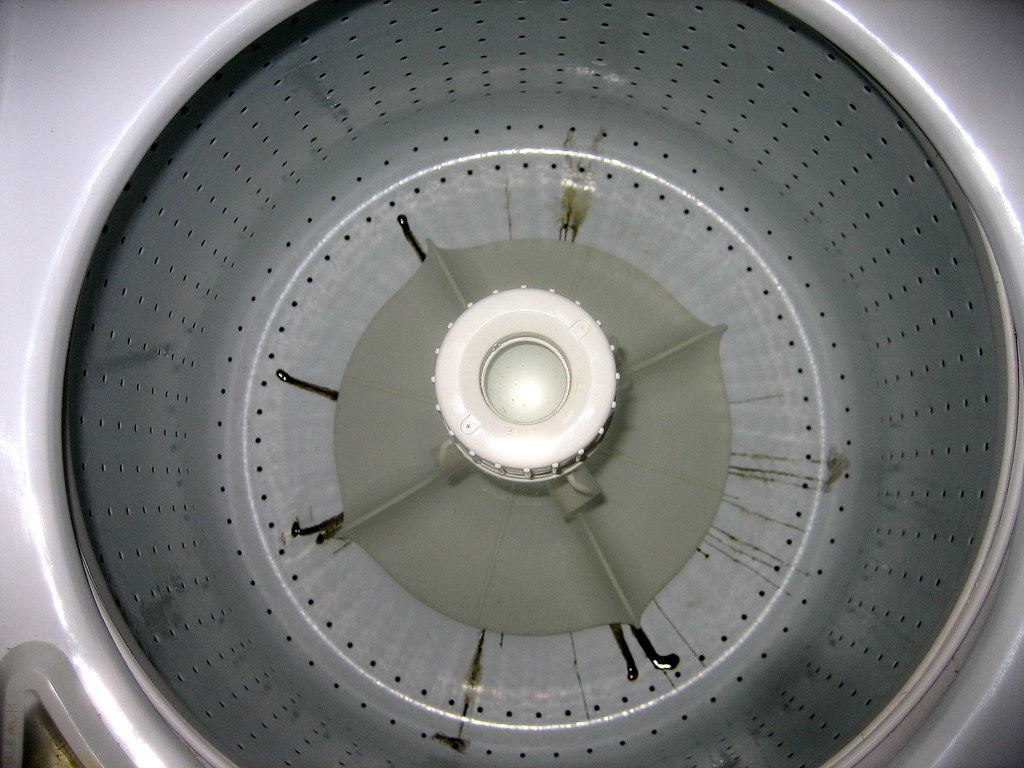
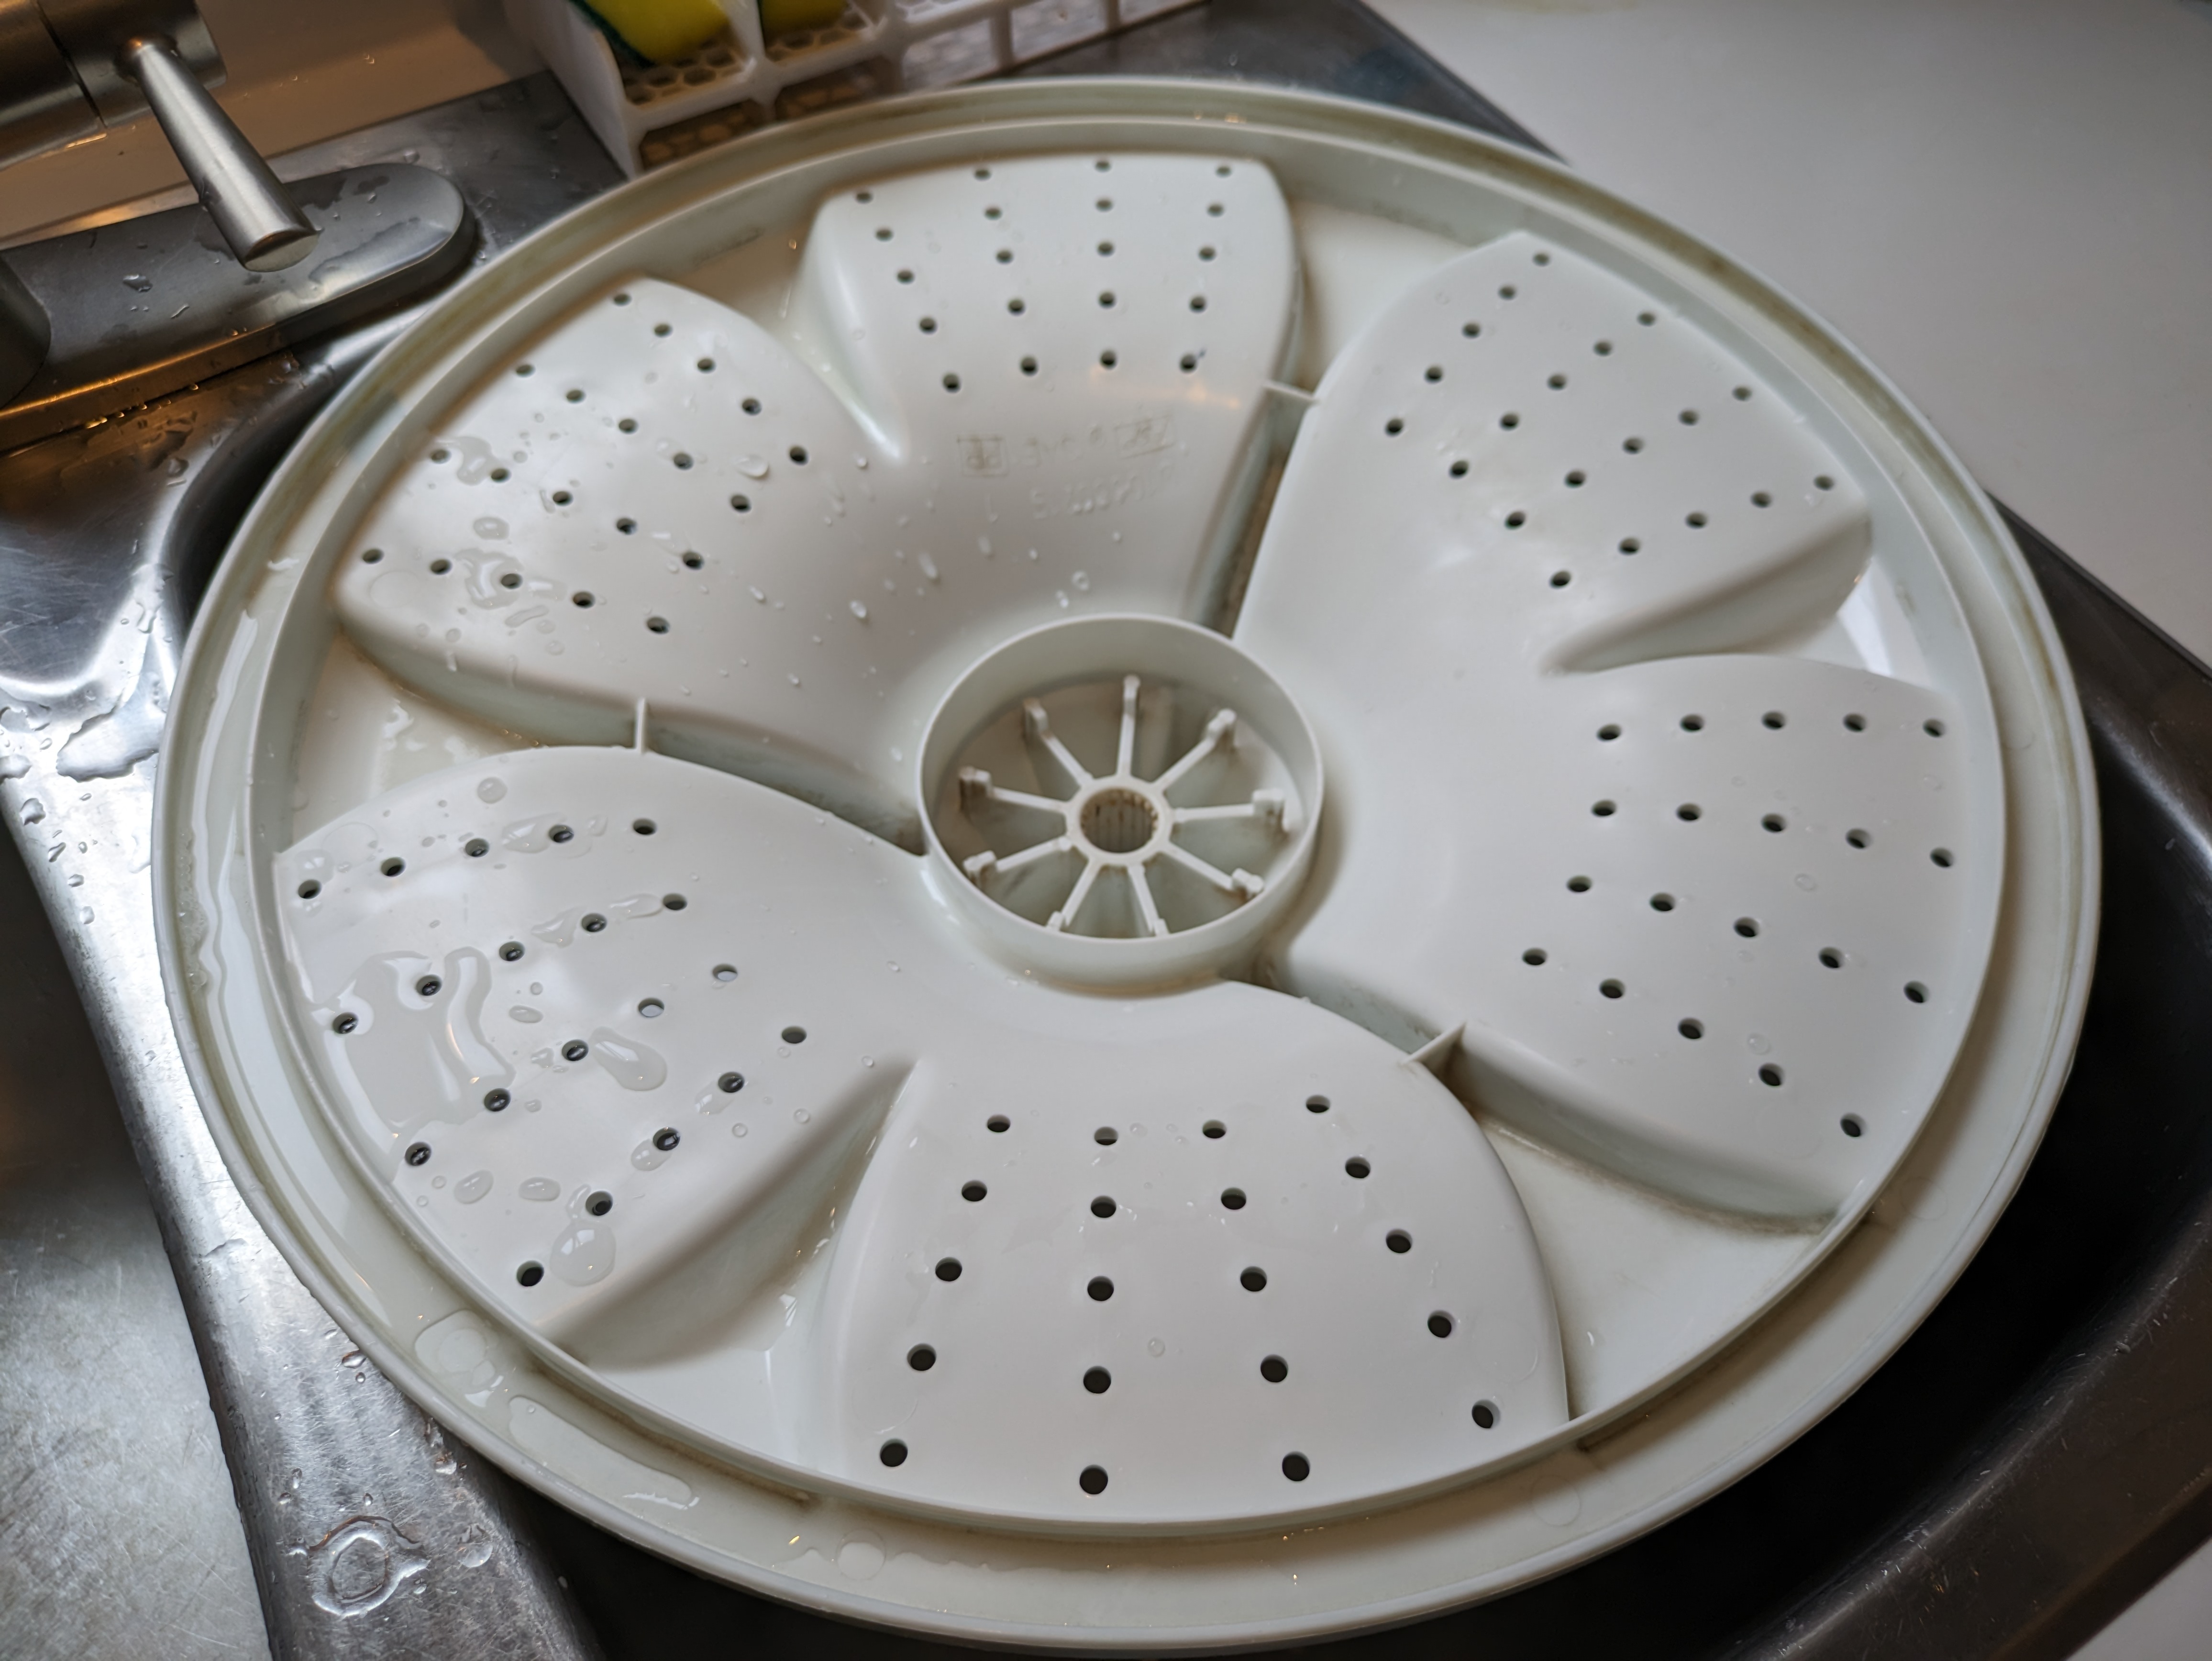
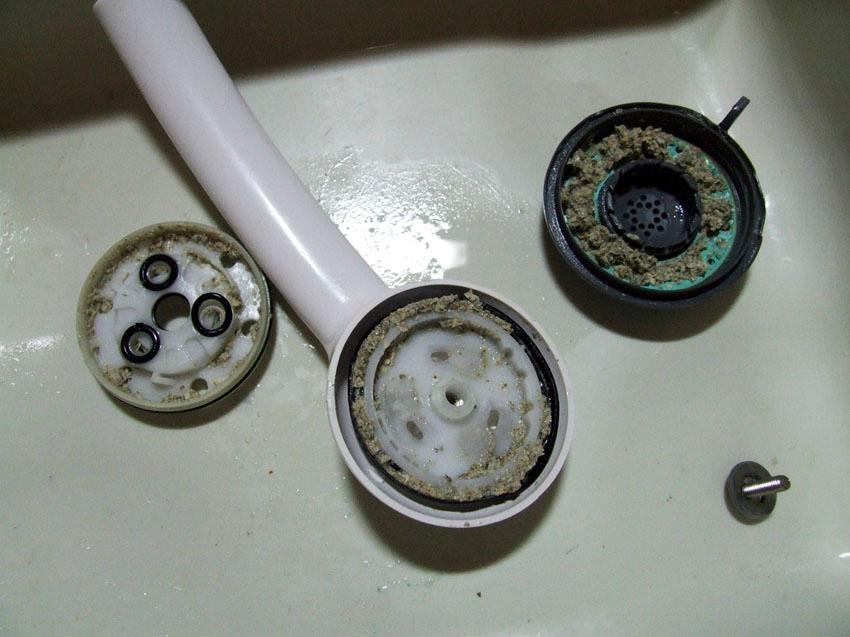
5. Regularly Clean the Lint Filter
The lint filter is a small but mighty component within your washing machine, diligently working behind the scenes to capture loose fibers, debris, hair, and other particles that are shed from your clothes during a wash cycle. Its primary job is to prevent these elements from circulating back into your laundry or, worse, clogging your washing machine’s pipes and intricate drain system. This crucial function makes its regular maintenance non-negotiable for the health and efficiency of your appliance.
When the lint filter becomes clogged, it can significantly hinder your washing machine’s performance. A dirty filter can impede proper water drainage, leading to issues like stagnant water, unpleasant odors emanating from the machine, and an overall reduction in washing effectiveness. Furthermore, a blocked filter forces your washing machine to work considerably harder to achieve its tasks, which in turn leads to increased energy consumption and accelerates the wear and tear on the machine’s motor and other vital components.
To keep everything running smoothly and prevent potential breakdowns, make it a firm habit to check and clean the lint filter after every use, or at the very least, once a week. Locating your filter is usually straightforward (often at the bottom front of the washer); simply open it up and pull out any accumulated lint, hair, or debris. This routine not only prevents clogs and bad smells but also ensures your machine can efficiently clean your clothes without unnecessary strain, extending its operational lifespan significantly.
Read more about: Unlocking Peak Efficiency: Engineer-Backed Strategies to Boost Your Car’s MPG by 10 Without Changing Your Route
6. Deep-Clean Your Washing Machine Monthly
While your washing machine is constantly cleaning your clothes, it also needs to be cleaned itself to maintain optimal performance and hygiene. Over time, a surprising amount of detergent residue, fabric softener buildup, and trapped dirt can accumulate inside the drum, the seals (gasket), and even the detergent dispenser. This buildup isn’t just unsightly; it creates a breeding ground for bacteria like E.coli, mineral deposits, and mold, leading to unpleasant odors and compromising the cleanliness of your garments and the machine itself.
Many washing machines today come equipped with a dedicated cleaning cycle or sanitize setting, which typically utilizes hot water to thoroughly clean the interior. Running this cycle every 1-2 months is a highly effective way to remove built-up grime and residue that can affect your washing machine’s performance and longevity. For machines without a specific sanitize cycle, industry experts like Steven Ip, founder of Cleanzen, recommend a powerful DIY solution.
To perform a deep clean, use the hottest water setting and add one cup each of baking soda and white vinegar directly into the drum. Let the machine run for about a minute to mix the solution, then pause it and allow the mixture to sit for an hour before completing the cycle. This natural, eco-friendly method effectively removes bacteria, mineral buildup, and odors. Nicola Davies, founder of Tranquil Home, further advises to finish by wiping the rubber seal, or gasket, with a cloth and mold cleaner to ensure all residues are eradicated. Regular deep cleaning ensures your machine remains sanitized, preserving its components and guaranteeing a fresh laundry experience every single time.
7. Ensure Your Washer is Perfectly Level
An often-overlooked aspect of washing machine installation and ongoing maintenance that directly impacts its lifespan and performance is ensuring it is perfectly level. An unlevel washing machine is a recipe for trouble, initiating a cascade of negative effects that can significantly shorten its operational life. During operation, especially during spin cycles, an unlevel machine will experience excessive vibration and vigorous shaking, which is detrimental to its internal components.
This relentless vibrating and shaking put undue stress on critical parts such as the drum bearings, the motor, and other mechanical components, leading to premature wear and tear. Over time, this constant stress can cause these parts to malfunction or even break down entirely, necessitating expensive repairs or an early replacement of the entire appliance. Furthermore, an unlevel machine can cause the door or lid to become misaligned or damaged, which can result in frustrating leaks during wash cycles, adding another layer of issues.
Properly leveling your washing machine before its initial use, and periodically checking its levelness, is a simple yet profoundly impactful step in preventing damage and prolonging its lifespan. Most washing machines come with adjustable feet that allow you to fine-tune their position until the appliance sits perfectly stable and balanced on the floor. Taking the time to ensure this foundational stability will help prevent unnecessary strain, reduce noisy operation, and ensure your machine functions smoothly and efficiently for many years to come.
Read more about: Decoding Crispiness: A Comprehensive Guide to the Best Air Fryers for Unbeatable Results
8.Inspect and Maintain Hoses
Often tucked away behind our appliances, the hoses connecting your washing machine to the water supply are silent workhorses, but their condition is absolutely critical for preventing household disasters. These unassuming conduits are constantly under pressure and exposed to the stresses of heat and movement. Neglecting to check them regularly is an open invitation for leaks, potential flooding, and substantial water damage that can be incredibly costly to repair.
The wear and tear on hoses can manifest in several ways: tiny cracks might develop, bulges could appear indicating internal weakness, or connections might become loose over time. As cleaning expert Karina Toner emphasizes, “Cracked or loose hoses can lead to leaks, flooding, and costly damage. Regular checks prevent unexpected breakdowns.” A simple visual inspection every few months can quickly identify these early warning signs, giving you ample time to address issues before they escalate into an emergency.
Even if your hoses appear to be in perfect condition, a proactive replacement schedule is a smart move. Toner advises that “Even if they appear intact, replacing hoses every 3–5 years is wise to avoid any sudden bursts or leaks.” When it’s time to replace, consider upgrading to stainless steel braided hoses. These are significantly more durable and resistant to leaks than standard rubber hoses, offering an enhanced layer of protection and peace of mind. This simple, periodic check and replacement strategy is a cornerstone of preventing major headaches and extending your machine’s trouble-free operation.
Read more about: The Silent Saboteurs: Why Your Semi-Trailers Are Leaking Days Before They Hit the Road
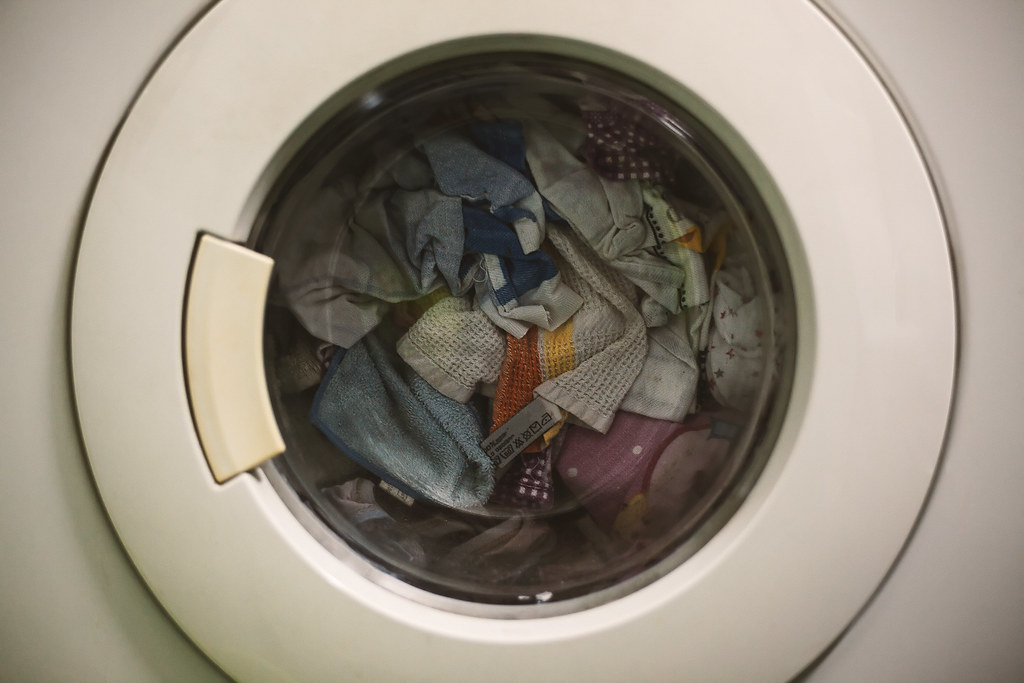
9. Only Wash Machine-Washable Items
While the temptation to toss everything into the washing machine might be strong for convenience, not all items are created equal when it comes to machine washability. Introducing non-machine-washable garments or items simply not suited for the intense tumbling and agitation of a washing cycle can lead to a dual disaster: damage to the item itself, and more importantly, significant harm to your expensive appliance. This often overlooked tip is fundamental to preserving both your wardrobe and your machine.
Delicate clothing, items adorned with intricate embellishments like sequins or buttons, or those made from fragile fabrics can easily tear, snag, or even disintegrate during a standard wash cycle. Beyond ruining the garment, these detached embellishments or fabric fragments can become lodged in the machine’s drum, pump, or drain system, causing blockages or mechanical damage. Similarly, items with heavy stains from materials like mud, sand, or gravel shouldn’t be loaded directly without pre-treatment, as these abrasive particles can damage the pump or drain.
The key is to always respect the care labels on your clothing and, equally, your washing machine’s user manual. These resources provide invaluable guidance on appropriate wash cycles, temperatures, and what materials are safe to put through your machine. By being selective and only washing items expressly designed for machine washing, you prevent unnecessary strain on the motor, agitator, and drainage systems. This mindful approach safeguards your machine from costly internal damage, ensuring it continues to operate efficiently for its intended lifespan.
Read more about: Sleep Better, Breathe Easier: A Microbiologist Reveals the Truth About How Often You Should Wash Your Bedding
10. Tackle Limescale Buildups
In many regions, hard water is a silent enemy to household appliances, and your washing machine is particularly vulnerable to its effects. Hard water contains high levels of minerals like calcium and magnesium, which, over time, can accumulate inside the machine’s internal components. This mineral accumulation is known as limescale, and it poses a significant threat to your washing machine’s efficiency and longevity, particularly impacting the heating element and water flow.
Limescale buildup acts like an insulating layer, forcing the heating element to work much harder and longer to reach the desired water temperature. This not only dramatically increases your energy consumption and utility bills but also accelerates the wear and tear on the heating element itself, potentially leading to its premature failure. Beyond the heating element, limescale can also constrict pipes and hoses, reducing water flow and thereby decreasing the overall cleaning effectiveness of your machine.
Fortunately, tackling limescale is a straightforward preventative measure. A highly effective method involves running a hot water cycle with the addition of a powerful descaling agent. If your machine lacks a dedicated hot water setting, you can manually pour hot water into the drum before starting a regular cycle. The addition of one cup of white vinegar or a mixture of baking soda and vinegar, as recommended by experts for deep cleaning, can work wonders in dissolving these mineral deposits. Regularly descaling ensures your machine heats water efficiently and maintains optimal water flow, vital for both cleanliness and extended lifespan.
11. Practice Gentle Door Closure
It might seem like a minor habit, but how you close your washing machine door can have a surprising impact on its long-term health. The quick, forceful slam of a door might be an unconscious act, but repeatedly subjecting the machine to this impact can inflict subtle yet significant damage over time. This seemingly innocuous action puts undue stress on several critical components, potentially leading to malfunctions that are both frustrating and expensive to rectify.
The latch and locking mechanism of your washing machine door are particularly vulnerable to rough handling. Consistent slamming can cause these delicate parts to become misaligned, bent, or even break. When the latch fails to engage properly, the door may not seal completely, leading to water leaks during cycles or preventing the machine from starting altogether due to safety interlocks. These issues not only disrupt your laundry routine but can also result in water damage to your floor or surrounding cabinetry.
Beyond the latch, the control board—the machine’s brain that regulates cycles and timing—can also suffer from the shock of repeated door slamming. While robust, sensitive electronics can be compromised by constant jarring, leading to erratic behavior or complete failure. Cultivating the simple habit of gently closing the washing machine door ensures these vital components remain intact and functional. This mindful approach prevents unnecessary wear, reduces the risk of leaks, and safeguards the sophisticated internal electronics, adding years of reliable service to your appliance.
Read more about: 12 Fascinating Facts About ‘Hello’ You Never Knew Had Such a Rich History

12. Ensure Proper Ventilation
We’ve all been there: a fresh load of laundry, and then the washing machine door is shut tight, almost as an afterthought. However, this seemingly harmless action creates the perfect storm for one of the most common and persistent washing machine problems: mold and mildew growth. The dark, damp environment inside a sealed drum is an ideal breeding ground for these unwanted fungi, which not only cause unpleasant, musty odors but can also shorten your machine’s life.
The rubber gasket around the door of front-loading machines is especially susceptible to mildew accumulation, as water can pool there. This buildup isn’t just unsightly; it can compromise the seal over time, potentially leading to leaks. More broadly, the persistent dampness and mold can contribute to the deterioration of internal components and lead to your freshly washed clothes coming out smelling less than pristine.
Steve Evans, owner of Memphis Maids, champions a simple, yet profoundly effective solution: “Last but not least, I suggest leaving the door open after each use. The drum of your washing machine is the perfect ground for mold and bacteria, especially when it’s closed, because it’s a dark and humid area. Keeping your door slightly open allows air circulation.” This small, consistent habit allows the interior of the machine to dry out completely between washes, dramatically reducing the risk of mold and mildew, eliminating odors, and preserving the machine’s internal health.
Read more about: The Hidden Costs: Unmasking the Real Reasons Your Electric Bill Exploded After Bringing Home an EV
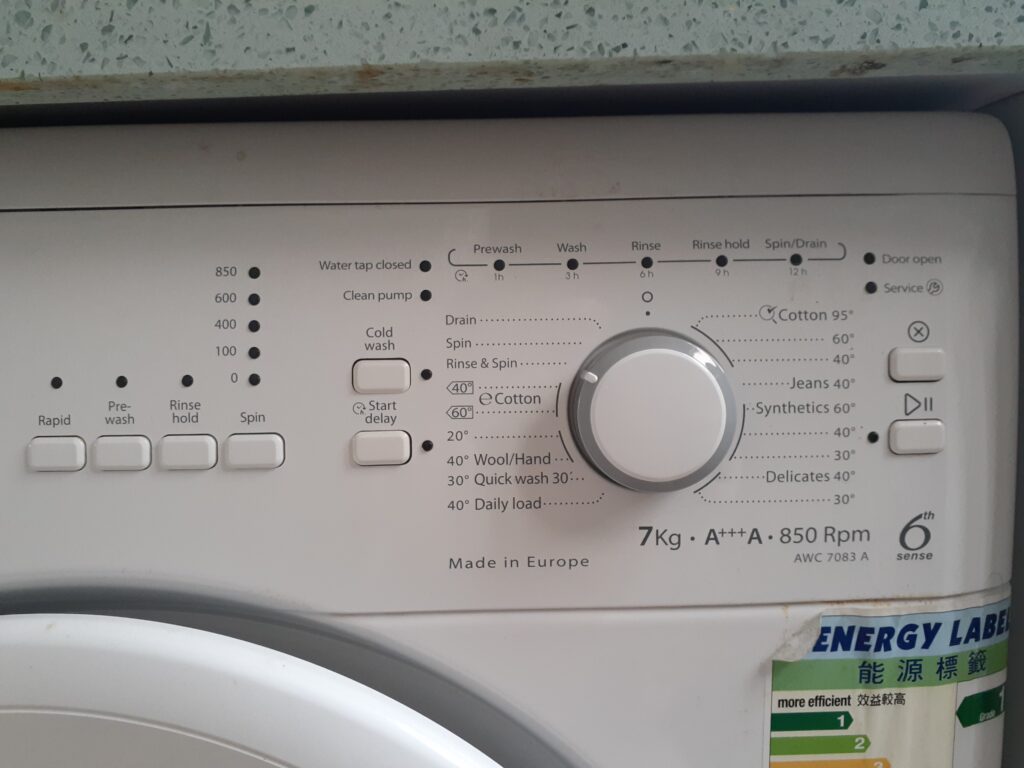
13. Heed Manufacturer’s Instructions
In our fast-paced world, it’s tempting to bypass the user manual that comes with a new appliance, deeming it an unnecessary formality. Yet, when it comes to maximizing the lifespan and performance of your expensive washing machine, the manufacturer’s instructions are an invaluable, often overlooked, treasure trove of wisdom. These manuals are not just technical documents; they are a direct guide from the engineers who designed your specific machine, offering tailored advice crucial for its optimal operation and longevity.
Every washing machine, whether it’s a front-loader, top-loader, or high-efficiency model, has unique specifications and recommended operating procedures. The manual details critical information such as the ideal detergent type and dosage, specific wash cycles for different fabrics, proper loading techniques beyond just avoiding overload, and even troubleshooting tips for minor issues. Deviating from these guidelines, even unknowingly, can lead to inefficiencies, premature wear on components, and costly damage.
Making it a habit to consult your user manual, especially for new features or when facing an unfamiliar issue, empowers you with the knowledge to care for your machine correctly. It clarifies the best practices for maintenance, helps you understand error codes, and informs you about specific cleaning cycles. By embracing the manufacturer’s instructions, you’re not just reading a book; you’re adopting a personalized maintenance strategy that directly translates into improved performance, reduced energy consumption, and significantly extending the functional life of your washing machine.

14. Consider Professional Assistance
While many of the tips we’ve discussed empower you to handle routine maintenance and minor issues, there comes a point where DIY enthusiasm should defer to expert knowledge. Your washing machine is a complex appliance, and attempting to fix intricate mechanical or electrical problems without the requisite expertise can easily exacerbate the issue, leading to more extensive damage and even safety hazards. Recognizing when to call a professional is a critical aspect of responsible appliance ownership.
If you notice persistent unusual noises, leaks that aren’t easily fixed by tightening a hose, error codes that don’t clear, or a complete failure to operate, these are strong indicators that a professional eye is needed. A qualified appliance repair person possesses the specialized tools, diagnostic skills, and in-depth knowledge to accurately identify the root cause of the problem. They can diagnose the exact issue, recommend the most effective course of action, and perform repairs safely and efficiently.
While the immediate cost of a service call might seem daunting, hiring a professional can actually save you money, time, and immense frustration in the long run. They can prevent further damage that might result from incorrect DIY attempts, ensure the repair is done correctly the first time, and often provide warranties on their work. Embracing professional assistance for complex issues is not an admission of defeat; it’s a smart investment in your washing machine’s enduring performance and a testament to truly advanced care.
Read more about: Why American Drivers Are Shifting Away From Sedans: An In-Depth Analysis of Market Dynamics and Consumer Preferences
15. Regularly Check and Replace Worn-Out Parts
Just like any mechanical system with moving parts, your washing machine contains components that are subject to wear and tear over time, regardless of how meticulously you follow daily cleaning routines. Belts, hoses (beyond just the water supply ones, internal ones too), and seals are all examples of parts that endure constant stress and friction. Proactively inspecting and replacing these consumables is a cornerstone of advanced maintenance, ensuring your machine’s smooth operation and preventing cascading failures.
A general guideline suggests checking the machine’s belts, hoses, and seals every 6-12 months for signs of deterioration. Look for cracks, fraying, stiffness, or any visible damage on belts. For internal hoses and seals, inspect for leaks, bulges, or hardening of the material. Addressing these issues before they fail catastrophically can prevent more significant, and often more expensive, damage to the motor, pump, or even the drum itself.
Regular replacement of worn-out parts is not merely about fixing a problem; it’s about preventative care that maintains peak performance. A failing belt, for instance, can lead to inefficient spinning or agitation, while compromised seals can cause leaks that damage electrical components. By staying vigilant and replacing these relatively inexpensive parts as needed, you significantly reduce the risk of unexpected breakdowns, optimize your machine’s efficiency, and ultimately, extend its operational life well beyond its average expectancy. It’s a small investment for substantial long-term gains.
Read more about: Crossover Suspension Reliability Report: 5 Models Built to Last, 5 That Will Cost You
And there you have it—a comprehensive guide to ensuring your washing machine not only lasts longer but performs at its absolute best, cycle after sparkling clean cycle! From the daily habits that prevent immediate damage to the less frequent but profoundly impactful checks and professional insights, these 15 simple tips are your blueprint for appliance longevity. By embracing these practical, actionable strategies, you’re not just preserving a machine; you’re investing in a smoother, more efficient household, saving yourself money, and enjoying the undeniable convenience of a truly reliable washing companion for years to come. Your washing machine works hard for you; give it the care it deserves, and it will pay you back in spades!
_0.jpg "From Basic Repairs to Epic Builds: 14 Indispensable Tools for the Modern Man’s Garage Workshop")
