

An egg gliding effortlessly from your skillet, a perfect flip of a pancake, or a quick sauté with minimal oil—these are the small kitchen victories we often take for granted with our non-stick pans. Yet, for many home cooks, this blissful experience is fleeting. The average nonstick pan, sadly, often meets its end within a mere one to two years, leading to a frustrating cycle of sticky food, flaking coatings, and constantly buying replacements. It’s a costly habit that not only dents our wallets but also contributes to unnecessary waste.
The good news? This isn’t a fate you have to accept. The truth is, most nonstick pans end up in the trash prematurely not because they’re inherently flawed, but because of simple, avoidable mistakes in cooking, cleaning, and storage. It’s a common misconception that the problem lies with the pan itself, when in reality, the issue often stems from how we care for it. This comprehensive guide is here to change that narrative, equipping you with the kind of expert-driven insights typically reserved for professional kitchens.
We’ve gathered 15 invaluable secrets, honed by top chefs and culinary experts, that promise to transform your nonstick pan’s lifespan. By embracing these proven methods and daily habits, you can extend the life of your beloved nonstick pans by two, three, or even four times their typical duration. From mastering heat control to savvy storage solutions and even deep-cleaning tricks, prepare to unlock years of slick, functional performance, save money, and cook with renewed confidence. Let’s dive in and make those pans last!
1. **Mastering Low to Medium Heat Control: The Ultimate Longevity Secret**When it comes to the longevity of your nonstick pan, there is one cardinal rule that stands above all others: heat control. High heat is unequivocally the fastest way to destroy a nonstick coating, yet it’s a mistake made by countless home cooks. Imagine your nonstick coating as a delicate, finely tuned surface; exposing it to intense, unchecked heat is like running a marathon in high heels – it’s going to break down much faster than intended.
The science behind this is straightforward but critical: when PTFE-based pans, the most common type, are heated above 500°F (260°C), the coating begins to break down at a molecular level. This process is called pyrolysis, and it doesn’t just reduce the pan’s nonstick efficacy; it permanently damages it. Even the seemingly innocuous act of preheating an empty pan on high for just a few minutes can cause irreversible damage, leading to a pan that stubbornly sticks even after its first use. This is why professional chefs meticulously manage their stove temperatures, understanding that proper heat is about precision, not power.
To safeguard your nonstick surface, always remember to use low to medium heat when you cook. For most stovetops, this translates to a setting of 4-5 out of 10. The sweet spot for nonstick cooking, where food cooks evenly and the coating remains intact, is typically between 300°F and 400°F (150°C to 204°C). This gentle approach ensures that the coating performs as intended, allowing your fried eggs to slide and your delicate fish to release without a fuss, all while preserving the integrity of the pan for years to come. It’s a small adjustment that yields massive returns in pan durability and performance.
Read more about: Avoid These Critical Mistakes: Your Definitive Guide to Buying the Perfect New TV
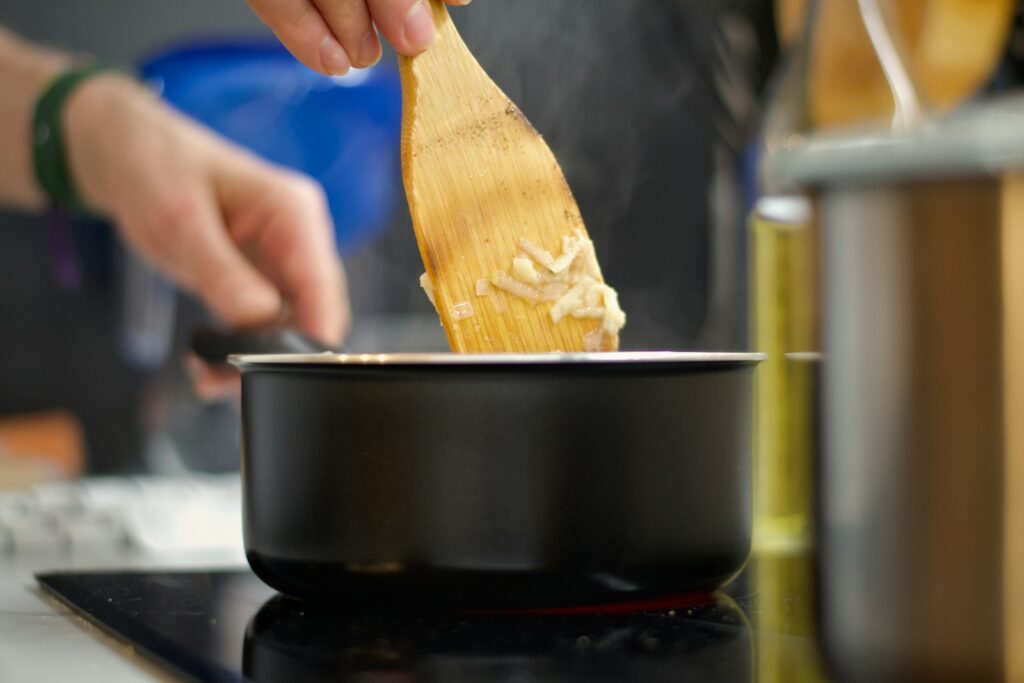
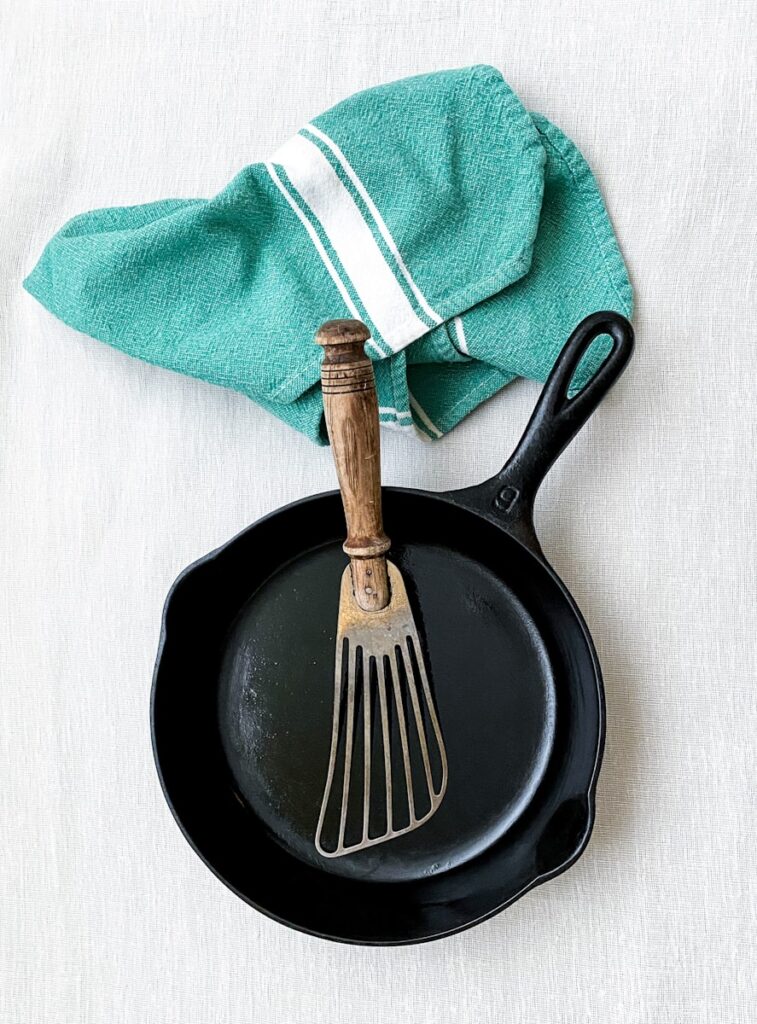
2. **Selecting the Right Utensils: Silicone, Wood, or Heat-Resistant Plastic**Just as important as managing heat is the choice of tools you use inside your nonstick pan. This is a non-negotiable rule in any kitchen, professional or home: never use metal utensils. The nonstick layer, while incredibly effective, is remarkably thin and delicate. Metal forks, knives, spatulas, or even metal serving spoons will inevitably create tiny, or even large, scratches on the surface. Once these scratches appear, the nonstick barrier is compromised, creating microscopic valleys and peaks where food can find purchase and stubbornly stick.
Think of the nonstick coating as a pristine, smooth canvas. Every time a metal utensil scrapes across it, it’s like tearing a hole in that canvas. Not only does this diminish the pan’s performance, but it also accelerates its overall deterioration, giving food more and more places to adhere. This is why top chefs, despite their often robust kitchen environments, are incredibly disciplined about their utensil choices when working with nonstick surfaces. They understand that prevention is the best cure for a compromised pan.
Your best options for preserving that precious nonstick surface are simple and readily available materials: silicone, wood, or heat-resistant plastic. Silicone utensils are flexible, highly heat-resistant, and incredibly gentle, conforming to the pan’s surface without a whisper of a scratch. Wooden utensils, a timeless classic, are soft and robust enough for most tasks without posing a threat to the coating. Lastly, plastic or nylon tools, as long as they are rated for high heat to prevent melting, offer a convenient and safe alternative. Embracing these gentle tools is a fundamental step in extending your nonstick pan’s life, ensuring those slippery surfaces stay true to their name.
3. **The Non-Negotiable Rule of Hand Washing Only**When the cooking is done, and the meal has been enjoyed, the post-cooking care of your nonstick pan is just as vital as the cooking process itself. And here’s another secret from the pros: always hand wash your nonstick pans, even if the manufacturer boldly labels them as “dishwasher safe.” This seemingly convenient shortcut is, in fact, a stealthy enemy to your pan’s delicate coating, drastically shortening its lifespan.
The dishwasher environment is a brutal gauntlet for nonstick cookware. It combines a triumvirate of destructive forces: harsh, abrasive detergents, high-pressure water jets, and intense, high-heat drying cycles. These elements together work to strip away the nonstick coating, gradually degrading its effectiveness and bonding to the pan’s metal base. What might seem like saving a few minutes of effort often costs you years of your pan’s life. Professional kitchens rarely, if ever, put nonstick pans through commercial dishwashers for precisely this reason; they know the immense value of a perfectly preserved surface.
Hand washing, by contrast, is a gentle and quick process that preserves the coating with minimal effort. Allow your pan to cool down properly (we’ll get to that important step next!), then use a soft sponge or dishcloth with a small amount of mild dish soap. For most meals, a simple wipe and rinse is all that’s required to get your pan sparkling clean. This mindful, hands-on approach ensures that the nonstick properties remain intact, delaying the frustrating onset of sticking and flaking for a much longer time. It’s a small act of kindness for your cookware that pays dividends.
Read more about: Unlock the Detailer’s ‘Secret’ Formula: Perfectly Restore Faded Black Car Trim Without Professional Tools
4. **Avoiding the Pitfalls of Cooking Sprays: Opt for Natural Fats**Many home cooks reach for aerosol cooking sprays, believing them to be a convenient, low-fat alternative for nonstick cooking. However, this seemingly helpful product is, in fact, one of the leading culprits behind the premature degradation of nonstick surfaces. This is a critical insight shared by chefs who understand the nuances of pan maintenance.
The issue lies with the additives found in most cooking sprays. These sprays contain propellants and emulsifiers, such as lecithin, which are designed to help the oil adhere evenly to the pan. While this might sound beneficial, these additives, especially when heated, can burn onto the nonstick surface at relatively low temperatures. The result is a sticky, caramelized residue that is incredibly difficult to remove and, more importantly, severely interferes with the pan’s nonstick performance. This sticky film acts as a barrier, making food adhere rather than slide, effectively negating the very purpose of your nonstick pan.
Instead of cooking sprays, the chef’s secret is to use a small amount of natural oil or butter. While nonstick pans require less fat than other cookware types, a modest addition of oil or butter is still beneficial. It aids in heat transfer, contributes to flavor, and provides a pure, clean layer that won’t leave behind troublesome residues. Simply pour a small amount of your preferred cooking oil or place a pat of butter in the pan, ensuring it coats the surface lightly. This not only keeps your pan performing optimally but also enhances the taste and texture of your food, a win-win for both your cookware and your culinary creations.
5. **Implementing Smart Storage Solutions for Protection**After all the careful cooking and gentle cleaning, it would be a shame to undo all that effort with careless storage. Improper storage is another leading cause of premature nonstick pan failure, as scratches from stacking can quickly compromise the delicate surface. This is a common oversight that even seasoned cooks can make, but with a few smart habits, you can easily protect your investment.
Professional kitchens often utilize pot racks to hang pans, completely eliminating the risk of stacking-related damage. The goal for home cooks should be similar: to prevent the nonstick surface from coming into contact with hard or sharp objects, especially other pans. When pans are haphazardly stacked, the rough edges of one pan or the exposed metal of another can easily scrape and gouge the nonstick coating, creating irreversible damage that leads to sticking and flaking.
The best solution for safe storage is to use pan protectors. These are typically made of felt or silicone and are designed to be placed between stacked pans, creating a soft, protective barrier. If you don’t have dedicated pan protectors, don’t fret! A dry dish towel, a sheet of paper towel, or even a sturdy paper plate can serve as an effective, temporary separator. By creating a physical buffer between your stacked nonstick pans, you ensure that their precious surfaces remain pristine and ready for many more years of effortless cooking. It’s a simple habit that makes a world of difference.
Read more about: From Icon to Irony: 14 Automotive Innovations That Backfired Spectacularly
6. **Understanding Nonstick Pan Construction and Deterioration**To truly extend the life of your nonstick pans, it’s incredibly helpful to understand what they’re made of and, crucially, what causes them to break down. Not all nonstick cookware is created equal, and their underlying construction significantly impacts their durability and performance. Knowing the science behind their magic helps us treat them with the respect they deserve, much like a chef understands their tools deeply.
The “nonstick” quality comes from a special coating applied to a metal pan, usually aluminum or stainless steel, which creates a super smooth, or hydrophobic, surface. This surface prevents food from gripping, allowing it to slide off effortlessly. There are three primary types of nonstick coatings: PTFE (Polytetrafluoroethylene), famously known as Teflon, which is extremely slippery and PFOA-free in modern versions; Ceramic, a silica-based gel that can handle higher temperatures but tends to lose its nonstick properties faster; and Hard-Anodized, a process that hardens the aluminum base, often then coated with PTFE, offering excellent durability for the base material. Each has its own heat tolerance and durability profile.
Despite their initial invincibility, these coatings are delicate and deteriorate for four main reasons. First, and most destructive, is heat damage, where excessive temperatures break down the coating at a molecular level. Second, physical scratching and abrasion from metal utensils or harsh cleaning pads compromise the thin layer. Third, chemical reactions, especially from prolonged exposure to acidic foods, can gradually contribute to breakdown. Finally, improper cleaning methods like dishwashers or thermal shock (hot pan to cold water) actively degrade the coating’s bond and structure. Understanding these vulnerabilities is the first step in actively protecting your nonstick investment, ensuring you can mitigate the very forces that lead to their demise.
7. **Perfecting Preheating Techniques for Optimal Pan Life**One of the most common and damaging mistakes made with nonstick pans happens before any food even touches the surface: improper preheating. Many cooks mistakenly crank up the heat to high, thinking a super-hot pan is necessary for good cooking. However, for nonstick, this rapidly degrades the coating, as we’ve discussed, and is a surefire way to shorten its life significantly. Mastering the art of gentle preheating is a secret to preserving that slippery surface.
Instead of blasting your pan with high heat, adopt the low to medium heat rule for preheating. Never preheat an empty nonstick skillet above medium heat; for most stovetops, this means a setting of 4-5 out of 10. The ideal surface temperature range for most nonstick cooking is a gentle 300°F to 400°F (150°C to 204°C). This allows the pan to come up to temperature slowly and evenly, without shocking or scorching the delicate coating. It’s a patient approach that respects the engineering of the pan.
A simple and effective way to test if your pan is perfectly preheated, a trick often used by culinary professionals, is the “water drop test.” Place your pan on the stove over medium-low heat for a minute or two. Then, sprinkle a few drops of water into the pan. If the drops sizzle away immediately, the pan is too hot. If they just sit there, it’s too cool. But if the drops form into little balls and dance gracefully across the surface, your pan is perfectly preheated and ready for cooking. This method ensures you hit that ideal temperature zone every time, safeguarding your coating and ensuring your food cooks beautifully without sticking. It’s a foundational technique for maximum pan longevity.
Now that we’ve established those essential daily habits, let’s dive even deeper into the world of non-stick pan mastery. This next section is all about elevating your care routine, tackling persistent issues, and knowing exactly when it’s time to respectfully retire a pan. These are the advanced techniques and expert insights that separate the good cooks from the truly great ones, ensuring your beloved non-stick companions serve you faithfully for a decade or more.
Read more about: The Culinary Science of Homemade Pizza: Mastering the Art of Dough and Sauce for Unforgettable Pies
8. **Implementing a Daily Cleaning Protocol for Pristine Performance**While we touched on the importance of hand washing in our earlier discussion, truly dedicated chefs follow a precise, step-by-step daily cleaning protocol that goes beyond a simple rinse. This routine ensures that every bit of residue is gently removed, maintaining that perfect nonstick glide day after day. It’s a small investment of time that yields immense returns in pan longevity and cooking pleasure.
The process begins, crucially, with cooling down. Never plunge a hot pan into cold water; allow it to cool until it’s merely warm to the touch. This prevents thermal shock, which can cause warping and damage the coating’s bond. Once it’s had a moment to relax, take a moment to wipe out any excess grease or food bits with a paper towel. This preliminary step minimizes scrubbing and makes the subsequent wash much more effective.
Next, it’s time for the gentle wash. Use a soft dish sponge or a dedicated cloth with warm, soapy water and a mild dish soap, like Dawn. Remember, the goal here is gentle persuasion, not aggressive abrasion. For most daily cooking, a light wipe is often all that’s required to get your pan sparkling clean. Then, rinse thoroughly to ensure every trace of soap residue is completely washed away.
The final, often overlooked, step in this daily ritual is immediate and complete drying. Dry the pan straight away with a soft towel. Allowing it to air dry can lead to unsightly water spots and, more importantly, mineral deposits that can subtly affect the nonstick surface over time. This mindful, hands-on approach ensures your pan is not only spotless but also protected and ready for its next culinary adventure.
9. **Mastering Weekly Deep Cleaning for Stubborn Residue**Even with the most meticulous daily cleaning, some stubborn residue or a slight sticky film can occasionally build up on your nonstick pan. This isn’t a sign of failure, but rather an invitation to engage in a deeper, more restorative cleaning process. Chefs know that these weekly interventions are crucial for maintaining peak performance and preventing irreversible issues.
One of the most effective and pan-safe methods for tackling cooked-on food or a persistent sticky film is creating a baking soda paste. Simply mix baking soda with a small amount of water until you have a thick, spreadable paste. Apply this directly to the affected areas, allowing the mild abrasive power of the baking soda to gently work on the residue without posing any threat to your delicate nonstick coating.
After applying the paste, gently scrub the areas with a non-abrasive sponge or a soft cloth. You’ll find that the baking soda effectively lifts and breaks down polymerized oils and food particles that regular washing might miss. Once the residue is gone, rinse the pan thoroughly to remove all traces of the paste. This method is a secret weapon against the subtle buildup that can slowly degrade your pan’s slickness.
For a broader, hands-off deep clean, especially if you notice a general dullness or a slightly sticky feel across the surface, consider a natural cleaning solution by simmering. Fill the pan with about an inch of water and add a tablespoon of baking soda. Gently simmer this solution on low heat for 10 to 15 minutes. This warm, alkaline bath effectively loosens any polymerized oil or food residue, making it incredibly easy to wipe away once the pan has cooled. It’s a gentle yet powerful technique for restoring your pan’s pristine condition.
10. **The Nuanced Truth: Does Vinegar Destroy Non-Stick Pans?**The question of whether vinegar is a friend or foe to nonstick pans is one that often arises in home kitchens, and it comes with a nuanced answer. Professional chefs understand that while vinegar has its place in cooking, its use as a cleaning agent for nonstick surfaces requires careful consideration due to its acidic nature. Concentrated or frequently used vinegar can indeed damage nonstick coatings.
Vinegar is an acid, and prolonged exposure can lead to the nonstick surface pitting and breaking down over time. While the occasional splash of vinegar for deglazing a pan during cooking is perfectly fine and often adds a wonderful depth of flavor to your sauces, using it regularly as a harsh cleaning agent is a definite no-go. This is why you’ll rarely see a chef reaching for a bottle of vinegar to clean their nonstick cookware; they know the long-term consequences.
A critical piece of advice from the pros is to never soak a nonstick skillet in a strong vinegar solution. This is an express lane to damaging your pan. If you absolutely feel the need to use vinegar for a particularly tough stain, perhaps one that even baking soda struggled with, extreme caution and proper dilution are paramount. Aim for a highly diluted solution—think one part white vinegar to three parts water.
Even with this diluted approach, it’s best to use it sparingly. Gently simmer this weak solution for no more than 10 minutes, then let the pan cool completely before washing it thoroughly with soap and water. The final soap and water wash is crucial, as it helps to neutralize the acid and prevent any further reaction with the coating. For almost any cleaning job, the baking soda paste or simmering methods are generally safer and just as effective, without the inherent risk of acid damage.
11. **The Powerful Conditioning of Seasoning Your Nonstick Pan**When we talk about seasoning a nonstick pan, it’s a very different beast from the robust, oil-baking process used for cast iron. For nonstick, it’s more accurately described as a ‘conditioning’ process. This technique, cherished by those who truly commit to pan longevity, helps to fill in microscopic pores in the coating, subtly enhancing its performance and, by extension, its lifespan.
While not all nonstick pans require seasoning, most PTFE-based pans can certainly benefit from an occasional conditioning treatment. It’s an especially helpful trick to have up your sleeve if your pan has started to lose a tiny bit of its legendary slickness, offering a gentle revival without resorting to harsh measures. Think of it as giving your pan a spa day, restoring its natural luster and ensuring it feels great.
The step-by-step seasoning process is surprisingly simple. First, ensure your pan is spotlessly clean and completely dry. Then, pour about a teaspoon of a neutral, high-smoke-point oil into the pan. Oils like canola, grapeseed, or vegetable oil are perfect for this. Use a paper towel to rub this oil all over the entire interior surface, creating a thin, even layer. The key here is *micro-thin*; you don’t want a puddle of oil, just a barely visible sheen, so wipe out any excess with a clean paper towel.
Next, place the pan on the stove over medium-low heat for just 1 to 2 minutes, or until you see the slightest wisp of smoke. This brief heating process allows the oil to bond with the coating, filling in those tiny imperfections. Immediately remove it from the heat, let it cool completely, and then give it one final wipe to remove any remaining oil. This conditioning ritual, performed every few months or whenever you notice a slight dip in performance, is a powerful secret to keeping your nonstick surfaces at their best.
12. **Advanced Temperature Management: Beyond Just Low-Medium Heat**While using low to medium heat is the golden rule for nonstick pan longevity, advanced temperature management goes a step further, equipping you with insights to truly master your heat sources. Understanding these nuances is crucial for preventing subtle, long-term damage that even seemingly careful cooks might overlook. Professional kitchens, with their diverse range of stovetops, rely on this precise control.
First, truly know the limits of your specific pan. Most PTFE coatings are safely durable up to around 500°F (260°C), while certain ceramic coatings might tolerate slightly higher temperatures, perhaps up to 570°F (300°C). Always make it a habit to check the manufacturer’s recommendations for your particular pan. Overheating, even briefly, can initiate the molecular breakdown we discussed, slowly but surely degrading that precious nonstick surface.
For those cooking on electric coil or gas stoves, which can often create intense hotspots directly beneath the pan, a heat diffuser can be a game-changer. This simple, flat metal disc sits directly on the burner under your pan, acting as a buffer. It works by distributing the heat far more evenly across the pan’s base, preventing the center from becoming disproportionately hot and thereby safeguarding your coating from localized damage. It’s an inexpensive accessory that offers significant protection.
Finally, cultivating the ability to recognize the subtle signs of overheating is another mark of a seasoned cook. If you ever observe your pan’s coating beginning to discolor, or, more dramatically, if you accidentally let it smoke without food, you’ve likely caused some permanent damage. While it might still be usable for a time, these visual cues are your pan’s way of telling you it’s been pushed too far, prompting a more mindful approach next time.
13. **Restoring Mildly Degraded Nonstick Surfaces: A Chef’s Comeback Story**It’s disheartening when your once-slippery nonstick pan starts to betray you, with food clinging where it once glided. But don’t despair! If your pan is only mildly degraded – meaning no visible scratches or flaking – there’s a strong chance you can restore a significant amount of its performance. The key, as top chefs know, is to address the most common culprit: that nearly invisible buildup of polymerized oil and food residue.
The moment you notice food starting to stick, consider it a call to action for early intervention. This is the ideal time to launch into a deep clean and re-seasoning routine, aiming to restore that coveted nonstickiness. Delaying this process only allows the problematic residue to further embed itself, making restoration more challenging. Prompt action is truly the secret to a successful comeback.
The oil conditioning method, or seasoning process, we discussed earlier is your best friend here. By thoroughly washing, drying, and then applying a micro-thin layer of high-smoke-point oil, you’re essentially filling in those microscopic rough patches that cause food to adhere. This creates a renewed, smoother surface that mimics the pan’s original performance. It’s a powerful, non-abrasive technique for rejuvenating a struggling pan.
For a more aggressive approach to tackle very stubborn buildup, especially if the oil conditioning alone isn’t enough, turn to the gentle abrasive restoration of a baking soda paste. Apply a thick paste of baking soda and water to the affected areas and let it sit for a good 30 minutes. The baking soda will gently break down the tenacious residue. Then, with a non-abrasive pad or cloth, gently scrub it away. This strips away the culprit residue without harming the underlying coating. Always follow this deep clean with a fresh seasoning to seal the deal.

14. **When to Call in the Experts: Professional Restoration Options**For the average home cook, when a nonstick pan gives up the ghost, the usual response is a trip to the store for a replacement. However, for those invested in very expensive, high-end pans, professional recoating presents a viable, albeit carefully considered, alternative. It’s often not cost-effective for a budget-friendly pan, but for a true culinary workhorse, it can extend its life significantly.
When might you consider this specialized service? If you own a professional-grade skillet that originally set you back several hundred dollars, the cost of re-coating might actually be cheaper than replacing it with a comparable new pan. This is particularly true for specialty sizes or unique designs that are hard to find. It’s about weighing the investment you’ve already made against the price of a full replacement.
Recoating services aren’t a cheap fix, typically costing anywhere from $50 to $100 or even more per pan. This is why comparing it diligently to the price of a brand-new, high-quality mid-range pan is essential before committing. For many, the convenience and comparable cost of a new pan will still win out, but for cherished pieces, the option exists.
To find these specialized services, you might need to do a little searching. Companies that specialize in industrial coatings sometimes extend their expertise to consumer cookware. A quick search for “cookware recoating services” or “nonstick pan re-lining” can yield local options or mail-in services. When choosing, always look for reputable companies with good reviews that specifically mention using food-grade, FDA-approved coatings to ensure the safety and longevity of your professionally restored pan.
15. **Clear Signs It’s Time to Say Goodbye: When to Throw Away Nonstick Pans**Knowing when to retire your nonstick pan is perhaps one of the most critical lessons in comprehensive cookware care. While we’ve covered many strategies to extend their life, there comes a point when a pan is simply beyond saving. Continuing to use a worn-out nonstick pan isn’t just frustrating; it can also raise health and safety concerns, and at that stage, the pan has truly reached the end of its useful life.
The most undeniable signal that it’s time for replacement is visible coating flaking or peeling. If you see bits of the nonstick material coming off, whether into your food or simply degrading from the surface, the pan is no longer safe or effective to use. This indicates a complete failure of the coating’s bond to the pan, and trying to salvage it is futile and potentially unhealthy.
Another clear indicator is persistent food sticking, even after you’ve diligently deep cleaned and re-seasoned the pan multiple times. If food still adheres stubbornly, it means the nonstick surface has permanently broken down, and its core function is gone. Minor surface scuffs are generally okay, but deep scratches that expose the silver-colored base metal beneath the coating are a serious concern. These compromise the nonstick surface entirely and, depending on the underlying metal, could potentially introduce reactive elements into your food.
Finally, if your pan has warped to such an extent that it wobbles, spins on your cooktop, or causes oil to pool heavily to one side, it’s time for it to go. A warped pan cannot heat evenly, leading to hotspots that will continually burn food in some areas while undercooking it in others. This not only ruins your cooking experience but also exacerbates coating breakdown. Prioritizing performance and safety means knowing when to gracefully let go and invest in a new, reliable culinary companion.
With these 15 invaluable secrets, you’re now equipped with the expert knowledge to truly transform your non-stick pan experience. From understanding the delicate science behind their construction to mastering the art of heat control, selecting the right tools, and implementing meticulous cleaning and storage routines, you hold the power to extend your pans’ lives by years. No more frustrating sticking, no more wasteful replacements – just effortless cooking, saved money, and the quiet satisfaction of knowing you’re treating your kitchen tools with the respect they deserve. Go forth and cook with confidence, knowing your non-stick pans will be your steadfast partners for a long, long time to come!


