

Hey there, fellow car enthusiast! If you’ve ever looked at your car’s faded, chalky black plastic trim and thought, “This just isn’t cutting it,” you’re in the absolute right place. I’ve certainly been there, staring at my car’s dull bumper or side mirrors, wishing they could look as sharp as they did when I first drove it off the lot. Over time, those black plastic parts—like bumpers, window trim, or fender flares—lose their luster due to sun exposure, dirt, and general wear, making an otherwise pristine vehicle look a little neglected.
But don’t worry, restoring that sleek, factory-fresh look is totally doable, and I’m genuinely excited to share everything I’ve learned from my own trial-and-error journey. You absolutely do not need expensive professional tools to achieve fantastic results right in your own driveway. This comprehensive guide is designed to walk you through how to restore black plastic trim on your car, step by step, with practical tips and tricks that make it easy, affordable, and incredibly long-lasting.
We’re going to dive deep into not just *how* to do it, but *why* it works, ensuring you gain the confidence to tackle this common car care challenge yourself. Get ready to bring that deep black shine back and make your car truly pop! It’s one of those satisfying projects that yields instant visual rewards and protects your investment for the long haul.

1. **Why Black Plastic Trim Fades: The Underlying Science**
You’ve probably noticed that the black plastic parts on your car don’t stay black forever. They inevitably turn gray, chalky, or even whitish over time, a transformation that can really detract from your vehicle’s overall appearance. I used to wonder why this happens myself, so I did some digging, and it turns out the culprit is usually a complex mix of UV rays, oxidation, and environmental grime.
The sun’s ultraviolet light is particularly damaging, as it actively breaks down the plastic’s surface, stripping away its natural oils and leaving it dry and faded. Couple this relentless solar assault with everyday hazards like road salt, stubborn dirt, and pervasive pollution, and you’ve got a perfect recipe for dull, disheartening trim. This constant exposure chips away at the plastic’s integrity, making it look much older and more worn than it actually is.
When I first noticed this on my SUV’s bumper, my initial thought was that I’d have to replace the whole thing. However, I soon learned that fading is predominantly a surface-level issue, rather than a fundamental structural failure of the plastic itself. The underlying plastic material is still robust and solid; it simply needs some dedicated care and attention to rejuvenate its color and fortify it against future damage.
Understanding that this phenomenon is primarily superficial gave me a huge boost of confidence, realizing that I could absolutely fix it myself without costly replacements. You can achieve the same remarkable results. Unlike paintwork, which typically boasts a protective clear coat, plastic trim pieces often lack this crucial layer of defense, making them inherently more susceptible to damage from the elements. This leads to the characteristic chalky appearance, surface brittleness, or noticeable color change you often see.
2. **Essential Supplies: What You’ll Need to Get Started (No Professional Tools!)**
Before we jump into the hands-on process of transforming your faded trim, let’s talk about getting prepared with the right supplies. You might be thinking you need a garage full of specialized equipment, but I can assure you that’s simply not the case. I’ve personally experimented with a whole range of methods and products, and what I’ve found is that having the *right*, readily available items makes all the difference in achieving outstanding results, all without needing to invest in professional-grade tools.
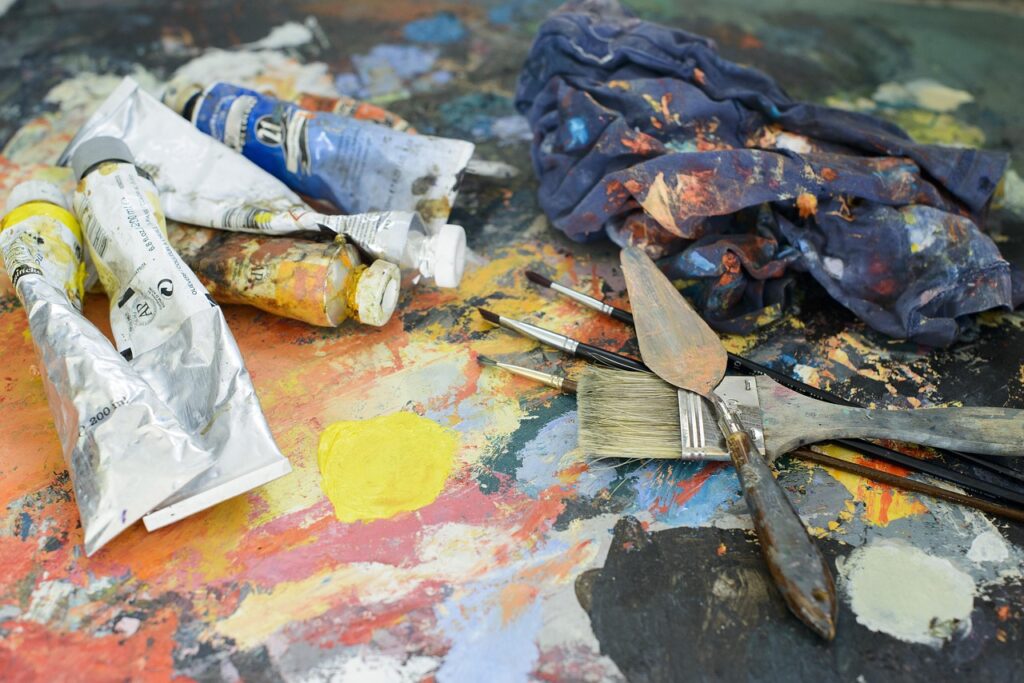
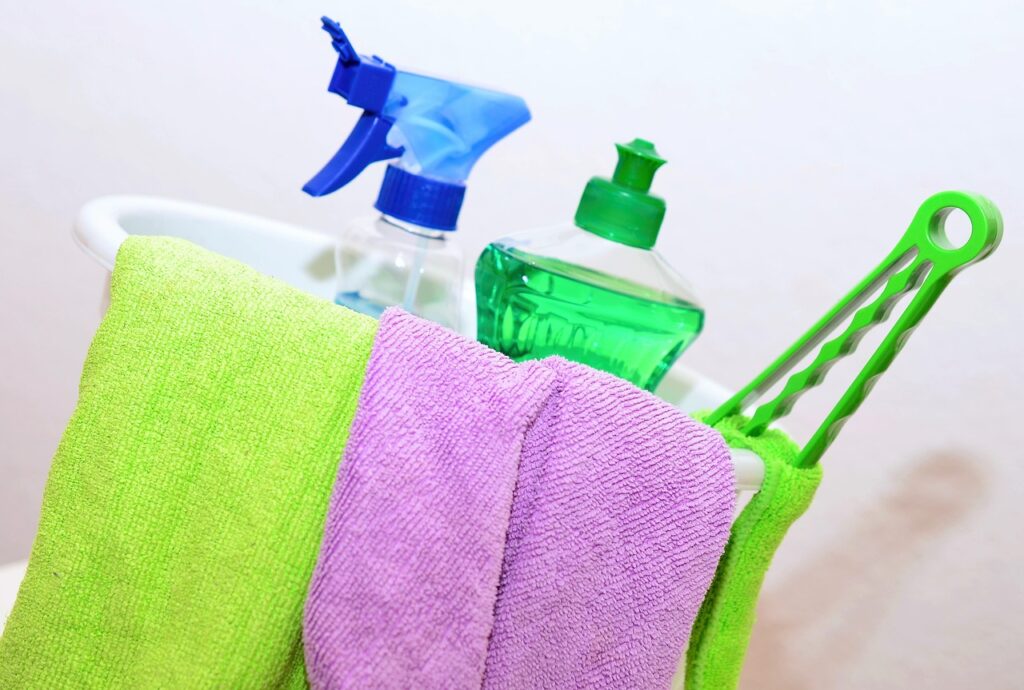
Here’s a simple, straightforward list of the supplies I consistently recommend, all based on what has genuinely worked wonders for me and is easily accessible: car wash soap, a few high-quality microfiber cloths, a soft-bristle brush for scrubbing, masking tape to protect adjacent areas, a good plastic cleaner (like an All-Purpose Cleaner, or APC), a dedicated plastic restorer product, some rubbing alcohol for prep, a reliable UV protectant spray, and optionally, a pair of gloves to keep your hands clean during the process.
You’ll typically find these items readily available in auto stores, hardware stores, supermarkets, or through online retailers, making them incredibly convenient to acquire. Most are also quite affordable, proving that effective car care doesn’t have to break the bank. I usually keep a stash of these in my garage, ensuring I’m always ready for a detailing session.
When it comes to the crucial plastic restorer, I’ve personally had excellent results with specific products like Solution Finish or CERAKOTE Trim Coat. These are consumer-friendly products that deliver professional-level outcomes without requiring specialized application equipment. The market offers a plethora of good options, so you can easily pick one that aligns with your budget and boasts solid reviews, ensuring you find a product that will truly bring your trim back to life with minimal fuss.
3. **Step 1: The Critical First Clean — Laying the Foundation**
The absolute first thing I do when embarking on any black plastic trim restoration project is to give it an incredibly thorough wash. You would be genuinely surprised at the sheer amount of dirt, grime, and gunk that can accumulate on these surfaces over time, often making the fade look far worse than it actually is. Skipping this fundamental step is a common mistake that can compromise the effectiveness of subsequent applications, so it’s imperative to get it right.
I always begin by giving the entire car a good rinse with water. This initial spray helps to loosen up any larger, loose debris and makes the scrubbing process much more manageable. Following that, I mix some standard car wash soap with water in a clean bucket. Then, using a soft-bristle brush – which is gentle enough not to scratch but firm enough to dislodge dirt – I gently but meticulously scrub the plastic trim. This process lifts embedded grime without causing damage.
It’s crucial to pay extra attention to those often-overlooked textured areas, such as bumper trim or fender flares, as these are prime hiding spots for dirt and environmental contaminants. I distinctly recall spending a solid ten minutes diligently scrubbing my truck’s bumper once, and the sheer volume of dirt that came off was astounding. The most rewarding part was seeing how much brighter and refreshed the trim looked just from this initial cleaning effort.
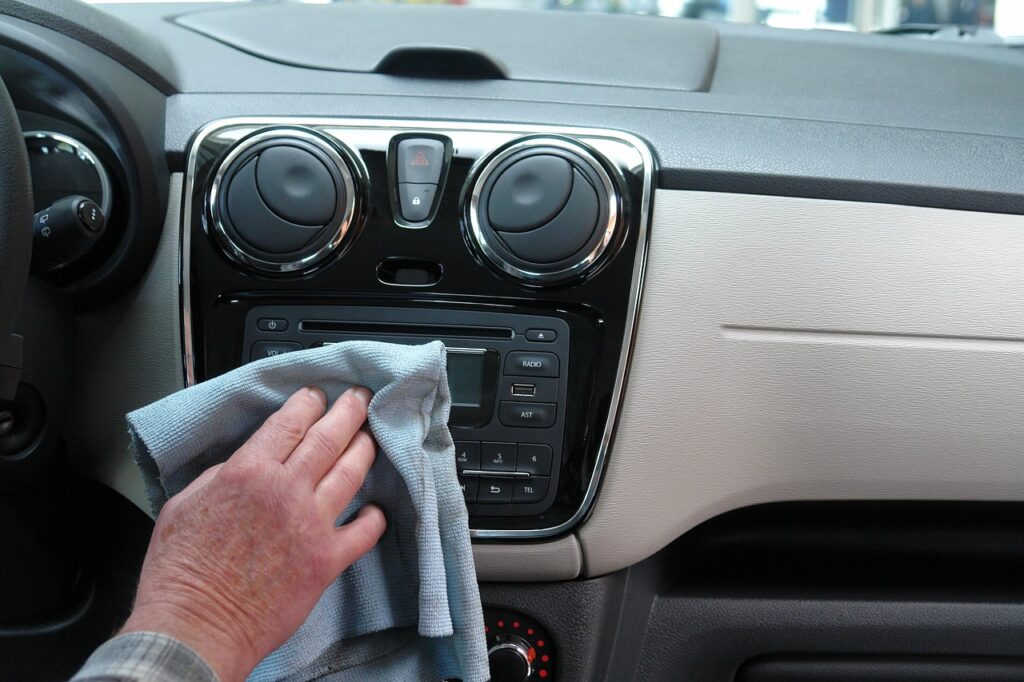
After a thorough scrubbing, it’s vital to rinse the trim meticulously with clean water to ensure absolutely no soap residue is left behind. Any lingering suds can interfere with the restorer product or leave unsightly marks. Once rinsed, I dry the trim completely with a clean microfiber cloth. This step prevents any water spots from forming and leaves you with a pristine, ready-to-work-on surface. If the trim still appears stubbornly grimy or feels waxy, I then reach for an all-purpose cleaner (APC). This powerful solution is a true game-changer for cutting through tough grease, old wax buildup, or other resilient contaminants that regular soap can’t handle. I apply the APC with a microfiber cloth, allow it to dwell for just a minute or so to break down the grime, and then rinse it off thoroughly. Trust me, starting with an immaculately clean surface is the undeniable key to achieving truly exceptional and lasting results.
Read more about: Beyond the Hull: Decoding the U.S. Navy’s Path Forward – A Deep Dive into Admiral Caudle’s Vision and the ‘USS’ Legacy

4. **Step 2: Preparing the Surface for a Flawless Finish**
Once your trim is sparkling clean from the initial wash, it’s time for the next crucial step: surface preparation. This stage is absolutely vital because any lingering oils, waxes, or residual cleaners can create an invisible barrier that prevents your plastic restorer product from bonding correctly with the trim. I unfortunately learned this the hard way when I once rushed this step, skipping proper prepping, and ended up with frustratingly streaky and uneven results on my car’s side mirrors. It’s a mistake you definitely want to avoid for a professional-looking finish.
For this essential preparation, I consistently use rubbing alcohol. It’s a simple, effective, and readily available solution. Just pour a small amount onto a clean microfiber cloth and carefully wipe down all the plastic trim you intend to restore. The rubbing alcohol works by dissolving and lifting any remaining residues, oils, or waxes, effectively giving you a perfectly clean slate for the restorer to adhere to. This ensures maximum adhesion and an even, consistent application of your chosen product.
It’s also incredibly important to carry out this preparation step in a shaded area, or on a day that isn’t too hot and sunny. Direct sunlight or excessive heat can cause the alcohol to evaporate too quickly, which, ironically, can leave behind its own set of streaks and compromise your perfectly clean surface. Taking a few extra minutes to choose the right environment for this step will significantly improve your final outcome.
Furthermore, if you’re working on trim pieces that are in close proximity to your car’s delicate paintwork—think window seals, intricate door handles, or integrated bumper sections—it’s a wise move to grab some high-quality masking tape. I always make it a point to carefully tape off all the surrounding painted areas. This simple act creates a protective barrier, preventing any accidental splatters or drips of cleaner or restorer from touching your paint. While it adds a few extra minutes to the overall process, this meticulousness genuinely saves you from potential headaches and corrective work later on, ensuring a clean and precise restoration without any unwanted messes.
Read more about: The Unbeatable Guide to Perfect Eggs: Unlocking Consistent Culinary Success Every Single Time

5. **Step 3: Applying the Plastic Restorer — Bringing Back the Deep Black**
Now, we’ve arrived at what I consider the most satisfying part of the entire process: actively bringing that dull black trim back to vibrant life! You’ll be amazed at the transformation that unfolds before your eyes. I’ve personally experimented with a few different plastic restorers, and while they all share the common goal of rejuvenation, their specific application methods can vary slightly. Therefore, it’s always a good habit to carefully read and follow the instructions provided with your chosen product to ensure optimal results.
Most plastic restorers come in a liquid form, designed for easy application. My preferred method is to dispense a small, controlled amount onto a clean microfiber cloth or a dedicated applicator pad. The key here is not to overdo it; remember, when it comes to these products, less is often more. Applying too much can lead to streaking or an unnecessarily thick layer that doesn’t cure properly, so a light touch is always best.
Once the product is on the cloth, I rub it into the plastic trim using small, consistent circular motions. I find it most effective to work in manageable sections, perhaps tackling one side of the bumper at a time, or a single fender flare. This sectional approach helps to maintain an even application across the entire surface and ensures you don’t miss any spots. With some high-quality products, such as Solution Finish, you’ll actually start to see results almost instantly. It’s incredibly gratifying to watch the faded gray plastic visibly transform into a deep, rich, factory-fresh black right before your very eyes. That immediate visual feedback is truly rewarding!
If you’re dealing with trim that is severely faded—I’m talking about those pieces that have turned practically white from years of sun exposure, like the fender flares on my old Jeep—you might find that a single application isn’t quite enough to achieve the desired depth of color. In such cases, a second coat is often necessary and can make a dramatic difference. After applying the first coat, allow it to fully dry and cure, which typically takes about 10-15 minutes, or as advised by your product’s instructions. Once dry, proceed with a second light application. The difference after that second coat, especially on heavily oxidized trim, is truly night and day, delivering a profound, lasting black finish that looks absolutely phenomenal.

6. **Step 4: Sealing and Protecting Your Investment for Longevity**
Restoring your trim to a deep, rich black is undoubtedly awesome and incredibly rewarding, but if you stop there, you’ll unfortunately find that the fade will begin to creep back eventually. I learned this crucial lesson after my very first attempt at restoration, which, to my disappointment, only lasted a few short months. To genuinely extend the life of your freshly restored trim and maintain that stunning look, you absolutely need to take the vital step of protecting it from the relentless onslaught of UV rays and other environmental elements.
For this essential protective layer, I always turn to a dedicated UV protectant spray specifically formulated for car plastics. These specialized sprays are designed to create a durable, invisible shield that effectively blocks harmful ultraviolet rays, which are the primary culprits behind fading. This protective barrier works tirelessly to keep your trim looking fresh, vibrant, and deeply black for significantly longer periods. It’s an investment in time that pays dividends in sustained aesthetic appeal and material integrity.
The application process for the UV protectant is quite similar to applying the restorer itself. I recommend a light, even application, again using a clean microfiber cloth and working in small, manageable sections to ensure thorough coverage without over-applying. Some incredibly convenient products available today actually combine both the restorer and the protectant into a single formula, which can be a fantastic time-saver. However, if your chosen products are separate, make sure to allow the restorer a full day—or as recommended by its instructions—to completely cure and bond with the plastic before you apply the protectant. This ensures maximum effectiveness for both layers.
Here’s a golden tip that I cannot stress enough: do not, under any circumstances, skip this sealing step, even if you’re tired or eager to finish the job. I once did, believing I could get away with it, and sure enough, my car’s trim started showing signs of fading again after just a few weeks of intense summer sun. A high-quality UV protectant isn’t just an add-on; it’s a critical component of a lasting restoration, capable of keeping your trim looking spectacular for months, or even up to a year, depending on how much direct sunlight your vehicle typically receives. It truly is the secret to enduring results.
Having mastered the foundational steps of cleaning, prepping, applying, and sealing your black trim, it’s time to explore the advanced techniques and long-term strategies that will not only perfect your results but also keep that factory-fresh look enduring for years. We’ll dive into specific product choices that pros swear by, examine alternative methods with a critical eye, and arm you with the ultimate maintenance regimen to protect your hard work. Get ready to elevate your detailing game and truly understand what it takes to achieve pristine black trim.

7. **Exploring Dedicated Trim Restorers: Carpro PERL**
When it comes to dedicated trim restorers, Carpro PERL consistently stands out as a personal favorite. This isn’t just another product; it’s a versatile, water-based silicone-oxide all-purpose dressing that truly delivers. The name PERL itself is an acronym, cleverly hinting at its broad capabilities across Plastic, Engine, Rubber, and Leather surfaces. Its ability to work wonders on multiple materials with minimal shine while simultaneously providing crucial UV protection makes it an indispensable tool in any detailer’s arsenal.
I’ve personally found PERL to be a fantastic solution for black plastic surfaces. Its application is remarkably quick and straightforward, allowing you to achieve noticeable improvements in appearance with very little effort. It’s the kind of product that empowers you to make a significant visual difference in just a few minutes, making it ideal for regular maintenance or quick touch-ups when time is of the essence. It truly simplifies the process of bringing dull plastics back to life.
However, it’s important to acknowledge that PERL does come with a slight trade-off. It’s not designed as a “permanent” solution in the same vein as some more intensive coatings. This means that you will eventually need to re-apply it to the trim to maintain its aesthetic benefits and protective qualities. Despite this, its sheer ease of use and incredible versatility make it my go-to recommendation as a reliable quick-fix solution for restoring plastics, especially for those who appreciate efficiency and effectiveness.

8. **Advanced Coatings for Lasting Results: Gtechniq C4 Trim Restorer**
For those seeking a more enduring solution than a quick dressing, Gtechniq C4 Trim Restorer is a product that absolutely warrants consideration. Unlike the more temporary nature of some other products, C4 is engineered to form a strong, lasting bond with the plastic, offering results that can genuinely last for up to two years before another application becomes necessary. This makes it a serious contender for car enthusiasts looking for sustained performance and protection.
The magic behind C4 lies in its innovative molecular structure. This advanced coating doesn’t just sit on the surface; it actively swaps part of its molecular structure with the surface molecules of your car’s trim. This creates a deeply integrated layer that transforms the plastic, providing a level of durability and resilience that surface dressings simply cannot match. It’s a sophisticated approach to trim restoration, offering more than just a superficial improvement.
While the promise of significantly longer-lasting results compared to products like PERL is undeniably appealing, there is a corresponding trade-off: C4 is slightly more complex to apply. The preparation phase, in particular, becomes paramount to ensure a proper chemical bond with the plastic. Using this product requires additional steps and meticulous care, but when executed correctly, the outcome is genuinely fantastic, yielding a revitalized trim that looks superb and withstands the elements for an extended period.
9. **Next-Gen Ceramic Coatings: The Last Coat – CeraTrim**
Venturing into the realm of modern detailing, a relatively new yet highly effective product on the market is CeraTrim from The Last Coat. Similar in principle to Gtechniq C4, this innovative solution is designed to form a robust bond with the vehicle’s plastic components, offering more than just a superficial treatment. It represents the cutting edge in trim restoration technology, providing a truly impressive upgrade to your vehicle’s aesthetics and protection.
What sets CeraTrim apart as a next-generation solution is its inherent ceramic properties. As the manufacturer proudly states, “CeraTrim is no mere dressing or stain. It is a true ceramic coating that will give your trim surfaces superior hydrophobic and self-cleaning properties and will protect your trim for the long haul under any driving conditions while restoring them to a newer appearance.” This means your trim won’t just look great; it will actively repel water and dirt, making subsequent cleaning efforts much easier.
Beyond its powerful restorative capabilities, CeraTrim delivers lasting protection against the very elements that cause fading and degradation in the first place. Its ceramic composition provides an exceptional shield against damaging UV rays and various external contaminants. For those committed to achieving a deep, enduring black finish combined with advanced protective benefits, CeraTrim offers a comprehensive and impressive solution that brings a professional-grade look and feel to your car’s exterior.
10. **Exploring Alternative Methods (And Why to Proceed with Caution)**
Over the years, curiosity (and sometimes necessity, when I lacked dedicated products) led me to experiment with various alternative ways to restore black plastic trim. While some of these methods can offer temporary improvements, it’s crucial to approach them with a clear understanding of their limitations and potential risks compared to the reliability of purpose-built automotive restorers. Often, the “easy way” with specialized products truly is the best path.
One method I’ve explored is using heat, specifically a heat gun set to a low setting. The theory behind it is that gently warming the plastic can coax out some of its natural oils, temporarily bringing back a darker hue. However, I cannot stress enough the importance of extreme caution here. Too much heat, or holding the gun stationary for too long, can easily melt or warp the plastic, leading to irreparable damage. Not everyone has access to a heat gun, it often demands more time and effort than other methods, and plastic trim pieces generally only last a handful of these heat treatments before they turn permanently grey, as there’s only so much oil to draw out. Furthermore, I personally never want heat near my paintwork due to the risk of damage. For these reasons, this is a method I generally don’t recommend.
Then there’s the unconventional “peanut butter trick.” Yes, you read that right—smooth peanut butter! The natural oils present in peanut butter can indeed temporarily darken faded trim. I once tried it on a small, inconspicuous patch, and to my surprise, it did work to a certain extent. However, the effect was incredibly short-lived, usually lasting no more than a week, and the process itself is quite messy and leaves behind a distinct, lingering odor. While it might offer a fleeting visual improvement, its practical drawbacks make it far less appealing than dedicated detailing products for any serious, lasting restoration.
Another approach some individuals consider is using spray paint designed specifically for plastic. This can certainly be a more permanent solution than most DIY fixes, but it comes with a steep learning curve and high stakes. Achieving an even, factory-quality finish is challenging, and if you mess it up, fixing overspray or an uneven coat can be incredibly tough, potentially requiring extensive corrective work. Repainting often necessitates removing the trim parts from the car, ensuring they are perfectly clean and decontaminated before painting, and finding the right color match can be time-consuming and expensive. Unless you possess significant experience with painting automotive parts, this is not a task to undertake lightly.
Ultimately, while these alternative methods exist and might offer some temporary or niche appeal, they rarely match the safety, ease of use, consistency, and lasting results provided by specialized automotive plastic restorer products. For the average car enthusiast looking for an effective and low-risk way to rejuvenate their vehicle’s trim, sticking to proven, purpose-formulated products remains the smartest and most satisfying choice.
11. **Proactive Maintenance: Keeping Your Restored Trim Pristine**
Restoring your trim to a deep, rich black is a truly satisfying accomplishment, but the journey doesn’t end there. To ensure that stunning, factory-fresh look endures, proactive and regular maintenance is absolutely crucial. I’ve discovered that consistent care makes an enormous difference in how long your restored trim maintains its vibrancy and protective qualities. It’s an ongoing commitment, but one that undeniably pays off in spades for the long-term appearance of your vehicle.
A fundamental aspect of this ongoing care is regular washing. I make it a habit to clean the trim with standard car wash soap every couple of weeks. This simple routine is incredibly effective at preventing the buildup of dirt, grime, and environmental contaminants that can quickly dull the surface and accelerate fading. Think of it as a preventative measure, keeping harmful elements from taking hold and extending the life of your restoration.
Equally important is the diligent reapplication of UV protectant. I’ve found that adding another layer of UV protectant every two to three months is a golden rule. This keeps the trim continually shielded from the sun’s damaging ultraviolet rays, which, as we’ve discussed, are the primary culprits behind fading. This protective barrier is your trim’s best defense against the relentless assault of the elements, ensuring its deep black appearance is sustained over time.
It’s also essential to be mindful of the products you use during your regular car care routine. Always avoid harsh chemicals, such as aggressive wax removers or strong degreasers, on or near your plastic trim. These powerful formulations can easily strip away the restorer and protectant layers you’ve so carefully applied, undoing your hard work and leaving the trim vulnerable to renewed fading. Stick to gentle, pH-neutral automotive cleaning products to safeguard your investment.
Finally, one of the easiest yet most impactful tips is to simply park your car in the shade whenever possible. Direct sunlight is the enemy of plastic trim, and consistently shielding your vehicle from its harsh rays will dramatically extend the life of your restoration. I’ve personally noticed that my trim stays blacker for significantly longer periods when I use a garage or carport. For quick touch-ups on the go, I also keep a microfiber cloth and some protectant spray in my trunk—it’s a small habit that has saved me from minor fading on many a road trip.

12. **Avoiding Pitfalls: Common Mistakes to Sidestep for a Flawless Finish**
Through years of trial and error in my own detailing adventures, I’ve made my share of mistakes while restoring trim. Let me share some invaluable lessons learned, hoping to save you from potential headaches and ensure your journey to flawless black trim is as smooth as possible. Avoiding these common pitfalls is just as crucial as following the correct steps.
The first, and arguably most critical, mistake is skipping or rushing the initial cleaning step. It’s tempting to jump straight to applying the restorer, but if you attempt to apply any product over accumulated dirt, grime, or old wax, it simply won’t adhere properly. This inevitably leads to frustratingly streaky, patchy, and uneven results that look far from professional. A pristine, impeccably clean surface is the non-negotiable foundation for any successful restoration.
Another frequent misstep is using too much product during application. There’s a common misconception that “more is better,” but when it comes to plastic restorers and protectants, this couldn’t be further from the truth. Over-applying can lead to a thick, greasy residue that not only fails to cure correctly but also acts as a magnet for dust and dirt, quickly making your trim look worse than before. A light, even application is always the superior approach.
Furthermore, rushing the drying process between coats is a surefire way to compromise your finish. Whether you’re applying a second coat of restorer or moving on to the UV protectant, each layer needs ample time to fully dry and bond with the plastic. If you don’t allow sufficient curing time, you’ll almost certainly end up with unsightly streaks, uneven coverage, and a less durable finish. Patience truly is a virtue in detailing.
Lastly, avoid the temptation to use household cleaners like bleach or abrasive scrubs on your car’s plastic trim. I once experimented with a kitchen cleaner on a small, hidden patch, and it unequivocally made the plastic look significantly worse, leaving it dull and damaged. These products are simply not formulated for automotive plastics and can cause irreparable harm. Always stick to automotive-grade products that are specifically designed for car care; they are engineered to be effective and safe, ensuring the best possible long-term results for your vehicle’s exterior.
Restoring the black plastic trim on your car is more than just a quick fix; it’s a profound transformation that breathes new life into your vehicle. It’s one of those deeply satisfying projects where the effort you put in yields stunning, tangible results, turning a tired-looking vehicle into something that feels rejuvenated and brand new. My own journey of figuring out the most effective ways to tackle faded trim—from meticulous cleaning and surface preparation to selecting the right restorers and sealants—has been incredibly rewarding.
By diligently following these comprehensive steps—ensuring a thorough clean, prepping the surface meticulously, applying a high-quality restorer, and crucially, sealing it with a robust protectant—you are not just restoring color; you are extending the life and enhancing the aesthetic appeal of your car. While it does require a bit of dedication and elbow grease, the unparalleled feeling of driving a car that looks sharp, polished, and exceptionally well-cared-for is truly worth every single second invested. So, gather your supplies, pick a pleasant afternoon, and give your car’s trim the ultimate TLC it so rightfully deserves. You’ll be absolutely amazed and immensely proud of the lasting transformation you achieve!

")
