


We’ve all been there: the dreaded spinning wheel, the buffering video, the game lagging out at the worst possible moment. Slow internet feels like a digital anchor, dragging down productivity, enjoyment, and frankly, our sanity. It’s incredibly frustrating to experience poor performance, especially when you know you’re paying for a certain speed, but it feels like you’re barely getting a fraction of it.
Good news! You don’t have to suffer in silence. While you won’t magically get speeds faster than what your internet service provider (ISP) promises, the vast majority of people aren’t even getting the *standard* internet speed they’re entitled to. The good news is, there are a wealth of tried-and-tested methods to unlock your connection’s full potential, ensuring a smoother online experience for all your devices.
This article is your ultimate guide, a convenient manual packed with simple, actionable solutions designed to maximize your internet speed today. We’re going to dive deep into a series of effective tips and tricks, ranging from quick fixes to hardware tweaks and software adjustments. Get ready to transform your online world from sluggish to sensational with these essential steps!

1. **Reboot Your Router and Modem Regularly**It might sound cliché, and perhaps a bit too simple, but restarting your network devices is a powerhouse move when it comes to troubleshooting slow internet. Think of it like a quick refresh button for your entire network. Over time, modems and routers can accumulate small errors and bugs in their memory, which can lead to data taking longer to travel between points, directly impacting your speed.
This simple power cycle works wonders by clearing out any lingering memory issues and resolving connectivity glitches that might be silently slowing you down. It effectively gives your devices a fresh start, ensuring that any tasks or processes that were causing bottlenecks are reset and your connection can operate at peak efficiency. It’s a foundational step that often provides an immediate and noticeable improvement, especially if your speeds have recently dipped unexpectedly.
To perform this essential reboot, unplug both your modem and your router from their power sources. It’s crucial to wait a full 60 seconds (feel free to hum the Jeopardy theme song while you wait, it makes the time fly by!) to ensure all residual power drains from the devices. After the minute is up, plug the modem back in first and wait for all its indicator lights to stabilize, which usually takes a minute or two. Once the modem is fully online, plug in your router and give it another minute to establish its connection and ‘shake hands’ with the modem. This sequence is important for proper network initialization.
For those who love automation, many modern routers offer a built-in “Reboot Scheduler” feature. For instance, some advanced routers might have this tucked away under Administrator > System settings. By setting your router to automatically restart every night at, say, 2 AM, you can proactively prevent performance degradation and ensure a nice weekly flush of any memory leaks or stalled connections, all without lifting a finger. Also, when rebooting a PC, always use the dedicated “Reboot” option rather than just shutting it down and turning it back on, as the reboot function specifically resets key settings for optimal performance.
Read more about: Conquering Connectivity: The 15 Most Common Wi-Fi Problems Plaguing Modern Homes, and How to Fix Them
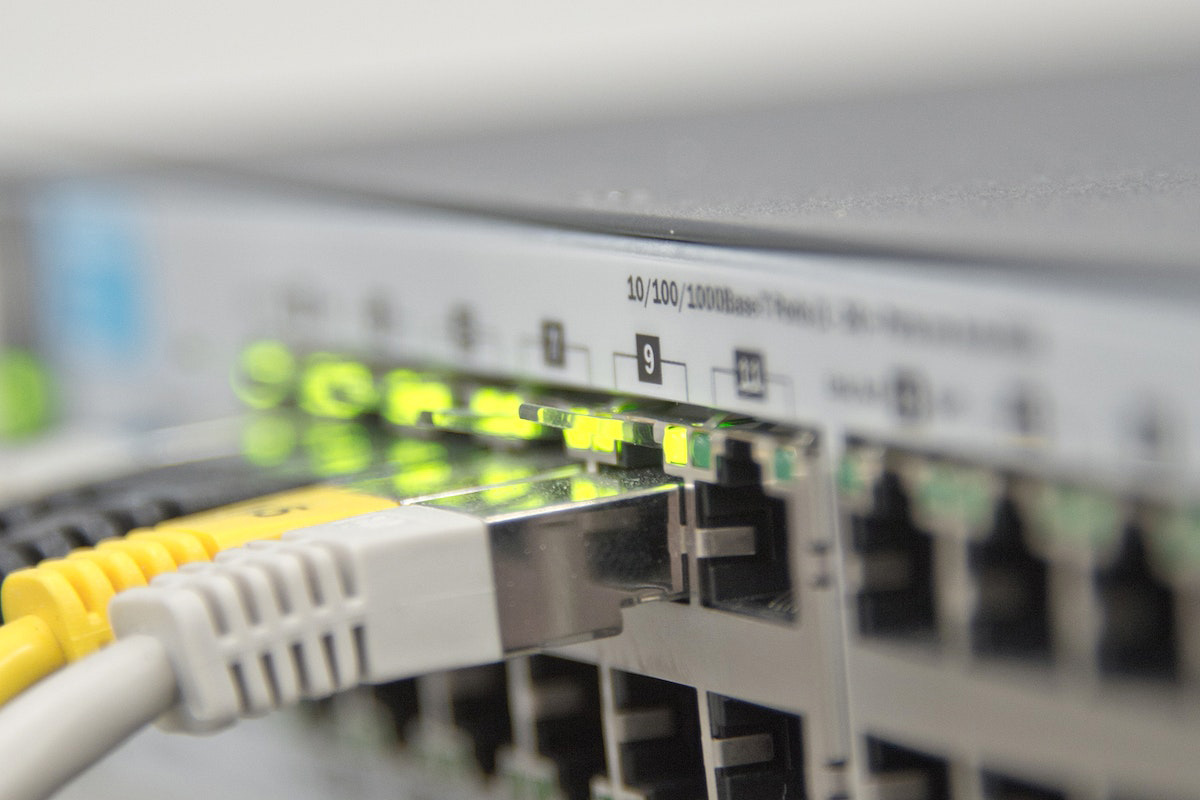
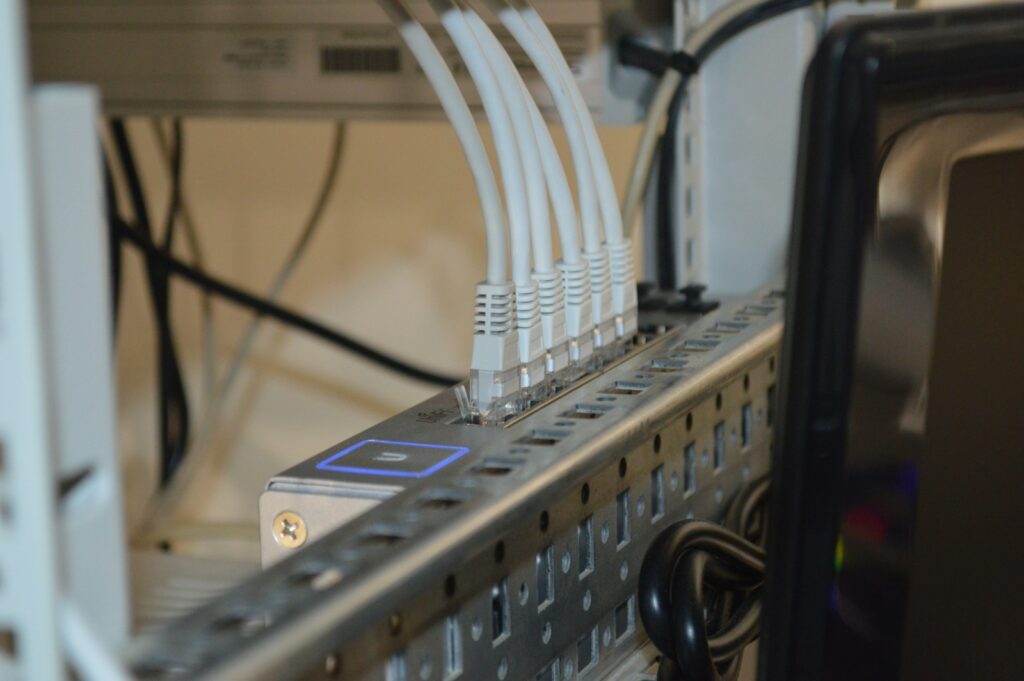
2. **Switch to a Wired Ethernet Connection**While Wi-Fi offers undeniable convenience, when it comes to raw speed, stability, and reliability, a wired Ethernet connection is the undisputed champion. Many computers and laptops come equipped with an Ethernet port, allowing you to create a physical connection directly to your router. This direct link significantly minimizes the lag time involved in signal transmission, as data doesn’t have to travel through the airwaves, contending with interference or signal degradation.
Not only do you gain superior speeds, but using an Ethernet cable also acts as a powerful shield against common network issues like interference and distance limitations that plague wireless connections. A standard Cat 5e cable, readily available and affordable, is capable of delivering up to 1,000 Mbps (1 Gigabit per second) under ideal conditions, which is roughly double the speed you might get from a 2.4 GHz Wi-Fi connection. For those with even higher demands, investing in high-quality, shielded Cat 6 or Cat 7 Ethernet cables can further eliminate interference and secure even faster performance.
Beyond the hardware, ensuring your Ethernet drivers are up-to-date is a basic yet crucial step. While Windows often handles driver updates, it doesn’t always grab the absolute latest versions. For optimal performance, it’s wise to periodically check for and download updated drivers directly from the manufacturer of your network card, such as Realtek or Broadcom. These updates frequently include performance enhancements and bug fixes that can noticeably improve your wired connection speed and stability.
When you’re connected via Ethernet, there’s no need to keep your Wi-Fi enabled on that device. Disabling your wireless card ensures there’s no competition between the two connections, allowing your device to fully leverage the superior speed and stability of the wired link. This small tweak guarantees you’re getting the most out of your physical connection without any unnecessary overhead from an active Wi-Fi radio. Furthermore, for devices far from the router, powerline networking adapters offer a fantastic alternative, extending fast-wired connections to any room with an electrical outlet, perfect for consoles or smart TVs.
Read more about: Power Outage Peril: The Home Security Systems That Leave You Vulnerable in the Dark
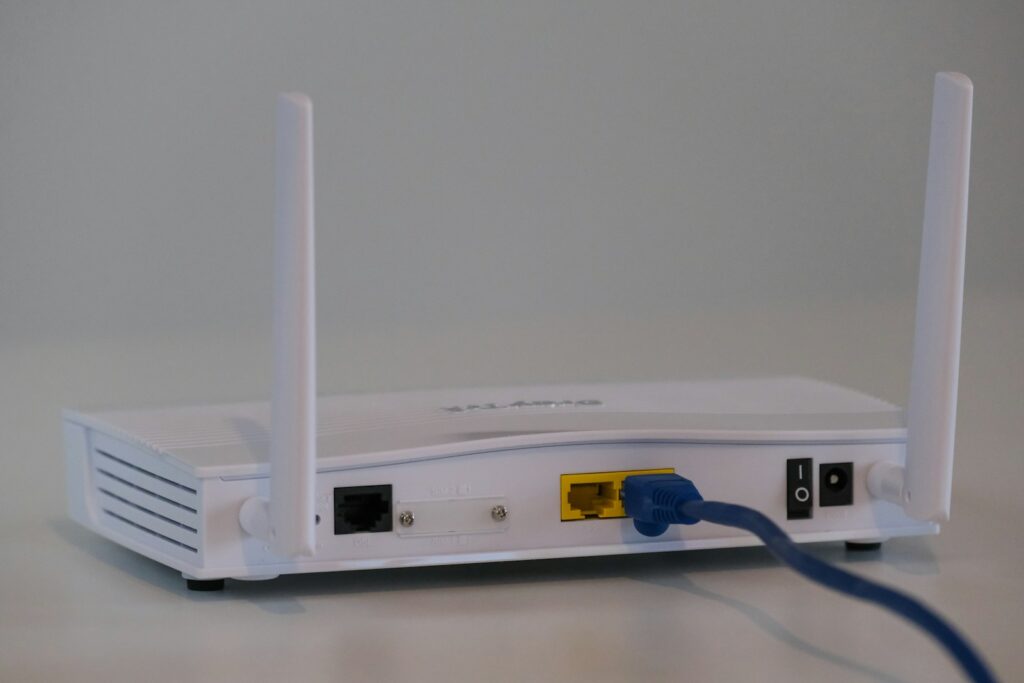
3. **Optimize Router Placement & Eliminate Interference**Router placement is not just about aesthetics; it’s a critical factor in determining your internet speed and signal strength. Think of radio waves as light – they travel, but they can also be blocked. The further you are from your router, the more the quality of the signal decreases, leading to lost data packets and slower speeds as your device has to request data to be resent. Basic physics dictates that shorter distances equate to faster, more reliable speeds.
To ensure your router’s signals can propagate effectively, aim for a central and elevated location within your home. Placing it high up on a shelf or mounting it on a wall helps the radio waves spread out and downwards, maximizing coverage. Crucially, avoid tucking your router away in cabinets, behind televisions, or in corners of your house. These locations can severely diminish its effectiveness and create frustrating dead zones where your Wi-Fi signal struggles to reach.
Interference is another silent killer of Wi-Fi performance. Your router’s signals can be obstructed or absorbed by various objects and other electronics. Common culprits include thick walls (especially brick), ceramic tile, concrete floors, large metal objects like filing cabinets, and even fish tanks – water is a notorious absorber of Wi-Fi signals. Even household appliances like microwaves, cordless phone bases, and Bluetooth speakers can emit frequencies that interfere with your Wi-Fi, causing slowdowns.
Performing an RF site survey with tools like Netspot (available for Android and iOS) can provide a visual heatmap of your signal strength throughout your home, helping you identify ‘Bermuda Triangles’ where your Wi-Fi goes to die. Once identified, you can strategically relocate your router or move signal-killing objects away from its immediate vicinity. By minimizing these interferences and ensuring a clear line of sight, you can significantly boost your wireless signal quality and, consequently, your internet speed.
Read more about: Conquering Connectivity: The 15 Most Common Wi-Fi Problems Plaguing Modern Homes, and How to Fix Them

4. **Disconnect Unnecessary Devices & Manage Bandwidth**Every device connected to your home network, whether actively being used or simply idling, consumes a portion of your available bandwidth. When too many devices are simultaneously drawing from the same internet pipeline, the bandwidth gets divided, resulting in a lower share and slower speeds for each individual device. This is a common scenario in modern homes filled with smartphones, tablets, smart home gadgets, and streaming devices.
Beyond just bandwidth consumption, every connected device must continuously send small packets of data to the router to maintain its connection to the network. This constant communication, especially if devices are numerous or far from the router, can create additional network interference, further degrading your signal quality. The cumulative effect of these background processes can subtly but significantly slow down your overall internet experience, making seemingly simple tasks feel sluggish.
The solution is straightforward: prune your network. Start by logging into your router’s administration page, which typically provides a list of all currently connected devices. Go through this list and identify any non-essential gadgets or old, unused devices that are secretly sipping your bandwidth from a dusty drawer. Temporarily turning these devices off, disabling their Wi-Fi connection, or connecting them to a different network (if available) will immediately free up valuable bandwidth for the devices you truly need.
By disconnecting these bandwidth vampires, you not only ensure that your primary devices receive a larger portion of the available internet speed, but you also reduce network congestion and interference. This leads to less time spent resending data and a more efficient, faster connection for everyone. For devices that aren’t critical for immediate use, consider if they can be scheduled to connect only during off-peak hours, such as late at night, further optimizing your bandwidth allocation during prime usage times. Even small adjustments here can lead to a significant improvement in network performance.
Read more about: The 14 Essential Tips That Can Save You Over $700 on Your Next Internet Bill This Year
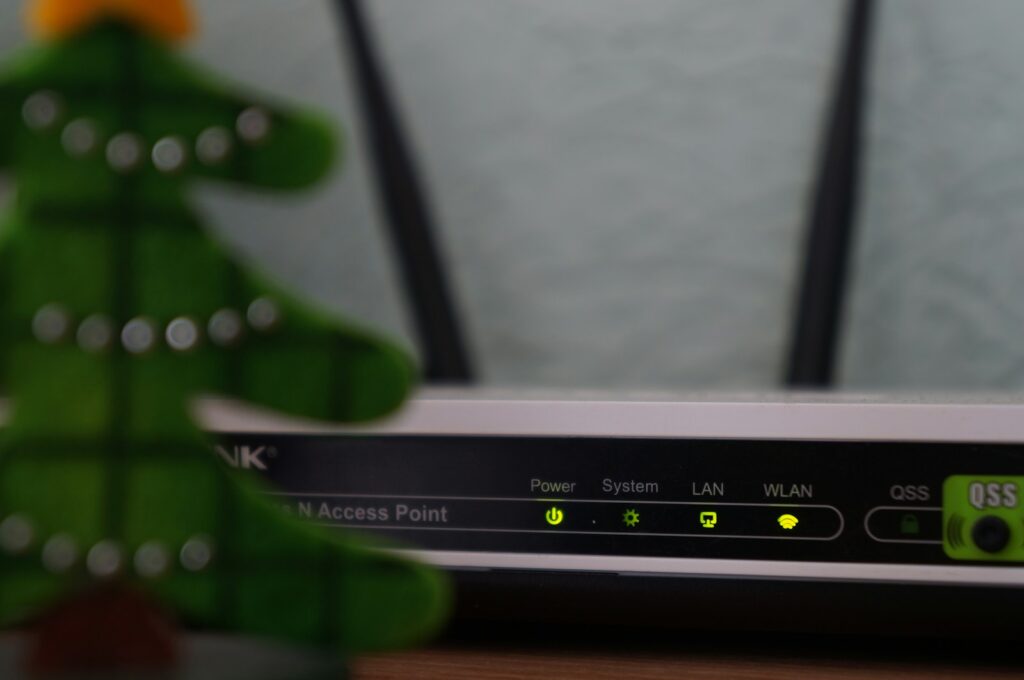
5. **Upgrade Your Router and Firmware**Your router is the central hub of your home network, and its age and capabilities directly influence your internet speed. If you’re still using a router that’s three or more years old, or worse, one provided by your ISP a decade ago, you’re likely missing out on significant performance improvements. Older hardware simply doesn’t support the latest wireless standards and technologies, creating an unavoidable bottleneck for your internet connection, regardless of the speed you’re paying for.
Investing in a modern router is one of the most impactful hardware upgrades you can make. Newer models support advanced wireless standards like Wi-Fi 6E or even the cutting-edge Wi-Fi 7, which offer vastly improved speeds, greater efficiency, and better handling of multiple devices. Many also come equipped with 10 Gigabit Ethernet (10GbE) ports, providing blistering wired speeds for hardcore gamers, video editing professionals, or anyone with a serious need for speed beyond standard Gigabit. This upgrade not only boosts speed but also expands your network’s overall capabilities.
Beyond purchasing new hardware, keeping your router’s firmware updated is absolutely crucial. Firmware is essentially the operating system for your router, and manufacturers are constantly releasing updates that improve performance, enhance security, and fix bugs. Neglecting firmware updates can leave your router vulnerable to security exploits and prevent it from operating at its optimal speed. It’s like running an old operating system on a powerful computer – you’re simply not getting the full potential.
To update your router’s firmware, you’ll typically need to log into its administration page, usually accessible by typing 192.168.1.1 or 192.168.0.1 into your web browser. Look for a section labeled “Firmware Update” or “System Tools.” Always download the latest firmware version directly from your router manufacturer’s official website (e.g., D-Link, ASUS, TP-Link, Netgear, Synology) and follow their instructions carefully. If your router appears on an “End of Life” list, it’s a strong indicator that it’s time for a replacement to keep up with modern internet demands.
Read more about: Buyer Beware: Unpacking 14 Smart TV Glitches That May Not Make It to Five Years
6. **Adjust Wi-Fi Settings (Frequency Band, Channel, Antennas)**Many users don’t realize their router offers different frequency bands, each with distinct characteristics that can impact performance. Routers typically operate on two main bands: 2.4 GHz and 5 GHz. The 2.4 GHz band is widely used, which often means crowded airwaves and slower speeds due to interference from neighboring networks and other devices. However, it boasts a wider range, making it suitable for devices further away. In contrast, the 5 GHz band is much faster and less prone to interference but has a smaller effective range, meaning speeds drop off more quickly with distance and obstacles.
To optimize, consider changing your preferred frequency band. On Windows, you can do this by searching for ‘Device Manager,’ navigating to ‘Network adapters,’ right-clicking your Wi-Fi adapter, and selecting ‘Properties.’ Under the ‘Advanced’ tab, find the ‘Preferred Band’ property and choose the 5 GHz option from the dropdown list if you’re close to the router and seeking maximum speed. This simple switch can provide an immediate and impressive boost, as verified by personal experiments demonstrating its effectiveness in reducing interference and increasing throughput.
Another critical Wi-Fi setting is your channel selection. Wireless networks operate on various channels, and if too many networks in your vicinity are using the same channel, it leads to congestion and slowdowns. Channels 1, 6, and 11 on the 2.4 GHz band are often recommended as they tend to have the least overlap. To find the least busy channel in your area, utilize tools like inSSIDer or Wi-Fi Analyzer, which scan and display channel usage. Once you identify an optimal channel, log into your router’s settings and manually change it for an instant and effective performance uplift.
Finally, don’t overlook your router’s physical antennas. If your router has movable antennas, their positioning can significantly affect signal strength and coverage. Upgrading to high-gain antennas can extend your router’s range and speed, while directional antennas allow you to focus the signal precisely where it’s needed most. For omni-directional antennas, a simple positioning trick—angling them perpendicularly (one straight up, one sideways)—can maximize coverage and help eliminate dead zones, ensuring a stronger, more consistent signal throughout your home.

7. **Secure Your Wi-Fi Network**An unsecured or poorly secured Wi-Fi network isn’t just a privacy risk; it’s a direct threat to your internet speed. An open network essentially extends an open invitation to anyone within range – whether it’s a neighbor, a passerby, or someone with malicious intent – to connect and use your bandwidth without permission. Every unauthorized device that piggy-backs on your connection siphons off precious bandwidth, leaving less for your legitimate devices and causing noticeable slowdowns.
Implementing robust security protocols is paramount. Always ensure your Wi-Fi network is secured with WPA2 or, even better, the more advanced WPA3 encryption. These protocols create a secure tunnel for your data, preventing eavesdropping and unauthorized access. Alongside strong encryption, setting an equally strong and unique password is non-negotiable. Resist the urge to use easily guessable phrases like “password123” or your street address. A truly secure password should be a complex string of characters, ideally 63 random characters long, which is the maximum length supported by most routers.
Managing these complex passwords can be a challenge, but password managers like Bitwarden can generate and securely store ultra-secure passphrases, taking the burden off your memory. Beyond a strong password, consider hiding your network’s SSID (Service Set Identifier), which is the name of your Wi-Fi network. While not a foolproof security measure, it makes your network invisible to casual snoopers, adding an extra layer of privacy and making it slightly harder for unwanted guests to find and attempt to connect to your Wi-Fi.
Another excellent strategy for maintaining security and speed, especially when you have visitors, is to set up a separate guest network. Most modern routers include this feature, allowing you to create an isolated network with its own password. You can even configure guest networks with limited bandwidth, ensuring your friends and family can connect and browse without inadvertently hogging resources or compromising the speed and security of your main network. This way, you can be a gracious host without sacrificing your own internet sanity.
Read more about: Unlock Ultimate Productivity: Transforming Your Vehicle into a High-Functioning Mobile Office
8. **Try Alternate DNS Servers**Your Internet Service Provider (ISP) automatically assigns you Domain Name System (DNS) servers, which translate website names into IP addresses. While convenient, ISP defaults aren’t always the fastest. They can add delays, making your browsing feel sluggish and slowing down every web request.
Switching to public DNS servers like Google Public DNS (8.8.8.8 and 8.8.4.4) or Cloudflare DNS (1.1.1.1) can significantly boost speed. These services are globally optimized for reliability and enhanced security, often resolving domain names much faster than less optimized ISP servers, especially during peak times.
To change DNS on Windows, open “Control Panel” > “Network and Internet” > “Network and Sharing Center” > “Change adapter settings.” Right-click your active connection, select “Properties,” then choose “Internet Protocol Version 4 (TCP/IPv4)” and click “Properties.” Select “Use the following DNS server addresses” and input your chosen public DNS. For Google, use 8.8.8.8 and 8.8.4.4. Save changes by clicking “OK” twice. This simple tweak bypasses congested ISP servers for quicker page loads and a snappier online experience.

9. **Scan for Viruses & Malware**Malicious software, including viruses and malware, is a significant drain on your internet speed, not just a security risk. Many types operate covertly in the background, constantly communicating with remote servers, uploading stolen data, or participating in botnets. These hidden activities consume substantial bandwidth, leaving less for legitimate tasks and directly contributing to slow speeds and unresponsive connections.
Regularly scanning your computer for these digital intruders is crucial for maintaining both online security and optimal internet performance. A clean system ensures your bandwidth is dedicated to your needs. Even the built-in Windows Security tool provides an effective first line of defense against common threats, alongside more comprehensive third-party solutions.
To perform a quick scan using Windows Security, type “Windows Security” into your search bar and launch the application. Click “Virus & Threat Protection,” then select “Quick Scan Threat Protection.” This initiates a rapid, system-wide scan, and Windows Security is designed to automatically detect and neutralize any issues it uncovers. Keeping your antivirus software updated is vital for a healthier, faster, and more secure internet experience.
Read more about: Fortify Your Digital Fortress: 14 Proactive Strategies to Shield Your Identity from Scammers

10. **Clear Your Browser’s Cache and Temporary Files**Your web browser aims to speed up your online experience by saving small data bits like images and scripts from visited websites into a cache. This helps pages load faster on return visits by retrieving content locally instead of re-downloading it. It’s a clever mechanism designed to streamline browsing.
However, this cache can become counterproductive over time. As you browse numerous sites, it can bloat with outdated, corrupted, or unnecessary files. When the cache is too large, or if stored files no longer match the live website, it can ironically slow down your browsing. The browser spends more time sifting through irrelevant data, leading to errors and sluggish performance.
Regularly clearing your browser’s cache is a powerful maintenance task that instantly improves loading times and resolves various browsing issues. For Google Chrome, click the three-dot icon > “More tools” > “Clear browsing data.” Ensure “Cached images and files” is checked, set the time range to “All time,” then click “Clear Data.” This ensures your browser operates at peak efficiency, unhindered by old data.

11. **Prioritize Traffic with QoS (Quality of Service)**In a busy home network with multiple devices and users, bandwidth is often a contested resource. Without proper management, all internet traffic – from 4K streaming to online gaming and video calls – competes equally, causing congestion and frustrating slowdowns. Quality of Service (QoS) settings on your router act as a traffic controller, ensuring your most critical activities receive preferential treatment.
QoS allows you to specify which applications, devices, or types of internet traffic should take precedence. For instance, prioritize your work VPN or a crucial video conference, guaranteeing smooth, uninterrupted communication even if others are simultaneously downloading large files or streaming high-definition content. It’s an intelligent way to allocate available bandwidth, preventing vital tasks from getting bogged down.
Access QoS settings by logging into your router’s administration page (usually via 192.168.1.1 or 192.168.0.1). Look for “QoS,” “Bandwidth Management,” or “Traffic Prioritization.” While interfaces vary, you’ll find options to create rules based on application types or specific devices. Configuring QoS enhances the *perceived* speed and reliability for your most important activities, making your network operate more efficiently for diverse usage demands.

12. **Purge Background Apps & Disable Auto-Play Videos**Modern operating systems and apps often run background processes, fetching data even when inactive. While sometimes useful, these operations constantly consume bandwidth and system resources. These invisible processes subtly but significantly drag down your overall internet speed and responsiveness, especially on devices with limited processing power.
Taking charge of ‘bandwidth vampires’ involves actively managing running applications. On Windows, Task Manager (Ctrl+Shift+Esc) is key. Navigate to “Processes,” sort by “Network” usage, and identify non-essential apps. Closing unnecessary applications—like cloud sync services, inactive messaging clients, or excessive browser tabs—immediately frees up valuable resources.
Auto-play videos are another major bandwidth culprit on many websites and social media. They start automatically, consuming data and CPU cycles without consent. This delays page loading and increases data usage, problematic with data caps. Most modern browsers offer settings to disable or restrict auto-play. For Chrome, go to “Settings” > “Privacy and security” > “Site Settings,” and manage “Sound” or “Autoplay” options. Limiting background processes and unsolicited media playback reclaims bandwidth for a faster, more focused online experience.

13. **Optimize Your Network Adapter Settings**Your device’s network adapter, for both Wi-Fi and Ethernet, has advanced settings often overlooked. Out-of-the-box, these prioritize compatibility over peak speed. Fine-tuning these configurations ensures your adapter communicates with the router efficiently, removing potential bottlenecks at your device’s connection point.
For Wi-Fi adapters, focus on “Preferred Band” or “Wireless Mode.” If your router supports 5 GHz and your device is close, explicitly setting your adapter to prefer 5 GHz (e.g., 802.11ac or 802.11ax) significantly reduces interference and boosts speeds compared to the congested 2.4 GHz band. Always ensure your wireless mode is set to the highest standard your hardware supports.
For wired Ethernet, the “Speed & Duplex” setting is vital. This controls the maximum speed and communication method. While “Auto Negotiation” is usually ideal for 1 Gbps Full Duplex, manual adjustment (e.g., “1.0 Gbps Full Duplex”) can sometimes resolve performance issues. Access these settings via “Device Manager” > “Network adapters” > right-click adapter > “Properties” > “Advanced” tab. Adjust with care, noting original settings. These granular tweaks enhance connection speed and stability.
Read more about: Beyond the Burn: 14 Essential Strategies to Keep Your Gaming Laptop Cool and Maximize Performance

14. **Block Ads and Trackers**Online advertisements and web trackers are more than visual annoyances; they significantly hinder internet speed and data efficiency. Every ad banner, pop-up, and tracking script forces your browser to download extra data and execute more code. This cumulative burden slows page loading, increases bandwidth consumption, and contributes to a sluggish browsing experience.
Implementing a reliable ad-blocking browser extension is the most direct solution. Tools like uBlock Origin or AdBlock Plus are popular for intercepting and preventing ads from loading entirely. By blocking these resource-intensive elements, your browser concentrates on rendering actual webpage content, resulting in dramatically faster loading times and a much cleaner, less cluttered online environment. This is a direct, measurable performance boost.
Beyond ads, web trackers are stealthy scripts that monitor online activity and follow you across different websites. While primarily for data collection, they also contribute to slower browsing speeds by adding overhead. Extensions like Privacy Badger actively identify and block these third-party trackers, optimizing browsing efficiency and bolstering digital privacy simultaneously.
For a comprehensive solution, consider DNS-level ad-blocking. This advanced method filters ads and trackers at the network level, meaning *all* devices connected to your network—including smartphones and smart TVs—benefit from an ad-free experience without individual browser extensions. Solutions like Pi-hole, or certain advanced routers, block known ad/tracker domains before they ever reach your devices, offering a truly cleaner, faster internet across your entire home.
By proactively blocking ads and trackers, you’re not only safeguarding privacy and decluttering your online world but also directly contributing to a significantly faster internet experience. Less extraneous data means more bandwidth for the content you want to see, making your browsing quicker, more responsive, and ultimately far more enjoyable.
Read more about: Trouble on the Update: 13 Smartwatches Users Wish They Never Synced to Their Phone.
So there you have it – 14 robust steps to help you reclaim control over your internet speed and transform your online experience from frustratingly slow to lightning-fast. From foundational hardware tweaks to advanced software configurations and savvy bandwidth management, each tip offers a practical pathway to better performance. Remember, a faster internet connection isn’t just about raw speed; it’s about a smoother, more efficient, and ultimately more enjoyable digital life. Don’t settle for less than you’re paying for – empower yourself with these solutions and get ready to surf, stream, and game like never before!


