

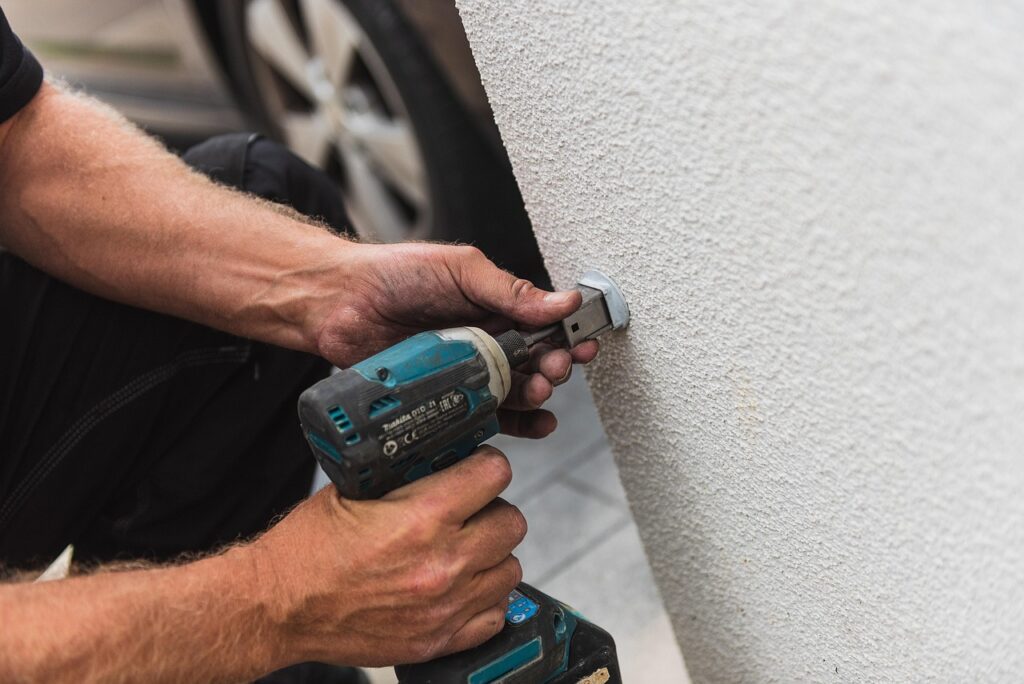
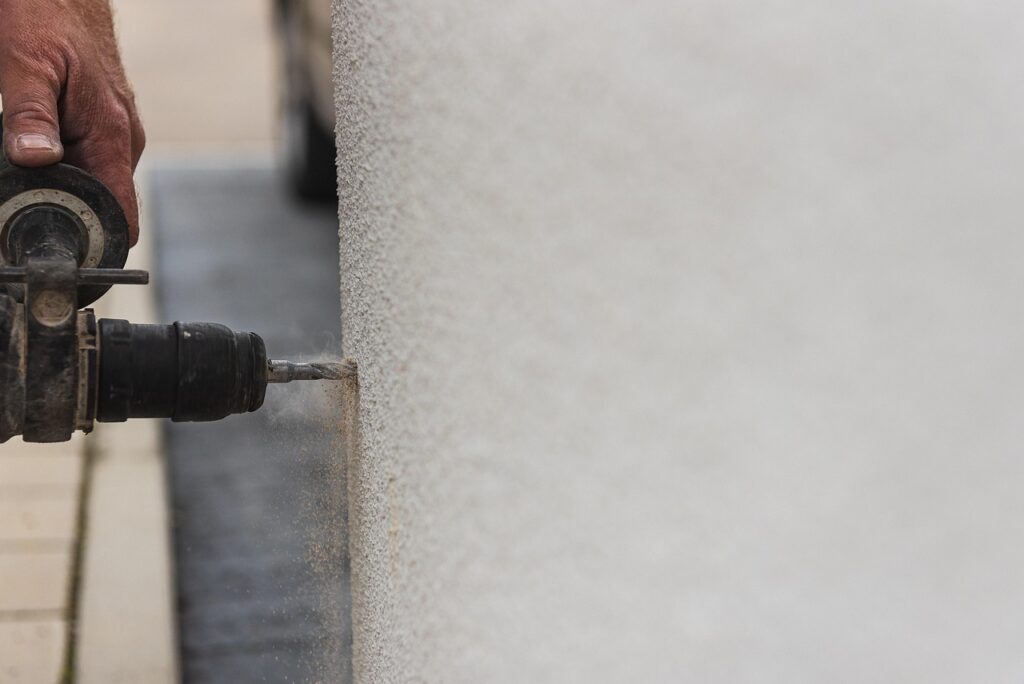
The world of home repair often feels like a secret society, guarded by seasoned handymen who wield specialized tools and even more specialized knowledge. Many homeowners feel intimidated, believing that anything beyond changing a lightbulb requires calling in a professional. However, the truth is far less daunting than it seems. With a little guidance, some basic tools, and a willingness to get your hands dirty, you can tackle a surprising array of common household and automotive problems yourself, saving significant money and gaining immense satisfaction.
This comprehensive guide is designed to peel back the curtain on those seemingly complex fixes, revealing practical, actionable advice that empowers you to become your own home repair hero. We’ve compiled essential tricks and step-by-step insights that handymen often keep to themselves, not out of malice, but because they simply assume you’ll call them. From revitalizing tired floors to silencing noisy cabinets and resolving minor plumbing woes, these DIY solutions are well within the reach of anyone looking to enhance their practical skills and maintain their property with confidence.
Get ready to transform your approach to home maintenance. We’re about to dive into a collection of indispensable repair strategies that are clear, concise, and incredibly effective. Each trick is presented with a focus on problem-solving, ensuring you understand not just “how” to fix it, but also “why” it works, making you a more knowledgeable and capable DIYer. Let’s equip you with the know-how to tackle those nagging issues and keep your home running smoothly.

1. **Refinish Your Own Hardwood**Hardwood floors add undeniable warmth and elegance to any home, but over time, they can lose their luster, suffering from scratches, scuffs, and general wear. The thought of refinishing them often conjures images of dust-filled rooms, expensive contractors, and weeks of disruption. However, this seemingly daunting project is surprisingly accessible for the dedicated DIYer. With a bit of time and determination, you can restore your floors to their former glory, saving a substantial amount compared to professional services.
The key to tackling this project is understanding your floor’s condition. If your floors are merely dull or lightly scratched, a simple buffing and recoating might suffice, eliminating the need for extensive sanding. This less aggressive approach is perfect for revitalizing the surface without removing too much of the existing wood. Your local hardware store is an invaluable resource, offering rental equipment like floor buffers for periods ranging from 4 to 48 hours, providing flexibility for your schedule.
When preparing for the task, ensure the room is completely clear of furniture and thoroughly cleaned. Any grit or debris left on the floor can cause further scratches during the refinishing process. If your floor requires more significant repair, such as deep gouges or areas where the finish has completely worn through, then sanding might be necessary. While it’s a more intensive step, modern sanding equipment is designed for user-friendliness, making it manageable even for those new to such projects. Remember, patience and proper preparation are your best allies in achieving a beautifully refinished hardwood floor that will impress for years to come.
Read more about: 12 Costly Home Upgrades That Actually Shrink Your House’s Resale Value
2. **Fix a Patchy Lawn**A patchy, struggling lawn can be a source of frustration for any homeowner, often leading to the assumption that only expensive, chemical-heavy lawn services can bring it back to life. However, cultivating a lush, green expanse doesn’t require a constant struggle or a hefty bill. The secret lies in understanding the basic needs of your grass and providing them at the right time, a skill that is entirely within the grasp of the average DIY enthusiast.
The process of repairing a patchy lawn typically begins with understanding the cause of the patches. Is it lack of water, poor soil nutrition, excessive foot traffic, or perhaps a pest issue? Once identified, addressing the root cause is crucial. For instance, if soil compaction is an issue, aeration can significantly improve water and nutrient penetration. Overseeding bare spots with a grass seed variety suitable for your climate and sun exposure is a fundamental step.
Beyond seeding, proper feeding and watering are paramount. Knowing what nutrients your lawn needs, often determined by a simple soil test, and applying the correct fertilizer at optimal times will encourage strong, healthy growth. Consistent, deep watering, rather than frequent shallow sprinkles, promotes deeper root development, making your grass more resilient. By taking a proactive and informed approach, you can transform a sparse, unsightly lawn into a vibrant green carpet without resorting to expensive professional interventions or an overload of chemicals.
Read more about: Mastering Your Winter Lawn: An Expert Guide to Optimal Grass Cutting for a Thriving Spring

3. **Garbage Disposal Repair**The garbage disposal is a marvel of modern kitchen convenience, making quick work of food scraps and minimizing waste. However, its noisy operation and internal “blades” (which are actually impellers that grind, not slice) can make it seem like an intimidating appliance to repair. Many homeowners instantly think of calling a plumber at the first sign of trouble, whether it’s an unpleasant odor or a worn-out component. The good news is that many common garbage disposal issues are surprisingly simple DIY fixes.
One of the most frequent complaints about garbage disposals is a lingering, foul odor. This is almost always caused by food scraps and gunk accumulating inside the grinding chamber and splash guard. Fortunately, eliminating this stench is straightforward. You can often clean it out by running ice cubes and rock salt, followed by citrus peels, through the disposal. This combination helps to scour the interior and leave a fresh scent, a simple routine that can prevent odors from taking hold in the first place.
Beyond odors, minor mechanical issues are also within reach. If the rubber splash guard, which prevents debris from flying out, becomes brittle or torn, replacing it is a quick job that can be done in about 20 minutes. Should the disposal cease to function entirely, often a simple reset button on the bottom of the unit is all that’s needed. Even the full replacement of a disposal unit, while requiring a bit more effort, is a project many homeowners can tackle, typically involving disconnecting plumbing and electrical lines and installing the new unit, offering significant savings over a professional installation.
Read more about: Don’t Let These Simple Mistakes Cost You! How to Avoid Instantly Voiding Your Home Warranty

4. **Fix Loud Cabinet Doors**The incessant banging of cabinet doors can be one of those small, daily annoyances that gradually erode household peace. Every time a drawer slides shut or a cabinet door closes with a jarring thud, it creates an unnecessary disturbance that can grate on your nerves. While some might consider replacing hinges or installing complex soft-close mechanisms, the solution to this common problem is surprisingly simple, incredibly inexpensive, and takes mere minutes to implement.
The unsung heroes of quiet cabinets are peel-and-stick door and drawer bumpers. These small, clear, adhesive-backed pads are designed to cushion the impact when a cabinet door or drawer front meets the frame. Available in packs of 20 or more for just a few dollars at any home center or online retailer, they are a minor investment for a major improvement in your home’s tranquility. Their subtle design means they blend seamlessly with your cabinetry, providing a functional benefit without compromising aesthetics.
Installation is as easy as it gets: simply ensure the back of the cabinet door or drawer front is clean and dry for optimal adhesion. Then, strategically place one bumper at the top corner and another at the bottom corner where the door or drawer makes contact with the cabinet frame. The soft material absorbs the shock, transforming harsh impacts into gentle closures. This quick fix not only eliminates annoying noise but also protects your cabinet finishes from wear and tear, extending their lifespan with minimal effort.
Read more about: 11 Essential Strategies for Small Businesses to Fortify Defenses Against Major Cyberattacks
5. **Get Dents Out of Wood**Dents in wood furniture, floors, or trim are common battle scars of daily life, often leaving an unsightly mark that detracts from the beauty of the wood. Whether it’s from a dropped object, a clumsy move, or general wear and tear, these indentations can be incredibly annoying. Many assume that repairing a dent requires sanding, filling, or even professional restoration, which can be time-consuming and costly. However, there’s a remarkably simple, effective, and almost magical DIY trick that can often lift shallow to medium-depth dents right out of wood.
This ingenious method leverages the natural properties of wood and steam. Wood fibers, when compressed, are forced down, creating the dent. The application of moisture and heat can cause these fibers to swell and expand, essentially pushing them back up to their original position. The beauty of this technique lies in its accessibility: you only need two common household items – a damp cloth and a clothes iron. No special tools or chemicals required, just a bit of careful application.
To perform this trick, first, ensure the wood surface is clean and free of dust or debris. Take a damp cloth (not soaking wet, just thoroughly moistened) and place it directly over the dent. Then, with your iron set to a medium-high heat setting (without steam), gently press the iron onto the damp cloth, directly over the dent. Move the iron slowly in small circles for about 10-20 seconds, allowing the steam to penetrate the wood fibers. Periodically lift the cloth to check the progress. You may need to repeat this process a few times, re-dampening the cloth as needed, until the dent gradually rises. Watch in amazement as the wood fibers rebound, making those annoying dents virtually disappear, revealing a smoother, restored surface.
Read more about: Remember Them? 15 Celebrities Who Are Legit Unrecognizable From 10 Years Ago (And Will Make You Say ‘Wait, What?!’)

6. **Weatherstripping is Easy**In the constant battle against rising energy bills and uncomfortable drafts, proper insulation is a homeowner’s best friend. One of the most overlooked yet impactful areas for energy loss is around exterior doors. If you can spot a sliver of light peeking through the gaps beneath or around your doors, you’re not just seeing light—you’re watching your hard-earned money escape in the form of heated or cooled air. This seemingly minor issue can have a significant cumulative effect on your utility costs, making your HVAC system work harder than necessary.
Fortunately, sealing these energy leaks is one of the simplest and most cost-effective DIY home improvements you can undertake: installing or replacing weatherstripping. This project requires minimal tools and expertise, yet yields immediate and noticeable benefits. Self-adhesive rubber foam weatherstripping, readily available at any hardware store, is the go-to solution. It’s designed for easy application, allowing you to quickly and effectively seal the perimeters of all external doors.
Even if your home already has weatherstripping, it might be outdated or degraded, especially if it was installed by previous owners. Over time, rubber can become brittle, compressed, or lose its adhesive quality, rendering it ineffective. A tell-tale sign that it’s time for a replacement is a persistent high gas or electricity bill despite other energy-saving efforts. Replacing old, worn-out strips with new ones is a straightforward process of peeling off the old and pressing on the new, ensuring a snug, air-tight seal that will help regulate your indoor temperature, reduce drafts, and most importantly, lower those burdensome energy expenses. It’s an investment that pays for itself quickly, offering enhanced comfort and savings for years to come.
Read more about: Revitalize Your Ride: 15 Simple Yet Transformative Ways to Make Your Old Car Feel Years Newer

7. **Unclog Clogged Drains**A sluggish or completely stopped drain is one of the most common and frustrating plumbing issues a homeowner faces. The immediate instinct for many is to reach for harsh chemical drain cleaners or, worse, to immediately call a plumber, incurring an often-steep service charge. However, the vast majority of clogged drains—whether in a bathroom sink, shower, or kitchen sink—are caused by easily removable culprits like hair, soap scum, or greasy grime. With the right approach and a few simple tools, you can resolve these blockages yourself, saving money and avoiding potentially damaging chemicals.
The first line of defense against most drain clogs is the humble plunger. This essential tool creates hydraulic pressure that can dislodge blockages without the need for corrosive substances. For sinks, ensure there’s enough water to cover the plunger’s cup, create a tight seal over the drain, and then pump vigorously. For tubs or showers, you might need to cover the overflow plate with a wet rag to ensure maximum suction. Consistent, forceful plunging can often clear even stubborn hairballs and soap buildup, restoring free flow in minutes.
If plunging doesn’t work, consider a drain snake or auger, a tool that can reach deeper into your plumbing to physically pull out or break up clogs. These are inexpensive to purchase and simple to operate, allowing you to clear blockages that are further down the pipe without professional help. Furthermore, adopting preventative measures, such as using drain screens to catch hair and food particles, regularly flushing drains with hot water and soap, and avoiding pouring grease down the sink, are invaluable DIY skills that minimize future clogs and keep your plumbing running smoothly, empowering you as the master of your home’s water flow.
The first section introduced seven critical DIY fixes that empower homeowners. Now, let’s continue our journey of self-sufficiency, revealing even more invaluable tricks that can save you time, money, and the hassle of calling a professional. These solutions address common annoyances around your home and even your vehicle, equipping you with the practical skills to maintain and improve your property with confidence, all while adhering to the actionable, authoritative guidance you expect from a trusted source.
Read more about: The Ultimate Guide: 11 Easy, Chemical-Free Ways to Conquer Clogged Drains for a Healthier Home
8. **How to Touch Up Chipped Auto Paint**Ignoring paint chips on your vehicle is a recipe for a much larger, rust-related problem down the road. Those seemingly minor imperfections, if left uncovered, will inevitably lead to rust, compromising your car’s aesthetics and structural integrity over time. Fortunately, repairing chipped car paint is an easy and cost-effective DIY task that any car owner can tackle, preventing expensive body shop visits in the future.
To successfully touch up chipped paint, you’ll need just a few readily available items. Begin by purchasing color-matched touch-up paint, fine-tip paint applicators, and a wax and grease remover from any auto parts store. The initial and crucial step is to clean the chip thoroughly. Use the wax and grease remover to ensure the area is free of any contaminants, allowing the new paint to adhere properly and create a seamless finish. Allow the cleaned surface to dry completely before proceeding.
Once the chip is clean and dry, it’s time for application. Dip your fine-tip applicator into the touch-up paint and carefully dab it onto the chip. Precision is key here; “Don’t add too much or the paint will drip,” creating an even larger visible flaw. Apply the paint in thin layers, allowing each layer to dry thoroughly. Once the final application is completely dry, which can take some time, enhance the protection and shine by applying wax to the area after 30 days. This final step helps to finish your car paint touch-up, blending it with the surrounding paintwork and protecting the repaired area.
Read more about: Shift Happens: 11 Legendary Car Designs That Burned Bright, Then Faded Away
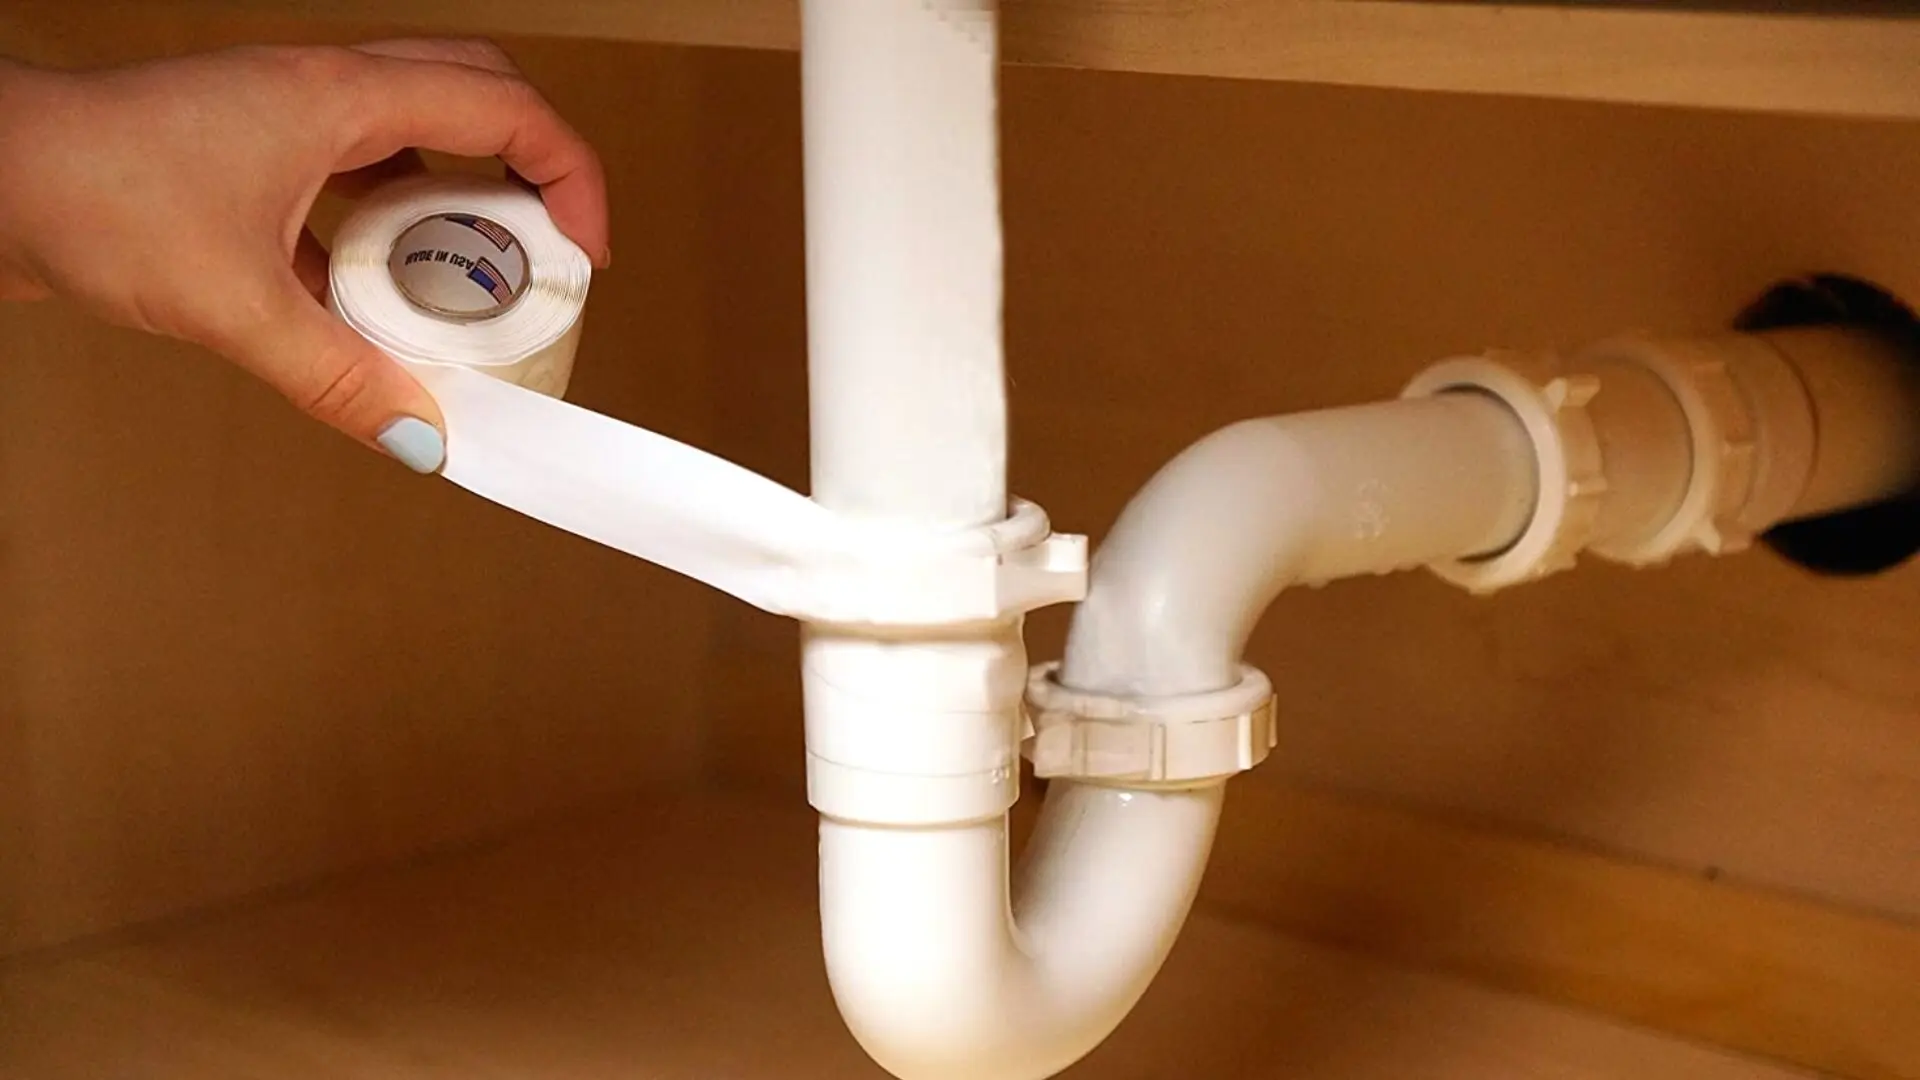
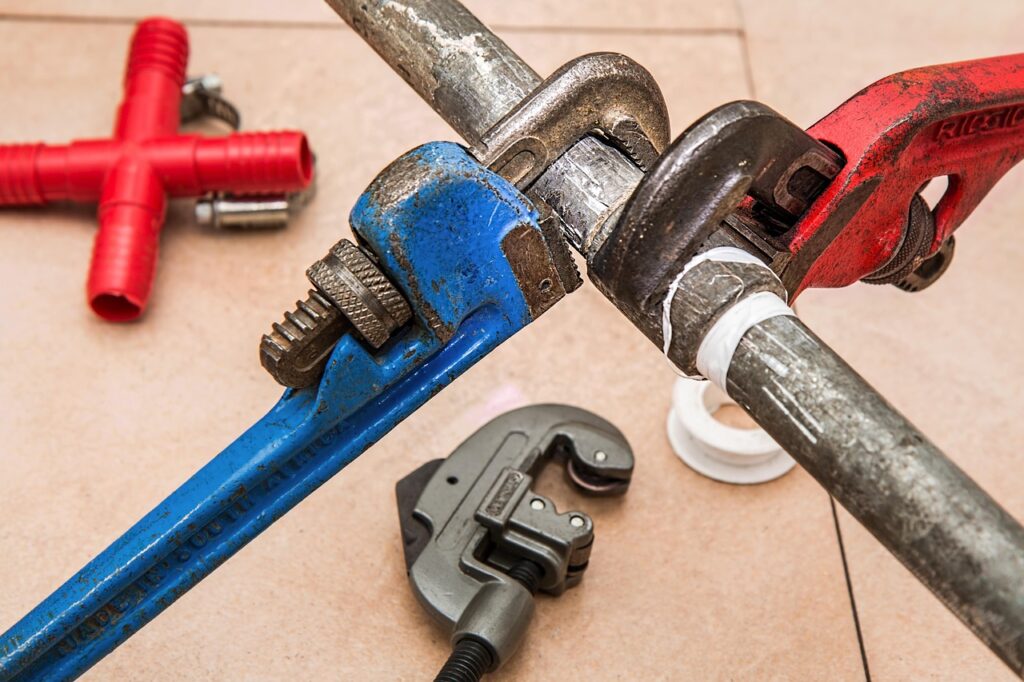
9. **Fix Leaking Plumbing Pipes**Few things cause more homeowner anxiety than the discovery of a leaking plumbing pipe. Even a small, slow drip can lead to significant and expensive damage over time, including wood rot, mold growth, and compromised structural elements. The common assumption is that a plumbing leak immediately warrants a costly professional service call. However, many common water leaks are surprisingly simple to locate and stop yourself, provided you act promptly and methodically.
These persistent drips often manifest in predictable areas around your home. You’ll frequently find most of these leaks around bathtubs and showers, where seals can degrade, or around drains, sinks, and toilets, where connections can loosen or washers can fail. The key to successful DIY repair is a thorough inspection of these high-risk zones. Look for tell-tale signs like water stains on ceilings or walls, dampness around fixtures, or small puddles. Identifying the exact source is the first step toward a lasting fix, transforming a vague problem into a concrete repair task.
While finding and repairing plumbing leaks can be tricky, it’s absolutely possible to DIY. Armed with a basic understanding of your home’s plumbing and a few common tools, you can confidently address many of these issues. Whether it’s tightening a compression fitting, replacing a worn washer in a faucet, or applying pipe thread sealant, taking a proactive approach to these leaks will not only save you from hefty repair bills but also protect your home from extensive water damage. Empower yourself to become the frontline defender against hidden leaks and keep your home’s plumbing system secure and efficient.
Read more about: Unexpected Appliance Disasters: 10 Common Breakdowns That Cause Genuine Homeowner Panic – And How to Tackle Them Confidently
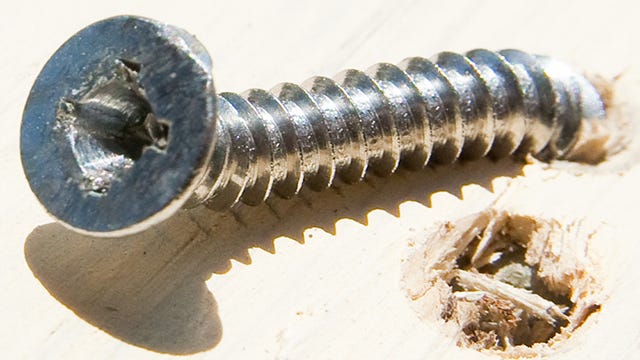
10. **Stripped Screws? No Problem**There are few things more frustrating in DIY than encountering a stripped screw. What should be a quick, straightforward fastening or removal can quickly devolve into a two-hour nightmare of failed attempts, cursing, and further damage to the workpiece. When the screw head’s indentations are so worn that a screwdriver or drill bit can’t gain purchase, progress grinds to a halt, leaving you with an unfinished project and mounting aggravation.
However, there’s a simple, inexpensive solution that every DIYer should have in their toolkit: a screw extraction kit. This invaluable set is “one of the best investments a DIYer can make,” designed specifically to address this common and infuriating problem. Typically costing about $20, these kits come with multiple bits, often three different sizes, ensuring you have the right tool for various screw sizes and types, making it a versatile addition to your workshop.
The genius of a screw extraction kit lies in its dual-ended design. One side of the extractor bit is engineered to ream a small hole into the center of the stripped screw head. Once this pilot hole is created, you simply flip the bit to the other side. This side features reverse threads that are designed to dig firmly into the newly reamed hole as you turn it out. This counter-clockwise action provides the necessary grip to extract even the most stubbornly stripped screws, transforming a once daunting challenge into a manageable, even satisfying, repair.
11. **Fix Wobbly Furniture with a Penny**That annoying wobble in your favorite bench or kitchen table isn’t just a minor irritation; it’s a constant reminder of instability and can even lead to spills or damage. While the immediate thought might be to invest in complex woodworking fixes or specialized shims, the solution to steadying rickety furniture can be found right in your pocket. This ingenious trick leverages everyday items to achieve a perfectly level and stable surface.
The secret to this simple fix lies in utilizing a common coin and a hot glue gun. The coin, whether it’s a penny, nickel, or dime, acts as a perfect, readily available shim to compensate for uneven furniture legs. It’s an incredibly accessible method that bypasses the need for costly specialized tools, making it an ideal solution for any homeowner seeking an immediate and effective remedy for frustrating wobbles.
Implementing this fix is remarkably straightforward. Begin by identifying the specific leg that’s causing the wobble. Then, apply a small, controlled drop of hot glue onto one side of your chosen coin. Carefully attach this glued coin to the problem area on the bottom of the short leg, ensuring it’s positioned to fill the gap causing the instability.
The hot glue provides a secure, yet reversible, bond, allowing the coin to act like a sturdy shim, leveling out the furniture piece instantly. You can even use a slice of synthetic cork, as mentioned in the context, along with glue for a similar effect, providing versatile options for this quick and effective stability hack that keeps your furniture rock-solid.
Read more about: 12 Ingenious Home Hacks: Transform Everyday Items into Powerful Problem-Solvers for a Smarter, More Efficient Home

12. **How to Replace Auto Lights**Your vehicle’s lighting system is far more than just a convenience; it’s a critical safety feature that ensures visibility for both you and other drivers on the road. When an auto light bulb burns out, it can significantly affect your driving experience and, more importantly, your safety. While some drivers might immediately head to a mechanic for this seemingly technical fix, replacing most automotive light bulbs is a straightforward DIY task that requires minimal mechanical expertise and can save you valuable time and money.
Certain auto light bulbs are known to burn out more frequently due to their constant use and exposure to vibrations. The most common culprits include taillight, stop, turn signal, backup, and headlight bulbs. However, the comprehensive lighting system of your vehicle means there are “many other bulbs in a vehicle that could use your attention, too,” from interior cabin lights to license plate illuminators. Maintaining all these lights ensures optimal visibility and adherence to road safety regulations.
This guide is designed to empower you by showing you “how to replace automotive light bulbs that often burn out and can affect your driving experience.” The process typically involves accessing the bulb housing, which is often as simple as opening the hood or trunk, twisting a socket, and replacing the old bulb with a new one. By learning these basic replacement techniques, you’ll be able to quickly address issues as they arise, keeping your vehicle safely lit and avoiding unnecessary service charges for what is fundamentally a simple and accessible repair.
Read more about: Guard Your Investment: 15 Worst Storage Mistakes That Could Ruin Your Classic Car Over a Decade

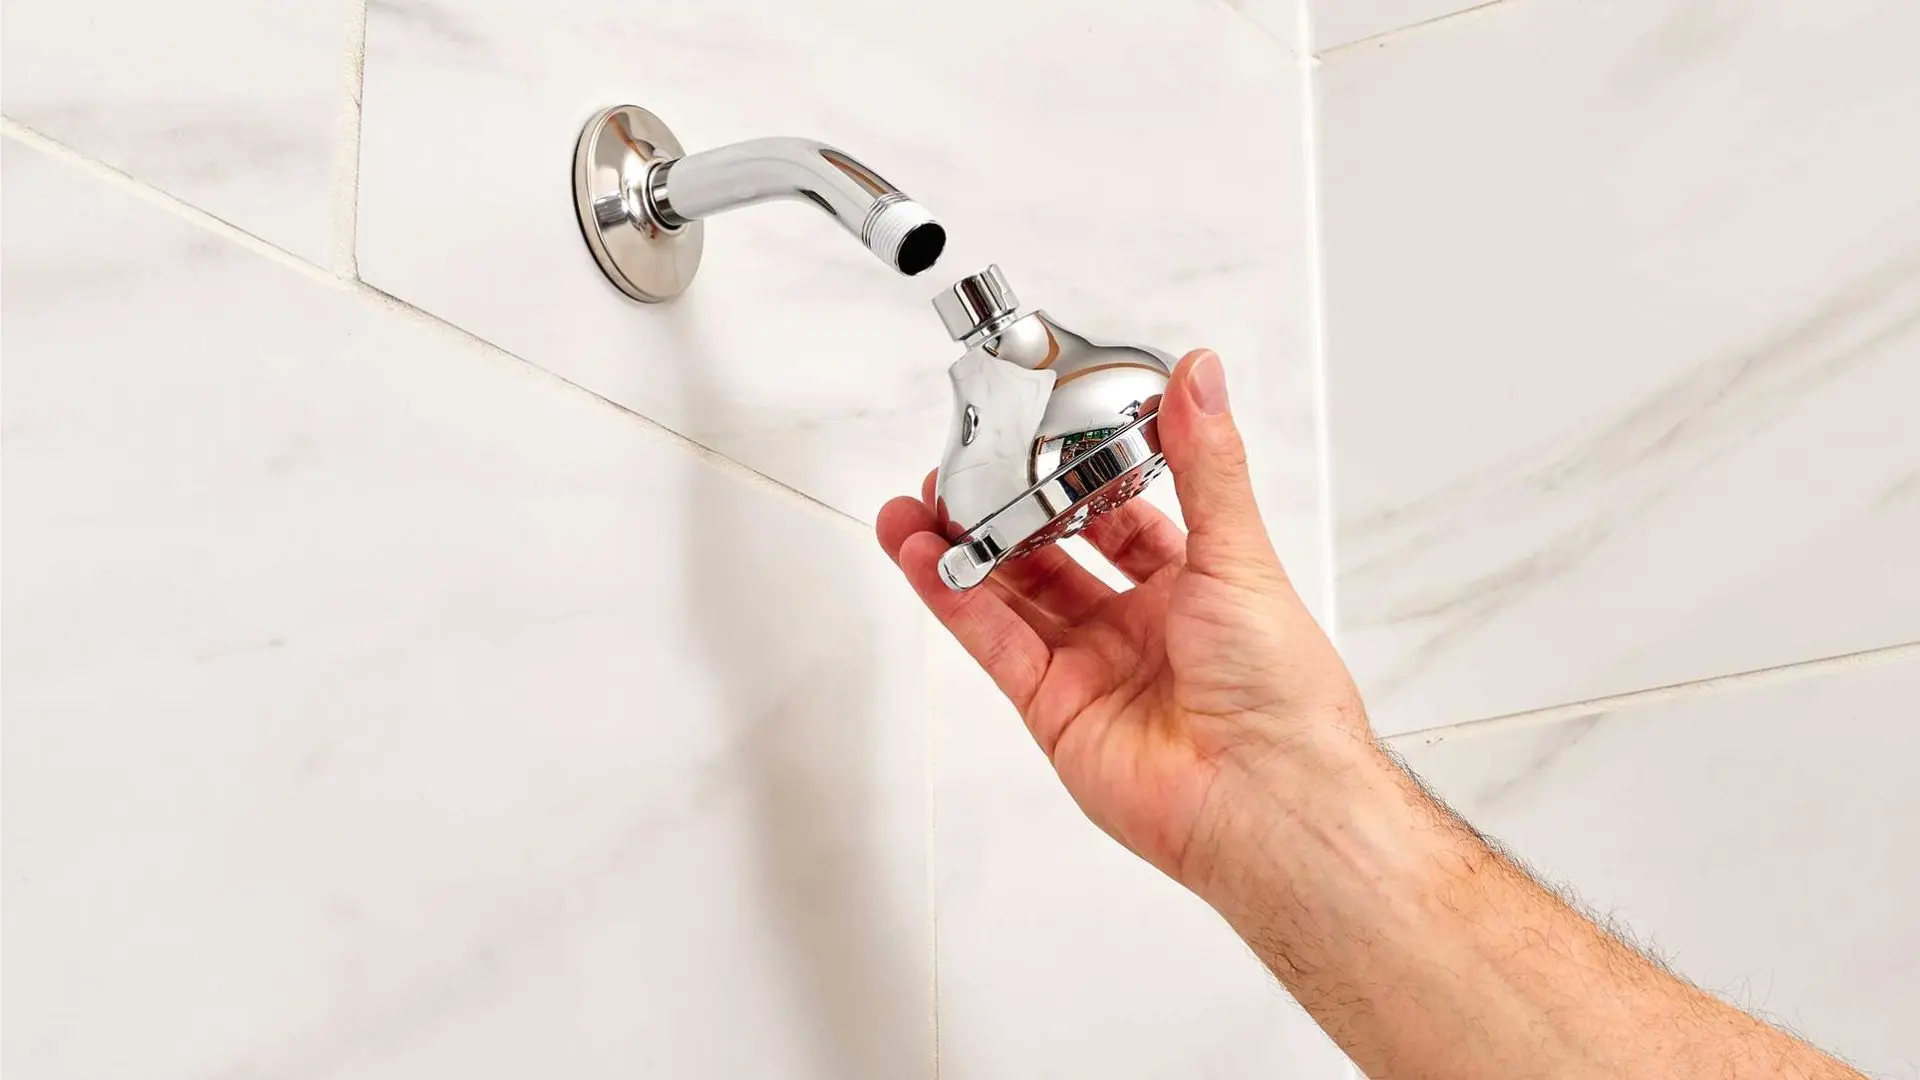
13. **Foam a Loose Showerhead**The daily annoyance of a wobbly showerhead can detract from what should be a relaxing experience. Beyond the discomfort, a loose showerhead often indicates that the pipe connection within the wall is not secure, leading to instability that could, over time, affect the plumbing. Many homeowners might resign themselves to this persistent wobble or consider invasive and costly repairs. However, an incredibly easy home fix exists that can solve this problem quickly and effectively, making your showerhead work like new.
The secret to this simple yet powerful repair lies in a can of expanding foam. This versatile product provides a robust, stabilizing solution for “any wobbly pipe,” and it extends far “beyond the bathroom” to address similar issues around the house. When applied, the foam expands to fill the void around the pipe within the wall, effectively encasing it and locking it firmly into place. This eliminates the movement that causes the wobble, restoring stability and functionality.
The application is remarkably straightforward: “a few squirts of expanding foam” are often all that’s required. Once cured, the foam creates a firm, supportive bond that prevents future wobbling, ensuring your showerhead remains steadily aimed exactly where you want it. This quick and unintrusive fix not only resolves the immediate problem but also offers a durable solution, proving that “Can you think of an easier home fix?” is a truly fitting question for this ingenious DIY trick.
Read more about: Navigating the New Economic Reality: What Tariffs Mean for Your Wallet and What to Buy Now
14. **Fix a Running Toilet: Flush Without Hang-Ups**A running toilet is one of the most common and irritating household issues, not only creating a persistent, annoying noise but also silently wasting significant amounts of water and driving up your utility bills. While the mechanics of a toilet can seem complex, often the cause of continuous running water is surprisingly simple and can be resolved with a quick, ingenious DIY trick, allowing you to avoid a costly plumber’s visit.
One of the frequent culprits behind a running toilet is a kinked toilet chain. This small chain connects the flush lever to the flapper valve, and if it becomes tangled or too taut, it prevents the flapper from fully sealing, allowing water to continuously flow from the tank into the bowl. This is a purely mechanical issue, and its fix is elegantly simple, requiring no special tools or advanced plumbing knowledge.
To permanently resolve a running toilet caused by a kinked chain, simply remove the chain from the arm attachment inside the tank. Then, take a standard plastic straw and slide it over the flapper chain, covering approximately two-thirds of its length. This simple addition acts as a stiffener, preventing the chain from kinking again. Finally, reattach the chain to the arm. “It’s that simple, and you’ll never have a running toilet caused by a kinked chain again,” ensuring quiet operation and significant water savings by becoming the master of your toilet’s internal mechanisms.
There you have it—a treasure trove of handyman secrets, now yours to command. From silencing squeaky cabinets to revitalizing dull floors, tackling plumbing leaks, and even performing cosmetic repairs on your car, these practical DIY tricks empower you to take charge of your home’s maintenance. Embrace these simple, actionable solutions, and transform yourself from a homeowner who calls for help into a confident, capable DIYer, ready to fix, build, and understand how things work. Your home, and your wallet, will thank you.


