

Life, with its dizzying pace and endless to-do lists, frequently leaves us seeking quick solutions, particularly in terms of our dietary choices. We have all experienced such situations: gazing into an empty refrigerator after a protracted day, with the alluring call of takeout merely a phone call distant. However, what if there existed a straightforward, empowering approach that not only promises delectable home-cooked meals but also brings forth a multitude of benefits for your well-being, your financial situation, and your tranquility of mind? Friends, it is time to discuss meal preparation, and trust me, by the end of this discussion, you will be eager to commence this very weekend!
At its core, meal prepping is truly one of the most efficacious ways to regain control over your food consumption, transforming what often feels like a daily struggle into a stress-free, cost-efficient, and profoundly gratifying journey towards your health and wellness objectives. It is not merely about cooking; it is about intentional living, about making deliberate choices that have a positive ripple effect throughout every facet of your life. The question is not “Can I do it?” but rather, “Why haven’t I done this sooner?”
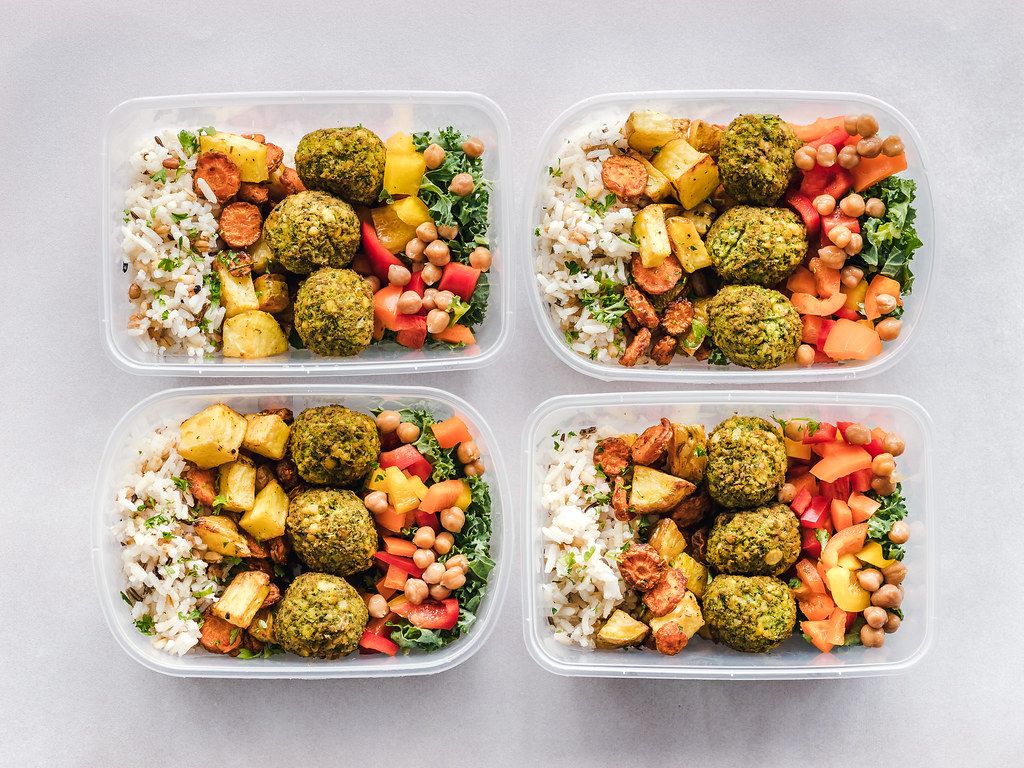
Many of us have encountered those meticulously curated photographs of neatly arranged meals adorning social media feeds, perhaps igniting a spark of curiosity or even a tinge of intimidation. But here is the wonderful truth: meal prepping is not a rigid, one-size-fits-all system. It embraces flexibility, adapting to your unique rhythm and requirements. As Jessica Hicks, a registered dietitian at NorthShore, aptly illustrates, meal prep can take on numerous forms. You may prepare meals for five days or just one. You could opt to prepare each meal in its entirety, or perhaps, like many experienced preppers, you might simply prepare separate ingredients—think pre-chopped vegetables or pre-cooked meats—to significantly expedite your cooking process later in the week.
No matter how profoundly you delve into the realm of meal preparation, the fundamental recommendation remains unwavering: it empowers you to meticulously consider your food intake and, most crucially, create meals that you will genuinely relish. This is not about insipid, repetitive eating; it is about crafting a culinary experience customized to your palate, ensuring that every bite brings both nourishment and delight. It is about adopting a proactive rather than a reactive stance, a mindset that can significantly transform your relationship with food.
Let us explore the indisputable advantages that render meal preparation not merely a sound idea, but a truly transformative practice. First and foremost, the health benefits are substantial and immediate. Envision having a repertoire of well – balanced, delectable meals prepared and at the ready, eliminating the guesswork and the impulsive decisions that so frequently thwart our best intentions. Meal preparation guarantees consistent access to nutrient – dense foods, making healthy eating the norm rather than an arduous struggle.
One of the most potent aspects of meal prepping is its capacity to assist you in regulating your food intake and remaining firmly on course with your personal dietary goals. It enables you to savor your favorite meals, but with pre – established portion sizes, providing you with the mindful control necessary to ensure that you do not overindulge. This is not about deprivation; it is about conscientious enjoyment and comprehending the appropriate balance for your body. It is a game – changer for anyone seeking to establish sustainable healthy habits.
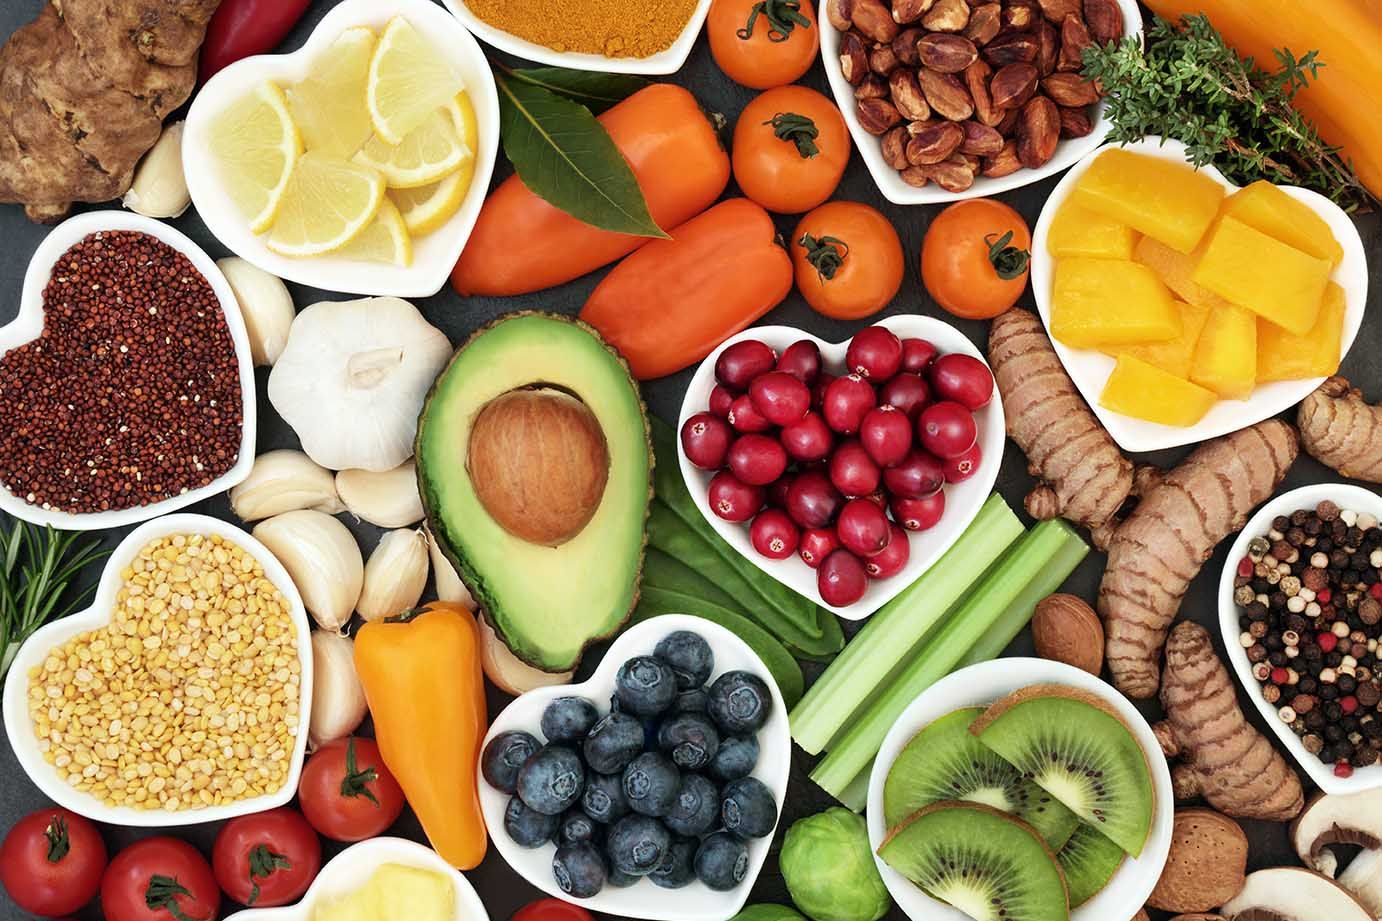
Basheerah Enahora, a registered dietitian and the owner of BE Nutrition, strikes the mark precisely when she states, “I definitely think meal prepping helps us with just living well in general.” This is not merely a dietary strategy; it is a lifestyle enhancer. When we devote a modicum of thought and planning to our food, we naturally gravitate towards making wiser choices, from the grocery store aisles to our dinner plates. Having a pre – determined list means you are more likely to select “really nutrient – rich foods,” setting you up for success even before you commence cooking.
Recipe details: Meal Prep Muffin Tin Egg Bites
Cook time: 10 min Total time: 35 min
Level: Easy Servings: 12 egg muffins
Energy: 0 kcal Protein: 0 g
Carbs: 0 g Fat: 0 g
Dish Tags:
Ingredients:
Nonstick cooking spray
10 large eggs
2 teaspoons kosher salt (see Cook’s Note)
8 ounces cooked ground sausage (sweet Italian, spicy, chorizo)
9 mini sweet peppers (about 9 ounces), cut into 1/2-inch pieces, sautéed until tender
12 strips cooked bacon, crumbled into large pieces
6 slices American cheese, crumbled into large pieces
3/4 cup shredded cooked chicken (about 8 ounces)
3 tablespoons Buffalo chicken sauce
3/4 cup crumbled blue cheese
Cooking steps:
1. Preheat the oven to 350 degrees F. Spray a 12-cup muffin tin with cooking spray.
2. Crack the eggs into a large bowl, add the salt and whisk to combine. Divide the mixture evenly among the muffin cups. Top with desired variation ingredients. Bake until the centers of the muffins no longer jiggle, 17 to 20 minutes.
3. Let the muffins cool in the pan for 5 minutes. Run a knife around the edges of the muffins, unmold and serve. If storing, allow to cool completely, place in a resealable plastic bag and refrigerate or freeze.
4. To reheat, microwave the muffins one at a time for about 30 seconds if refrigerated, 1 minute if frozen. You can also heat them in a 250-degree-F oven until warmed through.
Get the recipe: Meal Prep Muffin Tin Egg Bites
Read more about: Your Ultimate Guide to Smooth Sailing: Essential Tips Every First-Time Cruiser Needs to Know Before Embarking

And here is where one of the most significant ‘whys’ truly stands out: when you are consistently dining at home, you are inherently reducing the frequency of eating out. This is not merely about saving money (although we will address that later!); it is about protecting your health. Research presents a stark scenario: one study indicated that “less than 0.1% of restaurant meals were of ideal quality,” which means they often lacked a variety of fresh fruits and vegetables, whole grains, fish, lean poultry, and nuts, and frequently failed to restrict sugary drinks, sweets, and processed meats. By preparing your meals in advance, you circumvent this nutritional minefield, ensuring that your plate is filled with the beneficial elements you select and manage.
If the substantial health benefits have not yet persuaded you to allocate some time for meal preparation this weekend, then let us discuss the remarkable financial gains. This is when your wallet begins to benefit significantly! Cooking at home, facilitated by a well – thought – out meal preparation strategy, is a reliable way to save a considerable amount of money. The aggregate cost of daily takeout, quick restaurant visits, or even just purchasing coffee and a pastry on the go accumulates alarmingly quickly. Meal preparation immediately halts this financial hemorrhage.
Beyond merely avoiding the expense of eating out, meal preparation provides you with complete control over your ingredients. This implies that you can be extremely discerning in your grocery shopping, choosing seasonal produce, capitalizing on sales, and focusing solely on what you require for your planned meals. With proper planning, you can become proficient in preventing unnecessary food purchases, which not only saves you money but also substantially reduces food waste – a win – win for both your budget and the planet. Envision a refrigerator where every item serves a purpose, where neglected produce no longer languishes in the back!
For many of us, the most compelling ‘why’ often boils down to precious time and the yearning for a less stressful life. With hectic schedules in full swing, maintaining a healthy diet can seem like an insurmountable challenge, especially during chaotic weeknights. This is where meal preparation emerges as a true savior, offering proven benefits that extend far beyond just the dining plate. It is about saving time, certainly, but also about incorporating a wider variety of nutrients into your diet and, crucially, about cultivating a sense of calm and control.
Recipe details: Mom’s Turkey Meatloaf
Cook time: 15 min Total time: 1 hr 30 min
Level: Easy Servings: 8 (1-inch thick) slices
Total weight: 1724.6 g Calories: 2245.8 kcal
Energy: 2245.8 kcal Protein: 239.3 g
Carbs: 132.9 g Fat: 81.4 g
Dish Tags: american, main course, lunch/dinner, Sugar-Conscious, Peanut-Free, Tree-Nut-Free, Soy-Free, Shellfish-Free, Gluten, Wheat, Sulfites
Ingredients:
3/4 cup quick-cooking oats
1/2 cup skim milk
1 medium onion, peeled
2 pounds ground turkey breast
1/2 cup chopped red bell pepper
2 eggs, beaten
2 teaspoons Worcestershire sauce
1/4 cup ketchup
1/2 teaspoon salt
Freshly ground black pepper
1 (8-ounce) can tomato sauce
Cooking steps:
1. Preheat the oven to 350 degrees F.
2. In a small bowl, stir together the oats and milk. Thinly slice 1/4 of the onion and set aside. Finely chop the remaining onion. In a large bowl, combine the turkey, oat mixture, chopped onion, bell pepper, eggs, Worcestershire sauce, ketchup, salt and a few grinds of pepper. Mix just until well combined.
3. Transfer the mixture to a 9-by-13-inch baking dish and shape into a loaf about 5 inches wide and 2 1/2 inches high. Pour the tomato sauce over the meatloaf and sprinkle with the sliced onions. Bake for about 1 hour or until an instant-read thermometer registers 160 degrees.F.
4. Remove from the oven and let rest for 10 to 15 minutes before slicing.
Get the recipe: Mom’s Turkey Meatloaf
Read more about: Silence the City: How Electric Vehicles are Reducing Urban Noise Pollution
I have heard it said – and I wholeheartedly concur – that “meal prep saves lives.” This is not an exaggeration; it serves as a testament to the profound influence it can exert on daily well-being. Reflecting on my own experience, when I initially commenced working with The Real Food Dietitians team in 2021, I was far from being a meal prepping enthusiast. However, Jess and Stacie, who had been dedicated preppers for years, consistently extolled its numerous benefits. They would always emphasize how it effortlessly saves time and money, substantially reduces food waste, and inherently results in healthier eating due to fewer stops for enticing takeout and fast food.
Their most compelling point for me, however, was the promise of “less weeknight mealtime stress.” And indeed, how true that proved to be! The frantic rush to determine dinner after a taxing day, the fatigue of cooking from scratch when energy is at its lowest ebb – these are common pain points that meal prep elegantly resolves. It transforms dinner from a formidable task into a simple, gratifying act of warming up or swiftly assembling a pre – planned feast.
One of the initial obstacles for many aspiring preppers is the perception that without a flawless, rigid plan, meal prep (or batch cooking, as it is often referred to) will seem more overwhelming than it actually is. This is a common misconception, and it is something Basheerah Enahora keenly addresses: “People believe that a meal plan has to be this rigid structure, but it does not necessarily have to be that.” Flexibility is truly the cornerstone of sustainable meal prepping. It is about finding a rhythm that aligns with your schedule, rather than against it.
You can select a dedicated prep day that suits you best, or perhaps, if your week is particularly hectic, you can distribute the work, doing a bit of chopping here and a bit of cooking there whenever a spare moment presents itself. The key is to make it feel manageable and enjoyable, rather than another chore. This adaptability is what renders meal prep a realistic and enduring habit for anyone, regardless of their current culinary skill level or time constraints.
So, as we stand on the brink of a new weekend, brimming with possibilities, let us consider the incredible opportunity that lies before us. With just a touch of planning and perhaps a little preemptive chopping or marinating, you can truly regard yourself as a meal prepper and commence unlocking these incredible benefits. It is more than just preparing food; it is about investing in your future self, about creating space for joy and ease in your busy week. This weekend is not merely for rest; it is for revolutionizing your approach to food, health, and daily living. The ‘why’ is undeniably compelling; now, let us prepare to explore the ‘how’ in the next exciting step!
As we have explored the compelling ‘why’ behind meal preparation, a vivid picture has begun to emerge: one of restored health, abundant savings, and tranquil weeknights. The irresistible benefits are evident, painting a vision of a happier, more balanced life. But perhaps you are wondering how you can actually start making this vision a reality. This weekend, dear friends, is your moment. It is time to shift from the alluring promise of meal prep to crafting your very own blueprint for success.
The beauty of meal prepping lies in its adaptability. Disregard those rigid, intimidating images you may have encountered online. As Basheerah Enahora, RDN, sagely suggests, “People believe that a meal plan has to be this rigid structure, but it does not necessarily have to be that.” Your journey into meal prepping is a personal one, designed to flow with your unique schedule and preferences. It is about building a sustainable habit that feels effortless, rather than another chore to dread.
Embarking on your meal prepping adventure this weekend requires, at its core, a touch of joyful preparation. Think of it not as a daunting task, but as an exciting opportunity to invest in your future self. It is about being intentional, about setting yourself up for a week of delicious, stress – free eating. Let us delve into the core strategies that will turn your meal prep dreams into tangible, tasty triumphs.
Recipe details: Seafood and Chorizo Paella
Cook time: 50 min Total time: 1 hr 20 min
Level: Intermediate Servings: 4 to 6 servings
Total weight: 3054.5 g Calories: 3863.4 kcal
Energy: 3863.4 kcal Protein: 119.5 g
Carbs: 568.3 g Fat: 108.9 g
Dish Tags: mediterranean, main course, lunch/dinner, Balanced, Dairy-Free, Gluten-Free, Wheat-Free, Egg-Free, Peanut-Free, Sulfites
Ingredients:
6 cups chicken stock
3 tablespoons olive oil
3 links cured chorizo, sliced into 1/4-inch-thick half moons
1 cup minced Spanish onion
1 small green bell pepper, seeded and cut into strips
1 small red bell pepper, seeded and cut into strips
1 clove garlic, smashed
1 cup diced tomatoes
Salt and freshly ground black pepper
1/2 cup dry white wine
3 cups bomba rice
1/4 teaspoon saffron threads
Six head-on shrimp (21-25 count), deveined, or 12 littleneck clams, purged and scrubbed 1 cup shelled peas, blanched
Lemon wedges, for garnish
Minced fresh parsley, for garnish
Cooking steps:
1. Preheat the oven to 400 degrees F. Simmer the chicken stock in a medium saucepan.
2. In a 13-inch paella pan, heat the olive oil over medium-high heat. Add the chorizo and cook until lightly browned; transfer to a paper-towel-lined plate. Add the onions, peppers and garlic to the pan and cook until softened, about 5 minutes. Add the tomatoes and stir to combine, then stir in the rice and saffron. Deglaze the pan with the white wine and cook, stirring, until most of the liquid has evaporated, 2 minutes. Pour in 5 cups of the simmering chicken stock and bring to a boil over high heat, stirring constantly. Immediately remove the pan from the heat and season with salt. Arrange the chorizo and shrimp on top of the rice.
3. Set the pan on the floor of the oven or on the lowest oven rack and bake, uncovered, for 20 minutes. (Do not stir the paella once it goes in the oven.) Scatter the peas over the paella, return to the oven and continue cooking until all the liquid has been absorbed and the rice is tender but not too soft, another 5 to 10 minutes. If the rice needs further cooking, add the remaining cup of stock and cook for an additional 5 to 10 minutes.
4. Let the paella stand at room temperature, covered with foil, for 5 minutes. Serve garnished with lemon wedges and parsley.
Get the recipe: Seafood and Chorizo Paella
Read more about: 10 Drugstore Beauty Gems Makeup Artists Swear By Over High-End Products
Before you even think about chopping a single vegetable, take a moment to consider your timeline. This is not about setting a timer for how many hours you will spend in the kitchen, but rather determining the duration during which you will need meals ready to go. Are you looking to tackle a single weekend of healthy eating? Perhaps a full five-day work week? Or are you ambitious enough to map out meals for two weeks, or even a month?
The answer to this question is deeply personal and should align with what feels most manageable for you at present. If the idea of prepping for a full week feels overwhelming, start smaller. Prep for just three days, or even just for your most challenging meal of the day. This brings us to a golden piece of advice from the seasoned preppers at The Real Food Dietitians: “Prep to your pain point.” This simple yet powerful concept ensures that you are addressing your most pressing dietary challenges first, thereby building confidence and momentum.
Imagine this: if making healthy breakfasts on busy mornings is your biggest hurdle, then focus your initial meal prep efforts squarely on make-ahead breakfasts. Think overnight oats, pre-portioned smoothie packs, or batch-cooked egg muffins that you can simply grab and go. The immediate relief of having that healthy option ready will be incredibly motivating. Similarly, if weeknight dinners consistently leave you scrambling for takeout menus, then dedicate your prep time to dinner solutions. Alternatively, if you are constantly reaching for unhealthy snacks, then whip up some simple, healthy alternatives like hard-boiled eggs, energy balls, or homemade hummus. The goal is to identify where thoughtful preparation can bring the most immediate ease and benefit to your daily life.
Recipe details: Ready-To-Go Egg Bites
Cook time: 25 min Total time: 1 hr 35 min
Level: Easy Servings: 7 bites
Total weight: 1618.0 g Calories: 3408.1 kcal
Energy: 3408.1 kcal Protein: 166.3 g
Carbs: 324.1 g Fat: 158.7 g
Dish Tags: italian, main course, lunch/dinner, Balanced, Sugar-Conscious, Peanut-Free, Tree-Nut-Free, Soy-Free, Fish-Free, Sulfites
Ingredients:
8 ounces Mexican chorizo
1/2 yellow onion, diced
4 large eggs
1/4 cup heavy cream
1/4 cup sour cream
1/4 teaspoon kosher salt
1/4 teaspoon freshly ground black pepper
Nonstick cooking spray, for the mold
1/3 cup grated Monterey Jack cheese
Cooking steps:
1. Heat a large skillet over medium heat. Add the chorizo and onion and cook, stirring often, until the onion is soft and the chorizo is fully cooked, 5 to 6 minutes. Transfer to paper towels to drain the excess grease. Set aside to cool.
2. Combine the eggs, heavy cream, sour cream, salt and pepper in a large bowl. Whisk until light and fluffy, about 1 minute.
3. Generously coat the cups of a silicone egg bites mold (you can find them online!) with cooking spray. Divide the cheese among the cups. Divide the chorizo and onion among the cups. Then fill the cups with the egg mixture, leaving a little space at the top.
4. Multi-cooker directions: Set the trivet in a multi-cooker, then carefully pour 1 cup water into the pot. Cover the mold snugly with foil and carefully lower it onto the trivet.
5. Secure the lid on the multi-cooker and set the pressure valve to sealing. Press the steam button and set it to 10 minutes. (Note: It will take several minutes for the pressure to build, after which the 10-minute timer will automatically start counting down.)
6. After the 10 minutes are up, let the pressure release naturally for 10 minutes, then use the handle of a wooden spoon to move the valve to venting, which will let the rest of the pressure release quickly.
7. When the pressure is fully released, carefully remove the lid. Remove the silicone mold from the machine. Peel back the foil and turn the egg bites onto a plate. They should pop right out!
8. Standard oven directions: Preheat the oven to 325 degrees F. Pour water into a 9-by-13-inch baking dish until it’s halfway full. Set the mold in the baking dish, then cover the baking dish with foil. Bake until the eggs are set, about 1 hour. Let the mold sit in the water for 10 minutes before removing the egg bites from the mold.
9. Freezing and reheating instructions: Freeze by placing the bites on a lightly greased sheet pan or plate and freeze for 45 minutes. Transfer to a plastic zipper bag and return to the freezer.
10. To reheat 1 or 2 bites, wrap in a paper towel and microwave for 1 minute. Let sit for 1 minute before eating.
Get the recipe: Ready-To-Go Egg Bites
Read more about: 14 Timeless Boomer Truths That Woke Millennials Are Now Embracing (And Why)

Once you have decided on your prep duration and identified your pain points, the fun truly begins: choosing your recipes! This is not merely about finding something tasty; it is about constructing a collection of meals that nourish you, store well, and ignite a spark of joy in your week. Before you plunge headfirst into recipe books or online searches, take a few crucial preliminary steps.
First, embark on a culinary treasure hunt in your own kitchen. Take inventory of what you already have on hand. What ingredients are hidden in your pantry, fridge, and freezer? This simple act can inspire recipe choices, shorten your grocery list, and help prevent food waste. It is always a delight to discover that you already possess a key ingredient, is it not? While you are at it, be honest with yourself about any foods that are no longer edible. Do not hesitate to discard or compost anything past its prime; a clean slate sets the stage for fresh, healthy beginnings.
Next, determine the number of recipes you will make. For a foundational one-week meal prep, a fantastic starting point recommended by experienced preppers is to aim for at least two proteins. This could involve two distinct protein sources or perhaps a hearty one-dish recipe that features a protein. Alongside your proteins, plan for one versatile vegetable recipe, a go-to breakfast or lunch recipe, and a simple, satisfying snack recipe. This thoughtful combination ensures variety and keeps your meals exciting throughout the week.
It can be incredibly beneficial to physically write out your meal plan. This does not need to be a complex spreadsheet; even a simple note on your phone or a piece of paper outlining which meals you will eat on which days, and when you will enjoy leftovers, provides a comforting roadmap. When selecting your recipes, prioritize those known for storing well. Hearty stews, robust grain bowls, baked chicken, and roasted vegetables are often excellent candidates, as they tend to remain in good condition in the fridge
Recipe details: Doughnut Strawberry Shortcake
Cook time: Unknown Total time: 10
Level: Unknown Servings: 2
Total weight: 236.5 g Calories: 648.1 kcal
Energy: 648.1 kcal Protein: 5.4 g
Carbs: 30.1 g Fat: 57.8 g
Dish Tags: american, desserts, snack, Low-Carb, Low-Sodium, Low Potassium, Kidney-Friendly, Vegetarian, Pescatarian, Peanut-Free, Sulfites
Ingredients:
2 doughnuts (flavor of your choosing)
2 teaspoons butter, melted
1/2 cup cold heavy whipping cream
1 tablespoon confectioners’ sugar
4 large strawberries, stemmed, each sliced into 4 slices
Cooking steps:
1. Stem and slice the large strawberries into 4 slices each.
2. In a cold mixing bowl, combine the cold heavy whipping cream and confectioners’ sugar.
3. Whip the cream mixture using an electric mixer or whisk until stiff peaks form.
4. Melt the butter.
5. Carefully slice each doughnut horizontally in half.
6. Lightly brush the cut sides of each doughnut half with the melted butter.
7. On a serving plate, place the bottom half of a doughnut.
8. Arrange half of the sliced strawberries over the doughnut base.
9. Spoon a generous dollop of whipped cream over the strawberries, then top with the other doughnut half.
10. Repeat the layering process for the second doughnut and serve immediately.
Get the recipe: Doughnut Strawberry Shortcake
Read more about: Unlocking the Golden Standard: The British Jacket Potato Method for Unrivaled Crispness and Fluffiness
If the thought of creating a meal plan from scratch seems overwhelming, take a deep breath and recognize that you are not alone. Many seasoned professionals acknowledge this initial challenge, which is why pre-prepared meal plans serve as an excellent resource. Consider utilizing ready-made plans that come complete with recipes and grocery lists, specifically designed for beginners. The context provides excellent examples, such as a two-week plan suitable for any time of year or a targeted weekend meal prep plan designed to be completed in approximately two hours. These pre-constructed frameworks can serve as your starting point, eliminating guesswork and enabling you to dive straight into the practical joys of cooking.
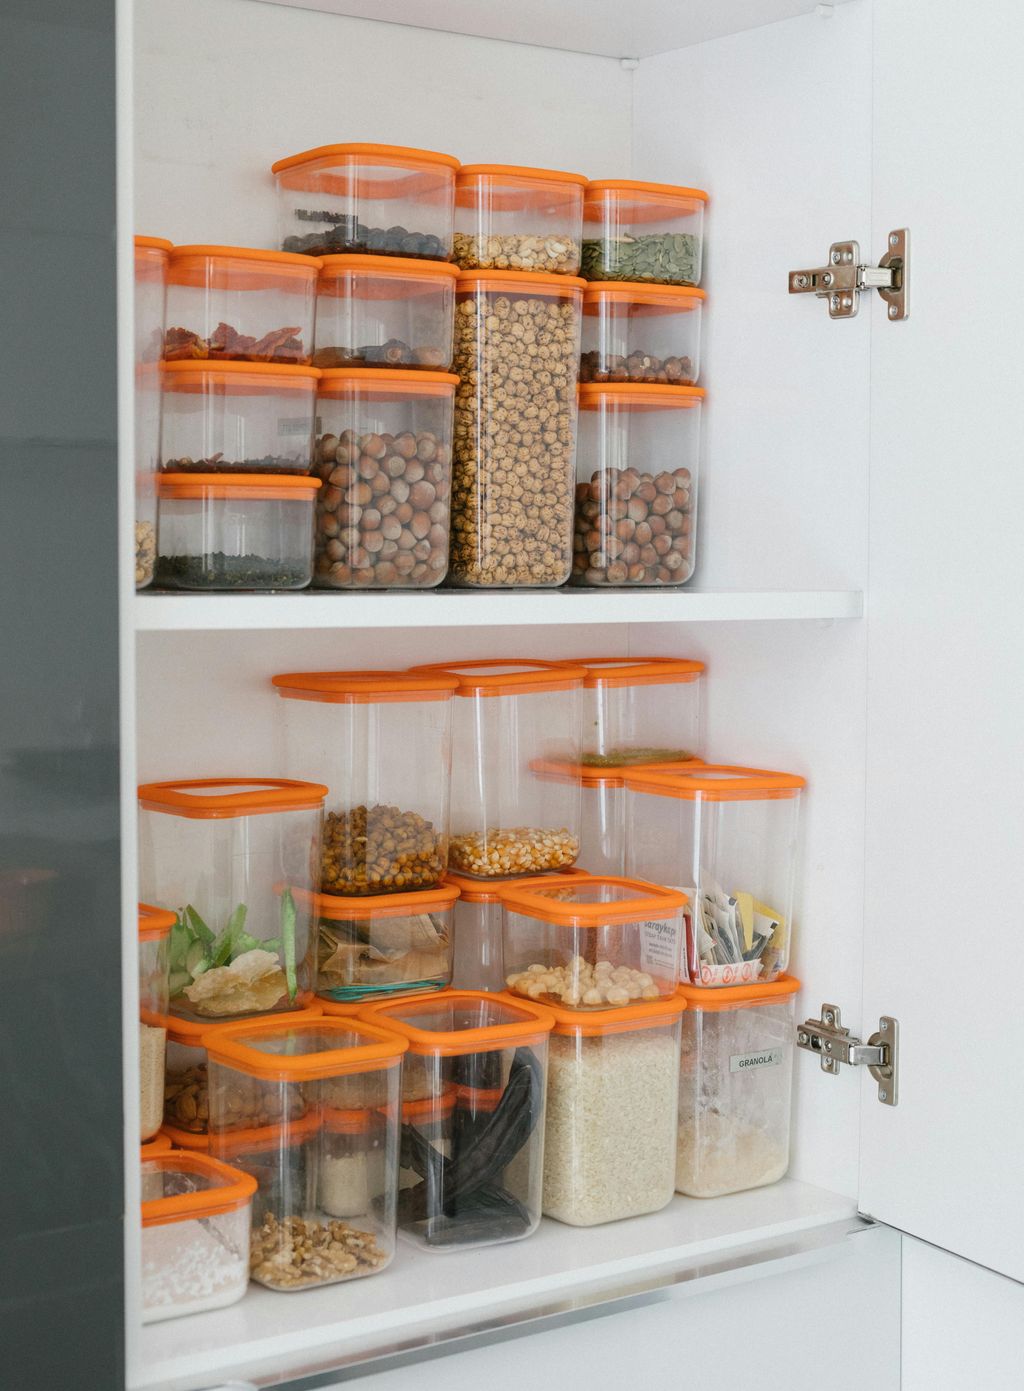
With your recipes selected and your plan in place, you will quickly realize the next crucial step: organizing your storage. Since you will be preparing an additional quantity of ingredients and food, you will need appropriate containers for everything, and not just any containers will suffice. These humble containers are the unsung heroes of successful meal prep, protecting your delicious creations and extending their freshness.
You may already have a collection of potential containers in your kitchen. Simple solutions such as repurposing old take-out containers, charming mason jars, or any existing food containers with a secure lid can work wonders, especially when you are just starting out. The key here is the phrase: “secure lid.” This is not merely about preventing spills; it is absolutely essential for food safety and longevity. A properly fitting lid is crucial for keeping oxygen away from food, which is the primary cause of spoilage. Without a good seal, your carefully prepared meals will lose their vibrancy and freshness far too quickly.
Recipe details: Carrot and Pineapple Cake
Prep time: 10 min Inactive time:
Cook time: 1 hr Total time: 1 hr 10 min
Level: Intermediate Servings: 8 servings
Total weight: 1424.1 g Calories: 3940.9 kcal
Energy: 3940.9 kcal Protein: 82.4 g
Carbs: 523.2 g Fat: 194.4 g
Dish Tags: american, desserts, lunch/dinner, snack, Vegetarian, Pescatarian, Dairy-Free, Peanut-Free, Soy-Free, Tree-Nuts, Sulfites
Ingredients:
2 cups granulated sugar
1 1/3 cups vegetable oil
3 extra-large eggs, at room temperature
1 teaspoon pure vanilla extract
2 1/2 cups plus 1 tablespoon all-purpose flour, divided
2 teaspoons ground cinnamon
2 teaspoons baking soda
1 1/2 teaspoons kosher salt
1 cup raisins
1 cup chopped walnuts
1 pound carrots, grated
1/2 cup diced fresh pineapple
3/4 pound cream cheese, at room temperature
1/2 pound unsalted butter, at room temperature
1 teaspoon pure vanilla extract
1 pound confectioners’ sugar, sifted
1/2 cup diced fresh pineapple
Cooking steps:
1. Preheat the oven to 350 degrees F.
2. Butter 2 (8-inch) round cake pans. Line with parchment paper, then butter and flour the pans.
3. For the cake: Beat the sugar, oil, and eggs together in the bowl of an electric mixer fitted with the paddle attachment until light yellow. Add the vanilla. In another bowl, sift together 2 1/2 cups flour, the cinnamon, baking soda, and salt.
4. Add the dry ingredients to the wet ingredients. Toss the raisins and walnuts with 1 tablespoon flour. Fold in the carrots and pineapple. Add to the batter and mix well.
5. Divide the batter equally between the 2 pans. Bake for 55 to 60 minutes, or until a toothpick comes out clean. Allow the cakes to cool completely in the pans set over a wire rack.
6. For the frosting: Mix the cream cheese, butter and vanilla in the bowl of an electric mixer fitted with the paddle attachment until just combined. Add the sugar and mix until smooth.
7. Place 1 layer, flat-side up, on a flat plate or cake pedestal. With a knife or offset spatula, spread the top with frosting. Place the second layer on top, rounded side up, and spread the frosting evenly on the top and sides of the cake. Decorate with diced pineapple.
Get the recipe: Carrot and Pineapple Cake
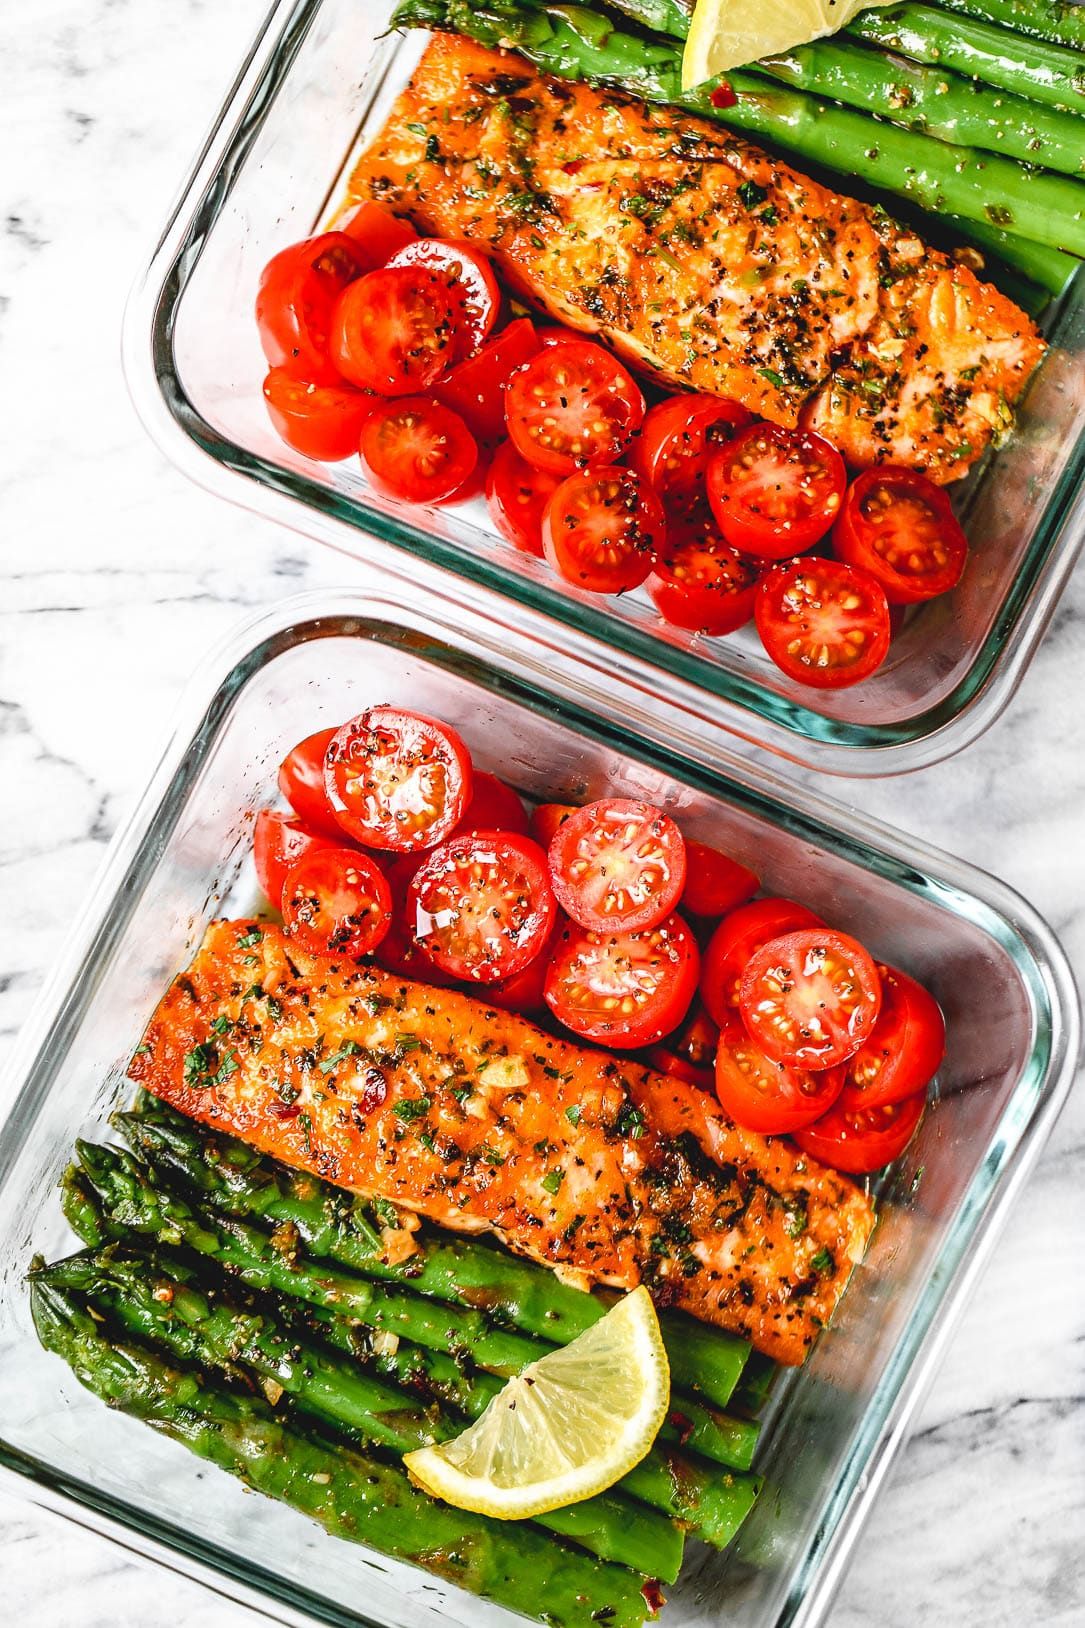
If you envision meal preparation becoming a regular and cherished habit in your life, it constitutes a wise investment to upgrade to high-quality, reusable meal prep containers. Consider them an investment in your health, your peace of mind, and your culinary longevity. Having tested numerous brands over years of dedicated meal preparation, some individuals develop a strong preference for glass containers equipped with lid-locking technology. Glass is an excellent choice because it is non-porous, does not retain odors or stains, and is generally microwave and oven safe (without the lid, of course). The lid-locking mechanism provides a superior seal, ensuring that your food remains fresher for longer and preventing any unwanted leaks in your bag. While we cannot enumerate the specific “8 Must-Have Meal Prep Containers” here, be aware that exploring options that meet your needs will significantly impact your long-term success in meal preparation.
You have planned, you have selected, and you are ready to proceed! The final strategic step before donning your apron is to create your grocery list. This is not merely any list; it is your meticulously crafted battle plan for the supermarket, designed for efficiency and mindful expenditure. Based directly on the ingredients in the recipes you have chosen, your list will serve as your guiding star through the aisles, preventing impulse purchases and ensuring that you obtain exactly what you require.
A professional tip for crafting your list is to organize the items by section of the store. Envision strolling through the supermarket with purpose, moving seamlessly from the produce section to the dairy aisle, then to proteins, and so forth. This simple organization saves you valuable time, eliminates backtracking, and renders the shopping experience far less chaotic. Envision categories such as ‘Proteins and Dairy,’ ‘Produce (Fresh, Canned, or Frozen Vegetables),’ ‘Grains and Pasta,’ and ‘Pantry Staples.’ This structured approach is transformative for a smooth and efficient shopping trip.
This intelligent grocery list beautifully ties back to the financial benefits of meal preparation. When you shop with a pre-determined list tailored to your planned meals, you gain complete control over your ingredients. You become exceptionally selective, empowered to take advantage of sales, choose seasonal produce, and focus solely on what you truly need. This intentional approach prevents unnecessary food purchases, which not only keeps more money in your wallet but also dramatically reduces food waste. Farewell to forgotten produce languishing at the back of the fridge!
Recipe details: Protein Bars
Prep time: 25 min Inactive time:
Cook time: 35 min Total time: 1 hr
Level: Easy Servings: 24 (2-inch) squares
Total weight: 963.3 g Calories: 3574.8 kcal
Energy: 3574.8 kcal Protein: 73.4 g
Carbs: 579.0 g Fat: 138.4 g
Dish Tags: american, biscuits and cookies, snack, Low-Sodium, Vegetarian, Pescatarian, Egg-Free, Peanut-Free, Soy-Free, Sulfites
Ingredients:
4 ounces soy protein powder, approximately 1 cup
2 1/4 ounces oat bran, approximately 1/2 cup
2 3/4 ounces whole-wheat flour, approximately 1/2 cup
3/4-ounce wheat germ, approximately 1/4 cup
1/2 teaspoon kosher salt
3 ounces raisins, approximately 1/2 cup
2 1/2 ounces dried cherries, approximately 1/2 cup
3 ounces dried blueberries, approximately 1/2 cup
2 1/2 ounces dried apricots, approximately 1/2 cup
1 (12.3-ounce) package soft silken tofu
1/2 cup unfiltered apple juice
4 ounces dark brown sugar, approximately 1/2 cup packed
2 large whole eggs, beaten
2/3 cup natural peanut butter
Canola oil, for pan
Cooking steps:
1. Line the bottom of a 13 by 9-inch glass baking dish with parchment paper and lightly coat with canola oil. Set aside. Preheat the oven to 350 degrees F.
2. In a large mixing bowl, combine the protein powder, oat bran, wheat flour, wheat germ, and salt. Set aside.
3. Coarsely chop the raisins, dried cherries, blueberries and apricots and place in a small bowl and set aside.
4. In a third mixing bowl, whisk the tofu until smooth. Add the apple juice, brown sugar, eggs, and peanut butter, 1 at a time, and whisk to combine after each addition. Add this to the protein powder mixture and stir well to combine. Fold in the dried fruit. Spread evenly in the prepared baking dish and bake in the oven for 35 minutes or until the internal temperature reaches 205 degrees F. Remove from the oven and cool completely before cutting into squares. Cut into squares and store in an airtight container for up to a week.
Get the recipe: Protein Bars
Read more about: Exposed: 15 Sneaky Supermarket Schemes Draining Your Wallet and the Planet
With your plan, recipes, containers, and grocery list at hand, you are poised for action. Now, let us discuss some intelligent techniques that will render your time in the kitchen truly productive and enjoyable. One of the most impactful strategies is to cook in large quantities, particularly for grains such as quinoa, rice, or farro, as they tend to require a significant amount of time to cook. Preparing a substantial pot of your chosen grain at the commencement of your preparation session will provide a versatile foundation for multiple meals throughout the week, thereby saving you valuable time and energy on subsequent cooking days.
Another essential tip for prolonging the lifespan of your prepared food is to utilize your freezer judiciously. If you prepare more food than you anticipate consuming within five days, do not let it go to waste! Freeze any excess in the single-meal-sized containers we discussed. This constitutes an excellent method to create a healthy “fast food” reserve for those unexpectedly busy days when even a pre-assembled meal seems like too much effort. Proper freezing, utilizing airtight containers, preserves freshness and nutrients, ready to be thawed and enjoyed at a later time.
Remember, meal preparation is about embracing flexibility. It is not about achieving perfection on your initial attempt. Commence with small steps, perhaps by addressing just one or two components, such as cooking a large batch of chicken or chopping all your vegetables for the week. As you gain confidence, you can progressively expand your efforts. The objective is to discover a rhythm that aligns harmoniously with your schedule, transforming meal preparation into a source of calm and control, rather than an additional source of stress.
Recipe details: I Cooked and Ate Many, Many Batches of Potatoes to Make the Best British Chips
Level: Unknown Servings: 6
Total weight: 2117.0 g Calories: 1522.1 kcal
Energy: 1522.1 kcal Protein: 55.8 g
Carbs: 311.7 g Fat: 6.4 g
Dish Tags: british, american, main course, lunch/dinner, High-Fiber, Low-Fat, Sugar-Conscious, Vegan, Vegetarian, Pescatarian, Mediterranean, Sulfites
Ingredients:
2 pounds russet potatoes (900g; about 4 large potatoes), peeled and cut lengthwise into 1/2-inch by 1/2-inch chips
3 tablespoons (45ml) distilled white vinegar
Kosher salt
3 quarts (2.9L) neutral oil, such as vegetable or canola, for frying
Malt vinegar, optional
Cooking steps:
1. Peel russet potatoes and cut lengthwise into 1/2-inch by 1/2-inch chips.
2. Place cut potatoes in a large bowl, cover with cold water, add distilled white vinegar, and soak for at least 30 minutes, or up to overnight.
3. Drain the potatoes thoroughly and spread them on a clean kitchen towel. Pat completely dry; ensure no moisture remains.
4. Heat neutral oil in a large deep-fryer or heavy-bottomed pot to 275°F (135°C).
5. Carefully add about half of the dried chips to the hot oil, ensuring not to overcrowd. Fry for 8-10 minutes, or until cooked through but not browned, stirring occasionally.
6. Using a spider or slotted spoon, transfer the blanched chips to a wire rack set over a baking sheet to drain. Repeat with the remaining chips.
7. Increase the oil temperature to 375°F (190°C).
8. Return the chips to the hot oil in batches. Fry for 3-5 minutes, or until deeply golden brown and very crisp.
9. Transfer the chips back to the wire rack to drain any excess oil.
10. Immediately season generously with kosher salt. Serve hot, optionally with malt vinegar.
Get the recipe: I Cooked and Ate Many, Many Batches of Potatoes to Make the Best British Chips
Read more about: Your Ultimate Guide to Smooth Sailing: Essential Tips Every First-Time Cruiser Needs to Know Before Embarking
Meal preparation, whether it involves planning for a week of culinary delights or simply gaining an early start on tomorrow’s lunch, genuinely alleviates your stress and assists you in maintaining steadfastness toward your health and wellness objectives. With a healthy meal plan that you personally devise and implement, you are not only certain to relish each nourishing bite but also, perhaps unexpectedly, enhance your culinary skills in the process. It is a journey of discovery, empowerment, and profound satisfaction.
Recipe details: Malt-O-Meal with Rooster Sauce
Level: Unknown Servings: 1
Total weight: 123.2 g Calories: 507.9 kcal
Energy: 507.9 kcal Protein: 15.3 g
Carbs: 78.2 g Fat: 15.8 g
Dish Tags: italian, main course, lunch/dinner, snack, Balanced, Low-Sodium, Sugar-Conscious, Kidney-Friendly, Vegan, Vegetarian, Pescatarian, Tree-Nuts, Sulfites
Ingredients:
1 tablespoon (heaping) peanut butter
1 serving prepared Malt-O-Meal
1 sprinking sweetend coconut flakes
1 drizzle sesame oil
1 drizzle Sriracha Hot Chili Sauce (rooster sauce)
Cooking steps:
1. Prepare one serving of Malt-O-Meal according to the package directions, ensuring a smooth, lump-free consistency.
2. Once prepared, carefully transfer the hot Malt-O-Meal into a serving bowl.
3. Add a heaping tablespoon of peanut butter to the center of the prepared Malt-O-Meal.
4. Generously sprinkle the sweetened coconut flakes evenly over the Malt-O-Meal and around the peanut butter.
5. Drizzle a small amount of sesame oil over the entire dish.
6. Finish with a drizzle of Sriracha Hot Chili Sauce, adjusting the amount to your preferred spice level and daring.
7. Gently stir all the ingredients together until well combined, or serve with the toppings artfully arranged for a visual contrast.
8. Serve immediately while warm to best enjoy the contrasting temperatures and flavor profiles.
Get the recipe: Malt-O-Meal with Rooster Sauce
Thus, as this weekend commences, brimming with potential, let it mark the weekend during which you transform your relationship with food. With these practical strategies, you are not merely preparing meals; you are investing in additional time, greater financial savings, and enhanced joy for the busy week that lies ahead. Proceed forth, aspiring meal preparer, and forge your delectable destiny! You are fully capable of achieving this.


